Silverball STRATO - Tournaments
Silverball STRATO - Tournaments
Silverball STRATO - Tournaments

You also want an ePaper? Increase the reach of your titles
YUMPU automatically turns print PDFs into web optimized ePapers that Google loves.
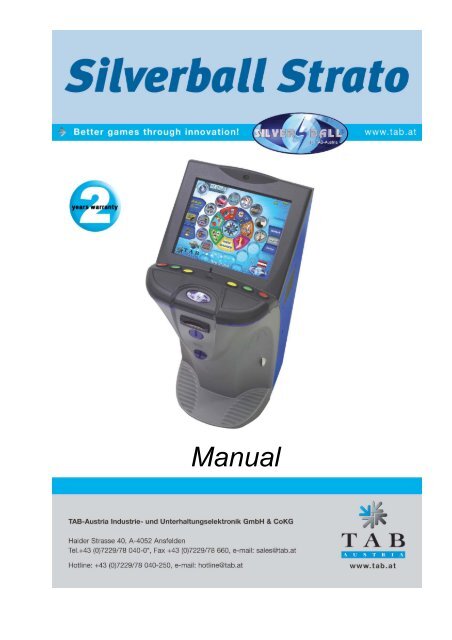
Manual
Thank you for choosing the<br />
<strong>Silverball</strong> <strong>STRATO</strong><br />
from the many different entertainment machines on the market.<br />
Please read the operating instructions carefully to ensure the satisfactory use of the<br />
<strong>Silverball</strong> <strong>STRATO</strong>.<br />
Please keep this manual at hand so that you may refer to it whenever needed.<br />
Our hotline is available for additional questions.<br />
Call +43 / 7229 / 78040 – 250<br />
Operating instructions <strong>Silverball</strong> <strong>STRATO</strong> machine manual<br />
(MH / SM 14.11.2005)<br />
Great care was taken in the compilation of these texts and images, but errors cannot be<br />
entirely ruled out.<br />
The manufacturer assumes no legal responsibility or any kind of liability for erroneous<br />
information and its consequences.<br />
The manufacturer is grateful for improvement suggestions and for information about errors.<br />
All rights, also those rights pertaining to photo-mechanical reproduction and storage on<br />
electronic or other media, are reserved. The program, manual and all components are<br />
subject to international copyright law.<br />
© 1996-2005 TAB-Austria<br />
A-4052 Ansfelden, Haider Straße 40<br />
Tel. + 43 / 7229 / 78040-0*, Fax + 43 / 7229 / 78660<br />
All rights reserved<br />
Page 3
Safety regulations for the user<br />
Setup Pointers<br />
• The machine may only be operated in dry rooms and connected to a safety plug socket<br />
that complies with the relevant safety standards.<br />
• Before starting the machine, it should be allowed to attain room temperature.<br />
• Check the main voltage before connecting the machine!<br />
• The machine is designed for an alternating voltage of 230 Volt (or 115 Volt if specified<br />
on the type plate), 50 Hz and 210 W power.<br />
• The machine may only be operated with a 3.15 amp fuse.<br />
• In case of breakage to housing parts, protruding wires, machine fires or smashed<br />
picture tubes the machine must be immediately switched off and the main plug<br />
disconnected.<br />
• Defective or bare wire cables, especially power cables and plug connecters must be<br />
replaced.<br />
• The monitor standard settings are 100% for Brightness and 90% for contrast<br />
• The recommended ambient temperature is 5 – 35 Degrees on the Celsius scale.<br />
IMPORTANT!<br />
In such cases ensure that any machine contact is avoided and that it cannot be<br />
switched on!<br />
• When positioned alongside other machines, interference in normal operation may occur.<br />
Please pay attention to the licensing terms and conditions of Microsoft.<br />
Disposal of Old Electrical & Electronic Equipment (Applicable in the European Union<br />
and other European countries with separate collection systems<br />
This symbol on the product or on its packaging indicates that this product shall not be treated as<br />
household waste. Instead it shall be handed over to the applicable collection point for the recycling of<br />
electrical and electronic equipment. By ensuring this product is disposed of correctly, you will help prevent<br />
potential negative consequences for the environment and human health, which could otherwise be caused by<br />
inappropriate waste handling of this product. The recycling of materials will help to conserve natural<br />
resources. For more detailed information about recycling of this product, please contact your local CITY<br />
OFFICE, YOUR HOUSEHOLD WASTE DISPOSAL SERVICE OR THE COMPANY WHERE YOU<br />
PURCHASED THE PRODUCT.<br />
Page 4
Index<br />
SETUP POINTERS 4<br />
INDEX 5<br />
MACHINE IN CHAMPIONSNET 6<br />
TAKING INTO USE 7<br />
TESTMODE 9<br />
INTERNET 25<br />
TECHNICAL DATA 25<br />
CHAMPIONSNET 26<br />
ONLINE TERMINAL MANAGEMENT 33<br />
<strong>STRATO</strong> UPDATE 34<br />
KEY OPTIONS: 36<br />
MACHINE DESCRIPTION: 37<br />
PC SYSTEM COMPONENTS IN THE SILVERBALL <strong>STRATO</strong> 37<br />
OPTIONAL FEATURES 37<br />
TROUBLESHOOTING 38<br />
ERROR MESSAGES 39<br />
ASTRO NOTE VALIDATOR CALIBRATION PROCEDURE 41<br />
ITEM LIST SILVERBALL <strong>STRATO</strong> 42<br />
CABLE PLAN 47<br />
EC DECLARATION OF CONFORMITY 49<br />
END-USER LICENSE AGREEMENT FOR MICROSOFT SOFTWARE 50<br />
ATTACHMENT 1 53<br />
WARRANTY TERMS BY TAB-AUSTRIA INDUSTRIE UND<br />
UNTERHALTUNGSELEKTRONIK GMBH & CO KG 54<br />
NOTES: 55<br />
Page 5
This manual describes the assembly and professional installation of the <strong>Silverball</strong> Strato<br />
machine.<br />
Please refer to the FAQ’s on the TAB home page at www.tab.at for information about<br />
current software versions. You may determine the version you are currently using by<br />
switching to Test Mode (see Page 9) or by selecting the TAB logo in the main interface.<br />
Please refer to the last page of this documentation for technical data and sizes.<br />
Machine in Championsnet<br />
Your machine is equipped with an onboard network card, which allows you to connect to<br />
the Championsnet. The following additional features will then be available:<br />
• Internet surfing<br />
• E-mails<br />
• <strong>Tournaments</strong><br />
• The creation and management of tournaments<br />
• Online service<br />
By networking your machine with others throughout the world you will be able to stage and<br />
manage individual tournaments for each game.<br />
The correct procedure is described along with more precise data and settings from Page<br />
19!<br />
IMPORTANT:<br />
Switch off the machine and disconnect mains cables before carrying out any work on the<br />
machine. Only qualified staff may carry out work on the machine.<br />
Page 6
Taking into use<br />
All machines are tested at the factory and delivered preset.<br />
We recommend that you wait for 15 minutes to allow the system to reach its operating<br />
temperature. Temperature differences and transport vibrations and so on may cause the<br />
touch screen settings to change. We therefore recommend that you ALWAYS follow the<br />
procedure below when taking the machine into use:<br />
Note:<br />
1) Unpack the machine and connect it to the mains (230 V/50 Hz plug socket).<br />
2) Switch on the machine (switch is located on the rear), the machine will start<br />
automatically. You are now in the main menu.<br />
The Jukebox button is only available with the MAX dongle!<br />
Page 7
Press the TAB LOGO to enter the information overview.<br />
TAB Austria’s telephone – fax number and Internet address, the most recent<br />
Championsnet transmission and your machine’s software version, dongle version and<br />
system version are displayed here.<br />
Then open the front lid and set the test switch to ON! The <strong>Silverball</strong> test mode<br />
appears on the screen.<br />
Page 8
Testmode<br />
You may make all the machine’s relevant settings in the test mode. The precise software<br />
version of the <strong>Silverball</strong> Strato and the dongle version are shown on the top edge of the<br />
screen.<br />
Page 9
o General<br />
• Touch screen settings<br />
Press the Calibration button and follow the instructions shown on the screen. Then<br />
you may test the screen with Test.<br />
• Volume setting<br />
Game<br />
The game volume may be set in 15 steps with the plus/minus keys.<br />
Stand-by<br />
The stand-by volume may be set in 15 steps with the plus/minus keys.<br />
Activating the “with internal amplifier” option allows you to increase the sound<br />
volume<br />
• Other<br />
You can book test credits to test your games here. Your hard drive will be checked<br />
when you activate the Check Hard Disk at Reboot option.<br />
Page 10
o Basic settings<br />
• Date and time<br />
You may set the current time and date here. The date and time will be set<br />
automatically if the machine is active in the Championsnet. You can then only adjust<br />
the time zones by 30 minutes or one hour.<br />
• Basic language<br />
Her you set the basic language for this machine<br />
• Miscellaneous<br />
Activate or deactivate the Stand-by sound<br />
• Automatically delete high score<br />
You can set here if and when you want to delete the high scores<br />
• Erotic<br />
Activate, deactivate or activate in a special time zone the erotic games and the erotic<br />
backgrounds<br />
• Basic language<br />
This is where the machine’s basic language may be set.<br />
Page 11
o Machine Test<br />
Test if all your input devices, p.e. buttons, coin acceptor,.. , are working properly.<br />
“Test Video” will activate the web cam.<br />
Page 12
o Hardware settings<br />
• Currency<br />
Set the programmed currency<br />
• Impuls<br />
Impuls settings for the<br />
• VDAI settings (only for machines with a german dongle)<br />
Settings to the VDAI<br />
• NV7 key<br />
This key is for the initialising of the bill acceptor. If you have to change the bill<br />
acceptor please be sure, that the key here is the same as on the bill acceptor. If not,<br />
change it here!<br />
• Coins and banknotes<br />
Activate, deactivate and set of the channels from the coin- and bill acceptor<br />
• Coinservice<br />
Here you can program the coin acceptor by yourself! Also you can program Tokens!<br />
Page 13
Page 14<br />
Procedure:<br />
• Choose „Run Coin service“<br />
• You are now in the following options menu<br />
• Change Coin Set<br />
o Upload of some currency tables<br />
• Teach Channel<br />
o Program coins and Tokens<br />
• Test Coinmech<br />
o Test the coin channels<br />
• Delete Channel<br />
o Delete coin channels<br />
• Exit<br />
o Back to the main options menu
The channels 6 up to 15 are free. These channels are ready to get programmed.<br />
• Choose „Teach Channel“ and press “Start”<br />
• Now you are in the following options menu where you have to throw in 15 coins<br />
• Follow the messages on the screen until you get the message “Teach complete”<br />
Page 15
• Select the currency and the value of it. Here you can see the channel 6 has been<br />
programmed with Croatian coins and the value is 1 Kuna = 1 credit. If you program a<br />
channel with token you have to choose „Token“!<br />
• Press „Set“ and the coin channel will be programmed and you can see it in the list of the<br />
coin channels.<br />
• Go „Back“ to the main options menu<br />
• Now switch machine ON and let the machine start<br />
Page 16
• Switch the Testmode to ON<br />
• In the menu „Hardware settings“ you have to choose your programmed currency<br />
In the menu „Machine tests“you are able to test it immediately.<br />
o Bookkeeping<br />
Here you find all the relevant informations to the bookkeeping.<br />
At “Bookkeeping2” there is an overview of it.<br />
• Bookkeeping visible in the overview test menu<br />
Page 17
If you activate this option, a Supervisor with his PIN code is allowed to look in here.<br />
o Setting the game price<br />
• Setting the game price<br />
This is where you are able to set the credit value. For instance, 50 cents = one credit.<br />
You may change these values using the counter units. This is the setting for<br />
Standard1 (normal). You may set the bonus values in Standard2 (Bonus).<br />
Page 18
• Free-game mode<br />
Activating the free-game mode will provide endless credits. The machine displays 99<br />
credits.<br />
o Games<br />
This section displays all the games that are available on the machine. You may individually<br />
switch each game ON or OFF, call up separate statistics for each game and modify each<br />
game’s level of difficulty.<br />
Note:<br />
The level of difficulty may only be modified when the machine is NOT in Championsnet.<br />
Page 19
o Local tournament settings<br />
You can create up to 2 local tournaments here. The tournaments can be played with 1 or 2<br />
games.<br />
Pressing “set games / price” allows you to set the games and the game price for it.<br />
At “Statistic” and “Winner`s list” you can find all the important informations after the<br />
ending of the tournament.<br />
Note:<br />
You can end a local tournament at any time!<br />
Page 20
o Advertising text - input<br />
You can create your own advertising pages with a lot of standard pictures and also set the<br />
time to show in the stand-by mode.<br />
Page 21
o PIN settings<br />
Set up to 3 different PIN codes for Supervisors. Also you can set a PIN code for the<br />
Testmode and one for the Bookkeeping 2.<br />
After setting a PIN code, the supervisor will get into the overview test mode.<br />
In this special Testmode, he can just change some lower options (like sound volume).<br />
After setting the PIN code you can find the <strong>Silverball</strong> logo in the lower left side after<br />
pressing the TAB Austria logo (also in the lower left side in the menu).<br />
Press the logo to get into the PIN code input.<br />
Page 22
Once you have made all the desired settings, switch the Test Mode switch to OFF. The<br />
machine will automatically restart and you will be returned to the <strong>Silverball</strong> Strato Main<br />
Interface.<br />
Selecting the button<br />
Page 23
will take you to the Internet browser menu and the e-mail input mask.<br />
Note:<br />
The images may vary slightly from machine to machine, but they all possess the same<br />
functions.<br />
Here you may use the browser to surf the Internet or send e-mails.<br />
E-mail<br />
• From:<br />
Enter your e-mail address here. If you haven’t got one, just enter your name.<br />
• To:<br />
Page 24
Enter the recipient’s e-mail address here, e.g. Max.Example@email.com.<br />
• Cc:<br />
If you want other recipients to receive a copy of the e-mail, just enter their e-mail<br />
addresses here. If you want to send copies to several recipients, separate the e-mail<br />
addresses by semi-colon.<br />
• Bcc:<br />
Enter the e-mail address here and the recipient will receive a blind copy.<br />
• Subject:<br />
You can enter the e-mail’s subject here (not mandatory)<br />
• Text:<br />
Enter the e-mail text here.<br />
Internet<br />
Note:<br />
• Browse:<br />
Enter the address of the page you wish to visit here and it will be displayed, e.g.<br />
www.tab.at.<br />
• Refresh:<br />
The page currently shown will be refreshed.<br />
• Home:<br />
This will take you back to the start page.<br />
• Stop:<br />
This stops loading the page.<br />
• Back:<br />
This will take you back to the page last displayed.<br />
• Forward:<br />
This will take you a page further along.<br />
• Exit:<br />
This will close the Internet browser.<br />
• Keyboard:<br />
This displays a keyboard with which to make entries, e.g. in search engines.<br />
You may only send e-mails or surf the Internet when the machine is in Championsnet and<br />
all connection settings have been made.<br />
Technical data<br />
Page 25
Note:<br />
• Machine sizes:<br />
Page 26<br />
Height: 125 cm<br />
Width: 59 cm<br />
Depth: 51 cm<br />
Weight: 52 kg *)<br />
• Electric data<br />
Power connection: 230 Volt to plug socket<br />
Power: 250 watts<br />
Fuse: 3.15 ampere<br />
The following should be observed when connecting several machines to a power<br />
distributor:<br />
No more than three machines should be connected to one properly installed power<br />
connection, which should possess a 13-amp fuse.<br />
*) Note:<br />
The weight may vary depending on the installed optional components!<br />
Championsnet
o Activate Championsnet<br />
Note:<br />
The terminal will restart automatically when Championsnet is activated!<br />
Selecting Change in Connection will take you to the following menu:<br />
• Provider connection<br />
Page 27
Page 28<br />
� Set by entering type, telephone number, password<br />
• Commence transmission<br />
� Here, you may determine when data transmissions should start<br />
automatically.<br />
• Connection type<br />
This is where you may set the type of your Internet connection. The<br />
checkbox Continuous Connection should remain deactivated, as otherwise<br />
the machine will stay online, which may result in considerable connection<br />
costs!
Modem<br />
Here, the connection may be established via an installed analogue modem<br />
or an ISDN card (optional). In Connection Type activate Modem. Then<br />
enter your telephone number, access number (user name) and the<br />
password in Provider Connection.<br />
Please enter the password a second time in Confirm. Fig. 1.0 on Page 32<br />
describes Page 2 for connection settings. Make sure that no entries or<br />
activations have been made here.<br />
• External modem<br />
The connection is made via an external GPRS modem. The settings for<br />
telephone, user name and password vary from network to network. This<br />
information may be obtained from your network provider.<br />
Make sure that Connection Type is set to External Modem and enter the<br />
connection data in Provider Connection. Press “GPRS/GSM” to configure<br />
the GPRS modem.<br />
Sometimes, alongside the connection data just entered, you will also receive<br />
an Init String from your network provider. If so, you must enter this string in the<br />
Modem section. You must also enter your SIM card’s PIN number (to be<br />
obtained from your network provider). If PIN set appears, the PIN has been<br />
correctly entered and you may exit the dialogue by pressing Back.<br />
Fig. 1.0 on Page 32 describes Page 2 for the connection settings. Make sure<br />
that no entries or activations have been made here.<br />
Page 29
• Network Direct<br />
Here, your machine is connected to an internal network. No dial-in parameters are required.<br />
Only the settings shown on Page 2 are necessary. Select Network Direct and press the<br />
Page 2 button (see Fig. 1.0). Please contact your network administrator to procure the data<br />
and enter it accordingly.<br />
• Network – VPN<br />
This generally applies to ADSL users. The required data, e.g. telephone number, user<br />
name and password, may be obtained from your network provider. Select Network – VPN<br />
as your connection and enter the settings. Now proceed to Page 2 (Fig. 1.0) where the<br />
following data should be entered and activated:<br />
- Deactivate Disable DNS<br />
- Enter DNS 1<br />
- Enter DNS 2<br />
- Deactivate Use DHCP<br />
- Enter IP address<br />
- Enter subnet mask<br />
Your Internet provider will provide you with the data required for the settings.<br />
• Network – PPPOE<br />
For TDSL users. The required data, e.g. telephone number, user name and password, may<br />
be obtained from your network provider. Select Network – PPPOE as your connection and<br />
enter the settings. Now proceed to Page 2 (Fig. 1.0) where the following data should be<br />
entered and activated:<br />
- Activate Disable DNS<br />
- Deactivate Use DHCP<br />
- Enter IP address<br />
- Enter subnet mask<br />
Your Internet provider will provide you with the data required for the settings.<br />
You may also connect several machines with one another and then connect to the Internet.<br />
A hardware router which creates the connection to the Internet through a data transfer<br />
connection is required for this. A data transfer connection is, for example, an ADSL link. A<br />
network card is installed in the PCs and configured for a local network (see Network Direct<br />
settings). The PCs are then connected to the router and this in turn is connected to the data<br />
transfer connection.<br />
Page 30
Page 2 of the Provider Connection menu:<br />
Fig. 1.0<br />
This is where you may make your Internet settings. Contact your Internet provider or your<br />
network administrator should the settings not function.<br />
• <strong>Silverball</strong> Max Terminal<br />
If you want to operate the <strong>Silverball</strong> Max as <strong>Silverball</strong> Selection Terminals in the network,<br />
activate Enable Max Terminal and enter an IP address outside the IP range at IP Pool<br />
Starting Address and IP Pool Ending Address.<br />
For example:<br />
Your router’s starting address is 100 and its ending address is 199. You can see<br />
your IP address, which might be 192.168.123.199. Now enter the IP address in SB-<br />
MAX-IP as follows: 192.168.123.200. The last number is beyond the range and is<br />
now recognized as the Selection Terminal. This address must also be entered in all<br />
other <strong>Silverball</strong> Selection Terminals as the address.<br />
Page 31
The machine must be registered when all the settings have been completed.<br />
The machine is registered during the registration process during which it is assigned its own<br />
machine number.<br />
To gain access to the Online Service, you must register on our homepage under OTM. You<br />
will then receive a separate TAN list and licences. The licenses are free of charge for a<br />
period of three months.<br />
The Online Service button will then become activated in Test Mode. Activate the Online<br />
Service by pressing this button, agreeing to the terms and conditions and entering a valid<br />
TAN number.<br />
Online Version Plus will allow you to update your version ONLINE in the Terminal and<br />
Licence Management section, e.g. by using a suitable broadband connection.<br />
Page 32
Online Terminal Management<br />
The Online Terminal Management allows you to manage networked machines from home.<br />
A variety of functions may be executed by a click of the mouse via the Online Terminal<br />
Management Homepage:<br />
• Online Music Shop<br />
Load music to individual terminals online.<br />
• Online <strong>Tournaments</strong><br />
Create, manage and participate in tournaments yourself!<br />
• Online Service<br />
Download important information for the terminals online around the clock.<br />
• Terminal and Licence Management<br />
Here, you may manage your terminals with the individual licences and, for instance,<br />
update your version online ( Online Version Plus )!<br />
Register directly for OTM at https://service.championsnet.net<br />
When you register for the first time, you will receive licences free of charge for three months<br />
which will allow you to activate your terminal in the Online Service. Please consult the<br />
homepage at www.tab.at in the OTM section for prices for mp3 and video titles and other<br />
details about the OTM service.<br />
Page 33
Strato Update<br />
The software is stored on the hard disk fitted in the machine. It may be updated with the<br />
help of a removable drive. However, it may also be updated online when in Championsnet<br />
and Online Version Plus has been selected. A DSL connection is necessary for this due to<br />
the fact that a great quantity of data must be downloaded.<br />
Procedure (with cartridge for removable disks):<br />
Page 34<br />
• Switch off machine<br />
• Insert the update disk with removable cartridge in the computer’s appropriate bay<br />
• Switch the machine on<br />
• The copying and update routine will start automatically and depending on the<br />
update size will take between 15 and 30 minutes.<br />
• A screen will appear once all the required data has been copied. You will then be<br />
asked to switch the machine off and to replace the update drive.<br />
• Switch the machine back on again.<br />
• Now all the data and the hard drive will be scanned and checked.<br />
• If everything has proceeded correctly, you will be requested to switch off the<br />
machine and switch it back on again.<br />
• The machine will now start with the new software.<br />
• Set the switch inside the machine to ON, this will take you to Test Mode.<br />
• Recalibrate the touch screen (see Taking into use).<br />
• Make any other required settings in Test Mode (only if required).<br />
• Set the Test Mode switch to OFF.<br />
• The machine will automatically restart<br />
The following must be observed when updating MP3 files only:
The new titles are transferred by a removable hard disk to the installed hard disk. The<br />
removable hard disk must possess Win 98’s DOS or higher. Also the MP3 files must exist<br />
on this removable hard disk with the music and if possible a corresponding jpg file with the<br />
record cover.<br />
The simplest way to create these is to convert music titles on a CD to MP3 and to scan the<br />
record cover. You will need a PC with Windows, the Mpeg DJ Encoder software and a<br />
scanner. You may procure the software from TAB Austria. The PC must be equipped with a<br />
corresponding cartridge for the removable disk and a scanner.<br />
You may also order the entire package from TAB. You may select titles at TAB’s homepage<br />
in the OTM (see Page 25)!<br />
Should you have installed a removable disk cartridge connection on your PC, you may<br />
update your update disk to the latest version using the Support/Update Disk download<br />
option in your OTM account.<br />
Page 35
Key options:<br />
When the machine is started with the test switch set to ON or by pressing Key 6 (right outer<br />
Player 2A), a menu with the following options will appear:<br />
� Request Filecheck<br />
All data on the hard disk will be checked for errors.<br />
� Request Touch Screen Calibration<br />
Selecting this menu will request calibration of the touch screen<br />
� Enable Selftest<br />
Choose this option and then switch the Testmode to “OFF”. Then the machine starts<br />
the self test and play the games alone.<br />
The following options will be available when the test switch is set to ON before an update<br />
procedure:<br />
� Force partitioning<br />
This will force the hard disk to be formatted.<br />
� No Backup and Restore<br />
Selecting this option will mean that no data will be backed up before the update is<br />
carried out.<br />
The touch screen will be automatically calibrated after the update!<br />
If the touch screen is severely de-calibrated so that it is no longer possible to select the<br />
options, the options may be paged through with the Player 1A key (far left) and selected<br />
with the Player 2A key (far right)!<br />
Page 36
Machine description:<br />
<strong>Silverball</strong> Strato is an ergonomically designed stand-up machine consisting of a metal body<br />
and plastic components.<br />
The machine contains an electronic coin checker, a 19” LCD (with touch screen) and a<br />
computer system.<br />
PC system components in the SILVERBALL <strong>STRATO</strong><br />
PC system (2.4 GHz) with PCI bus and min. 256 RAM<br />
Onboard graphics card with ATI chipset<br />
Onboard 16-bit sound card<br />
Onboard Networkcard<br />
Min. 40 GB hard disk<br />
TAB-PCI interface card with ccTalk interface and FRAM<br />
USB touch screen controller<br />
Comestero CCTalk coin checker<br />
Optional features<br />
Bank note checker:<br />
NV-7 with stacker facility<br />
VDAI connection:<br />
Reading out is possible from Version 3.50. Setting options for the VDAI *) connection are<br />
located in the <strong>Silverball</strong> test mode under hardware settings.<br />
*) Verband der deutschen Automatenindustrie – Association of the German Slot Machine<br />
Industry<br />
Page 37
Page 38<br />
Troubleshooting<br />
Fault Cause Remedy<br />
Touch screen only functions Connection cable from touch Replace connection cable.<br />
partly.<br />
screen to PC defective (the<br />
part that is connected to the<br />
PC).<br />
MEMORY TEST FAIL at start- Memory defective.<br />
up.<br />
Replace PC.<br />
No function. The mains plug has not been Connect to the mains socket.<br />
connected.<br />
The mains switch has not<br />
Switch on the mains switch.<br />
been switched on.<br />
Mains fuse triggered.<br />
Replace fuse.<br />
No picture. Power supply not connected. Check display's power supply<br />
and plug connections.<br />
Video cable not connected. Connect video cable.<br />
Display defective.<br />
Replace display.<br />
No sound Software volume control not<br />
turned up.<br />
Audio cable not connected.<br />
One or several keys<br />
doesn’t/don’t work.<br />
Loudspeaker defective.<br />
Flat connector not connected.<br />
Key not correctly assembled<br />
or defective.<br />
Turn up the software volume<br />
control.<br />
Connect audio cable.<br />
Replace loudspeaker.<br />
Check plug connections.<br />
Check key or replace.<br />
Coins are not correctly<br />
counted.<br />
Wrong value programmed. Check program settings.<br />
Inserted coins fall through. No power to the coin checker.<br />
Coin checker dirty.<br />
Check power supply.<br />
Coin channel not assigned. Clean coin checker.<br />
Coin checker defective. Change programming.<br />
Replace coin checker.<br />
Poor coin acceptance. Coin checker dirty. Clean coin checker.<br />
Counter does not work. Counter defective. Replace counter.
Error messages<br />
Various error messages may appear during the copying procedure. The possible messages<br />
are listed below:<br />
HARDLOCK DONGLE NOT CONNECTED<br />
The dongle must be connected for the copying procedure. Check dongle connection.<br />
WRONG DONGLE CONNECTED<br />
Wrong dongle connected.<br />
UNKNOWN CONFIGURATION<br />
The update hard disk does not support the device configuration, please have it checked by<br />
TAB.<br />
OVERWRITE PROTECTION<br />
Check the hard disk set-up, otherwise please have it checked by TAB.<br />
PARTITION ERROR<br />
The hard disk to be updated cannot be set up. Either the hard disk or its cable is defective.<br />
NO TOUCH SCREEN PROGRAM<br />
The program for the 25-point touch screen calibration was not found. Carry out renewed<br />
update.<br />
MASTERDISK ERROR<br />
An error has occurred accessing the update hard disk. Either the update hard disk or<br />
possibly the removable hard disk cartridge and the corresponding hard-disk cable are<br />
defective.<br />
SLAVEDISK ERROR<br />
An error accessing the hard disk to be updated has occurred. Either the hard disk or its<br />
cable is defective.<br />
MASTER COPY FILES ERROR<br />
An error reading the update hard disk has occurred. Either the update hard disk or possibly<br />
the removable hard disk cartridge and the corresponding hard-disk cable are defective.<br />
Page 39
SLAVE COPY FILES ERROR<br />
An error has occurred writing to the hard disk to be updated. Either the hard disk or its<br />
cable is defective.<br />
NOT COMPLETELY UPDATED<br />
The update procedure has not been completed and must be repeated.<br />
CHECK FILES ERROR<br />
The hard disk content does not correspond to the specifications. Carry out update to<br />
correct. If the error occurs immediately after updating, either the hard disk or its cable is<br />
defective.<br />
Page 40
ASTRO Note Validator Calibration Procedure<br />
The manufacturer advice to calibrate the note validator once a month.<br />
If the note acceptance for notes is more and more worse, please calibrate the note validator<br />
described below.<br />
Equipment Required:<br />
1. Stylus with small Tipp (for changing DIP switches settings)<br />
2. Thin & thick calibration paper<br />
Procedure:<br />
1. Ensure that GBA unit has been ON for at least 15 minutes prior calibration<br />
2. Locate DIP-1 via the access hole in the lid<br />
3. Turn DIP-1 via the access hole in the lid<br />
4. Insert THIN calibration sheet paper will be held for approx. 3 sec. and then rejected<br />
in one smooth action. If the paper is rejected in 3 movements, then reinsert paper. If<br />
still unsuccessful, then switch DIP-1 OFF, power down GBA unit and start again from<br />
point #1<br />
5. After thin paper is returned, insert the THICK calibration sheet. The paper is held for<br />
approx half second and then rejected in one smooth action. If unsuccessful, follow<br />
the procedure in point #1.<br />
6. Turn DIP-1 OFF and turn GBA unit OFF<br />
7. Power up GBA unit<br />
8. Calibration is complete<br />
Page 41
Component groups<br />
1) Body<br />
2) Monitor lid<br />
3) Front door<br />
4) Optional features<br />
1) Korpus<br />
Page 42<br />
Item List <strong>Silverball</strong> Strato<br />
2 C905 23 mm lock, various locks 675.191-550<br />
1 Wood body, SB PRO TFT 022.082-012<br />
1 Cash box door, SB PRO TFT 022.130-218<br />
1 Cable tree, SB Stand Pro TFT 360.110-675<br />
1 Choke for energy saving lamp, 7W 410.840-132<br />
1 Lock strap, SB PRO TFT 022.130-219<br />
2 Loudspeaker, 4 Ohm/40 W, 131 mm diameter 412.120-251<br />
2 Loudspeaker protective mesh, black, 135 x 13 412.120-252<br />
2 Plastic dish handle, retractable 675.080-200<br />
1 Surge protector, 4A 3.15 A 671.115-507<br />
2 Lock strap guide, SB PRO 022.223-725<br />
1 Kemo amplifier retention plate 022.082-063<br />
2 Amplifier module, 3.5 W M031 471.221-762<br />
1 Lock strap, SILVERBALL Pro JTIC 675.196-186<br />
1 Kemo amplifier base plate 022.130-217<br />
1 Lock angle, cash box lock 022.130-222<br />
1 Assembly angle switch 022.130-209<br />
1 Note slide reinforcing strap 022.130-210<br />
1 Fan 80 x 80 mm, with JST connector 831.900-033<br />
1 Fan mesh, 80 x 80 022.082-051<br />
1 Lock angle, 50 x 21 x 21 mm, galvanized 210.221-515<br />
1 Retention plate, JST connector 18 022.130-223<br />
1 Strato transport bracket 022.130-216<br />
1 Strato transport bracket holder 022.130-200<br />
1 Cosmo/Strato side lock hook 675.196-192<br />
1 Lock catch for betting machine 022.082-017<br />
1 MAX fire hinge, bottom 675.191-166<br />
1 Rear wall switch with 6.3 flat connector 671.188-150<br />
1 Strato note slide 022.130-211<br />
1 Astro GBA2 C2E bank note checker 010.100-523<br />
1 cctalk card for Astro GBA2 010.100-519<br />
1 Compact Astro GBA panel 022.031-046<br />
1 PC TAB Micro-ATX VC2 / <strong>STRATO</strong> 831.000-069
2) Monitor lid<br />
1 Lid lock angle, right 022.130-207<br />
1 Lid lock angle, left 022.130-208<br />
1 <strong>STRATO</strong> lid 19" TFT joystick/camera 373.210-106<br />
2 TAB classic key, round red 771.200-733<br />
2 TAB classic key, round yellow 771.200-734<br />
2 TAB classic key, round green 771.200-735<br />
1 Camera retention plate 022.130-204<br />
1 Plexi camera, SB PRO TFT 672.165-755<br />
1 Notecam Pro camera 831.800-011<br />
1 JV4 joystick with JST connector 360.110-654<br />
1 Joystick retention plate, SB PRO TFT 022.130-205<br />
1 Joystick blow-out fuse, SB PRO LCD 022.130-203<br />
1 Front lock 022.130-206<br />
1 LTM190EI LCD TFT 19" 831.700-031<br />
1 Touch screen 19" flat + USB K.138051117MA 462.930-102<br />
1 Touch controller cable USB to EXII 462.930-117<br />
3) Front door<br />
1 Reinforcement strap, front, SB PRO TFT 022.223-727<br />
1 Coin slide, SB PRO TFT 022.130-212<br />
1 Locking angle, front, top, SB PRO TFT 022.130-220<br />
1 Locking angle, front, bottom, SB PRO TFT 022.13-0221<br />
1 Coin checker holder for G13 MFT 464.065-241<br />
1 Change dispenser, TAB standard 464.071-427<br />
1 Coin slot, TAB standard 464.071-425<br />
2 Plexi blue for SB Pro front door 672.165-752<br />
1 Plastic front door, SILVERBALL Pro 373.210-095<br />
1 Light ring for SILVERBALL Pro 373.115-202<br />
1 Clamp plate for coin slot light 022.031-035<br />
4) Optional features<br />
1 Plastic cash box, SILVERBALL Pro 361.110-125<br />
1 Mains cable, 2.5 m with angle plug + protective ground 360.141-830<br />
1 Seci RM5GCC non-modifiable coin checker 464.138-705<br />
1 Vitural C. plastic cash box, 206 x 263 x 144 361.110-126<br />
Page 43
Page 44<br />
5<br />
4<br />
3<br />
1 LCD TFT 19" LTM 190 EI 831.700-031<br />
2 Touch Screen 19" flat + USB 462.930-102<br />
3 Camera retention plate 022.130-204<br />
4 Strato lid 19" TFT joystick/camera 373.210-106<br />
5 TAB classic key, round red 771.200-733<br />
5 TAB classic key, round yellow 771.200-734<br />
5 TAB classic key, round green 771.200-735<br />
6 Joystick retention plate, SB Pro TFT 022.130-205<br />
7 Lid lock angle, right 022.130-207<br />
7 Lid lock angle, left 022.130-208<br />
8 Front lock 022.130-206<br />
8<br />
2<br />
7<br />
1<br />
6
6<br />
5<br />
1 Light ring 373.115-202<br />
2 Front reinforcement strap 022.223-727<br />
3 Coin slide 022.130-212<br />
4 Locking angle, front, bottom 022.130-221<br />
5 Locking angle, front, top 022.130-220<br />
6 Plastic front door 373.210-095<br />
1<br />
4<br />
2<br />
3<br />
Page 45
4<br />
5<br />
6<br />
3<br />
1 Wood body 022.082-012<br />
2 Plastic cash box, <strong>Silverball</strong> Pro 361.110-125<br />
3 PC TAB Micro ATX 831.000-069<br />
4 Cash box door 022.130-218<br />
5 VC plastic cash box 361.110-126<br />
6 Note slide reinforcement strap 022.130-210<br />
Page 46<br />
2<br />
1
Cable plan<br />
Page 47
Page 48
EC Declaration of Conformity<br />
Page 49
Page 50<br />
END-USER LICENSE AGREEMENT FOR MICROSOFT SOFTWARE<br />
IMPORTANT - READ CAREFULLY: This End-User License Agreement ("EULA") is a<br />
legal agreement between you (either an individual or a single entity) and the<br />
manufacturer ("Manufacturer") or the special purpose computing device ("SYSTEM")<br />
you acquired which includes certain Microsoft software product(s) installed on the<br />
SYSTEM ("SOFTWARE PRODUCT" or "SOFTWARE"). The SOFTWARE includes<br />
computer software, the associated media, any printed materials, and any "online" or<br />
electronic documentation. By installing, copying or otherwise using the SOFTWARE,<br />
you agree to be bound by the terms of this EULA. If you do not agree to the terms of<br />
this EULA, Manufacturer and Microsoft Corporation ("Microsoft") are unwilling to<br />
license the SOFTWARE to you. In such event, you may not use or copy the<br />
SOFTWARE, and you should promptly contact Manufacturer for instructions on<br />
return of the unused product(s) for a refund.<br />
SOFTWARE LICENSE<br />
The SOFTWARE is protected by copyright laws and international copyright treaties, as well<br />
as other intellectual property laws and treaties. The SOFTWARE is licensed, not sold.<br />
1. GRANT OF LICENSE. This EULA grants you the following rights:<br />
• Software. You may use the SOFTWARE as installed on the System.<br />
• Application Sharing. The SOFTWARE may contain technology that enables<br />
applications to be shared between two or more SYSTEMS, even if an application is<br />
installed on only one of the SYSTEMS. You should consult your application license<br />
agreement or contact the application licensor to determine whether sharing the<br />
application is permitted by its licensor.<br />
• Storage/Network Use. If the SOFTWARE PRODUCT is installed on the SYSTEM over<br />
an internal network from a server, you must acquire and dedicate a license for the<br />
SOFTWARE PRODUCT for each SYSTEM on which the SOFTWARE PRODUCT is<br />
used or to which it is distributed. A license for the SOFTWARE PRODUCT may not be<br />
shared or used concurrently on different SYSTEMS.<br />
• Back-up Copy. If MANUFACTURER has not included a copy of the SOFTWARE on<br />
separate media with the SYSTEM, you may make a single copy of the SOFTWARE for<br />
use solely for archival purposes with the SYSTEM.<br />
2. DESCRIPTION OF OTHER RIGHTS AND LIMITATIONS.<br />
• Limitation on Reverse Engineering, Decompilation and Disassembly. You may not<br />
reverse engineer, decompile, or disassemble the SOFTWARE, except and only to the<br />
extent that such activity is expressly permitted by applicable law notwithstanding this<br />
limitation.<br />
• Single SYSTEM. The SOFTWARE is licensed with the SYSTEM as a single integrated<br />
product. The SOFTWARE may only be used with the SYSTEM.
• Rental. You may not rent or lease the SOFTWARE.<br />
• Software Transfer. You may permanently transfer all of your rights under this EULA<br />
only as part of a sale or transfer of the SYSTEM, provided you retain no copies, you<br />
transfer all of the SOFTWARE (including all component parts, the media, any upgrades<br />
or backup copies, and this EULA, and if applicable, the Certificate(s) of Authenticity),<br />
and the recipient agrees to the terms of this EULA. If the SOFTWARE is an upgrade,<br />
any transfer must include all prior versions of the SOFTWARE.<br />
• Termination. Without prejudice to any other rights, Manufacturer or Microsoft may<br />
terminate this EULA if you fail to comply with the terms and conditions of this EULA. In<br />
such event, you must destroy all copies of the SOFTWARE and all of its component<br />
parts.<br />
• Single EULA. The package for the SOFTWARE may contain multiple versions of this<br />
EULA, such as multiple translations and/or multiple media versions (e.g., in the user<br />
documentation and in the software). In this case, you are only licensed to use one (1)<br />
copy of the SOFTWARE PRODUCT.<br />
3. UPGRADES AND RECOVERY MEDIA.<br />
• If the SOFTWARE is provided by Manufacturer on media separate from the SYSTEM<br />
and is labeled "For Upgrade Purposes Only" (Upgrade SOFTWARE), you may install<br />
one copy of the Upgrade SOFTWARE onto the SYSTEM as a replacement copy for the<br />
SOFTWARE originally installed on the SYSTEM and use it in accordance with Section 1<br />
of this EULA. You may also install additional copies of the Upgrade SOFTWARE as<br />
replacement copies onto additional SYSTEMS which are the same brand and model as<br />
the SYSTEM and contain a duly licensed copy of the same version and language<br />
release of the SOFTWARE ("ADDITIONAL SYSTEMS"), provided that (1) Manufacturer<br />
has supplied a corresponding serialised sticker for each additional copy of the Upgrade<br />
SOFTWARE, and (2) you affix a serialised sticker per Manufacturer’s instructions for<br />
each unit of Upgrade SOFTWARE you install.<br />
• If the SOFTWARE is provided by Manufacturer on separate media and labeled as<br />
"Recovery Media", you may not make a copy of the SOFTWARE as described in<br />
Section 1 for archival purposes. Instead, you may use the Recovery Media solely to<br />
restore or reinstall the same version and language release of the SOFTWARE as<br />
originally installed on the SYSTEM and thereafter use the SOFTWARE as restored or<br />
reinstalled in accordance with Section 1 of this EULA. A single unit of Recovery Media<br />
may be used by you to restore or reinstall the SOFTWARE on ADDITIONAL SYSTEMS.<br />
4. COPYRIGHT.<br />
• All title and copyrights in and to the SOFTWARE (including but not limited to any<br />
images, photographs, animations, video, audio, music, text and "applets,"<br />
incorporated into the SOFTWARE), the accompanying printed materials, and any<br />
copies of the SOFTWARE, are owned by Microsoft or its suppliers. You may not<br />
copy the printed materials accompanying the SOFTWARE. All rights not specifically<br />
granted under this EULA are reserved by Microsoft.<br />
5. PRODUCT SUPPORT.<br />
Page 51
• Product support for the SOFTWARE is not provided by Microsoft or its subsidiaries.<br />
For product support, please refer to Manufacturer's support number provided in the<br />
documentation for the SYSTEM. Should you have any questions concerning this<br />
EULA, or if you desire to contact Manufacturer for any other reason, please refer to<br />
the address provided in the documentation for the SYSTEM.<br />
6. LIMITED WARRANTY.<br />
• Limited Warranty. Manufacturer warrants that the SOFTWARE will perform<br />
substantially in accordance with the accompanying written materials for a period of<br />
ninety (90) days from the date of receipt. Any implied warranties on the SOFTWARE are<br />
limited to ninety (90) days. Some states/jurisdictions do not allow limitations on duration<br />
of an implied warranty, so the above limitation may not apply to you.<br />
• Customer Remedies. Manufacturer's and its suppliers' entire liability and your exclusive<br />
remedy shall be, at Manufacturer's option, either (a) return of the price paid, or (b) repair<br />
or replacement of the SOFTWARE that does not meet the above Limited Warranty and<br />
which is returned to Manufacturer with a copy of your receipt. This Limited Warranty is<br />
void if failure of the SOFTWARE has resulted from accident, abuse, or misapplication.<br />
Any replacement SOFTWARE will be warranted for the remainder of the original<br />
warranty period or thirty (30) days, whichever is longer.<br />
• No Other Warranties. EXCEPT AS EXPRESSLY PROVIDED IN THE LIMITED<br />
WARRANTY SECTION ABOVE, THE SOFTWARE IS PROVIDED TO THE END USER<br />
"AS IS" WITHOUT OF ANY KIND, EITHER EXPRESSED OR IMPLIED, INCLUDING,<br />
BUT NOT LIMITED TO, WARRANTIES OF NON-INFRINGEMENT,<br />
MERCHANTABILITY, AND/OR FITNESS FOR A PARTICULAR PURPOSE. THE<br />
ENTIRE RISK OF THE QUALITY AND PERFORMANCE OF THE SOFTWARE IS<br />
WITH YOU.<br />
• No Liability for Consequential Damages. MANUFACTURER'S SUPPLIERS SHALL<br />
NOT BE HELD TO ANY LIABILITY FOR ANY DAMAGES SUFFERED OR INCURRED<br />
BY THE END USER (INCLUDING, BUT NOT LIMITED TO, GENERAL, SPECIAL,<br />
CONSEQUENTIAL OR INCIDENTAL DAMAGES INCLUDING DAMAGES FOR LOSS<br />
OF BUSINESS PROFITS INTERRUPTION, LOSS OF BUSINESS INFORMATION<br />
AND THE LIKE), ARISING FROM OR IN CONNECTION WITH THE DELIVERY, USE<br />
OR PERFORMANCE OF THE SOFTWARE.<br />
7. NOTE ON JAVA SUPPORT.<br />
THE SOFTWARE PRODUCT MAY CONTAIN SUPPORT FOR PROGRAMS WRITTEN IN<br />
JAVA. JAVA TECHNOLOGY IS NOT FAULT TOLERANT AND IS NOT DESIGNED,<br />
MANUFACTURED, OR INTENDED FOR USE OR RESALE AS ON-LINE CONTROL<br />
EQUIPMENT IN HAZARDOUS ENVIRONMENTS REQUIRING FAIL-SAFE<br />
PERFORMANCE, SUCH AS IN THE OPERATION OF NUCLEAR FACILITIES,<br />
Page 52
AIRCRAFT NAVIGATION OR COMMUNICATION SYSTEMS, AIR TRAFFIC<br />
CONTROL, DIRECT LIFE SUPPORT MACHINES, OR WEAPONS SYSTEMS, IN<br />
WHICH THE FAILURE OF JAVA TECHNOLOGY COULD LEAD DIRECTLY TO<br />
DEATH, PERSONAL INJURY, OR SEVERE PHYSICAL OR ENVIRONMENTAL<br />
DAMAGE.<br />
Attachment 1<br />
Page 53
Warranty terms by TAB-AUSTRIA Industrie und<br />
Unterhaltungselektronik GmbH & Co KG<br />
(TAB hereinafter)<br />
We are granting a warranty for this machine under the following conditions:<br />
1. Insofar as the “General Terms of Business of TAB-AUSTRIA Industrie- und<br />
Unterhaltungselektronik GmbH & Co KG” are not modified by the following which sets<br />
out the conditions and scope of our warranty performance, these terms will continue to<br />
apply without change.<br />
2. The warranty period for our products from delivery is:<br />
• 24 months for all <strong>Silverball</strong> Terminals (<strong>Silverball</strong> Strato, <strong>Silverball</strong> Strato Max,<br />
<strong>Silverball</strong> Cosmo, <strong>Silverball</strong> Cosmo Max, <strong>Silverball</strong> Pro, <strong>Silverball</strong> Max Pro, <strong>Silverball</strong><br />
Beetle Pro, <strong>Silverball</strong> Beetle Max Pro)<br />
• 24 months for Max Fire, Max Fire Video, Virtual Pinball, Golden Island<br />
• 12 months for all other products, particularly betting terminals<br />
• Six months for all spare parts; however, if a warranty period of more than six months<br />
still obtains for the machines, this period will apply in its entirety to the spare part.<br />
3. The warranty will only be granted for new products by TAB, not for their spare parts, not<br />
for products of different brands and manufacturers and corresponding spare parts. No<br />
warranty is granted for used products either.<br />
4. In accordance with the following provisions, we shall repair defects to the machine that<br />
have been demonstrably caused by a material and/or manufacturing fault which already<br />
existed at the time the product was handed over, and which was reported within 14 days<br />
of it becoming apparent to our sales partner or the first end user while still within the<br />
warranty period. No warranty is assumed for used machines.<br />
5. The warranty exclusively covers such components that are essential to operating the<br />
product. It does not include easily damaged parts or wearing parts, such as, for<br />
example, glass, plastic or light bulbs. Minor deviations from the desired composition<br />
insignificant to the value and usability of the machine will not result in any warranty<br />
obligations. Damage caused by physical, chemical, electrical or electrochemical or other<br />
effects not related to the customary dedicated use will not result in any warranty<br />
obligations; neither does damage caused by water or abnormal environmental<br />
conditions or inappropriate operating conditions. Also, no warranty can be assumed for<br />
machine defects caused by transport damage for which we are not responsible,<br />
incorrect installation and assembly, incorrect use, non-observance of operating or<br />
assembly instructions or lack of care.<br />
Page 54
6. The warranty claim becomes void if repairs or interventions have been carried out by the<br />
customer himself/herself or by persons who were not accordingly authorized or who<br />
were not authorized by us or in the event of our machines being fitted with spare,<br />
supplementary or accessory parts that are not original parts, or if parts have been<br />
removed.<br />
7. The warranty performance will be made in such a way that defective components will at<br />
our discretion be repaired or replaced with faultless components free of charge unless<br />
improvement or exchange are impossible or would result in for us unreasonable cost. In<br />
such cases, a reduction in price or, in the event of not only a minor defect, cancellation<br />
of sale may be claimed.<br />
8. Machines for which a warranty performance is being claimed on the basis of this<br />
warranty must be handed over or sent to us. Repairs at the installation site are not<br />
possible. The customer will bear transport costs and the transport risk.<br />
9. Exchanged parts will become our property.<br />
10. Warranty performances will neither result in an extension of the warranty period nor will<br />
they initiate a new warranty period.<br />
11. Further or other claims (in particular claims for damages suffered beyond the machine)<br />
are excluded insofar as liability is not mandatory by law.<br />
12. These warranty terms apply to machines purchased and operated in Austria. They apply<br />
to machines conveyed to other countries only insofar as they possess the technical<br />
requirements (e.g. voltage, frequency, etc.) for the corresponding country, have been<br />
officially approved for use there and are suited to the individual climate and<br />
environmental conditions.<br />
13. The TFT LCD display consists of more than 1,000,000 Thin-Film Transistors (TFT). A<br />
small amount of missing, black, or luminous points is characteristic for TFT LCD<br />
technology. The warranty performance will be granted if more than 15 missing, black, or<br />
luminous points are present.<br />
Version dated 25 April 2005<br />
Notes:<br />
Page 55
Page 56