ASUS WL-500gP OpenWRT config for Topfield PVR - Toppy.org.uk
ASUS WL-500gP OpenWRT config for Topfield PVR - Toppy.org.uk
ASUS WL-500gP OpenWRT config for Topfield PVR - Toppy.org.uk

You also want an ePaper? Increase the reach of your titles
YUMPU automatically turns print PDFs into web optimized ePapers that Google loves.
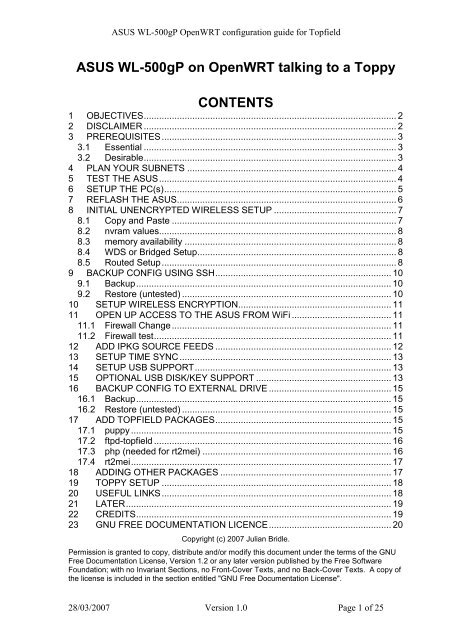
<strong>ASUS</strong> <strong>WL</strong>-<strong>500gP</strong> <strong>OpenWRT</strong> <strong>config</strong>uration guide <strong>for</strong> <strong>Topfield</strong><br />
<strong>ASUS</strong> <strong>WL</strong>-<strong>500gP</strong> on <strong>OpenWRT</strong> talking to a <strong>Toppy</strong><br />
CONTENTS<br />
1 OBJECTIVES................................................................................................... 2<br />
2 DISCLAIMER ................................................................................................... 2<br />
3 PREREQUISITES............................................................................................ 3<br />
3.1 Essential ................................................................................................... 3<br />
3.2 Desirable................................................................................................... 3<br />
4 PLAN YOUR SUBNETS .................................................................................. 4<br />
5 TEST THE <strong>ASUS</strong>............................................................................................. 4<br />
6 SETUP THE PC(s)........................................................................................... 5<br />
7 REFLASH THE <strong>ASUS</strong>...................................................................................... 6<br />
8 INITIAL UNENCRYPTED WIRELESS SETUP ................................................ 7<br />
8.1 Copy and Paste ........................................................................................ 7<br />
8.2 nvram values............................................................................................. 8<br />
8.3 memory availability ................................................................................... 8<br />
8.4 WDS or Bridged Setup.............................................................................. 8<br />
8.5 Routed Setup............................................................................................ 8<br />
9 BACKUP CONFIG USING SSH..................................................................... 10<br />
9.1 Backup.................................................................................................... 10<br />
9.2 Restore (untested) .................................................................................. 10<br />
10 SETUP WIRELESS ENCRYPTION............................................................ 11<br />
11 OPEN UP ACCESS TO THE <strong>ASUS</strong> FROM WiFi ....................................... 11<br />
11.1 Firewall Change...................................................................................... 11<br />
11.2 Firewall test............................................................................................. 11<br />
12 ADD IPKG SOURCE FEEDS ..................................................................... 12<br />
13 SETUP TIME SYNC ................................................................................... 13<br />
14 SETUP USB SUPPORT............................................................................. 13<br />
15 OPTIONAL USB DISK/KEY SUPPORT ..................................................... 13<br />
16 BACKUP CONFIG TO EXTERNAL DRIVE ................................................ 15<br />
16.1 Backup.................................................................................................... 15<br />
16.2 Restore (untested) .................................................................................. 15<br />
17 ADD TOPFIELD PACKAGES..................................................................... 15<br />
17.1 puppy ...................................................................................................... 15<br />
17.2 ftpd-topfield ............................................................................................. 16<br />
17.3 php (needed <strong>for</strong> rt2mei) .......................................................................... 16<br />
17.4 rt2mei...................................................................................................... 17<br />
18 ADDING OTHER PACKAGES ................................................................... 17<br />
19 TOPPY SETUP .......................................................................................... 18<br />
20 USEFUL LINKS.......................................................................................... 18<br />
21 LATER........................................................................................................ 19<br />
22 CREDITS.................................................................................................... 19<br />
23 GNU FREE DOCUMENTATION LICENCE................................................ 20<br />
Copyright (c) 2007 Julian Bridle.<br />
Permission is granted to copy, distribute and/or modify this document under the terms of the GNU<br />
Free Documentation License, Version 1.2 or any later version published by the Free Software<br />
Foundation; with no Invariant Sections, no Front-Cover Texts, and no Back-Cover Texts. A copy of<br />
the license is included in the section entitled "GNU Free Documentation License".<br />
28/03/2007 Version 1.0 Page 1 of 25
<strong>ASUS</strong> <strong>WL</strong>-<strong>500gP</strong> <strong>OpenWRT</strong> <strong>config</strong>uration guide <strong>for</strong> <strong>Topfield</strong><br />
1 OBJECTIVES<br />
• Connect the <strong>Toppy</strong> to an existing wireless LAN in order to transfer TAPs and<br />
recordings to and fro without trailing cables across the house<br />
• Automate the daily feed of EPG data to the <strong>Toppy</strong> without leaving a PC turned on.<br />
There are many choices of firmware <strong>for</strong> the various embedded devices but as an ardent<br />
open systems supporter I liked the sound of one with the word ‘Open’ in its title and it<br />
promised a tiny plat<strong>for</strong>m independent linux OS. The same firmware will run on most<br />
MIPS/Broadcom based routers e.g. <strong>ASUS</strong>, Linksys, Belkin, D-Link, Buffalo etc. The<br />
advantage is flexibility in that you can build a system with exactly what you want in it and<br />
nothing else, but consequently you get very little ready made. Unlike most other firmware<br />
options, its footprint is small enough to get rt2mei up and running without requiring any<br />
external memory or disk.<br />
The other main contender is Oleg’s firmware, which is based on the original GPL router<br />
firmware with additional features. It is well documented <strong>for</strong> a <strong>Toppy</strong> setup and will almost<br />
certainly be simpler to setup and provide more features as standard. However I believe it<br />
only works on the <strong>ASUS</strong> <strong>WL</strong>-500 series routers and does require at least a USB flash drive<br />
to run rt2mei.<br />
My home wireless LAN is provided by a Netgear DG384GT Wireless ADSL router.<br />
Because this does not support WDS, I was <strong>for</strong>ced to <strong>config</strong>ure the <strong>ASUS</strong> as a wireless<br />
client with routing between its LAN switch 1 and the wireless side rather than the<br />
conventional bridged solution. This factor makes this setup a little more complicated.<br />
These instructions should still work <strong>for</strong> any existing wireless router at home, but could be<br />
simplified if the <strong>ASUS</strong> is intended to be your only router or if your existing router supports<br />
WDS.<br />
The instructions should also still work in outline <strong>for</strong> any other <strong>OpenWRT</strong> supported router<br />
but you will have to adjust certain parts <strong>for</strong> hardware differences.<br />
2 DISCLAIMER<br />
An <strong>OpenWRT</strong> setup is not <strong>for</strong> the faint hearted and you really need to be pretty familiar<br />
with linux or unix system <strong>config</strong>urations. That means real <strong>config</strong>uration using the<br />
command line and editing files, not just filling in the GUI dialogs (sic).<br />
I have produced this guide from my own experiences and there is no guarantee that it will<br />
work <strong>for</strong> you. Flashing your router with new firmware is inherently risky. You will quite<br />
rightly void your manufacturer warranty and could brick 2 your router. You may use this<br />
document at your own risk and I accept no responsibility <strong>for</strong> any consequences. Naturally<br />
if you are successful I am more than willing to accept the credit, although the real credit<br />
should go to the writers and maintainers of <strong>OpenWRT</strong> and the various utilities, guides and<br />
<strong>for</strong>ums that I browsed to get this far.<br />
1 The wired LAN is probably irrelevant to most people beyond its use <strong>for</strong> <strong>config</strong>uring the <strong>ASUS</strong>, but it can<br />
offer some wired LAN ports in your TV room if that’s any use.<br />
2 Make it permanently inoperable. i.e. turn it into a brick.<br />
28/03/2007 Version 1.0 Page 2 of 25
<strong>ASUS</strong> <strong>WL</strong>-<strong>500gP</strong> <strong>OpenWRT</strong> <strong>config</strong>uration guide <strong>for</strong> <strong>Topfield</strong><br />
3 PREREQUISITES<br />
3.1 Essential<br />
• A <strong>Toppy</strong> with a USB port (e.g. TF5800<strong>PVR</strong>)<br />
• An <strong>ASUS</strong> <strong>WL</strong>-<strong>500gP</strong> (P=Premium)<br />
• Another working wireless router (probably providing your home Internet<br />
connection)<br />
• USB cable to the <strong>Toppy</strong><br />
• PuTTY ssh terminal emulator http://the.earth.li/~sgtatham/putty/latest/x86/putty-<br />
0.59-installer.exe (Windows) or any linux ssh e.g. OpenSSH<br />
• <strong>OpenWRT</strong> 0.9 firmware image -<br />
http://downloads.openwrt.<strong>org</strong>/whiterussian/0.9/default/openwrt-brcm-2.4squashfs.trx<br />
• A TFTP client program. Win2000/XP has a good enough one built-in otherwise<br />
http://perso.wanadoo.fr/philippe.jounin/tftpd32.html (although you may need to<br />
brush up on your French) atftp apparently works well <strong>for</strong> linux.<br />
• A wired networked PC/Laptop<br />
• A working knowledge of the vi editor - enough to insert, replace, yank, put, write<br />
and quit.<br />
• Lots of time<br />
3.2 Desirable<br />
• MyStuff TAP or other EPG using .mei files.<br />
• Very preferably a second PC/laptop although this one can be wireless, and is only<br />
helpful during the first part of the setup.<br />
• Some <strong>for</strong>m of extra USB storage. e.g. USB flash drive or disk drive <strong>for</strong> making<br />
backups of the <strong>config</strong> etc. It is possible to fit everything required <strong>for</strong> rt2mei and<br />
ftpd-topfield in the standard <strong>ASUS</strong> memory, but you need more space if you want<br />
any bigger packages. If you want to transfer recordings onto the <strong>ASUS</strong> from the<br />
<strong>Toppy</strong>, you need to up-size appropriately and a disk is probably better. Note that as<br />
far as I know there is no reliable NTFS support under <strong>OpenWRT</strong>, although it can<br />
support ext2/ext3 <strong>for</strong> linux compatibility, <strong>for</strong> Windows compatability you need to<br />
<strong>for</strong>mat the drive as FAT32.<br />
• A great deal of patience<br />
The build process is possible with a single computer to talk to the <strong>ASUS</strong> but it will avoid<br />
much rebooting and NIC re<strong>config</strong>uring if you can have one PC on your home LAN (or<br />
WiFi) and another plugged into the switch of the <strong>ASUS</strong>. It is possible to achieve it with<br />
two NICs on a single PC, but sometimes it would not be obvious whether the routing was<br />
working via the home WiFi or the <strong>ASUS</strong> direct.<br />
28/03/2007 Version 1.0 Page 3 of 25
<strong>ASUS</strong> <strong>WL</strong>-<strong>500gP</strong> <strong>OpenWRT</strong> <strong>config</strong>uration guide <strong>for</strong> <strong>Topfield</strong><br />
4 PLAN YOUR SUBNETS<br />
In order to connect to a WiFi LAN which does not support WDS, you need to set the <strong>ASUS</strong><br />
up as a wireless station and route between separate LAN and WIFI subnets. Choose any<br />
private subnet you like - this is what I chose. If your chosen subnets/addresses are<br />
different, then you will need to substitute them in the rest of this document.<br />
Purpose Subnet Address Subnet mask <strong>ASUS</strong> Address<br />
Wired LAN on <strong>ASUS</strong> 192.168.100.0 255.255.255.0 192.168.100.3<br />
Home WiFi Subnet 192.168.99.0 255.255.255.0 192.168.99.3<br />
Choose a fixed IP addresses on each subnet <strong>for</strong> the <strong>ASUS</strong> that is compatible with your<br />
home LAN. Preferably make sure it is outside the range of addresses that any DHCP<br />
service might allocate on you existing router. For simplicity I prefer to make the last octet<br />
the same on both subnets. For example I allocated 192.168.99.3 on the WiFi side and<br />
192.168.100.3 on the <strong>ASUS</strong> switch side, and I restricted the DHCP scope on both routers<br />
to be from 50-99.<br />
5 TEST THE <strong>ASUS</strong><br />
Connect and power-up the <strong>ASUS</strong> as per the supplied documentation.<br />
Try to get it running using the standard firmware and disconnected from your wired LAN<br />
first. Allocate a different subnet to your home subnet. Use the <strong>ASUS</strong> HTML UI to enter<br />
the WiFi and LAN parameters even if you can’t get it to connect wirelessly. If you are<br />
currently running Oleg’s, then the nvram values are probably reasonably OK already and<br />
you can skip this stage.<br />
One setup that is known to work on a Netgear DG834G v2 (and may not work <strong>for</strong> v3) is as<br />
follows:<br />
System Setup -> Operation Mode -> Access Point<br />
Wireless -> Bridge -> Hybrid<br />
Wireless -> Advanced -> Extended Mode -> Ethernet Bridge<br />
If you manage to get access to your <strong>ASUS</strong> from other wireless nodes with encryption<br />
turned on, then you can probably avoid the messing about with routing, firewall etc. In this<br />
case, you may be OK to follow section 8.4 instead of the more complicated 8.5.38.5 (see<br />
note later).<br />
28/03/2007 Version 1.0 Page 4 of 25
<strong>ASUS</strong> <strong>WL</strong>-<strong>500gP</strong> <strong>OpenWRT</strong> <strong>config</strong>uration guide <strong>for</strong> <strong>Topfield</strong><br />
6 SETUP THE PC(s)<br />
Create entries in the hosts files 1 on any PCs which will be used to access the <strong>ASUS</strong> - e.g.<br />
C:\Windows\System32\drivers\etc\hosts on Win2K/XP or /etc/hosts under<br />
linux/unix<br />
192.168.99.3 asus asuswifi<br />
192.168.100.3 asuslan<br />
Configure a PC to have another non-clashing address on the <strong>ASUS</strong> Wired subnet (say<br />
192.168.100.10) and plug it into any of the 4 <strong>ASUS</strong> LAN switch ports. If your PC is setup<br />
to use DHCP, you can just release and renew the PC’s LAN interface or reboot the PC to<br />
get the <strong>ASUS</strong> to dish out an address via DHCP.<br />
Leave the second PC (or NIC) connected to the existing WiFi router either directly or<br />
wirelessly so that it can reach the WiFi host(s).<br />
Install PuTTY on the PCs then make sure your PATH is set up to find pscp and the other<br />
ssh tools from a command window. Under 2000/XP I think this is Right-click My<br />
Computer, Properties, Advanced, Environment Variables. Select ‘Path’ in the System<br />
variables pane and edit its value adding a semicolon and the path to the PuTTY install<br />
directory. E.g. ;C:\Program Files\PuTTY Then press OK all the way out.<br />
The default PuTTY <strong>config</strong> works well although from memory you may have to change the<br />
default action of the backspace key to generate Control-H<br />
1 Or in AD/Wins/DNS as appropriate to your network.<br />
28/03/2007 Version 1.0 Page 5 of 25
<strong>ASUS</strong> <strong>WL</strong>-<strong>500gP</strong> <strong>OpenWRT</strong> <strong>config</strong>uration guide <strong>for</strong> <strong>Topfield</strong><br />
7 REFLASH THE <strong>ASUS</strong><br />
This is your last chance to preserve your manufacturer warranty. DO NOT PROCEED<br />
UNLESS YOU ARE PREPARED TO LOSE THIS.<br />
Contrary to the general statements about <strong>OpenWRT</strong> on most routers, the <strong>ASUS</strong> <strong>WL</strong>-500<br />
routers do not revert to the default 192.168.1.1 address when you start the bootloader. You<br />
can always connect to them on the last address you used (so don’t <strong>for</strong>get it). If this does<br />
not work, then try the default address.<br />
I think it is most reliable to install OpenWrt using a tftp client when the router is in diag<br />
mode. To put the router in diag mode, do this:<br />
• Unplug the power on the <strong>ASUS</strong>.<br />
• Press the black RESTORE (not the red EZsetup) button using a pen or matchstick.<br />
• Plug the power back in while keeping the RESTORE button pressed in.<br />
• Once you see a slowly blinking power light, you're in diag mode. Now the router<br />
should accept a firmware image via tftp.<br />
• On the PC connected to the <strong>ASUS</strong> via wire 1 , get to a command prompt and cd to<br />
the directory where the firmware file is.<br />
• Type the following command:<br />
tftp -i 192.168.99.3 put openwrt-brcm-2.4-squashfs.trx<br />
• The <strong>OpenWRT</strong> <strong>ASUS</strong> notes suggest that the <strong>ASUS</strong> does not reboot itself and<br />
advise you to wait 6 minutes then power-cycle it. In my experience it does reboot<br />
and is ready to accept a connection after this process. If you want to be cautious,<br />
wait 6 minutes anyway and then try to connect. Only reboot if you don’t get a<br />
connection.<br />
Start PuTTY and try to connect to the host called ‘asuslan’ using the Telnet protocol. Select<br />
it from the radio buttons below the hostname field. You should see a banner something<br />
like this:<br />
BusyBox v1.00 (2007.01.30-11:42+0000) Built-in shell (ash)<br />
Enter 'help' <strong>for</strong> a list of built-in commands.<br />
_______ ________ __<br />
| |.-----.-----.-----.| | | |.----.| |_<br />
| - || _ | -__| || | | || _|| _|<br />
|_______|| __|_____|__|__||________||__| |____|<br />
|__| W I R E L E S S F R E E D O M<br />
WHITE RUSSIAN (0.9) -------------------------------<br />
* 2 oz Vodka Mix the Vodka and Kahlua together<br />
* 1 oz Kahlua over ice, then float the cream or<br />
* 1/2oz cream milk on the top.<br />
---------------------------------------------------<br />
root@OpenWrt:~#<br />
1 Don’t try to download firmware wirelessly even if your wireless is very reliable it’s a recipe <strong>for</strong> bricking<br />
your router.<br />
28/03/2007 Version 1.0 Page 6 of 25
At the # prompt type:<br />
passwd<br />
<strong>ASUS</strong> <strong>WL</strong>-<strong>500gP</strong> <strong>OpenWRT</strong> <strong>config</strong>uration guide <strong>for</strong> <strong>Topfield</strong><br />
And enter a new password (twice). This will disable telnet and enable ssh (more secure).<br />
Record this password somewhere safe then open another PuTTY and try to connect to<br />
asuslan using the ssh protocol this time. The login is root and the password is whatever<br />
you just set. If this also shows a banner like above, then all’s well. Go back to the original<br />
telnet window and type:<br />
exit<br />
Which will close that session. From here on in you can only use ssh.<br />
If it didn’t work, use the original telnet window to try and diagnose the problem and/or<br />
redo the password. If all else fails, directly editing /etc/passwd and removing the<br />
encrypted password between the second and third semicolons will leave the telnet service<br />
operational while you try and resolve problems.<br />
8 INITIAL UNENCRYPTED WIRELESS SETUP<br />
8.1 Copy and Paste<br />
From this point, you are going to have to type quite a few long commands. You may find it<br />
helpful to copy and paste between this document an the PuTTY window.<br />
8.1.1 In Windows<br />
Copying and pasting on the Windows side is by your normal preferred Windows method.<br />
E.g.<br />
Select text with the left mouse button or shift-right-cursor, then control-c, rightclick�copy,<br />
Edit�Copy etc.<br />
Paste is Control-V, Right-click�Paste or Edit�Paste.<br />
8.1.2 In PuTTY<br />
In a PuTTY window, copying is usually achieved by just selecting with the left mouse<br />
button. It will end up in the Windows clipboard automatically.<br />
Pasting a command using putty is by pressing the middle mouse button. If you only have<br />
two buttons then you can usually press both together to simulate that.<br />
The PuTTY behaviour can be affected by the settings in Window�Selection.<br />
To copy and paste between the two should be obvious, use the Windows copy and the<br />
PuTTY paste or vice-versa.<br />
28/03/2007 Version 1.0 Page 7 of 25
<strong>ASUS</strong> <strong>WL</strong>-<strong>500gP</strong> <strong>OpenWRT</strong> <strong>config</strong>uration guide <strong>for</strong> <strong>Topfield</strong><br />
8.2 nvram values<br />
Many of the core networking features are driven by settings stored in a table in the non<br />
volatile ram. These are accessed as follows:<br />
nvram show | less # Shows all values<br />
nvram get name # Shows a single value<br />
nvram set name=”value” # Sets a value<br />
To extract the whole lot and peruse it, try this:<br />
nvram show | sort > /tmp/settings<br />
vi /tmp/settings<br />
8.3 memory availability<br />
Apparently some routers (or some releases of <strong>OpenWRT</strong>) only reveal half their 32MbRAM<br />
by default. Mine was correct after flashing standard <strong>ASUS</strong> firmware and RC6 and 0.9<br />
final. YMMV - Check the memory by running:<br />
dmesg | grep Memory<br />
A line like this means you have all the memory available:<br />
Memory: 30436k/32768k available<br />
If it shows about 16Mb then try:<br />
nvram set sdram_init=0x0009<br />
nvram set sdram_ncdl=0<br />
8.4 WDS or Bridged Setup<br />
If you were able to make the router connect with the standard firmware, then you may be<br />
able to avoid much of the complexity of a routed setup. In this case try the following<br />
which relies in the firmware settings left behind by the standard <strong>ASUS</strong> firmware, otherwise<br />
go straight <strong>for</strong> the routed setup.<br />
nvram set wl0_akm=open<br />
nvram commit<br />
reboot<br />
If bridged setup doesn’t work after a bit of trying, then the Routed Setup should work <strong>for</strong><br />
all cases.<br />
8.5 Routed Setup<br />
This should be the lowest common denominator which will work in all cases. However, it<br />
does mean that the LAN switch on the <strong>ASUS</strong> will need to be on a separate subnet from the<br />
Wireless side.<br />
8.5.1 move WiFi to separate vlan<br />
Remove wifi from LAN bridge br0:<br />
nvram set lan_ifnames=vlan0 # Just the 4 port switch<br />
28/03/2007 Version 1.0 Page 8 of 25
<strong>ASUS</strong> <strong>WL</strong>-<strong>500gP</strong> <strong>OpenWRT</strong> <strong>config</strong>uration guide <strong>for</strong> <strong>Topfield</strong><br />
Setup wireless device as eth2 if not already (White Russian RC6 sets it to eth1 which is<br />
correct <strong>for</strong> earlier <strong>WL</strong>-500gDeluxe, but not Premium). I think it’s fixed in 0.9 final but I<br />
had already re<strong>config</strong>ured mine under RC6 so I can’t be sure.<br />
nvram set wan_ifname=eth2 # Make the wan point at WiFi<br />
nvram set wan_device=eth2 # May be unnecessary<br />
nvram set wl0_ifname=eth2 # May be unnecessary<br />
I don’t think the bridge br0 is useful in itself, but haven’t been able to test removing it<br />
completely without committing nvram and I am afraid of bricking the router. I may try this<br />
once I am convinced I can only break the LAN side.<br />
If you intend to use the router LAN, you can include the port labelled WAN so you get 5<br />
ports. It is fundamentally the same as the other ports and only differentiated by vlan. I<br />
haven’t tried this myself, but it should work by changing these values, which moves port 0<br />
from vlan1 to vlan0.<br />
nvram set vlan0ports=”0 1 2 3 4 5*”<br />
nvram set vlan1ports=5<br />
8.5.2 routing<br />
Set gateway and DNS to your WiFi router.<br />
nvram set wan_proto=static<br />
nvram set wan_ipaddr=192.168.99.3 # <strong>ASUS</strong> address<br />
nvram set wan_netmask=255.255.255.0<br />
nvram set wan_gateway=192.168.99.1 # Existing router<br />
nvram set wan_dns=192.168.99.1 # Existing router<br />
8.5.3 wifi <strong>config</strong><br />
Set wifi params wireless mode as sta (client station), leave encryption off at first<br />
nvram set wl0_mode=sta<br />
nvram set wl0_akm=open<br />
nvram set wl0_ssid=<br />
nvram commit<br />
reboot<br />
Wait <strong>for</strong> the <strong>ASUS</strong> to reboot, restart PuTTY and log back in.<br />
If you can ping www.google.com, it’s looking good.<br />
28/03/2007 Version 1.0 Page 9 of 25
<strong>ASUS</strong> <strong>WL</strong>-<strong>500gP</strong> <strong>OpenWRT</strong> <strong>config</strong>uration guide <strong>for</strong> <strong>Topfield</strong><br />
9 BACKUP CONFIG USING SSH<br />
You should make a backup at key stages in case something makes the router unresponsive.<br />
My impression is that <strong>for</strong> practical purposes, you can’t truly brick the router unless you are<br />
linking your own firmware images. You should be able to recover using the TFTP method<br />
although a serious cock-up with the nvram settings may mean you have to reflash to the<br />
original <strong>ASUS</strong> firmware by this method be<strong>for</strong>e putting <strong>OpenWRT</strong> back on.<br />
9.1 Backup<br />
firmware image:<br />
mount -o remount,ro /dev/mtdblock/4 /jffs<br />
dd if=/dev/mtdblock/1 > /tmp/first_<strong>config</strong> 1 .trx<br />
mount -o remount,rw /dev/mtdblock/4 /jffs<br />
dd if=/dev/mtdblock/3 > /tmp/first_<strong>config</strong>.nvram<br />
nvram, package list and /etc/<strong>config</strong> files as a compressed tar:<br />
nvram show | sort >/etc/nvram.save # Can take quite a few seconds<br />
cd /<br />
tar cvf - usr/lib/ipkg/status etc |<br />
gzip -c >/tmp/first_<strong>config</strong>.tgz<br />
Then, from the PC, make sure your PATH is set up to find pscp, then open a command<br />
window, cd to the directory where you want to store the backups and then fetch them:<br />
pscp -unsafe -scp "root@192.168.3.99:/tmp/first_<strong>config</strong>.*" .<br />
Note the trailing full stop in the above command - it is important.<br />
9.2 Restore (untested)<br />
From PC:<br />
pscp -scp first_<strong>config</strong>.* root@192.168.3.99:/tmp<br />
From <strong>ASUS</strong>, firmware image:<br />
tar:<br />
dd if=/tmp/first_<strong>config</strong>.nvram of=/dev/mtdblock/3<br />
mount -o remount,ro /dev/mtdblock/4 /jffs<br />
mtd -r write /tmp/first_<strong>config</strong>.trx linux<br />
cd / # or /tmp if you want to review files be<strong>for</strong>e overwriting<br />
gzip -dc /tmp/first_<strong>config</strong>.tgz | tar xvf - files_or_dirs 2<br />
1 Or a different name of your choice at each significant build milestone.<br />
2 A space separated list of the files and/or directories you wish to restore or omit it to restore everything.<br />
28/03/2007 Version 1.0 Page 10 of 25
<strong>ASUS</strong> <strong>WL</strong>-<strong>500gP</strong> <strong>OpenWRT</strong> <strong>config</strong>uration guide <strong>for</strong> <strong>Topfield</strong><br />
10 SETUP WIRELESS ENCRYPTION<br />
Install the nas package which is needed to support WPA/WPA2 encryption<br />
ipkg update # Gets available package list<br />
ipkg install nas # Allows WPA/WPA2 encryption<br />
Turn on encryption on your home router, reboot it <strong>for</strong> good measure then try to get<br />
encryption going on the <strong>ASUS</strong>.<br />
This is not obvious with wl0_mode=sta Do not try to use the automatic protocol selections<br />
- choose one standard which your router supports. In my case the Netgear DG384GT<br />
supports WPA-PSK and TKIP but not WPA2 or AES. The nas module will not autonegotiate<br />
in this mode so you must read your existing router’s specs to establish which of<br />
these technologies it supports and choose compatible values <strong>for</strong> wl0_akm and<br />
wl0_wpa_crypto.<br />
nvram set wl0_akm=psk # or psk2/radius/radius2 (not multiple)<br />
nvram set wl0_wpa_psk=<br />
nvram set wl0_wpa_crypto=tkip # Or aes (not both)<br />
nvram commit<br />
reboot<br />
Hopefully you should be able to see the address of the <strong>ASUS</strong> in the list of attached devices<br />
in your home router and/or ping each router from the other. If not check, double-check and<br />
recheck all the nvram settings. Make sure the spellings of the variable names are correct as<br />
there is no error checking. You can create any old named values. It took me days to realise<br />
I had misspelled wl0_wpa_crypto as wl0_wpa_crypt.<br />
11 OPEN UP ACCESS TO THE <strong>ASUS</strong> FROM WiFi<br />
11.1 Firewall Change<br />
This change is probably only necessary if you have a routed setup. Try the Firewall test<br />
first and only make the change if you don’t get an SSH connection.<br />
vi /etc/firewall.user<br />
Remove the leading # from the two iptables command lines around 19 and 20 which<br />
refer to dropbear (a tiny ssh server) so that port 22 is available from the WiFi side.<br />
Replicate these 2 lines <strong>for</strong> ports 21, 80 and 443 to allow FTP, HTTP and HTTPS access<br />
(one day). Hint: vi uses 2Y to yank (copy) 2 lines and P to put (paste) them.<br />
reboot<br />
11.2 Firewall test<br />
Disconnect any wired connection between your LAN and the router and see if you can ssh<br />
onto the router via WiFi. i.e. Start PuTTY and connect to the host called ‘asus’ or<br />
‘asuswifi’<br />
28/03/2007 Version 1.0 Page 11 of 25
<strong>ASUS</strong> <strong>WL</strong>-<strong>500gP</strong> <strong>OpenWRT</strong> <strong>config</strong>uration guide <strong>for</strong> <strong>Topfield</strong><br />
12 ADD IPKG SOURCE FEEDS<br />
At this point, you are going to have to do some editing. My highly subjective opinion<br />
borne out of 20+ years of code-cutting under Unix is that vim is the best editor with vi as<br />
an acceptable alternative. There are loads of tutorials out there. Here is a link to just one:<br />
http://www.eng.hawaii.edu/Tutor/vi.html<br />
You may well think it is very terse and non-intuitive and if you can’t get on with it, you<br />
may prefer to install nano which is easier to learn…<br />
ipkg install \<br />
http://downloads.openwrt.<strong>org</strong>/backports/0.9/nano_1.3.8-1_mipsel.ipk<br />
I don’t know how to use it but you can probably substitute nano everywhere you see vi.<br />
There is a file called /etc/ipkg.conf which lists URLs <strong>for</strong> the various sources <strong>for</strong><br />
software.<br />
Note that ipkg seems to ignore the order of these entries when installing - I have a feeling<br />
that it is searching in alphabetical order of the URL! It probably looks first <strong>for</strong> the highest<br />
alphabetical filename to <strong>for</strong>ce it towards higher version numbers but my example had the<br />
same version of ntpclient in most of the feed locations and chose the nslu2 one which<br />
didn’t auto-start. There<strong>for</strong>e you should resist the temptation to put all known sources into<br />
/etc/ipkg.conf as you will never be sure a given package is coming from the closest<br />
matching source.<br />
So far the only clean way I have found to pick up packages from exactly where you want is<br />
to create multiple copies of the ipkg.conf file. Each containing just the source you want to<br />
use.<br />
If anyone finds a better way of doing this, please tell me!<br />
cd /etc<br />
vi ipkg.conf and add:<br />
dest usbkey /usbkey # in case you install a big package<br />
cp ipkg.conf ipkg.0.9<br />
vi ipkg.0.9 and add<br />
/etc/ipkg.0.9(add these lines after existing src lines)<br />
src backports http://downloads.openwrt.<strong>org</strong>/backports/0.9<br />
src rc6 http://downloads.openwrt.<strong>org</strong>/backports/rc6<br />
src rc5 http://downloads.openwrt.<strong>org</strong>/backports/rc5<br />
src nslu2 http://ipkg.nslu2-linux.<strong>org</strong>/feeds/optware/wl500g/cross/stable<br />
Save and exit then type:<br />
ipkg -f /etc/ipkg.0.9 update # Updates all package lists<br />
Then copy that file 3 times to the following filenames:<br />
cp ipkg.0.9 ipkg.rc6<br />
cp ipkg.0.9 ipkg.rc5<br />
cp ipkg.0.9 ipkg.nslu2<br />
28/03/2007 Version 1.0 Page 12 of 25
<strong>ASUS</strong> <strong>WL</strong>-<strong>500gP</strong> <strong>OpenWRT</strong> <strong>config</strong>uration guide <strong>for</strong> <strong>Topfield</strong><br />
Then edit each of the 4 extra files (i.e all but ipkg.conf) file and delete the unwanted ‘src’<br />
lines to leave the single corresponding src line and all the dest etc. lines.<br />
ipkg.0.9:<br />
src backports http://downloads.openwrt.<strong>org</strong>/backports/0.9<br />
ipkg.rc6:<br />
src rc6 http://downloads.openwrt.<strong>org</strong>/backports/rc6<br />
ipkg.rc5:<br />
src rc5 http://downloads.openwrt.<strong>org</strong>/backports/rc5<br />
ipkg.nslu2:<br />
src nslu2 http://ipkg.nslu2-linux.<strong>org</strong>…<br />
13 SETUP TIME SYNC<br />
The <strong>ASUS</strong> has no internal clock and keeps time using the cpu once set. This means it<br />
resets to 00:00 1 Jan 2000 at every reboot, and probably drifts thereafter. Clearly any<br />
sensible setup needs an accurate time so this is where the ntpclient module comes in.<br />
ipkg install ntpclient # Time sync<br />
The ntp client package installs a startup script in /etc/hotplug.d/iface. This will set the<br />
clock on reboot. You also need to manually create a cron job <strong>for</strong> it to correct any clock<br />
drift while the <strong>ASUS</strong> is running. If you prefer you can leave this until later when we add<br />
the rt2mei crontab entry.<br />
crontab -e<br />
crontab contents to add:<br />
23 * * * * /etc/hotplug.d/iface/10-ntpclient ifup<br />
You also need to create the daylight saving rules<br />
echo "GMT+0BST-1,M3.5.0/01:00:00,M10.5.0/02:00:00" > /etc/TZ<br />
Note that this will not set the time until the router has finished booting so many system logs<br />
etc. will show year 2000 timestamps which only roughly indicate how long after booting<br />
any event happened.<br />
14 SETUP USB SUPPORT<br />
The following packages should give you USB 1.1 and 2.0 support <strong>for</strong> the <strong>Toppy</strong>.<br />
ipkg install kmod-usb-uhci # USB 1.0/1.1<br />
ipkg install kmod-usb2 # USB 2.0<br />
15 OPTIONAL USB DISK/KEY SUPPORT<br />
This will support external disks/flash drives<br />
ipkg install kmod-usb-storage # USB disks etc.<br />
ipkg install kmod-vfat # Windows FileSystems.<br />
ipkg install kmod-ext2 # Earlier Linux FileSystems.<br />
ipkg install kmod-ext3 # Later Linux FileSystems.<br />
Install the fdisk partitioning utility from RC5 unless you find a native 0.9 version or a later<br />
backport!<br />
ipkg -f /etc/ipkg.rc5 install fdisk<br />
Power off, insert the USB media, power up and log back in.<br />
dmesg | less<br />
28/03/2007 Version 1.0 Page 13 of 25
<strong>ASUS</strong> <strong>WL</strong>-<strong>500gP</strong> <strong>OpenWRT</strong> <strong>config</strong>uration guide <strong>for</strong> <strong>Topfield</strong><br />
And look <strong>for</strong> something like this - in my case my USB key has 2 partitions.<br />
hub.c: new USB device 01:03.2-2, assigned address 3<br />
scsi0 : SCSI emulation <strong>for</strong> USB Mass Storage devices<br />
Vendor: Model: Removable Disk Rev: PMAP<br />
Type: Direct-Access ANSI SCSI revision: 02<br />
Vendor: Model: Removable Disk Rev: PMAP<br />
Type: Direct-Access ANSI SCSI revision: 02<br />
Attached scsi removable disk sda at scsi0, channel 0, id 0, lun 0<br />
Attached scsi removable disk sdb at scsi0, channel 0, id 0, lun 1<br />
SCSI device sda: 3068928 512-byte hdwr sectors (1571 MB)<br />
sda: Write Protect is off<br />
Partition check:<br />
/dev/scsi/host0/bus0/target0/lun0: p1<br />
SCSI device sdb: 3072 512-byte hdwr sectors (2 MB)<br />
sdb: Write Protect is off<br />
/dev/scsi/host0/bus0/target0/lun1: p1<br />
WARNING: USB Mass Storage data integrity not assured<br />
The system seems to auto-mount the device under a generic name in /mnt, but preferring a<br />
more meaningful name, I remount it as /usbkey.<br />
df # Will show their sizes<br />
Mount the partition(s) you are interested in e.g.:<br />
mkdir /usbkey # if it doesn’t already exist<br />
mount /dev/scsi/host0/bus0/target0/lun0/Part1 /usbkey<br />
If the above works, create a file /etc/init.d/S62mount containing something like the<br />
following:<br />
and then:<br />
/etc/init.d/S62mount<br />
umount /mnt/disc0_1<br />
umount /mnt/disc1_1<br />
mount /dev/scsi/host0/bus0/target0/lun0/part1 /usbkey<br />
chmod 775 /etc/init.d/S62mount<br />
I have not established how to cleanly prevent the automatic mount under /mnt but the<br />
<strong>ASUS</strong> doesn’t seem to mind the same FS being mounted twice. The mount is per<strong>for</strong>med<br />
by the /etc/hotplug.d/usb/01-mount script and it can probably be removed or<br />
chmodded to stop it executing. The two umount lines could then be removed from the<br />
above script.<br />
28/03/2007 Version 1.0 Page 14 of 25
<strong>ASUS</strong> <strong>WL</strong>-<strong>500gP</strong> <strong>OpenWRT</strong> <strong>config</strong>uration guide <strong>for</strong> <strong>Topfield</strong><br />
16 BACKUP CONFIG TO EXTERNAL DRIVE<br />
16.1 Backup<br />
firmware image:<br />
mkdir /usbkey/backup<br />
mount -o remount,ro /dev/mtdblock/4 /jffs<br />
dd if=/dev/mtdblock/1 > /usbkey/backup/bare_<strong>config</strong> 1 .trx<br />
mount -o remount,rw /dev/mtdblock/4 /jffs<br />
dd if=/dev/mtdblock/3 > /usbkey/backup/bare_<strong>config</strong>.nvram<br />
nvram, package list and /etc/<strong>config</strong> files as a compressed tar:<br />
nvram show | sort >/etc/nvram.save # Can take quite a few seconds<br />
cd /<br />
tar cvf - usr/lib/ipkg/status etc |<br />
gzip -c >/usbkey/backup/bare_<strong>config</strong>.tgz<br />
16.2 Restore (untested)<br />
firmware image:<br />
tar:<br />
dd if=/usbkey/backup/bare_<strong>config</strong>.nvram of=/dev/mtdblock/3<br />
mount -o remount,ro /dev/mtdblock/4 /jffs<br />
mtd -r write /usbkey/backup/bare_<strong>config</strong>.trx linux<br />
cd / # or /tmp if you want to review files be<strong>for</strong>e overwriting<br />
gzip -dc /usbkey/backup/bare_<strong>config</strong>.tgz | tar xvf - files_or_dirs 2<br />
17 ADD TOPFIELD PACKAGES<br />
17.1 puppy<br />
ipkg -f /etc/ipkg.nslu2 install puppy<br />
Puppy is the only binary installed in /opt/bin, and rt2mei looks <strong>for</strong> it there. Linking it<br />
seems cleaner than moving it or changing the PATH.<br />
Test it:<br />
ln -s /opt/bin/puppy /bin<br />
puppy -c dir DataFiles # Should show your recordings<br />
1 Or a different name of your choice at each significant build milestone.<br />
2 A space separated list of the files and/or directories you wish to restore or omit it to restore everything.<br />
28/03/2007 Version 1.0 Page 15 of 25
<strong>ASUS</strong> <strong>WL</strong>-<strong>500gP</strong> <strong>OpenWRT</strong> <strong>config</strong>uration guide <strong>for</strong> <strong>Topfield</strong><br />
17.2 ftpd-topfield<br />
Do not be tempted to use a version of ftpd-topfield from the nslu2 site because it doesn’t<br />
work under <strong>OpenWRT</strong> - it displays directories as ?. If you see a newer <strong>OpenWRT</strong> version<br />
on Steveb’s site it is worth trying though.<br />
Test it<br />
ipkg install libgcc<br />
# Next 3 lines are entered as one continuous command line<br />
ipkg install<br />
http://members.ozemail.com.au/~msteveb/topfield/wl500gopenwrt/ftpd-topfield_0.7.1-0_mipsel.ipk<br />
/usr/bin/ftpd-topfield -D -P 21<br />
Then try and access the ftp server on the <strong>ASUS</strong> from the wireless PC.<br />
ftp asus<br />
Log in as anonymous with no password (it doesn’t accept any other user) then type dir<br />
which should show the top-level directories from the <strong>Toppy</strong> i.e. ProgramFiles DataFiles<br />
etc. If so, all’s well. Type bye to exit. You could also try typing ftp://asus in the Windows<br />
Explorer address bar.<br />
Back on the <strong>ASUS</strong>, add a startup script <strong>for</strong> ftpd-topfield. The nslu2 versions do this <strong>for</strong><br />
you, but the <strong>OpenWRT</strong> port doesn’t.<br />
vi /etc/init.d/S65topfield<br />
/etc/init.d/S65topfield:<br />
/usr/bin/ftpd-topfield -D -P 21<br />
Now make it executable<br />
chmod 750 /etc/init.d/S65topfield<br />
Then reboot the <strong>ASUS</strong> and test that ftpd-topfield has been started up automatically by<br />
trying remote ftp access again.<br />
17.3 php (needed <strong>for</strong> rt2mei)<br />
ipkg install libopenssl<br />
ipkg install zlib<br />
ipkg -f /etc/ipkg.0.9 install php5<br />
ipkg -f /etc/ipkg.0.9 install php5-cli<br />
ipkg -f /etc/ipkg.0.9 install php5-mod-pcre<br />
vi /etc/php.ini<br />
Add this line after the “Dynamic Extensions” commentary<br />
/etc/php.ini<br />
extension = pcre.so<br />
28/03/2007 Version 1.0 Page 16 of 25
17.4 rt2mei<br />
<strong>ASUS</strong> <strong>WL</strong>-<strong>500gP</strong> <strong>OpenWRT</strong> <strong>config</strong>uration guide <strong>for</strong> <strong>Topfield</strong><br />
This does not seem to be available as an ipkg package but it is just a few scripts so you can<br />
download the (nslu2) files to your PC from wooders’ site unzip them and transfer them<br />
using pscp which is provided with PuTTY. You may want to edit rt2mei.cfg on your PC or<br />
use one that someone else in the same TV area is using.<br />
On the <strong>ASUS</strong>:<br />
mkdir /rt2mei<br />
Back on the PC make sure your PATH is set up to find pscp, then in a command window,<br />
cd to the directory where you extracted the files and then transfer:<br />
On the <strong>ASUS</strong>:<br />
pscp -scp rt2mei r2tmei.* root@asus:/rt2mei<br />
cd /rt2mei<br />
chmod 775 rt2mei rt2mei.php<br />
./rt2mei -ramdisk<br />
You should see a load of progress messages about downloading channel data and then a<br />
transfer to the toppy.<br />
Setup a cron job<br />
crontab -e<br />
crontab contents to add:<br />
# Resync time at 23 minutes past every hour<br />
23 * * * * /etc/hotplug.d/iface/10-ntpclient ifup<br />
# Attempt to transfer EPG at 07:32 daily<br />
32 07 * * * /rt2mei/rt2mei -ramdisk > /tmp/rt2mei.out<br />
18 ADDING OTHER PACKAGES<br />
You can add other packages using ipkg. It’s worth checking how much memory you have<br />
free on the <strong>ASUS</strong>. The df (disk free) command will give something like this:<br />
root@OpenWrt:~# df<br />
Filesystem 1k-blocks Used Available Use% Mounted on<br />
/dev/root 1024 1024 0 100% /rom<br />
none 15256 4696 10560 31% /tmp<br />
/dev/mtdblock/4 6336 2484 3852 39% /jffs<br />
/jffs 1024 1024 0 100% /<br />
Look in the Mounted on column:<br />
• /jffs is the static ram and this will fillup as you add things to /<br />
• /tmp is the dynamic ram and this will get affected by temporary files, runtime<br />
memory allocation etc. Its contents are lost at reboot.<br />
If you have an external drive this will appear here too under whatever name(s) it is<br />
mounted<br />
You can choose to add larger packages to the external drive by specifying another dest<br />
from the ipkg.conf file. E.g.<br />
ipkg -f /etc/ipkg.0.9 -d usbkey some_package<br />
You may then have to link parts of that filesystem into root and/or modify your PATH.<br />
See ipkg-link on the <strong>OpenWRT</strong> UsbStorageHowto<br />
28/03/2007 Version 1.0 Page 17 of 25
<strong>ASUS</strong> <strong>WL</strong>-<strong>500gP</strong> <strong>OpenWRT</strong> <strong>config</strong>uration guide <strong>for</strong> <strong>Topfield</strong><br />
19 TOPPY SETUP<br />
I use the PowerManager TAP to switch off my <strong>Toppy</strong> at night and set up a watch timer to<br />
wake it up be<strong>for</strong>e the above 07:32 download.<br />
Depending on how you like it to work, and assuming you are using MyStuff, you could use<br />
the MergeMEI feature of eit2mei to populate the EPG <strong>for</strong> channels with no RT data.<br />
Peruse the <strong>for</strong>ums <strong>for</strong> details but in essence you need to hand-edit the eit2mei.ini file to<br />
include a line like this:<br />
MergeMEI=MyStuff.mei<br />
And change MyStuff option L1=Never and L3=Freeview<br />
20 USEFUL LINKS<br />
<strong>Toppy</strong> UK site http://www.toppy.<strong>org</strong>.<strong>uk</strong><br />
PuTTY http://the.earth.li/~sgtatham/putty<br />
<strong>OpenWRT</strong> site http://openwrt.<strong>org</strong><br />
vi editor tutorial http://www.eng.hawaii.edu/Tutor/vi.html<br />
WhiteRussian http://wiki.openwrt.<strong>org</strong>/OpenWrtDocs/Configuration<br />
<strong>ASUS</strong> <strong>WL</strong>-<strong>500gP</strong> http://wiki.openwrt.<strong>org</strong>/OpenWrtDocs/Hardware/Asus/<strong>WL</strong>500GP<br />
Client mode http://wiki.openwrt.<strong>org</strong>/ClientModeHowto<br />
Switches/VLAN http://wiki.openwrt.<strong>org</strong>/OpenWrtDocs/NetworkInterfaces<br />
USB storage http://wiki.openwrt.<strong>org</strong>/UsbStorageHowto<br />
puppy http://www.nslu2-linux.<strong>org</strong>/wiki/Puppy/HomePage<br />
ftpd-topfield http://members.ozemail.com.au/~msteveb/topfield/wl500g-openwrt/<br />
rt2mei site http://www.wooders.co.<strong>uk</strong>/rt2mei/<br />
X-wrt web interface http://x-wrt.<strong>org</strong><br />
28/03/2007 Version 1.0 Page 18 of 25
21 LATER<br />
<strong>ASUS</strong> <strong>WL</strong>-<strong>500gP</strong> <strong>OpenWRT</strong> <strong>config</strong>uration guide <strong>for</strong> <strong>Topfield</strong><br />
A few things to try in the future:<br />
• Install an SMB/Samba server and/or SMB/CIFS mount.<br />
• Maybe install a command line ftp client (wput or curl) and make rt2mei use that so<br />
ftpd-topfield is the only file transfer agent.<br />
• webif2 (especially HTTPS support when it arrives)<br />
• Try out <strong>Toppy</strong>web - probably needs to run on a separate host and needs editing to<br />
make use of the FTP service instead of assuming it can talk to the toppy directly.<br />
• Generating MyStuff searches<br />
• Creating an <strong>OpenWRT</strong> build environment under linux<br />
• Generate a pre<strong>config</strong>ured firmware image with even more cutdown list of packages<br />
and <strong>Toppy</strong> utils preinstalled<br />
• Redo <strong>for</strong> the Kamikaze release as and when it is considered stable<br />
22 CREDITS<br />
Thanks to all the people whose work I scoured <strong>for</strong> this in<strong>for</strong>mation, especially the<br />
<strong>OpenWRT</strong> development team and the authors of all the <strong>Topfield</strong> specific packages.<br />
Thanks also to R2-D2 <strong>for</strong> being the first guinea-pig <strong>for</strong> the guide, providing valuable<br />
feedback and <strong>for</strong> coming within gnat’s whisker of bricking his router in the process.<br />
28/03/2007 Version 1.0 Page 19 of 25
<strong>ASUS</strong> <strong>WL</strong>-<strong>500gP</strong> <strong>OpenWRT</strong> <strong>config</strong>uration guide <strong>for</strong> <strong>Topfield</strong><br />
23 GNU FREE DOCUMENTATION LICENCE<br />
0. PREAMBLE<br />
The purpose of this License is to make a manual, textbook, or other functional and useful<br />
document "free" in the sense of freedom: to assure everyone the effective freedom to copy<br />
and redistribute it, with or without modifying it, either commercially or noncommercially.<br />
Secondarily, this License preserves <strong>for</strong> the author and publisher a way to get credit <strong>for</strong> their<br />
work, while not being considered responsible <strong>for</strong> modifications made by others.<br />
This License is a kind of "copyleft", which means that derivative works of the document<br />
must themselves be free in the same sense. It complements the GNU General Public<br />
License, which is a copyleft license designed <strong>for</strong> free software.<br />
We have designed this License in order to use it <strong>for</strong> manuals <strong>for</strong> free software, because free<br />
software needs free documentation: a free program should come with manuals providing<br />
the same freedoms that the software does. But this License is not limited to software<br />
manuals; it can be used <strong>for</strong> any textual work, regardless of subject matter or whether it is<br />
published as a printed book. We recommend this License principally <strong>for</strong> works whose<br />
purpose is instruction or reference.<br />
1. APPLICABILITY AND DEFINITIONS<br />
This License applies to any manual or other work, in any medium, that contains a notice<br />
placed by the copyright holder saying it can be distributed under the terms of this License.<br />
Such a notice grants a world-wide, royalty-free license, unlimited in duration, to use that<br />
work under the conditions stated herein. The "Document", below, refers to any such<br />
manual or work. Any member of the public is a licensee, and is addressed as "you". You<br />
accept the license if you copy, modify or distribute the work in a way requiring permission<br />
under copyright law.<br />
A "Modified Version" of the Document means any work containing the Document or a<br />
portion of it, either copied verbatim, or with modifications and/or translated into another<br />
language.<br />
A "Secondary Section" is a named appendix or a front-matter section of the Document that<br />
deals exclusively with the relationship of the publishers or authors of the Document to the<br />
Document's overall subject (or to related matters) and contains nothing that could fall<br />
directly within that overall subject. (Thus, if the Document is in part a textbook of<br />
mathematics, a Secondary Section may not explain any mathematics.) The relationship<br />
could be a matter of historical connection with the subject or with related matters, or of<br />
legal, commercial, philosophical, ethical or political position regarding them.<br />
The "Invariant Sections" are certain Secondary Sections whose titles are designated, as<br />
being those of Invariant Sections, in the notice that says that the Document is released<br />
under this License. If a section does not fit the above definition of Secondary then it is not<br />
allowed to be designated as Invariant. The Document may contain zero Invariant Sections.<br />
If the Document does not identify any Invariant Sections then there are none.<br />
28/03/2007 Version 1.0 Page 20 of 25
<strong>ASUS</strong> <strong>WL</strong>-<strong>500gP</strong> <strong>OpenWRT</strong> <strong>config</strong>uration guide <strong>for</strong> <strong>Topfield</strong><br />
The "Cover Texts" are certain short passages of text that are listed, as Front-Cover Texts or<br />
Back-Cover Texts, in the notice that says that the Document is released under this License.<br />
A Front-Cover Text may be at most 5 words, and a Back-Cover Text may be at most 25<br />
words.<br />
A "Transparent" copy of the Document means a machine-readable copy, represented in a<br />
<strong>for</strong>mat whose specification is available to the general public, that is suitable <strong>for</strong> revising the<br />
document straight<strong>for</strong>wardly with generic text editors or (<strong>for</strong> images composed of pixels)<br />
generic paint programs or (<strong>for</strong> drawings) some widely available drawing editor, and that is<br />
suitable <strong>for</strong> input to text <strong>for</strong>matters or <strong>for</strong> automatic translation to a variety of <strong>for</strong>mats<br />
suitable <strong>for</strong> input to text <strong>for</strong>matters. A copy made in an otherwise Transparent file <strong>for</strong>mat<br />
whose markup, or absence of markup, has been arranged to thwart or discourage<br />
subsequent modification by readers is not Transparent. An image <strong>for</strong>mat is not Transparent<br />
if used <strong>for</strong> any substantial amount of text. A copy that is not "Transparent" is called<br />
"Opaque".<br />
Examples of suitable <strong>for</strong>mats <strong>for</strong> Transparent copies include plain ASCII without markup,<br />
Texinfo input <strong>for</strong>mat, LaTeX input <strong>for</strong>mat, SGML or XML using a publicly available<br />
DTD, and standard-con<strong>for</strong>ming simple HTML, PostScript or PDF designed <strong>for</strong> human<br />
modification. Examples of transparent image <strong>for</strong>mats include PNG, XCF and JPG. Opaque<br />
<strong>for</strong>mats include proprietary <strong>for</strong>mats that can be read and edited only by proprietary word<br />
processors, SGML or XML <strong>for</strong> which the DTD and/or processing tools are not generally<br />
available, and the machine-generated HTML, PostScript or PDF produced by some word<br />
processors <strong>for</strong> output purposes only.<br />
The "Title Page" means, <strong>for</strong> a printed book, the title page itself, plus such following pages<br />
as are needed to hold, legibly, the material this License requires to appear in the title page.<br />
For works in <strong>for</strong>mats which do not have any title page as such, "Title Page" means the text<br />
near the most prominent appearance of the work's title, preceding the beginning of the body<br />
of the text.<br />
A section "Entitled XYZ" means a named subunit of the Document whose title either is<br />
precisely XYZ or contains XYZ in parentheses following text that translates XYZ in<br />
another language. (Here XYZ stands <strong>for</strong> a specific section name mentioned below, such as<br />
"Acknowledgements", "Dedications", "Endorsements", or "History".) To "Preserve the<br />
Title" of such a section when you modify the Document means that it remains a section<br />
"Entitled XYZ" according to this definition.<br />
The Document may include Warranty Disclaimers next to the notice which states that this<br />
License applies to the Document. These Warranty Disclaimers are considered to be<br />
included by reference in this License, but only as regards disclaiming warranties: any other<br />
implication that these Warranty Disclaimers may have is void and has no effect on the<br />
meaning of this License.<br />
2. VERBATIM COPYING<br />
You may copy and distribute the Document in any medium, either commercially or<br />
noncommercially, provided that this License, the copyright notices, and the license notice<br />
saying this License applies to the Document are reproduced in all copies, and that you add<br />
no other conditions whatsoever to those of this License. You may not use technical<br />
28/03/2007 Version 1.0 Page 21 of 25
<strong>ASUS</strong> <strong>WL</strong>-<strong>500gP</strong> <strong>OpenWRT</strong> <strong>config</strong>uration guide <strong>for</strong> <strong>Topfield</strong><br />
measures to obstruct or control the reading or further copying of the copies you make or<br />
distribute. However, you may accept compensation in exchange <strong>for</strong> copies. If you distribute<br />
a large enough number of copies you must also follow the conditions in section 3.<br />
You may also lend copies, under the same conditions stated above, and you may publicly<br />
display copies.<br />
3. COPYING IN QUANTITY<br />
If you publish printed copies (or copies in media that commonly have printed covers) of the<br />
Document, numbering more than 100, and the Document's license notice requires Cover<br />
Texts, you must enclose the copies in covers that carry, clearly and legibly, all these Cover<br />
Texts: Front-Cover Texts on the front cover, and Back-Cover Texts on the back cover.<br />
Both covers must also clearly and legibly identify you as the publisher of these copies. The<br />
front cover must present the full title with all words of the title equally prominent and<br />
visible. You may add other material on the covers in addition. Copying with changes<br />
limited to the covers, as long as they preserve the title of the Document and satisfy these<br />
conditions, can be treated as verbatim copying in other respects.<br />
If the required texts <strong>for</strong> either cover are too voluminous to fit legibly, you should put the<br />
first ones listed (as many as fit reasonably) on the actual cover, and continue the rest onto<br />
adjacent pages.<br />
If you publish or distribute Opaque copies of the Document numbering more than 100, you<br />
must either include a machine-readable Transparent copy along with each Opaque copy, or<br />
state in or with each Opaque copy a computer-network location from which the general<br />
network-using public has access to download using public-standard network protocols a<br />
complete Transparent copy of the Document, free of added material. If you use the latter<br />
option, you must take reasonably prudent steps, when you begin distribution of Opaque<br />
copies in quantity, to ensure that this Transparent copy will remain thus accessible at the<br />
stated location until at least one year after the last time you distribute an Opaque copy<br />
(directly or through your agents or retailers) of that edition to the public.<br />
It is requested, but not required, that you contact the authors of the Document well be<strong>for</strong>e<br />
redistributing any large number of copies, to give them a chance to provide you with an<br />
updated version of the Document.<br />
4. MODIFICATIONS<br />
You may copy and distribute a Modified Version of the Document under the conditions of<br />
sections 2 and 3 above, provided that you release the Modified Version under precisely this<br />
License, with the Modified Version filling the role of the Document, thus licensing<br />
distribution and modification of the Modified Version to whoever possesses a copy of it. In<br />
addition, you must do these things in the Modified Version:<br />
• A. Use in the Title Page (and on the covers, if any) a title distinct from that of the<br />
Document, and from those of previous versions (which should, if there were any, be<br />
listed in the History section of the Document). You may use the same title as a<br />
previous version if the original publisher of that version gives permission.<br />
28/03/2007 Version 1.0 Page 22 of 25
<strong>ASUS</strong> <strong>WL</strong>-<strong>500gP</strong> <strong>OpenWRT</strong> <strong>config</strong>uration guide <strong>for</strong> <strong>Topfield</strong><br />
• B. List on the Title Page, as authors, one or more persons or entities responsible <strong>for</strong><br />
authorship of the modifications in the Modified Version, together with at least five<br />
of the principal authors of the Document (all of its principal authors, if it has fewer<br />
than five), unless they release you from this requirement.<br />
• C. State on the Title page the name of the publisher of the Modified Version, as the<br />
publisher.<br />
• D. Preserve all the copyright notices of the Document.<br />
• E. Add an appropriate copyright notice <strong>for</strong> your modifications adjacent to the other<br />
copyright notices.<br />
• F. Include, immediately after the copyright notices, a license notice giving the<br />
public permission to use the Modified Version under the terms of this License, in<br />
the <strong>for</strong>m shown in the Addendum below.<br />
• G. Preserve in that license notice the full lists of Invariant Sections and required<br />
Cover Texts given in the Document's license notice.<br />
• H. Include an unaltered copy of this License.<br />
• I. Preserve the section Entitled "History", Preserve its Title, and add to it an item<br />
stating at least the title, year, new authors, and publisher of the Modified Version as<br />
given on the Title Page. If there is no section Entitled "History" in the Document,<br />
create one stating the title, year, authors, and publisher of the Document as given on<br />
its Title Page, then add an item describing the Modified Version as stated in the<br />
previous sentence.<br />
• J. Preserve the network location, if any, given in the Document <strong>for</strong> public access to<br />
a Transparent copy of the Document, and likewise the network locations given in<br />
the Document <strong>for</strong> previous versions it was based on. These may be placed in the<br />
"History" section. You may omit a network location <strong>for</strong> a work that was published<br />
at least four years be<strong>for</strong>e the Document itself, or if the original publisher of the<br />
version it refers to gives permission.<br />
• K. For any section Entitled "Acknowledgements" or "Dedications", Preserve the<br />
Title of the section, and preserve in the section all the substance and tone of each of<br />
the contributor acknowledgements and/or dedications given therein.<br />
• L. Preserve all the Invariant Sections of the Document, unaltered in their text and in<br />
their titles. Section numbers or the equivalent are not considered part of the section<br />
titles.<br />
• M. Delete any section Entitled "Endorsements". Such a section may not be included<br />
in the Modified Version.<br />
• N. Do not retitle any existing section to be Entitled "Endorsements" or to conflict in<br />
title with any Invariant Section.<br />
• O. Preserve any Warranty Disclaimers.<br />
If the Modified Version includes new front-matter sections or appendices that qualify as<br />
Secondary Sections and contain no material copied from the Document, you may at your<br />
option designate some or all of these sections as invariant. To do this, add their titles to the<br />
list of Invariant Sections in the Modified Version's license notice. These titles must be<br />
distinct from any other section titles.<br />
You may add a section Entitled "Endorsements", provided it contains nothing but<br />
endorsements of your Modified Version by various parties--<strong>for</strong> example, statements of peer<br />
review or that the text has been approved by an <strong>org</strong>anization as the authoritative definition<br />
of a standard.<br />
28/03/2007 Version 1.0 Page 23 of 25
<strong>ASUS</strong> <strong>WL</strong>-<strong>500gP</strong> <strong>OpenWRT</strong> <strong>config</strong>uration guide <strong>for</strong> <strong>Topfield</strong><br />
You may add a passage of up to five words as a Front-Cover Text, and a passage of up to<br />
25 words as a Back-Cover Text, to the end of the list of Cover Texts in the Modified<br />
Version. Only one passage of Front-Cover Text and one of Back-Cover Text may be added<br />
by (or through arrangements made by) any one entity. If the Document already includes a<br />
cover text <strong>for</strong> the same cover, previously added by you or by arrangement made by the<br />
same entity you are acting on behalf of, you may not add another; but you may replace the<br />
old one, on explicit permission from the previous publisher that added the old one.<br />
The author(s) and publisher(s) of the Document do not by this License give permission to<br />
use their names <strong>for</strong> publicity <strong>for</strong> or to assert or imply endorsement of any Modified<br />
Version.<br />
5. COMBINING DOCUMENTS<br />
You may combine the Document with other documents released under this License, under<br />
the terms defined in section 4 above <strong>for</strong> modified versions, provided that you include in the<br />
combination all of the Invariant Sections of all of the original documents, unmodified, and<br />
list them all as Invariant Sections of your combined work in its license notice, and that you<br />
preserve all their Warranty Disclaimers.<br />
The combined work need only contain one copy of this License, and multiple identical<br />
Invariant Sections may be replaced with a single copy. If there are multiple Invariant<br />
Sections with the same name but different contents, make the title of each such section<br />
unique by adding at the end of it, in parentheses, the name of the original author or<br />
publisher of that section if known, or else a unique number. Make the same adjustment to<br />
the section titles in the list of Invariant Sections in the license notice of the combined work.<br />
In the combination, you must combine any sections Entitled "History" in the various<br />
original documents, <strong>for</strong>ming one section Entitled "History"; likewise combine any sections<br />
Entitled "Acknowledgements", and any sections Entitled "Dedications". You must delete<br />
all sections Entitled "Endorsements."<br />
6. COLLECTIONS OF DOCUMENTS<br />
You may make a collection consisting of the Document and other documents released<br />
under this License, and replace the individual copies of this License in the various<br />
documents with a single copy that is included in the collection, provided that you follow<br />
the rules of this License <strong>for</strong> verbatim copying of each of the documents in all other<br />
respects.<br />
You may extract a single document from such a collection, and distribute it individually<br />
under this License, provided you insert a copy of this License into the extracted document,<br />
and follow this License in all other respects regarding verbatim copying of that document.<br />
7. AGGREGATION WITH INDEPENDENT WORKS<br />
A compilation of the Document or its derivatives with other separate and independent<br />
documents or works, in or on a volume of a storage or distribution medium, is called an<br />
"aggregate" if the copyright resulting from the compilation is not used to limit the legal<br />
rights of the compilation's users beyond what the individual works permit. When the<br />
28/03/2007 Version 1.0 Page 24 of 25
<strong>ASUS</strong> <strong>WL</strong>-<strong>500gP</strong> <strong>OpenWRT</strong> <strong>config</strong>uration guide <strong>for</strong> <strong>Topfield</strong><br />
Document is included in an aggregate, this License does not apply to the other works in the<br />
aggregate which are not themselves derivative works of the Document.<br />
If the Cover Text requirement of section 3 is applicable to these copies of the Document,<br />
then if the Document is less than one half of the entire aggregate, the Document's Cover<br />
Texts may be placed on covers that bracket the Document within the aggregate, or the<br />
electronic equivalent of covers if the Document is in electronic <strong>for</strong>m. Otherwise they must<br />
appear on printed covers that bracket the whole aggregate.<br />
8. TRANSLATION<br />
Translation is considered a kind of modification, so you may distribute translations of the<br />
Document under the terms of section 4. Replacing Invariant Sections with translations<br />
requires special permission from their copyright holders, but you may include translations<br />
of some or all Invariant Sections in addition to the original versions of these Invariant<br />
Sections. You may include a translation of this License, and all the license notices in the<br />
Document, and any Warranty Disclaimers, provided that you also include the original<br />
English version of this License and the original versions of those notices and disclaimers.<br />
In case of a disagreement between the translation and the original version of this License or<br />
a notice or disclaimer, the original version will prevail.<br />
If a section in the Document is Entitled "Acknowledgements", "Dedications", or "History",<br />
the requirement (section 4) to Preserve its Title (section 1) will typically require changing<br />
the actual title.<br />
9. TERMINATION<br />
You may not copy, modify, sublicense, or distribute the Document except as expressly<br />
provided <strong>for</strong> under this License. Any other attempt to copy, modify, sublicense or distribute<br />
the Document is void, and will automatically terminate your rights under this License.<br />
However, parties who have received copies, or rights, from you under this License will not<br />
have their licenses terminated so long as such parties remain in full compliance.<br />
10. FUTURE REVISIONS OF THIS LICENSE<br />
The Free Software Foundation may publish new, revised versions of the GNU Free<br />
Documentation License from time to time. Such new versions will be similar in spirit to the<br />
present version, but may differ in detail to address new problems or concerns. See<br />
http://www.gnu.<strong>org</strong>/copyleft/.<br />
Each version of the License is given a distinguishing version number. If the Document<br />
specifies that a particular numbered version of this License "or any later version" applies to<br />
it, you have the option of following the terms and conditions either of that specified version<br />
or of any later version that has been published (not as a draft) by the Free Software<br />
Foundation. If the Document does not specify a version number of this License, you may<br />
choose any version ever published (not as a draft) by the Free Software Foundation.<br />
28/03/2007 Version 1.0 Page 25 of 25