BP90 Owner's Manual-English - Digitech
BP90 Owner's Manual-English - Digitech
BP90 Owner's Manual-English - Digitech

You also want an ePaper? Increase the reach of your titles
YUMPU automatically turns print PDFs into web optimized ePapers that Google loves.
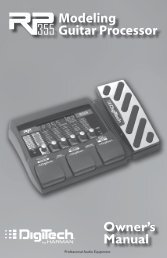
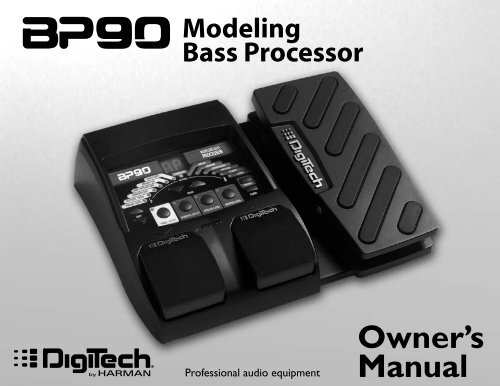
Modeling<br />
Bass Processor<br />
Professional audio equipment<br />
Owner’s<br />
<strong>Manual</strong>
The symbols shown above are internationally accepted symbols that warn of potential hazards with electrical<br />
products. The lightning flash with arrowpoint in an equilateral triangle means that there are dangerous<br />
voltages present within the unit. The exclamation point in an equilateral triangle indicates that it is necessary<br />
for the user to refer to the owner’s manual.<br />
These symbols warn that there are no user serviceable parts inside the unit. Do not open the unit. Do not<br />
attempt to service the unit yourself. Refer all servicing to qualified personnel. Opening the chassis for any<br />
reason will void the manufacturer’s warranty. Do not get the unit wet. If liquid is spilled on the unit, shut it<br />
off immediately and take it to a dealer for service. Disconnect the unit during storms to prevent damage.<br />
ELECTROMAGNETIC COMPATIBILITY<br />
This device complies with part 15 of the FCC Rules and the Product Specifications noted on the<br />
Declaration of Conformity. Operation is subject to the following two conditions:<br />
• this device may not cause harmful interference, and<br />
• this device must accept any interference received, including interference that may cause<br />
undesired operation.<br />
Operation of this unit within significant electromagnetic fields should be avoided.<br />
• use only shielded interconnecting cables.<br />
If you want to dispose this product, do not mix it with general household waste. There is a<br />
separate collection system for used electronic products in accordance with legislation that<br />
requires proper treatment, recovery and recycling.<br />
Private household in the 25 member states of the EU, in Switzerland and Norway may return their used<br />
electronic products free of charge to designated collection facilities or to a retailer (if you purchase a similar<br />
new one).<br />
For Countries not mentioned above, please contact your local authorities for a correct method of disposal.<br />
By doing so you will ensure that your disposed product undergoes the necessary treatment, recovery and<br />
recycling and thus prevent potential negative effects on the environment and human health.<br />
WARNING FOR YOUR PROTECTION<br />
PLEASE READ THE FOLLOWING:<br />
KEEP THESE INSTRUCTIONS<br />
HEED ALL WARNINGS<br />
FOLLOW ALL INSTRUCTIONS<br />
THE APPARATUS SHALL NOT bE ExPOSED TO DRIPPING OR SPLASHING LIqUID<br />
AND NO ObjECT FILLED WITH LIqUID, SUCH AS vASES, SHALL bE PLACED<br />
ON THE APPARATUS.<br />
CLEAN ONLY WITH A DRY CLOTH.<br />
DO NOT bLOCK ANY OF THE vENTILATION OPENINGS. INSTALL IN ACCORDANCE<br />
WITH THE MANUFACTURER’S INSTRUCTIONS.<br />
DO NOT INSTALL NEAR ANY HEAT SOURCES SUCH AS RADIATORS, HEAT<br />
REGISTERS, STOvES, OR OTHER APPARATUS (INCLUDING AMPLIFIERS) THAT<br />
PRODUCE HEAT.<br />
ONLY USE ATTACHMENTS/ACCESSORIES SPECIFIED bY THE MANUFACTURER.<br />
UNPLUG THIS APPARATUS DURING LIGHTNING STORMS OR WHEN UNUSED FOR<br />
LONG PERIODS OF TIME.<br />
Do not defeat the safety purpose of the polarized or grounding-type plug. A<br />
polarized plug has two blades with one wider than the other. A grounding<br />
type plug has two blades and a third grounding prong. The wide blade or<br />
third prong are provided for your safety. If the provided plug does not fit<br />
your outlet, consult an electrician for replacement of the obsolete outlet.<br />
Protect the power cord from being walked on or pinched particularly at<br />
plugs, convenience receptacles, and the point where they exit from the<br />
apparatus.<br />
Use only with the cart stand, tripod bracket, or table specified by the manufacture,<br />
or sold with the apparatus. When a cart is used, use caution when<br />
moving the cart/apparatus combination to avoid injury from tip-over.<br />
Refer all servicing to to qualified service personnel. Servicing is required<br />
when the apparatus has been damaged in any way, such as power-supply<br />
cord or plug is damaged, liquid has been spilled or objects have fallen into<br />
the apparatus, the apparatus has been exposed to rain or moisture, does not<br />
operate normally, or has been dropped.<br />
POWER ON/OFF SWITCH: The Power switch used in this piece of equipment<br />
DOES NOT break the connection from the mains.<br />
MAINS DISCONNECT: The plug shall remain readily operable. For rack-mount<br />
or installation where plug is not accessible, an all-pole mains switch with a<br />
contact separation of at least 3 mm in each pole shall be incorporated into<br />
the electrical installation of the rack or building.
Manufacturer’s Name: DigiTech<br />
Manufacturer’s Address: 8760 S. Sandy Parkway<br />
Sandy, Utah 84070, USA<br />
DECLARATION OF CONFORMITY<br />
declares that the product:<br />
Product name: BP 90<br />
Product option: all (requires Class II power adapter that conforms to the requirements of EN60065, EN60742, or equivalent.)<br />
conforms to the following Product Specifications:<br />
Safety: IEC 60065 -01+Amd 1<br />
Supplementary Information:<br />
EMC: EN 55022:2006<br />
EN 55024:1998<br />
FCC Part 15<br />
The product herewith complies with the requirements of the:<br />
Low Voltage Directive 2006/95/EC<br />
EMC Directive 2004/108/EC.<br />
RoHS Directive 2002/95/EC<br />
WEEE Directive 2002/96/EC<br />
EC Regulation 278/2009<br />
With regard to Directive 2005/32/EC and EC Regulation 1275/2008 of 17 December 2008, this product is designed, produced, and<br />
classified as Professional Audio Equipment and thus is exempt from this Directive.<br />
Director, Engineering<br />
Signal Processing<br />
8760 S. Sandy Parkway<br />
Sandy, Utah 84070, USA<br />
Date: April 28, 2011<br />
European Contact: Your local DigiTech Sales and Service Office or<br />
Harman Music Group<br />
8760 South Sandy Parkway<br />
Sandy, Utah<br />
84070 USA<br />
Ph: (801) 566-8800<br />
Fax: (801) 568-7583
Warranty<br />
We at DigiTech® are very proud of our products and back up each one we sell with the following warranty:<br />
1. The warranty registration card must be mailed within ten days after purchase date to validate this<br />
warranty, or you can register via our website (www.digitech.com).<br />
2. DigiTech warrants this product, when used solely within the U.S., to be free from defects in materials and<br />
workmanship under normal use and service.<br />
3. DigiTech liability under this warranty is limited to repairing or replacing defective materials that show<br />
evidence of defect, provided the product is returned to DigiTech WITH RETURN AUTHORIZATION,<br />
where all parts and labor will be covered up to a period of one year. A Return Authorization number<br />
may be obtained from DigiTech by telephone. The company shall not be liable for any consequential<br />
damage as a result of the product’s use in any circuit or assembly.<br />
4. Proof-of-purchase is considered to be the burden of the consumer.<br />
5. DigiTech reserves the right to make changes in design, or make additions to, or improvements upon this<br />
product without incurring any obligation to install the same on products previously manufactured.<br />
6. The consumer forfeits the benefits of this warranty if the product’s main assembly is opened and<br />
tampered with by anyone other than a certified DigiTech technician or, if the product is used with AC<br />
voltages outside of the range suggested by the manufacturer.<br />
7. The foregoing is in lieu of all other warranties, expressed or implied, and DigiTech neither assumes nor<br />
authorizes any person to assume any obligation or liability in connection with the sale of this product. In<br />
no event shall DigiTech or its dealers be liable for special or consequential damages or from any delay in<br />
the performance of this warranty due to causes beyond their control.<br />
NOTE: The information contained in this manual is subject to change at any time without notification. Some<br />
information contained in this manual may also be inaccurate due to undocumented changes in the product or<br />
operating system since this version of the manual was completed. The information contained in this version of<br />
the owner’s manual supersedes all previous versions.
Table of Contents<br />
Section One - Introduction<br />
Getting Acquainted .......................................................... 1<br />
Included Items .................................................................. 1<br />
About the <strong>BP90</strong> ................................................................ 2<br />
Performance Mode ....................................................... 2<br />
Edit Mode ........................................................................ 2<br />
Bypass Mode ................................................................... 2<br />
Tuner Mode ..................................................................... 2<br />
Tone Library Button...................................................... 4<br />
Effects Library Button .................................................. 4<br />
Effects Level Button ...................................................... 4<br />
Master Level Button ..................................................... 4<br />
Presets ............................................................................. 5<br />
A Guided Tour of the <strong>BP90</strong> ........................................... 6<br />
Front Panel ..................................................................... 6<br />
Rear Panel .....................................................................10<br />
Getting Started ...............................................................12<br />
Making Connections ......................................................12<br />
Mono Operation - Amplifier ....................................12<br />
Stereo Operation ........................................................13<br />
Applying Power ..............................................................15<br />
Section Two - Editing Functions<br />
Editing/Creating Presets ...............................................16<br />
Storing/Copying a Preset..............................................17<br />
Section Three - Models and Effects<br />
About the Models ..........................................................19<br />
Model Definitions ..........................................................20<br />
Fretless/Wah ...................................................................20<br />
Compressor ....................................................................21<br />
Amp/Distortion Models ...............................................22<br />
Noise Gate ......................................................................23<br />
EQ. .....................................................................................23<br />
Chorus/FX. ......................................................................24<br />
Chorus. ..........................................................................25<br />
Flanger ...........................................................................25<br />
Phaser ............................................................................25<br />
Tremolo .........................................................................25<br />
Panner ............................................................................25<br />
Vibrato ...........................................................................25<br />
Octavider ......................................................................26<br />
Envelope Filter .............................................................26<br />
YaYa TM .............................................................................26<br />
AutoYa TM .......................................................................26<br />
Step Filter .....................................................................26<br />
SynthTalk TM ...................................................................26<br />
Detune ...........................................................................27<br />
Pitch Shift ......................................................................27<br />
DigiTech Whammy .................................................27<br />
Delay .................................................................................28<br />
Reverb ..............................................................................30
Section Four - Other Functions<br />
Expression Pedal Assign ................................................31<br />
Drum Machine ................................................................33<br />
Factory Reset ..................................................................33<br />
Expression Pedal Calibration ......................................34<br />
Section Five - Appendix<br />
Specifications ...................................................................35<br />
Tone Library ....................................................................37<br />
Effects Library .................................................................38<br />
Disclaimer: DigiTech, DigiTech Whammy, and AudioDNA2 are trademarks of HARMAN in the U.S. and other<br />
countries. Ampeg SVT, Ashdown Bass Magnifier, Fender Bassman, Sunn 200S, SWR Interstellar Overdrive,<br />
Trace-Elliot Commando, Ampeg B15, Hiwatt Custom 50, Mesa/Boogie 400+, SWR Basic Black, Fender Dual<br />
Showman, Vox Clyde McCoy Wah, Guyatone OD-1, Voodoo Labs Sparkledrive, Boss DS-1, and Electro-Harmonix<br />
Big Muff are products of DigiTech’s competitors and trademarks of their respective companies in the U.S.<br />
and other countries and are not associated or affiliated with DigiTech or HARMAN. © 2010 HARMAN. All<br />
Rights Reserved.
Section 1 - Introduction<br />
Getting Acquainted<br />
Congratulations on your purchase of the <strong>BP90</strong>. You now have an incredibly advanced modeling<br />
bass processor that can keep up with your creative impulses and even increase them. Armed with<br />
DigiTech ® ’s patented AudioDNA2 ® custom audio DSP chip, the <strong>BP90</strong> gives you a huge selection of<br />
tones and effects, right at your fingertips. When you easily select an amp or distortion tone and<br />
an effects chain from the Tone Library or the Effects Library, you’ll appreciate the accuracy in each<br />
model, and the dynamic interaction in each tone. Add a built-in drum machine, and you have the<br />
<strong>BP90</strong>: the key to unlock your creative potential.<br />
Included Items<br />
Before you get started, please make sure that the following items have been included:<br />
• <strong>BP90</strong><br />
• Power Supply<br />
• Warranty Card<br />
The utmost care was taken while your <strong>BP90</strong> was being manufactured. Everything should be included<br />
and in perfect working order. If anything is missing, contact the factory at once. Please help<br />
us become acquainted with you and your needs by completing your warranty card or registering<br />
online at www.digitech.com. It is your safeguard should a problem arise with your <strong>BP90</strong>.<br />
1
2<br />
About the <strong>BP90</strong><br />
Performance Mode<br />
When you first apply power to the <strong>BP90</strong>, it powers up in Performance mode. Performance mode<br />
provides access to all of the presets within the <strong>BP90</strong> via the Up and Down Footswitches. The<br />
Edit Up/Down buttons cycle through the effects in the matrix.<br />
Edit Mode<br />
When you select an Effect with the Edit Up/Down buttons, you can adjust the Effect with the<br />
Value Up/Down buttons. (For descriptions of the Effects and their parameters, see page 20.)<br />
When you make changes to a preset’s Effects, you must store the changes or they will be lost<br />
when you select a different preset or disconnect power to the <strong>BP90</strong>. See page 17 for a description<br />
of the Store procedure.<br />
The <strong>BP90</strong> presets can be bypassed for a clean, unprocessed bass signal. To bypass the <strong>BP90</strong>, press<br />
and release both Footswitches simultaneously. The Display reads By indicating the preset is<br />
bypassed. In Bypass mode, all buttons are disabled. Press either Footswitch to exit Bypass mode<br />
and return the <strong>BP90</strong> to the last preset used.<br />
Tuner Mode<br />
The Tuner in the <strong>BP90</strong> allows you to quickly tune or check the tuning on your bass. Enter Tuner<br />
mode by pressing and holding both Footswitches simultaneously. The Display briefly shows tu<br />
indicating that you are in Tuner mode. To begin tuning, play a note on your bass (a harmonic at the<br />
12th fret usually works best). The Display shows the note being played. The Matrix LEDs indicate<br />
whether you are sharp or flat. The left 6 red LEDs indicate the note is flat and should be tuned
up. The right 6 red LEDs indicate the note is sharp and should be tuned down. The center LED<br />
indicates the note is in tune. The output is muted in Tuner mode; rock the Expression Pedal to<br />
regain volume.<br />
Left LEDs indicate<br />
note is flat<br />
Center LED indicates<br />
note is in tune<br />
NOISE GATE<br />
EQUALIZER<br />
AMP / DISTORTION<br />
COMPRESSOR<br />
FRETLESS / WAH<br />
PRESET LEVEL<br />
EDIT<br />
TONE LIBRARY<br />
CHORUS/FX<br />
IN TUNE<br />
VALUE<br />
Display shows<br />
note played<br />
DELAY<br />
REVERB<br />
EXPRESSION<br />
PATTERN<br />
TEMPO<br />
LEVEL<br />
LEVEL<br />
EFFECTS LIBRARY EFFECTS LEVEL MASTER LEVEL<br />
BASS<br />
DRUMS<br />
STORE<br />
Right LEDs indicate<br />
note is sharp<br />
In Tuner mode, you can change your tuning reference with the Value Up/Down buttons. The<br />
default factory setting is A=440 Hz (displayed as 40). Other tuning references are A=A flat (displayed<br />
as Ab), A=G (displayed as ), and A=G flat (displayed as b). The display window will briefly<br />
flash the currently selected tuning preference.<br />
Exit Tuner mode by pressing either Footswitch.<br />
3
4<br />
Tone Library Button<br />
You can press this button at any time (except in Bypass or Tuner mode) to access the Tone Library,<br />
and then use the Value Up/Down buttons to select from a variety of genre-based amp tone<br />
defaults ranging from Blues to Metal to Country. Behind the scenes, the Fretless/Wah, Compressor,<br />
Amp/Distortion, and EQ are configured to create a specified tone. You can further refine the<br />
sound by editing the preset (see Editing/Creating Presets on page 16). Changing between different<br />
Tone Library defaults does not change the Chorus/FX, Delay or Reverb, letting you experiment<br />
with different amp styles quickly in the context of the current effect chain.<br />
Effects Library Button<br />
You can press this button at any time (except in Bypass or Tuner mode) to access the Effects Library<br />
and then use the Value Up/Down buttons to select from a variety of post-amplifier model<br />
effect chains (Chorus, Chorus + Delay, Delay + Reverb, etc.). You can further refine the sound by<br />
editing the preset (see Editing/Creating Presets on page 16). Changing between different Effects Library<br />
defaults does not change the Compressor, Distortion, Amp/Cabinet model, and EQ settings,<br />
letting you experiment with different effect chains quickly in the context of the current amp tone.<br />
Effects Level Button<br />
You can press this button at any time (except in Bypass or Tuner mode) to access the Effects Level.<br />
This button changes the relative level of the post-amp effects (Chorus/FX, Delay, and Reverb). This<br />
can be thought of as an effects mix control, where increasing this button’s value increases the level<br />
of these effects and decreasing its value decreases the level of these effects.<br />
Master Level Button<br />
Press this button and use the Value Up/Down buttons to set the overall output level of the <strong>BP90</strong>.
Value<br />
Buttons<br />
NOISE GATE<br />
EQUALIZER<br />
AMP / DISTORTION<br />
COMPRESSOR<br />
FRETLESS / WAH<br />
PRESET LEVEL<br />
EDIT<br />
1. Access the Tone Library<br />
with this button and select<br />
a tone with the Value buttons.<br />
TONE LIBRARY<br />
CHORUS/FX<br />
IN TUNE<br />
VALUE<br />
DELAY<br />
REVERB<br />
EXPRESSION<br />
PATTERN<br />
TEMPO<br />
LEVEL<br />
LEVEL<br />
EFFECTS LIBRARY EFFECTS LEVEL MASTER LEVEL<br />
2. Access the Effects Library<br />
with this button and select<br />
a tone with the Value buttons.<br />
DRUMS<br />
STORE<br />
3. Access the effects level<br />
with this button and adjust the<br />
level with the Value buttons.<br />
The Tone Library button, Effects Library button, and Effects Level button make it easy<br />
to quickly load preset tones, effects, and effects chains.<br />
To learn about storing changes to presets, see page 17.<br />
Presets<br />
Presets are numbered locations of programmed sounds which reside in the <strong>BP90</strong>. Presets are recalled<br />
with the Footswitches. The active effects in each preset are indicated by lighted LEDs in the<br />
Effect Matrix. The <strong>BP90</strong> comes with 50 User presets (1-50) and 50 Factory presets (51-00). The<br />
User presets are locations where your creations may be stored. The Factory presets do not allow<br />
you to store any changes to them. From the factory, the 50 User presets are exact duplicates of<br />
the 50 Factory presets. This allows you to create your own presets without losing the sounds that<br />
came with the <strong>BP90</strong>.<br />
5
6<br />
A Guided Tour of the <strong>BP90</strong><br />
Front Panel<br />
4<br />
3<br />
2<br />
NOISE GATE<br />
EQUALIZER<br />
AMP / DISTORTION<br />
COMPRESSOR<br />
FRETLESS / WAH<br />
PRESET LEVEL<br />
EDIT<br />
5<br />
CHORUS/FX<br />
IN TUNE<br />
VALUE<br />
DELAY<br />
REVERB<br />
EXPRESSION<br />
PATTERN<br />
TEMPO<br />
LEVEL<br />
LEVEL<br />
TONE LIBRARY<br />
EFFECTS LIBRARY EFFECTS LEVEL MASTER LEVEL<br />
1<br />
6<br />
BASS<br />
DRUMS<br />
STORE<br />
7<br />
8<br />
9
1. Footswitches<br />
These two Footswitches select presets, access the Tuner, or bypass the <strong>BP90</strong>. The<br />
Footswitch on the right will select the next preset up, and the Footswitch on the left will<br />
select the next preset down. Pressing both Footswitches together will bypass the currently<br />
selected preset. Pressing and holding both Footswitches for 2 seconds will access the Tuner.<br />
Press either Footswitch to exit Bypass or Tuner mode.<br />
2. Tone Library, Effects Library, Effects Level, and Master Level Buttons<br />
At the heart of creating presets in the <strong>BP90</strong> are the Tone Library, Effects Library, and Effects<br />
Level buttons. By pressing one of these buttons and using the Value Up/Down buttons,<br />
you can select from 20 amp/distortion tones, 20 effects chains, or the overall post amp/<br />
distortion effects level respectively. The Master Level button accesses the master output volume<br />
parameter for the <strong>BP90</strong>. Each button is described in detail below.<br />
Tone Library Button<br />
The Tone Library button accesses a library of preset amp tones. Press this button<br />
and then use the Value Up/Down buttons to select from a variety of genre-based<br />
amp tones ranging from Blues to Metal to Country (see page 37 for a list of available<br />
tones). Behind the scenes, the Fretless/Wah, Compressor, Amp/Distortion, and EQ are<br />
configured to create a specified tone. You can further refine the sound by editing the<br />
preset (see Editing/Creating Presets on page 16). Changing between different Tone Library<br />
selections does not change the Chorus/FX, Delay, or Reverb settings, allowing you to<br />
experiment with different amp styles quickly in the context of the current effect chain.<br />
The Display will read cu (for “custom”) when any of the associated effects have been<br />
changed from a default library setting.<br />
7
8<br />
Effects Library Button<br />
The Effects Library button accesses a library of preset effect configurations. Press this<br />
button and use the Value Up/Down buttons to select a variety of post-amplifier model<br />
effect chains (Chorus, Chorus + Delay, Delay + Reverb, etc…). You can further refine the<br />
sound by editing the preset (see Editing/Creating Presets on page 16). Changing between<br />
different Effects Library selections does not change the Fretless/Wah, Compressor, Amp/<br />
Distortion and EQ settings, allowing you to experiment with different effect chains quickly<br />
in the context of the current amp tone. The Display will read cu (for “custom”) when any<br />
of the associated effects have been changed from a default library setting.<br />
Effects Level Button<br />
The Effects Level button lets you adjust the levels of post-amp model effects (Chorus/FX,<br />
Delay, and Reverb). Press this button and use the Value Up/Down buttons to<br />
change the relative level of the post-amp effects (Chorus/FX, Delay, and Reverb). Think<br />
of it as an effects mix control where increasing this setting increases the level of these<br />
effects, while decreasing this setting decreases the level of these effects.<br />
Master Level Button<br />
The Master Level button lets you adjust the output level of the <strong>BP90</strong>. Press this button<br />
and use the Value Up/Down buttons to change the output level of the <strong>BP90</strong>.<br />
3. Edit Up/Down<br />
The Edit Up/Down buttons select which effect is to be edited. As each effect is selected,<br />
the Display shows the effect setting. A decimal in the bottom right corner of the Display<br />
turns on when a preset has been modified. The Edit Up/Down buttons are also used to<br />
change the <strong>BP90</strong> Drum Machine parameters (Note that Drum Machine settings are global<br />
for all presets and are not saved with the preset).
4. Value Up/Down<br />
The Value Up/Down buttons are used for editing effects, navigating Tone/Effects Libraries,<br />
adjusting Effects and Master Levels, and adjusting Drum Machine settings.<br />
5. Display<br />
The Display provides information for different functions depending on the mode that has<br />
been selected. In Performance mode, the Display shows the currently selected preset number.<br />
In Edit mode, the Display shows the value of the effect being adjusted. A decimal in<br />
the bottom right corner of the Display turns on when a preset has been modified. In Tuner<br />
mode, the Display shows the note being played.<br />
6. Matrix<br />
The matrix provides information regarding the current preset and Effect edit functions. In<br />
Performance mode, the LEDs next to each Effect provide a visual indication of which Effects<br />
are in use for the currently selected preset. While editing a preset, the LEDs indicate the<br />
Effect currently selected for editing. In Tuner mode, the LEDs indicate whether the note<br />
played is sharp, flat, or in tune.<br />
7. Drums<br />
The Drums button is used to turn on and off the <strong>BP90</strong>’s built-in drum machine. When the<br />
Drums button is turned on, the Drums button LED lights and the selected drum pattern<br />
plays continuously. Use the Value Up/Down buttons to change the pattern of the drum<br />
machine. See page 33 for more information about the drum machine.<br />
8. Store<br />
The Store button is used to save your changes to the User presets. See page 17 for more<br />
information about storing presets.<br />
9. Expression Pedal<br />
The Expression Pedal provides real-time control of the <strong>BP90</strong>’s Volume, Wah, or the assigned<br />
effect parameter.<br />
9
10<br />
Rear Panel<br />
1. Input<br />
Connect your instrument to this high-impedance TS input.<br />
1 2 3 4 5<br />
2. Amp / Mixer<br />
This button optimizes the <strong>BP90</strong>’s outputs for use when plugged into a bass amp or a mixer/<br />
recording device. When set to Mixer (“In” position), the outputs are optimized for connecting<br />
to a mixer, recording device or headphones. When set to Amp (“Out” position), the<br />
outputs are optimized for running directly in to the input of a bass amp.<br />
3. Left (Mono) and Right Outputs<br />
Connect the Left (Mono) output to the input of a single amplifier (or mixer input) for mono<br />
operation. Connect the Left and Right outputs to the inputs of 2 amplifiers (or 2 mixer<br />
channels) for stereo operation.
4. Headphones<br />
Connect a pair of stereo headphones to this 1/8" jack. For proper frequency response,<br />
the Amp/Mixer switch should be set to Mixer (“in” position) when using headphones.<br />
Headphones with an impedance of 100 Ohms or less are recommended.<br />
Note: The Headphones output can have either a mono or stereo signal, depending on what<br />
1/4" outputs are connected. If neither (or both) 1/4" outputs are connected, the Headphones<br />
output will be in stereo. If a cable is connected to the Left (Mono) 1/4" output only, the Headphones<br />
output will be in mono.<br />
5. Power Input<br />
Connect only the DigiTech ® approved power supply to this jack (see table in Specifications).<br />
11
12<br />
Getting Started<br />
Making Connections<br />
There are several different connection options available with the <strong>BP90</strong>. Before connecting the<br />
<strong>BP90</strong>, make sure that the power to your amplifier and the <strong>BP90</strong> is turned off. There is no power<br />
switch on the <strong>BP90</strong>. To turn the <strong>BP90</strong> on or off, connect or disconnect the included power supply<br />
from the Power Input jack.<br />
Mono Operation - Amplifier<br />
Connect your bass to the Input of the <strong>BP90</strong>. Connect a single mono instrument cable from the<br />
Left (Mono) output of the <strong>BP90</strong> to the instrument input or effect return on your amplifier. Set<br />
the Amp/Mixer switch to Amp.<br />
NOTE: When using a<br />
bass amp, it may be best to<br />
connect the Output of the<br />
<strong>BP90</strong> to the effect return of<br />
the amplifier.<br />
Bass Amp Input/<br />
Effect Return<br />
Left (Mono)<br />
Output Input<br />
BASS<br />
NOISE NOISE GATE<br />
GATE<br />
DELAY<br />
DELAY<br />
EQUALIZER<br />
EQUALIZER<br />
CHORUS/FX<br />
CHORUS/FX<br />
CHORUS/FX<br />
REVERB<br />
REVERB<br />
AMP AMP / / / / DISTORTION<br />
DISTORTION<br />
EXPRESSION<br />
EXPRESSION<br />
IN TUNE TUNE<br />
COMPRESSOR<br />
COMPRESSOR<br />
PATTERN<br />
PATTERN<br />
FRETLESS FRETLESS / / / / WAH<br />
WAH<br />
TEMPO<br />
TEMPO<br />
PRESET PRESET LEVEL<br />
LEVEL<br />
LEVEL<br />
LEVEL<br />
LEVEL<br />
VALUE VALUE<br />
EDIT<br />
DRUMS<br />
DRUMS<br />
STORE<br />
TONE TONE LIBRARY<br />
LIBRARY<br />
EFFECTS EFFECTS LIBRARY LIBRARY LIBRARY LIBRARY EFFECTS EFFECTS EFFECTS EFFECTS LEVEL<br />
LEVEL MASTER MASTER LEVEL<br />
LEVEL<br />
Amp/Mixer<br />
switch set to<br />
Amp.
Stereo Operation<br />
For stereo operation connect the bass to the Input of the <strong>BP90</strong>. Connect one cable to the<br />
<strong>BP90</strong>’s Left (Mono) output, and another cable to the <strong>BP90</strong>’s Right output. Connect one cable<br />
to the input of one amplifier, channel of a mixer, or power amp. Connect the second cable to a<br />
second amplifier, second channel of a mixer, or power amp. If connecting to a mixing console, set<br />
the pan controls of the mixer channels hard left and right in order to retain stereo separation. If<br />
connecting to a mixer, set the Amp/Mixer switch to Mixer. If connecting to two amplifiers, set<br />
the Amp/Mixer switch to Amp.<br />
Stereo Amp Setup<br />
Bass Amp Input/Effect Returns<br />
Outputs Input<br />
Amp/Mixer<br />
BASS<br />
switch set to<br />
NOISE NOISE GATE<br />
GATE<br />
DELAY<br />
DELAY<br />
EQUALIZER<br />
CHORUS/FX<br />
EQUALIZER<br />
CHORUS/FX<br />
REVERB<br />
REVERB<br />
AMP AMP AMP / / / / DISTORTION<br />
DISTORTION<br />
EXPRESSION<br />
EXPRESSION<br />
IN TUNE<br />
COMPRESSOR<br />
IN TUNE<br />
COMPRESSOR<br />
PATTERN<br />
PATTERN<br />
FRETLESS FRETLESS / / / / WAH<br />
WAH<br />
TEMPO<br />
TEMPO<br />
Amp.<br />
PRESET PRESET LEVEL<br />
LEVEL<br />
LEVEL<br />
LEVEL<br />
LEVEL<br />
VALUE<br />
EDIT<br />
DRUMS<br />
DRUMS<br />
STORE<br />
TONE TONE LIBRARY<br />
LIBRARY<br />
EFFECTS EFFECTS LIBRARY LIBRARY EFFECTS EFFECTS LEVEL LEVEL MASTER MASTER LEVEL<br />
LEVEL<br />
NOTE: When using a bass<br />
amp, it may be best to connect<br />
the Output of the <strong>BP90</strong><br />
to the effect return of the<br />
amplifier.<br />
13
14<br />
Stereo Mixer Setup<br />
4 6 4 6 4 6 4 6 4 6 4 6 4 6 4 6<br />
2<br />
8 2<br />
8 2<br />
8 2<br />
8 2<br />
8 2<br />
8 2<br />
8 2<br />
8<br />
0 Aux 1 10 0 Aux 1 10 0 Aux 1 10 0 Aux 1 10 0 Aux 1 10 0 Aux 1 10 0 Aux 1 10 0 Aux 1 10<br />
4 6 4 6 4 6 4 6 4 6 4 6 4 6 4 6<br />
2<br />
8 2<br />
8 2<br />
8 2<br />
8 2<br />
8 2<br />
8 2<br />
8 2<br />
8<br />
0 Aux 2 10 0 Aux 2 10 0 Aux 2 10 0 Aux 2 10 0 Aux 2 10 0 Aux 2 10 0 Aux 2 10 0 Aux 2 10<br />
-1<br />
0<br />
+1 -1<br />
0<br />
+1 -1<br />
0<br />
+1 -1<br />
0<br />
+1 -1<br />
0<br />
+1 -1<br />
0<br />
+1 -1<br />
0<br />
+1 -1<br />
0<br />
+1<br />
-2<br />
+2 -2<br />
+2 -2<br />
+2 -2<br />
+2 -2<br />
+2 -2<br />
+2 -2<br />
+2 -2<br />
+2<br />
-3<br />
+3 -3<br />
+3 -3<br />
+3 -3<br />
+3 -3<br />
+3 -3<br />
+3 -3<br />
+3 -3<br />
+3<br />
-4<br />
+4 -4<br />
+4 -4<br />
+4 -4<br />
+4 -4<br />
+4 -4<br />
+4 -4<br />
+4 -4<br />
+4<br />
-5 Pan +5 -5 Pan +5 -5 Pan +5 -5 Pan +5 -5 Pan +5 -5 Pan +5 -5 Pan +5 -5 Pan +5<br />
Mute<br />
Mute<br />
Mute<br />
Mute<br />
Mute<br />
Mute<br />
Mute<br />
Mute<br />
L / R<br />
L / R<br />
L / R<br />
L / R<br />
L / R<br />
L / R<br />
L / R<br />
L / R<br />
+10<br />
+5<br />
0<br />
-5<br />
-10<br />
Mixer<br />
+10<br />
+5<br />
0<br />
-5<br />
-10<br />
+10<br />
+5<br />
0<br />
-5<br />
-10<br />
+10<br />
+5<br />
0<br />
-5<br />
-10<br />
+10<br />
+5<br />
0<br />
-5<br />
-10<br />
+10<br />
+5<br />
0<br />
-5<br />
-10<br />
+10<br />
+5<br />
0<br />
-5<br />
-10<br />
+10<br />
+5<br />
0<br />
-5<br />
-10<br />
-20 -20 -20 -20 -20 -20 -20 -20<br />
-30 -30 -30 -30 -30 -30 -30 -30<br />
-<br />
-<br />
-<br />
-<br />
-<br />
-<br />
-<br />
-<br />
1 2 3 4 5 6<br />
Outputs<br />
BASS<br />
NOISE NOISE GATE<br />
GATE<br />
DELAY<br />
DELAY<br />
EQUALIZER<br />
CHORUS/FX<br />
EQUALIZER<br />
CHORUS/FX<br />
EQUALIZER<br />
CHORUS/FX<br />
REVERB<br />
REVERB<br />
AMP AMP / / / / DISTORTION<br />
DISTORTION<br />
EXPRESSION<br />
EXPRESSION<br />
IN TUNE<br />
COMPRESSOR<br />
IN TUNE<br />
COMPRESSOR<br />
PATTERN<br />
PATTERN<br />
FRETLESS FRETLESS / / / / WAH<br />
WAH<br />
TEMPO<br />
TEMPO<br />
PRESET PRESET LEVEL<br />
LEVEL<br />
LEVEL<br />
LEVEL<br />
LEVEL<br />
VALUE<br />
EDIT<br />
DRUMS<br />
DRUMS<br />
STORE<br />
TONE TONE LIBRARY<br />
LIBRARY<br />
EFFECTS LIBRARY LIBRARY EFFECTS EFFECTS LEVEL<br />
LEVEL MASTER MASTER LEVEL<br />
LEVEL<br />
Amp/Mixer switch<br />
set to Mixer<br />
Instrument Input
Applying Power<br />
Before applying power to anything, set your amp(s) to a clean tone and set the tone controls to<br />
a flat EQ response (on most amps, this would be 0 or 5 on the tone controls). Then follow the<br />
steps listed below.<br />
1. Turn the amp volume all the way down.<br />
2. Connect the plug of the power supply to the power jack on the rear panel of the <strong>BP90</strong>.<br />
3. Connect the other end of the power supply to an AC outlet. Use the Master Level button<br />
and the Value Up/Down buttons to set the <strong>BP90</strong>’s Master Level to “0”.<br />
4. Turn the power of your amplifier(s) to the on position and adjust the volume(s) to a normal<br />
playing level.<br />
5. Use the Master Level button and the Value Up/Down buttons to gradually increase the<br />
<strong>BP90</strong>’s Master Level to achieve the desired volume.<br />
4. Turn amp volume up<br />
1. Turn amp volume down<br />
2. Connect the power adapter to power jack<br />
BASS<br />
BASS<br />
NOISE NOISE GATE<br />
GATE<br />
DELAY<br />
DELAY<br />
EQUALIZER<br />
EQUALIZER<br />
CHORUS/FX<br />
CHORUS/FX<br />
REVERB<br />
REVERB<br />
AMP AMP / / / / DISTORTION<br />
DISTORTION<br />
EXPRESSION<br />
EXPRESSION<br />
IN TUNE<br />
COMPRESSOR<br />
COMPRESSOR<br />
PATTERN<br />
PATTERN<br />
FRETLESS FRETLESS / / / / WAH<br />
WAH<br />
TEMPO<br />
TEMPO<br />
PRESET PRESET LEVEL<br />
LEVEL<br />
LEVEL<br />
LEVEL<br />
VALUE<br />
EDIT<br />
DRUMS<br />
DRUMS<br />
STORE<br />
TONE TONE LIBRARY<br />
LIBRARY<br />
EFFECTS EFFECTS LIBRARY<br />
LIBRARY EFFECTS EFFECTS LEVEL<br />
LEVEL MASTER MASTER LEVEL<br />
LEVEL<br />
3. Connect the power adapter to<br />
AC outlet and set the <strong>BP90</strong>’s Master<br />
Level to “0”<br />
5. Set the <strong>BP90</strong>’s Master Level to the<br />
desired listening volume<br />
15
Section Two - Editing Functions<br />
Editing/Creating Presets<br />
The <strong>BP90</strong> is designed to make preset editing and creation easy and intuitive. When creating your<br />
own sound, you must first start with an existing preset. Note that the preset you begin with<br />
doesn’t have to be in the memory location you intend to have it reside, since you can store it to<br />
any User preset location during the store procedure.<br />
The easiest way to start is by using the Tone Library and Effects Library buttons. The Tone<br />
Library button gives you access to a variety of pre-programmed amp/distortion tones (see page<br />
37) based on different musical styles. The Effects Library button then lets you select from a palette<br />
of effects chains (see page 38), from simple delays to full multi-effect signals with modulation,<br />
delay and reverb. Use the Effects Level Button to easily increase or decrease the Chorus/FX,<br />
Delay and Reverb levels if desired. Using these three controls should get you close to a sound you<br />
are after. From there you can then use the Edit buttons to select individual Effects, and the Value<br />
Up/Down buttons to adjust their settings.<br />
To edit and create a custom preset:<br />
1. Use the Footswitches to select the preset you wish to edit. If you are trying to find something<br />
different from the existing presets, begin by using the Tone Library, Effects Library,<br />
Effects Level and Value Up/Down buttons to get close to a sound you want.<br />
2. Once you have a sound close to what you are after, begin editing the Effects by pressing the<br />
Edit Up/Down buttons and selecting the Effect you want to adjust.<br />
3. To turn an Effect on, select it with the Edit Up/Down buttons. Each Effect has multiple settings<br />
to select from. Use the Value Up/Down buttons to change the values for the selected<br />
Effect To turn an Effect off, press and hold the Value Down button until Ofappears in the<br />
Display. (For EQs, b5, d5, and t5 are the settings with no boost or cut.)<br />
16
Anytime a stored value within a preset is changed, you need to store the changes (with the Store<br />
button), or the changes will be lost. Changing presets, or turning the power off before storing any<br />
changes erases any edits made and the <strong>BP90</strong> will revert to the stored values for the preset.<br />
Storing/Copying a Preset<br />
Once the preset has been modified to your liking, you may store your settings to any of the<br />
50 User preset locations (presets 1-50). The following steps outline the procedure for storing<br />
changes to a preset or copying a preset to a different location:<br />
1. Press the Store button once and the current Preset location will flash in the Display. This<br />
is asking you to select a new User Preset location where your new sound will reside.<br />
2. If desired, select a new User Preset location using the Footswitches.<br />
3. Press the Store button again to save the changes.<br />
The procedure for copying one Preset to another Preset location is the same. Simply use the<br />
Footswitches to select the Preset that you want to copy, then follow the steps listed above.<br />
17
18<br />
Storing/Copying a Preset<br />
NOISE NOISE GATE<br />
GATE<br />
EQUALIZER<br />
EQUALIZER<br />
AMP AMP / / DISTORTION<br />
DISTORTION<br />
COMPRESSOR<br />
COMPRESSOR<br />
FRETLESS FRETLESS / / WAH<br />
WAH<br />
PRESET PRESET LEVEL<br />
LEVEL<br />
EDIT<br />
CHORUS/FX<br />
CHORUS/FX<br />
IN TUNE<br />
VALUE<br />
DELAY<br />
DELAY<br />
REVERB<br />
REVERB<br />
EXPRESSION<br />
EXPRESSION<br />
EXPRESSION<br />
PATTERN PATTERN PATTERN<br />
TEMPO TEMPO TEMPO<br />
LEVEL LEVEL LEVEL<br />
TONE TONE LIBRARY<br />
LIBRARY<br />
EFFECTS EFFECTS LIBRARY<br />
LIBRARY EFFECTS EFFECTS LEVEL<br />
LEVEL MASTER MASTER LEVEL<br />
LEVEL<br />
BASS<br />
BASS BASS<br />
DRUMS DRUMS DRUMS<br />
STORE STORE<br />
2. Select a destination<br />
with the Footswitches.<br />
1. Press the Store button;<br />
the Preset number flashes.<br />
3. Press the Store button<br />
again to save your changes.
Section Three - Models and Effects<br />
About the Models<br />
The <strong>BP90</strong> can be thought of as several different “virtual” amplifiers and individual, high-tech<br />
stompboxes in a single programmable package. With stompboxes, the order in which they are<br />
connected affects the overall sound. The <strong>BP90</strong> has placed the Amp and Effect models in an order<br />
for optimum results. The following diagram shows the order in which they are connected.<br />
Fretless/<br />
Wah<br />
Amp/<br />
Compressor Cabinet<br />
EQ<br />
Distortion<br />
Chorus/FX<br />
Delay Reverb<br />
Noise Gate<br />
19
20<br />
Model Definitions<br />
Each Amp and Effect model within the <strong>BP90</strong> has multiple settings to select from. Use the Value<br />
Up/Down buttons to change the values for the selected Effect. The following overview of the<br />
<strong>BP90</strong>’s Effects outlines the settings each Effect contains.<br />
Fretless/Wah<br />
The Fretless simulator creates a fretless bass sound when using a fretted bass. Wah is an effect<br />
controlled by the expression pedal making the bass sound as if it’s saying “Wah.” The Value buttons<br />
select the Fretless or Wah type that is simulated.<br />
The Fretless effect has 30 types (10-39).The first digit (1-3) shows the fretless type, the second<br />
digit (0-9) selects the fretless variation. When Cr, CY, or Fr are displayed, the Wah effect has<br />
been selected and is controlled with the Expression Pedal. See page 31 on how to link the Wah<br />
effect to the Expression Pedal.<br />
The Fretless/Wah settings are:<br />
OF Fretless/Wah is turned off.<br />
10-39 Fretless settings<br />
Cr Dunlop ® Cry BabyTM wah<br />
CY Vox ® Clyde McCoyTM wah<br />
Fr Full range wah
Compressor<br />
A Compressor is used to automatically limit the dynamic level of the bass signal. The Compressor<br />
effect has 110 different settings (00-99; F0-F9).The first digit represents the crossover<br />
frequency. Any signal below this frequency is compressed. The second digit (0-9) increases the<br />
amount of compression. (Example: A compressor setting of 62 would be a crossover frequency of<br />
400 Hz with a compression amount of 2.)<br />
The settings for the compressor effect are:<br />
OF Compressor is turned off<br />
00-09 50Hz<br />
10-19 63Hz<br />
20-29 80Hz<br />
30-39 100Hz<br />
40-49 160Hz<br />
50-59 250Hz<br />
60-69 400Hz<br />
70-79 630Hz<br />
80-89 1kHz<br />
90-99 1.6kHz<br />
F0-F9 Full Range<br />
21
22<br />
Amp/Distortion Models<br />
The <strong>BP90</strong> has 11 amp and 5 distortion models to choose from. Each model is identified by a<br />
single letter and has nine settings (for example, b1 through b9). As the setting increases, the<br />
amp/distortion gain increases. Each amp model has a cabinet model assigned to it as shown in the<br />
following list.<br />
OF Amp/Distortion is turned off.<br />
Amp Models<br />
R1 - R9 Based on an Ampeg ® SVT with an Ampeg SVT 8x10 cabinet<br />
a1 - a9 Based on an Ashdown Bass Magnifier with an Eden D4x10XLT cabinet<br />
b1 - b9 Based on a Fender ® Bassman ® with a Fender Bassman 4x10 cabinet<br />
s1 - s9 Based on a Sunn ® 200S with a Sunn 2x15 cabinet<br />
O1 - O9 Based on an SWR ® Interstellar Overdrive with an Eden D4x10XLT cabinet<br />
t1 - t9 Based on a Trace-Elliot ® Commando with a Sunn 2x15 cabinet<br />
o1 - o9 Based on an Ampeg B15 with an Ampeg Portaflex 1x15 cabinet<br />
H1 - H9 Based on a Hiwatt ® Custom 50 with a Fender Bassman 4x10 cabinet<br />
y1 - y9 Based on a Mesa Boogie ® 400+ with an Ampeg SVT 8x10 cabinet<br />
c1 - c9 Based on a SWR ® Basic Black with an Ampeg Portaflex 1x15 cabinet<br />
d1 - d9 Based on a Fender Dual Showman with a Sunn 2x15 cabinet<br />
Disclaimer: DigiTech, DigiTech Whammy, and AudioDNA2 are trademarks of HARMAN in the U.S. and other<br />
countries. Ampeg SVT, Ashdown Bass Magnifier, Fender Bassman, Sunn 200S, SWR Interstellar Overdrive,<br />
Trace-Elliot Commando, Ampeg B15, Hiwatt Custom 50, Mesa/Boogie 400+, SWR Basic Black, Fender Dual<br />
Showman, Vox Clyde McCoy Wah, Guyatone OD-1, Voodoo Labs Sparkledrive, Boss DS-1, and Electro-Harmonix<br />
Big Muff are products of DigiTech’s competitors and trademarks of their respective companies in the U.S.<br />
and other countries and are not associated or affiliated with DigiTech or HARMAN. © 2010 HARMAN. All<br />
Rights Reserved.
Distortion Models<br />
f1-f9 DigiFuzz Fuzz distortion<br />
1- 9 Based on a Guyatone ® OD-1<br />
p1-p9 Based on an EH ® Big Muff ® Pi<br />
L1-L9 Based on a Voodoo Labs Sparkledrive<br />
n1-n9 Based on a Boss ® DS-1 TM<br />
Noise Gate<br />
The Noise Gate effect includes two models: a Silencer gate and an Auto Swell (pluck detector<br />
gate), each with nine settings.<br />
A silencer gate is designed to eliminate noise while you are not playing. The Silencer gate’s nine<br />
settings ( 1- 9) determine the threshold, which determines how loud a signal must be before it<br />
can be heard. The higher the setting, the louder a signal must be in order to be heard.<br />
The Auto Swell provides an automatic volume swell effect. The auto swell’s nine settings (S1-S9)<br />
determine the attack time (how quickly the swell grows from the note you play). The higher the<br />
setting, the faster the swell grows.<br />
The noise gate settings are:<br />
OF Noise gate effect is turned off<br />
1- 9 Silencer gate. 1 is the lowest threshold, 9 is the highest threshold.<br />
S1-S9 Auto Swell gate. S1 is the fastest attack time, s9 is the slowest attack time.<br />
EQ<br />
The <strong>BP90</strong>’s EQ helps further shape your tone with Bass, Midrange, and Treble controls. The EQ<br />
settings are:<br />
23
24<br />
b1-b9 Bass tone control. b1-b4 cut bass frequencies by –12dB, –9dB, –6dB, and –3dB<br />
respectively. b5 has no boost or cut. b6-b9 boost bass frequencies by 3dB, 6dB, 9dB,<br />
and 12dB respectively.<br />
d1-d9 Midrange tone control. d1-d4 cut midrange frequencies by –12dB, –9dB, –6dB, and<br />
–3dB respectively. d5 has no boost or cut. b6-b9 boost midrange frequencies by<br />
3dB, 6dB, 9dB, and 12dB respectively.<br />
t1-t9 Treble tone control. t1 - t4 cut treble frequencies by –12dB, –9dB, –6dB, and –3dB<br />
respectively. t5 has no boost or cut. t6-t9 boost treble frequencies by 3dB, 6dB,<br />
9dB, and 12dB respectively.<br />
Chorus/FX<br />
The Chorus/FX model actually contains ten different modulation and pitch effects (described on<br />
the following pages). Each effect includes nine settings which include a variety of configurations<br />
that generally range from more subtle (lower settings) to more extreme (higher settings). The<br />
Chorus/FX settings are:<br />
OF Chorus/FX effect is turned off<br />
C1-C9 Dual Chorus<br />
F1-F9 Flanger<br />
P1-P9 Phaser<br />
t1-t9 Tremolo<br />
n1-n9 Panner<br />
b1-b9 Vibrato<br />
o1-o9 Octavider<br />
E1-E9 Envelope Filter<br />
Y1-Y9 YaYa TM<br />
A1-A9 AutoYa<br />
L1-L9 Step Filter<br />
S1-S9 SynthTalk TM<br />
d1-d9 Detune<br />
H1-H9 Pitch Shift<br />
h1-h9 Whammy TM
Chorus<br />
A Chorus adds a short delay to your signal. The delayed signal is modulated in and out of tune<br />
and then mixed back with the original signal to create a thicker sound. The <strong>BP90</strong> Chorus effect is<br />
based on the Dual Chorus. Chorus settings are C1-C9.<br />
Flanger<br />
A Flanger uses the same principle as a Chorus but uses a shorter delay time and adds regeneration<br />
(or repeats) to the modulating delay. This results in an exaggerated up and down sweeping motion<br />
to the effect. Settings are F1-F9.<br />
Phaser<br />
A phaser splits the incoming signal, and then changes the phasing of the signal. This signal is then<br />
taken in and out of phase and mixed back in with the original signal. As the phasing changes, different<br />
frequencies get canceled resulting in a warm sort of twisting sound. Settings are P1-P9.<br />
Tremolo<br />
A Tremolo effect modulates the volume of the signal at an even rate. Settings are t1-t9.<br />
Panner<br />
A Panner modulates the sound from left to right at an even rate. Settings are n1-n9.<br />
Vibrato<br />
A Vibrato effect modulates the pitch of the incoming signal at an even rate. Settings are b1-b9.<br />
25
26<br />
Octavider<br />
Based on the Boss ® OC-2 Octaver TM , this adds two signals to your original bass signal. The first is<br />
one octave below your bass, and the second is two octaves below your bass. Each additional signal<br />
has its own volume control. Settings are o1-o9.<br />
Envelope Filter<br />
The Envelope Filter is a dynamic Wah effect that alters your sound based upon how hard you play.<br />
Settings are E1-E9.<br />
YaYa TM<br />
AutoYa combines the characteristics of a Wah and a Flanger, creating an almost human vowel characteristic<br />
as if the bass were saying “Yah.” Control the effect with the Expression Pedal. Settings are<br />
Y1-Y9.<br />
AutoYa<br />
Similar to the YaYa effect described above, AutoYa automatically provides this animation to the<br />
sound at an even rate. Settings are A1-A9.<br />
Step Filter<br />
The Step Filter is like an automatic “random wah” with a square waveform. Settings are L1-L9.<br />
SynthTalk TM<br />
SynthTalk is another effect exclusive to DigiTech ® . It makes your bass appear to speak based upon<br />
the dynamics of your playing style. Settings are S1-S9.
Detune<br />
A Detuner makes a copy of your incoming signal, takes the copied signal slightly out of tune from<br />
the original, then mixes the two signals together. The result is a doubling type of effect as if two<br />
bass guitars were playing the same part together. Settings are d1-d9.<br />
Pitch Shift<br />
A Pitch Shifter copies the incoming signal, then shifts the pitch of the copy to a different note. The<br />
shifted note is then mixed back with the original signal, sounding as if two bass guitars were playing<br />
different notes. Settings are H1-H9.<br />
DigiTech ® Whammy<br />
The DigiTech ® Whammy TM is an effect that uses the Expression Pedal to bend the pitch of the incoming<br />
signal, or add a bendable harmony with the original signal. As the Pedal is moved, the note<br />
bends either up or down. When DigiTech Whammy is selected, it is automatically placed before<br />
the Amp modeling. Settings are h1-h9.<br />
27
28<br />
Delay<br />
Delay is an effect that will record a portion of the incoming signal, and then play it back a short<br />
time later. The recording can repeat just once or several times.<br />
The <strong>BP90</strong> offers four different delay models (Analog Delay, Digital Delay, Pong Delay, and Tape<br />
Delay), each with 5 seconds of delay time available. There are two different parameters used to<br />
program the delay: Delay Variation and Delay Time. The first parameter of the delay effect is Delay<br />
Model type and Variation, which varies the amount of feedback (number of repeats) and level. The<br />
second delay parameter is Delay Time. This is indicated by a value 1-99 (10ms-990ms), 1.0 - 5.0 (1<br />
- 5 seconds respectively in 100ms increments) in the Preset Number display when the Delay LED<br />
is lit. Delay settings are listed on the following page.
Delay Variation<br />
OF Delay effect is turned off<br />
Analog Delay<br />
A1 feedback=5% level=15<br />
A2 feedback=5% level=30<br />
A3 feedback=5% level=50<br />
A4 feedback=20% level=15<br />
A5 feedback=20% level=30<br />
A6 feedback=20% level=50<br />
A7 feedback=45% level=15<br />
A8 feedback=45% level=30<br />
A9 feedback=45% level=50<br />
Digital Delay<br />
d1 feedback=5% level=15<br />
d2 feedback=5% level=30<br />
d3 feedback=5% level=50<br />
d4 feedback=20% level=15<br />
d5 feedback=20% level=30<br />
d6 feedback=20% level=50<br />
d7 feedback=45% level=15<br />
d8 feedback=45% level=30<br />
d9 feedback=45% level=50<br />
Delay Time<br />
1-99 10ms-990ms in 10ms increments<br />
1.0-5.0 1-5 seconds in 100ms increments<br />
Pong Delay<br />
P1 feedback=5% level=15<br />
P2 feedback=5% level=30<br />
P3 feedback=5% level=50<br />
P4 feedback=20% level=15<br />
P5 feedback=20% level=30<br />
P6 feedback=20% level=50<br />
P7 feedback=45% level=15<br />
P8 feedback=45% level=30<br />
P9 feedback=45% level=50<br />
Tape Delay<br />
t1 feedback=5% level=15<br />
t2 feedback=5% level=30<br />
t3 feedback=5% level=50<br />
t4 feedback=20% level=15<br />
t5 feedback=20% level=30<br />
t6 feedback=20% level=50<br />
t7 feedback=45% level=15<br />
t8 feedback=45% level=30<br />
t9 feedback=45% level=50<br />
29
30<br />
Reverb<br />
Using reverb in recorded program material gives the listener a sense that the material is being<br />
performed in an actual room or hall. It is this similarity to actual acoustic spaces that makes reverberation<br />
a useful tool in recorded music. Settings are:<br />
OF Reverb effect is turned off.<br />
r1-r9 Room reverb<br />
H1-H9 Hall reverb<br />
p1-p9 Plate reverb<br />
S1-S9 Studio reverb
Section Four - Other Functions<br />
Expression Pedal Assign<br />
The Expression Pedal on the <strong>BP90</strong> can be assigned in each preset to control the Volume, Wah,<br />
DigiTech ® Whammy TM , or one of several other parameters in real time with your foot. The procedure<br />
for assigning a parameter to the Expression Pedal is as follows:<br />
1. Press the Edit Up button until the Expression LED lights up. An effect LED will also light<br />
indicating which effect the Expression Pedal is currently assigned to and the currently linked<br />
parameter will be shown in the display.<br />
2. Press the Value Up/Down buttons until the desired effect LED is lit (NOTE: the effect must<br />
be turned on in the preset before it can be selected). The Expression LED will stay lit during<br />
your selection and the Display will show a two-digit character value to describe the effect<br />
parameter that the Expression Pedal is assigned to (see page 32).<br />
3. Once you have assigned a parameter, you can set the control range of that parameter. Press<br />
the Edit Up button again. The number value shown is the minimum parameter value – this is<br />
the value that will be reached when the Expression Pedal is rocked back (heel down).<br />
4. Press the Edit Up button again. The number value shown is the maximum parameter value –<br />
this is the value that will be reached when the Expression Pedal is rocked forward (toe down).<br />
5. Use the Store procedure (see page 17) to save your changes to the preset.<br />
31
32<br />
Expression assignments available are as follows:<br />
No Assignment OF<br />
Volume Pr (Output Level Pre Delay)<br />
Volume PS (Output Level Post Delay)<br />
Wah AH (Expression Pedal acts as a Wah pedal)<br />
Amp A (Expression Pedal controls the Amp Gain)<br />
Chorus SP (Speed) LE (Level)<br />
Flanger SP (Speed) LE (Level)<br />
Phaser SP (Speed) LE (Level)<br />
Tremolo SP (Speed) dP (Depth)<br />
Panner SP (Speed) dP (Depth)<br />
Vibrato SP (Speed) dP (Depth)<br />
Octavider OL (Octavider level)<br />
Envelope Filter ES (Sensitivity)<br />
YaYa Pd (Expression Pedal acts as a YaYa TM Effect when engaged)<br />
AutoYa SP (Speed) dP (Depth)<br />
Detune LE (Level of the Detuned signal)<br />
Pitch Shift LE (Level of the Pitch Shifted signal)<br />
Whammy HY (Expression Pedal acts as a DigiTech ® Whammy TM pedal)<br />
Delay dL (Delay Level) dF (Delay Feedback)<br />
Reverb rL (Reverb Level)
Drum Machine<br />
The <strong>BP90</strong> features a built-in drum machine, which is enabled by pressing the Drums button.<br />
Select patterns, tempo, and level with the Edit Up/Down buttons. Change their values with the<br />
Value Up/Down buttons. The drum machine has the following parameters<br />
Drum Patterns 1-40<br />
Drum Tempo 1-99 (equivalent of 40 – 240BPM)<br />
Drum Level 0-99<br />
Drum machine settings are globally set and not individually stored with each of the <strong>BP90</strong>’s user<br />
presets.<br />
Factory Reset<br />
This function resets the <strong>BP90</strong> to its original factory settings. This procedure erases all custom<br />
User presets.<br />
ATTENTION: Performing this function will erase all user-programmed data. All such<br />
data will be lost forever! Be sure you want to erase the memory and return the <strong>BP90</strong><br />
to its factory default state before continuing with this procedure.<br />
The procedure for performing a Factory Reset is as follows:<br />
1. Press and hold the Store button while powering up the <strong>BP90</strong>.<br />
2. When the display prompts you with FR, release the Store button.<br />
3. Press and hold the Store button for 3 seconds until RS appears in the display and release. The<br />
Factory Reset procedure takes approximately 10 seconds.<br />
4. Once the factory reset has finished you will need to calibrate the Expression Pedal. Follow<br />
steps 2-4 on the next page to complete calibration.<br />
33
34<br />
Expression Pedal Calibration<br />
The Expression Pedal on the <strong>BP90</strong> needs to be recalibrated for use after a factory reset has been<br />
performed. This calibration procedure is automatically entered after a factory reset procedure.<br />
(You can also initiate the calibration procedure by pressing and holding both Footswitches for<br />
approximately 7 seconds.) In the event the Pedal’s calibration fails, or if the Pedal does not function<br />
properly, it can be re-calibrated using the Pedal Calibration procedure. This will not erase the<br />
User presets. The procedure for Calibrating the Expression Pedal is as follows:<br />
1. Press and hold the Up/Down Footswitches until PC appears in the display (bY then tu<br />
then -- will be displayed before PC is shown). Release the Footswitches at this time.<br />
2. When the Display prompts you with td, rock the Expression Pedal forward (toe down)<br />
and press either Footswitch.<br />
3. When the Display prompts you with hd, rock the Expression Pedal back (heel down)<br />
and press either Footswitch.<br />
4. If calibration is successful, CS will appear briefly in the Display and the <strong>BP90</strong> will return<br />
to Performance mode. If the calibration procedure fails, Er will appear in the Display followed<br />
by td. Steps 2 and 3 should be repeated until calibration is successful.
Section 5 - Appendix<br />
Specifications<br />
General Specifications<br />
A/D/A Converter: 24-bit high performance audio<br />
Sampling Frequency: 44.1 kHz<br />
DSP Section: AudioDNA2 DSP Processor<br />
Simultaneous Effects: 9<br />
Preset Memory: 50 User Presets (1-50) / 50 Factory Presets (51-00)<br />
Drum Machine: 40 Patterns<br />
Dimensions: 6.5" Length x 8.5" Width x 2" Height<br />
Unit Weight: 1.52 lbs.<br />
Analog Input Connections<br />
Bass Input: 1/4" Unbalanced (TS)<br />
Input Impedance: 500k Ohms<br />
Analog Output Connections<br />
Left/Right Outputs: 1/4" Unbalanced<br />
Left/Right Output Impedance: 500 Ohms per side<br />
Maximum Output: +7.0 dBu<br />
Headphones: 1/8" Stereo (TRS) – 17.4mW per channel @ 50 Ohms<br />
35
36<br />
Power Requirements<br />
Power Adapter: *IMPORTANT NOTE: Use only the correct power supply according to the Voltage<br />
in your Country (see below table).<br />
Country (Voltage) Compatible PSU Model<br />
Japan (100 VAC, 50/60 Hz): PS200R-100* or PS0913DC-01*<br />
US and Canada (120 VAC, 60 Hz): PS200R-120* or PS0913DC-01*<br />
Europe (230 VAC, 50 Hz): PS200R-230* or PS0913DC-01*<br />
UK (240 VAC, 50 Hz): PS200R-240* or PS0913DC-02*<br />
Australia (240 VAC, 50 Hz): PS200R-240-AU* or PS0913DC-02*<br />
Model<br />
Power Supply Specs<br />
Output Polarity<br />
PS200R: 9 VDC 300 mA<br />
PS0913DC: 9 VDC 1.3 A
Tone Library<br />
Display Name Display Name<br />
1 Rock 1 11 Fingerstyle<br />
2 Rock 2 12 Pick Style<br />
3 Slap 1 13 Groove<br />
4 Slap 2 14 Solo Bass<br />
5 Funk 15 Honky<br />
6 Clean 16 Sustain<br />
7 Drive 17 Grind<br />
8 Warm 18 Smooth<br />
9 Bright 19 Motown<br />
10 Heavy 20 Vintage<br />
37
38<br />
Effects Library<br />
Display Name Display Name<br />
1 Chorus 11 Tape Delay<br />
2 Flanger 12 Hall Reverb<br />
3 Phaser 13 Room Reverb<br />
4 Pitch 14 Studio Reverb<br />
5 Fretless 15 Chorus + Digital Delay<br />
6 Octaver 16 Chorus + Hall Reverb<br />
7 Envelope Filter 17 Chorus + Delay + Reverb<br />
8 Digital Delay 18 Flanger + Analog Delay<br />
9 Analog Delay 19 Phaser + Tape Delay<br />
10 Pong Delay 20 Vibrato + Analog Delay
DigiTech ®<br />
8760 South Sandy Parkway<br />
Sandy, Utah 84070<br />
PH (801) 566-8800<br />
FAX (801) 566-7005<br />
http://www.digitech.com<br />
Printed in China<br />
<strong>BP90</strong> Owner’s <strong>Manual</strong> 5014596-A<br />
©2012 HARMAN, all rights reserved.<br />
Disclaimer: DigiTech, DigiTech Whammy, and AudioDNA2 are trademarks of HARMAN in<br />
the U.S. and other countries. Ampeg SVT, Ashdown Bass Magnifier, Fender Bassman, Sunn<br />
200S, SWR Interstellar Overdrive, Trace-Elliot Commando, Ampeg B15, Hiwatt Custom<br />
50, Mesa/Boogie 400+, SWR Basic Black, Fender Dual Showman, Vox Clyde McCoy Wah,<br />
Guyatone OD-1, Voodoo Labs Sparkledrive, Boss DS-1, and Electro-Harmonix Big Muff are<br />
products of DigiTech’s competitors and trademarks of their respective companies in the<br />
U.S. and other countries and are not associated or affiliated with DigiTech or HARMAN.