User manual ADS TECH API-1394-PCI PYRO DIGITAL VIDEO
User manual ADS TECH API-1394-PCI PYRO DIGITAL VIDEO
User manual ADS TECH API-1394-PCI PYRO DIGITAL VIDEO

Create successful ePaper yourself
Turn your PDF publications into a flip-book with our unique Google optimized e-Paper software.
You can read the recommendations in the user guide, the technical guide or the installation guide for <strong>ADS</strong> <strong>TECH</strong> <strong>API</strong>-<strong>1394</strong>-<strong>PCI</strong><br />
<strong>PYRO</strong> <strong>DIGITAL</strong> <strong>VIDEO</strong>. You'll find the answers to all your questions on the <strong>ADS</strong> <strong>TECH</strong> <strong>API</strong>-<strong>1394</strong>-<strong>PCI</strong> <strong>PYRO</strong> <strong>DIGITAL</strong> <strong>VIDEO</strong><br />
in the user <strong>manual</strong> (information, specifications, safety advice, size, accessories, etc.). Detailed instructions for use are in the <strong>User</strong>'s<br />
Guide.<br />
<strong>User</strong> <strong>manual</strong> <strong>ADS</strong> <strong>TECH</strong> <strong>API</strong>-<strong>1394</strong>-<strong>PCI</strong> <strong>PYRO</strong> <strong>DIGITAL</strong> <strong>VIDEO</strong><br />
<strong>User</strong> guide <strong>ADS</strong> <strong>TECH</strong> <strong>API</strong>-<strong>1394</strong>-<strong>PCI</strong> <strong>PYRO</strong> <strong>DIGITAL</strong> <strong>VIDEO</strong><br />
Operating instructions <strong>ADS</strong> <strong>TECH</strong> <strong>API</strong>-<strong>1394</strong>-<strong>PCI</strong> <strong>PYRO</strong> <strong>DIGITAL</strong> <strong>VIDEO</strong><br />
Instructions for use <strong>ADS</strong> <strong>TECH</strong> <strong>API</strong>-<strong>1394</strong>-<strong>PCI</strong> <strong>PYRO</strong> <strong>DIGITAL</strong> <strong>VIDEO</strong><br />
Instruction <strong>manual</strong> <strong>ADS</strong> <strong>TECH</strong> <strong>API</strong>-<strong>1394</strong>-<strong>PCI</strong> <strong>PYRO</strong> <strong>DIGITAL</strong> <strong>VIDEO</strong><br />
Your user <strong>manual</strong><br />
<strong>ADS</strong> <strong>TECH</strong> <strong>API</strong>-<strong>1394</strong>-<strong>PCI</strong> <strong>PYRO</strong> <strong>DIGITAL</strong> <strong>VIDEO</strong>
Powered by TCPDF (www.tcpdf.org)<br />
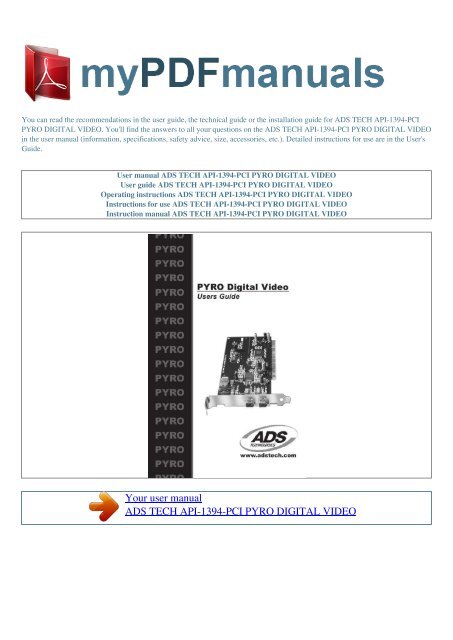
Manual abstract:<br />
Display your broadcast quality production on your TV or copy to your VCR. Your friends will be amazed with your Hollywood directorial style!<br />
FireWire/<strong>1394</strong> is the latest in high-speed external bus technology. This means you can instantly connect devices to your PC without opening up the case.<br />
FireWire offers true plug and play and hot swapping of devices. Just plug in your digital camcorder, launch the software and you're ready to make movies.<br />
<strong>PYRO</strong> Features: · Connect to Digital Camcorders · Connect the <strong>PYRO</strong> <strong>1394</strong> WebCam · Connect to <strong>1394</strong> Hard Drives · Edit video and send out to tape ·<br />
Capture still images · Produce Digital Video Movies · 3 ports at 400 Mbps · Fully IEEE <strong>1394</strong>a compliant · Plug and Play Requirements: · Intel Celeron<br />
400MHz or AMD K6-400MHz or above · Windows 98, Windows 98SE, Windows 2000 or Windows ME · 64 MB of RAM and Sound Card · AGP or <strong>PCI</strong> video<br />
card with 4 MB of RAM · CD-ROM Drive · 170 MB hard disk space for capture/editing applications · 4 GB hard disk space (20 minutes of raw DV footage) 6<br />
Package Contents 1. 2. 3. 4. <strong>PYRO</strong> Card Software CD (Drivers and Video Editing Package) <strong>1394</strong> to DV Editing Cable <strong>User</strong>'s Manual Note: If you did not<br />
receive one or more of the contents listed above inside the <strong>PYRO</strong> package, please contact the vendor you purchased it from or contact <strong>ADS</strong> directly.<br />
What you need to install <strong>PYRO</strong>: · Screwdriver · Windows 98, Windows 98 SE, Win 2000, or Win ME CD · <strong>PYRO</strong> CD 7 INSTALLATION GUIDE 8 Installation<br />
Guide Note to beginning Videographers: If you are new to video editing, we recommend that you learn the basic concepts of video capture and editing with<br />
Video Studio, then when you are ready, move on to Media Studio Pro 6.0VE. Media Studio Pro 6.0VE is located on CD #2 and you can install this when you<br />
are ready. Media Studio Pro 6.<br />
0VE is a professional level video capture and editing system, which offers a great deal of flexibility and complex video creation capabilities. We have included<br />
both Video Studio and Media Studio Pro 6.0VE so that you can progress from a simple consumer level video-editing program (Video Studio) to a professional<br />
level editor (Media Studio Pro) without having to purchase anything extra. We believe this makes the <strong>PYRO</strong> <strong>1394</strong>DV an exceptional value to you, the<br />
consumer. INSTALL IN THIS ORDER: 1.<br />
) 2.) 3.) 4.) Hardware Installation - Install <strong>PYRO</strong> Card Camcorder driver Installation Connecting the Digital Camcorder Install Video Studio 9 1.)<br />
HARDWARE INSTALLATION Follow the steps below to Install the <strong>PYRO</strong> hardware. Move on to connecting your camcorder and installing the Video Studio<br />
software only if the <strong>PYRO</strong> hardware is properly installed. If the <strong>PYRO</strong> card is listed in Device Manager under <strong>1394</strong> Bus Controller with no exclamation<br />
marks and no conflicts, then the <strong>PYRO</strong> is properly installed <strong>PYRO</strong> does require the use of an IRQ (Hardware interrupt address). Most new motherboards<br />
allow IRQ's to be shared, but not all motherboards are created equal. Check our on-line help at www.adstech.<br />
com for help on setting up IRQ steering if you encounter problems at this stage. <strong>PYRO</strong> <strong>1394</strong> <strong>PCI</strong> Card Hardware Installation Step 1 Power down your<br />
computer and disconnect the power cord. Be sure to remove the power cord completely from your computer as shown in the picture to the left. Step 2 Remove<br />
each screw found on the back of the computer. Be sure to put the screws you removed in a safe place, as you will need them again when replacing the shell on<br />
your computer. 10 Step 3 Carefully remove the shell from your computer. Step 4 With the power cable disconnected from your computer, touch the metal part<br />
of the case to ground yourself. This will discharge any static electricity from your body which can damage your computer. Step 5 Locate an available <strong>PCI</strong><br />
expansion slot. This will be in the area of your computer where other cards that look similar to the <strong>PYRO</strong> <strong>PCI</strong> card are installed.<br />
Step 6 Visually confirm that the <strong>PYRO</strong> <strong>1394</strong> <strong>PCI</strong> Card will fit into the available slot you have chosen. 11 Step 7 If necessary, remove the knockout on the back<br />
of your computer which corresponds to the <strong>PCI</strong> slot you have confirmed as your selection..<br />
Your user <strong>manual</strong><br />
<strong>ADS</strong> <strong>TECH</strong> <strong>API</strong>-<strong>1394</strong>-<strong>PCI</strong> <strong>PYRO</strong> <strong>DIGITAL</strong> <strong>VIDEO</strong>