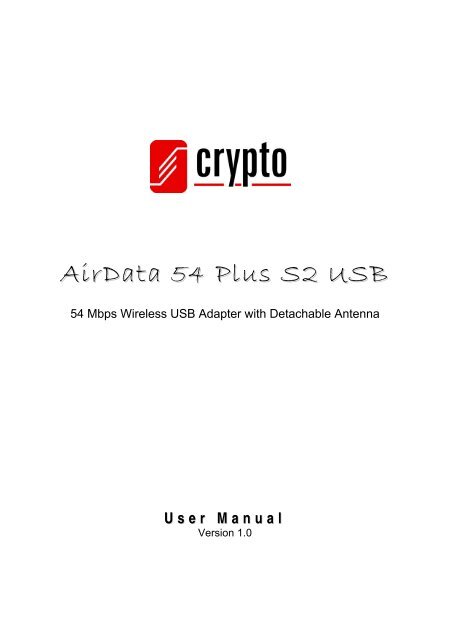
AirData 54 Plus S2 USB
AirData 54 Plus S2 USB
AirData 54 Plus S2 USB

You also want an ePaper? Increase the reach of your titles
YUMPU automatically turns print PDFs into web optimized ePapers that Google loves.
<strong>AirData</strong> <strong>54</strong> <strong>Plus</strong> <strong>S2</strong> <strong>USB</strong><br />
<strong>54</strong> Mbps Wireless <strong>USB</strong> Adapter with Detachable Antenna<br />
U s e r M a n u a l<br />
Version 1.0
<strong>AirData</strong> <strong>54</strong> <strong>Plus</strong> <strong>S2</strong> <strong>USB</strong> User Manual<br />
Contents<br />
1. Introduction ....................................................................................................................... 2<br />
Product Features ............................................................................................................. 3<br />
System Requirements ..................................................................................................... 3<br />
LED Indicator...................................................................................................................3<br />
Package Contents ........................................................................................................... 3<br />
2. Installation Procedure ................................................................................................ 3<br />
For Windows XP.............................................................................................................. 3<br />
For Vista/7 ....................................................................................................................... 8<br />
3. Wireless Network Configuration Utility................................................................ 12<br />
3.1 For Windows XP...................................................................................................... 12<br />
3.1.1 Start....................................................................................................... 18<br />
3.1.2 Profile.................................................................................................... 24<br />
3.1.3 Network................................................................................................. 29<br />
3.1.4 Advanced .............................................................................................. 31<br />
3.1.5 Statistics................................................................................................ 32<br />
3.1.6 WMM..................................................................................................... 33<br />
3.1.7 WPS...................................................................................................... 39<br />
3.1.8 About..................................................................................................... 42<br />
3.1.9 Link Status ............................................................................................ 43<br />
3.2 For Windows Vista/7................................................................................................ 44<br />
3.2.1 Profile.................................................................................................... 44<br />
3.2.2 Link Status ............................................................................................ 51<br />
3.2.3 Site Survey............................................................................................ 52<br />
3.2.4 Statistics................................................................................................ 58<br />
3.2.5 WPS Configuration ............................................................................... 59<br />
3.2.6 QoS....................................................................................................... 61<br />
3.2.7 About..................................................................................................... 68<br />
3.2.8 How to Manage Windows Profile.......................................................... 68<br />
4. Glossary ........................................................................................................................... 73<br />
5. Technical Support ..................................................................................................... 77<br />
1
<strong>AirData</strong> <strong>54</strong> <strong>Plus</strong> <strong>S2</strong> <strong>USB</strong> User Manual<br />
1. Introduction<br />
Congratulations on purchasing the <strong>AirData</strong> <strong>54</strong> <strong>Plus</strong> <strong>S2</strong> <strong>USB</strong> Wireless Adapter which provides<br />
superior performance required by the high-speed wireless networking of today!<br />
The <strong>AirData</strong> <strong>54</strong> <strong>Plus</strong> <strong>S2</strong> <strong>USB</strong> Wireless Adapter supports the high speed IEEE 802.11g<br />
standard that enables connection speeds up to <strong>54</strong>Mbps. The 802.11g standard is also<br />
compatible with 802.11b products. This means that you do not need to change your entire<br />
network structure in order to incorporate the 802.11b products.<br />
Once you install the <strong>AirData</strong> <strong>54</strong> <strong>Plus</strong> <strong>S2</strong> <strong>USB</strong> Wireless Adapter to your system, you<br />
immediately have the ability to connect to your home or office WLAN. Your system has now<br />
a built-in wireless capability and you can share files, printers and play network games with<br />
other computers within the wireless network of your building or your neighborhood. You can<br />
join an existing network or create one of your own and invite your friends and neighbors to<br />
share the power of wireless networking!<br />
The <strong>AirData</strong> <strong>54</strong> <strong>Plus</strong> <strong>S2</strong> <strong>USB</strong> Wireless Adapter has a detachable powerful external antenna<br />
which provides wide area coverage and makes it possible for you to quickly setup an<br />
extremely fast network, without having to install cables. Thanks to the antenna the signal<br />
power is remarkably strong allowing to receive distant signals more easily. You can access<br />
computers almost anywhere in the building or in open spaces. It is now possible to create a<br />
larger, secure and much more flexible home or office network.<br />
In addition to offering fast data transfer rates, the <strong>AirData</strong> <strong>54</strong> <strong>Plus</strong> <strong>S2</strong> <strong>USB</strong> Wireless Adapter<br />
supports the newest and most advanced security features available today. WEP, WPA-PSK<br />
and WPA2 use different kinds of secret keys and can provide an excellent security<br />
measure. The security settings can be customized for companies, offices and business<br />
spaces as well as for home users, while the WPA and WPA2 security features make your<br />
<strong>AirData</strong> <strong>54</strong> <strong>Plus</strong> <strong>S2</strong> <strong>USB</strong> Wireless Adapter ideal for business applications.<br />
Finally, the <strong>AirData</strong> <strong>54</strong> <strong>Plus</strong> <strong>S2</strong> <strong>USB</strong> Configuration Utility allows you to establish a wireless<br />
connection fast and configure the settings easily. It provides important information on the<br />
connection quality and the behavior of the wireless channel and allows you to fully optimize<br />
the performance of your <strong>AirData</strong> <strong>54</strong> <strong>Plus</strong> Wireless <strong>USB</strong> Adapter.<br />
2
<strong>AirData</strong> <strong>54</strong> <strong>Plus</strong> <strong>S2</strong> <strong>USB</strong> User Manual<br />
Product Features<br />
● Compliance with IEEE 802.11g and 802.11b standards<br />
● Data rates up to <strong>54</strong>Mbps for 802.11g and 11Mps for 802.11b<br />
● Strong network security with WEP, WPA, WPA-PSK and AES support<br />
● Windows XP/VISTA/7 compatible<br />
• External Omni Directional Antenna<br />
System Requirements<br />
● Windows XP, VISTA/7 operating systems<br />
● PC with Pentium 300MHz system or above<br />
● 32MB RAM<br />
● One available <strong>USB</strong> port<br />
● One CD-ROM drive<br />
LED Indicator<br />
LED Light Status Description<br />
ACT Blinking Data is being transmitted or received<br />
Package Contents<br />
‧ <strong>AirData</strong> <strong>54</strong> <strong>Plus</strong> Wireless <strong>USB</strong> Adapter<br />
‧ <strong>USB</strong> Extension Cable<br />
‧ Installation CD (Drivers, Utility, User’s Manual)<br />
‧ QIG and Warranty<br />
2. Installation Procedure<br />
Note: If you have installed the Wireless Adapter driver & utility before, please<br />
uninstall the old version first.<br />
For Windows XP<br />
The Found New Hardware Wizard below will appear after the <strong>USB</strong> adapter is installed.<br />
Please click Cancel to continue.<br />
3
<strong>AirData</strong> <strong>54</strong> <strong>Plus</strong> <strong>S2</strong> <strong>USB</strong> User Manual<br />
Insert the Installation CD into your CD-ROM drive, the following window will appear. Click<br />
Install Driver & Utility to begin the device driver installation.<br />
Please read the following license agreement. Use the scroll bar to view the rest of this<br />
agreement. Select I accept the terms of the license agreement and click Next to<br />
continue.<br />
In Windows XP, there is a Windows Zero Configuration Tool for you to setup the wireless<br />
adapter. You can choose to configure the adapter through the Microsoft Zero<br />
Configuration Tool or the Ralink Configuration Tool. It is recommended to choose the<br />
Ralink Configuration Tool for the adapter. Click Next to continue.<br />
4
<strong>AirData</strong> <strong>54</strong> <strong>Plus</strong> <strong>S2</strong> <strong>USB</strong> User Manual<br />
Click Install to begin the installation.<br />
5
<strong>AirData</strong> <strong>54</strong> <strong>Plus</strong> <strong>S2</strong> <strong>USB</strong> User Manual<br />
Please wait, while the adapter is configuring your new software installation.<br />
After the setup wizard has successfully installed wireless LAN, click Finish to exit the<br />
wizard.<br />
6
<strong>AirData</strong> <strong>54</strong> <strong>Plus</strong> <strong>S2</strong> <strong>USB</strong> User Manual<br />
To check if the adapter is properly installed, you can right-click My Computer � choose<br />
Properties � click Device Manager.<br />
The Configuration Utility appears as an icon on the system tray of Windows while the<br />
adapter is running. You can start the utility by double-clicking on the icon.<br />
Right-click the icon, there are some items for you to use the configuration utility,<br />
� Launch Config Utilities � Select this option to open the Configuration Utility tool.<br />
� Use Zero Configuration as Configuration utility� Select this option to use<br />
Windows XP built-in wireless configuration utility (Windows Zero Configuration) to<br />
configure to card.<br />
� Switch to AP Mode � Select this option to change to AP mode.<br />
� Exit � Select Exit to close the Configuration Utility tool.<br />
7
<strong>AirData</strong> <strong>54</strong> <strong>Plus</strong> <strong>S2</strong> <strong>USB</strong> User Manual<br />
For Vista/7<br />
The Found New Hardware Wizard below will appear after the <strong>USB</strong> adapter is installed.<br />
Please click Cancel to continue.<br />
Insert the Installation CD into the CD-ROM drive, and the following window will appear.<br />
Click Install Driver & Utility to begin the device driver installation.<br />
Please read the following license agreement. Use the scroll bar to view the rest of this<br />
agreement. Select I accept the terms of the license agreement and click Next to<br />
continue.<br />
Click Install to begin the installation.<br />
8
<strong>AirData</strong> <strong>54</strong> <strong>Plus</strong> <strong>S2</strong> <strong>USB</strong> User Manual<br />
Please wait, while the adapter is configuring your new software installation.<br />
After the setup wizard has successfully installed the wireless LAN device, click Finish to<br />
9
<strong>AirData</strong> <strong>54</strong> <strong>Plus</strong> <strong>S2</strong> <strong>USB</strong> User Manual<br />
exit the wizard.<br />
To check if the adapter is properly installed, you can right-click My Computer � choose<br />
Properties � click Device Manager.<br />
The Configuration Utility appears as an icon on the system tray of Windows while the<br />
adapter is running. You can open the utility by double-clicking on the following icon.<br />
10
<strong>AirData</strong> <strong>54</strong> <strong>Plus</strong> <strong>S2</strong> <strong>USB</strong> User Manual<br />
Ralink’s wireless utility needs to cooperate with Microsoft AutoConfig service in order to<br />
perform scanning and connecting actions, so the AutoConfig service should be enabled<br />
before that.<br />
Control Menu � Once Ralink wireless utility is minimized, the user can click the Ralink<br />
icon on the taskbar to bring up the control menu.<br />
� Launch Config Utilities � Restore Ralink wireless utility window.<br />
� Switch to AP Mode � Select this option to change to AP mode.<br />
� Exit � Select Exit to close the Configuration Utility tool.<br />
11
<strong>AirData</strong> <strong>54</strong> <strong>Plus</strong> <strong>S2</strong> <strong>USB</strong> User Manual<br />
3. Wireless Network Configuration Utility<br />
3.1 For Windows XP<br />
The Configuration Utility is a powerful application that helps you to configure the Wireless<br />
LAN adapter and monitor the link status and statistics during the communication process.<br />
When the adapter is installed, the configuration utility will be displayed automatically. This<br />
adapter will auto connect to wireless device which has better signal strength and no<br />
wireless security setting.<br />
In Windows XP, it provides wireless configuration utility named “Windows Zero<br />
configuration” which provides a basic configuration function for Ralink Wireless NIC,<br />
Ralink’s Utility (RaUI) provides WPA supplicant functionality. To make it easier for user to<br />
select the correct utility, RaUI will let user make the selection when it first runs after<br />
windows XP boots.<br />
RaUI can co-exist with WZC (Windows Zero Configuration). When coexisting with WZC,<br />
RaUI only provides monitoring function, such as link status, network status, statistic<br />
counters, advanced feature status, WMM status and WPS status. It won’t interfere with<br />
WZC’s configuration or profile functions. Please see the picture below: To select WZC or<br />
RaUI<br />
If “Use Zero Configurations as Configuration utility” is selected, please continue on the<br />
section. The picture below illustrates the RaUI status when WZC is active as the main<br />
control utility.<br />
12
<strong>AirData</strong> <strong>54</strong> <strong>Plus</strong> <strong>S2</strong> <strong>USB</strong> User Manual<br />
When activating WZC, there are some differences in the RaUI status in comparison to the<br />
RaUI status when the WZC is not running:<br />
(1) Profile button will be gray; profile function is removed since the NIC is controlled by<br />
WZC.<br />
(2) The connect and add profile function will be gray. Again, the NIC is controlled by WZC<br />
[Use WZC to configure wireless adapter]<br />
If the connection is lost or the device is not connected, a notification window will appear as<br />
shown in the following picture.<br />
13
<strong>AirData</strong> <strong>54</strong> <strong>Plus</strong> <strong>S2</strong> <strong>USB</strong> User Manual<br />
Right-click the network connection icon in the task bar.<br />
Select “View Available Wireless Networks” and the following window will appear as<br />
shown below.<br />
Select intended AP and click “Connect” as shown below, then click “Connect Anyway”.<br />
14
<strong>AirData</strong> <strong>54</strong> <strong>Plus</strong> <strong>S2</strong> <strong>USB</strong> User Manual<br />
AP1 is successfully connected.<br />
If you want to modify the information about the AP, click “Change advanced settings”<br />
15
<strong>AirData</strong> <strong>54</strong> <strong>Plus</strong> <strong>S2</strong> <strong>USB</strong> User Manual<br />
Choose “Wireless Networks” tab.<br />
Click “Properties” and then click “OK” button.<br />
16
<strong>AirData</strong> <strong>54</strong> <strong>Plus</strong> <strong>S2</strong> <strong>USB</strong> User Manual<br />
After filling the desired value, click the “OK” button. The following notification will appear as<br />
shown below.<br />
By clicking the Ralink’s icon will bring up the RaUI main window. The user can find the<br />
surrounding APs in the list. The current connected AP will also be shown with the green<br />
icon indicated as shown in the screen below. The user may use the available tabs to<br />
configure more advanced features provided by Ralink’s wireless NIC.<br />
17
<strong>AirData</strong> <strong>54</strong> <strong>Plus</strong> <strong>S2</strong> <strong>USB</strong> User Manual<br />
3.1.1 Start<br />
When starting RaUI, the system will connect to the AP with the best signal strength without<br />
setting profile or matching the profile setting. It will issue a scan command to wireless NIC.<br />
After two seconds, the AP list will be updated with the result of BSS list scan. The AP list<br />
includes the most used fields, such as SSID, network type, channel used, wireless mode,<br />
security status and signal percentage. The arrow icon indicates the connected BSS or IBSS<br />
network.<br />
18
<strong>AirData</strong> <strong>54</strong> <strong>Plus</strong> <strong>S2</strong> <strong>USB</strong> User Manual<br />
There are three sections in RaUI. These sections are briefly described below.<br />
Button Section: include Profile page, Network page, Advanced page, Statistics page, WMM<br />
page, WPS page, About button, Radio On/Off button and Help button.<br />
� Button Section<br />
� Move to the Left<br />
� Move to the Right<br />
Function Section: Corresponding button<br />
� Profile Page<br />
19
<strong>AirData</strong> <strong>54</strong> <strong>Plus</strong> <strong>S2</strong> <strong>USB</strong> User Manual<br />
� Network Page<br />
� Advanced Page<br />
20
<strong>AirData</strong> <strong>54</strong> <strong>Plus</strong> <strong>S2</strong> <strong>USB</strong> User Manual<br />
� Statistics Page<br />
� WMM Page<br />
� WPS Page<br />
21
<strong>AirData</strong> <strong>54</strong> <strong>Plus</strong> <strong>S2</strong> <strong>USB</strong> User Manual<br />
� About Page<br />
Status Section: Includes Link Status, Authentication Status, AP’s information, Configuration<br />
and retrying the connection when authentication is failed.<br />
� Link Status<br />
� Authentication Status<br />
22
<strong>AirData</strong> <strong>54</strong> <strong>Plus</strong> <strong>S2</strong> <strong>USB</strong> User Manual<br />
� AP’s Information<br />
� Retry the Connection<br />
� Configuration<br />
At the mean time of starting RaUI, there is also a small Ralink icon that appears within the<br />
windows taskbar as shown below. You may double click it to bring up the main menu if you<br />
selected to close RaUI menu earlier. You may also use the mouse’s right button to close<br />
RaUI utility.<br />
23
<strong>AirData</strong> <strong>54</strong> <strong>Plus</strong> <strong>S2</strong> <strong>USB</strong> User Manual<br />
�� Ralink icon in system tray.<br />
Besides, the small icon will change color to reflect current wireless network connection status.<br />
The status is indicated as follows:<br />
� -- indicate Connected and Signal Strength is Good.<br />
� -- indicate Connected and Signal Strength is Normal<br />
� -- indicate Wireless NIC is not connected yet<br />
� -- indicate Wireless NIC is not detected<br />
� -- indicate Connected and Signal Strength is Weak<br />
3.1.2 Profile<br />
The Profile can book keeping your favorite wireless setting among your home, office, and<br />
other public hot-spots. You may save multiple profiles, and activate the correct one at your<br />
preference.<br />
[Definition of each field]<br />
Profile Name: Name of profile, preset to PROF*(*indicate 1,2,3,…)<br />
SSID: AP or Ad-Hoc name<br />
Network Type: Network’s type, including infrastructure and Ad-Hoc.<br />
Authentication: Authentication mode<br />
Encryption: Encryption Type<br />
Use 802.1x: Whether or not use 802.1x feature<br />
Channel: channel in use for Ad-Hoc mode<br />
Power Save Mode: Choose from CAM (Constantly Awake Mode) or Power Saving Mode.<br />
Tx Power: Transmit power, the amount of power used by a radio transceiver to send the<br />
signal out.<br />
RTS Threshold: User can adjust the RTS threshold number by sliding the bar or key in the<br />
value directly.<br />
Fragment Threshold: User can adjust the Fragment threshold number by sliding the bar or<br />
24
<strong>AirData</strong> <strong>54</strong> <strong>Plus</strong> <strong>S2</strong> <strong>USB</strong> User Manual<br />
key in the value directly.<br />
[Icons and buttons]<br />
� indicates connection is successful on currently activated profile<br />
� indicates connection is failed on currently activate profile<br />
� indicates network type is infrastructure mode<br />
� indicates network type is Ad-Hoc<br />
� indicates security-enabled wireless network<br />
� Add a new profile<br />
� Edit an existing profile<br />
� Delete an existing profile<br />
� Activate selected profile<br />
� Show the information of Status Section<br />
� Hide the information of Status Section<br />
3.1.2.1 Add/Edit Profile<br />
There are 3 methods to open Profile Editor from:<br />
� You can open it from “Add to Profile” button in Site Survey function<br />
� You can open it from “Add” button in Profile function<br />
� You can open it from “Edit” button in Profile function<br />
25
<strong>AirData</strong> <strong>54</strong> <strong>Plus</strong> <strong>S2</strong> <strong>USB</strong> User Manual<br />
Profile Name: The user can chose the name for this profile, or use the default name defined<br />
by the system.<br />
SSID: The user can key in the intended SSID name or use the pull down menu to select from<br />
the available APs.<br />
Power Save Mode: Choose from CAM [Constantly Awake Mode] or Power Saving Mode.<br />
Network Type: There are two types, infrastructure and 802.11 Ad-Hoc modes. Under Ad-Hoc<br />
mode, user can also choose the preamble type; the available preamble type includes auto<br />
and long. In addition to that the channel field will be available for setup in Ad-Hoc mode.<br />
RTS Threshold: User can adjust the RTS threshold number by sliding the bar or key in the<br />
value directly. The default value is 2347.<br />
Fragment Threshold: User can adjust the Fragment threshold number by sliding the bar or<br />
key in the value directly. The default value is 2346.<br />
Channel: Only available for setting under Ad-Hoc mode. User can choose the channel<br />
frequency to start their Ad-Hoc network.<br />
Authentication Type: There are 7 type of authentication modes supported by RaUI. They are<br />
Open, Shared, LEAP, WPA, WPA-PSK, WPA2, WPA2-PSK.<br />
Encryption Type: For open and shared authentication mode, the selection of encryption type<br />
are None and WEP. For WPA, WPA2, WPA-PSK and WPA2-PSK authentication mode, the<br />
encryption type supports both TKIP and AES.<br />
802.1x Setting: It is an authentication for WPA and WPA2 certificate to server.<br />
WPA Pre-Shared Key: This is the shared secret key between the AP and the STA. For WPA-<br />
PSK and WPA2-PSK authentication mode, this field must be filled with a key that is longer<br />
than 8 and less than 32 alphanumerical characters.<br />
WEP Key: Only valid when using a WEP encryption algorithm. The key must be matched with<br />
the AP’s key. There are several formats to enter the keys:<br />
� Hexadecimal – 40bits: 10 Hex characters<br />
� Hexadecimal – 128bits: 26 Hex characters.<br />
� ASCII – 40bits: 5 ASCII characters<br />
� ASCII – 128bits: 13 ASCII characters<br />
26
<strong>AirData</strong> <strong>54</strong> <strong>Plus</strong> <strong>S2</strong> <strong>USB</strong> User Manual<br />
3.1.2.2 Example to Add Profile in Profile<br />
Click Add in Profile function<br />
Add Profile page will pop up.<br />
Change profile name to what you want to connect. Pull down the SSID and select one<br />
27
<strong>AirData</strong> <strong>54</strong> <strong>Plus</strong> <strong>S2</strong> <strong>USB</strong> User Manual<br />
intended AP. The AP list is the result of last Network.<br />
28
<strong>AirData</strong> <strong>54</strong> <strong>Plus</strong> <strong>S2</strong> <strong>USB</strong> User Manual<br />
Then, you can see the profile which you set appear in the profile list. Click “Activate” to<br />
activate the profile setting.<br />
3.1.3 Network<br />
Under the Network function, the system will display the information of surrounding APs from<br />
the last scan result. The list information includes SSID, BSSID, Signal, Channel, Encryption<br />
algorithm, Authentication and Network type as below:<br />
29
<strong>AirData</strong> <strong>54</strong> <strong>Plus</strong> <strong>S2</strong> <strong>USB</strong> User Manual<br />
[Definition of each field]<br />
SSID: Name of BSS or IBSS network<br />
Network Type: Network type in use, infrastructure for BBS, Ad-Hoc for IBSS network<br />
Channel: Channel in use.<br />
Wireless Mode: AP support wireless mode. IT may support, 802.11b, 802.11g or 802.11n<br />
wireless mode.<br />
Security-Enable: Whether AP provides security-enabled wireless network<br />
Signal: Receive signal strength of specified network<br />
[Icons & Buttons]<br />
� Indicates a successful connection .<br />
� Indicates that the network type is infrastructure mode.<br />
� Indicates the network type Ad-Hoc mode.<br />
� Indicates a security-enabled wireless network.<br />
� Indicates 802.11b wireless mode.<br />
� Indicates 802.11g wireless mode.<br />
� Indicates 802.11n wireless mode.<br />
AP lists are sorted by SSID, Channel, or Signal.<br />
surrounding wireless networks.<br />
save user’s setting to a new profile.<br />
� Command used to connect to the selected network.<br />
� Indicate the<br />
� Issue a rescan command to wireless NIC to update the information on<br />
� Add the selected AP to Profile setting. It will bring up profile page and<br />
30
<strong>AirData</strong> <strong>54</strong> <strong>Plus</strong> <strong>S2</strong> <strong>USB</strong> User Manual<br />
[Connected Network]<br />
When RaUI is executed for the first time, it will select the best AP to connect automatically.<br />
If the user wants to connect to another AP, he can click the “Connect” button for the intended<br />
AP to make a connection.<br />
If the intended network has encryption other than “Not Use”, RaUI will bring up the security<br />
page appropriate information to make the connection.<br />
When you double-click on the intended AP, you can see the AP’s detailed information.<br />
3.1.4 Advanced<br />
Wireless Mode: Select wireless mode. The following options are supported: 802.11B only,<br />
802.11B/G mix, and 802.11B/G/N mix. (802.11 A/B/G mix selection item only exists for A/B/G<br />
adapter; 802.11B/G/N mix selection item only exists for B/G/N adapter; 802.11B/G/N mix<br />
selection item only exists for A/B/G/N adapter.)<br />
Enable Tx Burst: Ralink’s proprietary frame burst mode.<br />
Enable TCP Windows Size: Enhance throughout.<br />
Fast Roaming at: Fast to roaming, setup by transmit power.<br />
Select your Country Region Code: 8 countries to choose.<br />
Show Authentication Status Dialog: When you connect AP with authentication, choose<br />
whether show “Authentication Status Dialog” or not. Authentication Status Dialog display the<br />
process required for 802.11x Authentication.<br />
Enable CCX (Cisco Compatible eXtensions): support Cisco Compatible Extensions<br />
function.<br />
� LEAP turn on CCKM<br />
� Enable Radio Measurement: can channel measurement every 0~2000<br />
milliseconds.<br />
Apply: Save the save changes<br />
31
<strong>AirData</strong> <strong>54</strong> <strong>Plus</strong> <strong>S2</strong> <strong>USB</strong> User Manual<br />
� Show the information of Status Section<br />
� Hide the information of Status Section<br />
3.1.5 Statistics<br />
Statistics page displays the detail counter information based on 802.11 MIB counters. This<br />
page translates the MIB counters into a format easier for user to understand.<br />
[Transmit Statistics]<br />
Frames Transmitted Successfully: Frames successfully sent.<br />
Frames Fail To Receive ACK After All Retries: Frames failed transmit after hitting retry<br />
limit.<br />
RTS Frames Successfully Receive CTS: Successfully receive CTS after sending RTS<br />
frame.<br />
RTS Frames Fail to Receive CTS: Fail to receive CTS after sending RTS frame.<br />
Frames Retransmitted Successfully: Successfully retransmitted frames numbers<br />
Reset Counter: Reset counters to zero<br />
[Receive Statistics]<br />
32
<strong>AirData</strong> <strong>54</strong> <strong>Plus</strong> <strong>S2</strong> <strong>USB</strong> User Manual<br />
Frames Received Successfully: Frames received successfully.<br />
Frames Received With CRC Error: Frames receive with CRC error.<br />
Frames Dropped Due To Out-Of-Resource: Frames dropped due to resource issue.<br />
Duplicate Frames Received: Duplicate received frames.<br />
Reset Counter: Reset counters to zero<br />
� Show the information of Status Section<br />
� Hide the information of Status Section<br />
3.1.6 WMM<br />
WMM function involves “WMM Enable”, “WMM-Power Save Enable” and “DLS Setup”.<br />
WMM Enable: Enabe Wi-Fi Multi-Media.<br />
WMM-Power Save Enable: Enable WMM Power Save.<br />
Direct Link Setup Enable: Enable DLS (direct Link Setup).<br />
[WMM Enable – Enable Wi-Fi Multi-Media]<br />
If you want to use “WMM-Power Save” or “Direct Link Setup” you must enable WMM. The<br />
setting methods of enabling WMM are indicated below:<br />
Click “WMM Enable”<br />
33
<strong>AirData</strong> <strong>54</strong> <strong>Plus</strong> <strong>S2</strong> <strong>USB</strong> User Manual<br />
Change to “Network” function. Add an AP that supports WMM features to a Profile. The result<br />
is illustrated in the following figure at the Profile page.<br />
[WMM-Power Save Enable – Enable WMM Power Save]<br />
Click “WMM-Power Save Enable”<br />
34
<strong>AirData</strong> <strong>54</strong> <strong>Plus</strong> <strong>S2</strong> <strong>USB</strong> User Manual<br />
Please select which ACs you want to enable. The setting of enabling WMM-Power Save is<br />
successful.<br />
[Direct Link Setup Enable – Enable DLS (Direct Link Setup)]<br />
Click “Direct Link Setup Enable”<br />
Change to “Network” function. And add an AP that supports DLS features to a Profile. The<br />
result will look like the below figure in Profile page.<br />
35
<strong>AirData</strong> <strong>54</strong> <strong>Plus</strong> <strong>S2</strong> <strong>USB</strong> User Manual<br />
The Setting of DLS indicates as follow:<br />
Fill in the blanks of Direct Link with MAC address of STA. The STA must conform to the<br />
following conditions:<br />
� Connect with the same AP that supports DLS features.<br />
� Εnable DLS<br />
Timeout Value represent that the device will disconnect automatically after some seconds.<br />
The value is an integer and it must be between 0~65535. When this value is zero then it is<br />
always connected. Default value of Timeout Value is 60 seconds.<br />
36
<strong>AirData</strong> <strong>54</strong> <strong>Plus</strong> <strong>S2</strong> <strong>USB</strong> User Manual<br />
Click “Apply” button. The result is illustrated in the following picture.<br />
Description of “DLS Status”:<br />
As shown in the figure above, after configuring the DLS successfully, the MAC address of the<br />
connected device and the Timeout Value of setting will be shown in the “DLS Status”. In the<br />
“DLS Status” of the connected device, it shows the MAC address of the Airdata adapter and<br />
the Timeout Value of setting.<br />
Display the values of “DLS Status” to “Direct Link Setup” as follow:<br />
In “DLS Status”, select a direct link STA that you want to show its values in “Direct Link<br />
Setup”.<br />
37
<strong>AirData</strong> <strong>54</strong> <strong>Plus</strong> <strong>S2</strong> <strong>USB</strong> User Manual<br />
Double-Click and the result is shown in the figure below.<br />
Disconnect Direct Link Setup as shown below:<br />
Select a direct link STA.<br />
Click the “Tear Down” button. The result is shown in the figure below.<br />
38
<strong>AirData</strong> <strong>54</strong> <strong>Plus</strong> <strong>S2</strong> <strong>USB</strong> User Manual<br />
3.1.7 WPS<br />
WPS Configuration: The primary goal of Wi-Fi Protected Setup (Wi-Fi Simple Configuration)<br />
is to simplify the security setup and management of Wi-Fi networks. Ralink STA as an<br />
Enrollee or external Registrar supports the configuration setup using PIN configuration<br />
method or PBC configuration setup using PIN configuration method or PBC configuration<br />
method through an internal or external Registrar.<br />
WPS AP List: Displays the information of surrounding APs with WPS IE from the last scan<br />
result. Listed information includes SSID, BSSID, Channel, ID (Device Password ID), Security-<br />
Enabled.<br />
Rescan: Issues a rescan command to wireless NIC to update the information on surrounding<br />
wireless networks.<br />
Information: Displays the information about WPS IE on the selected network. List Information<br />
includes Authentication Type, Encryption Type, Config Methods, Device Password ID,<br />
Selected Registrar, State, Version, AP Setup Locked, UUID-E and RF Bands.<br />
PIN Code: 8-digit numbers. It is required to enter PIN Code into Registrar using PIN method.<br />
Each NIC Wireless has only one PIN Code of Enrollee.<br />
39
<strong>AirData</strong> <strong>54</strong> <strong>Plus</strong> <strong>S2</strong> <strong>USB</strong> User Manual<br />
Config Mode: It illustrates the station role-playing as an Enrollee or an external Registrar.<br />
WPS Profile List: Display all of the credentials got from the Registrar. List information<br />
includes SSID, MAC address, Authentication and Encryption Type. If STA Enrollee,<br />
credentials are created as soon as each WPS success. If STA Registrar, RaUI creates a new<br />
credential with WPA2-PSK/AES/64Hex-Key and doesn’t change until next switching to STA<br />
Registrar.<br />
Control items on WPS Profile List:<br />
� Detail: Information about Security and Key in the credential<br />
� Connect: Command to connect to the selected network inside credentials. The<br />
active selected credential is as like as the active selected Profile.<br />
� Rotate: Command to rotate to connect to the next inside credentials<br />
� Disconnect: Stop WPS action and disconnect the active link. And then select the<br />
last profile at the Profile Page of RaUI if exist. If there is an empty profile page, the driver<br />
will select any non-security AP.<br />
� Delete: Delete an existing credential. Select the next credential if it exists. If there<br />
is an empty credential, the driver will select any non-security AP.<br />
PIN: Start to add to Registrar using PIN configuration method. IF STA Registrar, remember to<br />
enter the PIN Code read from you Enrollee before starting PIN.<br />
PBC: Start to add to AP using PBC configuration method.<br />
When you click PIN or PBC, please don’t do any rescan within two-minute connection. If you<br />
want to abort this setup within the interval, restart PIN/PBC or press Disconnect to stop WPS<br />
connection.<br />
WPS associate IE: Send the association request with WPS IE during WPS setup. It is<br />
optional for STA.<br />
WPS probe IE: Send the probe request with WPS IE during WPS setup. IT is optional for<br />
STA.<br />
Progress Bar: Display rate of progress from Start to Connected status.<br />
Status Bar: Display the current WPS Status.<br />
[WPS Information on AP]<br />
WPS information contain authentication type, encryption type, config methods, device<br />
password ID, selected registrar, state, version, AP setup locked, UUID-E and RF bands.<br />
Authentication Type: There are three types of authentication modes supported by RaConfig.<br />
The available options are Open, Shared, WPA-PSK, and WPA system.<br />
Encryption Type: For Open and shared authentication mode, the selection of encryption are<br />
None and WEP. For WPA, WPA2, WPA-PSK, and WPA2-PSK authentication mode, the<br />
encryption type supports both TKIP and AES.<br />
40
<strong>AirData</strong> <strong>54</strong> <strong>Plus</strong> <strong>S2</strong> <strong>USB</strong> User Manual<br />
Config Methods: Correspond to the methods the AP supports as an Enrollee for adding<br />
external Registrars. (A bitwise OR of values)<br />
Device Password ID: Indicates the method or identifies the specific password that the<br />
selected Registrar intends to use. AP in PBC mode must indicate 0x0004 within two-minute<br />
Walk time.<br />
41
<strong>AirData</strong> <strong>54</strong> <strong>Plus</strong> <strong>S2</strong> <strong>USB</strong> User Manual<br />
Selected Registrar: Indicate if the user has recently activated a Registrar to add an Enrollee.<br />
The values are “TRUE” and “FALSE”<br />
State: The current configuration state on AP. The values are “Unconfigured” and<br />
“Configured”.<br />
Version: WPS specified version.<br />
AP Setup Locked: Indicates if an AP has entered a setup locked state.<br />
UUID-E: The universal unique identifier (UUID) element generated by the Enrollee. There is a<br />
16 byte value.<br />
RF-Bands: Indicates all RF bands available on the AP. A dual-band AP must provide it. The<br />
values are “2.4GHz” and “5GHz”<br />
3.1.8 About<br />
This function displays the wireless card and driver version information.<br />
Connect to Ralink’s Website: WWW.RALINKTECH.COM<br />
Display Configuration Utility, Driver, and EEPROM version information<br />
Display Wireless NIC MAC Address.<br />
42
<strong>AirData</strong> <strong>54</strong> <strong>Plus</strong> <strong>S2</strong> <strong>USB</strong> User Manual<br />
3.1.9 Link Status<br />
Link Status displays the detailed information for the current connection<br />
Status: Illustrates the current connection status. If there is no connection, it will show<br />
Disconnected. Otherwise, the SSID and BSSID will be shown here.<br />
Extra Info: Displays the link status in use.<br />
Channel: Displays the current channel in use.<br />
Authentication: Authentication mode in use.<br />
Encryption: Encryption type in use.<br />
Network Type: Network type in use.<br />
IP Address: IP address about current connection.<br />
Sub Mask: Sub Mask about current connection.<br />
Default Gateway: Default gateway about current connection.<br />
Link Speed: Show current transmit rate and receive rate.<br />
Throughput: Display transmits and receive throughput in Mbps.<br />
Link Quality: Display Connection quality based on signal strength and Tx/Rx packet error<br />
rate.<br />
Signal Strength 1: Receive signal strength 1, user can choose to display in percentage or<br />
dBm format.<br />
Signal Strength 2: Receive signal strength 2, user can choose to display in percentage or<br />
dBm format.<br />
Signal Strength 3: Receive signal strength 3, user can choose to display in percentage or<br />
dBm format.<br />
Noise Strength: Display noise signal strength.<br />
HT: Display current HT Status in use, containing BW, GI, MCS, SNR0, and SNR1 value.<br />
(Show the information only for 802.11n wireless card)<br />
43
<strong>AirData</strong> <strong>54</strong> <strong>Plus</strong> <strong>S2</strong> <strong>USB</strong> User Manual<br />
3.2 For Windows Vista/7<br />
Ralink wireless utility is shown in the figure below. There are 6 setting pages in Ralink<br />
wireless utility:<br />
� Profile Page: Manage the profile.<br />
� Link Status Page: Display current connection information.<br />
� Site Survey Page: Display the available networks.<br />
� Statistics Page: Display the packet counters<br />
� WPS Configuration Page: Connect to WPS (Wi-Fi Protected Setup) capable<br />
APs.<br />
� QoS Page: It involves “WMM Enable”, “WMM – Power Save Enable” and DLS<br />
setup<br />
� About Page: Display Ralink driver and utility information.<br />
3.2.1 Profile<br />
In the “Profile” tab, you can view and manage the current used Available Point(s). You can<br />
Add, Delete, Edit, or Activate the current Available Point(s). Also you can duplicate the AP<br />
or set current AP as Default.<br />
44
<strong>AirData</strong> <strong>54</strong> <strong>Plus</strong> <strong>S2</strong> <strong>USB</strong> User Manual<br />
Profile Name: The Profile List displays all the profiles and the relative settings of the<br />
profiles including Profile Name, SSID, and Channel…etc; preset to PROF* (* indicate<br />
1,2,3,…)<br />
SSID: AP to Ad-hoc name.<br />
Channel: Channel in use for Ad-Hoc mode.<br />
Authentication: Authentication mode.<br />
Encryption: Security algorithm in use.<br />
Network Type: Network’s type, including Infrastructure and Ad-hoc.<br />
Indicates a successful connection on the currently activated profile.<br />
Indicates a failed connection on the currently activated profile.<br />
Add/Delete/Edit Button: Click these buttons to add/delete/edit the selected profiles.<br />
Activate Button: Click”Activate” to connect the selected profile. When a profile is<br />
activated, the adapter will be initially connected to the profile.<br />
45
<strong>AirData</strong> <strong>54</strong> <strong>Plus</strong> <strong>S2</strong> <strong>USB</strong> User Manual<br />
3.2.1.1 Add a profile<br />
By either pushing the “Add” button in the Profile Page or the “Add to Profile” button in the<br />
Site Survey Page, it brings up the profile setting sheet which contains two setting pages --<br />
“Configuration” page and “Authentication and Security” page.<br />
46
<strong>AirData</strong> <strong>54</strong> <strong>Plus</strong> <strong>S2</strong> <strong>USB</strong> User Manual<br />
[Configuration page]<br />
� Profile Name: Name of the profile<br />
� SSID: Name of the desired network<br />
� Network Type: Network of the desired network, either infrastructure or Ad-Hoc.<br />
Infrastructure – This operation mode requires the presence of a wireless Access<br />
Point. All communication is done via the Access Point or Router.<br />
Ad-Hoc – Select this mode if you want to connect to another wireless station in the<br />
Wireless LAN network without an Access Point or Router.<br />
� Tx-Power: The desired TX power level; the available options are 100%, 75%, 50%<br />
and Auto. If you want to lower the transmit power of the adapter for saving the<br />
power of the system, you can select the lower percentages from the list. The lower<br />
the power the lower signal strength and the coverage range.<br />
47
<strong>AirData</strong> <strong>54</strong> <strong>Plus</strong> <strong>S2</strong> <strong>USB</strong> User Manual<br />
[Authentication and Security page]<br />
� Authentication Type: Authentication of the desired network. For infrastructure<br />
network, the available modes are Open, Shared, WPA, WPA-PSK, WPA2, and<br />
WPA2-PSK.<br />
Open: No authentication is needed among the wireless devices.<br />
Shared: Only Wireless device using a shared key (WEP Key identifier) is<br />
allowed to connect to each other. The user has to setup the same key with the<br />
wireless device that the adapter intends to connect to.<br />
WPA: WPA provides a scheme of mutual authentication using either IEEE<br />
802.1x/Extensible Authentication Protocol (EAP) authentication or pre-shared<br />
key (PSK) technology. It provides a high level of assurance to enterprise, small<br />
business and home users that data will remain protected and that only<br />
authorized users may access their networks. For enterprises that have already<br />
deployed IEEE 802.1x authentication, WPA offers the advantage of leveraging<br />
existing authentication databases and infrastructure.<br />
WPA-PSK – It is a special mode designed for home and small business users<br />
who do not have access to network authentication servers. In this mode, known<br />
as Pre-Shared Key, the user manually enters the starting password in their<br />
access point or gateway, as well as in each wireless station in the network.<br />
WPA-PSK takes over automatically from that point, keeping unauthorized users<br />
that don’t have the matching password from joining the network, while encrypting<br />
the data traveling between authorized devices.<br />
48
<strong>AirData</strong> <strong>54</strong> <strong>Plus</strong> <strong>S2</strong> <strong>USB</strong> User Manual<br />
WPA2 – Like WPA, WPA2 supports IEEE 802.1 x/EAP authentications or PSK<br />
technology. It also includes a new advanced encryption mechanism using the<br />
Advanced Encryption Standard (AES). AES is required to the corporate user or<br />
government users. The different between WPA and WPA2 is that WPA2<br />
provides data encryption via the AES. In contrast, WPA uses Temporal Key<br />
Integrity Protocol (TKIP).<br />
WPA2-PSK – WPA2-PSK is also for home and small business. The difference<br />
between WPA-PSK and WPA2-PSK is that WPA2-PSK provides data encryption<br />
via the AES. In contrast, WPA-PSK uses Temporal Key Integrity Protocol (TKIP).<br />
� Encryption: The encryption of the desired network.<br />
-- For Open and Shared authentications, the available encryption modes are<br />
None and WEP.<br />
-- For WPA, WPA-PSK, WPA2 and WPA2-PSK authentications, the available<br />
modes are TKIP and AES.<br />
None – Disable the Encryption mode.<br />
WEP – Enables the WEP Data Encryption. When this item is selected, you have<br />
to continue by setting up the WEP Key Length & the key Index.<br />
TKIP – TKIP (Temporal Key Integrity Protocol) changes the temporal key every<br />
10000 packets. This insures much greater security than the standard WEP<br />
security.<br />
AES – AES has been developed to ensure the highest degree of security and<br />
authenticity for digital information and it is the most advanced solution defined by<br />
IEEE 802.11i for the security in the wireless network.<br />
Note: All devices in the network should use the same encryption method to<br />
ensure the communication.<br />
� WPA Pre-Shared Key: The WPA-PSK key can take values from 8 to 64<br />
characters and can be letters or numbers. This same key must be used on all of<br />
the wireless stations in the network.<br />
� WEP Key (Key1~Key4): The WEP keys are used to encrypt data transmitted in<br />
the wireless network. There are two types of key length: 64-bit & 128-bit. Select<br />
the default encryption key form key1 to key4 by selected the radio button.<br />
Fill the text box by following the rule below:<br />
64-bit – Input 10-digit Hex values (in the “A-F”, “a-f, and “0-9” range) or 5-digit<br />
ASCII characters (including “a-z” and “0-9”) as the encryption keys. For example:<br />
“0123456aef” or “test1”<br />
128-bit – Input 26-digit Hex values (in the “A-F”, “a-f, and “0-9” range) or 13-digit<br />
ASCII characters (including “a-z” and “0-9”) as the encryption keys. For example:<br />
“01234567890123456789abcdef” or “administrator”.<br />
49
<strong>AirData</strong> <strong>54</strong> <strong>Plus</strong> <strong>S2</strong> <strong>USB</strong> User Manual<br />
3.2.1.2 Edit a profile<br />
Selecting an exiting profile then clicking the “Edit” button on Profile Page brings up the<br />
profile setting sheet filled with the profile information for user modification.<br />
3.2.1.3 Delete a profile<br />
You can delete a profile by selecting an existing profile then clicking the “Delete” button on<br />
Profile Page.<br />
50
<strong>AirData</strong> <strong>54</strong> <strong>Plus</strong> <strong>S2</strong> <strong>USB</strong> User Manual<br />
3.2.1.4 Activate a profile<br />
Select an existing profile then click the “Active” button on Profile Page to activate the<br />
profile.<br />
3.2.2 Link Status<br />
In this section, you can immediately monitor the current connected link status, such as Link<br />
Speed, Throughput, Link Quality, Signal Strength, Noise Level …etc.<br />
51
<strong>AirData</strong> <strong>54</strong> <strong>Plus</strong> <strong>S2</strong> <strong>USB</strong> User Manual<br />
Status: Current connection status. If no connection, then Disconnected will appear.<br />
Otherwise, the SSID and BSSID will be shown here.<br />
Extra Info: Display the link status and current channel in use.<br />
Channel: Display the number of the radio channel and the frequency used for the<br />
networking.<br />
Link Speed (Mbps): Display the transmission and reception rate of the network. The<br />
maximum transmission rate is <strong>54</strong>Mbp.<br />
Throughput (Kbits/sec): Display transmits and receives throughout in K bits/sec.<br />
Link Quality: Display connection quality based on signal strength and TX/RX packet error<br />
rate.<br />
dBm: If you want to know the signal strength in dBm’s, select the check box.<br />
Signal Strength: Receive signal strength, user can choose to display in percentage or<br />
dBm format.<br />
Signal Strength2: Receive signal strength 2, user can choose to display in percentage or<br />
dBm format.<br />
Noise Level: Display the noise signal strength.<br />
HT: Display current HT status in use, containing BW, GI, MCS, SNR0, and SNR1 value.<br />
3.2.3 Site Survey<br />
When you open the Configuration Utility, the system will scan all the channels to find all the<br />
access points/stations within the accessible range of your adapter and automatically<br />
connect to the wireless device with the highest signal strength. From the “Site Survey”, all<br />
the nearby networks will be listed. You can change the connection to another network or<br />
add one of the networks to your own profile list.<br />
52
<strong>AirData</strong> <strong>54</strong> <strong>Plus</strong> <strong>S2</strong> <strong>USB</strong> User Manual<br />
SSID: Name of BBS or IBSS network.<br />
BSSID: MAC address of AP or randomly generated oρ IBSS.<br />
Signal: Receive signal strength of specified network.<br />
Channel: Channel in use.<br />
Encryption: Encryption algorithm used within BBS or IBSS. Valid value includes WEP, TKIP,<br />
AES, and Not Use.<br />
Authentication: Authentication mode used within the network, including Unknown, WPA-<br />
PSK, WPA2-PSK, WPA and WPA2.<br />
Network Type: Network type in use, Infrastructure or Ad-Hoc.<br />
Rescan: Issue an rescan command to wireless NIC to update information on surrounding<br />
wireless network.<br />
Re-Scanning: Clicking the re-scan button to perform the re-scanning action.<br />
Add to Profile: Add the selected AP to Profile setting. It will bring up profile page and save<br />
user’s setting to a new profile.<br />
[Connect A Network]<br />
(1) When Raconfig is executed for the first time, it will select the best AP to connect<br />
automatically.<br />
(2) If the user wants to connect to another AP, the user can double-click on the intended AP<br />
to make a connection.<br />
(3) If the intended network has encryption other than “Not Use”, Raconfig will bring up the<br />
security page and let user input the appropriate information to make the connection.<br />
This icon indicates that the changes have been made.<br />
Example 1: Open and Non-Encrypted<br />
Step 1 – Choose “Open” authentication type<br />
Step 2 – Choose “None” encryption type<br />
53
<strong>AirData</strong> <strong>54</strong> <strong>Plus</strong> <strong>S2</strong> <strong>USB</strong> User Manual<br />
Step 3 – After the profile is saved, click “Activate” button on Profile Page to activate<br />
the profile.<br />
Example 2: WEP-Encrypted<br />
Step 1 – Choose “Open” or “Shared” authentication type<br />
Step 2 – Choose “WEP” encryption type<br />
Step 3 –Enter the WEP KEY<br />
Step 4 –After the profile is saved, click the “Activate” button on Profile Page to<br />
<strong>54</strong>
<strong>AirData</strong> <strong>54</strong> <strong>Plus</strong> <strong>S2</strong> <strong>USB</strong> User Manual<br />
activate the profile.<br />
Example 3: WPA-PSK/WPA2-PSK<br />
Step 1 – Choose “WPA-PSK” or “WPA2-PSK” authentication type<br />
Step 2 – Choose “TKIP” or “AES” encryption type<br />
Step 3 –Enter the pre-shared KEY<br />
Step 4 –After the profile is saved, click the “Activate” button on Profile Page to<br />
activate the profile.<br />
55
<strong>AirData</strong> <strong>54</strong> <strong>Plus</strong> <strong>S2</strong> <strong>USB</strong> User Manual<br />
Example 4:WPA/WPA2<br />
Step 1 – Choose “WPA” or “WPA2” authentication type<br />
Step 2 – Choose “TKIP” or “AES” encryption type<br />
Step 3 –After the profile is saved, click the “Activate” button on Profile Page to<br />
activate the profile.<br />
56
<strong>AirData</strong> <strong>54</strong> <strong>Plus</strong> <strong>S2</strong> <strong>USB</strong> User Manual<br />
Step 4 –The Windows profile setting dialog is popped-up for user to modify.<br />
57
<strong>AirData</strong> <strong>54</strong> <strong>Plus</strong> <strong>S2</strong> <strong>USB</strong> User Manual<br />
3.2.4 Statistics<br />
The statistics page displays the detail counter information based on 802.11 MIB counters.<br />
This page translates the MIB counters into a format easier for the user to understand. You<br />
may reset the counters to Zero by clicking “Reset Counter”.<br />
[Transmit Statistics]<br />
Frames Transmitted Successfully: Frames successfully sent<br />
Frames Transmitted Successfully After Retry: Frames sent successfully with retry.<br />
Frames Fail to Receive ACK After All Retries: Frames failed transmit after hitting retry limit.<br />
RTS Frames Successfully Receive CTS: Successfully receive CTS after sending RTS<br />
frames.<br />
RTS Frames Fail To Receive CTS: Failed to receive CTS after sending RTS frames.<br />
[Receive Statistics]<br />
Frames Received Successfully: Frames received successfully.<br />
Frames Received with CRC Error: Frames received with CRC error.<br />
Frames Dropped Due to Out-of-Resource: Frames dropped due to resource issue.<br />
Duplicate Frames Received: Duplicate received frames.<br />
58
<strong>AirData</strong> <strong>54</strong> <strong>Plus</strong> <strong>S2</strong> <strong>USB</strong> User Manual<br />
3.2.5 WPS Configuration<br />
The primary goal of Wi-Fi Protected Setup (Wi-Fi Simple Configuration) is to simplify the<br />
security setup and management of Wi-Fi Networks.<br />
WPS Associate IE: If the “WPS Associate IE” option is checked, station will send the<br />
association request with WPS IE during WPS setup.<br />
WPS Probe IE: If the “WPS Probe IE” option is checked, station will send the probe request<br />
with WPS IE during WPS setup.<br />
[Display WPS capable AP information]<br />
The WPS capable AP information is listed in the upper frame, and the display AP’s characters<br />
are SSID, BSSID, current operating channel, device password ID, authentication type, and<br />
encryption type.<br />
Re-Scanning: Clicking “re-scan” button performs the re-scanning action.<br />
WPS AP Information: Clicking the WPS information” button brings up the WPS capable AP<br />
information dialog.<br />
Authentication Type: there are three types of supported authentication modes, and those<br />
are Open, Shared, WPA-PSK and WPA modes.<br />
59
<strong>AirData</strong> <strong>54</strong> <strong>Plus</strong> <strong>S2</strong> <strong>USB</strong> User Manual<br />
Encryption Type: For Open & Shared authentication modes, the available encryption types<br />
are None and WEP. For WPA, WPA2, WPA-PSK and WPA2-PSK authentication modes, the<br />
available encryption types are TKIP and AES.<br />
Config Methods: This attribute contains the configuration methods supported and enabled by<br />
the selected Registrar.<br />
Device Password ID: Device Password ID indicates the method or identifies the specific<br />
password that the selected Registrar intends to use.<br />
Selected Registrar: Selected Registrar indicates if the user has recently activated a<br />
Registrar to add an Enrollee.<br />
State: This attribute is used to indicate the current configuration state. This attribute is either<br />
“Un-Configured” or “Configured”.<br />
Version: This attribute is the specified WPS version.<br />
AP Setup Locked: AP Setup Locked indicates if AP has entered a setup locked state.<br />
UUID-E: UUID-E is the universally unique identifier (UUID) generated by the Enrollee.<br />
RF-Bands: RF Bands indicates the available RF bands.<br />
[Configure WPS Profiles]<br />
The user can configure WPS profile with either PIN method or PBC method.<br />
PIN Method:<br />
Step 1 � The Registrar enters the pin code generated by station.<br />
Step 2 � Click the “PIN” button.<br />
PBC Method:<br />
Step 1 � Click the “PBC” button within 2 second while the Registrar clicks the<br />
button.<br />
[Manage WPS Profiles]<br />
The Received WPS profiles are listed in the lower frame, and the listed WPS profile attributes<br />
are SSID, MAC address, authentication type, and encryption type.<br />
WPS profile detail information: Selecting a profile then clicking the “Detail” button brings up<br />
the WPS profile detail information dialog.<br />
Connect with WPS Profile: Clicking the “Connect” button will connect to AP with the select<br />
WPS profile.<br />
Rotate WPS profile: If there are more than two WPS profiles, clicking the “Rotate” button will<br />
rotate to next profile and connect to AP with this profile. If the connection can’t be established,<br />
the station will perform the WPS profile rotation repeatedly.<br />
Disconnect from WPS AP: Clicking the “Disconnect” button will stop the WPS connection.<br />
Delete WPS profile: Clicking the “Delete” button will delete the selected WPS profile.<br />
60
<strong>AirData</strong> <strong>54</strong> <strong>Plus</strong> <strong>S2</strong> <strong>USB</strong> User Manual<br />
3.2.6 QoS<br />
The QoS Page of RaConfig. It involves “WMM Enable”, “WMM – Power Save Enable” and<br />
“DLS setup Enable”.<br />
Configure to enable Wi-Fi Multi-Media<br />
If you want to use “WMM – Power Save” or “Direct Link”, you must enable WMM. The<br />
setting method of enabling WMM is indicated below:<br />
Step1: Click “WMM Enable”<br />
Step2: Click “Apply”.<br />
61
<strong>AirData</strong> <strong>54</strong> <strong>Plus</strong> <strong>S2</strong> <strong>USB</strong> User Manual<br />
Step3: Change to “Site Survey Page”. Add an AP that supports WMM features to a<br />
Profile. The result is illustrated in the following figure in the Profile page.<br />
Enable WMM – Power Save<br />
Step1: Click “WMM – Power Save Enable”. And Click “Setting…” button.<br />
62
<strong>AirData</strong> <strong>54</strong> <strong>Plus</strong> <strong>S2</strong> <strong>USB</strong> User Manual<br />
Step2: After clicking the “Setting…” button, the “Power Save Setting” dialog will appear.<br />
Please select which ACs you want to enable and click the “Apply” button. The setting of<br />
enabling WMM – Power Save is successful.<br />
Enable DLS (Direct Link Setup)<br />
Step1: Click “Direct Link Setup Enable” and Click the “Apply” button<br />
63
<strong>AirData</strong> <strong>54</strong> <strong>Plus</strong> <strong>S2</strong> <strong>USB</strong> User Manual<br />
Step2: Change to “Site Survey Page” and add an AP that supports DLS features to<br />
a Profile. The result is illustrated in the following figure in the Profile page<br />
The Setting of the DLS:<br />
Fill in the blanks of Direct Link with MAC Address of STA. The STA must conform to two<br />
64
<strong>AirData</strong> <strong>54</strong> <strong>Plus</strong> <strong>S2</strong> <strong>USB</strong> User Manual<br />
conditions as follows:<br />
Step1: Connect with the same AP that supports DLS features.<br />
Step2: Have to enable DLS.<br />
Timeout Value represents that it disconnects automatically after some seconds. The value is<br />
an integer with values between 0~65535. It represents that it always is connected when the<br />
value is zero. The default value of Timeout Value is 60 seconds<br />
65
<strong>AirData</strong> <strong>54</strong> <strong>Plus</strong> <strong>S2</strong> <strong>USB</strong> User Manual<br />
Click “Apply” button. The result is illustrated in the following figure.<br />
Describe “DLS Status” as follow:<br />
As shown in the figure above, after successfully configuring the DLS, the MAC address of the<br />
device connected and the Timeout Value of setting in “DLS Status” will be shown. In the<br />
“DLS Status” of the connected device, the MAC address of the Airdata Wireless <strong>USB</strong> adapter<br />
and the Timeout Value setting will be shown.<br />
Display the values of “DLS Status” to “Direct Link Setup” as follows:<br />
Step1: In “DLS Status”, select a direct link STA that you want to show it’s values in “Direct<br />
Link Setup”.<br />
66
<strong>AirData</strong> <strong>54</strong> <strong>Plus</strong> <strong>S2</strong> <strong>USB</strong> User Manual<br />
Step2: Double click and the result is illustrated in the following figure.<br />
Disconnect Direct Link Setup as follows:<br />
Step1: Select a direct link STA.<br />
67
<strong>AirData</strong> <strong>54</strong> <strong>Plus</strong> <strong>S2</strong> <strong>USB</strong> User Manual<br />
Step2: Click “Tear Down” button. The result is illustrated in the following figure.<br />
3.2.7 About<br />
In the “About” tab, you can click the hyperlink to connect the website for the information of<br />
the wireless chipset vendor and review basic information about the Utility such as the<br />
RaConfig Version, Driver Version, EEPROM Version, IP Address, Sub Mask, and Default<br />
Gateway.<br />
3.2.8 How to Manage Windows Profile<br />
Windows profile manager can be reached via connection icon on the task bar or control<br />
68
<strong>AirData</strong> <strong>54</strong> <strong>Plus</strong> <strong>S2</strong> <strong>USB</strong> User Manual<br />
panel.<br />
[via Network icon]<br />
Step 1: Right-click connection icon on the task bar, then click “Network and Sharing Center”<br />
Step 2: Select “Manage wireless networks”<br />
Step 3: Right-click the mouse to bring up the profile manage menu.<br />
69
<strong>AirData</strong> <strong>54</strong> <strong>Plus</strong> <strong>S2</strong> <strong>USB</strong> User Manual<br />
[via Control Panel]<br />
Step 1: Select “Control Panel” on start menu.<br />
70
<strong>AirData</strong> <strong>54</strong> <strong>Plus</strong> <strong>S2</strong> <strong>USB</strong> User Manual<br />
Step 2: Double-click “Network and Sharing Center” icon.<br />
Step 3: Select “Manage Wireless network”.<br />
71
<strong>AirData</strong> <strong>54</strong> <strong>Plus</strong> <strong>S2</strong> <strong>USB</strong> User Manual<br />
Step 4: Right-click the mouse to bring up the profile managing menu.<br />
72
<strong>AirData</strong> <strong>54</strong> <strong>Plus</strong> <strong>S2</strong> <strong>USB</strong> User Manual<br />
4. Glossary<br />
802.1x: The IEEE 802.1x is a standard for user authentication on networks.<br />
Access Point: A hardware device or a computer's software that seamlessly connects wired<br />
and wireless networks.<br />
Ad-Hoc: An independent wireless LAN network formed by a group of computers equipped<br />
with wireless network adapters.<br />
ADSL: Asymmetric Digital Subscriber Line is a new technology that allows more data to be<br />
sent over existing copper telephone lines. ADSL supports data rates from 1.5 to 8 Mbps<br />
downstream and from 16 to 640 Kbps upstream.<br />
ASCII: American Standard Code for Information Interchange is a code for representing<br />
characters as numbers. Each letter is represented as a number from 0 to 127. ASCII was<br />
originally developed for communications and uses only seven bits per character. Since<br />
computers use 8-bit byte (256 character combinations) and ASCII uses only the first 128 (0-<br />
127), the second set of 128 characters (128-255) are technically not ASCII, but are typically<br />
used for different language and math symbols representation.<br />
Authentication: The process of identifying a network client usually based on a username and<br />
password.<br />
Beacon: A beacon is a packet broadcasted by the Access Point / Router in order to keep the<br />
network synchronized.<br />
CCX: The Cisco Compatible eXtensions Program for WLAN devices, is a program that<br />
provides compatibility testing for compliance with proprietary Cisco wireless features.<br />
Channel: A channel is a separate path through which signals can flow.<br />
DHCP: Dynamic Host Configuration Protocol is a protocol that automatically assigns dynamic<br />
IP addresses to devices on a network.<br />
DSSS: Direct Sequence Spread Spectrum is a transmission technology where a data signal<br />
is combined with a higher data rate bit sequence. The additional bits increase the signal's<br />
resistance to interference.<br />
73
<strong>AirData</strong> <strong>54</strong> <strong>Plus</strong> <strong>S2</strong> <strong>USB</strong> User Manual<br />
EAP: Extensive Authentication Protocol is a framework for extending authentication<br />
techniques in PPP (Point-to-Point Protocol) a protocol that is commonly used for dial-up<br />
connections. EAP opens up the possibilities to use a range of new authentication protocols,<br />
including token cards, one-time passwords etc.<br />
Encryption: The modification of data using a secret code. Encryption is an effective way to<br />
achieve data security.<br />
EEPROM: Electronically Erasable Programmable Read-Only Memory, a non-volatile<br />
storage chip used to store small amounts of volatile (configuration) data.<br />
Ethernet: A local-area network (LAN) architecture developed by Xerox Corporation in<br />
cooperation with DEC and Intel in 1976. The most common Ethernet systems are called<br />
10BASE-T and provide transmission speeds up to 10 Mbps. Fast Ethernet (100BASE-T)<br />
provides transmission speeds up to 100 megabits per second. Gigabit and 10-Gigabit<br />
Ethernet provide even higher transmission speeds of 1 gigabit per second and 10 gigabits per<br />
second respectively.<br />
Fragmentation: When the size of a transmitted packet exceeds a certain limit allowed by the<br />
network medium it is broken into several segments. The procedure is called fragmentation.<br />
Low fragmentation thresholds result in smaller frames and can tackle with packet collision<br />
problems due to network traffic. Setting the threshold too low can lead to, reducing throughput<br />
due to the additional headers applied to each. High fragmentation threshold has the opposite<br />
effect.<br />
Gateway: A device that interconnects networks.<br />
HEX: Hexadecimal is the base-16 number system.<br />
IBSS: Independent Basic Service Set, also known as an Ad-Hoc network.<br />
IEEE: Institute of Electrical and Electronics Engineers. The IEEE is an organization that is<br />
best known for developing standards for the computer and electronics industry.<br />
Infrastructure: A Wireless Infrastructure network configuration is essentially a WLAN that<br />
incorporates a Wireless Access Point / Router.<br />
74
<strong>AirData</strong> <strong>54</strong> <strong>Plus</strong> <strong>S2</strong> <strong>USB</strong> User Manual<br />
ISM Band: Industrial, Scientific and Medical Band is the 2.4 – 2.483 GHz frequency band.<br />
LED: Light Emitting Diode, an electronic device that lights up when electricity is passed<br />
through it.<br />
MAC Address: Media Access Control Address is a unique HEX number assigned by the<br />
manufacturer to any Ethernet networking device.<br />
Node: A network junction or connection point, typically an Access Point / Router.<br />
OFDM: Orthogonal Frequency Division Multiplexing is a modulation scheme that works by<br />
dividing the communication channel into a number of sub-channels that are spaced apart at<br />
precise frequencies. This spacing provides the “orthogonality” in this technique which allows<br />
the transmitter and the receiver to communicate using a “dedicated” sub-channel. The<br />
benefits of OFDM are high spectral efficiency and resiliency to interference.<br />
Open Authentication: Open System authentication is a null authentication algorithm. Any<br />
station that requests authentication receives it. If the key that the station is using is not<br />
correct, then further communication is not possible<br />
Packet: A set of data routed between an origin and a destination in a network.<br />
Preamble Type: A preamble is a signal used in network communications to synchronize the<br />
transmission timing between two or more systems.<br />
RADIUS: Remote Authentication Dial-In User Service is an authentication and accounting<br />
system used by many Internet Service Providers (ISPs). When you dial in to the ISP you<br />
must enter your username and password. This information is passed to a RADIUS server,<br />
which checks that the information is correct, and then authorizes access to the ISP system.<br />
RTS: Request To Send is a signal sent from the transmitting station to the receiving station<br />
requesting permission to transmit.<br />
Shared Key Authentication: When Shared Key authentication is enabled, the Access Point /<br />
Router sends a packet to the client. The client uses a secret key in order to encode the<br />
packet and retransmits the encoded information back to the Access Point / Router. If the<br />
packet is correctly encoded then the client is authenticated.<br />
75
<strong>AirData</strong> <strong>54</strong> <strong>Plus</strong> <strong>S2</strong> <strong>USB</strong> User Manual<br />
SSID: Service Set Identifier is a unique name shared among all clients and nodes in a<br />
wireless network. The SSID must be identical for all clients and nodes within a wireless<br />
network.<br />
Subnet Mask: The method used for splitting IP networks into a series of sub-groups, or<br />
subnets.<br />
TKIP: Temporal Key Integrity Protocol. The TKIP works with a RADIUS server and changes<br />
the network keys every 10.000 packets, ensuring greater security.<br />
TLS: Transport Layer Security is a protocol that guarantees privacy and data integrity<br />
between client / server applications communicating over the Internet. It is application protocolindependent,<br />
allowing higher-level protocols to be setup on top of it transparently.<br />
Throughput: The amount of data transferred from one place to another or processed in a<br />
specified amount of time.<br />
WEP: Wired Equivalent Privacy is an encryption scheme that is used in wireless data<br />
communication and prevents stations that do not have the correct WEP key from linking to an<br />
Access Point / Router.<br />
WPA: Wi-Fi Protected Access is a standard designed to improve the WEP security feature<br />
on WLANs. It incorporates TKIP and EAP.<br />
WPA-PSK: Wi-Fi Protected Access Pre Shared Key is a variation of the WPA standard that is<br />
designed for small office – home use. It incorporates a Pre Shared Key, called passphrase to<br />
prevent unwanted stations from linking to an Access Point / Router.<br />
AES : AES (Advanced Encryption Standard), a chip-based security, has been developed to<br />
ensure the highest degree of security and authenticity for digital information, wherever and<br />
however communicated or stored, while making more efficient use of hardware and/or<br />
software than previous encryption standards. It is also included in IEEE 802.11i standard.<br />
Compare with AES, TKIP is a temporary protocol for replacing WEP security until<br />
manufacturers implement AES at the hardware level.<br />
76
<strong>AirData</strong> <strong>54</strong> <strong>Plus</strong> <strong>S2</strong> <strong>USB</strong> User Manual<br />
5. Technical Support<br />
For technical information and support please contact us:<br />
Web Site: www.crypto.gr<br />
E-mail: support@crypto.gr<br />
Disposal of old electrical and electronic equipment<br />
If you see this symbol on the product or on its packaging, you should hand the product over<br />
to the applicable collection point for the recycling of electrical and electronic equipment. Do<br />
not throw it away with household wastes.<br />
The improper disposal of these products may have negative consequences for the<br />
environment and human health.<br />
For more information about the recycling of this product, please contact your local city<br />
office, your household waste disposal service or the shop where you purchased it.<br />
77