Art and Design - Madame Tussauds
Art and Design - Madame Tussauds
Art and Design - Madame Tussauds

You also want an ePaper? Increase the reach of your titles
YUMPU automatically turns print PDFs into web optimized ePapers that Google loves.
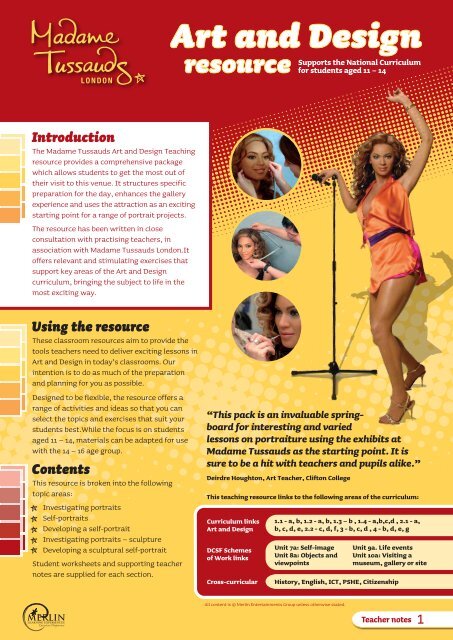
Introduction<br />
The <strong>Madame</strong> <strong>Tussauds</strong> <strong>Art</strong> <strong>and</strong> <strong>Design</strong> Teaching<br />
resource provides a comprehensive package<br />
which allows students to get the most out of<br />
their visit to this venue. It structures specific<br />
preparation for the day, enhances the gallery<br />
experience <strong>and</strong> uses the attraction as an exciting<br />
starting point for a range of portrait projects.<br />
The resource has been written in close<br />
consultation with practising teachers, in<br />
association with <strong>Madame</strong> <strong>Tussauds</strong> London.It<br />
offers relevant <strong>and</strong> stimulating exercises that<br />
support key areas of the <strong>Art</strong> <strong>and</strong> <strong>Design</strong><br />
curriculum, bringing the subject to life in the<br />
most exciting way.<br />
Using the resource<br />
These classroom resources aim to provide the<br />
tools teachers need to deliver exciting lessons in<br />
<strong>Art</strong> <strong>and</strong> <strong>Design</strong> in today’s classrooms. Our<br />
intention is to do as much of the preparation<br />
<strong>and</strong> planning for you as possible.<br />
<strong>Design</strong>ed to be flexible, the resource offers a<br />
range of activities <strong>and</strong> ideas so that you can<br />
select the topics <strong>and</strong> exercises that suit your<br />
students best.While the focus is on students<br />
aged 11 – 14, materials can be adapted for use<br />
with the 14 – 16 age group.<br />
Contents<br />
This resource is broken into the following<br />
topic areas:<br />
Investigating portraits<br />
Self-portraits<br />
Developing a self-portrait<br />
Investigating portraits – sculpture<br />
Developing a sculptural self-portrait<br />
Student worksheets <strong>and</strong> supporting teacher<br />
notes are supplied for each section.<br />
<strong>Art</strong> <strong>and</strong> <strong>Design</strong><br />
resource<br />
Supports the National Curriculum<br />
for students aged 11 – 14<br />
“This pack is an invaluable springboard<br />
for interesting <strong>and</strong> varied<br />
lessons on portraiture using the exhibits at<br />
<strong>Madame</strong> <strong>Tussauds</strong> as the starting point. It is<br />
sure to be a hit with teachers <strong>and</strong> pupils alike.”<br />
Deirdre Houghton, <strong>Art</strong> Teacher, Clifton College<br />
This teaching resource links to the following areas of the curriculum:<br />
Curriculum links<br />
<strong>Art</strong> <strong>and</strong> <strong>Design</strong><br />
DCSF Schemes<br />
of Work links<br />
Cross-curricular<br />
1.1 - a, b, 1.2 - a, b, 1.3 – b , 1.4 - a,b,c,d , 2.1 - a,<br />
b, c, d, e, 2.2 - c, d, f, 3 - b, c, d , 4 - b, d, e, g<br />
Unit 7a: Self-image<br />
Unit 8a: Objects <strong>and</strong><br />
viewpoints<br />
All content is © Merlin Entertainments Group unless otherwise stated.<br />
Unit 9a. Life events<br />
Unit 10a: Visiting a<br />
museum, gallery or site<br />
History, English, ICT, PSHE, Citizenship<br />
Teacher notes 1
<strong>Art</strong> <strong>and</strong> <strong>Design</strong><br />
resource<br />
Investigating portraits<br />
Learning objectives<br />
Students should learn:<br />
to analyse the work of other artists <strong>and</strong> to use their<br />
observations to inform their own work.<br />
to discuss <strong>and</strong> question critically a range of visual <strong>and</strong> other<br />
information to help them develop ideas for independent work<br />
to produce portraits from photographs <strong>and</strong> real life.<br />
Resources required:<br />
Student Worksheets 1 - 3<br />
Sketchbooks or paper<br />
Section notes on worksheets<br />
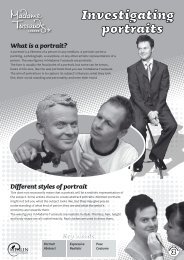
Worksheets 1 - 3 ask students to explore the definition of a portrait <strong>and</strong> to<br />
consider how <strong>Madame</strong> <strong>Tussauds</strong> wax figures can be categorised as<br />
portraits. Students look at different styles of portrait from realistic to<br />
abstract, as well as pose <strong>and</strong> costume.<br />
The importance of close observation in portraiture is emphasised<br />
throughout <strong>and</strong> students begin observing subjects <strong>and</strong> making sketched<br />
studies of their own.<br />
Discussion points<br />
What kind of people make<br />
interesting subjects for portraits?<br />
(Celebrities are a good example.)<br />
Extension activities<br />
The celebrity wax figures in <strong>Madame</strong> <strong>Tussauds</strong><br />
would be excellent primary source material for<br />
creating Warhol inspired work. Students could<br />
take photographs of the Marilyn Monroe /<br />
Elizabeth Taylor wax figures for example, then<br />
use photo software to work with colour to<br />
generate a pop art effect. Alternatively they<br />
could print out their photos in black <strong>and</strong> white<br />
<strong>and</strong> paint over them with bright colours.<br />
Drawing media (pencils, pens or charcoal)<br />
Clip-boards (extension activity only)<br />
Why do you think some artists<br />
choose the same subjects for<br />
their portraits repeatedly?<br />
Supports the National Curriculum<br />
for students aged 11 – 14<br />
Ask students to make sketches of their favourite<br />
celebrities on the day of their visit to <strong>Madame</strong><br />
<strong>Tussauds</strong>. Give them the following guidance <strong>and</strong><br />
a suggested task time of 20 minutes:<br />
a bc<br />
d<br />
How does the way we use<br />
portraits today differ from the<br />
time before photography existed?<br />
Concentrate on the torso (head <strong>and</strong> shoulders).<br />
Draw the outline of the torso as if it were a silhouette.<br />
Sketch in the features, being very careful to place<br />
them correctly.<br />
Shade <strong>and</strong> add detail.<br />
Teacher notes 2
Self-portraits<br />
<strong>Art</strong> <strong>and</strong> <strong>Design</strong><br />
resource<br />
Learning objectives<br />
Students should learn:<br />
to analyse the work of other artists <strong>and</strong> to use their<br />
observations to inform their own work<br />
to apply <strong>and</strong> extend their experience of a range of materials,<br />
tools <strong>and</strong> processes<br />
to explore composition, style <strong>and</strong> technique.<br />
Resources required:<br />
Worksheet 4<br />
Access to internet so that students can research a favourite<br />
self-portrait or reference books containing colour art prints.<br />
Section notes on worksheets<br />
Through discussion of famous artists who have produced self-portraits<br />
<strong>and</strong> close analysis of two famous paintings which are shown on the<br />
worksheet, students learn how to extract meaning beyond the literal<br />
from works of art, <strong>and</strong> exp<strong>and</strong> their underst<strong>and</strong>ing of content, form,<br />
material, technique <strong>and</strong> process.<br />
Discussion points<br />
Why have so many artists throughout time been interested in<br />
producing self-portraits?<br />
What are the challenges of representing yourself through art?<br />
What aspects of ourselves should we look to represent in a<br />
self-portrait? Should we aim to portray our thoughts, feelings <strong>and</strong><br />
experiences as well as our appearance?<br />
Supports the National Curriculum<br />
for students aged 11 – 14<br />
Extension activities<br />
Brief students to create a ‘spidergram of me’, thinking about what aspects of their<br />
lives best represent them to inform their ongoing work on self-portraits.<br />
As a homework activity, ask students to create a personal identity box from card,<br />
using nets. Alternatively they can use an old shoe-box or similar. In their box they<br />
should place items that show images of, or signify their interests, values <strong>and</strong><br />
life-experiences. They can decorate the inside <strong>and</strong> outside of the box accordingly as<br />
well. You might like to bring in some examples of the work of Joseph Cornell for<br />
them to look at for inspiration.<br />
Teacher notes 3
<strong>Art</strong> <strong>and</strong> <strong>Design</strong><br />
resource<br />
Developing a self-portrait<br />
Learning objectives<br />
Students should learn:<br />
to record <strong>and</strong> analyse first h<strong>and</strong> observations<br />
to apply <strong>and</strong> extend their experience of a range of materials,<br />
tools <strong>and</strong> processes<br />
to explore composition, style <strong>and</strong> technique<br />
to exp<strong>and</strong> their underst<strong>and</strong>ing of style through analysis of other<br />
artists’ work.<br />
Resources required:<br />
Worksheets 5 <strong>and</strong> 6<br />
Paper or sketchbooks<br />
Mirrors<br />
Section notes on worksheets<br />
Drawing media<br />
(pencils, pens or charcoal)<br />
Paints if desired<br />
Supports the National Curriculum<br />
for students aged 11 – 14<br />
Students make <strong>and</strong> record a selection of observational studies to inform their work.<br />
Following this, students work with paint or drawing media to create an expressive image of<br />
themselves that conveys mood <strong>and</strong> emotion. Emphasis is on techniques <strong>and</strong> processes,<br />
including the use of line, tone, colour, marks <strong>and</strong> texture. Some consideration is also given to the use of symbols in<br />
portraiture to convey mood, emotion <strong>and</strong> life-experience. Both worksheets encourage peer assessment of work.<br />
Discussion points<br />
How can you show your personality in a<br />
self-portrait?<br />
How could you use colour, texture or position of<br />
the face to show emotion most effectively in a<br />
self-portrait?<br />
What makes a self-portrait powerful?<br />
Do you think the materials used make any<br />
difference? What about the combining of<br />
different materials?<br />
Do you think words or an explanation would add<br />
to the portrait or does it speak for itself?<br />
Extension activities<br />
Ask students to take photocopies of their drawings <strong>and</strong> photographs (from different angles) of<br />
themselves. They should then cut <strong>and</strong> reorganise this material, combining it with other images or text<br />
to create an image of self. They could also make a personal statement <strong>and</strong> insert it into the picture.<br />
Students could work in pairs, experimenting with digital photography to create images of themselves.<br />
They may like to create a silhouette (using a strong, directional light to create the silhouette).<br />
They can then fill that silhouette in with collage items.<br />
Brief students to create a digital self-portrait using Adobe Photoshop (or a similar programme) to<br />
manipulate a digital image of themselves. They may like to look at creating a Warhol influenced piece.<br />
Teacher notes 4
<strong>Art</strong> <strong>and</strong> <strong>Design</strong><br />
resource<br />
Investigating portraits<br />
Learning objectives<br />
Students should learn:<br />
to apply <strong>and</strong> extend their experience of a<br />
range of materials<br />
to analyse <strong>and</strong> evaluate the work of others.<br />
Resources required:<br />
Worksheet 7<br />
Section notes on worksheets<br />
Students learn about the process behind the creation of <strong>Madame</strong><br />
<strong>Tussauds</strong> wax figures <strong>and</strong> begin to gather information to inform<br />
their own sculptures, including details of the materials they will use.<br />
Discussion points<br />
Suggest three materials that an artist might use to make a<br />
sculptural portrait.<br />
What tools do you think they might use to form a 3D shape from<br />
each material?<br />
What materials do the sculptors at <strong>Madame</strong> <strong>Tussauds</strong> use to make<br />
their portraits?<br />
Can you remember what is used to create the face <strong>and</strong> the eyes of<br />
the wax figures in <strong>Madame</strong> <strong>Tussauds</strong>?<br />
<strong>Madame</strong> <strong>Tussauds</strong> sculptures use real clothes <strong>and</strong> props. How does<br />
this add to the sculptures <strong>and</strong> what does it tell us about the sitters?<br />
Supports the National Curriculum<br />
for students aged 11 – 14<br />
Extension activities<br />
As a homework activity, ask students to research sculptures on the Tate Modern<br />
website www.tate.org.uk/modern They should choose their two favourite sculptures<br />
<strong>and</strong> do a sketch of each one in their sketchbooks, shading their sketches <strong>and</strong> writing<br />
two lines about the artist that made each of them.<br />
Students could also take photographs of any sculptural works that there might be in<br />
the vicinity of their home or the school <strong>and</strong> keep these for future inspiration.<br />
Teacher notes 5
<strong>Art</strong> <strong>and</strong> <strong>Design</strong><br />
resource<br />
Learning objectives<br />
Students should learn:<br />
to apply <strong>and</strong> extend their experience of a range of materials, tools <strong>and</strong> processes<br />
to record observations from photographs or first h<strong>and</strong>, using different mediums<br />
to explore style <strong>and</strong> technique in 3D.<br />
Resources required:<br />
Worksheets 8 <strong>and</strong> 9<br />
Wooden manikins (one per group)<br />
Sculpting materials (e.g. clay, papier mache, modroc, plasticine, wire)<br />
Carving <strong>and</strong> / or sculpting tools (dependent on material chosen)<br />
Paints (acrylics, poster paints or other paints that will adhere to surface of chosen materials)<br />
Section notes on worksheets<br />
Supports the National Curriculum<br />
for students aged 11 – 14<br />
Developing a sculptural self-portrait<br />
Worksheet 8 provides notes on 3D sketching using a manikin. This observation work will aid<br />
underst<strong>and</strong>ing of the importance of capturing an accurate likeness from all angles when working<br />
with sculptural self-portraits. Students then plan their sculpture carefully before starting,<br />
creating a planning sheet using suggested categories supplied.<br />
Following this preparatory work, students create a sculpture of their own. Worksheet 9 houses<br />
information on texture <strong>and</strong> moulding as well as tips on painting the sculpture after it has been<br />
completed. You may like to conclude the unit of work with a peer assessment session.<br />
Discussion points<br />
How does the use of space differ in a painted portrait compared to a sculptural portrait?<br />
Do you think it’s easier or harder to work on a 3D sculpture <strong>and</strong> why?<br />
If you were describing to a friend how you created your portrait sculpture what would you say?<br />
How would you say colour is most commonly used in portrait sculptures?<br />
How do <strong>Madame</strong> <strong>Tussauds</strong> manage to make their figures so lifelike? Did you get any tips from<br />
the attraction sculptors that may help you with your own sculpture?<br />
Extension activities<br />
Students can produce a written evaluation of their own work, assessing the<br />
strengths <strong>and</strong> weaknesses of the process they underwent as well as the end result.<br />
Ask students to create a storyboard demonstrating how they made their sculpture.<br />
They may like to create a photo storyboard of each stage of the process.<br />
Ask students to keep a diary as they work, using the end of each lesson to make key<br />
points on each task. This can be reviewed on completion of the project.<br />
Teacher notes 6