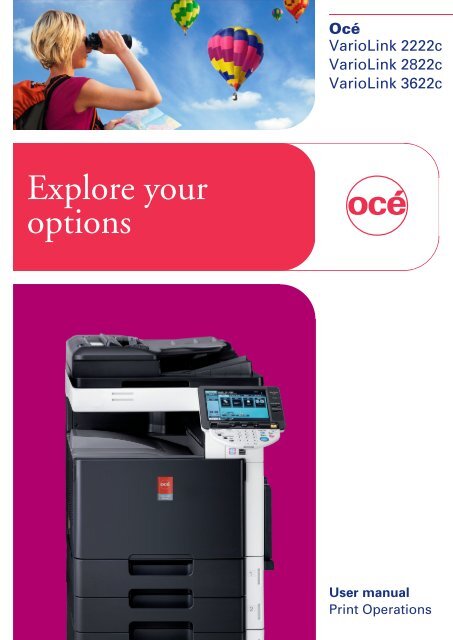
User Manual Print Operations: VarioLink (VL) 2222c, VL2822c ... - Océ
User Manual Print Operations: VarioLink (VL) 2222c, VL2822c ... - Océ
User Manual Print Operations: VarioLink (VL) 2222c, VL2822c ... - Océ

Create successful ePaper yourself
Turn your PDF publications into a flip-book with our unique Google optimized e-Paper software.
Explore your<br />
options<br />
<strong>Océ</strong><br />
<strong>VarioLink</strong> <strong>2222c</strong><br />
<strong>VarioLink</strong> 2822c<br />
<strong>VarioLink</strong> 3622c<br />
o<br />
<strong>User</strong> manual<br />
<strong>Print</strong> <strong>Operations</strong>
Thank you for selecting an <strong>Océ</strong> solution for your document<br />
production and management needs. The following information will<br />
help you get the most productive and reliable use out of your<br />
system.<br />
<strong>Océ</strong> brand supplies are designed for <strong>Océ</strong> multi-function<br />
copy/print/fax systems to ensure maximum product performance<br />
and quality. Substituting other supplies may result in inferior image<br />
quality and machine malfunction.<br />
To order supplies call the <strong>Océ</strong> Supply Line:<br />
1-800-462-6797 (US)<br />
1-866-462-4478 (CAN)<br />
01277 846 146 (UK)<br />
Should your system develop a problem that cannot be remedied by<br />
using the maintenance or troubleshooting procedures outlined in<br />
this manual, please contact <strong>Océ</strong> Technical Support by calling:<br />
1-800-243-5556 (US)<br />
1-866-462-4478 (CAN)<br />
08708 500 749 (UK)<br />
For faster service, please have your machine model and serial<br />
number available before calling.
Meter Reading Overview<br />
If your monthly <strong>Océ</strong> invoices are calculated based on your product<br />
usage. You can help ensure accurate billing by providing us with<br />
accurate meter reads every month.<br />
There are three methods to enter meter readings:<br />
1. If your equipment is networked and your organization has an<br />
SMTP mail server, you can set up the product to automatically<br />
share the meter information with <strong>Océ</strong>. This is the most popular,<br />
and least time-intensive method for you. Your service representative<br />
can configure your system to automatically e-mail monthly meter<br />
counts to <strong>Océ</strong>.<br />
2. Use the <strong>Océ</strong> “E-Z Reading” web site to enter your monthly<br />
readings. We can even set you up to receive a monthly e-mail<br />
reminder. Go to www.oceusa.com and click on Meter Reads.<br />
3. Enter your readings by phone by calling 800-945-9708.<br />
Viewing the Counters (Meter Count)<br />
For more information, see Chapter 8 of the <strong>User</strong>’s Guide - Copy <strong>Operations</strong><br />
1 Press Utility/Counter<br />
on the control panel<br />
2<br />
Press<br />
Meter Count<br />
3<br />
Record the Total and Black<br />
Counter readings and enter<br />
them on the <strong>Océ</strong><br />
“E-Z Reading” web site.<br />
(See www.oceusa.com)
<strong>Océ</strong>-Technologies B.V.<br />
Copyright<br />
©2009,<strong>Océ</strong>-Technologies B.V. Venlo, The Netherlands.<br />
All rights reserved. No part of this work may be reproduced, copied, adapted, or<br />
transmitted in any form or by any means without written permission from <strong>Océ</strong>.<br />
<strong>Océ</strong>-Technologies B.V. makes no representation or warranties with respect to the<br />
contents hereof and specifically disclaims any implied warranties of<br />
merchantability or fitness for any particular purpose.<br />
Further, <strong>Océ</strong>-Technologies B.V. reserves the right to revise this publication and to<br />
make changes from time to time in the content hereof without obligation to notify<br />
any person of such revision or changes.<br />
edition:2009-09<br />
GB
Table of contents<br />
1 Introduction<br />
1.1 Welcome .......................................................................................................................................... 1-3<br />
1.1.1 <strong>User</strong>'s guides ..................................................................................................................................... 1-3<br />
1.1.2 <strong>User</strong>'s Guide ...................................................................................................................................... 1-4<br />
1.2 Conventions used in this manual .................................................................................................. 1-5<br />
1.2.1 Symbols used in this manual ............................................................................................................. 1-5<br />
To use this machine safely................................................................................................................. 1-5<br />
Procedural instruction........................................................................................................................ 1-5<br />
Key symbols....................................................................................................................................... 1-6<br />
1.2.2 Document and paper indications....................................................................................................... 1-6<br />
Paper size .......................................................................................................................................... 1-6<br />
Paper indication ................................................................................................................................. 1-6<br />
2 Overview<br />
2.1 <strong>Print</strong>er controller ............................................................................................................................. 2-3<br />
2.1.1 Roles of the printer controller ............................................................................................................ 2-3<br />
2.1.2 Flow of printing .................................................................................................................................. 2-4<br />
2.1.3 Control panel...................................................................................................................................... 2-5<br />
2.2 Operating environment................................................................................................................... 2-7<br />
2.2.1 Connectable computers and operating system................................................................................. 2-7<br />
Windows ............................................................................................................................................ 2-7<br />
Macintosh .......................................................................................................................................... 2-7<br />
2.2.2 Interfaces used for connection .......................................................................................................... 2-8<br />
Ethernet.............................................................................................................................................. 2-8<br />
USB interface..................................................................................................................................... 2-8<br />
Connection diagram........................................................................................................................... 2-8<br />
2.3 Setup procedure ............................................................................................................................. 2-9<br />
2.3.1 For network connection ..................................................................................................................... 2-9<br />
2.3.2 For local connection ........................................................................................................................ 2-10<br />
3 Precautions for Installation<br />
3.1 Introduction ..................................................................................................................................... 3-3<br />
3.2 <strong>Print</strong>er drivers compatible with respective operating systems.................................................. 3-4<br />
3.3 Connection methods selectable in each operating system........................................................ 3-6<br />
3.3.1 Windows Vista/Server 2008............................................................................................................... 3-6<br />
3.3.2 Windows 2000/XP/Server 2003 ......................................................................................................... 3-7<br />
3.3.3 Windows NT 4.0................................................................................................................................. 3-8<br />
3.3.4 Mac OS X 10.2/10.3/10.4/10.5 .......................................................................................................... 3-8<br />
3.3.5 Mac OS 9.2 ........................................................................................................................................ 3-9<br />
3.3.6 NetWare ............................................................................................................................................. 3-9<br />
4 <strong>Manual</strong> Installation Using the Add <strong>Print</strong>er Wizard<br />
4.1 Windows Vista/Server 2008............................................................................................................ 4-3<br />
4.1.1 For network connection (LPR/Port 9100/SMB) ................................................................................. 4-3<br />
Settings for the machine.................................................................................................................... 4-3<br />
Installing the printer driver by searching for the printer using the Add <strong>Print</strong>er Wizard...................... 4-4<br />
Installing the printer driver by creating a printer port......................................................................... 4-5<br />
4.1.2 For network connection (IPP/IPPS) ................................................................................................... 4-6<br />
Settings for the machine.................................................................................................................... 4-6<br />
Installing the printer driver manually using the Add <strong>Print</strong>er Wizard ................................................... 4-6<br />
<strong>VL</strong>3622c/<strong>VL</strong>2822c/<strong>VL</strong><strong>2222c</strong> Contents-1
4.1.3 For network connection (Web service print) ...................................................................................... 4-8<br />
Settings for the machine.................................................................................................................... 4-8<br />
Installing the printer from the Network window ................................................................................. 4-8<br />
Installing the printer driver by specifying the IP address using the Add <strong>Print</strong>er Wizard.................... 4-9<br />
4.1.4 For local connection ........................................................................................................................ 4-10<br />
4.2 Windows XP/Server 2003 ............................................................................................................. 4-11<br />
4.2.1 For network connection (LPR/Port9100) ......................................................................................... 4-11<br />
Settings for the machine.................................................................................................................. 4-11<br />
Installing the printer driver manually using the Add <strong>Print</strong>er Wizard ................................................. 4-11<br />
4.2.2 For network connection (SMB) ........................................................................................................ 4-13<br />
Settings for the machine.................................................................................................................. 4-13<br />
Installing the printer driver by specifying the printer using the Add <strong>Print</strong>er Wizard......................... 4-13<br />
4.2.3 For network connection (IPP/IPPS) ................................................................................................. 4-14<br />
Settings for the machine.................................................................................................................. 4-14<br />
Installing the printer driver manually using the Add <strong>Print</strong>er Wizard ................................................. 4-15<br />
4.2.4 For local connection ........................................................................................................................ 4-16<br />
4.3 Windows 2000 ............................................................................................................................... 4-17<br />
4.3.1 For network connection (LPR/Port9100) ......................................................................................... 4-17<br />
Settings for the machine.................................................................................................................. 4-17<br />
Installing the printer driver manually using the Add <strong>Print</strong>er Wizard ................................................. 4-17<br />
4.3.2 For network connection (SMB) ........................................................................................................ 4-19<br />
Settings for the machine.................................................................................................................. 4-19<br />
Installing the printer driver manually using the Add <strong>Print</strong>er Wizard ................................................. 4-19<br />
4.3.3 For network connection (IPP/IPPS) ................................................................................................. 4-20<br />
Settings for the machine.................................................................................................................. 4-20<br />
Installing the printer driver manually using the Add <strong>Print</strong>er Wizard ................................................. 4-20<br />
4.3.4 For local connection ........................................................................................................................ 4-21<br />
4.4 Windows NT 4.0............................................................................................................................. 4-22<br />
4.4.1 For network connection (LPR) ......................................................................................................... 4-22<br />
Settings for the machine.................................................................................................................. 4-22<br />
Installing the printer driver manually using the Add <strong>Print</strong>er Wizard ................................................. 4-22<br />
5 Installation on Macintosh Computers<br />
5.1 Mac OS X 10.2/10.3/10.4/10.5 ........................................................................................................ 5-3<br />
5.1.1 Installing the printer driver ................................................................................................................. 5-3<br />
5.1.2 Selecting and connecting a printer (OS X 10.4/10.5)......................................................................... 5-4<br />
Configuring the Bonjour settings ....................................................................................................... 5-4<br />
Configuring the AppleTalk settings.................................................................................................... 5-5<br />
Configuring the LPR settings ............................................................................................................. 5-6<br />
Configuring the IPP settings .............................................................................................................. 5-7<br />
5.1.3 Selecting and connecting a printer (OS X 10.2/10.3)......................................................................... 5-9<br />
Configuring the Rendezvous settings................................................................................................ 5-9<br />
Configuring the AppleTalk settings.................................................................................................. 5-10<br />
Configuring the LPR settings ........................................................................................................... 5-11<br />
Configuring the IPP settings ............................................................................................................ 5-12<br />
5.2 Mac OS 9.2..................................................................................................................................... 5-13<br />
5.2.1 Installing the printer driver ............................................................................................................... 5-13<br />
5.2.2 Selecting and connecting a printer .................................................................................................. 5-13<br />
Configuring the AppleTalk settings.................................................................................................. 5-13<br />
Configuring the LPR settings ........................................................................................................... 5-14<br />
6 Installation when Using NetWare<br />
6.1 NetWare ........................................................................................................................................... 6-3<br />
6.1.1 Network Settings ............................................................................................................................... 6-3<br />
6.1.2 Configuring the Windows client ......................................................................................................... 6-3<br />
Contents-2 <strong>VL</strong>3622c/<strong>VL</strong>2822c/<strong>VL</strong><strong>2222c</strong>
7 Uninstalling the <strong>Print</strong>er Driver<br />
7.1 Windows .......................................................................................................................................... 7-3<br />
7.2 Macintosh ........................................................................................................................................ 7-5<br />
7.2.1 For Mac OS X..................................................................................................................................... 7-5<br />
7.2.2 For Mac OS 9.2.................................................................................................................................. 7-5<br />
8 <strong>Print</strong> function of PCL/PS/XPS drivers for Windows<br />
8.1 <strong>Print</strong> operations............................................................................................................................... 8-3<br />
8.2 Default settings of the printer driver ............................................................................................. 8-5<br />
8.2.1 Displaying the Properties window ..................................................................................................... 8-5<br />
8.2.2 Configure tab ..................................................................................................................................... 8-5<br />
8.2.3 Settings tab........................................................................................................................................ 8-6<br />
8.2.4 Registering the default settings ......................................................................................................... 8-7<br />
8.3 Common Setting ............................................................................................................................. 8-8<br />
8.4 Parameter details............................................................................................................................ 8-9<br />
8.4.1 My Tab ............................................................................................................................................... 8-9<br />
Edit [My Tab] .................................................................................................................................... 8-10<br />
8.4.2 [Basic] tab ........................................................................................................................................ 8-11<br />
8.4.3 [Layout] tab ...................................................................................................................................... 8-13<br />
8.4.4 [Finish] tab........................................................................................................................................ 8-14<br />
8.4.5 [Cover Mode] tab ............................................................................................................................. 8-15<br />
8.4.6 [Stamp/Composition] tab................................................................................................................. 8-16<br />
Editing watermark ............................................................................................................................ 8-18<br />
Editing overlay.................................................................................................................................. 8-19<br />
Editing the copy security ................................................................................................................. 8-20<br />
Editing date/time and page number ................................................................................................ 8-22<br />
8.4.7 [Quality] tab...................................................................................................................................... 8-22<br />
8.4.8 [Other] tab ........................................................................................................................................ 8-25<br />
9 <strong>Print</strong> Functions of Mac OS X<br />
9.1 <strong>Print</strong> operations............................................................................................................................... 9-3<br />
9.2 Default settings of the printer driver ............................................................................................. 9-5<br />
9.2.1 Option settings................................................................................................................................... 9-5<br />
9.2.2 Registering the default settings ......................................................................................................... 9-6<br />
9.3 Common Setting ............................................................................................................................. 9-7<br />
9.4 Adding a custom size ..................................................................................................................... 9-9<br />
9.5 Parameter details.......................................................................................................................... 9-10<br />
9.5.1 [Page Attributes] .............................................................................................................................. 9-10<br />
9.5.2 [Copies & Pages].............................................................................................................................. 9-11<br />
9.5.3 [Output Method]............................................................................................................................... 9-11<br />
Checking the [Output Method] detail settings ................................................................................. 9-13<br />
9.5.4 [Layout / Finish]................................................................................................................................ 9-14<br />
9.5.5 [Paper Tray / Output Tray] ............................................................................................................... 9-16<br />
9.5.6 [Cover Mode / Transparency Interleave].......................................................................................... 9-17<br />
9.5.7 [Per Page Setting] ............................................................................................................................ 9-18<br />
Editing Per Page Setting.................................................................................................................. 9-19<br />
9.5.8 [Stamp / Composition] ..................................................................................................................... 9-19<br />
Editing the copy security ................................................................................................................. 9-20<br />
Editing Date/Time ............................................................................................................................ 9-22<br />
Editing Page Number....................................................................................................................... 9-22<br />
Editing Header/Footer...................................................................................................................... 9-23<br />
9.5.9 [Quality] ............................................................................................................................................ 9-23<br />
<strong>VL</strong>3622c/<strong>VL</strong>2822c/<strong>VL</strong><strong>2222c</strong> Contents-3
10 <strong>Print</strong> Functions of Mac OS 9.2<br />
10.1 <strong>Print</strong> operations............................................................................................................................. 10-3<br />
10.2 Default settings of the printer driver ........................................................................................... 10-4<br />
10.2.1 Option settings................................................................................................................................. 10-4<br />
10.2.2 Registering the default settings ....................................................................................................... 10-5<br />
10.3 Parameter details.......................................................................................................................... 10-6<br />
10.3.1 Page Attributes ................................................................................................................................ 10-6<br />
10.3.2 Specifying the custom page sizes ................................................................................................... 10-6<br />
10.3.3 General............................................................................................................................................. 10-7<br />
10.3.4 [Layout] (Combination) ..................................................................................................................... 10-7<br />
10.3.5 <strong>Print</strong>er specific options (Finishing Option 1 to 5)............................................................................. 10-8<br />
11 Function Details<br />
11.1 Proof <strong>Print</strong>...................................................................................................................................... 11-3<br />
11.1.1 Setting the printer driver .................................................................................................................. 11-3<br />
For Windows.................................................................................................................................... 11-3<br />
For Mac OS X................................................................................................................................... 11-4<br />
11.1.2 Recalling a job from the control panel ............................................................................................. 11-4<br />
11.2 Secure <strong>Print</strong> ................................................................................................................................... 11-6<br />
11.2.1 Setting the printer driver .................................................................................................................. 11-6<br />
For Windows.................................................................................................................................... 11-6<br />
For Mac OS X................................................................................................................................... 11-7<br />
11.2.2 Recalling a job from the control panel ............................................................................................. 11-8<br />
When the [Confidential Document Access Method] is set to [Mode 1] ........................................... 11-9<br />
When the [Confidential Document Access Method] is set to [Mode 2] ......................................... 11-11<br />
11.3 Save in <strong>User</strong> Box ......................................................................................................................... 11-13<br />
11.3.1 Setting the printer driver ................................................................................................................ 11-13<br />
For Windows.................................................................................................................................. 11-13<br />
For Mac OS X................................................................................................................................. 11-14<br />
11.3.2 Recalling a job from the control panel ........................................................................................... 11-15<br />
11.4 <strong>Print</strong>ing a document on the machine for which user authentication is specified ................ 11-17<br />
For Windows.................................................................................................................................. 11-17<br />
For Mac OS X................................................................................................................................. 11-19<br />
11.5 <strong>Print</strong>ing a document on the machine for which Account Track function is enabled ........... 11-20<br />
11.5.1 Setting the printer driver ................................................................................................................ 11-20<br />
For Windows.................................................................................................................................. 11-20<br />
For Mac OS X................................................................................................................................. 11-21<br />
11.6 ID & <strong>Print</strong>...................................................................................................................................... 11-23<br />
11.6.1 Setting the printer driver ................................................................................................................ 11-23<br />
For Windows.................................................................................................................................. 11-23<br />
For Mac OS X................................................................................................................................. 11-25<br />
11.6.2 Recalling a job from the control panel ........................................................................................... 11-26<br />
Entering the user information and printing..................................................................................... 11-26<br />
<strong>Print</strong>ing a document by specifying it from the [ID & <strong>Print</strong> <strong>User</strong> Box] ............................................. 11-27<br />
Logging in using the authentication unit........................................................................................ 11-29<br />
11.7 <strong>Print</strong>ing from a cellular phone or PDA ...................................................................................... 11-30<br />
11.7.1 Operating environment .................................................................................................................. 11-30<br />
11.7.2 <strong>Print</strong>ing a document....................................................................................................................... 11-30<br />
11.8 Specifying the encryption passphrase by the user.................................................................. 11-33<br />
11.8.1 Settings for the machine................................................................................................................ 11-33<br />
11.8.2 Setting the printer driver ................................................................................................................ 11-35<br />
For Windows.................................................................................................................................. 11-35<br />
For Mac OS X................................................................................................................................. 11-36<br />
11.9 Specifying the ICC profile .......................................................................................................... 11-37<br />
11.9.1 Setting the printer driver ................................................................................................................ 11-37<br />
For Windows.................................................................................................................................. 11-37<br />
For Mac OS X................................................................................................................................. 11-38<br />
Contents-4 <strong>VL</strong>3622c/<strong>VL</strong>2822c/<strong>VL</strong><strong>2222c</strong>
11.10 Registering the ICC profiles in the printer driver ..................................................................... 11-39<br />
11.10.1 Setting the printer driver ................................................................................................................ 11-39<br />
For Windows .................................................................................................................................. 11-39<br />
For Mac OS X................................................................................................................................. 11-40<br />
11.11 Banner printing function............................................................................................................. 11-42<br />
11.11.1 Paper.............................................................................................................................................. 11-42<br />
Applicable paper............................................................................................................................ 11-42<br />
11.11.2 <strong>Print</strong>er drivers and supported operating systems.......................................................................... 11-42<br />
11.11.3 Configuring the printer driver ......................................................................................................... 11-42<br />
11.11.4 <strong>Print</strong>ing........................................................................................................................................... 11-43<br />
12 Settings on the Control Panel<br />
12.1 Basic operations of <strong>User</strong> Settings............................................................................................... 12-3<br />
12.1.1 Displaying the <strong>User</strong> Settings screen................................................................................................ 12-3<br />
12.2 <strong>User</strong> settings ................................................................................................................................. 12-5<br />
12.2.1 PDL Setting...................................................................................................................................... 12-5<br />
12.2.2 Number of Copies............................................................................................................................ 12-6<br />
12.2.3 Original Direction ............................................................................................................................. 12-7<br />
12.2.4 Spool <strong>Print</strong> Jobs in HDD before RIP................................................................................................ 12-8<br />
12.2.5 A4/A3LTR/LGR Auto Switch ...................................................................................................... 12-9<br />
12.2.6 Banner Sheet Setting..................................................................................................................... 12-10<br />
12.2.7 Binding Direction Adjustment ........................................................................................................ 12-11<br />
12.2.8 Line Width Adjustment................................................................................................................... 12-12<br />
12.2.9 Gray Background Text Correction................................................................................................. 12-13<br />
12.2.10 Paper Tray...................................................................................................................................... 12-14<br />
12.2.11 Paper Size...................................................................................................................................... 12-15<br />
12.2.12 2-Sided <strong>Print</strong>.................................................................................................................................. 12-16<br />
12.2.13 Binding Position............................................................................................................................. 12-17<br />
12.2.14 Staple............................................................................................................................................. 12-18<br />
12.2.15 Punch............................................................................................................................................. 12-19<br />
12.2.16 Banner Sheet Paper Tray............................................................................................................... 12-20<br />
12.2.17 Font Settings.................................................................................................................................. 12-21<br />
12.2.18 Symbol Set..................................................................................................................................... 12-22<br />
12.2.19 Font Size ........................................................................................................................................ 12-23<br />
12.2.20 Line/Page ....................................................................................................................................... 12-24<br />
12.2.21 CR/LF Mapping.............................................................................................................................. 12-25<br />
12.2.22 <strong>Print</strong> PS Errors ............................................................................................................................... 12-26<br />
12.2.23 ICC Profile Settings........................................................................................................................ 12-27<br />
12.2.24 Auto Trapping ................................................................................................................................ 12-29<br />
12.2.25 Black Overprint .............................................................................................................................. 12-30<br />
12.2.26 Verify XPS Digital Signature........................................................................................................... 12-31<br />
12.2.27 <strong>Print</strong> Reports .................................................................................................................................. 12-32<br />
12.2.28 TIFF Image Paper Setting .............................................................................................................. 12-33<br />
12.2.29 Link File Error Notification.............................................................................................................. 12-35<br />
12.2.30 Use Proxy Server ........................................................................................................................... 12-36<br />
12.2.31 <strong>Print</strong>................................................................................................................................................ 12-38<br />
12.3 Basic operations in Administrator Settings.............................................................................. 12-40<br />
12.3.1 Displaying the Administrator Settings screen................................................................................ 12-40<br />
12.4 Administrator Settings................................................................................................................ 12-42<br />
12.4.1 <strong>Print</strong>/Fax Output Setting ................................................................................................................ 12-42<br />
12.4.2 Output Tray Settings...................................................................................................................... 12-43<br />
12.4.3 Delete Secure <strong>Print</strong> Documents..................................................................................................... 12-44<br />
12.4.4 Auto Delete Secure Document ...................................................................................................... 12-45<br />
12.4.5 ID & <strong>Print</strong> Delete Time.................................................................................................................... 12-46<br />
12.4.6 ID & <strong>Print</strong> Delete after <strong>Print</strong> Setting................................................................................................ 12-47<br />
<strong>VL</strong>3622c/<strong>VL</strong>2822c/<strong>VL</strong><strong>2222c</strong> Contents-5
12.4.7 Skip Job Operation Settings.......................................................................................................... 12-48<br />
12.4.8 ID & <strong>Print</strong> Settings.......................................................................................................................... 12-49<br />
12.4.9 ID & <strong>Print</strong> Operation Settings......................................................................................................... 12-50<br />
12.4.10 <strong>Print</strong> without Authentication........................................................................................................... 12-51<br />
12.4.11 Single Color > 2 Color Output Management ................................................................................. 12-52<br />
12.4.12 I/F timeout setting .......................................................................................................................... 12-53<br />
12.4.13 <strong>Print</strong> XPS Errors ............................................................................................................................. 12-54<br />
12.4.14 Web Connection Direct <strong>Print</strong> ......................................................................................................... 12-55<br />
12.4.15 Configuring Authentication under OpenAPI Settings .................................................................... 12-56<br />
12.4.16 Configuring the cellular phone or PDA settings............................................................................. 12-57<br />
12.4.17 <strong>Print</strong> Data Capture ......................................................................................................................... 12-58<br />
12.4.18 Secure <strong>Print</strong> Only ........................................................................................................................... 12-59<br />
12.4.19 Driver Password Encryption Setting .............................................................................................. 12-60<br />
13 Web Connection<br />
13.1 Using Web Connection................................................................................................................. 13-3<br />
13.1.1 Operating environment .................................................................................................................... 13-3<br />
13.1.2 Accessing Web Connection............................................................................................................. 13-3<br />
13.1.3 Web browser cache ......................................................................................................................... 13-4<br />
For Internet Explorer ........................................................................................................................ 13-4<br />
For Netscape Navigator................................................................................................................... 13-4<br />
For Mozilla Firefox............................................................................................................................ 13-4<br />
13.2 Login and Logout .......................................................................................................................... 13-5<br />
13.2.1 Login and logout flows..................................................................................................................... 13-5<br />
When user authentication or account track is not enabled ............................................................. 13-5<br />
When <strong>User</strong> Authentication or Account Track is enabled ................................................................. 13-6<br />
13.2.2 Logout.............................................................................................................................................. 13-7<br />
13.2.3 Login ................................................................................................................................................ 13-8<br />
Login options ................................................................................................................................... 13-8<br />
Logging in as a public user.............................................................................................................. 13-9<br />
Logging in as a registered user...................................................................................................... 13-10<br />
Logging in to the administrator mode............................................................................................ 13-11<br />
Logging in as the <strong>User</strong> Box Administrator ..................................................................................... 13-12<br />
13.3 Structure of pages ...................................................................................................................... 13-13<br />
13.4 Overview of the user mode ........................................................................................................ 13-15<br />
13.4.1 Information..................................................................................................................................... 13-15<br />
13.4.2 Job ................................................................................................................................................. 13-16<br />
13.4.3 <strong>User</strong> Box ........................................................................................................................................ 13-16<br />
13.4.4 Direct print ..................................................................................................................................... 13-17<br />
13.4.5 Address Registration...................................................................................................................... 13-18<br />
13.4.6 Customize ...................................................................................................................................... 13-19<br />
13.5 Administrator mode overview.................................................................................................... 13-20<br />
13.5.1 Maintenance .................................................................................................................................. 13-20<br />
13.5.2 System Settings............................................................................................................................. 13-21<br />
13.5.3 Security .......................................................................................................................................... 13-22<br />
13.5.4 <strong>User</strong> authentication/Account track ................................................................................................ 13-23<br />
13.5.5 Network.......................................................................................................................................... 13-24<br />
13.5.6 <strong>User</strong> Box ........................................................................................................................................ 13-25<br />
13.5.7 <strong>Print</strong>er Setting ................................................................................................................................ 13-26<br />
13.5.8 Address Registration...................................................................................................................... 13-27<br />
13.5.9 Fax Settings ................................................................................................................................... 13-28<br />
13.5.10 Setting for each purpose ............................................................................................................... 13-29<br />
Contents-6 <strong>VL</strong>3622c/<strong>VL</strong>2822c/<strong>VL</strong><strong>2222c</strong>
14 Troubleshooting<br />
14.1 Cannot print................................................................................................................................... 14-3<br />
14.2 Cannot configure the settings/Cannot print according to the settings................................... 14-5<br />
14.2.1 The printer driver settings have no effect ........................................................................................ 14-5<br />
14.2.2 Others .............................................................................................................................................. 14-6<br />
14.2.3 Error message.................................................................................................................................. 14-6<br />
15 Appendix<br />
15.1 Product specifications.................................................................................................................. 15-3<br />
15.2 <strong>Print</strong>ing reports ............................................................................................................................. 15-7<br />
15.2.1 Configuration page .......................................................................................................................... 15-7<br />
15.2.2 PCL font list ..................................................................................................................................... 15-8<br />
15.2.3 PS font list........................................................................................................................................ 15-9<br />
15.2.4 GDI demo page.............................................................................................................................. 15-10<br />
15.3 PPD driver (For Linux and applications) ................................................................................... 15-11<br />
15.3.1 PPD driver types ............................................................................................................................ 15-11<br />
15.3.2 PPD driver for Linux....................................................................................................................... 15-11<br />
Registering the PPD driver for Linux.............................................................................................. 15-11<br />
Configuring the PPD driver for Linux ............................................................................................. 15-11<br />
Registering the PPD driver for OpenOffice .................................................................................... 15-11<br />
<strong>Print</strong>ing with OpenOffice................................................................................................................ 15-12<br />
15.3.3 PPD driver for applications ............................................................................................................ 15-12<br />
How to print ................................................................................................................................... 15-12<br />
15.4 Glossary ....................................................................................................................................... 15-13<br />
16 Index<br />
16.1 Index by item ................................................................................................................................. 16-3<br />
16.2 Index by button.............................................................................................................................. 16-6<br />
<strong>VL</strong>3622c/<strong>VL</strong>2822c/<strong>VL</strong><strong>2222c</strong> Contents-7
Contents-8 <strong>VL</strong>3622c/<strong>VL</strong>2822c/<strong>VL</strong><strong>2222c</strong>
1 Introduction
1.1 Welcome 1<br />
1 Introduction<br />
1.1 Welcome<br />
Thank you for purchasing this machine.<br />
This <strong>User</strong>'s Guide describes the functions, operating instructions, precautions for correct operation, and simple<br />
troubleshooting guidelines of this machine. In order to obtain maximum performance from this product<br />
and use it effectively, please read this <strong>User</strong>'s Guide as necessary.<br />
1.1.1 <strong>User</strong>'s guides<br />
<strong>Print</strong>ed manual Overview<br />
[Quick Guide Copy/<strong>Print</strong>/Fax/Scan/Box <strong>Operations</strong>]<br />
This manual describes operating procedures and the<br />
functions that are most frequently used in order to enable<br />
you to begin using this machine immediately.<br />
This manual contains notes and precautions that<br />
should be followed to ensure safe usage of this machine.<br />
Please be sure to read this manual before using this<br />
machine.<br />
This manual describes details on trademarks and<br />
copyrights.<br />
• Trademarks and copyrights<br />
<strong>User</strong>'s guide DVD manuals Overview<br />
[<strong>User</strong>'s Guide Copy <strong>Operations</strong>] This manual describes details on copy mode operations<br />
and the settings of this machine.<br />
• Specifications of originals and copy paper<br />
• Copy function<br />
• Maintaining this machine<br />
• Troubleshooting<br />
[<strong>User</strong>'s Guide Enlarge Display <strong>Operations</strong>] This manual describes details on operating procedures<br />
of the enlarge display mode.<br />
• Copy function<br />
• Scanning function<br />
• G3 fax function<br />
• Network fax function<br />
[<strong>User</strong>'s Guide <strong>Print</strong> <strong>Operations</strong>] This manual describes details on printer functions.<br />
• <strong>Print</strong>er function<br />
• Setting the printer driver<br />
[<strong>User</strong>'s Guide Box <strong>Operations</strong>] This manual describes details on the boxed functions<br />
using the hard disk.<br />
• Saving data in user boxes<br />
• Retrieving data from user boxes<br />
• Transferring and printing data from user boxes<br />
[<strong>User</strong>'s Guide Network Scan/Fax/Network Fax<br />
<strong>Operations</strong>]<br />
This manual describes details on transmitting<br />
scanned data.<br />
• E-mail TX, FTP TX, SMB TX, Save in <strong>User</strong> Box,<br />
WebDAV TX, Web Services<br />
• G3 fax<br />
• IP Address Fax, Internet Fax<br />
[<strong>User</strong>'s Guide Fax Driver <strong>Operations</strong>] This manual describes details on the fax driver function<br />
that transmits faxes directly from a computer.<br />
• PC-FAX<br />
[<strong>User</strong>'s Guide Network Administrator] This manual describes details on setting methods for<br />
each function using the network connection.<br />
• Network settings<br />
• Settings using Web Connection<br />
<strong>VL</strong>3622c/<strong>VL</strong>2822c/<strong>VL</strong><strong>2222c</strong> 1-3
1<br />
1.1.2 <strong>User</strong>'s Guide<br />
Welcome<br />
<strong>User</strong>'s guide DVD manuals Overview<br />
[<strong>User</strong>'s Guide Advanced Function <strong>Operations</strong>] This manual describes details on functions that become<br />
available by registering the optional license kit<br />
and by connecting to an application.<br />
• Web browser function<br />
• Image panel<br />
• PDF Processing Function<br />
• Searchable PDF<br />
• My panel and My address functions<br />
This <strong>User</strong>'s Guide is intended for users ranging from those using this machine for the first time to administrators.<br />
It describes basic operations, functions that enable more convenient operations, maintenance procedures,<br />
simple troubleshooting operations, and various setting methods of this machine.<br />
Note that basic technical knowledge about the product is required to enable users to perform maintenance<br />
work or troubleshooting operations. Limit your maintenance and troubleshooting operations to the areas explained<br />
in this manual.<br />
Should you experience any problems, please contact our service representative.<br />
1-4 <strong>VL</strong>3622c/<strong>VL</strong>2822c/<strong>VL</strong><strong>2222c</strong><br />
1.1
1.2 Conventions used in this manual 1<br />
1.2 Conventions used in this manual<br />
1.2.1 Symbols used in this manual<br />
Symbols are used in this manual to express various types of information.<br />
The following describes each symbol related to correct and safe usage of this machine.<br />
To use this machine safely<br />
7 WARNING<br />
- This symbol indicates that a failure to heed the instructions may lead to death or serious injury.<br />
7 CAUTION<br />
- This symbol indicates that negligence of the instructions may lead to mishandling that may cause injury<br />
or property damage.<br />
NOTICE<br />
This symbol indicates a risk that may result in damage to this machine or documents.<br />
Follow the instructions to avoid property damage.<br />
Procedural instruction<br />
0 This check mark indicates an option that is required in order to use conditions or functions that are prerequisite<br />
for a procedure.<br />
1 This format number "1" represents the first step.<br />
2 This format number represents the order of serial steps.<br />
% This symbol indicates a supplementary explanation of a procedural<br />
instruction.<br />
% This symbol indicates transition of the control panel to access a desired menu item.<br />
This symbol indicates a desired page.<br />
The operation procedures<br />
are described<br />
using illustrations.<br />
<strong>VL</strong>3622c/<strong>VL</strong>2822c/<strong>VL</strong><strong>2222c</strong> 1-5
1<br />
d Reference<br />
This symbol indicates a reference.<br />
View the reference as required.<br />
Key symbols<br />
Conventions used in this manual<br />
[ ]<br />
Key names on the touch panel and computer screen, or manual names are indicated by these brackets.<br />
Bold text<br />
Key names, part names, product names and option names on the control panel are indicated in bold text.<br />
1.2.2 Document and paper indications<br />
Paper size<br />
The following explains the indication for documents and paper described<br />
in this manual.<br />
When indicating the document or paper size, the Y side represents the<br />
width and the X side the length.<br />
Paper indication<br />
w indicates the paper size with the length (X) being longer than the<br />
width (Y).<br />
v indicates the paper size with the length (X) being shorter than the<br />
width (Y).<br />
1-6 <strong>VL</strong>3622c/<strong>VL</strong>2822c/<strong>VL</strong><strong>2222c</strong><br />
1.2
2 Overview
2.1 <strong>Print</strong>er controller 2<br />
2 Overview<br />
This chapter describes the overview and connection environment of the printer controller that provides the<br />
printer function.<br />
2.1 <strong>Print</strong>er controller<br />
The printer controller is a device that enables the printing and network printing functions on this machine.<br />
2.1.1 Roles of the printer controller<br />
Incorporating the printer controller enables this machine to function as a printing system, allowing printing<br />
using applications on the computer connected to this machine. When using this machine as a network printer,<br />
you can print using applications on the computer.<br />
2<br />
1<br />
3<br />
1. This machine<br />
2. <strong>Print</strong>er controller<br />
3. <strong>Print</strong>ing system<br />
The printer controller provides the following functions.<br />
- <strong>Print</strong>ing data sent from a printer driver on a computer<br />
- Support of network protocols including TCP/IP (IPv4/IPv6), IPX/SPX, and AppleTalk<br />
- <strong>Print</strong>ing via a network using Web service (Windows Vista/Server 2008), SMB (Windows), LPR or IPP<br />
printing<br />
- Configuring settings for this machine and the printer controller from a client computer via the network<br />
(using a Web browser)<br />
- Control of the number of pages to be printed (the <strong>User</strong> Authentication and Account Track functions)<br />
- Fax operations using a computer (PC-FAX transmission)<br />
d Reference<br />
To use the fax function, the optional Fax Kit is required. For details on the PC-FAX transmission, refer to the<br />
[<strong>User</strong>'s Guide Fax Driver <strong>Operations</strong>].<br />
<strong>VL</strong>3622c/<strong>VL</strong>2822c/<strong>VL</strong><strong>2222c</strong> 2-3
2<br />
2.1.2 Flow of printing<br />
<strong>Print</strong>er controller<br />
The following outlines the flow of operations for using this printing system as a printer.<br />
<strong>Print</strong> data sent from an application is received by the printer driver.<br />
The data is sent to the machine via the USB interface for USB connection or via Ethernet (TCP/IP, IPX/SPX,<br />
AppleTalk) for network connection. Then the data is passed from the machine to the printer controller. The<br />
printer controller rasterizes images (expands output target characters and images to bitmap data). This data<br />
is printed from this machine.<br />
<strong>Print</strong><br />
When using USB<br />
connection<br />
USB<br />
Computer<br />
When using<br />
network connection<br />
Application Application<br />
<strong>Print</strong>er driver <strong>Print</strong>er driver<br />
This machine<br />
<strong>Print</strong>er controller<br />
Ethernet<br />
(TCP/IP, IPX/SPX)<br />
PCL processing (Rasterization)<br />
While this machine is operating as a printer, originals can be scanned using the copy function or network scan<br />
function. To use the copy function of this machine, press the Copy key on the control panel.<br />
When a print job is received during copying, the data is stored in the memory of this machine. When the copying<br />
is completed, the print job is automatically printed.<br />
2-4 <strong>VL</strong>3622c/<strong>VL</strong>2822c/<strong>VL</strong><strong>2222c</strong><br />
2.1
2.1 <strong>Print</strong>er controller 2<br />
2.1.3 Control panel<br />
The printer driver settings are mainly configured on the computer. However, printing the font list and configuring<br />
the printer controller settings and default print settings are available using the control panel of this machine.<br />
The following describes the important keys used for the printer function.<br />
12<br />
11<br />
10<br />
9<br />
No. Name Description<br />
1 Touch Panel Various screens and messages are displayed.<br />
Configure various settings by directly pressing the touch<br />
panel.<br />
2 Utility/Counter Press this key to display the [Utility] screen and the Meter<br />
Count screen.<br />
3 Reset Press this key to reset all settings (except programmed settings)<br />
entered using the control panel or touch panel.<br />
4 Proof Copy Press this key to perform proof printing when a proof print job<br />
is stored.<br />
5 Start Press this key to start the operation of the selected function.<br />
When this machine is ready to begin the operation, the indicator<br />
on the Start key lights up in blue. If the indicator on the<br />
Start key lights up in orange, the operation cannot begin.<br />
6 Data Indicator Flashes in blue while a print job or fax is being received.<br />
Lights up in blue when a print job or fax is queued to be printed<br />
or while it is being printed.<br />
7 C (clear) Press this key to erase a value entered using the keypad or<br />
characters entered from the keyboard on the screen.<br />
8 Keypad Press to enter numbers. Use the keypad to enter the administrator<br />
password or other setting values.<br />
<strong>VL</strong>3622c/<strong>VL</strong>2822c/<strong>VL</strong><strong>2222c</strong> 2-5<br />
1<br />
8 7 6 5 4<br />
2<br />
3
2<br />
<strong>Print</strong>er controller<br />
No. Name Description<br />
9 Access If user authentication and account track is enabled, press this<br />
key after entering the user name and password (for user authentication)<br />
or the account name and password (for account<br />
track) in order to use this machine.<br />
10 <strong>User</strong> Box Press this key to enter <strong>User</strong> Box mode. While the machine is<br />
in <strong>User</strong> Box mode, the indicator on the <strong>User</strong> Box key lights<br />
up in green. For details, refer to the [<strong>User</strong>'s Guide Box <strong>Operations</strong>].<br />
11 Fax/Scan Press this key to enter Fax/Scan mode. While the machine is<br />
in Fax/Scan mode, the indicator on the Fax/Scan key lights<br />
up in green. For details, refer to the [<strong>User</strong>'s Guide Network<br />
Scan/Fax/Network Fax <strong>Operations</strong>].<br />
12 Copy Press this key to enter Copy mode (The machine is in Copy<br />
mode in default). While the machine is in Copy mode, the indicator<br />
on the Copy key lights up in green. For details, refer<br />
to the [<strong>User</strong>'s Guide Copy <strong>Operations</strong>].<br />
Reference<br />
- The default print settings can be changed in the [Utility] mode.<br />
- You can use this machine as a printer in either of <strong>User</strong> Box, Fax/Scan, and Copy modes.<br />
d Reference<br />
For details on proof printing, refer to page 11-3.<br />
2-6 <strong>VL</strong>3622c/<strong>VL</strong>2822c/<strong>VL</strong><strong>2222c</strong><br />
2.1
2.2 Operating environment 2<br />
2.2 Operating environment<br />
This section describes the system requirements for using this printing system and the interfaces used for<br />
connection.<br />
2.2.1 Connectable computers and operating system<br />
Make sure that the computer to be connected meets the following conditions.<br />
Windows<br />
Windows<br />
Operating system The supported OS varies depending on the type of printer driver. For details, refer<br />
to page 3-4.<br />
CPU Any processor of the same or higher specifications as recommended for your<br />
operating system<br />
Memory Memory capacity as recommended for your operating system<br />
Sufficient memory resource is required for your operating system and the applications<br />
to be used.<br />
Drive DVD-ROM drive<br />
Macintosh<br />
Macintosh<br />
Operating system Mac OS 9.2/OS X (10.2.8, 10.3, 10.4, 10.5)<br />
CPU PowerPC, Intel Processor<br />
(Intel Processor must be Mac OS X 10.4/10.5 only)<br />
Memory Memory capacity as recommended for your operating system<br />
Drive DVD-ROM drive<br />
<strong>VL</strong>3622c/<strong>VL</strong>2822c/<strong>VL</strong><strong>2222c</strong> 2-7
2<br />
2.2.2 Interfaces used for connection<br />
To connect this printing system to a computer, the following interfaces can be used.<br />
Ethernet<br />
Operating environment<br />
Use this interface to use this printing system via a network connection.<br />
It supports 1000Base-T, 100Base-TX, and 10Base-T standards. In addition, TCP/IP (LPD/LPR, IPP, SMB),<br />
Web services, IPX/SPX (NetWare), AppleTalk (EtherTalk) protocols are supported.<br />
USB interface<br />
Use this interface to use this printing system via a USB connection. The USB interface can be connected to<br />
a computer running Windows. A USB cable is required for connection. Use a type A (4 pin, male) or type B<br />
(4 pin, male) USB cable. A USB cable measuring three meters or less is recommended.<br />
Connection diagram<br />
The printer cables are connected to each port on this machine.<br />
Back side of the machine<br />
1<br />
2<br />
1. Ethernet port (1000Base-T/100Base-TX/10Base-T)<br />
2. USB port<br />
2-8 <strong>VL</strong>3622c/<strong>VL</strong>2822c/<strong>VL</strong><strong>2222c</strong><br />
2.2
2.3 Setup procedure 2<br />
2.3 Setup procedure<br />
To use this printing system, you must complete the setup in advance.<br />
The setup refers to a series of procedures for connecting the machine to the computer and installing the printer<br />
driver to the computer.<br />
Perform the setup using the following procedures.<br />
2.3.1 For network connection<br />
1 Connect this machine to the computer.<br />
2 Check that the computer to be used is connected to the network.<br />
3 Specify the IP address of this machine, and then connect it to the network.<br />
4 Change the network settings for this machine according to the connection method or protocol.<br />
% LPR: In [LPD Setting], enable LPD printing.<br />
% Port9100: In [TCP/IP Settings], enable the RAW port number (initial setting: [9100]).<br />
% SMB: Configure settings of [<strong>Print</strong> Settings] in [SMB Settings].<br />
% IPP/IPPS: In [IPP Settings], enable IPP printing. To use IPPS printing, install the certificate in advance.<br />
% Web Service <strong>Print</strong>: In [Web Service Settings], enable the print function.<br />
% Bonjour: In [Bonjour Setting], enable Bonjour.<br />
% AppleTalk: In [AppleTalk Settings], enable AppleTalk.<br />
5 Install the printer driver.<br />
% Specify the network port for the printer driver according to the connection method or protocol.<br />
6 Install the screen fonts.<br />
% The DVD-ROM contains the European TrueType fonts as "screen fonts". The "Screen Font" or<br />
"Screen Fonts" folder in the DVD-ROM contains the screen fonts.<br />
% Install the screen fonts using the standard function for the OS of adding fonts. For details, refer to<br />
Help of the Operating System.<br />
% Macintosh fonts are compressed. Decompress them before installing.<br />
Reference<br />
- After installing the printer driver, perform test print to make sure that the connections are made properly.<br />
d Reference<br />
For details on the connectable interfaces, refer to page 2-8.<br />
For details on the network settings, refer to the [<strong>User</strong>'s Guide Network Administrator].<br />
The procedure for installing the printer driver varies depending on the connection method, operating system<br />
of the computer, and printer driver. For details, refer to page 3-3.<br />
To update an existing printer driver, uninstall it first. For details, refer to page 7-3.<br />
Configure the interface timeout settings in the Utility menu on the control panel if necessary. For details, refer<br />
to page 12-53.<br />
<strong>VL</strong>3622c/<strong>VL</strong>2822c/<strong>VL</strong><strong>2222c</strong> 2-9
2<br />
2.3.2 For local connection<br />
1 Connect this machine to the computer.<br />
2 Install the printer driver.<br />
Setup procedure<br />
3 Install the screen fonts.<br />
% The DVD-ROM contains the European TrueType fonts as "screen fonts". The "ScreenFont" or<br />
"Screen Fonts" folder in the DVD-ROM contains the screen fonts.<br />
% Install the screen fonts using the standard function for the OS of adding fonts. For details, refer to<br />
Help of the Operating System.<br />
2-10 <strong>VL</strong>3622c/<strong>VL</strong>2822c/<strong>VL</strong><strong>2222c</strong><br />
2.3
3 Precautions<br />
for Installation
3.1 Introduction 3<br />
3 Precautions for Installation<br />
The following describes the information necessary for selecting a printer driver.<br />
3.1 Introduction<br />
This chapter describes the information you should keep in mind before installing the printer driver.<br />
The procedure for installing the printer driver varies depending on how this machine is connected to the computer,<br />
operating system installed on the computer, and type of the printer driver to be installed.<br />
To determine the printer driver to be installed and connection method, check the operating system of the<br />
computer and connection environment.<br />
Select the installation method according to the printer driver and connection method.<br />
<strong>VL</strong>3622c/<strong>VL</strong>2822c/<strong>VL</strong><strong>2222c</strong> 3-3
3<br />
<strong>Print</strong>er drivers compatible with respective operating systems<br />
3.2 <strong>Print</strong>er drivers compatible with respective operating systems<br />
Before using this printing system, you must install the printer driver.<br />
The following lists the printer drivers included on the DVD and the supported operating systems. Select the<br />
required printer driver.<br />
<strong>Print</strong>er driver Page descriptionlanguage<br />
PCL Driver (PCL<br />
driver)<br />
PostScript driver<br />
(PS driver)<br />
PostScript PPD<br />
driver (PS-PPD)<br />
XPS Driver (XPS<br />
driver)<br />
Supported Operating Systems<br />
PCL6 Windows NT Workstation Version 4.0 (Service Pack 6 or later)<br />
Windows NT Server Version 4.0 (Service Pack 6 or later)<br />
Windows 2000 Professional (Service Pack 4 or later)<br />
Windows 2000 Server (Service Pack 3 or later)<br />
Windows XP Home Edition (Service Pack 1 or later)<br />
Windows XP Professional (Service Pack 1 or later)<br />
Windows Server 2003, Standard Edition (Service Pack 1 or later)<br />
Windows Server 2003, Enterprise Edition (Service Pack 1 or later)<br />
Windows Server 2003 R2, Standard Edition<br />
Windows Server 2003 R2, Enterprise Edition<br />
Windows XP Professional e64 Edition<br />
Windows Server 2003, Standard e64 Edition<br />
Windows Server 2003, Enterprise e64 Edition<br />
Windows Server 2003 R2, Standard e64 Edition<br />
Windows Server 2003 R2, Enterprise e64 Edition<br />
Windows Vista Business *<br />
Windows Vista Enterprise *<br />
Windows Vista Home Basic *<br />
Windows Vista Home Premium *<br />
Windows Vista Ultimate *<br />
Windows Server 2008 Standard *<br />
Windows Server 2008 Enterprise *<br />
* Supports 32-bit (e86)/64-bit (e64) environment.<br />
PostScript 3<br />
Emulation<br />
Windows 2000 Professional (Service Pack 4 or later)<br />
Windows 2000 Server (Service Pack 3 or later)<br />
Windows XP Home Edition (Service Pack 1 or later)<br />
Windows XP Professional (Service Pack 1 or later)<br />
Windows Server 2003, Standard Edition (Service Pack 1 or later)<br />
Windows Server 2003, Enterprise Edition (Service Pack 1 or later)<br />
Windows Server 2003 R2, Standard Edition<br />
Windows Server 2003 R2, Enterprise Edition<br />
Windows XP Professional e64 Edition<br />
Windows Server 2003, Standard e64 Edition<br />
Windows Server 2003, Enterprise e64 Edition<br />
Windows Server 2003 R2, Standard e64 Edition<br />
Windows Server 2003 R2, Enterprise e64 Edition<br />
Windows Vista Business *<br />
Windows Vista Enterprise *<br />
Windows Vista Home Basic *<br />
Windows Vista Home Premium *<br />
Windows Vista Ultimate *<br />
Windows Server 2008 Standard *<br />
Windows Server 2008 Enterprise *<br />
* Supports 32-bit (e86)/64-bit (e64) environment.<br />
Mac OS 9.2 or later,<br />
Mac OS X 10.2.8/10.3/10.4/10.5<br />
XPS Windows Vista Business *<br />
Windows Vista Enterprise *<br />
Windows Vista Home Basic *<br />
Windows Vista Home Premium *<br />
Windows Vista Ultimate *<br />
Windows Server 2008 Standard *<br />
Windows Server 2008 Enterprise *<br />
*<br />
Supports 32-bit (e86)/64-bit (e64) environment.<br />
3-4 <strong>VL</strong>3622c/<strong>VL</strong>2822c/<strong>VL</strong><strong>2222c</strong><br />
3.2
3.2 <strong>Print</strong>er drivers compatible with respective operating systems 3<br />
<strong>Print</strong>er driver Page descriptionlanguage<br />
Supported Operating Systems<br />
Fax driver Windows NT Workstation Version 4.0 (Service Pack 6 or later)<br />
Windows NT Server Version 4.0 (Service Pack 6 or later)<br />
Windows 2000 Professional (Service Pack 4 or later)<br />
Windows 2000 Server (Service Pack 3 or later)<br />
Windows XP Home Edition (Service Pack 1 or later)<br />
Windows XP Professional (Service Pack 1 or later)<br />
Windows Server 2003, Standard Edition (Service Pack 1 or later)<br />
Windows Server 2003, Enterprise Edition (Service Pack 1 or later)<br />
Windows Server 2003 R2, Standard Edition<br />
Windows Server 2003 R2, Enterprise Edition<br />
Windows XP Professional e64 Edition<br />
Windows Server 2003, Standard e64 Edition<br />
Windows Server 2003, Enterprise e64 Edition<br />
Windows Server 2003 R2, Standard e64 Edition<br />
Windows Server 2003 R2, Enterprise e64 Edition<br />
Windows Vista Business *<br />
Windows Vista Enterprise *<br />
Windows Vista Home Basic *<br />
Windows Vista Home Premium *<br />
Windows Vista Ultimate *<br />
Windows Server 2008 Standard *<br />
Windows Server 2008 Enterprise *<br />
* Supports 32-bit (e86)/64-bit (e64) environment.<br />
Reference<br />
- Select the page description language according to the application used for printing.<br />
- Either of the installer or Add <strong>Print</strong>er Wizard can be used for installing the PCL driver, PS driver, and XPS<br />
driver for Windows.<br />
d Reference<br />
For details on the fax drivers, refer to the [<strong>User</strong>'s Guide Fax Driver <strong>Operations</strong>].<br />
<strong>VL</strong>3622c/<strong>VL</strong>2822c/<strong>VL</strong><strong>2222c</strong> 3-5
3<br />
Connection methods selectable in each operating system<br />
3.3 Connection methods selectable in each operating system<br />
The connection method for this machine varies depending on the operating system of the computer. The<br />
printer driver installation method also varies depending on the connection method. This machine can be connected<br />
via a network or a USB interface. In network connection, the printer driver installation method varies<br />
depending on the protocol to be used.<br />
Network connection (Ethernet):<br />
This machine is connected as a network printer.<br />
This printing system supports 1000Base-T, 100Base-TX, and 10Base-T standards. In addition, TCP/IP<br />
(LPD/LPR, IPP, SMB), IPX/SPX (NetWare), AppleTalk (EtherTalk) protocols are supported.<br />
The applicable protocols vary depending on the operating system of the computer.<br />
USB interface:<br />
This machine is connected as a local printer. The USB interface can be connected to a computer running<br />
Windows.<br />
For USB connection, this manual covers only the plug and play based setup procedures.<br />
3.3.1 Windows Vista/Server 2008<br />
Setup procedures Connection method Reference page<br />
Connection method<br />
in which installer-based<br />
setup is<br />
possible<br />
Connection method<br />
in which setup<br />
is possible using<br />
Add <strong>Print</strong>er Wizard<br />
Connection method<br />
in which plug<br />
and play-based<br />
setup is possible<br />
Port 9100 A network connection using the<br />
PORT9100 print service. It uses a<br />
TCP/IP protocol and the RAW<br />
printing port.<br />
IPP A network connection using the<br />
IPP (Internet <strong>Print</strong>ing Protocol)<br />
print service. <strong>Print</strong>ing via the Internet<br />
is possible with the HTTP<br />
(HyperText Transfer Protocol) of<br />
the TCP/IP protocol.<br />
USB A connection using a USB port.<br />
LPR A network connection using the<br />
LPR (Line <strong>Print</strong>er Remote) print<br />
service. It uses a TCP/IP protocol<br />
and the LPR printing port.<br />
Port9100 A network connection using the<br />
PORT9100 print service. It uses a<br />
TCP/IP protocol and the RAW<br />
printing port.<br />
SMB A network connection using SMB<br />
(Server Message Block) for sharing<br />
files or printers in Windows. It<br />
supports the TCP/IP protocol.<br />
IPP/IPPS A network connection using the<br />
IPP (Internet <strong>Print</strong>ing Protocol)<br />
print service. <strong>Print</strong>ing via the Internet<br />
is possible with the HTTP<br />
(HyperText Transfer Protocol) of<br />
the TCP/IP protocol. IPPS is an<br />
IPP for SSL encrypted communication.<br />
Web service<br />
print<br />
It is a connection corresponding<br />
to Web Service function of Windows<br />
Vista/Server 2008 and capable<br />
of automatically detecting<br />
the printer on the network.<br />
USB A connection using a USB port.<br />
3-6 <strong>VL</strong>3622c/<strong>VL</strong>2822c/<strong>VL</strong><strong>2222c</strong><br />
3.3<br />
• Select a connection<br />
method during installation<br />
procedures.<br />
Select [Normal <strong>Print</strong>ing]<br />
for the Port 9100<br />
or USB connection<br />
method, or [Internet<br />
<strong>Print</strong>ing] for the IPP<br />
connection method.<br />
p. 4-3<br />
USB A connection using a USB port. p. 4-10
3.3 Connection methods selectable in each operating system 3<br />
Reference<br />
- To use Windows Vista/Server 2008, log on to the computer using a user name with Administrator privileges,<br />
and then install the printer driver.<br />
d Reference<br />
Before you can use this machine in the network environment, you must configure network settings for this<br />
machine. For details, refer to [<strong>User</strong>'s Guide Network Administrator].<br />
In Windows Vista/Server 2008, you cannot set up IPPS connection (Secure <strong>Print</strong>) using the installer. To use<br />
IPPS connection, use the Add <strong>Print</strong>er Wizard. For details, refer to page 4-6.<br />
3.3.2 Windows 2000/XP/Server 2003<br />
Setup procedures Connection method Reference page<br />
Connection method<br />
in which installer-based<br />
setup is<br />
possible<br />
Connection method<br />
in which setup<br />
is possible using<br />
Add <strong>Print</strong>er Wizard<br />
Connection method<br />
in which plug<br />
and play-based<br />
setup is possible<br />
Port9100 A network connection using the<br />
PORT9100 print service. It uses a<br />
TCP/IP protocol and the RAW<br />
printing port.<br />
IPP/IPPS A network connection using the<br />
IPP (Internet <strong>Print</strong>ing Protocol)<br />
print service. <strong>Print</strong>ing via the Internet<br />
is possible with the HTTP<br />
(HyperText Transfer Protocol) of<br />
the TCP/IP protocol. IPPS is an<br />
IPP for SSL encrypted communication.<br />
USB A connection using a USB port.<br />
LPR A network connection using the<br />
LPR (Line <strong>Print</strong>er Remote) print<br />
service. It uses a TCP/IP protocol<br />
and the LPR printing port.<br />
Port9100 A network connection using the<br />
PORT9100 print service. It uses a<br />
TCP/IP protocol and the RAW<br />
printing port.<br />
SMB A network connection using SMB<br />
(Server Message Block) for sharing<br />
files or printers in Windows. It<br />
supports the TCP/IP protocol.<br />
IPP/IPPS A network connection using the<br />
IPP (Internet <strong>Print</strong>ing Protocol)<br />
print service. <strong>Print</strong>ing via the Internet<br />
is possible with the HTTP<br />
(HyperText Transfer Protocol) of<br />
the TCP/IP protocol. IPPS is an<br />
IPP for SSL encrypted communication.<br />
USB A connection using a USB port.<br />
• Select a connection<br />
method during installation<br />
procedures.<br />
Select [Normal <strong>Print</strong>ing]<br />
for the Port9100<br />
or USB connection<br />
method, [Internet<br />
<strong>Print</strong>ing] for the IPP<br />
connection method,<br />
or [Secure <strong>Print</strong>ing]<br />
for the IPPS connection<br />
method.<br />
Windows XP/ Server<br />
2003: p. 4-11<br />
Windows 2000: p. 4-17<br />
USB A connection using a USB port. Windows XP/ Server<br />
2003: p. 4-16<br />
Windows 2000: p. 4-21<br />
Reference<br />
- To use Windows 2000/XP/Server 2003, log on to the computer using a user name with the Administrator<br />
privileges, and then install the printer driver.<br />
- The installer does not support installation in the IPv6 environment of Windows XP/Server 2003.<br />
d Reference<br />
Before you can use this machine in the network environment, you must configure network settings for this<br />
machine. For details, refer to [<strong>User</strong>'s Guide Network Administrator].<br />
<strong>VL</strong>3622c/<strong>VL</strong>2822c/<strong>VL</strong><strong>2222c</strong> 3-7
3<br />
3.3.3 Windows NT 4.0<br />
Connection methods selectable in each operating system<br />
Setup procedures Connection method Reference page<br />
Connection method<br />
in which installer-based<br />
setup is<br />
possible<br />
Connection method<br />
in which setup<br />
is possible using<br />
Add <strong>Print</strong>er Wizard<br />
Network connection<br />
Reference<br />
- When using Windows NT4.0, log on to the computer using a user name with the Administrator privilege,<br />
and then install the printer driver.<br />
- In Windows NT4.0, to install the printer driver for this machine connected directly to the network using<br />
TCP/IP protocol, you must have the [Microsoft TCP/IP <strong>Print</strong>ing] service installed in your computer.<br />
- To use the installer in Windows NT4.0, you must have Internet Explorer 5.0 or later installed in your computer.<br />
d Reference<br />
Before you can use this machine in the network environment, you must configure network settings for this<br />
machine. For details, refer to [<strong>User</strong>'s Guide Network Administrator].<br />
3.3.4 Mac OS X 10.2/10.3/10.4/10.5<br />
LPR *Select a connection<br />
method during installation<br />
procedures. Select<br />
[Normal <strong>Print</strong>ing] for the<br />
LPR connection method.<br />
LPR A network connection using the<br />
LPR print service.<br />
p. 4-22<br />
Setup procedures Connection method Reference page<br />
Connection method<br />
in which setup<br />
is possible<br />
Bonjour A network connection using Bonjour<br />
and Rendezvous.<br />
AppleTalk A network connection using AppleTalk.<br />
LPR A network connection using the<br />
LPR print service.<br />
IPP A network connection using the<br />
IPP print service.<br />
d Reference<br />
Before you can use this machine in the network environment, you must configure network settings for this<br />
machine. For details, refer to [<strong>User</strong>'s Guide Network Administrator].<br />
3-8 <strong>VL</strong>3622c/<strong>VL</strong>2822c/<strong>VL</strong><strong>2222c</strong><br />
p. 5-3<br />
3.3<br />
• Install your desired<br />
driver using the installer<br />
and specify<br />
the connection method<br />
when selecting<br />
the printer.
3.3 Connection methods selectable in each operating system 3<br />
3.3.5 Mac OS 9.2<br />
d Reference<br />
Before you can use this machine in the network environment, you must configure network settings for this<br />
machine. For details, refer to [<strong>User</strong>'s Guide Network Administrator].<br />
3.3.6 NetWare<br />
Setup procedures Connection method Reference page<br />
Connection method<br />
in which setup<br />
is possible<br />
AppleTalk A network connection using AppleTalk.<br />
LPR A network connection using the<br />
LPR print service.<br />
p. 5-13<br />
• Specify the connection<br />
method when selecting<br />
a printer.<br />
NetWare version Protocol used Connection method<br />
NetWare 4.x IPX Bindery Pserver Nprinter/Rprinter<br />
NetWare 5.x IPX NDS Pserver Nprinter/Rprinter<br />
TCP/IP NDPS<br />
NetWare 6.x IPX NDS Pserver<br />
TCP/IP NDPS<br />
d Reference<br />
For details on the NetWare functions, refer to the NetWare operation manual.<br />
To use the machine in the NetWare environment, you must configure the network settings for the machine in<br />
advance. For details, refer to [<strong>User</strong>'s Guide Network Administrator].<br />
<strong>VL</strong>3622c/<strong>VL</strong>2822c/<strong>VL</strong><strong>2222c</strong> 3-9
3<br />
Connection methods selectable in each operating system<br />
3-10 <strong>VL</strong>3622c/<strong>VL</strong>2822c/<strong>VL</strong><strong>2222c</strong><br />
3.3
4 <strong>Manual</strong><br />
Installation Using the<br />
Add <strong>Print</strong>er Wizard
4.1 Windows Vista/Server 2008 4<br />
4 <strong>Manual</strong> Installation Using the Add <strong>Print</strong>er Wizard<br />
This chapter describes the procedure for installing the Windows printer driver using the standard Windows<br />
Add <strong>Print</strong>er function, without using the installer.<br />
4.1 Windows Vista/Server 2008<br />
4.1.1 For network connection (LPR/Port 9100/SMB)<br />
In Windows Vista/Server 2008, you can install the printer driver either by searching for the printer on the network,<br />
or by creating a new printer port.<br />
Settings for the machine<br />
Before using Port9100, LPR, or SMB printing, you must configure the network settings for the machine.<br />
Items to be configured Description<br />
IP address In [TCP/IP Settings] of the machine, specify the IP address.<br />
RAW port number To use Port9100 printing:<br />
In [TCP/IP Settings] for the machine, enable the RAW port number<br />
(initial setting: [9100]).<br />
LPD Setting To use LPR printing:<br />
In [LPD Setting] for the machine, enable LPD printing.<br />
SMB Setting To use SMB printing:<br />
At [<strong>Print</strong> Settings] in [SMB Settings] for the machine, specify NetBI-<br />
OS Name, <strong>Print</strong> Service Name, and Workgroup.<br />
d Reference<br />
For details on the network settings for the machine, refer to the [<strong>User</strong>'s Guide Network Administrator].<br />
To use SMB printing in the IPv6 environment, [Direct Hosting Setting] for the machine must be enabled. For<br />
details, refer to [<strong>User</strong>'s Guide Network Administrator].<br />
<strong>VL</strong>3622c/<strong>VL</strong>2822c/<strong>VL</strong><strong>2222c</strong> 4-3
4<br />
Windows Vista/Server 2008<br />
Installing the printer driver by searching for the printer using the Add <strong>Print</strong>er<br />
Wizard<br />
0 Installing the driver to Windows Vista/Server 2008-based computers requires the administrator authority.<br />
0 Since the printer is searched for during the installation, be sure to connect this machine to the network<br />
before turning it on.<br />
1 Insert the printer driver DVD-ROM for Windows into the DVD-ROM drive of the computer.<br />
2 Click [Start], and then select [Control Panel].<br />
3 Click [<strong>Print</strong>ers] under [Hardware and Sound].<br />
The [<strong>Print</strong>ers] window appears.<br />
% When [Control Panel] is displayed in Classic View, double-click [<strong>Print</strong>ers].<br />
4 Click [Add a printer] on the toolbar.<br />
The [Add <strong>Print</strong>er] window appears.<br />
5 Click [Add a network, wireless or Bluetooth printer].<br />
Connected printers are detected.<br />
% If no printer is detected, turn this machine off, then on again.<br />
In this case, turn off the printer, and then wait approximately 10 seconds before turning it on again.<br />
If you turn this machine on immediately after turning it off, it may not function correctly.<br />
6 Select your machine from the list, and then click [Next].<br />
% To use the LPR/Port9100 protocol, select the printer with its IP address.<br />
% To use the SMB connection, select the printer with its "\\NetBIOS name\print service name".<br />
% For the SMB connection, click [Next], and then click [OK] in the [Connect to <strong>Print</strong>er] page that appears.<br />
% It may take some time to finish searching the entire list of printers.<br />
7 Click [Have Disk...].<br />
8 Click [Browse...].<br />
9 Select a desired printer driver folder in the DVD-ROM, and then click [Open].<br />
% Select a folder according to the printer driver, operating system, and language to be used. Selectable<br />
printer drivers:<br />
PCL driver, PS driver, XPS driver and fax driver<br />
10 Click [OK].<br />
The [<strong>Print</strong>ers] list appears.<br />
11 Click [Next].<br />
% To use the SMB connection, click [OK].<br />
12 Follow the instructions on the pages that follow.<br />
% If the [<strong>User</strong> Account Control] window appears, click [Continue].<br />
% If the [Windows Security] window for verifying the publisher appears, click [Install this driver software<br />
anyway].<br />
13 Click [Finish].<br />
14 After finishing the installation, make sure that the icon for the installed printer is displayed in the [<strong>Print</strong>ers]<br />
window.<br />
15 Remove the DVD-ROM from the DVD-ROM drive.<br />
This completes the printer driver installation.<br />
4-4 <strong>VL</strong>3622c/<strong>VL</strong>2822c/<strong>VL</strong><strong>2222c</strong><br />
4.1
4.1 Windows Vista/Server 2008 4<br />
Installing the printer driver by creating a printer port<br />
0 Installing the driver to Windows Vista/Server 2008-based computers requires the administrator authority.<br />
0 Since the printer is searched for during the installation, be sure to connect this machine to the network<br />
before turning it on.<br />
1 Insert the printer driver DVD-ROM for Windows into the DVD-ROM drive of the computer.<br />
2 Click [Start], and then select [Control Panel].<br />
3 Click [<strong>Print</strong>ers] under [Hardware and Sound].<br />
The [<strong>Print</strong>ers] window appears.<br />
% When [Control Panel] is displayed in Classic View, double-click [<strong>Print</strong>ers].<br />
4 Click [Add a printer] on the toolbar.<br />
The [Add <strong>Print</strong>er] window appears.<br />
5 Click [Add a local printer].<br />
The page for [Choose a printer port] appears.<br />
6 Click [Create a new port:], and then select the port type.<br />
% To use the LPR/Port9100 protocol, select [Standard TCP/IP Port].<br />
% To use the SMB connection, select [Local Port].<br />
7 Click [Next].<br />
8 Specify the IP address and port.<br />
% To use the LPR/Port9100 protocol, select [TCP/IP Device], and then enter the IP address.<br />
% To use the SMB connection, enter "\\NetBIOS name\print service name" in the [Port Name] box.<br />
% Enter the same NetBIOS name and print service name specified in [<strong>Print</strong> Settings] in [SMB Settings].<br />
9 Click [Next].<br />
% If the [Additional Port Information Required] dialog box appears, go to Step 10.<br />
% If the [Install the printer driver] dialog box appears, go to Step 13.<br />
10 Select [Custom], and then click [Settings...].<br />
11 Change the settings according to the port, and then click [OK].<br />
% For LPR connection, select [LPR], and then enter "<strong>Print</strong>" in the [Queue Name:] box.<br />
% You must discriminate between upper and lower case letters when entering it.<br />
% For Port9100, select [Raw], and then enter a RAW port number (initial setting: [9100]) in the [Port<br />
Number:] box.<br />
% If both LPR and Port9100 are enabled on this machine, the printer driver is connected to this machine<br />
using LPR.<br />
12 Click [Next].<br />
The [Install the printer driver] page appears.<br />
13 Click [Have Disk...].<br />
14 Click [Browse...].<br />
15 Select a desired printer driver folder in the DVD-ROM, and then click [Open].<br />
% Select a folder according to the printer driver, operating system, and language to be used. Selectable<br />
printer drivers:<br />
PCL driver, PS driver, XPS driver and fax driver<br />
16 Click [OK].<br />
The [<strong>Print</strong>ers] list appears.<br />
<strong>VL</strong>3622c/<strong>VL</strong>2822c/<strong>VL</strong><strong>2222c</strong> 4-5
4<br />
17 Click [Next].<br />
Windows Vista/Server 2008<br />
18 Follow the instructions on the pages that follow.<br />
% If the [<strong>User</strong> Account Control] window appears, click [Continue].<br />
% If the [Windows Security] window for verifying the publisher appears, click [Install this driver software<br />
anyway].<br />
19 Click [Finish].<br />
20 After finishing the installation, make sure that the icon for the installed printer is displayed in the [<strong>Print</strong>ers]<br />
window.<br />
21 Remove the DVD-ROM from the DVD-ROM drive.<br />
This completes the printer driver installation.<br />
4.1.2 For network connection (IPP/IPPS)<br />
Settings for the machine<br />
To use IPP printing, you must configure the network settings for the machine in advance.<br />
Items to be configured Description<br />
IP address In [TCP/IP Settings] of the machine, specify the IP address.<br />
IPP Setting In [IPP Settings] for the machine, enable IPP printing.<br />
d Reference<br />
For details on the network settings for the machine, refer to the [<strong>User</strong>'s Guide Network Administrator].<br />
Before you can use IPPS printing, you must register a certificate with this machine. You can use the selfsigned<br />
certificate that is preinstalled in this machine. For details, refer to [<strong>User</strong>'s Guide Network Administrator].<br />
Installing the printer driver manually using the Add <strong>Print</strong>er Wizard<br />
0 Installing the driver to Windows Vista/Server 2008-based computers requires the administrator authority.<br />
1 Insert the printer driver DVD-ROM for Windows into the DVD-ROM drive of the computer.<br />
2 Click [Start], and then select [Control Panel].<br />
3 Click [<strong>Print</strong>ers] under [Hardware and Sound].<br />
The [<strong>Print</strong>ers] window appears.<br />
% When [Control Panel] is displayed in Classic View, double-click [<strong>Print</strong>ers].<br />
4 Click [Add a printer] on the toolbar.<br />
The [Add <strong>Print</strong>er] window appears.<br />
5 Click [Add a network, wireless or Bluetooth printer].<br />
Connected printers are detected.<br />
6 In the window showing the search result, click [The printer that I want isn't listed].<br />
4-6 <strong>VL</strong>3622c/<strong>VL</strong>2822c/<strong>VL</strong><strong>2222c</strong><br />
4.1
4.1 Windows Vista/Server 2008 4<br />
7 In the [Select a shared printer by name] box, enter the URL for the machine in the following format, and<br />
then click [Next].<br />
% http:///ipp<br />
Example: When the IP address for the machine is 192.168.1.20, http://192.168.1.20/ipp<br />
% When specifying to use IPPS printing, enter "https://./ipp". . For , specify the host name and domain name registered for the DNS server<br />
being used.<br />
% If the certificate for the machine is not the one issued by the certifying authority, you must register<br />
the certificate for the machine on the Windows Vista/Server 2008 system as the certificate by<br />
"Trusted Root Certification Authorities" for the computer account.<br />
% When registering a certificate to the machine, confirm that . is displayed<br />
as the common name of the certificate.<br />
8 Click [Have Disk...].<br />
9 Click [Browse...].<br />
10 Select a desired printer driver folder in the DVD-ROM, and then click [Open].<br />
% Select a folder according to the printer driver, operating system, and language to be used. Selectable<br />
printer drivers:<br />
PCL driver, PS driver, XPS driver and fax driver<br />
11 Click [OK].<br />
The [<strong>Print</strong>ers] list appears.<br />
12 Click [OK].<br />
13 Follow the instructions on the pages that follow.<br />
% If the [<strong>User</strong> Account Control] window appears, click [Continue].<br />
% If the [Windows Security] window for verifying the publisher appears, click [Install this driver software<br />
anyway].<br />
14 Click [Finish].<br />
15 After finishing the installation, make sure that the icon for the installed printer is displayed in the [<strong>Print</strong>ers]<br />
window.<br />
16 Remove the DVD-ROM from the DVD-ROM drive.<br />
This completes the printer driver installation.<br />
Once the settings for the printer have been configured, you can use the printer in the same way as a general<br />
local printer.<br />
<strong>VL</strong>3622c/<strong>VL</strong>2822c/<strong>VL</strong><strong>2222c</strong> 4-7
4<br />
4.1.3 For network connection (Web service print)<br />
Windows Vista/Server 2008<br />
In Windows Vista/Server 2008, printers supporting the Web service print function on the network can be located<br />
and installed.<br />
d Reference<br />
To install a different printer driver in the computer where one has already been installed, you must uninstall<br />
the currently installed one along with its package. For details, refer to page 7-3.<br />
Settings for the machine<br />
To use the Web service print, you must configure the network settings for the machine in advance.<br />
Items to be configured Description<br />
IP address In [TCP/IP Settings] of the machine, specify the IP address.<br />
Web Service Settings In [Web Service Settings] for the machine, enable the print function.<br />
d Reference<br />
For details on the network settings for the machine, refer to the [<strong>User</strong>'s Guide Network Administrator].<br />
Installing the printer from the Network window<br />
0 Installing the driver to Windows Vista/Server 2008-based computers requires the administrator authority.<br />
1 Turn on the power of the machine while it is connected to the network.<br />
Since the printer is searched for during the installation, be sure to connect the machine to the network.<br />
2 To use the Web service print, check that [Network discovery] is enabled in [Network and Sharing Center]<br />
on the computer.<br />
3 Insert the printer driver DVD-ROM for Windows into the DVD-ROM drive of the computer.<br />
4 Press the [Start] key, and then select [Network].<br />
The [Network] window appears, starting to search for the computers and devices on the network.<br />
5 Select the device name of the machine, and then click [Install] on the toolbar.<br />
% If the [<strong>User</strong> Account Control] window appears, click [Continue].<br />
A printer compatible with the selected Web service print function is located, and then the [Found New<br />
Hardware] dialog box appears.<br />
6 Follow the instructions on the pages that follow.<br />
% If the [<strong>User</strong> Account Control] window appears, click [Continue].<br />
% If the [Windows Security] window for verifying the publisher appears, click [Install this driver software<br />
anyway].<br />
d Reference<br />
The operating steps in the [Found New Hardware] dialog box are the same as those described in "Installing<br />
the printer driver by specifying the IP address using the Add <strong>Print</strong>er Wizard". For details, refer to Steps 11<br />
through 20 in the succeeding section.<br />
4-8 <strong>VL</strong>3622c/<strong>VL</strong>2822c/<strong>VL</strong><strong>2222c</strong><br />
4.1
4.1 Windows Vista/Server 2008 4<br />
Installing the printer driver by specifying the IP address using the Add <strong>Print</strong>er<br />
Wizard<br />
0 Installing the driver to Windows Vista/Server 2008-based computers requires the administrator authority.<br />
0 Since the printer is searched for during the installation, be sure to connect this machine to the network<br />
before turning it on.<br />
1 Turn on the power of the machine while it is connected to the network.<br />
Since the printer is searched for during the installation, be sure to connect the machine to the network.<br />
2 To use the Web service print, check that [Network discovery] is enabled in [Network and Sharing Center]<br />
on the computer.<br />
3 Insert the printer driver DVD-ROM for Windows into the DVD-ROM drive of the computer.<br />
4 Click [Start], and then select [Control Panel].<br />
5 Click [<strong>Print</strong>ers] under [Hardware and Sound].<br />
The [<strong>Print</strong>ers] window appears.<br />
% When [Control Panel] is displayed in Classic View, double-click [<strong>Print</strong>ers].<br />
6 Click [Add a printer] on the toolbar.<br />
The [Add <strong>Print</strong>er] window appears.<br />
7 Click [Add a local printer].<br />
The page for [Choose a printer port] appears.<br />
8 Click [Create a new port:], and then select the port type.<br />
% Select [Standard TCP/IP Port].<br />
9 Click [Next].<br />
10 Select [Web Services Device], enter the IP address, and click [Next].<br />
A printer of the entered IP address that is compatible with the Web service print function is located, and<br />
then the [Found New Hardware] dialog box appears.<br />
11 Click [Locate and install driver software (recommended)].<br />
12 If a dialog box to confirm whether to search online appears, click [Don't search online].<br />
13 Click [Browse my computer for driver software (advanced)].<br />
14 Click [Browse...].<br />
15 Select a desired printer driver folder in the DVD-ROM, and then click [Open].<br />
% Select a folder according to the printer driver, operating system, and language to be used. Selectable<br />
printer drivers:<br />
PCL driver, PS driver, XPS driver and fax driver<br />
16 Click [Next].<br />
17 Follow the instructions on the pages that follow.<br />
% If the [<strong>User</strong> Account Control] window appears, click [Continue].<br />
% If the [Windows Security] window for verifying the publisher appears, click [Install this driver software<br />
anyway].<br />
18 Click [Close].<br />
19 After finishing the installation, make sure that the icon for the installed printer is displayed in the [<strong>Print</strong>ers]<br />
window.<br />
<strong>VL</strong>3622c/<strong>VL</strong>2822c/<strong>VL</strong><strong>2222c</strong> 4-9
4<br />
20 Remove the DVD-ROM from the DVD-ROM drive.<br />
This completes the printer driver installation.<br />
4.1.4 For local connection<br />
Windows Vista/Server 2008<br />
When this machine is connected via a USB port, the printer driver can be installed with plug and play.<br />
Reference<br />
- When a USB connection is used, the printer driver is installed easily with the plug and play feature. However,<br />
it can also be installed using the Add <strong>Print</strong>er Wizard. To use the Add <strong>Print</strong>er Wizard, select the<br />
USB port to be connected in the [Choose a printer port] page.<br />
1 Connect this machine to the computer using a USB cable, and then start the computer.<br />
NOTICE<br />
When starting up the computer, do not plug in or unplug the cable.<br />
2 Turn on the main power of this machine.<br />
The [Found New Hardware] dialog box appears.<br />
% If the [Found New Hardware] dialog box does not appear, turn this machine off, then on again. In<br />
this case, turn off this machine, and then wait approximately 10 seconds before turning it on again.<br />
If you turn this machine on immediately after turning it off, it may not function correctly.<br />
3 Click [Locate and install driver software (recommended)].<br />
The dialog box requesting the disk (DVD-ROM) appears.<br />
% If you do not have the disk (DVD-ROM), click [I don't have the disc, show me other options]. On the<br />
next page, select [Browse my computer for driver software (advanced)], and then specify a desired<br />
printer driver folder.<br />
% Select a folder according to the printer driver, operating system, and language to be used.<br />
4 Insert the printer driver DVD-ROM for Windows into the DVD-ROM drive of the computer.<br />
The information on the disk is searched for, and then the list of the software supported by this machine<br />
appears.<br />
5 Select a desired printer driver name, and then click [Next].<br />
% Selectable printer drivers:<br />
PCL driver, PS driver, XPS driver and fax driver<br />
6 Follow the instructions on the pages that follow.<br />
% If the [<strong>User</strong> Account Control] window appears, click [Continue].<br />
7 When the installation completes, click [Close].<br />
8 After finishing the installation, make sure that the icon for the installed printer is displayed in the [<strong>Print</strong>ers]<br />
window.<br />
% If the [Windows Security] window for verifying the publisher appears, click [Install this driver software<br />
anyway].<br />
9 Remove the DVD-ROM from the DVD-ROM drive.<br />
This completes the printer driver installation.<br />
4-10 <strong>VL</strong>3622c/<strong>VL</strong>2822c/<strong>VL</strong><strong>2222c</strong><br />
4.1
4.2 Windows XP/Server 2003 4<br />
4.2 Windows XP/Server 2003<br />
4.2.1 For network connection (LPR/Port9100)<br />
To use LPR/Port9100 printing, specify the port while installing the printer driver.<br />
Settings for the machine<br />
To use Port9100 or LPR printing, you must configure the network settings for the machine in advance.<br />
Items to be configured Description<br />
IP address In [TCP/IP Settings] of the machine, specify the IP address.<br />
RAW port number To use Port9100 printing:<br />
In [TCP/IP Settings] for the machine, enable the RAW port number<br />
(initial setting: [9100]).<br />
LPD Setting To use LPR printing:<br />
In [LPD Setting] for the machine, enable LPD printing.<br />
d Reference<br />
For details on the network settings for the machine, refer to the [<strong>User</strong>'s Guide Network Administrator].<br />
Installing the printer driver manually using the Add <strong>Print</strong>er Wizard<br />
0 Installing the driver to Windows XP/Server 2003-based computers requires the administrator authority.<br />
1 Insert the printer driver DVD-ROM for Windows into the DVD-ROM drive of the computer.<br />
2 Click [Start], and then select [<strong>Print</strong>ers and Faxes].<br />
% If [<strong>Print</strong>ers and Faxes]is not displayed in the [Start] menu, open [Control Panel] from the [Start] menu,<br />
click [<strong>Print</strong>ers and Other Hardware], then click [<strong>Print</strong>ers and Faxes].<br />
3 In Windows XP, select [Add a printer] from the [<strong>Print</strong>er Tasks] menu.<br />
In Windows Server 2003, double-click [Add <strong>Print</strong>er].<br />
[Add <strong>Print</strong>er Wizard] starts.<br />
4 Click [Next >].<br />
5 Select [Local printer attached to this computer], and then click [Next >].<br />
% Clear the [Automatically detect and install my Plug and Play printer] check box.<br />
The [Select a <strong>Print</strong>er Port] page appears.<br />
6 Select [Create a new port:], and then select [Standard TCP/IP Port] as the [Type of port:].<br />
7 Click [Next >].<br />
[Add Standard TCP/IP <strong>Print</strong>er Port Wizard] starts.<br />
8 Click [Next >].<br />
9 In the [<strong>Print</strong>er Name or IP Address:] box, enter the IP address for the machine, and then click [Next >].<br />
% If the [Additional Port Information Required ] dialog box appears, go to Step 10.<br />
% If the [Finish] screen appears, go to Step 13.<br />
10 Select [Custom], and then click [Settings:].<br />
11 Change the settings according to the port, and then click [OK].<br />
% For LPR connection, select [LPR], and then enter "<strong>Print</strong>" in the [Queue Name:] box.<br />
% You must discriminate between upper and lower case letters when entering it.<br />
% For Port9100, select [Raw], and then enter a RAW port number (initial setting: [9100]) in the [Port<br />
Number:] box.<br />
<strong>VL</strong>3622c/<strong>VL</strong>2822c/<strong>VL</strong><strong>2222c</strong> 4-11
4<br />
12 Click [Next >].<br />
Windows XP/Server 2003<br />
13 Click [Finish].<br />
[Add <strong>Print</strong>er Wizard] appears.<br />
14 Click [Have Disk...].<br />
15 Click [Browse...].<br />
16 Select a desired printer driver folder in the DVD-ROM, and then click [Open].<br />
% Select a folder according to the printer driver, operating system, and language to be used. Selectable<br />
printer drivers:<br />
PCL driver, PS driver and fax driver<br />
17 Click [OK].<br />
The [<strong>Print</strong>ers] list appears.<br />
18 Click [Next >].<br />
19 Follow the instructions on the pages that follow.<br />
% To use a network connection, perform a test print after the network settings have been configured.<br />
20 Click [Finish].<br />
% If the "Windows logo testing" or [Digital Signature] window appears, click [Continue Anyway] or<br />
[Yes].<br />
21 After finishing the installation, make sure that the icon for the installed printer is displayed in the [<strong>Print</strong>ers<br />
and Faxes] window.<br />
22 Remove the DVD-ROM from the DVD-ROM drive.<br />
This completes the printer driver installation.<br />
4-12 <strong>VL</strong>3622c/<strong>VL</strong>2822c/<strong>VL</strong><strong>2222c</strong><br />
4.2
4.2 Windows XP/Server 2003 4<br />
4.2.2 For network connection (SMB)<br />
To use SMB printing, specify the port by specifying the printer while installing the printer driver. The printer<br />
can be specified either by searching for the printer on the network, or by entering the printer name directly.<br />
Settings for the machine<br />
To use SMB printing, you must configure the network settings for the machine in advance.<br />
Items to be configured Description<br />
IP address In [TCP/IP Settings] of the machine, specify the IP address.<br />
SMB Setting To use SMB printing:<br />
At [<strong>Print</strong> Settings] in [SMB Settings] for the machine, specify NetBI-<br />
OS Name, <strong>Print</strong> Service Name, and Workgroup.<br />
d Reference<br />
For details on the network settings for the machine, refer to the [<strong>User</strong>'s Guide Network Administrator].<br />
To use SMB printing in the IPv6 environment, [Direct Hosting Setting] for the machine must be enabled. For<br />
details, refer to [<strong>User</strong>'s Guide Network Administrator].<br />
Installing the printer driver by specifying the printer using the Add <strong>Print</strong>er<br />
Wizard<br />
0 Installing the driver to Windows XP/Server 2003-based computers requires the administrator authority.<br />
1 Insert the printer driver DVD-ROM for Windows into the DVD-ROM drive of the computer.<br />
2 Click [Start], and then select [<strong>Print</strong>ers and Faxes].<br />
% If [<strong>Print</strong>ers and Faxes]is not displayed in the [Start] menu, open [Control Panel] from the [Start] menu,<br />
click [<strong>Print</strong>ers and Other Hardware], then click [<strong>Print</strong>ers and Faxes].<br />
3 In Windows XP, select [Add a printer] from the [<strong>Print</strong>er Tasks] menu.<br />
In Windows Server 2003, double-click [Add <strong>Print</strong>er].<br />
[Add <strong>Print</strong>er Wizard] starts.<br />
4 Click [Next >].<br />
5 Select [Local printer attached to this computer], and then click [Next >].<br />
% Clear the [Automatically detect and install my Plug and Play printer] check box.<br />
The page for [Select a <strong>Print</strong>er Port] appears.<br />
6 Click [Create a new port:], select [Local Port] as the [Type of port:], and then click [Next >].<br />
7 Enter "\\NetBIOS name\print service name" in the [Port Name] box.<br />
% Enter the same NetBIOS name and print service name specified in [<strong>Print</strong> Settings] in [SMB Settings].<br />
8 Click [OK].<br />
[Add <strong>Print</strong>er Wizard] appears.<br />
9 Click [Have Disk...].<br />
<strong>VL</strong>3622c/<strong>VL</strong>2822c/<strong>VL</strong><strong>2222c</strong> 4-13
4<br />
10 Click [Browse...].<br />
Windows XP/Server 2003<br />
11 Select a desired printer driver folder in the DVD-ROM, and then click [Open].<br />
% Select a folder according to the printer driver, operating system, and language to be used. Selectable<br />
printer drivers:<br />
PCL driver, PS driver and fax driver<br />
12 Click [OK].<br />
The [<strong>Print</strong>ers] list appears.<br />
13 Click [Next >].<br />
14 Follow the instructions on the pages that follow.<br />
% To use a network connection, perform a test print after the network settings have been configured.<br />
15 Click [Finish].<br />
% If the "Windows logo testing" or [Digital Signature] window appears, click [Continue Anyway] or<br />
[Yes].<br />
16 After finishing the installation, make sure that the icon for the installed printer is displayed in the [<strong>Print</strong>ers<br />
and Faxes] window.<br />
17 Remove the DVD-ROM from the DVD-ROM drive.<br />
This completes the printer driver installation.<br />
4.2.3 For network connection (IPP/IPPS)<br />
To use IPP printing, specify the port while installing the printer driver.<br />
Settings for the machine<br />
To use IPP printing, you must configure the network settings for the machine in advance.<br />
Items to be configured Description<br />
IP address In [TCP/IP Settings] of the machine, specify the IP address.<br />
IPP Setting In [IPP Settings] for the machine, enable IPP printing.<br />
d Reference<br />
For details on the network settings for the machine, refer to the [<strong>User</strong>'s Guide Network Administrator].<br />
Before you can use IPPS printing, you must register a certificate with this machine. You can use the selfsigned<br />
certificate that is preinstalled in this machine. For details, refer to [<strong>User</strong>'s Guide Network Administrator].<br />
4-14 <strong>VL</strong>3622c/<strong>VL</strong>2822c/<strong>VL</strong><strong>2222c</strong><br />
4.2
4.2 Windows XP/Server 2003 4<br />
Installing the printer driver manually using the Add <strong>Print</strong>er Wizard<br />
0 Installing the driver to Windows XP/Server 2003-based computers requires the administrator authority.<br />
1 Insert the printer driver DVD-ROM for Windows into the DVD-ROM drive of the computer.<br />
2 Click [Start], and then select [<strong>Print</strong>ers and Faxes].<br />
% If [<strong>Print</strong>ers and Faxes]is not displayed in the [Start] menu, open [Control Panel] from the [Start] menu,<br />
click [<strong>Print</strong>ers and Other Hardware], then click [<strong>Print</strong>ers and Faxes].<br />
3 In Windows XP, select [Add a printer] from the [<strong>Print</strong>er Tasks] menu.<br />
In Windows Server 2003, double-click [Add <strong>Print</strong>er].<br />
[Add <strong>Print</strong>er Wizard] starts.<br />
4 Click [Next >].<br />
5 In the [Local or Network <strong>Print</strong>er] page, select [A network printer, or a printer attached to another computer],<br />
and then click [Next >].<br />
6 In the [Specify a <strong>Print</strong>er] page, select [Connect to a printer on the Internet or on a home or office network:].<br />
7 In the [URL:] field, enter the URL for the machine in the following format, and then click [Next >].<br />
% http:///ipp<br />
Example: When the IP address for the machine is 192.168.1.20, http://192.168.1.20/ipp<br />
% When specifying to use IPPS printing, enter "https:///ipp".<br />
% If a confirmation dialog box appears after clicking [Next >], click [OK].<br />
8 Click [Have Disk...].<br />
9 Click [Browse...].<br />
10 Select a desired printer driver folder in the DVD-ROM, and then click [Open].<br />
% Select a folder according to the printer driver, operating system, and language to be used. Selectable<br />
printer drivers:<br />
PCL driver, PS driver and fax driver<br />
11 Click [OK].<br />
The [<strong>Print</strong>ers] list appears.<br />
12 Click [OK].<br />
13 Follow the instructions on the pages that follow.<br />
14 Click [Finish].<br />
% If the "Windows logo testing" or [Digital Signature] window appears, click [Continue Anyway] or<br />
[Yes].<br />
15 After finishing the installation, make sure that the icon for the installed printer is displayed in the [<strong>Print</strong>ers<br />
and Faxes] window.<br />
16 Remove the DVD-ROM from the DVD-ROM drive.<br />
This completes the printer driver installation.<br />
Once the settings for the printer have been configured, you can use the printer in the same way as a general<br />
local printer.<br />
<strong>VL</strong>3622c/<strong>VL</strong>2822c/<strong>VL</strong><strong>2222c</strong> 4-15
4<br />
4.2.4 For local connection<br />
Windows XP/Server 2003<br />
When this machine is connected via a USB port, the printer driver can be installed with plug and play.<br />
Reference<br />
- When a USB connection is used, the printer driver is installed easily with the plug and play feature. However,<br />
it can also be installed using the Add <strong>Print</strong>er Wizard. To use the Add <strong>Print</strong>er Wizard, select the<br />
USB port to be connected in the [Choose a printer port] page.<br />
1 Connect this machine to the computer using a USB cable, and then start the computer.<br />
NOTICE<br />
When starting up the computer, do not plug in or unplug the cable.<br />
2 Insert the printer driver DVD-ROM for Windows into the DVD-ROM drive of the computer.<br />
3 Turn on the main power of this machine.<br />
The [Found New Hardware Wizard] window appears.<br />
% If the [Found New Hardware Wizard] window does not appear, turn the machine off, then on again.<br />
In this case, turn off this machine, and then wait approximately 10 seconds before turning it on<br />
again. If you turn the printer on immediately after turning it off, it may not function correctly.<br />
% If a page with a message saying "Windows connect to Windows Update" appears, select ["No, not<br />
this time"].<br />
4 Select [Install from a list or specific location (Advanced)], and then click [Next >].<br />
5 Under [Search for the best driver in these locations.], select [Include this location in the search:], and<br />
then click [Browse].<br />
6 Select a desired printer driver folder in the DVD-ROM, and then click [OK].<br />
% Select a folder according to the printer driver, operating system, and language to be used. Selectable<br />
printer drivers:<br />
PCL driver, PS driver and fax driver<br />
7 Click [Next >], and then follow the instructions on the pages that follow.<br />
8 Click [Finish].<br />
% If the "Windows logo testing" or [Digital Signature] window appears, click [Continue Anyway] or<br />
[Yes].<br />
9 After finishing the installation, make sure that the icon for the installed printer is displayed in the [<strong>Print</strong>ers<br />
and Faxes] window.<br />
10 Remove the DVD-ROM from the DVD-ROM drive.<br />
This completes the printer driver installation.<br />
4-16 <strong>VL</strong>3622c/<strong>VL</strong>2822c/<strong>VL</strong><strong>2222c</strong><br />
4.2
4.3 Windows 2000 4<br />
4.3 Windows 2000<br />
4.3.1 For network connection (LPR/Port9100)<br />
To use LPR/Port9100 printing, specify the port while installing the printer driver.<br />
Settings for the machine<br />
To use Port9100 or LPR printing, you must configure the network settings for the machine in advance.<br />
Items to be configured Description<br />
IP address In [TCP/IP Settings] of the machine, specify the IP address.<br />
RAW port number To use Port9100 printing:<br />
In [TCP/IP Settings] for the machine, enable the RAW port number<br />
(initial setting: [9100]).<br />
LPD Setting To use LPR printing:<br />
In [LPD Setting] for the machine, enable LPD printing.<br />
d Reference<br />
For details on the network settings for the machine, refer to the [<strong>User</strong>'s Guide Network Administrator].<br />
Installing the printer driver manually using the Add <strong>Print</strong>er Wizard<br />
0 Installing the driver to Windows 2000-based computers requires the administrator authority.<br />
1 Insert the printer driver DVD-ROM for Windows into the DVD-ROM drive of the computer.<br />
2 Click [Start], and then select [Settings] - [<strong>Print</strong>ers].<br />
3 Double-click [Add <strong>Print</strong>er].<br />
[Add <strong>Print</strong>er Wizard] starts.<br />
4 Follow the instructions on the pages that follow.<br />
5 On the window for specifying how the printer is attached, select [Local printer], and then click [Next >].<br />
% Clear the [Automatically detect and install my Plug and Play printer] check box.<br />
The page for [Select the <strong>Print</strong>er Port] appears.<br />
6 Click [Create a new port:], and then select [Standard TCP/IP Port] as the type of port.<br />
7 Click [Next >].<br />
[Add Standard TCP/IP <strong>Print</strong>er Port Wizard] starts.<br />
8 Click [Next >].<br />
9 In the [<strong>Print</strong>er Name or IP Address:] box, enter the IP address for the machine, and then click [Next >].<br />
% If the [Additional Port Information Required ] dialog box appears, go to Step 10.<br />
% If the [Finish] page appears, go to Step 13.<br />
10 Select [Custom], and then click [Settings...].<br />
11 Change the settings according to the port, and then click [OK].<br />
% For LPR connection, select [LPR], and then enter "<strong>Print</strong>" in the [Queue Name:] box.<br />
% You must discriminate between upper and lower case letters when entering it.<br />
% For Port9100, select [Raw], and then enter a RAW port number (initial setting: [9100]) in the [Port<br />
Number:] box.<br />
12 Click [Next >].<br />
<strong>VL</strong>3622c/<strong>VL</strong>2822c/<strong>VL</strong><strong>2222c</strong> 4-17
4<br />
Windows 2000<br />
13 Click [Finish].<br />
[Add <strong>Print</strong>er Wizard] appears.<br />
14 Click [Have Disk...].<br />
15 Click [Browse...].<br />
16 Select a desired printer driver folder in the DVD-ROM, and then click [Open].<br />
% Select a folder according to the printer driver, operating system, and language to be used. Selectable<br />
printer drivers:<br />
PCL driver, PS driver and fax driver<br />
17 Click [OK].<br />
The [<strong>Print</strong>er:] list appears.<br />
18 Click [Next >].<br />
19 Follow the instructions on the pages that follow.<br />
20 Click [Finish].<br />
% If the [Digital Signature] window appears, click [Yes].<br />
21 After finishing the installation, make sure that the icon for the installed printer is displayed in the [<strong>Print</strong>ers]<br />
window.<br />
22 Remove the DVD-ROM from the DVD-ROM drive.<br />
This completes the printer driver installation.<br />
4-18 <strong>VL</strong>3622c/<strong>VL</strong>2822c/<strong>VL</strong><strong>2222c</strong><br />
4.3
4.3 Windows 2000 4<br />
4.3.2 For network connection (SMB)<br />
To use SMB printing, specify the port by specifying the printer while installing the printer driver.<br />
Settings for the machine<br />
To use SMB printing, you must configure the network settings for the machine in advance.<br />
Items to be configured Description<br />
IP address In [TCP/IP Settings] of the machine, specify the IP address.<br />
SMB Setting To use SMB printing:<br />
At [<strong>Print</strong> Settings] in [SMB Settings] for the machine, specify NetBI-<br />
OS Name, <strong>Print</strong> Service Name, and Workgroup.<br />
d Reference<br />
For details on the network settings for the machine, refer to the [<strong>User</strong>'s Guide Network Administrator].<br />
Installing the printer driver manually using the Add <strong>Print</strong>er Wizard<br />
0 Installing the driver to Windows 2000-based computers requires the administrator authority.<br />
1 Insert the printer driver DVD-ROM for Windows into the DVD-ROM drive of the computer.<br />
2 Click [Start], and then select [Settings] - [<strong>Print</strong>ers].<br />
3 Double-click [Add <strong>Print</strong>er].<br />
[Add <strong>Print</strong>er Wizard] starts.<br />
4 Follow the instructions on the pages that follow.<br />
5 On the window for specifying how the printer is attached, select [Local printer], and then click [Next >].<br />
% Clear the [Automatically detect and install my Plug and Play printer] check box.<br />
The page for [Select the <strong>Print</strong>er Port] appears.<br />
6 Click [Create a new port:], and then select [Local Port] as the port type.<br />
7 Click [Next >].<br />
8 Enter "\\NetBIOS name\print service name" in the [Port Name] box.<br />
% Enter the same NetBIOS name and print service name specified in [<strong>Print</strong> Settings] in [SMB Settings].<br />
9 Click [OK].<br />
[Add <strong>Print</strong>er Wizard] appears.<br />
10 Click [Have Disk...].<br />
11 Click [Browse...].<br />
12 Select a desired printer driver folder in the DVD-ROM, and then click [Open].<br />
% Select a folder according to the printer driver, operating system, and language to be used. Selectable<br />
printer drivers:<br />
PCL driver, PS driver and fax driver<br />
13 Click [OK].<br />
The [<strong>Print</strong>er:] list appears.<br />
14 Click [Next >].<br />
15 Follow the instructions on the pages that follow.<br />
<strong>VL</strong>3622c/<strong>VL</strong>2822c/<strong>VL</strong><strong>2222c</strong> 4-19
4<br />
Windows 2000<br />
16 Click [Finish].<br />
% If the [Digital Signature] window appears, click [Yes].<br />
17 After finishing the installation, make sure that the icon for the installed printer is displayed in the [<strong>Print</strong>ers]<br />
window.<br />
18 Remove the DVD-ROM from the DVD-ROM drive.<br />
This completes the printer driver installation.<br />
4.3.3 For network connection (IPP/IPPS)<br />
For IPP printing, configure the network settings before installing the printer driver.<br />
Settings for the machine<br />
To use IPP printing, you must configure the network settings for the machine in advance.<br />
Items to be configured Description<br />
IP address In [TCP/IP Settings] of the machine, specify the IP address.<br />
IPP Setting In [IPP Settings] for the machine, enable IPP printing.<br />
d Reference<br />
For details on the network settings for the machine, refer to the [<strong>User</strong>'s Guide Network Administrator].<br />
Before you can use IPPS printing, you must register a certificate with this machine. You can use the selfsigned<br />
certificate that is preinstalled in this machine. For details, refer to [<strong>User</strong>'s Guide Network Administrator].<br />
Installing the printer driver manually using the Add <strong>Print</strong>er Wizard<br />
0 Installing the driver to Windows 2000-based computers requires the administrator authority.<br />
1 Insert the printer driver DVD-ROM for Windows into the DVD-ROM drive of the computer.<br />
2 Click [Start], and then select [Settings] - [<strong>Print</strong>ers].<br />
3 Double-click the [Add <strong>Print</strong>er] icon.<br />
[Add <strong>Print</strong>er Wizard] starts.<br />
4 Click [Next].<br />
5 In the [Local or Network <strong>Print</strong>er] page, select [Network printer], and then click [Next >].<br />
6 In the [Locate Your <strong>Print</strong>er] page, select [Connect to a printer on the Internet or your intranet].<br />
7 In the [URL:] field, enter the URL for the machine in the following format, and then click [Next].<br />
% http:///ipp<br />
Example: When the IP address for the machine is 192.168.1.20, http://192.168.1.20/ipp<br />
% When specifying to use IPPS printing, enter "https:///ipp".<br />
8 When the confirmation dialog box appears, click [OK].<br />
9 Click [Have Disk...].<br />
10 Click [Browse...].<br />
11 Select a desired printer driver folder in the DVD-ROM, and then click [Open].<br />
% Select a folder according to the printer driver, operating system, and language to be used. Selectable<br />
printer drivers:<br />
PCL driver, PS driver and fax driver<br />
4-20 <strong>VL</strong>3622c/<strong>VL</strong>2822c/<strong>VL</strong><strong>2222c</strong><br />
4.3
4.3 Windows 2000 4<br />
12 Click [OK].<br />
The [<strong>Print</strong>er:] list appears.<br />
13 Click [OK].<br />
14 Follow the instructions on the pages that follow.<br />
15 Click [Finish].<br />
% If the [Digital Signature] window appears, click [Yes].<br />
16 After finishing the installation, make sure that the icon for the installed printer is displayed in the [<strong>Print</strong>ers]<br />
window.<br />
17 Remove the DVD-ROM from the DVD-ROM drive.<br />
This completes the printer driver installation.<br />
Once the settings for the printer have been configured, you can use the printer in the same way as a general<br />
local printer.<br />
4.3.4 For local connection<br />
When this machine is connected via a USB port, the printer driver can be installed with plug and play.<br />
Reference<br />
- When a USB connection is used, the printer driver is installed easily with the plug and play feature. However,<br />
it can also be installed using the Add <strong>Print</strong>er Wizard. To use the Add <strong>Print</strong>er Wizard, select the<br />
USB port to be connected in the [Select the <strong>Print</strong>er Port] page.<br />
1 Connect this machine to the computer using a USB cable, and then start the computer.<br />
NOTICE<br />
When starting up the computer, do not plug in or unplug the cable.<br />
2 Insert the printer driver DVD-ROM for Windows into the DVD-ROM drive of the computer.<br />
3 Turn on the main power of this machine.<br />
The [Found New Hardware Wizard] window appears.<br />
% If the [Found New Hardware Wizard] window does not appear, turn the machine off, then on again.<br />
In this case, turn off this machine, and then wait approximately 10 seconds before turning it on<br />
again. If you turn the printer on immediately after turning it off, it may not function correctly.<br />
4 Click [Next >].<br />
5 Select [Search for a suitable driver for my device (recommended)], and then click [Next >].<br />
6 Select [Specify a Location], and then click [Next >].<br />
7 Click [Browse...].<br />
8 Select a desired printer driver folder in the DVD-ROM, and then click [Open].<br />
% Select a folder according to the printer driver, operating system, and language to be used. Selectable<br />
printer drivers:<br />
PCL driver, PS driver and fax driver<br />
9 Click [OK], and then follow the instructions on the pages that follow.<br />
10 Click [Finish].<br />
% If the [Digital Signature] window appears, click [Yes].<br />
11 After finishing the installation, make sure that the icon for the installed printer is displayed in the [<strong>Print</strong>ers]<br />
window.<br />
<strong>VL</strong>3622c/<strong>VL</strong>2822c/<strong>VL</strong><strong>2222c</strong> 4-21
4<br />
12 Remove the DVD-ROM from the DVD-ROM drive.<br />
This completes the printer driver installation.<br />
4.4 Windows NT 4.0<br />
4.4.1 For network connection (LPR)<br />
To use LPR printing, specify the port while installing the printer driver.<br />
Settings for the machine<br />
To use LPR printing, you must configure the network settings for the machine in advance.<br />
Windows NT 4.0<br />
Items to be configured Description<br />
IP address In [TCP/IP Settings] of the machine, specify the IP address.<br />
LPD Setting To use LPR printing:<br />
In [LPD Setting] for the machine, enable LPD printing.<br />
d Reference<br />
For details on the network settings for the machine, refer to the [<strong>User</strong>'s Guide Network Administrator].<br />
Installing the printer driver manually using the Add <strong>Print</strong>er Wizard<br />
0 Installing the driver to Windows NT 4.0-based computers requires the administrator authority.<br />
0 In Windows NT4.0, to use the LPR port, you must have the [Microsoft TCP/IP <strong>Print</strong>ing] service installed<br />
in your computer.<br />
1 Insert the printer driver DVD-ROM for Windows into the DVD-ROM drive of the computer.<br />
2 Click [Start], and then select [Settings] - [<strong>Print</strong>ers].<br />
3 Double-click the [Add <strong>Print</strong>er] icon.<br />
[Add <strong>Print</strong>er Wizard] starts.<br />
4 On the page for specifying how the printer is attached, select [This computer].<br />
5 Click [Next >].<br />
A page for selecting a port appears.<br />
6 Click [Add Port...].<br />
7 From the [Available <strong>Print</strong>er Ports] list, select [LPR Port], and then click [New Port...].<br />
8 Enter the IP address of the machine in the "Address" box, enter "<strong>Print</strong>" in the "Queue Name" box, and<br />
then click [OK].<br />
% You must discriminate between upper and lower case letters when entering it.<br />
9 Select the created port, and then click [Next >].<br />
10 Click [Have Disk...].<br />
11 Click [Browse...].<br />
12 Select a desired printer driver folder in the DVD-ROM, and then click [Open].<br />
% Select a folder according to the printer driver, operating system, and language to be used. Selectable<br />
printer drivers:PCL driver and fax driver<br />
13 Click [OK].<br />
The [<strong>Print</strong>er:] list appears.<br />
4-22 <strong>VL</strong>3622c/<strong>VL</strong>2822c/<strong>VL</strong><strong>2222c</strong><br />
4.4
4.4 Windows NT 4.0 4<br />
14 Click [Next >].<br />
15 Follow the instructions on the pages that follow.<br />
16 Click [Finish].<br />
17 After finishing the installation, make sure that the icon for the installed printer is displayed in the [<strong>Print</strong>ers]<br />
window.<br />
18 Remove the DVD-ROM from the DVD-ROM drive.<br />
This completes the printer driver installation.<br />
<strong>VL</strong>3622c/<strong>VL</strong>2822c/<strong>VL</strong><strong>2222c</strong> 4-23
4<br />
Windows NT 4.0<br />
4-24 <strong>VL</strong>3622c/<strong>VL</strong>2822c/<strong>VL</strong><strong>2222c</strong><br />
4.4
5 Installation<br />
on Macintosh<br />
Computers
5.1 Mac OS X 10.2/10.3/10.4/10.5 5<br />
5 Installation on Macintosh Computers<br />
This chapter describes the settings necessary when using Macintosh and the procedure for installing printer<br />
drivers for Macintosh.<br />
5.1 Mac OS X 10.2/10.3/10.4/10.5<br />
5.1.1 Installing the printer driver<br />
1 Start the Macintosh computer.<br />
2 Insert the printer driver DVD-ROM for Macintosh into the DVD-ROM drive of the computer.<br />
% Exit all running applications, if any.<br />
3 Open the folder in the DVD-ROM that contains the desired printer driver.<br />
% Select a folder according to the printer driver, operating system, and language to be used.<br />
4 Copy the driver file onto the desktop according to the Mac OS version.<br />
% OS X 10.2: 36C-1_102.pkg<br />
% OS X 10.3: 36C-1_103104.pkg<br />
% OS X 10.4: 36C-1_103104.pkg<br />
% OS X 10.5: 36C-1_105.pkg<br />
% For OS X 10.5, the driver folder varies depending on the paper size. Select the appropriate driver<br />
folder for your environment.<br />
To use metric-based paper size (A4 and the like): Select a file in "WW_A4" folder.<br />
To use inch-based paper size (8 1/2 e 11 in letter size): Select "WW_Letter" folder.<br />
5 Double-click the file copied onto the desktop.<br />
The installer starts.<br />
% To cancel installation, press [Cancel].<br />
6 Click [Continue] following the instructions on the pages that follow until the [Installation] page appears.<br />
% When the name and password prompt appears during the procedure, enter the administrator name<br />
and password.<br />
7 In the [Installation] page, click [Install].<br />
The printer driver is installed in the computer. When the installation is completed, a message appears.<br />
% For OS X 10.2/10.3/10.4, when the printer driver is installed for the second and subsequent times,<br />
[Install] may change to [Upgrade].<br />
8 Click [Close].<br />
This completes the printer driver installation.<br />
Next, select a printer.<br />
<strong>VL</strong>3622c/<strong>VL</strong>2822c/<strong>VL</strong><strong>2222c</strong> 5-3
5<br />
5.1.2 Selecting and connecting a printer (OS X 10.4/10.5)<br />
Mac OS X 10.2/10.3/10.4/10.5<br />
In OS X 10.4/10.5, the printer can be connected with Bonjour, AppleTalk, LPR (LPD), or IPP.<br />
After configuring the network setting for the machine, selecting this machine as the printer to be used in the<br />
[<strong>Print</strong> & Fax] window enables printing.<br />
Configuring the Bonjour settings<br />
Configuring the [Bonjour Setting] for the machine<br />
Enable Bonjour in [Bonjour Setting] for the machine, and then enter the Bonjour name.<br />
d Reference<br />
For details on the [Bonjour Setting] for the machine, refer to the [<strong>User</strong>'s Guide Network Administrator].<br />
Adding a printer<br />
1 In the [Apple Menu], select [System Preferences...].<br />
2 Click the [<strong>Print</strong> & Fax] icon.<br />
3 Click [+] on the [<strong>Print</strong> & Fax] window.<br />
4 Click [Default].<br />
Connected printers are detected.<br />
% If no printer is detected, turn this machine off, then on again.<br />
In this case, turn off this machine, and then wait approximately 10 seconds before turning it on<br />
again. If you turn the printer on immediately after turning it off, it may not function correctly.<br />
5 From the [<strong>Print</strong>er Name] list, select the desired Bonjour-connected model name.<br />
The printer driver corresponding to the selected printer name is automatically selected.<br />
% After the printer driver is selected, go to Step 7.<br />
% If an incorrect printer driver is selected, go to Step 6.<br />
6 Select the desired printer driver manually.<br />
% When OS X 10.5 is used, select the [Select a driver to use...] from the [<strong>Print</strong> Using:], and then select<br />
the printer driver of the desired model name from the list.<br />
% When OS X 10.4 is used, select [GENERIC] from the [<strong>Print</strong> Using:], and then select the printer driver<br />
of the desired model name from the list.<br />
7 Click [Add].<br />
When the selected printer is registered in the [<strong>Print</strong> & Fax], the setting procedure is completed.<br />
% If the [Installable Options] window appears, proceed to change the option settings as necessary.<br />
For details, refer to page 9-5.<br />
Reference<br />
- For OS X 10.4, you can also add a printer by clicking [Add] in the [<strong>Print</strong>er Setup Utility] window.<br />
5-4 <strong>VL</strong>3622c/<strong>VL</strong>2822c/<strong>VL</strong><strong>2222c</strong><br />
5.1
5.1 Mac OS X 10.2/10.3/10.4/10.5 5<br />
Configuring the AppleTalk settings<br />
Configuring the [AppleTalk Settings] for the machine<br />
Enable AppleTalk in [AppleTalk Settings], and then enter the printer name.<br />
d Reference<br />
For details on the [AppleTalk Settings] for the machine, refer to the [<strong>User</strong>'s Guide Network Administrator].<br />
Configuring the [AppleTalk Settings] for the computer<br />
Configure the AppleTalk settings for the Macintosh computer connected to the printer.<br />
1 In the [Apple Menu], select [System Preferences...].<br />
2 Click the [Network] icon.<br />
3 The Ethernet setting window appears.<br />
% For OS X 10.5, select [Ethernet], and then click [Advanced...].<br />
% For OS X 10.4, select [Built-in Ethernet], and then click [Configure...].<br />
4 Double-click the [AppleTalk] tab to enable AppleTalk.<br />
5 Click the close button at the top left corner of the window.<br />
% When the [This service has unsaved changes] message appears, click [Apply].<br />
Adding a printer<br />
1 In the [Apple Menu], select [System Preferences...].<br />
2 Click the [<strong>Print</strong> & Fax] icon.<br />
3 Click [+] on the [<strong>Print</strong> & Fax] window.<br />
4 Click [Default].<br />
Connected printers are detected.<br />
% If no printer is detected, turn this machine off, then on again.<br />
In this case, turn off this machine, and then wait approximately 10 seconds before turning it on<br />
again. If you turn the printer on immediately after turning it off, it may not function correctly.<br />
5 From the [<strong>Print</strong>er Name] list, select the desired AppleTalk-connected model name.<br />
The printer driver corresponding to the selected printer name is automatically selected.<br />
% After the printer driver is selected, go to Step 7.<br />
% If an incorrect printer driver is selected, go to Step 6.<br />
6 Select the desired printer driver manually.<br />
% When OS X 10.5 is used, select the [Select a driver to use...] from the [<strong>Print</strong> Using:], and then select<br />
the printer driver of the desired model name from the list.<br />
% When OS X 10.4 is used, select [GENERIC] from the [<strong>Print</strong> Using:], and then select the printer driver<br />
of the desired model name from the list.<br />
7 Click [Add].<br />
When the selected printer is registered in the [<strong>Print</strong> & Fax], the setting procedure is completed.<br />
% If the [Installable Options] window appears, proceed to change the option settings as necessary.<br />
For details, refer to page 9-5.<br />
Reference<br />
- For OS X 10.4, you can also add a printer by clicking [Add] in the [<strong>Print</strong>er Setup Utility] window.<br />
<strong>VL</strong>3622c/<strong>VL</strong>2822c/<strong>VL</strong><strong>2222c</strong> 5-5
5<br />
Configuring the LPR settings<br />
[TCP/IP Settings] for the machine<br />
Specify the IP address for the machine.<br />
[LPD Setting] for the printer<br />
Before using LPR printing, enable LPD printing in [LPD Setting] for the machine.<br />
Mac OS X 10.2/10.3/10.4/10.5<br />
d Reference<br />
For details on specifying the IP address for the machine, refer to the [<strong>User</strong>'s Guide Network Administrator].<br />
For details on the [LPD Setting] for the machine, refer to the [<strong>User</strong>'s Guide Network Administrator].<br />
Configuring the TCP/IP settings for the computer<br />
Configure the TCP/IP settings for the Macintosh computer connected to the printer.<br />
1 In the [Apple Menu], select [System Preferences...].<br />
2 Click the [Network] icon.<br />
3 The Ethernet setting window appears.<br />
% For OS X 10.5, select [Ethernet], and then click [Advanced...].<br />
% For OS X 10.4, select [Built-in Ethernet], and then click [Configure...].<br />
4 Click the [TCP/IP] tab.<br />
5 Configure the settings including the IP address and subnet mask according to the settings of the network<br />
to which the Macintosh computer is connected.<br />
6 Click the close button at the top left corner of the window.<br />
% When the [This service has unsaved changes] message appears, click [Apply].<br />
Adding a printer<br />
1 In the [Apple Menu], select [System Preferences...].<br />
2 Click the [<strong>Print</strong> & Fax] icon.<br />
3 Click [+] on the [<strong>Print</strong> & Fax] window.<br />
4 Click [IP] or [IP <strong>Print</strong>er].<br />
5 In [Protocol:], select [Line <strong>Print</strong>er Daemon - LPD].<br />
6 In [Address:], enter the IP address for the machine.<br />
The printer driver corresponding to this machine being identified with its IP address is automatically selected.<br />
% After the printer driver is selected, go to Step 8.<br />
% If an incorrect printer driver is selected, go to Step 7.<br />
7 Select the desired printer driver manually.<br />
% When OS X 10.5 is used, select the [Select a driver to use...] from the [<strong>Print</strong> Using:], and then select<br />
the printer driver of the desired model name from the list.<br />
% When OS X 10.4 is used, select [GENERIC] from the [<strong>Print</strong> Using:], and then select the printer driver<br />
of the desired model name from the list.<br />
8 Click [Add].<br />
When the selected printer is registered in the [<strong>Print</strong> & Fax], the setting procedure is completed.<br />
% If the [Installable Options] window appears, proceed to change the option settings as necessary.<br />
For details, refer to page 9-5.<br />
5-6 <strong>VL</strong>3622c/<strong>VL</strong>2822c/<strong>VL</strong><strong>2222c</strong><br />
5.1
5.1 Mac OS X 10.2/10.3/10.4/10.5 5<br />
Reference<br />
- For OS X 10.4, you can also add a printer by clicking [Add] in the [<strong>Print</strong>er Setup Utility] window.<br />
Configuring the IPP settings<br />
[TCP/IP Settings] for the machine<br />
Specify the IP address for the machine.<br />
[IPP Settings] for the machine<br />
In [IPP Settings] for the machine, enable IPP printing.<br />
d Reference<br />
For details on specifying the IP address for the machine, refer to the [<strong>User</strong>'s Guide Network Administrator].<br />
For details on the [IPP Settings] for the machine, refer to the [<strong>User</strong>'s Guide Network Administrator].<br />
Configuring the TCP/IP settings for the computer<br />
Configure the TCP/IP settings for the Macintosh computer connected to the printer.<br />
1 In the [Apple Menu], select [System Preferences...].<br />
2 Click the [Network] icon.<br />
3 The Ethernet setting window appears.<br />
% For OS X 10.5, select [Ethernet], and then click [Advanced...].<br />
% For OS X 10.4, select [Built-in Ethernet], and then click [Configure...].<br />
4 Click the [TCP/IP] tab.<br />
5 Configure the settings including the IP address and subnet mask according to the settings of the network<br />
to which the Macintosh computer is connected.<br />
6 Click the close button at the top left corner of the window.<br />
% When the [This service has unsaved changes] message appears, click [Apply].<br />
Adding a printer<br />
1 In the [Apple Menu], select [System Preferences...].<br />
2 Click the [<strong>Print</strong> & Fax] icon.<br />
3 Click [+] on the [<strong>Print</strong> & Fax] window.<br />
[<strong>Print</strong>er Browser] appears.<br />
4 Click [IP] or [IP <strong>Print</strong>er].<br />
5 In [Protocol:], select [Internet <strong>Print</strong>ing Protocol - IPP].<br />
6 In [Address:], enter the IP address for the machine. In [Queue:], enter "ipp".<br />
The printer driver corresponding to this machine being identified with its IP address is automatically selected.<br />
% After the printer driver is selected, go to Step 8.<br />
% If an incorrect printer driver is selected, go to Step 7.<br />
7 Select the desired printer driver manually.<br />
% When OS X 10.5 is used, select the [Select a driver to use...] from the [<strong>Print</strong> Using:], and then select<br />
the printer driver of the desired model name from the list.<br />
% When OS X 10.4 is used, select [GENERIC] from the [<strong>Print</strong> Using:], and then select the printer driver<br />
of the desired model name from the list.<br />
<strong>VL</strong>3622c/<strong>VL</strong>2822c/<strong>VL</strong><strong>2222c</strong> 5-7
5<br />
Mac OS X 10.2/10.3/10.4/10.5<br />
8 Click [Add].<br />
When the selected printer is registered in the [<strong>Print</strong> & Fax], the setting procedure is completed.<br />
% If the [Installable Options] window appears, proceed to change the option settings as necessary.<br />
For details, refer to page 9-5.<br />
Reference<br />
- For OS X 10.4, you can also add a printer by clicking [Add] in the [<strong>Print</strong>er Setup Utility] window.<br />
5-8 <strong>VL</strong>3622c/<strong>VL</strong>2822c/<strong>VL</strong><strong>2222c</strong><br />
5.1
5.1 Mac OS X 10.2/10.3/10.4/10.5 5<br />
5.1.3 Selecting and connecting a printer (OS X 10.2/10.3)<br />
In OS X 10.2/10.3, the printer can be connected with Rendezvous, AppleTalk, LPR (LPD), or IPP.<br />
After configuring the network setting for the machine, selecting this machine as the printer to be used in<br />
[<strong>Print</strong>er Setup Utility] or [<strong>Print</strong> Center] enables printing.<br />
Configuring the Rendezvous settings<br />
Configuring the [Bonjour Setting] for the machine<br />
Enable Bonjour in [Bonjour Setting] for the machine, and then enter the Bonjour name.<br />
d Reference<br />
For details on the [Bonjour Setting] for the machine, refer to the [<strong>User</strong>'s Guide Network Administrator].<br />
Adding a printer<br />
1 Select [Macintosh HD] - [Applications] - [Utilities] where the driver has been installed, and then doubleclick<br />
[<strong>Print</strong>er Setup Utility] or [<strong>Print</strong> Center] to open it.<br />
2 When the [You have no printers available. ] window appears, click [Add]. When the [<strong>Print</strong>er List] appears,<br />
click [Add].<br />
% If available printers have already been specified, the [You have no printers available. ] window does<br />
not appear.<br />
3 Select [Rendezvous] for the connection method.<br />
Connected printers are detected.<br />
% If no printer is detected, turn this machine off, then on again.<br />
In this case, turn off this machine, and then wait approximately 10 seconds before turning it on<br />
again. If you turn the printer on immediately after turning it off, it may not function correctly.<br />
4 From the [Name] list, select the desired model name.<br />
The printer driver corresponding to the selected printer name is automatically selected.<br />
% After the printer driver is selected, go to Step 6.<br />
% If an incorrect printer driver is selected, go to Step 5.<br />
5 Select the desired printer driver manually.<br />
% From [<strong>Print</strong>er Model], select [GENERIC], and then select the desired model from the list of model<br />
names.<br />
6 Click [Add].<br />
When the selected printer is registered in the [<strong>Print</strong>er List], the setting procedure is completed.<br />
<strong>VL</strong>3622c/<strong>VL</strong>2822c/<strong>VL</strong><strong>2222c</strong> 5-9
5<br />
Configuring the AppleTalk settings<br />
Configuring the [AppleTalk Settings] for the machine<br />
Enable AppleTalk in [AppleTalk Settings], and then enter the printer name.<br />
Mac OS X 10.2/10.3/10.4/10.5<br />
d Reference<br />
For details on the [AppleTalk Settings] for the machine, refer to the [<strong>User</strong>'s Guide Network Administrator].<br />
Configuring the AppleTalk settings for the computer<br />
Configure the AppleTalk settings for the Macintosh computer connected to the printer.<br />
1 In the [Apple Menu], select [System Preferences...].<br />
2 Click the [Network] icon.<br />
3 From [Show:], select [Built-in Ethernet].<br />
4 Click the [AppleTalk] tab, and then select the [Make AppleTalk Active] check box.<br />
5 Click the close button at the top left corner of the window.<br />
% When the [This service has unsaved changes or Apply configuration changes ] message appears,<br />
click [Apply].<br />
Adding a printer<br />
1 Select [Macintosh HD] - [Applications] - [Utilities] where the driver has been installed, and then doubleclick<br />
[<strong>Print</strong>er Setup Utility] or [<strong>Print</strong> Center] to open it.<br />
2 When the [You have no printers available. ] window appears, click [Add]. When the printer list appears,<br />
click [Add].<br />
% If available printers have already been specified, the [You have no printers available. ] window does<br />
not appear.<br />
3 Select [AppleTalk] for the connection method, and then select the zone to which the machine is connected.<br />
Connected printers are detected.<br />
% If no printer is detected, turn this machine off, then on again.<br />
In this case, turn off this machine, and then wait approximately 10 seconds before turning it on<br />
again. If you turn the printer on immediately after turning it off, it may not function correctly.<br />
4 From the [Name] list, select the desired model name.<br />
The printer driver corresponding to the selected printer name is automatically selected.<br />
% After the printer driver is selected, go to Step 6.<br />
% If an incorrect printer driver is selected, go to Step 5.<br />
5 Select the desired printer driver manually.<br />
% From [<strong>Print</strong>er Model], select [GENERIC], and then select the desired model from the list of model<br />
names.<br />
6 Click [Add].<br />
When the selected printer is registered in the [<strong>Print</strong>er List], the setting procedure is completed.<br />
5-10 <strong>VL</strong>3622c/<strong>VL</strong>2822c/<strong>VL</strong><strong>2222c</strong><br />
5.1
5.1 Mac OS X 10.2/10.3/10.4/10.5 5<br />
Configuring the LPR settings<br />
[TCP/IP Settings] for the machine<br />
Specify the IP address for the machine.<br />
[LPD Setting] for the printer<br />
Before using LPR printing, enable LPD printing in [LPD Setting] for the machine.<br />
d Reference<br />
For details on specifying the IP address for the machine, refer to the [<strong>User</strong>'s Guide Network Administrator].<br />
For details on the [LPD Setting] for the machine, refer to the [<strong>User</strong>'s Guide Network Administrator].<br />
Configuring the TCP/IP settings for the computer<br />
Configure the TCP/IP settings for the Macintosh computer connected to the printer.<br />
1 In the [Apple Menu], select [System Preferences...].<br />
2 Click the [Network] icon.<br />
3 From [Show], select [Built-in Ethernet].<br />
4 Click the [TCP/IP] tab.<br />
5 Select the [Configure:] item and configure the settings including the IP address and subnet mask according<br />
to the settings for the network to which the Macintosh computer is connected.<br />
6 Click the close button at the top left corner of the window.<br />
% When the [This service has unsaved changes or Apply configuration changes ] message appears,<br />
click [Apply].<br />
Adding a printer<br />
1 Select [Macintosh HD] - [Applications] - [Utilities] where the driver has been installed, and then doubleclick<br />
[<strong>Print</strong>er Setup Utility] or [<strong>Print</strong> Center] to open it.<br />
2 When the [You have no printers available. ] window appears, click [Add]. When the printer list appears,<br />
click [Add].<br />
% If available printers have already been specified, the [You have no printers available. ] window does<br />
not appear.<br />
3 Select [IP <strong>Print</strong>ing] for the connection method.<br />
4 For OS X 10.3, select [LPD/LPR] for [<strong>Print</strong>er Type:].<br />
5 In [<strong>Print</strong>er Address:], enter the IP address for the machine.<br />
6 From [<strong>Print</strong>er Model], select [GENERIC], select the desired model from the list of model names, and<br />
then click [Add].<br />
When the selected printer is registered in the [<strong>Print</strong>er List], the setting procedure is completed.<br />
<strong>VL</strong>3622c/<strong>VL</strong>2822c/<strong>VL</strong><strong>2222c</strong> 5-11
5<br />
Configuring the IPP settings<br />
[TCP/IP Settings] for the machine<br />
Specify the IP address for the machine.<br />
[IPP Settings] for the machine<br />
In [IPP Settings] for the machine, enable IPP printing.<br />
Mac OS X 10.2/10.3/10.4/10.5<br />
d Reference<br />
For details on specifying the IP address for the machine, refer to the [<strong>User</strong>'s Guide Network Administrator].<br />
For details on the [IPP Settings] for the machine, refer to the [<strong>User</strong>'s Guide Network Administrator].<br />
Configuring the TCP/IP settings for the computer<br />
Configure the TCP/IP settings for the Macintosh computer connected to the printer.<br />
1 In the [Apple Menu], select [System Preferences...].<br />
2 Click the [Network] icon.<br />
3 From [Show], select [Built-in Ethernet].<br />
4 Click the [TCP/IP] tab.<br />
5 Select the [Configure:] item and configure the settings including the IP address and subnet mask according<br />
to the settings for the network to which the Macintosh computer is connected.<br />
6 Click the close button at the top left corner of the window.<br />
% When the [This service has unsaved changes or Apply configuration changes ] message appears,<br />
click [Apply].<br />
Adding a printer<br />
1 Select [Macintosh HD] - [Applications] - [Utilities] where the driver has been installed, and then doubleclick<br />
[<strong>Print</strong>er Setup Utility] or [<strong>Print</strong> Center] to open it.<br />
2 When the [You have no printers available. ] window appears, click [Add]. When the printer list appears,<br />
click [Add].<br />
% If available printers have already been specified, the [You have no printers available. ] window does<br />
not appear.<br />
3 Select [IP <strong>Print</strong>ing] for the connection method.<br />
4 For OS X 10.3, select [Internet <strong>Print</strong>ing Protocol - IPP] for [<strong>Print</strong>er Type:].<br />
5 In [<strong>Print</strong>er Address:], enter the IP address for the machine.<br />
% Leave [Queue Name:] blank.<br />
6 From [<strong>Print</strong>er Model], select [GENERIC], select the desired model from the list of model names, and<br />
then click [Add].<br />
When the selected printer is registered in the [<strong>Print</strong>er List], the setting procedure is completed.<br />
5-12 <strong>VL</strong>3622c/<strong>VL</strong>2822c/<strong>VL</strong><strong>2222c</strong><br />
5.1
5.2 Mac OS 9.2 5<br />
5.2 Mac OS 9.2<br />
5.2.1 Installing the printer driver<br />
After being connected, this machine can be used as a printer by selecting a PostScript printer and specifying<br />
the"printer description (PPD) file".<br />
First, copy the "printer description (PPD) file" to the computer.<br />
1 Insert the printer driver DVD-ROM for Macintosh into the DVD-ROM drive of the computer.<br />
2 Open the folder in the DVD-ROM that contains the desired printer driver.<br />
% Select a folder according to the printer driver, operating system, and language to be used.<br />
3 Select the PPD file "36C-1UVxxx.ppd", and copy it to [Macintosh HD] - [System Folder] − [Extension] −<br />
[<strong>Print</strong>er Descriptions] on the computer.<br />
This completes the printer driver installation.<br />
5.2.2 Selecting and connecting a printer<br />
In OS 9, the printer can be connected using AppleTalk or LPR (LPD).<br />
Configure the network settings for the machine, and then select the printer.<br />
Configuring the AppleTalk settings<br />
Configuring the [AppleTalk Settings] for the machine<br />
Enable AppleTalk in [AppleTalk Settings], and then enter the printer name.<br />
d Reference<br />
For details on the [AppleTalk Settings] for the machine, refer to the [<strong>User</strong>'s Guide Network Administrator].<br />
Configuring the AppleTalk settings for the computer<br />
Configure the AppleTalk settings for the Macintosh computer connected to the printer.<br />
1 In the [Apple Menu], select [Control Panels] - [AppleTalk].<br />
2 From [Connect via:], select [Ethernet].<br />
3 Click the close button at the top left corner of the window.<br />
% When the [Save changes to the current configuration? ] message appears, click [Save].<br />
Selecting a printer<br />
1 In the [Apple Menu] menu, select [Chooser].<br />
2 Make sure that [AppleTalk] is set to [Active], and then click the "LaserWriter" icon.<br />
3 From the [Select a PostScript <strong>Print</strong>er:] list, click the desired model name, and then click [Create].<br />
The window for selecting a PostScript printer description (PPD) file appears.<br />
% If a different PPD file has already been selected, click [Setup...] in Step 3, and then click [Select<br />
PPD...] from the window that is already displayed.<br />
4 Click the applicable PPD file, and then click [Select] (or [Open]).<br />
When the selected printer is registered in the [Chooser], the setting procedure is completed.<br />
% If the window showing the installable options appears, proceed to change the option settings as<br />
necessary. Go to Step 5.<br />
% If the [Chooser] window appears, go to Step 7.<br />
5 Specify the options installed in the machine.<br />
<strong>VL</strong>3622c/<strong>VL</strong>2822c/<strong>VL</strong><strong>2222c</strong> 5-13
5<br />
6 Click [OK].<br />
The [Chooser] window appears again.<br />
7 Close the [Chooser] window.<br />
Configuring the LPR settings<br />
[TCP/IP Settings] for the machine<br />
Specify the IP address for the machine.<br />
[LPD Setting] for the printer<br />
Before using LPR printing, enable LPD printing in [LPD Setting] for the machine.<br />
Mac OS 9.2<br />
d Reference<br />
For details on specifying the IP address for the machine, refer to the [<strong>User</strong>'s Guide Network Administrator].<br />
For details on the [LPD Setting] for the machine, refer to the [<strong>User</strong>'s Guide Network Administrator].<br />
Configuring the TCP/IP settings for the computer<br />
Configure the TCP/IP settings for the Macintosh computer connected to the printer.<br />
1 In the [Apple Menu], select [Control Panels] - [TCP/IP].<br />
2 From [Connect via:], select [Ethernet].<br />
3 Select the [Configure:] item and configure the settings including the IP address and subnet mask according<br />
to the settings for the network to which the Macintosh computer is connected.<br />
4 Click the close button at the top left corner of the window.<br />
% When the [Save changes to the current configuration? ] message appears, click [Save].<br />
Adding a printer<br />
1 Select [Macintosh HD] - [Applications (Mac OS 9)] - [Utilities], and then double-click [Desktop <strong>Print</strong>er<br />
Utility] to open it.<br />
The [New Desktop <strong>Print</strong>er] window appears.<br />
2 In [<strong>Print</strong>ing:], select [LaserWriter].<br />
3 In [Create Desktop...], select [<strong>Print</strong>er (LPR)].<br />
The [Untitled] window appears.<br />
4 In [PostScriptTM <strong>Print</strong>er Description (PPD) File], click [Change...].<br />
The window for selecting a PostScript printer description (PPD) file appears.<br />
5 Click the applicable PPD file, and then click [Select].<br />
The [Untitled] window appears again.<br />
6 Click [Change...] for [LPR <strong>Print</strong>er Selection].<br />
The window for entering the IP address appears.<br />
7 In [<strong>Print</strong>er Address:], enter the IP address of the machine, and then click [OK].<br />
The [Untitled] window appears again.<br />
8 Click [Create...].<br />
The window for saving the settings appears.<br />
9 Enter the [Save desktop printer as], and then click [Save].<br />
An icon for the LPR printer is created on the desktop.<br />
5-14 <strong>VL</strong>3622c/<strong>VL</strong>2822c/<strong>VL</strong><strong>2222c</strong><br />
5.2
6 Installation<br />
when Using<br />
NetWare
6.1 NetWare 6<br />
6 Installation when Using NetWare<br />
This chapter describes the settings necessary when using NetWare and the procedure for installing printer<br />
drivers for the Windows client.<br />
6.1 NetWare<br />
6.1.1 Network Settings<br />
In the [NetWare Settings] screen for the machine, specify [IPX Setting] and [NetWare <strong>Print</strong> Mode].<br />
d Reference<br />
For details on the NetWare settings for the machine, refer to the [<strong>User</strong>'s Guide Network Administrator].<br />
6.1.2 Configuring the Windows client<br />
For the Windows client that uses a printer, install the printer driver using the [Add <strong>Print</strong>er Wizard].<br />
0 Administrator authority is required for installation.<br />
1 Insert the printer driver DVD for Windows into the DVD-ROM drive of the computer.<br />
2 Open the [<strong>Print</strong>ers] window or [<strong>Print</strong>ers and Faxes] window.<br />
3 Perform [Add a printer] or [Add <strong>Print</strong>er].<br />
[Add <strong>Print</strong>er Wizard] starts.<br />
4 In the port settings, browse the network and specify the name of the created queue (or NDPS printer<br />
name).<br />
5 From the printer model list, specify the desired folder in the DVD-ROM that contains the printer driver.<br />
% Select a folder according to the printer driver, operating system, and language to be used.<br />
Selectable printer drivers:<br />
Windows 2000/XP/Server 2003: PCL driver, PS driver<br />
Windows Vista/Server 2008: PCL driver, PS driver, XPS driver<br />
Windows NT4.0: PCL driver<br />
6 Follow the instructions on the pages that follow to complete the installation.<br />
<strong>VL</strong>3622c/<strong>VL</strong>2822c/<strong>VL</strong><strong>2222c</strong> 6-3
6<br />
NetWare<br />
6-4 <strong>VL</strong>3622c/<strong>VL</strong>2822c/<strong>VL</strong><strong>2222c</strong><br />
6.1
7 Uninstalling<br />
the <strong>Print</strong>er Driver
7.1 Windows 7<br />
7 Uninstalling the <strong>Print</strong>er Driver<br />
This chapter describes the procedure for uninstalling the printer driver.<br />
7.1 Windows<br />
When you have to remove the printer driver, for example, when reinstallation of the printer driver is necessary,<br />
remove the driver using the following procedure.<br />
1 Open the [<strong>Print</strong>ers] window or [<strong>Print</strong>ers and Faxes] window.<br />
2 Select the icon for the printer to be uninstalled.<br />
3 Press the [Delete] key on the computer to uninstall the printer driver.<br />
4 From then on, follow the instructions on the pages that follow.<br />
When the printer driver has been deleted, the icon disappears from the [<strong>Print</strong>ers] or [<strong>Print</strong>ers and Faxes]<br />
window.<br />
In Windows NT 4.0, this completes the uninstallation process. Go to Step 10.<br />
In Windows 2000/XP/Vista/Server 2003/Server 2008, go on to uninstall the printer driver from the server<br />
properties.<br />
5 Open [Server Properties].<br />
% In Windows Vista/Server 2008, right-click on the area that has nothing displayed in the [<strong>Print</strong>ers]<br />
window, click [Run as administrator] - [Server Properties].<br />
% In Windows 2000/XP/Server 2003, click the [File] menu, then [Server Properties].<br />
% If the [<strong>User</strong> Account Control] window appears, click [Continue].<br />
6 Click the [Driver] tab.<br />
7 From the [Installed printer drivers:] list, select the printer driver to be removed, and then click [Remove...].<br />
% In Windows Vista/Server 2008, go to Step 8.<br />
% In Windows 2000/XP/Server 2003, go to Step 9.<br />
8 In the dialog box for confirming the items to be removed, select [Remove driver and driver package.],<br />
and then click [OK].<br />
9 In the dialog box for confirming if you are sure to remove the printer, click [Yes].<br />
% In Windows Vista/Server 2008, the dialog box appears to reconfirm if you are sure. Click [Uninstall].<br />
10 Close the open windows, and then restart the computer.<br />
% Be sure to restart the computer.<br />
This completes removing the printer driver.<br />
Reference<br />
- In Windows 2000/XP/Server 2003, even if the printer driver is deleted using the preceding method, the<br />
model information file will remain in the computer. For this reason, when reinstalling the same version<br />
of the printer driver, the driver may not be rewritten. In this case, remove the following files as well.<br />
– Check the "C:\WINDOWS\system32\spool\drivers\w32e86" folder ("C:\WIN-<br />
DOWS\system32\spool\drivers\e64" folder in the e64 system, and "C:\WINNT\system32\spool\drivers\w32e86"<br />
folder in Windows 2000), and if there is a folder (file described in "oem*.inf" shown below<br />
in Windows 2000) of the corresponding model, remove it. However, if multiple drivers are installed including<br />
the PCL driver, PostScript driver and fax driver, the model information of all drivers is deleted.<br />
To leave drivers other than the fax driver, do not remove the folder.<br />
<strong>VL</strong>3622c/<strong>VL</strong>2822c/<strong>VL</strong><strong>2222c</strong> 7-3
7<br />
Windows<br />
– From the "C:\WINDOWS\inf" folder ("C:\WINNT\inf" folder in Windows 2000), remove "oem*.inf" and<br />
"oem*.PNF" ("*" included in the file name indicates a number, which differs depending on the computer<br />
environment).<br />
Before removing these files, open the inf file, and then check the model name described on the last few<br />
lines to confirm it is the file for the corresponding model. The number of the PNF file is the same as that<br />
of the inf file.<br />
– In Windows Vista/Server 2008, this operation is not necessary if you have selected [Remove driver and<br />
driver package.].<br />
7-4 <strong>VL</strong>3622c/<strong>VL</strong>2822c/<strong>VL</strong><strong>2222c</strong><br />
7.1
7.2 Macintosh 7<br />
7.2 Macintosh<br />
When you have to remove the printer driver, for example, when reinstallation of the printer driver is necessary,<br />
remove the driver using the following procedure.<br />
7.2.1 For Mac OS X<br />
1 Open the [<strong>Print</strong> & Fax] (or [<strong>Print</strong>er Setup Utility]/[<strong>Print</strong> Center]) window.<br />
% The [<strong>Print</strong> & Fax] window can be opened from the [System Preferences...] in the [Apple Menu] (OS<br />
X 10.3/10.4/10.5).<br />
% The [<strong>Print</strong>er Setup Utility]/[<strong>Print</strong> Center] window can be opened from [Macintosh HD] - [Applications]<br />
- [Utilities] (OS X 10.2/10.3/10.4).<br />
2 Select the printer name to be deleted, and then click [-] (or [Delete]).<br />
The selected printer is deleted.<br />
3 Close the [<strong>Print</strong> & Fax] (or [<strong>Print</strong>er Setup Utility]/[<strong>Print</strong> Center]) window.<br />
4 Drag the following installed files, which are located in [Macintosh HD] - [Library] − [<strong>Print</strong>ers] − [PPDs] −<br />
[Contents] − [Resources] ([Resources] − [en.lproj] for OS X 10.2/10.3/10.4) to the [Trash] icon.<br />
% [GENERIC36C-1.gz]<br />
% [GENERIC28C-1.gz]<br />
% [GENERIC22C-1.gz]<br />
5 Delete unnecessary files from [Library] - [<strong>Print</strong>ers].<br />
% Drag the [36C-1] folder, which is located in [Library] - [<strong>Print</strong>ers] - [GENERIC], to the [Trash] icon.<br />
% In addition, for Mac OS X 10.2, drag all the [36C-1] folders, which are located in [Library] - [<strong>Print</strong>ers]<br />
- [PPDPlugins], to the [Trash] icon.<br />
6 Restart the computer.<br />
This completes removing the printer driver.<br />
7.2.2 For Mac OS 9.2<br />
1 Drag the printer icon on the desktop to the [Trash] icon.<br />
2 Drag the PPD file "36C-1UVxxx.ppd", which is located in [Macintosh HD] − [System Folder] - [Extension]<br />
- [<strong>Print</strong>er Descriptions], to the [Trash] icon.<br />
The related printer driver files are deleted.<br />
3 Restart the computer.<br />
This completes removing the printer driver.<br />
<strong>VL</strong>3622c/<strong>VL</strong>2822c/<strong>VL</strong><strong>2222c</strong> 7-5
7<br />
Macintosh<br />
7-6 <strong>VL</strong>3622c/<strong>VL</strong>2822c/<strong>VL</strong><strong>2222c</strong><br />
7.2
8 <strong>Print</strong><br />
function of PCL/PS/XPS<br />
drivers for Windows
8.1 <strong>Print</strong> operations 8<br />
8 <strong>Print</strong> function of PCL/PS/XPS drivers for Windows<br />
This chapter describes functions of the PCL/PS/XPS printer drivers for Windows.<br />
8.1 <strong>Print</strong> operations<br />
<strong>Print</strong> jobs are specified from the application software.<br />
1 Open the data in the application, and click [File]. Then click [<strong>Print</strong>] from the menu.[<strong>Print</strong>]<br />
% If the menu is not available, click [<strong>Print</strong>].<br />
2 Check that the printer name has been selected in [<strong>Print</strong>er Name] ( or [Select <strong>Print</strong>er]).<br />
% If the printer is not selected, click to select the printer.<br />
% The [<strong>Print</strong>] dialog box differs depending on the application.<br />
3 Specify the print range and the number of copies to print.<br />
4 Click [Properties] (or [Preferences]) to change the printer driver settings as necessary.<br />
% Clicking [Properties] or [Preferences] in the [<strong>Print</strong>] window displays the [<strong>Print</strong>ing Preferences] page<br />
of the printer driver where you can configure various functions. For details, refer to page 8-9.<br />
% [<strong>Print</strong>ing Preferences] of the printer driver changed in the [<strong>Print</strong>] window are not saved, and the original<br />
settings are restored when you exit the application.<br />
5 Click [<strong>Print</strong>].<br />
<strong>Print</strong>ing is executed and the data indicator of the machine flashes.<br />
% When [Secure <strong>Print</strong> Only] is set to [On] on [Device Option] of the [Configure] tab, [Secure <strong>Print</strong>] window<br />
appears. Go to Step 6.<br />
<strong>VL</strong>3622c/<strong>VL</strong>2822c/<strong>VL</strong><strong>2222c</strong> 8-3
8<br />
6 Enter the ID and password of the document, and then click [OK].<br />
Data is sent and saved in the [Secure Document <strong>User</strong> Box] of this machine.<br />
d Reference<br />
For details on the [Configure] tab, refer to page 8-5.<br />
For details on secure printing, refer to page 11-6.<br />
<strong>Print</strong> operations<br />
8-4 <strong>VL</strong>3622c/<strong>VL</strong>2822c/<strong>VL</strong><strong>2222c</strong><br />
8.1
8.2 Default settings of the printer driver 8<br />
8.2 Default settings of the printer driver<br />
When you have installed the printer driver, you need to change the initialization conditions such as options,<br />
user authentication and account track functions and enable functions of the machine from the [<strong>Print</strong>ing Preferences]<br />
window of the printer driver.<br />
NOTICE<br />
If the model name, installed options, user authentication and account track functions for the machine are not<br />
specified on the [Configure] tab, the option functions cannot be used from the [<strong>Print</strong>ing Preferences] window<br />
of the printer driver. Be sure to configure the settings for the installed options.<br />
8.2.1 Displaying the Properties window<br />
1 Open the [<strong>Print</strong>ers] window or [<strong>Print</strong>ers and Faxes] window.<br />
% In Windows Vista/Server 2008, click [Start], open [Control Panel], and then click [<strong>Print</strong>ers] in [Hardware<br />
and Sound]. When [Control Panel] is displayed in Classic View, double-click [<strong>Print</strong>ers].<br />
% In Windows XP/Server 2003, click [Start], then [<strong>Print</strong>ers and Faxes].<br />
% In Windows XP/Server 2003, if [<strong>Print</strong>ers and Faxes] is not displayed in the [Start] menu, open [Control<br />
Panel] from the [Start] menu, select [<strong>Print</strong>ers and Other Hardware], then [<strong>Print</strong>ers and Faxes].<br />
When [Control Panel] is displayed in Classic View, double-click [<strong>Print</strong>ers].<br />
% In Windows 2000/NT 4.0, click [Start], and then select [Settings], then [<strong>Print</strong>ers].<br />
2 Right-click the icon of the installed printer, and click [Properties].<br />
8.2.2 Configure tab<br />
Specify the model name used and presence or absence of the installed options, user authentication and account<br />
track functions, and then allow the printer driver to use the functions of the machine.<br />
Item Name Functions<br />
[Device Option] Configure the model name of the machine and the status of the installed<br />
printer options and user authentication/account track. Specify the status of<br />
each item in the [Setting] box.<br />
[Paper Tray Information] Displays the paper type assigned for each paper tray.<br />
Click [Paper Tray Settings...] to configure the settings for each paper tray.<br />
[Acquire Device Information]<br />
Click this button to communicate with this machine and load the status of the<br />
installed options.<br />
[Acquire Settings...] Click this button to configure conditions such as the destination when you<br />
perform [Acquire Device Information].<br />
<strong>VL</strong>3622c/<strong>VL</strong>2822c/<strong>VL</strong><strong>2222c</strong> 8-5
8<br />
Item Name Functions<br />
Default settings of the printer driver<br />
[Encrypt. Passphrase] Any string used to encrypt communication with this machine.<br />
If the encryption passphrase for the machine was changed from [Use Factory<br />
Default] to [<strong>User</strong>-Defined], enter the same encryption passphrase as for the<br />
machine. An encryption key is automatically created for the entered text, and<br />
used for communication with the machine.<br />
[Software Tools] Allows you to start up the software tools such as Web Connection.<br />
Reference<br />
- Be sure to select a model and options in [Device Option].<br />
- When [Secure <strong>Print</strong> Only] is set to [On] in [Device Option], only the secure print jobs are allowed. For<br />
details on secure printing, refer to page 11-6.<br />
- In [Encrypt. Passphrase], enter the encryption passphrase that matches the one that configured in [Driver<br />
Password Encryption Setting] of the machine.<br />
- The function of [Acquire Device Information] is available only when your computer is connected to and<br />
can communicate with the machine.<br />
- To use [Acquire Device Information], in [Administrator Settings] of this machine, set [System Connection]<br />
- [OpenAPI Settings] - [Authentication] to [OFF]. For details, refer to page 12-56.<br />
d Reference<br />
For details on allowing the user to specify [Encrypt. Passphrase], refer to page 11-33.<br />
8.2.3 Settings tab<br />
The Settings tab allows you to change the default settings for displaying the confirmation messages or the<br />
window for entering the authentication settings.<br />
Item Name Functions<br />
[EMF Spool] Select this check box when meta file (EMF) spool is required for use in its own<br />
system environment.<br />
[Display Constraint Message]<br />
[Display paper set in<br />
<strong>Print</strong> Server Properties]<br />
[Verify Authentication<br />
settings before printing]<br />
[Popup Authentication<br />
Dialog when printing]<br />
Select this check box to display the message when functions that cannot be<br />
configured simultaneously are enabled for the printer driver.<br />
Select this check box to use forms added in the [Server Properties] dialog<br />
box of the <strong>Print</strong>ers window.<br />
Select this check box to verify authentication settings for this machine before<br />
printing, and display the message if they are not satisfied.<br />
Select this check box to display the [<strong>User</strong> Authentication/Account Track] dialog<br />
box when specifying printing, prompting entering the user name and account<br />
name.<br />
8-6 <strong>VL</strong>3622c/<strong>VL</strong>2822c/<strong>VL</strong><strong>2222c</strong><br />
8.2
8.2 Default settings of the printer driver 8<br />
Item Name Functions<br />
[Enter ID/PWD to execute<br />
secure print]<br />
Reference<br />
- [EMF Spool] and [Save Custom Size...] are functions available only for the PCL driver.<br />
- To use the EMF spool function with a PS/XPS driver, select [Enable advanced printing features] in the<br />
[Advanced] tab to enable the EMF spool.<br />
8.2.4 Registering the default settings<br />
Select this check box to display the [Secure <strong>Print</strong>] dialog box prompting entry<br />
of ID and password when performing secure print.<br />
[Save Custom Size...] Click this button to register custom paper sizes.<br />
The settings for the machine functions configured when printing can only be applied while using the application.<br />
When you exit the application, the settings return to their default settings.<br />
To register the settings, change the printer driver basic settings (default settings).<br />
1 Open the [<strong>Print</strong>ers] window or [<strong>Print</strong>ers and Faxes] window.<br />
% In Windows Vista/Server 2008, click [Start], open [Control Panel], and then click [<strong>Print</strong>ers] in [Hardware<br />
and Sound]. When [Control Panel] is displayed in Classic View, double-click [<strong>Print</strong>ers].<br />
% In Windows XP/Server 2003, click [Start], then [<strong>Print</strong>ers and Faxes].<br />
% In Windows XP/Server 2003, if [<strong>Print</strong>ers and Faxes] is not displayed in the [Start] menu, open [Control<br />
Panel] from the [Start] menu, select [<strong>Print</strong>ers and Other Hardware], then [<strong>Print</strong>ers and Faxes].<br />
When [Control Panel] is displayed in Classic View, double-click [<strong>Print</strong>ers].<br />
% In Windows 2000/NT 4.0, click [Start], and then select [Settings], then [<strong>Print</strong>ers].<br />
2 Right-click the icon of the installed printer, and click [<strong>Print</strong>ing Preferences...].<br />
% In Windows NT 4.0, right-click the icon of the installed printer, and then click [Document Defaults...].<br />
The [<strong>Print</strong>ing Preferences] dialog box of the printer appears.<br />
3 Change the settings of the function, and then click [OK] to exit the function.<br />
The changed settings are applied when the printer is used by all of the application software.<br />
d Reference<br />
For details on the function and settings of the printer driver, refer to page 8-9.<br />
The printer driver has the function to save the setting as a [Favorite Setting]. For details, refer to page 8-8.<br />
<strong>VL</strong>3622c/<strong>VL</strong>2822c/<strong>VL</strong><strong>2222c</strong> 8-7
8<br />
8.3 Common Setting<br />
This section describes the settings and buttons common to tabs.<br />
Common Setting<br />
Item Name Functions<br />
[OK] Click this button to enable changed settings and close the properties window.<br />
[Cancel] Click this button to disable (cancel) changed settings and close the properties<br />
window.<br />
[Help] Click this button to display Help of the items in the displayed window.<br />
[Add...] (Favorite Setting) Click this button to save current settings so that they can be recalled later.<br />
[Edit...](Favorite Setting) Click this button to change saved settings.<br />
[Default] Click this button to return to the default settings.<br />
View Selecting [Paper View] displays the sample page layout based on current settings<br />
for checking the output result image.<br />
Selecting [<strong>Print</strong>er View] displays a printer figure showing the options installed<br />
in the machine such as the paper tray.<br />
Paper:<br />
<strong>Print</strong>er:<br />
[<strong>Print</strong>er Information] Click this button to start Web Connection and check the printer information.<br />
This button is enabled only when your computer can communicate with this<br />
machine.<br />
8-8 <strong>VL</strong>3622c/<strong>VL</strong>2822c/<strong>VL</strong><strong>2222c</strong><br />
8.3
8.4 Parameter details 8<br />
8.4 Parameter details<br />
8.4.1 My Tab<br />
The <strong>Print</strong>ing Preferences window is the window to configure the printer driver functions. Click [Properties] (or<br />
[Preferences]) in the <strong>Print</strong> dialog box, or right-click the printer icon in the [<strong>Print</strong>ers] or [<strong>Print</strong>ers and Faxes] window,<br />
and then specify [<strong>Print</strong>ing Preferences...] ([Document Defaults...] for Windows NT 4.0) to open it.<br />
My Tab allows you to customize the display contents. By registering frequently used setting functions to My<br />
Tab, the printer driver can be easier to use, and you can modify various settings from a single window.<br />
Function Name Option Description<br />
[More Details] − Click this button to display the Help of My Tab.<br />
[Do not show again] ON/OFF Select this check box to hide the comment field containing<br />
[More Details] from the next time.<br />
[Edit My Tab...] − Click this button to register or delete the functions displayed<br />
on My Tab.<br />
For details, refer to page 8-10.<br />
Reference<br />
- Items other than the above are customized on [Edit My Tab...], and the specific display contents vary<br />
depending on the registered contents.<br />
<strong>VL</strong>3622c/<strong>VL</strong>2822c/<strong>VL</strong><strong>2222c</strong> 8-9
8<br />
Edit [My Tab]<br />
1 On [My Tab], click [Edit My Tab...].<br />
Parameter details<br />
2 Select the function you want to register on [My Tab], and then click [to the LEFT] or [to the RIGHT].<br />
% Select the desired function from those indicated in the respective tabs in [Setting Item List].<br />
% Clicking [to the LEFT] places the selected function on the left side of [My Tab] and likewise clicking<br />
[to the RIGHT] places it on the right side of [My Tab].<br />
% At the left of the functions currently registered to [My Tab], the icons indicating the [LEFT<br />
side]/[RIGHT side] appear.<br />
3 The following describes how to change the layout of the registered functions.<br />
% Select the function whose position you want to move and click [Up], [Down], [Left/Right] as needed.<br />
% To delete a function from [My Tab], select the function you want to delete, and then click [Remove].<br />
4 Click [OK].<br />
8-10 <strong>VL</strong>3622c/<strong>VL</strong>2822c/<strong>VL</strong><strong>2222c</strong><br />
8.4
8.4 Parameter details 8<br />
8.4.2 [Basic] tab<br />
The Basic tab allows you to configure the basic printing functions such as paper size and type as well as<br />
output method.<br />
Function Name Option Description<br />
[Original Orientation]<br />
Portrait, Landscape Select the orientation for the original.<br />
[Original Size] The paper sizes registered<br />
as the standard paper<br />
sizes and custom<br />
sizes<br />
Select the paper size of the original.<br />
Custom Size Register custom sizes.<br />
[Paper Size] The paper sizes registered<br />
as the standard paper<br />
sizes and custom<br />
sizes that can be used<br />
with the machine<br />
Custom Size Register custom sizes.<br />
Specify the output paper size. If it is different from the<br />
original size and the zoom is set to [Auto], the output<br />
image will be enlarged or reduced to fit the size.<br />
[Zoom] 25 to 400% Select an enlarge or reduce ratio.<br />
[Paper Tray] Auto, Tray 1 to Tray 4,<br />
LCT, Bypass Tray<br />
[Paper Type] Paper types available for<br />
the machine<br />
Select a paper tray to be used.<br />
Selectable items vary depending on the option installation<br />
status.<br />
Select a paper type to be used for printing.<br />
It can be changed only when Paper Tray is set to [Auto].<br />
When Paper Tray is not set to [Auto], the paper types<br />
registered in [Paper Settings for Each Tray] are available.<br />
<strong>VL</strong>3622c/<strong>VL</strong>2822c/<strong>VL</strong><strong>2222c</strong> 8-11
8<br />
Function Name Option Description<br />
[Output Method] [<strong>Print</strong>] Select this option to print immediately.<br />
Parameter details<br />
[Secure <strong>Print</strong>] Select this option to save the document to be printed in<br />
[Secure Document <strong>User</strong> Box] of the machine. When<br />
printing, entering the [ID] and [Password] is required<br />
from the control panel of the machine. Select this option<br />
when printing highly confidential documents.<br />
[Save in <strong>User</strong> Box] Select this option to save the document to be printed in<br />
a <strong>User</strong> Box of the machine.<br />
[Save in <strong>User</strong> Box/<strong>Print</strong>] Select this option to save the document in a <strong>User</strong> Box<br />
and print at the same time.<br />
[Proof <strong>Print</strong>] After one copy of the document is printed, the machine<br />
stops printing temporarily. Select this option to avoid<br />
misprinting a large volume of print jobs.<br />
[ID&<strong>Print</strong>] Select this option to save the document to be printed in<br />
[ID & <strong>Print</strong> <strong>User</strong> Box] of the machine. When printing,<br />
user authentication must be performed via the control<br />
panel of the machine.<br />
[<strong>User</strong> Settings...] − Specify the ID and password, or the file name and <strong>User</strong><br />
Box number when performing [Secure <strong>Print</strong>] or [Save in<br />
<strong>User</strong> Box].<br />
[Authentication/Account<br />
Track...]<br />
− Click this button to specify the user name and password<br />
when [<strong>User</strong> Authentication] is enabled on this machine,<br />
or the account name and password when<br />
[Account Track] is enabled on this machine.<br />
[Copies] 1 to 9999 Specify the number of copies to be printed.<br />
[Collate] ON/OFF Select this check box to collate pages sequentially<br />
when printing multiple sets of copies.<br />
[Offset] ON/OFF Select this check box to stagger each set when printing<br />
multiple sets of copies.<br />
[Paper Settings<br />
for Each Tray...]<br />
[Paper Type Settings] Select a paper tray to be specified.<br />
Selectable items vary depending on the option installation<br />
status.<br />
[Paper Type] Select the type of paper to be loaded onto the paper<br />
tray.<br />
Reference<br />
- Paper size "12 e 18" is equivalent to 304.8 e 457.2 mm that is slightly larger than A3.<br />
- In [Original Size], you can select A0, A1, A2, B1, B2, or B3; however, the printing paper size is reduced<br />
to the size specified in [Paper Size]. [Same as Original Size] cannot be selected in [Paper Size].<br />
- To use paper of which the size is other than the standard sizes, specify the custom paper size. You can<br />
register a custom size by selecting [Custom Size] from the paper size or original size option.<br />
- To print data of the size corresponding to the full standard size, selecting "W" of the standard size paper<br />
for original size enables the data to be printed at the center of paper larger than the original size.<br />
For example, if you want to center and print 8-1/2 e 11 size data on 11 e 17 sized paper, create data<br />
with the "8-1/2 e 11W" size, and then, using the printer driver, set [Original Size] to [8-1/2 e 11W] and<br />
specify the paper tray to be used as [Paper Tray].<br />
On the machine side, set 11 e 17 size paper in the tray to be used, select the tray in [Paper] of the [Basic]<br />
screen of the control panel, and select [Change Tray Settings] - [Wide Paper] to specify [8-1/2 e 11W].<br />
Then, confirm that [Auto Detect] is selected for [Custom Size] and 11 e 17 is displayed.<br />
When 12-1/4 e 18 paper is loaded, you must select [12-1/4 e 18] for [Custom Size].<br />
To print on custom sized paper, use the bypass tray, select [Change Tray Settings] - [Wide Paper] to<br />
specify [8-1/2 e 11W], and enter the desired paper size to be used for [Change Size].<br />
- Specify [Side2] when printing on the back side of paper.<br />
- [<strong>User</strong>] of Paper Type is the frequently used paper type registered on the machine side. For details on<br />
registering the user paper, refer to the [<strong>User</strong>'s Guide Copy <strong>Operations</strong>].<br />
8-12 <strong>VL</strong>3622c/<strong>VL</strong>2822c/<strong>VL</strong><strong>2222c</strong><br />
8.4
8.4 Parameter details 8<br />
d Reference<br />
For details on the paper sizes loadable in the paper trays, refer to the [<strong>User</strong>'s Guide Copy <strong>Operations</strong>].<br />
For details on the output method, refer to page 11-3.<br />
8.4.3 [Layout] tab<br />
Function Name Option Description<br />
[Combination] 2 in 1, 4 in 1, 6 in 1, 9 in<br />
1, 16 in 1, 2 e 2, 3 e 3,<br />
4 e 4<br />
[Combination Details...]<br />
Select any of the options to print multiple pages of the<br />
original on to one sheet or print information on one<br />
page of the original on to several sheets. In [Combination<br />
Details...], specify the page order and use of the<br />
border frame.<br />
[Combination] Select the combination condition.<br />
[Layout Order] Specify the layout order. It can be specified when N in<br />
1 is specified for Combination.<br />
[Border] Specify the presence and type of border lines. It can be<br />
specified when N in 1 is specified for Combination.<br />
[Overlap width line] Specify the presence of overlap width line. It can be<br />
specified when N e N is specified for Combination.<br />
[Rotate 180] ON/OFF Select this check box to rotate the document 180° to<br />
print.<br />
[Skip Blank Pages]<br />
ON/OFF Select this check box to not print any blank pages.<br />
[Chapters] ON/OFF Select this check box to specify the page to be printed<br />
on the front side. It can be specified when <strong>Print</strong> Type is<br />
[2-Sided] or [Booklet].<br />
[Entry] − Specify the pages to be printed on the front side when<br />
[Chapters] is selected.<br />
[<strong>Print</strong> Type] [1-Sided], [2-Sided],<br />
[Booklet]<br />
[Binding Position] [Auto], [Left Bind], [Right<br />
Bind], [Top Bind]<br />
Specify 2-Sided <strong>Print</strong> or Booklet printing.<br />
Specify the binding position.<br />
[Binding Margin] ON/OFF Select this check box to specify the binding margin.<br />
Click [Binding Margin Settings...] to specify the margin<br />
values.<br />
<strong>VL</strong>3622c/<strong>VL</strong>2822c/<strong>VL</strong><strong>2222c</strong> 8-13
8<br />
Function Name Option Description<br />
[Binding Margin<br />
Settings...]<br />
Parameter details<br />
Reference<br />
- The options "2 e 2, 3 e 3 and 4 e 4" for [Combination], which are for printing a sheet of original onto<br />
multiple sheets of paper, are available only for the PCL driver.<br />
- The [Skip Blank Pages] function is available for the PCL/XPS drivers.<br />
- The positions of binding margins vary according to the [Binding Position] setting.<br />
8.4.4 [Finish] tab<br />
[Shift Mode] Select how to process the image to prepare the page<br />
margin.<br />
[Front Side]/[Back Side] Specify the binding margin values. For 2-sided printing,<br />
clearing the [Same value for front and back sides]<br />
check box allows you to specify different values for the<br />
front and back sides.<br />
[Unit] Select a unit to be used for specifying the size.<br />
[Image Shift] ON/OFF Select this check box to print by shifting the entire print<br />
image. Click [Image Shift Settings...] to specify the image<br />
shift values.<br />
[Image Shift Settings...]<br />
[Unit] Select a unit to be used for specifying the size.<br />
[Front Side]/[Back Side] Specify the shift direction and values. For 2-sided printing,<br />
clearing the [Same value for Front and Back sides]<br />
check box allows you to specify different values for the<br />
front and back sides.<br />
Function Name Option Description<br />
[Staple] ON/OFF, Left Corner/Right<br />
Corner/2 Position<br />
(Left)/2 Position<br />
(Right)/2 Position (Top)<br />
[Center Staple<br />
and Fold]<br />
Select this check box to specify stapling.<br />
From the drop-down list, specify the number of staples<br />
and the stapling position.<br />
ON/OFF Select this check box to specify center staple and fold.<br />
[Punch] ON/OFF, 2-Hole (Left)/2-<br />
Hole (Right)/2-Hole<br />
(Top)/3-Hole (Left)/3-<br />
Hole (Right)/3-Hole<br />
(Top)/4-Hole (Left)/4-<br />
Hole (Right)/4-Hole (Top)<br />
Select this check box to specify hole punching.<br />
From the drop-down list, specify the number of punches<br />
and the punching position.<br />
[Fold] ON/OFF, [Half-Fold] Select this check box to specify folding.<br />
From the drop-down list, specify the folding condition.<br />
8-14 <strong>VL</strong>3622c/<strong>VL</strong>2822c/<strong>VL</strong><strong>2222c</strong><br />
8.4
8.4 Parameter details 8<br />
Function Name Option Description<br />
[Output Tray] Default, Tray 1 and Tray<br />
3<br />
[Paper Arrangement]<br />
Reference<br />
- The [Staple] function is available only if the optional Finisher FS-527 or Finisher FS-529 is installed.<br />
- The [Punch] function is available only when the Punch Kit is installed on the optional Finisher FS-527.<br />
- The [Center Staple and Fold] and [Fold] functions are available only when the Saddle Stitcher is installed<br />
on the optional Finisher FS-527.<br />
8.4.5 [Cover Mode] tab<br />
[Prioritize Arranging Papers]/[PrioritizeProductivity]<br />
Specify the tray to output the printed pages.<br />
Selectable items vary depending on the option installation<br />
status.<br />
Specify the method for paper arrangement (adjusting<br />
the binding position) for 2-sided printing. When [Prioritize<br />
Arranging Papers] is selected, the paper arrangement<br />
process is performed after receiving all data.<br />
When [Prioritize Productivity] is selected, the paper arrangement<br />
process is performed while receiving and<br />
printing data.<br />
Function Name Option Description<br />
[Front Cover] ON/OFF, [Blank]/[<strong>Print</strong>] Select this check box to attach a front cover page.<br />
It can be specified when any other option than [Auto] is<br />
selected for Paper Tray.<br />
[Front Cover Tray] Tray 1 to Tray 4, LCT, Bypass<br />
Tray<br />
Select the paper tray for the front cover sheet.<br />
Selectable items vary depending on the option installation<br />
status.<br />
[Back Cover] ON/OFF, [Blank]/[<strong>Print</strong>] Select this check box to attach a back cover page.<br />
It can be specified when any other option than [Auto] is<br />
selected for Paper Tray.<br />
[Back Cover Tray] Tray 1 to Tray 4, LCT, Bypass<br />
Tray<br />
Select the paper tray for the back cover sheet.<br />
Selectable items vary depending on the option installation<br />
status.<br />
[Per Page Setting] ON/OFF Select this check box to insert paper between pages<br />
and switch the paper and tray for each page. [Edit<br />
List...] allows you to create a list specifying conditions<br />
on a page basis.<br />
<strong>VL</strong>3622c/<strong>VL</strong>2822c/<strong>VL</strong><strong>2222c</strong> 8-15
8<br />
Function Name Option Description<br />
8.4.6 [Stamp/Composition] tab<br />
Parameter details<br />
[Edit List...] [List Name] Select the name of the list to be edited. The settings are<br />
listed.<br />
[Transparency Interleave]<br />
[Edit List Name...] Rename a list.<br />
[Up]/[Down] Click the button to move the selected condition row up<br />
or down. Move the rows so that the page numbers are<br />
arranged in ascending order.<br />
[Add] Click this button to add a condition. Specify conditions<br />
in [Add/Edit].<br />
[Delete] Click this button to delete the selected condition row.<br />
[Page Number] Specify the page numbers using a numerical value. To<br />
specify multiple pages, separate each page number<br />
with a comma or specify the range using a hyphen.<br />
[<strong>Print</strong> Type] Specify the print type from the [Change Settings] dropdown<br />
list.<br />
[Paper Tray] Specify the paper tray to be used from the [Change<br />
Settings] drop-down list.<br />
[Staple] From the [Change Settings] drop-down list, specify the<br />
number of staples and the stapling position.<br />
ON/OFF, [Blank] Select this check box to insert interleaves when printing<br />
transparencies.<br />
It can be specified when [Transparency] is selected for<br />
Paper Type.<br />
[Interleave Tray] Tray 1 to Tray 4, LCT Select the paper tray for the transparency interleaves.<br />
Selectable items vary depending on the option installation<br />
status.<br />
Function Name Option Description<br />
[Watermark] ON/OFF Select this check box to print the document with a watermark<br />
(character stamp) overlapped. Clicking [Edit...]<br />
allows you to create, change, or delete watermarks.<br />
[Edit...] − For details, refer to page 8-18.<br />
8-16 <strong>VL</strong>3622c/<strong>VL</strong>2822c/<strong>VL</strong><strong>2222c</strong><br />
8.4
8.4 Parameter details 8<br />
Function Name Option Description<br />
[Overlay] [None] The overlay function is not used.<br />
[Create Host Image] <strong>Print</strong>ing the original with this setting creates the overlay<br />
data. Created data is saved in the computer.<br />
[<strong>Print</strong> Host Image] Select this option to print the original on top of the overlay<br />
data created with [Create Host Image].<br />
Selecting this setting displays the overlay data stored in<br />
the computer in the list below, allowing you to select it.<br />
Clicking [Edit...] allows you to specify the overlay printing<br />
conditions.<br />
[<strong>Print</strong> Device Image] Select this option to print the original on top of an overlay<br />
data of the machine.<br />
Clicking [Edit...] allows you to specify the overlay data<br />
and conditions registered in this machine.<br />
[Edit...] − For details, refer to page 8-19.<br />
[Copy Security] ON/OFF, [Copy Protect]/[Repeatable<br />
Stamp]/[Copy<br />
Guard]/[Password Copy]<br />
Specify the special pattern or password to prevent<br />
copying. Click [Edit...] to specify items to be printed,<br />
positions, composition method and password.<br />
If you select [Password Copy], the [Edit...] screen appears<br />
where you can specify a password.<br />
[Edit...] − For details, refer to page 8-20.<br />
[Date/Time] ON/OFF Select this check box to print the date and time. Click<br />
[Edit...] to specify items and pages to be printed and<br />
positions.<br />
[Page Number] ON/OFF Select this check box to print page number. Click [Edit...]<br />
to specify items and pages to be printed and positions.<br />
[Edit...] − For details, refer to page 8-22.<br />
[Header/Footer] Machine Setting 1 to Machine<br />
Setting 20<br />
[Edit...] [Acquire Device Information]<br />
[Distribution Control<br />
Number]<br />
Select this check box to print the header and footer.<br />
Select the header/footer from the list specified in the<br />
main unit. Clicking [Edit...] allows you to specify items<br />
and pages to be printed.<br />
Select this option to communicate with the machine to<br />
read the header settings configured on the machine.<br />
When printing multiple copies, this function prints the<br />
number of copies in the header/footer.<br />
[Edit...] Specify the distribution control number conditions.<br />
[Pages] Specify the pages to be printed.<br />
[Text Color] Specify the text color used for printing.<br />
Reference<br />
- [<strong>Print</strong> Device Image] of the [Overlay] function is available only for the PCL driver.<br />
- The function of [Acquire Device Information] is available only when your computer is connected to and<br />
can communicate with the machine.<br />
To use [Acquire Device Information] , in [Administrator Settings] of the machine, set [System Connection]<br />
- [OpenAPI Settings] - [Authentication] to [OFF]. For details, refer to page 12-56.<br />
<strong>VL</strong>3622c/<strong>VL</strong>2822c/<strong>VL</strong><strong>2222c</strong> 8-17
8<br />
Editing watermark<br />
Parameter details<br />
Function Name Description<br />
[Watermark Name] Enter the name of the watermark.<br />
You can enter up to 30 characters.<br />
[Watermark Text] Enter the text to be printed as the watermark.<br />
You can enter up to 30 characters.<br />
[Add] Click this button to create a new watermark.<br />
[Delete] Click this button to delete the selected watermark.<br />
[ ]/[ ] Click the button to change the order of items displays in the list. This allows<br />
you to move the frequently used items upward.<br />
[Position] Select the vertical and lateral positions. You can specify the positions using<br />
the scroll bars provided on the right of and under the image.<br />
[Center] Click this button to return the watermark back to the center position.<br />
[Angle] Specify the watermark print angle.<br />
[Font Name] Select the font.<br />
[Size] Select the size.<br />
[Style] Select the style.<br />
[Frame] Select the frame style.<br />
[Text Color] Specify the watermark text color.<br />
[Transparent] Select this check box to print the watermark in a transparent image.<br />
[1st Page Only] Select this check box to print the watermark only on the first page.<br />
[Repeat] Select this check box to print the watermark on one page repeatedly.<br />
[Sharing] Select this check box to register the watermark for sharing it with other users<br />
or clear this check box to register it for private use.<br />
8-18 <strong>VL</strong>3622c/<strong>VL</strong>2822c/<strong>VL</strong><strong>2222c</strong><br />
8.4
8.4 Parameter details 8<br />
Editing overlay<br />
The window to be displayed by clicking [Edit...] varies depending on the overlay selection ([<strong>Print</strong> Host Image]<br />
or [<strong>Print</strong> Device Image]).<br />
When [<strong>Print</strong> Host Image] is selected:<br />
You can specify the overlay printing conditions. When the overlay data does not appear in the list, read it by<br />
specifying the file.<br />
Function Name Description<br />
[Browse Files...] Click this button to load the overlay file.<br />
[Delete] Click this button to delete the selected overlay.<br />
[Change 2nd Page and Lat- Select this check box to change the overlay files of the 2nd and subseer]quent<br />
pages.<br />
[File Information] Displays the information of the selected overlay.<br />
[Pages] Specify the pages to be printed.<br />
[Overwrite] Specify the sequence for printing the overlay on top of the original.<br />
When [<strong>Print</strong> Device Image] is selected:<br />
You can specify the overlay printing conditions by specifying the overlay registered in the machine.<br />
Function Name Description<br />
[Acquire Device Information]<br />
Select this option to communicate with the machine to read the overlay<br />
settings configured on the machine.<br />
<strong>VL</strong>3622c/<strong>VL</strong>2822c/<strong>VL</strong><strong>2222c</strong> 8-19
8<br />
Function Name Description<br />
[Overlay Info] Displays the information of the selected overlay.<br />
[<strong>Print</strong> on Front Side]/[<strong>Print</strong><br />
on Back Side]<br />
Parameter details<br />
Reference<br />
- [<strong>Print</strong> Device Image] of the [Overlay] function is available only for the PCL driver.<br />
- The function of [Acquire Device Information] is available only when your computer is connected to and<br />
can communicate with the machine. To use [Acquire Device Information], in [Administrator Settings] of<br />
this machine, set [System Connection] - [OpenAPI Settings] - [Authentication] to [OFF]. For details, refer<br />
to page 12-56.<br />
Editing the copy security<br />
Select the check box to specify whether printing is done or not for each of<br />
the front side/back side.<br />
[Overlay Name] Select the overlay name registered in the machine.<br />
[Browse...] Click this button to display the detailed information of the selected overlay.<br />
[Select Color] Select the overlay printing color.<br />
[Density] Select the overlay printing density.<br />
[Overwrite] Specify the sequence for printing the overlay on top of the original.<br />
[Same as Front Side] Clear this check box to specify the same value for both the front and back<br />
sides.<br />
[Pages] Specify the pages to be printed.<br />
Function Name Description<br />
[Copy Security] Select a function to prevent unauthorized copying.<br />
[Copy Protect]: Composes the specified text in the background before<br />
printing data. Copy Protect text is not highly visible when printing, but the<br />
text is highlighted when a document is copied illegally.<br />
[Repeatable Stamp]: Composes the specified text before printing data.<br />
This stamp is distinguishable even during printing.<br />
[Copy Guard]: Composes Copy Guard patterns before printing data. If a<br />
document is copied illegally on the machine that supports this function,<br />
the composed pattern is scanned, and the copying process is cancelled.<br />
[Password Copy]: Composes Password Copy patterns before printing data.<br />
If a document is copied illegally on the machine that supports this function,<br />
the composed pattern is scanned, and you are prompted to enter the<br />
password. To copy a document, enter the specified password when printing.<br />
[Password] Enter the password for [Password Copy].<br />
8-20 <strong>VL</strong>3622c/<strong>VL</strong>2822c/<strong>VL</strong><strong>2222c</strong><br />
8.4
8.4 Parameter details 8<br />
Function Name Description<br />
[Characters] Select this check box to embed the selected character string in a pattern.<br />
A preregistered character string (common stamp) or a character string<br />
registered in the machine (registered stamp) can be specified.<br />
[Date/Time] Select this check box to embed the selected date and time in a pattern.<br />
Click [Edit...] under [Format] to specify the display type and presence or<br />
absence of the time display.<br />
[Serial Number] Select this check box to embed the serial number of the machine in a pattern.<br />
[Distribution Control<br />
Number]<br />
Select this check box to embed the copy number in a pattern when printing<br />
multiple copies. Click [Edit...] under [Start Number] to specify the start<br />
number and number of digit to be displayed.<br />
[Job Number] Select this check box to embed the print job number in a pattern for documents<br />
that are automatically paginated.<br />
[Acquire Device Information]<br />
Select this option to communicate with the machine to read the copy security<br />
settings configured on the machine.<br />
Function Name Description<br />
[Angle] Specify the pattern angle.<br />
[Text Size] Specify the text size of a pattern.<br />
[Pattern Color] Specify the color of the pattern. Click [Adjust Color] to specify the density<br />
and color contrast.<br />
[Pattern Overwrite] Specify the sequence for printing a pattern on top of the original.<br />
[Background Pattern] Specify the background pattern.<br />
[Pattern] Specify the embedding method of a pattern.<br />
Reference<br />
- The function of [Acquire Device Information] is available only when your computer is connected to and<br />
can communicate with the machine.<br />
To use [Acquire Device Information] , in [Administrator Settings] of the machine, set [System Connection]<br />
- [OpenAPI Settings] - [Authentication] to [OFF]. For details, refer to page 12-56.<br />
- Items that can be specified vary depending on the selected [Copy Security] function.<br />
<strong>VL</strong>3622c/<strong>VL</strong>2822c/<strong>VL</strong><strong>2222c</strong> 8-21
8<br />
Editing date/time and page number<br />
8.4.7 [Quality] tab<br />
The functions displayed vary depending on which of the PCL/PS/XPS drivers is used.<br />
PCL driver<br />
Parameter details<br />
Function Name Description<br />
[Format] Displays the format of the date and time to be printed. Click [Edit...] to<br />
specify the display type and presence or absence of the time display.<br />
[Pages] Specify the pages to print the date and time.<br />
[Text Color] Specify the text color used for printing.<br />
[<strong>Print</strong> Position] Specify the print position.<br />
[Starting Page] Specify the page to start printing the page number.<br />
[Starting Page Number] Specify the start number for printing the page number.<br />
[Cover Mode] Specify whether the page number is printed on the front cover page and<br />
the back cover page, when attaching the cover pages.<br />
[Text Color] Specify the text color used for printing.<br />
[<strong>Print</strong> Position] Specify the print position.<br />
8-22 <strong>VL</strong>3622c/<strong>VL</strong>2822c/<strong>VL</strong><strong>2222c</strong><br />
8.4
8.4 Parameter details 8<br />
PS driver<br />
XPS driver<br />
Function Name Option Description<br />
[Select Color] [Auto Color] Select this option to identify the colors used in the print<br />
data to use them in printing.<br />
[Full Color] Select this option to print in full-color processes<br />
(YMCK) regardless of the print data (color/gray scale).<br />
[Gray Scale] Select this option to print in gray scale.<br />
[2 Color] Select this option to print in 2 colors.<br />
[2 Color] [Black+Red]<br />
It can be specified when you have selected [2 Color] in<br />
[Black+Green]<br />
[Select Color].<br />
[Black+Blue]<br />
The color area and gray scale area are printed in the<br />
[Black+Cyan]<br />
[Black+Magenta]<br />
[Black+Yellow]<br />
specified 2 colors.<br />
[<strong>Print</strong> with Black] ON/OFF<br />
[Text], [Text/Figure], [All]<br />
[Quality Adjustment...]<br />
It can be specified when you have selected [Gray Scale]<br />
in [Select Color].<br />
It protects the tinted characters, lines and figures from<br />
being printed lighter according to the selected conditions.<br />
− Click this button to adjust the image quality. Select<br />
[Simple] to adjust entire documents or [Detail] to adjust<br />
the text, photos, figures, tables, and graphs in each<br />
original.<br />
For PS drivers, profiles can also be managed here.<br />
<strong>VL</strong>3622c/<strong>VL</strong>2822c/<strong>VL</strong><strong>2222c</strong> 8-23
8<br />
Function Name Option Description<br />
[Color Settings] [Document], [Photo],<br />
[DTP], [Web], [CAD]<br />
Parameter details<br />
Select any of the options to print with a quality suitable<br />
for the selected original.<br />
[Document]: Select this option to print with a quality<br />
suitable for documents with many characters.<br />
[Photo]: Select this option to print with a quality suitable<br />
for photos.<br />
[DTP]: Select this option to print with a quality suitable<br />
for documents produced by DTP.<br />
[Web]: Select this option to print with a quality suitable<br />
for Web page printing.<br />
[CAD]: Select this option to print with a quality suitable<br />
for CAD data printing.<br />
[Pattern] [Fine], [Coarse] Specify fineness of the graphic patterns.<br />
[Image Compression]<br />
[Best Quality], [Maximum<br />
Compression]<br />
Specify the compression ratio for a graphic image.<br />
[Auto Trapping] ON/OFF Select this option to superimpose neighboring colors to<br />
print so as to prevent white space being generated<br />
around a picture.<br />
[Black Over <strong>Print</strong>] ON/OFF<br />
[Text], [Text/Figure]<br />
Select this check box to superimpose black color on a<br />
neighboring color to print so as to prevent white space<br />
being generated around black characters or figures.<br />
You can specify to cause the overlapping on the characters<br />
alone or on characters and figures.<br />
[Glossy Mode] ON/OFF Select this check box to print using a gloss finish.<br />
[Toner Save] ON/OFF Select this check box to adjust the printing density in<br />
order to save the amount of toner consumed.<br />
[Edge Enhancement]<br />
ON/OFF Select this check box to enhance the edges of characters,<br />
graphics and images so that thin lines and small<br />
letters become clearly visible.<br />
[Font Settings...] − Select whether to use the TrueType fonts or printer<br />
fonts when printing. In addition, select whether the<br />
fonts to be downloaded are bitmap fonts or outline<br />
fonts.<br />
Reference<br />
- The [2 Color] option of [Select Color] is available only for the PCL driver. [2 Color] allows you to specify<br />
a combination of two colors.<br />
- The [Full Color] option of [Select Color] is available for the PS/XPS driver.<br />
- The [<strong>Print</strong> with Black] function that becomes available when you select [Gray Scale] in [Select Color] is<br />
available for the PCL/XPS drivers.<br />
- The [Pattern] function is available for the PCL/XPS drivers.<br />
- The [Image Compression] function is available only for the PCL driver.<br />
- The [Auto Trapping] and [Black Over <strong>Print</strong>] functions are available only for the PS drivers.<br />
- For the PS drivers, profile management with [Quality Adjustment] is also available. For details, refer to<br />
page 11-37 and page 11-39.<br />
- The [Font Settings] function is available for the PCL/PS drivers.<br />
8-24 <strong>VL</strong>3622c/<strong>VL</strong>2822c/<strong>VL</strong><strong>2222c</strong><br />
8.4
8.4 Parameter details 8<br />
8.4.8 [Other] tab<br />
Function Name Option Description<br />
[Excel Job Control]<br />
[Remove White<br />
Background]<br />
[Thin Line Support]<br />
[Check Driver<br />
Version...]<br />
ON/OFF When multiple Microsoft Excel sheets with different<br />
page settings are printed at one time, the sheets may<br />
be separated into single-sheet jobs depending on the<br />
data contained. Select this check box to minimize such<br />
job separation.<br />
ON/OFF When an overlay file is printed on top of Microsoft PowerPoint<br />
data, white areas are removed so that the white<br />
background of the PowerPoint data does not hide the<br />
overlay file. Clear this check box to print the original<br />
data as is without removing the background.<br />
ON/OFF When printing with reduced size, thin lines may become<br />
blurred. Select this check box to prevent the thin lines<br />
from becoming blurred.<br />
− Click this button to display the printer driver version information.<br />
Reference<br />
- The [Remove White Background] function is available for the PCL/XPS drivers.<br />
- The [Thin Line Support] function is available only for the PCL driver.<br />
- The [Excel Job Control] and [Remove White Background] settings are not available in Windows XP Professional<br />
e64, Windows Vista e64, Windows Server 2003 e64, or Windows Server 2008 e64.<br />
- You can change the [Excel Job Control] setting only when the printer driver setting dialog is displayed<br />
from the [<strong>Print</strong>ers] ([<strong>Print</strong>ers and Faxes] in Windows XP/Server 2003) window.<br />
<strong>VL</strong>3622c/<strong>VL</strong>2822c/<strong>VL</strong><strong>2222c</strong> 8-25
8<br />
Parameter details<br />
8-26 <strong>VL</strong>3622c/<strong>VL</strong>2822c/<strong>VL</strong><strong>2222c</strong><br />
8.4
9 <strong>Print</strong><br />
Functions of Mac OS X
9.1 <strong>Print</strong> operations 9<br />
9 <strong>Print</strong> Functions of Mac OS X<br />
This chapter describes the functions of the PS printer driver for OS X.<br />
9.1 <strong>Print</strong> operations<br />
<strong>Print</strong> jobs are specified from the application software.<br />
1 Open the data in the application, and click [File]. Then click [<strong>Print</strong>] from the menu.<br />
% If the menu is not available, click [<strong>Print</strong>].<br />
The [<strong>Print</strong>] window appears.<br />
2 Check that the desired printer name is selected in [<strong>Print</strong>er:].<br />
% If the target printer is not selected, select it.<br />
% If the printer does not appear, select the printer from [<strong>Print</strong> & Fax], [<strong>Print</strong>er Setup Utility] or [<strong>Print</strong><br />
Center]. For details, refer to page 5-4 and page 5-9.<br />
% The [<strong>Print</strong>] window varies depending on the application software.<br />
3 Specify the print range and the number of copies to print.<br />
% When the setting items are not displayed in OS X 10.5, click on the right side of [<strong>Print</strong>er:].<br />
Setting items<br />
<strong>Print</strong>er options<br />
4 Switch the setting window as necessary to change the printer driver settings.<br />
% When you change the pop-up menu of the print options, another setting window of the printer driver<br />
appears, allowing you to configure various functions. For details, refer to page 9-10.<br />
% The printer driver settings changed in the [<strong>Print</strong>] window are not saved, and the original settings are<br />
restored when you exit the application.<br />
5 Click [<strong>Print</strong>].<br />
<strong>Print</strong>ing is executed and the data indicator of the machine flashes.<br />
% When [Secure <strong>Print</strong> Only] is selected in [Installable Options], the [Secure <strong>Print</strong>] window appears. Go<br />
to Step 6.<br />
<strong>VL</strong>3622c/<strong>VL</strong>2822c/<strong>VL</strong><strong>2222c</strong> 9-3
9<br />
6 Enter the [Secure <strong>Print</strong> ID:] and [Password:] of the document, and then click [OK].<br />
Data is sent and saved in the [Secure Document <strong>User</strong> Box] of this machine.<br />
d Reference<br />
For details on [Installable Options], refer to page 9-5.<br />
For details on [Secure <strong>Print</strong>], refer to page 11-6.<br />
<strong>Print</strong> operations<br />
9-4 <strong>VL</strong>3622c/<strong>VL</strong>2822c/<strong>VL</strong><strong>2222c</strong><br />
9.1
9.2 Default settings of the printer driver 9<br />
9.2 Default settings of the printer driver<br />
When you have installed the printer driver, you need to change the initialization conditions such as options<br />
and enable functions of the machine from the printer driver.<br />
NOTICE<br />
Any options that are installed in the machine but not configured ion the [<strong>Print</strong>er Info] tab cannot be used by<br />
the printer driver. Be sure to configure the settings for the installed options.<br />
9.2.1 Option settings<br />
1 Open the [<strong>Print</strong> & Fax] (or [<strong>Print</strong>er Setup Utility]/[<strong>Print</strong> Center]) window.<br />
% The [<strong>Print</strong> & Fax] window can be opened from the [System Preferences...] in the [Apple Menu] (OS<br />
X 10.4/10.5).<br />
% The [<strong>Print</strong>er Setup Utility]/[<strong>Print</strong> Center] window can be opened from [Macintosh HD] - [Applications]<br />
- [Utilities].<br />
2 Display the [<strong>Print</strong>er Info] window.<br />
% For the [<strong>Print</strong> & Fax] window, click [Options & Supplies...] (OS X 10.5) or [<strong>Print</strong>er Setup...] (OS X 10.4).<br />
% For the [<strong>Print</strong>er Setup Utility]/[<strong>Print</strong> Center] window, select [Show Info] of the [<strong>Print</strong>ers] menu.<br />
3 Display the [Installable Options] window.<br />
% For Mac OS X 10.5, click [Driver].<br />
% In OS X 10.2/10.3/10.4, select [Installable Options].<br />
4 Specify the installed options.<br />
5 Click [OK] or [Apply Changes], and then close the [<strong>Print</strong>er Info] window.<br />
<strong>VL</strong>3622c/<strong>VL</strong>2822c/<strong>VL</strong><strong>2222c</strong> 9-5
9<br />
9.2.2 Registering the default settings<br />
Default settings of the printer driver<br />
The settings for the machine functions configured when printing can only be applied while using the application.<br />
When you exit the application, the settings return to their default settings.<br />
To register the settings, save the printer driver settings. For Mac OS X, you can register the paper setting as<br />
the default setting. Settings for other print functions can be saved using the [Presets] function and used by<br />
recalling them as necessary.<br />
Settings configured in the [Page Setup] dialog box are saved by selecting [Save As Default] in [Settings:].<br />
The functions of the printer driver configured in the [<strong>Print</strong>] window are saved by selecting [Save As] in [Presets:].<br />
These settings can be used by selecting them in [Presets:].<br />
Reference<br />
- The [Per Page Setting] list is not saved with the preset.<br />
d Reference<br />
For details on the function and settings of the printer driver, refer to page 9-10.<br />
9-6 <strong>VL</strong>3622c/<strong>VL</strong>2822c/<strong>VL</strong><strong>2222c</strong><br />
9.2
9.3 Common Setting 9<br />
9.3 Common Setting<br />
The following describes the common settings that are displayed when you specify, in the [<strong>Print</strong>] window, the<br />
functions unique to the machine ([Output Method], [Layout / Finish], [Paper Tray / Output Tray], [Cover Mode<br />
/ Transparency Interleave], [Per Page Setting], [Stamp / Composition] and [Quality]).<br />
OS X 10.5:<br />
OS X 10.4:<br />
<strong>VL</strong>3622c/<strong>VL</strong>2822c/<strong>VL</strong><strong>2222c</strong> 9-7
9<br />
Common Setting<br />
Item Name Functions<br />
[Paper View] Displays the sample page layout based on current settings for checking the<br />
print result image.<br />
[Detailed Information] Displays the current settings in texts.<br />
[<strong>Print</strong>er Information] Displays the installation option status.<br />
[Default] Click this button to return to the default settings.<br />
[Cancel] Click this button to disable (cancel) changed settings and close the properties<br />
window.<br />
[<strong>Print</strong>] Click this button to enable changed settings for printing.<br />
Reference<br />
- Clicking [Acquire Device Information] in the <strong>Print</strong>er Information window communicates with the machine<br />
and load the status of the installed options. This function is available only when your computer is<br />
connected to and can communicate with the machine.<br />
9-8 <strong>VL</strong>3622c/<strong>VL</strong>2822c/<strong>VL</strong><strong>2222c</strong><br />
9.3
9.4 Adding a custom size 9<br />
9.4 Adding a custom size<br />
To use paper of other than a standard size, register a custom paper size.<br />
1 From the [File] menu, select [Page Setup] (or [Page Setup]).<br />
2 Open the window for registering a custom size.<br />
% For Mac OS X 10.4/10.5, select [Manage Custom Sizes...] from the Paper Size list.<br />
% For Mac OS X 10.2/10.3, select [Custom Paper Size] from [Settings:].<br />
3 Click [+] (OS X 10.4/10.5) or [New] (OS X 10.2/10.3).<br />
4 Enter the paper size name.<br />
Be sure to use paper size names other than existing names, such as A4 and Custom.<br />
5 Configure the following items.<br />
% Page Size (Paper Size): Specify the paper size.<br />
% <strong>Print</strong>er Margins: Specify the paper margins.<br />
6 Click [OK] for OS X 10.4/10.5, or click [Save] for OS X 10.2/10.3.<br />
This saves the custom paper size, which can be selected from the Paper Size drop-down list in [Page<br />
Attributes].<br />
Reference<br />
- For Mac OS X 10.5, you can also select [Manage Custom Sizes...] with [Paper Size:] in the [<strong>Print</strong>] window.<br />
<strong>VL</strong>3622c/<strong>VL</strong>2822c/<strong>VL</strong><strong>2222c</strong> 9-9
9<br />
9.5 Parameter details<br />
Parameter details<br />
The printer driver functions are specified in the following windows: [Page Attributes] specified in the [Page<br />
Setup] window and [Output Method], [Layout / Finish], [Paper Tray / Output Tray], [Cover Mode / Transparency<br />
Interleave], [Per Page Setting], [Stamp / Composition] and [Quality] specified in the [<strong>Print</strong>] window.<br />
9.5.1 [Page Attributes]<br />
From the [File] menu, select in [Page Setup] (or [Page Setup]).<br />
Function Name Option Description<br />
[Paper Size:] The paper sizes registered<br />
as the standard paper<br />
sizes and custom<br />
sizes that can be used<br />
with the machine<br />
Specify the output paper size.<br />
Manage Custom Sizes<br />
(OS X 10.4/10.5)<br />
[Orientation:] Portrait, Landscape Select the orientation for the original.<br />
[Scale:] −<br />
(Varies depending on the<br />
version of OS X.) )<br />
Select an enlarge or reduce ratio.<br />
Reference<br />
- Paper size "12 e 18" is equivalent to 304.8 e 457.2 mm that is slightly larger than A3.<br />
- To use paper of which the size is other than the standard sizes, specify the custom paper size. For details<br />
on registering the custom size, refer to page 9-9.<br />
- To print data of the size corresponding to the full standard size, selecting "W" of the standard size paper<br />
for original size enables the data to be printed at the center of paper larger than the original size.<br />
For example, if you want to center and print 8-1/2 e 11 size data on 11 e 17 sized paper, create data<br />
with the "8-1/2 e 11W" size, and then, using the printer driver, set [Paper Size] to [8-1/2 e 11W] and<br />
specify the paper tray to be used as [Paper Tray].<br />
On the machine side, set 11 e 17 size paper in the tray to be used, select the tray in [Paper] of the [Basic]<br />
screen of the control panel, and select [Change Tray Settings] - [Wide Paper] to specify [8-1/2 e 11W].<br />
Then, confirm that [Auto Detect] is selected for [Custom Size] and 11 e 17 is displayed.<br />
When 12-1/4 e 18 paper is loaded, you must select [12-1/4 e 18] for [Custom Size].<br />
To print on custom sized paper, use the bypass tray, select [Change Tray Settings] - [Wide Paper] to<br />
specify [8-1/2 e 11W], and enter the desired paper size to be used for [Change Size].<br />
- For Mac OS X 10.5, you can specify [Paper Size] and [Orientation] also from the <strong>Print</strong> window.<br />
d Reference<br />
For details on the paper sizes loadable in the paper trays, refer to the [<strong>User</strong>'s Guide Copy <strong>Operations</strong>].<br />
9-10 <strong>VL</strong>3622c/<strong>VL</strong>2822c/<strong>VL</strong><strong>2222c</strong><br />
9.5
9.5 Parameter details 9<br />
9.5.2 [Copies & Pages]<br />
From the [File] menu, select in [<strong>Print</strong>] (or [<strong>Print</strong>]).<br />
Function Name Option Description<br />
[Copies:] 1 to 9999 Specify the number of copies to be printed.<br />
[Collated] ON/OFF Do not specify this function.<br />
Specify this function at [Collate] in [Output Method].<br />
[Pages:] − Specify the page range to print.<br />
Reference<br />
- For OS X 10.5, [Paper Size:] and [Orientation:] are also displayed, but the function is the same as that<br />
available from [Page Attributes].<br />
- When the setting items are not displayed in OS X 10.5, click on the right side of [<strong>Print</strong>er:].<br />
9.5.3 [Output Method]<br />
Function Name Option Description<br />
[Collate] ON/OFF Select this check box to collate pages sequentially<br />
when printing multiple sets of copies.<br />
[Offset] ON/OFF Select this check box to stagger each set when printing<br />
multiple sets of copies.<br />
<strong>VL</strong>3622c/<strong>VL</strong>2822c/<strong>VL</strong><strong>2222c</strong> 9-11
9<br />
Function Name Option Description<br />
[Output Method:] [<strong>Print</strong>] Select this option to print immediately.<br />
[<strong>User</strong> Authentication]<br />
d Reference<br />
For details on each print function in [Output Method:], refer to page 11-3.<br />
Parameter details<br />
[Secure <strong>Print</strong>] Select this option to save the document to be printed in<br />
[Secure Document <strong>User</strong> Box] of the machine. When<br />
printing, entering the ID and password is required from<br />
the control panel of the machine. Select this option<br />
when printing highly confidential documents.<br />
[Save in <strong>User</strong> Box] Select this option to save the document to be printed in<br />
a <strong>User</strong> Box of the machine.<br />
[Save in <strong>User</strong> Box and<br />
<strong>Print</strong>]<br />
Select this option to save the document in a <strong>User</strong> Box<br />
and print at the same time.<br />
[Proof <strong>Print</strong>] After one copy of the document is printed, the machine<br />
stops printing temporarily. Select this option to avoid<br />
misprinting a large volume of print jobs.<br />
[ID&<strong>Print</strong>] Select this option to save the document to be printed in<br />
[ID & <strong>Print</strong> <strong>User</strong> Box] of the machine. When printing,<br />
user authentication must be performed via the control<br />
panel of the machine.<br />
− Select this check box to specify the user name and<br />
password if [<strong>User</strong> Authentication] has been specified<br />
for the machine.<br />
Selecting this check box displays the setting window.<br />
[Account Track] − Select this check box to specify the account name and<br />
password if [Account Track] has been specified for the<br />
machine.<br />
Selecting this check box displays the setting window.<br />
[Detail Settings...] − Click this button to display the window for configuring<br />
the detail settings.<br />
9-12 <strong>VL</strong>3622c/<strong>VL</strong>2822c/<strong>VL</strong><strong>2222c</strong><br />
9.5
9.5 Parameter details 9<br />
Checking the [Output Method] detail settings<br />
Clicking [Detail Settings...] displays the [Output Method:] functions for which detail settings can be specified.<br />
Clicking [Expand All] displays the settings.<br />
Selecting a function and clicking [Settings...] displays the window for specifying the detail settings for the selected<br />
function.<br />
Function Name Description<br />
[Secure <strong>Print</strong>] This is the same window as that appears when you specify [Secure <strong>Print</strong>]<br />
in [Output Method:].<br />
[Save in <strong>User</strong> Box] This is the same window as that appears when you specify [Save in <strong>User</strong><br />
Box] or [Save in <strong>User</strong> Box and <strong>Print</strong>] in [Output Method:].<br />
[<strong>User</strong> Authentication] This is the same window as that appears when you select the [<strong>User</strong> Authentication]<br />
check box in [Output Method:].<br />
[Account Track] This is the same window as that appears when you select the [Account<br />
Track] check box in [Output Method].<br />
[Administrator Settings] Select this option to display the window for changing the display settings<br />
of the <strong>User</strong> Authentication Settings window and changing the [Encryption<br />
Passphrase:].<br />
<strong>VL</strong>3622c/<strong>VL</strong>2822c/<strong>VL</strong><strong>2222c</strong> 9-13
9<br />
Function Name Description<br />
[Popup Authentication Dialog<br />
when printing]<br />
Parameter details<br />
Reference<br />
- In [Encryption Passphrase:], enter the encryption passphrase that matches the one that configured in<br />
[Driver Password Encryption Setting] of the machine.<br />
d Reference<br />
For details on allowing the user to specify [Encryption Passphrase:], refer to page 11-33.<br />
9.5.4 [Layout / Finish]<br />
The [Layout] window and the [Finish] window can be switched.<br />
Select this check box to display the <strong>User</strong> Authentication, Account Track<br />
or Secure <strong>Print</strong> window when specifying printing, prompting entering the<br />
user name, account name, document ID and password.<br />
[Encryption Passphrase:] Any string used to encrypt communication with this machine.<br />
If the encryption passphrase for the machine was changed from [Use Factory<br />
Default] to [<strong>User</strong>-Defined], enter the same encryption passphrase as<br />
for the machine.<br />
An encryption key is automatically created for the entered text, and used<br />
for communication with the machine.<br />
[Enhanced Server:] Set this item to [On] when the external server authentication is used.<br />
9-14 <strong>VL</strong>3622c/<strong>VL</strong>2822c/<strong>VL</strong><strong>2222c</strong><br />
9.5
9.5 Parameter details 9<br />
Function Name Option Description<br />
[<strong>Print</strong> Type:] [1-Sided], [2-Sided],<br />
[Booklet]<br />
Specify 2-Sided <strong>Print</strong> or Booklet printing.<br />
[Binding Posi- [Left Bind], [Right Bind], Specify the binding position.<br />
tion:]<br />
[Top Bind]<br />
[Poster Mode:] Off, 2 e 2, 3 e 3, 4 e 4 Select this option to print one sheet of an original divided<br />
into multiple pages. In [Overlap width line], specify<br />
the presence of the border frame.<br />
<strong>Print</strong>ing documents containing pages of different sizes<br />
or orientations in one job may cause images to be partially<br />
lost or overlapped.<br />
[Overlap width<br />
line]<br />
ON/OFF Specify the presence of overlap width line. It can be<br />
specified when Poster Mode is set to an option other<br />
than [Off].<br />
[Rotate 180] ON/OFF Select this check box to rotate the document 180° to<br />
print.<br />
[Image Shift] ON/OFF Select this check box to print by shifting the entire print<br />
image. In the window that appears when this option is<br />
selected, detailed amount of shift can be specified.<br />
[Front Side]/[Back Side] Specify the shift direction and values. For 2-sided printing,<br />
clearing the [Same value for Front and Back sides]<br />
check box allows you to specify different values for the<br />
front and back sides.<br />
[Chapters] ON/OFF Select this check box to specify the page to be printed<br />
on the front side. In the window that appears when this<br />
option is selected, the page can be specified.<br />
It can be specified when <strong>Print</strong> Type is [2-Sided] or<br />
[Booklet].<br />
[Page Number:] Specify the pages to be printed on the front side when<br />
[Chapters] is selected.<br />
[Staple:] ON/OFF Select this check box to specify stapling.<br />
From the drop-down list, specify the number of staples<br />
and the stapling position.<br />
[Punch:] ON/OFF Select this check box to specify hole punching.<br />
From the drop-down list, specify the number of punches.<br />
[Fold & Staple:] OFF, [Center Staple and<br />
Fold], [Half-Fold]<br />
[Paper Arrangement:]<br />
[Prioritize Arranging Papers]/[PrioritizeProductivity]<br />
Specify the fold and staple.<br />
Specify the method for paper arrangement (adjusting<br />
the binding position) for 2-sided printing. When [Prioritize<br />
Arranging Papers] is selected, the paper arrangement<br />
process is performed after receiving all data.<br />
When [Prioritize Productivity] is selected, the paper arrangement<br />
process is performed while receiving and<br />
printing data.<br />
Reference<br />
- The [Staple:] function is available only if the optional Finisher FS-527 or Finisher FS-529 is installed.<br />
- The [Punch:] function is available only when the Punch Kit is installed on the optional Finisher FS-527.<br />
- The [Fold & Staple:] function is available only when the Saddle Stitcher is installed on the optional Finisher<br />
FS-527.<br />
<strong>VL</strong>3622c/<strong>VL</strong>2822c/<strong>VL</strong><strong>2222c</strong> 9-15
9<br />
9.5.5 [Paper Tray / Output Tray]<br />
Function Name Option Description<br />
[Paper Tray:] Auto, Tray 1 to Tray 4,<br />
LCT, Bypass Tray<br />
[Paper Type:] Paper types available for<br />
the machine<br />
[Paper Settings<br />
for Each Tray...]<br />
Parameter details<br />
Select a paper tray to be used.<br />
Selectable items vary depending on the option installation<br />
status.<br />
Select a paper type to be used for printing.<br />
It can be changed only when Paper Tray is set to [Auto].<br />
When Paper Tray is not set to [Auto], the paper types<br />
registered in [Paper Settings for Each Tray...] are available.<br />
[Paper Tray:] Select a paper tray to be specified.<br />
Selectable items vary depending on the option installation<br />
status.<br />
[Paper Type:] Select the type of paper to be loaded onto the paper<br />
tray.<br />
[Output Tray:] Default, Tray 1 and Tray<br />
3<br />
Specify the tray to output the printed pages.<br />
Selectable items vary depending on the option installation<br />
status.<br />
Reference<br />
- Specify [Duplex Side 2] when printing on the back side of paper.<br />
- [<strong>User</strong>] of Paper Type is the frequently used paper type registered on the machine side. For details on<br />
registering the user paper, refer to the [<strong>User</strong>'s Guide Copy <strong>Operations</strong>].<br />
9-16 <strong>VL</strong>3622c/<strong>VL</strong>2822c/<strong>VL</strong><strong>2222c</strong><br />
9.5
9.5 Parameter details 9<br />
9.5.6 [Cover Mode / Transparency Interleave]<br />
The [Cover Mode] setting window and the [Transparency Interleave] window can be switched.<br />
Function Name Option Description<br />
[Front Cover:] ON/OFF Select this check box to attach a front cover page.<br />
It can be specified when any other option than [Auto] is<br />
selected for Paper Tray.<br />
Off, [<strong>Print</strong>], [Blank] Select whether to print on the front cover sheet.<br />
Off, Tray 1 to Tray 4, Select the paper tray for the front cover sheet.<br />
LCT, Bypass Tray Selectable items vary depending on the option installation<br />
status.<br />
[Back Cover:] ON/OFF Select this check box to attach a back cover page.<br />
It can be specified when any other option than [Auto] is<br />
selected for Paper Tray.<br />
Off, [<strong>Print</strong>], [Blank] Select whether to print on the back cover sheet.<br />
Off, Tray 1 to Tray 4,<br />
LCT, Bypass Tray<br />
Select the paper tray for the back cover sheet.<br />
Selectable items vary depending on the option installation<br />
status.<br />
<strong>VL</strong>3622c/<strong>VL</strong>2822c/<strong>VL</strong><strong>2222c</strong> 9-17
9<br />
Function Name Option Description<br />
[Transparency Interleave:]<br />
9.5.7 [Per Page Setting]<br />
Parameter details<br />
ON/OFF Select this check box to insert interleaves when printing<br />
transparencies.<br />
It can be specified when [Transparency] is selected for<br />
Paper Type.<br />
Off, [Blank] It is specified so that the transparency interleave is output<br />
in blank (this setting cannot be changed).<br />
Off, Tray 1 to Tray 4, LCT Select the paper tray for the transparency interleaves.<br />
Selectable items vary depending on the option installation<br />
status.<br />
The print type and paper tray can be specified for each page. This function is convenient if you want to<br />
change the paper tray while printing multiple pages. The settings can be registered in the list and used as<br />
necessary.<br />
Function Name Option Description<br />
[Per Page Setting:]<br />
ON/OFF Select this check box to insert paper between pages<br />
and switch the paper and tray for each page.<br />
[Add...] − Click this button to display the [Per Page Setting] dialog<br />
box to create a list specifying conditions.<br />
[Delete...] − Click this button to delete the list.<br />
[Edit...] − Click this button to display the [Per Page Setting] dialog<br />
box to edit a list specifying conditions.<br />
9-18 <strong>VL</strong>3622c/<strong>VL</strong>2822c/<strong>VL</strong><strong>2222c</strong><br />
9.5
9.5 Parameter details 9<br />
Editing Per Page Setting<br />
Function Name Description<br />
[List Name:] Enter the name of the list.<br />
[Add] Add a condition to the list.<br />
[Delete] Delete a condition from the list.<br />
[+][,] Sort the selected condition rows according to page number.<br />
[Page Number:] Enter the page number of the selected condition row.<br />
Specify the page numbers using a numerical value. To specify multiple<br />
pages, separate each page number with a comma (for example, "2,4,6")<br />
or specify the range using a hyphen (for example, "6-10").<br />
[<strong>Print</strong> Type:] Select <strong>Print</strong> or Blank and 2-Sided or 1-Sided printing for the selected condition<br />
row.<br />
[Paper Tray:] Specify the paper tray used to print the selected condition row.<br />
[Staple:] Specify the number of staples and the stapling position for the selected<br />
condition row.<br />
9.5.8 [Stamp / Composition]<br />
<strong>VL</strong>3622c/<strong>VL</strong>2822c/<strong>VL</strong><strong>2222c</strong> 9-19
9<br />
Editing the copy security<br />
Parameter details<br />
Function Name Option Description<br />
[Copy Security] ON/OFF Specify the special pattern or password to prevent<br />
copying. Click [Settings...] to specify items to be printed,<br />
positions, composition method and password.<br />
[Settings...] − For details, refer to page 9-20.<br />
[Date/Time] ON/OFF Select this check box to print the date and time. Click<br />
[Settings...] to specify items and pages to be printed<br />
and positions.<br />
[Settings...] − For details, refer to page 9-22.<br />
[Page Number] ON/OFF Select this check box to print page number. Click [Settings...]<br />
to specify items and pages to be printed and<br />
positions.<br />
[Settings...] − For details, refer to page 9-22.<br />
[Header/Footer] ON/OFF Select this check box to print the header and footer.<br />
Select the header/footer from the list specified in the<br />
main unit. Click [Settings...] to specify items and pages<br />
to be printed.<br />
[Settings...] − For details, refer to page 9-23.<br />
Function Name Description<br />
[Copy Security:] Select a function to prevent unauthorized copying.<br />
[Copy Protect]: Composes the specified text in the background before<br />
printing data. Copy Protect text is not highly visible when printing, but the<br />
text is highlighted when a document is copied illegally.<br />
[Repeatable Stamp]: Composes the specified text before printing data.<br />
This stamp is distinguishable even during printing.<br />
[Copy Guard]: Composes Copy Guard patterns before printing data. If a<br />
document is copied illegally on the machine that supports this function,<br />
the composed pattern is scanned, and the copying process is cancelled.<br />
[Password Copy]: Composes Password Copy patterns before printing data.<br />
If a document is copied illegally on the machine that supports this function,<br />
the composed pattern is scanned, and you are prompted to enter the<br />
password. To copy a document, enter the specified password when printing.<br />
[Password:] Enter the password for [Password Copy].<br />
[Characters:] Select this check box to embed the selected character string in a pattern.<br />
A preregistered character string (common stamp) or a character string<br />
registered in the machine (registered stamp) can be specified.<br />
9-20 <strong>VL</strong>3622c/<strong>VL</strong>2822c/<strong>VL</strong><strong>2222c</strong><br />
9.5
9.5 Parameter details 9<br />
Function Name Description<br />
[Date/Time:] Select this check box to embed the selected date and time in a pattern.<br />
Selecting from the drop-down list allows you to specify the display type<br />
and presence or absence of the time display.<br />
[Serial Number] Select this check box to embed the serial number of the machine in a pattern.<br />
[Distribution Control<br />
Number:]<br />
Select this check box to embed the copy number in a pattern when printing<br />
multiple copies. The start number or number of digits can be specified.<br />
[Job Number] Select this check box to embed the print job number in a pattern for documents<br />
that are automatically paginated.<br />
Function Name Description<br />
[Text Size:] Specify the text size of a pattern.<br />
[Angle:] Specify the pattern angle.<br />
[Pattern:] Specify the embedding method of a pattern.<br />
[Pattern Overwrite:] Specify the sequence for printing a pattern on top of the original.<br />
[Background Pattern:] Specify the background pattern.<br />
[Adjust Color...] Specify the color of the pattern.<br />
Reference<br />
- Items that can be specified vary depending on the selected [Copy Security] function.<br />
<strong>VL</strong>3622c/<strong>VL</strong>2822c/<strong>VL</strong><strong>2222c</strong> 9-21
9<br />
Editing Date/Time<br />
Function Name Description<br />
[Format:] Displays the format of the date and time to be printed.<br />
[Pages:] Specify the pages to print the date and time.<br />
[Text Color:] Specify the text color used for printing.<br />
[<strong>Print</strong> Position:] Specify the print position.<br />
Editing Page Number<br />
Parameter details<br />
Function Name Description<br />
[Starting Page:] Specify the page to start printing the page number.<br />
[Starting Page Number:] Specify the start number for printing the page number.<br />
[Cover Mode:] Specify whether the page number is printed on the front cover page and<br />
the back cover page, when attaching the cover pages.<br />
[Text Color:] Specify the text color used for printing.<br />
[<strong>Print</strong> Position:] Specify the print position.<br />
9-22 <strong>VL</strong>3622c/<strong>VL</strong>2822c/<strong>VL</strong><strong>2222c</strong><br />
9.5
9.5 Parameter details 9<br />
9.5.9 [Quality]<br />
Editing Header/Footer<br />
Function Name Description<br />
[Recall Header/Footer:] Select the header/footer setting registered in the machine.<br />
[Distribution Control When printing multiple copies, this function prints the number of copies in<br />
Number:]<br />
the header/footer. The start number or number of digits can be specified.<br />
[Pages:] Specify the pages to print the header/footer.<br />
[Text Color:] Specify the text color used for printing.<br />
Function Name Option Description<br />
[Select Color:] [Auto Color], [Full Color],<br />
[Gray Scale]<br />
Specify the color to be printed.<br />
[Auto Color]: Select this option to identify the colors<br />
used in the print data to use them in printing.<br />
[Full Color]: Select this option to print in full-color processes<br />
(CMYK) regardless of the print data (color/gray<br />
scale).<br />
[Gray Scale]: Select this option to print in gray scale.<br />
[Glossy Mode] ON/OFF Select this check box to print using a gloss finish.<br />
[Toner Save] ON/OFF Select this check box to adjust the printing density in<br />
order to save the amount of toner consumed.<br />
<strong>VL</strong>3622c/<strong>VL</strong>2822c/<strong>VL</strong><strong>2222c</strong> 9-23
9<br />
Function Name Option Description<br />
[Edge Enhancement]<br />
[Color Settings:] [Document], [Photo],<br />
[DTP], [Web], [CAD]<br />
[Quality Adjustment...]<br />
d Reference<br />
For details on managing the profile, refer to page 11-37 and page 11-39.<br />
Parameter details<br />
ON/OFF Select this check box to enhance the edges of characters,<br />
graphics and images so that thin lines and small<br />
letters become clearly visible.<br />
Select any of the options to print with a quality suitable<br />
for the selected original.<br />
[Document]: Select this option to print with a quality<br />
suitable for documents with many characters.<br />
[Photo]: Select this option to print with a quality suitable<br />
for photos.<br />
[DTP]: Select this option to print with a quality suitable<br />
for documents produced by DTP.<br />
[Web]: Select this option to print with a quality suitable<br />
for Web page printing.<br />
[CAD]: Select this option to print with a quality suitable<br />
for CAD data printing.<br />
− Click this button to adjust the image quality. Adjust the<br />
text, photos, figures, tables, and graphs in each original.<br />
Profiles can also be managed here.<br />
[Auto Trapping] ON/OFF Select this option to superimpose neighboring colors to<br />
print so as to prevent white space being generated<br />
around a picture.<br />
[Black Over <strong>Print</strong>:] Off, [Text], [Text/Figure] Select this check box to superimpose black color on a<br />
neighboring color to print so as to prevent white space<br />
being generated around black characters or figures.<br />
You can specify to cause the overlapping on the characters<br />
alone or on characters and figures.<br />
9-24 <strong>VL</strong>3622c/<strong>VL</strong>2822c/<strong>VL</strong><strong>2222c</strong><br />
9.5
10 <strong>Print</strong><br />
Functions of Mac OS 9.2
10.1 <strong>Print</strong> operations 10<br />
10 <strong>Print</strong> Functions of Mac OS 9.2<br />
This chapter describes the functions of the printer driver for OS 9.2.<br />
10.1 <strong>Print</strong> operations<br />
<strong>Print</strong> jobs are specified from the application software.<br />
1 Open the data in the application, and click [File]. Then click [<strong>Print</strong>] from the menu.<br />
% If the menu is not available, click [<strong>Print</strong>].<br />
The [<strong>Print</strong>] window appears.<br />
2 Check that the desired printer name is selected in [<strong>Print</strong>er:].<br />
% If the target printer is not selected, select it.<br />
% If the printer does not appear, select the printer from [Chooser]. For details, refer to page 5-13.<br />
% The [<strong>Print</strong>] window varies depending on the application software.<br />
3 Specify the print range and the number of copies to print.<br />
4 Switch the setting window as necessary to change the printer driver settings.<br />
% When you change the menu of [General], another setting window of the printer driver appears, allowing<br />
you to configure various functions. For details, refer to page 10-6.<br />
% The printer driver settings changed in the [<strong>Print</strong>] window are not saved, and the original settings are<br />
restored when you exit the application.<br />
5 Click [<strong>Print</strong>].<br />
<strong>Print</strong>ing is executed and the data indicator of the machine flashes.<br />
<strong>VL</strong>3622c/<strong>VL</strong>2822c/<strong>VL</strong><strong>2222c</strong> 10-3
10<br />
10.2 Default settings of the printer driver<br />
Default settings of the printer driver<br />
When you have installed the printer driver, you need to change the initialization conditions such as options<br />
and enable functions of the machine from the printer driver.<br />
NOTICE<br />
Any options that are installed in the machine but not configured cannot be used by the printer driver. Be sure<br />
to configure the settings for the installed options.<br />
10.2.1 Option settings<br />
1 In the [Apple Menu] menu, select [Chooser].<br />
2 Select the printer name.<br />
3 Click [Setup...].<br />
4 Click [Configure].<br />
The option setting window appears.<br />
% When the printer is specified as the LPR printer, double-click the LPR printer icon on the desktop,<br />
click [Change Setup...] in the [<strong>Print</strong>er] menu to display the option setting window.<br />
5 Specify the options installed in the machine.<br />
6 Click [OK].<br />
The [Chooser] window appears again.<br />
7 Close the [Chooser] window.<br />
d Reference<br />
The option settings are displayed automatically when the printer driver is selected for the first time. For details,<br />
refer to page 5-13.<br />
10-4 <strong>VL</strong>3622c/<strong>VL</strong>2822c/<strong>VL</strong><strong>2222c</strong><br />
10.2
10.2 Default settings of the printer driver 10<br />
10.2.2 Registering the default settings<br />
The settings for the machine functions configured when printing can only be applied while using the application.<br />
When you exit the application, the settings return to their default settings.<br />
To register the settings, save the printer driver settings. For OS 9.2, click [Save Settings] in the [<strong>Print</strong>] window<br />
to save the settings.<br />
d Reference<br />
For details on the function and settings of the printer driver, refer to page 10-6.<br />
Reference<br />
- The settings in the [Page Setup] dialog box cannot be saved.<br />
<strong>VL</strong>3622c/<strong>VL</strong>2822c/<strong>VL</strong><strong>2222c</strong> 10-5
10<br />
10.3 Parameter details<br />
Parameter details<br />
The printer driver function settings can be configured in [Page Attributes] in the [Page Setup] dialog box or<br />
[Layout] or [Finishing Options] in the [<strong>Print</strong>] window.<br />
10.3.1 Page Attributes<br />
From the [File] menu, select in [Page Setup] (or [Page Setup]).<br />
Function Name Description<br />
[Paper:] Specify the output paper size.<br />
[Orientation:] Select the orientation for the original.<br />
[Scale:] Select an enlarge or reduce ratio.<br />
Reference<br />
- To use paper of which the size is other than the standard sizes, specify the custom paper size. For details<br />
on registering the custom size, refer to page 10-6.<br />
10.3.2 Specifying the custom page sizes<br />
Select [Custom Page Sizes] in the [Page Setup] dialog box.<br />
1 From the [File] menu, select [Page Setup] (or [Page Setup]).<br />
2 Select [Custom Page Sizes].<br />
3 Click [New].<br />
4 Configure the following items.<br />
Function Name Description<br />
[Paper Size] Specify the desired paper size.<br />
[Margins] Specify the paper margins.<br />
[Custom Page Size Name] Enter the registered name for the specified paper size or margins, and<br />
then click [OK].<br />
[Units:] Select the unit to specify the margins.<br />
10-6 <strong>VL</strong>3622c/<strong>VL</strong>2822c/<strong>VL</strong><strong>2222c</strong><br />
10.3
10.3 Parameter details 10<br />
10.3.3 General<br />
5 Click [OK].<br />
This saves the custom page settings, which can be selected from the Paper drop-down list in [Page<br />
Attributes].<br />
From the [File] menu, select in [<strong>Print</strong>].<br />
Function Name Description<br />
[Copies:] Specify the number of copies to be printed.<br />
[Collated] Select this check box to collate pages sequentially when printing multiple<br />
sets of copies.<br />
[Pages:] Specify the page range to print.<br />
[Paper Source] Select the paper tray and paper type to be used.<br />
10.3.4 [Layout] (Combination)<br />
Specify this item to print multiple pages on one page.<br />
Function Name Description<br />
[Pages per sheet:] Multiple pages can be combined on a single page.<br />
[Layout direction] Specify the page combination order.<br />
[Border:] Specify the borders between pages.<br />
<strong>VL</strong>3622c/<strong>VL</strong>2822c/<strong>VL</strong><strong>2222c</strong> 10-7
10<br />
10.3.5 <strong>Print</strong>er specific options (Finishing Option 1 to 5)<br />
Parameter details<br />
Specify the printer specific options. These options can be specified when functions of the machine such as<br />
stapling and punching are to be used.<br />
Function Name Description<br />
[Offset:] Specify offset.<br />
[Output Tray:] Select the output tray.<br />
[Binding Position:] Specify the binding position.<br />
[<strong>Print</strong> Type:] Perform 2-sided printing.<br />
[Combination:] Perform booklet printing.<br />
[Staple:] Perform stapling.<br />
[Punch:] Perform hole punching.<br />
[Fold] Perform folding.<br />
[Front Cover:] Select this option to attach a front cover page.<br />
[Front Cover Tray:] Select the paper tray for the front cover sheet.<br />
[Back Cover:] Select this option to attach a back cover page.<br />
[Back Cover Tray:] Select the paper tray for the back cover sheet.<br />
[Transparency Interleave:] Select the option to insert interleaves between transparencies.<br />
[Interleave Tray:] Select the paper tray for the transparency interleaves.<br />
[Output Method:] Specify the [Proof <strong>Print</strong>] function that pauses the printing after one copy<br />
of the document is output so that you can check how it is printed.<br />
[Select Color:] Select whether to print in color or gray scale.<br />
[Glossy Mode:] Select this check box to print using a gloss finish.<br />
[Color Settings:] Select any of the options to print with a quality suitable for the original.<br />
[Auto Trapping:] Select this option to superimpose neighboring colors to print so as to prevent<br />
white space being generated around a picture.<br />
[Black Over <strong>Print</strong>:] Select this check box to superimpose black color on a neighboring color<br />
to print so as to prevent white space being generated around black characters<br />
or figures.<br />
You can specify to cause the overlapping on the characters alone or on<br />
characters and figures.<br />
[Color Matching (Text):] Select this option to adjust the color quality of the text in the original.<br />
[Pure Black (Text):] Select whether to use (ON/OFF) the Pure Black function for the texts in the<br />
original.<br />
[Screen (Text):] Select whether to use screening for the texts in the original.<br />
[Color Matching (Photo):] Select this option to adjust the color quality of the photos in the original.<br />
[Pure Black (Photo):] Select whether to use (ON/OFF) the Pure Black function for the photos in<br />
the original.<br />
[Screen (Photo):] Select whether to use screening for the photos in the original.<br />
[Smoothing (Photo):] Select whether to use smoothing for the photos in the original.<br />
10-8 <strong>VL</strong>3622c/<strong>VL</strong>2822c/<strong>VL</strong><strong>2222c</strong><br />
10.3
10.3 Parameter details 10<br />
Function Name Description<br />
[Color Matching (Graphic):] Select this option to adjust the color quality of the figures, tables, or<br />
graphs in the original.<br />
[Pure Black (Graphic):] Select whether to use (ON/OFF) the Pure Black function for the figures, tables,<br />
or graphs in the original.<br />
[Screen (Graphic):] Select whether to use screening for the figures, tables, or graphs in the<br />
original.<br />
[Smoothing (Graphic):] Select whether to use smoothing for the figures, table, or graphs in the<br />
original.<br />
[Toner Save:] Select this check box to adjust the printing density in order to save the<br />
amount of toner consumed.<br />
[Edge Enhancement:] Select this check box to enhance the edges of characters, graphics and<br />
images so that thin lines and small letters become clearly visible.<br />
Reference<br />
- The [Staple:] function is available only if the optional Finisher FS-527 or Finisher FS-529 is installed.<br />
- The [Punch:] function is available only when the Punch Kit is installed on the optional Finisher FS-527.<br />
- The [Fold:] function is available only when the Saddle Stitcher is installed on the optional Finisher FS-<br />
527.<br />
<strong>VL</strong>3622c/<strong>VL</strong>2822c/<strong>VL</strong><strong>2222c</strong> 10-9
10<br />
Parameter details<br />
10-10 <strong>VL</strong>3622c/<strong>VL</strong>2822c/<strong>VL</strong><strong>2222c</strong><br />
10.3
11 Function<br />
Details
11.1 Proof <strong>Print</strong> 11<br />
11 Function Details<br />
This chapter describes the functions that require special attention, for example, when combining the printer<br />
driver and panel operation of the machine.<br />
11.1 Proof <strong>Print</strong><br />
The Proof <strong>Print</strong> function is a feature used when printing out multiple copies. It allows the printer to output one<br />
copy and pause the printing operation before printing the remaining number of copies. Because this function<br />
allows confirming the printed result before outputting the remaining copies, it is helpful in preventing misprinting<br />
when producing a large number of copies.<br />
The Proof <strong>Print</strong> function can be specified using the printer driver when printing, and printing of the remaining<br />
number of copies can be performed from the control panel.<br />
11.1.1 Setting the printer driver<br />
The following five printer drivers support this feature.<br />
- PCL <strong>Print</strong>er Driver for Windows (PCL driver)<br />
- PostScript <strong>Print</strong>er Driver for Windows (PS driver)<br />
- XPS <strong>Print</strong>er Driver for Windows (XPS driver)<br />
- PostScript PPD <strong>Print</strong>er Driver for Mac OS X<br />
- PostScript PPD <strong>Print</strong>er Driver for Mac OS 9.2<br />
Perform printing with the following settings specified.<br />
- Output Method: [Proof Copy]<br />
- Number of Copies: Multiple sets<br />
For Windows<br />
1 Click to display the [Basic] tab.<br />
2 Select [Proof Copy] in [Output Method].<br />
3 Specify the desired number of copies and print.<br />
One copy is printed for checking.<br />
<strong>VL</strong>3622c/<strong>VL</strong>2822c/<strong>VL</strong><strong>2222c</strong> 11-3
11<br />
For Mac OS X<br />
1 Display the [Output Method] window.<br />
2 Select [Proof <strong>Print</strong>] in [Output Method:].<br />
Proof <strong>Print</strong><br />
3 Specify the desired number of copies and print.<br />
One copy is printed for checking.<br />
% In OS 9.2, the proof printing can be selected at [Output Method:] in [Finishing Options 3] screen.<br />
11.1.2 Recalling a job from the control panel<br />
Reference<br />
- For details on the functions of the keys on the control panel, refer to the [<strong>User</strong>'s Guide Copy <strong>Operations</strong>].<br />
1 Press [Job List] on the control panel, and then press [Job Details].<br />
The <strong>Print</strong> window appears.<br />
11-4 <strong>VL</strong>3622c/<strong>VL</strong>2822c/<strong>VL</strong><strong>2222c</strong><br />
11.1
11.1 Proof <strong>Print</strong> 11<br />
2 While [Current Jobs] is displayed, press [Release Held Job].<br />
The [Release Held Job] screen appears.<br />
3 From the job list, select the job you want to print.<br />
% To print the remaining number of copies, continue with Step 6.<br />
% To change the printing conditions, continue with Step 4.<br />
% If the job you want to release is not displayed, press [ ] or [ ] until the desired job is displayed.<br />
If an incorrect job was selected, touch the button for the selected job again to deselect it.<br />
4 Press [Change Setting].<br />
The [Change Setting] screen appears.<br />
% To check the results of setting changes, select the job whose sample copy is to be printed from the<br />
job list, and then press the Proof Copy key on the control panel.<br />
One copy is printed for checking. After performing the<br />
Proof Copy key, the original settings are restored. Configure the settings again as necessary.<br />
5 Change the printing conditions in the [Change Setting] screen, and then press [OK].<br />
The [Release Held Job] screen appears again.<br />
% To cancel releasing the held job, press [Cancel].<br />
6 Press [OK] or the Start key in the control panel.<br />
The stored job is changed to an active job, and then printed.<br />
<strong>VL</strong>3622c/<strong>VL</strong>2822c/<strong>VL</strong><strong>2222c</strong> 11-5
11<br />
11.2 Secure <strong>Print</strong><br />
Secure <strong>Print</strong><br />
The Secure <strong>Print</strong> function saves print jobs in the Secure <strong>Print</strong> <strong>User</strong> Box of the machine. Because the job is<br />
output only by entering the ID and password from the control panel, it is helpful for outputting highly confidential<br />
documents.<br />
The Secure <strong>Print</strong> function can be specified using the printer driver when printing, and printing can be performed<br />
from the control panel.<br />
In order to prevent information leakage, you can restrict the printings done on this machine only to the secure<br />
printing.<br />
d Reference<br />
For details on the function to limit to the secure printing only on the machine, refer to page 12-59.<br />
For details on the printer driver settings for Windows, refer to page 8-5, and for Mac OS X, refer to page 9-5.<br />
Reference<br />
- When the secure printing is frequently used, it will be helpful to configure [Custom Display Settings] -<br />
[<strong>User</strong> Box Settings] of the machine so that [Secure Document <strong>User</strong> Box] always appears on the screen.<br />
For details, refer to the [<strong>User</strong>'s Guide Box <strong>Operations</strong>].<br />
11.2.1 Setting the printer driver<br />
The following four printer drivers support this feature.<br />
- PCL <strong>Print</strong>er Driver for Windows (PCL driver)<br />
- PostScript <strong>Print</strong>er Driver for Windows (PS driver)<br />
- XPS <strong>Print</strong>er Driver for Windows (XPS driver)<br />
- PostScript PPD <strong>Print</strong>er Driver for Mac OS X<br />
Perform printing with the following settings specified.<br />
- Output Method: [Secure <strong>Print</strong>]<br />
For Windows<br />
1 Click to display the [Basic] tab.<br />
2 Select [Secure <strong>Print</strong>] in [Output Method].<br />
11-6 <strong>VL</strong>3622c/<strong>VL</strong>2822c/<strong>VL</strong><strong>2222c</strong><br />
11.2
11.2 Secure <strong>Print</strong> 11<br />
3 Enter the [Secure <strong>Print</strong> ID] and [Password].<br />
% When [Password Rules] is enabled on the machine, the passwords that can be used for secure<br />
printing are limited. If a password that does not comply with the password rules is entered, the job<br />
is deleted. For details on the [Password Rules], refer to the [<strong>User</strong>'s Guide Copy <strong>Operations</strong>].<br />
4 <strong>Print</strong> the document.<br />
% The ID and password required for secure printing can be registered in advance on [<strong>User</strong> Settings...]<br />
of the [Basic] tab. To use the same ID and password whenever you print, register them in advance<br />
so that the screen to prompt entering the ID and password does not appear when you select [Secure<br />
<strong>Print</strong>].<br />
For Mac OS X<br />
1 Display the [Output Method] window.<br />
2 Select [Secure <strong>Print</strong>] in [Output Method].<br />
<strong>VL</strong>3622c/<strong>VL</strong>2822c/<strong>VL</strong><strong>2222c</strong> 11-7
11<br />
3 Enter the [Secure <strong>Print</strong> ID:] and [Password;].<br />
Secure <strong>Print</strong><br />
% Selecting the [Save Settings] check box saves the settings. In addition, if the [Do not show this window<br />
when setting] check box is selected, the dialog box does not appear when the function is specified.<br />
% When [Password Rules] is enabled on the machine, the passwords that can be used for secure<br />
printing are limited. If a password that does not comply with the password rules is entered, the job<br />
is deleted. For details on the [Password Rules], refer to the [<strong>User</strong>'s Guide Copy <strong>Operations</strong>].<br />
4 <strong>Print</strong> the document.<br />
11.2.2 Recalling a job from the control panel<br />
The [Secure <strong>Print</strong>] jobs are saved in the [Secure Document <strong>User</strong> Box]. To print a secured document, the ID<br />
and password that have been specified in the printer driver are required.<br />
Reference<br />
- Secured documents are automatically deleted after a certain length of time has elapsed since their registration.<br />
The default setting for this time is 1 day, and the value can be specified in the administrator<br />
mode. For details, refer to page 12-45.<br />
- To manually delete a secured document that has been printed, operate in administrator mode. For details,<br />
refer to page 12-44.<br />
d Reference<br />
For details on the functions of the keys on the control panel, refer to the [<strong>User</strong>'s Guide Copy <strong>Operations</strong>].<br />
For details on the <strong>User</strong> Box functions of the machine, refer to the [<strong>User</strong>'s Guide Box <strong>Operations</strong>].<br />
For details on specifying the [Confidential Document Access Method], refer to the [<strong>User</strong>'s Guide Copy <strong>Operations</strong>].<br />
11-8 <strong>VL</strong>3622c/<strong>VL</strong>2822c/<strong>VL</strong><strong>2222c</strong><br />
11.2
11.2 Secure <strong>Print</strong> 11<br />
When the [Confidential Document Access Method] is set to [Mode 1]<br />
1 Press the <strong>User</strong> Box key on the control panel.<br />
% Press [<strong>User</strong> Box] when the application menu is displayed.<br />
2 Select [Secure Document <strong>User</strong> Box] in [System <strong>User</strong> Box], and then press [Use/File].<br />
3 Enter the [ID] for the secure print document, and then press [OK].<br />
4 Enter the password for the secure print document, and then press [OK].<br />
If the specified ID and password match, the list of secure print documents appears.<br />
<strong>VL</strong>3622c/<strong>VL</strong>2822c/<strong>VL</strong><strong>2222c</strong> 11-9
11<br />
5 Select the document to be printed on the [<strong>Print</strong>] tab, and then press [<strong>Print</strong>].<br />
The contents and a preview of the document can be checked in [Document Details].<br />
6 Change the print conditions as necessary.<br />
7 Press [Start] or the Start key in the control panel.<br />
The document is printed.<br />
% To stop operations, press [Cancel].<br />
Secure <strong>Print</strong><br />
11-10 <strong>VL</strong>3622c/<strong>VL</strong>2822c/<strong>VL</strong><strong>2222c</strong><br />
11.2
11.2 Secure <strong>Print</strong> 11<br />
When the [Confidential Document Access Method] is set to [Mode 2]<br />
1 Press the <strong>User</strong> Box key on the control panel.<br />
% Press [<strong>User</strong> Box] when the application menu is displayed.<br />
2 Select [Secure Document <strong>User</strong> Box] in [System <strong>User</strong> Box], and then press [Use/File].<br />
3 Enter the [ID] for the secure print document, and then press [OK].<br />
The list of secure print documents matching the specified ID appears.<br />
4 Select the document you want to print and then press [Enter Password].<br />
<strong>VL</strong>3622c/<strong>VL</strong>2822c/<strong>VL</strong><strong>2222c</strong> 11-11
11<br />
Secure <strong>Print</strong><br />
5 Enter the password for the secure print document, and then press [OK].<br />
The list of secure print documents matching the specified password appears.<br />
% If [Prohibited Functions When Authentication Error] in Administrator Settings is set to [Mode 2] and<br />
a user enters an incorrect password the specified number of times, the document is locked. To release<br />
from the operation prohibition status, contact your administrator.<br />
6 Select the document to be printed on the [<strong>Print</strong>] tab, and then press [<strong>Print</strong>].<br />
The contents and a preview of the document can be checked in [Document Details].<br />
7 Change the print conditions as necessary.<br />
8 Press [Start] or the Start key in the control panel.<br />
% The document is printed.<br />
% To stop operations, press [Cancel].<br />
11-12 <strong>VL</strong>3622c/<strong>VL</strong>2822c/<strong>VL</strong><strong>2222c</strong><br />
11.2
11.3 Save in <strong>User</strong> Box 11<br />
11.3 Save in <strong>User</strong> Box<br />
The Save in <strong>User</strong> Box function saves print jobs in a <strong>User</strong> Box of the machine. Because the print jobs are printed<br />
by specifying the <strong>User</strong> Box from the control panel, this function can also be used for document distribution.<br />
The Save in <strong>User</strong> Box function can be specified using the printer driver when printing, and printing or distribution<br />
can be performed from the control panel.<br />
d Reference<br />
For details on the <strong>User</strong> Box functions of the machine, refer to the [<strong>User</strong>'s Guide Box <strong>Operations</strong>].<br />
11.3.1 Setting the printer driver<br />
The following four printer drivers support this feature.<br />
- PCL <strong>Print</strong>er Driver for Windows (PCL driver)<br />
- PostScript <strong>Print</strong>er Driver for Windows (PS driver)<br />
- XPS <strong>Print</strong>er Driver for Windows (XPS driver)<br />
- PostScript PPD <strong>Print</strong>er Driver for Mac OS X<br />
Perform printing with the following settings specified.<br />
- Output Method: [Save in <strong>User</strong> Box] or [Save in <strong>User</strong> Box/<strong>Print</strong>]<br />
Reference<br />
- Create the <strong>User</strong> Box for saving the data in advance with the <strong>User</strong> Box function of the machine. For details<br />
on the <strong>User</strong> Box functions of the machine, refer to the [<strong>User</strong>'s Guide Box <strong>Operations</strong>].<br />
For Windows<br />
1 Click to display the [Basic] tab.<br />
2 Select [Save in <strong>User</strong> Box] or [Save in <strong>User</strong> Box/<strong>Print</strong>] in [Output Method].<br />
% To save data in a <strong>User</strong> Box and print at the same time, select [Save in <strong>User</strong> Box/<strong>Print</strong>].<br />
<strong>VL</strong>3622c/<strong>VL</strong>2822c/<strong>VL</strong><strong>2222c</strong> 11-13
11<br />
Save in <strong>User</strong> Box<br />
3 Enter the [File Name] of the document and the [<strong>User</strong> Box Number] for the save location.<br />
4 <strong>Print</strong> the document.<br />
% The file name and the <strong>User</strong> Box number required for saving data in the <strong>User</strong> Box can be registered<br />
in advance on [<strong>User</strong> Setting] of the [Basic] tab. To use the same file name and <strong>User</strong> Box number<br />
whenever you save documents, register them in advance so that the screen to prompt entering the<br />
file name and <strong>User</strong> Box number does not appear when you select [Save in <strong>User</strong> Box].<br />
For Mac OS X<br />
1 Display the [Output Method] window.<br />
2 Select [Save in <strong>User</strong> Box] or [Save in <strong>User</strong> Box and <strong>Print</strong>] in [Output Method:].<br />
11-14 <strong>VL</strong>3622c/<strong>VL</strong>2822c/<strong>VL</strong><strong>2222c</strong><br />
11.3
11.3 Save in <strong>User</strong> Box 11<br />
3 Enter the [File Name:] of the document and the [<strong>User</strong> Box Number:] for the save location.<br />
% Selecting the [Save Settings] check box saves the settings. In addition, if the [Do not show this window<br />
when setting] check box is selected, the dialog box does not appear when the function is specified.<br />
4 <strong>Print</strong> the document.<br />
11.3.2 Recalling a job from the control panel<br />
The [Save in <strong>User</strong> Box] and [Save in <strong>User</strong> Box/<strong>Print</strong>] jobs are saved in a <strong>User</strong> Box of the specified number.<br />
To print a document saved in a <strong>User</strong> Box, open the specified box to retrieve the document. If a password is<br />
specified for the <strong>User</strong> Box, the <strong>User</strong> Box password is required.<br />
Reference<br />
- <strong>User</strong> Box documents are automatically deleted after a certain length of time has elapsed since their registration.<br />
The default setting for this time is 1 day, and the value can be specified when creating a <strong>User</strong><br />
Box.<br />
d Reference<br />
For details on the functions of the keys on the control panel, refer to the [<strong>User</strong>'s Guide Copy <strong>Operations</strong>].<br />
For details on the <strong>User</strong> Box functions of the machine, refer to the [<strong>User</strong>'s Guide Box <strong>Operations</strong>].<br />
1 Press the <strong>User</strong> Box key on the control panel.<br />
% Press [<strong>User</strong> Box] when the application menu is displayed.<br />
2 Select the desired <strong>User</strong> Box number, and then press [Use/File].<br />
Boxes are classified as [Public] <strong>User</strong> Boxes, [Personal] <strong>User</strong> Boxes, or [Group] <strong>User</strong> Boxes.<br />
Specify the desired <strong>User</strong> Box from the classification of the saved <strong>User</strong> Boxes.<br />
The <strong>User</strong> Box number can be directly specified.<br />
% If a password is specified for the <strong>User</strong> Box, go to Step 3.<br />
% If a password is not specified for the <strong>User</strong> Box, go to Step 4.<br />
<strong>VL</strong>3622c/<strong>VL</strong>2822c/<strong>VL</strong><strong>2222c</strong> 11-15
11<br />
3 Enter the <strong>User</strong> Box password, and then press [OK].<br />
A list of documents in the specified <strong>User</strong> Box appears.<br />
4 Select the document to be printed on the [<strong>Print</strong>] tab, and then press [<strong>Print</strong>].<br />
Save in <strong>User</strong> Box<br />
% Documents saved in <strong>User</strong> Boxes can be transmitted via E-mail or fax. For details on the <strong>User</strong> Box<br />
functions of the machine, refer to the [<strong>User</strong>'s Guide Box <strong>Operations</strong>].<br />
5 Change the print conditions as necessary.<br />
6 Press [Start] or the Start key in the control panel.<br />
The document is printed.<br />
% To stop operations, press [Cancel].<br />
11-16 <strong>VL</strong>3622c/<strong>VL</strong>2822c/<strong>VL</strong><strong>2222c</strong><br />
11.3
11.4 <strong>Print</strong>ing a document on the machine for which user authentication is specified 11<br />
11.4 <strong>Print</strong>ing a document on the machine for which user authentication<br />
is specified<br />
When [<strong>User</strong> Authentication] is specified on the machine, a user name and password must be entered when<br />
printing.<br />
The following four printer drivers support this feature.<br />
- PCL <strong>Print</strong>er Driver for Windows (PCL driver)<br />
- PostScript <strong>Print</strong>er Driver for Windows (PS driver)<br />
- XPS <strong>Print</strong>er Driver for Windows (XPS driver)<br />
- PostScript PPD <strong>Print</strong>er Driver for Mac OS X<br />
Reference<br />
- If you enter an incorrect user name or password for the [<strong>User</strong> Authentication] settings of this machine<br />
or have not enabled [<strong>User</strong> Authentication], you will not be authenticated by this machine and the job will<br />
be discarded when printing.<br />
- If an incorrect password is entered the specified number of times while [<strong>User</strong> Authentication] settings<br />
are configured on the machine and [Prohibited Functions When Authentication Error] is set to [Mode 2],<br />
the user may be locked and access to the machine may be blocked.<br />
- Even a registered user cannot print a document if the user is not allowed to print. In addition, color printing<br />
is not available for a user who is not authorized for color printing. For user authentication, contact<br />
the administrator of the machine.<br />
- Even when using an optional Authentication Unit for [<strong>User</strong> Authentication], enter the user name and<br />
password. For details, refer to the [<strong>User</strong>'s Guide Copy <strong>Operations</strong>].<br />
For Windows<br />
1 Click to display the [Basic] tab.<br />
2 Click [Authentication/Account Track...].<br />
<strong>VL</strong>3622c/<strong>VL</strong>2822c/<strong>VL</strong><strong>2222c</strong> 11-17
11<br />
<strong>Print</strong>ing a document on the machine for which user authentication is specified<br />
3 Select [Recipient <strong>User</strong>], and then enter a [<strong>User</strong> Name] and [Password] that are registered with the machine.<br />
% The user name and password can each contain up to 64 characters.<br />
% If [Public <strong>User</strong>] access is allowed on the printer, the printer can be used by [Public <strong>User</strong>].<br />
% The password can also be specified in the printer driver in advance as the default value, and individual<br />
jobs do not require password entry.<br />
% When user authentication is performed with the Authentication Manager, you must enter the user<br />
information specified by the server administrator. The windows and input items that appear vary according<br />
to the settings. For details, contact your server administrator.<br />
4 Click [OK] to determine the settings and start printing.<br />
If the entered user name is a name enabled on the machine, the job is printed and counted as a job for<br />
the specified user.<br />
Reference<br />
- If user authentication is not enabled in the [Configure] tab, user authentication will not be performed. If<br />
you are using the user authentication, be sure to enable it in the [Device Option] list. For details, refer<br />
to page 8-5.<br />
- It is necessary to configure server settings when user authentication is performed with the server. Click<br />
[Server Setting...], and then select a server.<br />
- Clicking [Verify] allows communication with this machine to confirm whether the entered user can be<br />
authenticated. This function is available only when your computer is connected to and can communicate<br />
with this machine.<br />
- When authentication is performed with the Authentication Manager, in the [Administrator Settings] of<br />
this machine, set [System Connection] − [OpenAPI Settings] − [Authentication] to [OFF]. For details, refer<br />
to page 12-56.<br />
11-18 <strong>VL</strong>3622c/<strong>VL</strong>2822c/<strong>VL</strong><strong>2222c</strong><br />
11.4
11.4 <strong>Print</strong>ing a document on the machine for which user authentication is specified 11<br />
For Mac OS X<br />
1 Display the [Output Method] window.<br />
2 Select the [<strong>User</strong> Authentication] check box.<br />
3 Select [Recipient <strong>User</strong>], and then enter a [<strong>User</strong> Name:] and [Password:] that are registered with the machine.<br />
% The user name and password can each contain up to 64 characters.<br />
% If [Public <strong>User</strong> Access] access is allowed on the printer, the printer can be used by [Public <strong>User</strong>].<br />
% Selecting the [Save Settings] check box saves the settings. In addition, if the [Do not show this window<br />
when setting] check box is selected, the dialog box does not appear when the function is specified.<br />
% When user authentication is performed with the Authentication Manager, you must enter the user<br />
information specified by the server administrator. The windows and input items that appear vary according<br />
to the settings. For details, contact your server administrator.<br />
4 Click [OK] to determine the settings and start printing.<br />
If the entered user name is a name enabled on the machine, the job is printed and counted as a job for<br />
the specified user.<br />
Reference<br />
- It is necessary to configure server settings when user authentication is performed with the server. Click<br />
[<strong>User</strong> Authentication Server Setting...], and then select a server.<br />
- When authentication is performed with the Authentication Manager, in [Administrator Settings] of this<br />
machine, set [System Connection] − [OpenAPI Settings] − [Authentication] to [OFF]. For details, refer to<br />
page 12-56.<br />
<strong>VL</strong>3622c/<strong>VL</strong>2822c/<strong>VL</strong><strong>2222c</strong> 11-19
11<br />
<strong>Print</strong>ing a document on the machine for which Account Track function is enabled<br />
11.5 <strong>Print</strong>ing a document on the machine for which Account Track<br />
function is enabled<br />
When the [Account Track] settings are configured on the machine, you must enter the account track code<br />
(access code) when printing.<br />
The following four printer drivers support this feature.<br />
- PCL <strong>Print</strong>er Driver for Windows (PCL driver)<br />
- PostScript <strong>Print</strong>er Driver for Windows (PS driver)<br />
- XPS <strong>Print</strong>er Driver for Windows (XPS driver)<br />
- PostScript PPD <strong>Print</strong>er Driver for Mac OS X<br />
Reference<br />
- If you enter an incorrect access code for the [Account Track] settings on the machine or have not enabled<br />
[Account Track], you will not be authenticated by the printer and the job will be discarded when<br />
printing.<br />
If an incorrect password is entered the specified number of times while the [Account Track] setting is<br />
configured on the machine and [Prohibited Functions When Authentication Error] is set to [Mode 2], the<br />
account will be locked and access to the machine will be blocked.<br />
- Even a registered account cannot print a document if the account is not allowed to print. In addition,<br />
color printing is not available for a user who is not authorized for color printing.<br />
- For account track, contact the administrator of the machine.<br />
11.5.1 Setting the printer driver<br />
For Windows<br />
1 Click to display the [Basic] tab.<br />
2 Click [Authentication/Account Track...].<br />
11-20 <strong>VL</strong>3622c/<strong>VL</strong>2822c/<strong>VL</strong><strong>2222c</strong><br />
11.5
11.5 <strong>Print</strong>ing a document on the machine for which Account Track function is enabled 11<br />
3 Enter an [Department Name] and [Password] that are registered with the machine.<br />
% The account name and password can each contain up to 8 characters.<br />
% The password can also be specified in the printer driver in advance as the default value, and individual<br />
jobs do not require password entry.<br />
4 Click [OK] to determine the settings and start printing.<br />
If the entered access code is an access code enabled on the machine, the job is printed and counted<br />
as a job for the specified account.<br />
Reference<br />
- If account track is not enabled on the [Configure] tab, account track cannot be performed. If you are<br />
using account track, be sure to enable it in the [Device Option] list. For details, refer to page 8-5.<br />
- Clicking [Verify] allows communication with the machine to confirm whether the entered account can<br />
be authenticated. This function is available only when your computer is connected to and can communicate<br />
with this machine.<br />
For Mac OS X<br />
1 Display the [Output Method] window.<br />
2 Select the [Account Track] check box.<br />
<strong>VL</strong>3622c/<strong>VL</strong>2822c/<strong>VL</strong><strong>2222c</strong> 11-21
11<br />
<strong>Print</strong>ing a document on the machine for which Account Track function is enabled<br />
3 Add an [Department Name:] and [Password:] that are registered with the machine.<br />
% The account name and password can each contain up to 8 characters.<br />
% Selecting the [Save Settings] check box saves the settings. In addition, if the [Do not show this window<br />
when setting] check box is selected, the dialog box does not appear when the function is specified.<br />
4 Click [OK] to determine the settings and start printing.<br />
If the entered access code is an access code enabled on the machine, the job is printed and counted<br />
as a job for the specified account.<br />
11-22 <strong>VL</strong>3622c/<strong>VL</strong>2822c/<strong>VL</strong><strong>2222c</strong><br />
11.5
11.6 ID & <strong>Print</strong> 11<br />
11.6 ID & <strong>Print</strong><br />
When the ID & <strong>Print</strong> function is used, printing is started only after the user name and password entered from<br />
the control panel of the machine are accepted and the authentication process has been completed successfully.<br />
This is helpful in maintaining security of the document.<br />
To use the ID & <strong>Print</strong> function, the user authentication must be completed on the machine.<br />
When processing a print job from a computer, specify ID & <strong>Print</strong> after entering the user name and password<br />
from the printer driver.<br />
Data to be printed in the ID & <strong>Print</strong> mode is saved in the [ID & <strong>Print</strong> <strong>User</strong> Box], and after printing, they are<br />
automatically deleted from the [ID & <strong>Print</strong> <strong>User</strong> Box]. You can also print the data saved in the [ID & <strong>Print</strong> <strong>User</strong><br />
Box] by entering the user name and password from the control panel of the machine to log in to the printer.<br />
When the optional Authentication Unit (biometric type) AU-101, Authentication Unit (biometric type) AU-<br />
102, or Authentication Unit (IC card type) AU-201 is used for [<strong>User</strong> Authentication], you can start printing<br />
or log in to this machine simply by touching the authentication unit with your finger or IC card.<br />
d Reference<br />
To enable the ID & <strong>Print</strong> function when printing a document from the commuter, specify the function from the<br />
printer driver. For details, refer to page 11-23.<br />
For details on the operation of the job saved in the [ID & <strong>Print</strong> <strong>User</strong> Box], refer to page 11-26.<br />
For details on using the authentication unit for printing or logging in, refer to page 11-29.<br />
11.6.1 Setting the printer driver<br />
For Windows<br />
1 Click to display the [Basic] tab.<br />
2 Click [Authentication/Account Track...].<br />
<strong>VL</strong>3622c/<strong>VL</strong>2822c/<strong>VL</strong><strong>2222c</strong> 11-23
11<br />
ID & <strong>Print</strong><br />
3 Select [Recipient <strong>User</strong>], enter the [<strong>User</strong> Name] and [Password] that are registered with the machine and<br />
click [OK].<br />
% For details on the user authentication, refer to page 11-17.<br />
% If [<strong>User</strong> Authentication/Account Track] - [<strong>User</strong> Authentication Settings] - [Administrative Setting] -<br />
[ID & <strong>Print</strong> Settings] - [Public <strong>User</strong>] is set to [Save] in the [Administrator Settings] of the machine and<br />
the public user job is permitted, public user jobs are also saved in the [ID & <strong>Print</strong> <strong>User</strong> Box]. For details,<br />
refer to page 12-49.<br />
4 Select [ID&<strong>Print</strong>] in [Output Method].<br />
% If [<strong>User</strong> Authentication/Account Track] - [<strong>User</strong> Authentication Settings] - [Administrative Setting] -<br />
[ID & <strong>Print</strong> Settings] - [ID & <strong>Print</strong> ] is set to [ON] in the [Administrator Settings] of the machine, general<br />
print jobs are also saved in the [ID & <strong>Print</strong> <strong>User</strong> Box]. For details, refer to page 12-49.<br />
5 <strong>Print</strong> the document.<br />
11-24 <strong>VL</strong>3622c/<strong>VL</strong>2822c/<strong>VL</strong><strong>2222c</strong><br />
11.6
11.6 ID & <strong>Print</strong> 11<br />
For Mac OS X<br />
1 Display the [Output Method] window.<br />
2 Select the [<strong>User</strong> Authentication] check box.<br />
3 Select [Recipient <strong>User</strong>], enter the [<strong>User</strong> Name:] and [Password:] that are registered with the machine<br />
and click [OK].<br />
% For details on the user authentication, refer to page 11-17.<br />
% If [<strong>User</strong> Authentication/Account Track] - [<strong>User</strong> Authentication Settings] - [Administrative Setting] -<br />
[ID & <strong>Print</strong> Settings] - [Public <strong>User</strong>] is set to [Save] in the [Administrator Settings] of the machine and<br />
the public user job is permitted, public user jobs are also saved in the [ID & <strong>Print</strong> <strong>User</strong> Box]. For details,<br />
refer to page 12-49.<br />
<strong>VL</strong>3622c/<strong>VL</strong>2822c/<strong>VL</strong><strong>2222c</strong> 11-25
11<br />
4 Select [ID&<strong>Print</strong>] in [Output Method:].<br />
ID & <strong>Print</strong><br />
% If [<strong>User</strong> Authentication/Account Track] - [<strong>User</strong> Authentication Settings] - [Administrative Setting] -<br />
[ID & <strong>Print</strong> Settings] - [ID & <strong>Print</strong>] is set to [ON] in the [Administrator Settings] of the machine, general<br />
print jobs are also saved in the [ID & <strong>Print</strong> <strong>User</strong> Box]. For details, refer to page 12-49.<br />
5 <strong>Print</strong> the document.<br />
11.6.2 Recalling a job from the control panel<br />
Reference<br />
- For a public user, a document can be printed by opening the ID & <strong>Print</strong> <strong>User</strong> Box after logging in as a<br />
public user.<br />
Entering the user information and printing<br />
1 Enter the [<strong>User</strong> Name] and [Password] from the control panel of the printer.<br />
% If the control panel shows a screen that appears after logging in, for example, when public user access<br />
is allowed without requiring to log in, logging out by pressing the Access key brings up a login<br />
screen.<br />
11-26 <strong>VL</strong>3622c/<strong>VL</strong>2822c/<strong>VL</strong><strong>2222c</strong><br />
11.6
11.6 ID & <strong>Print</strong> 11<br />
2 Press [Begin <strong>Print</strong>ing].<br />
Once the user is authenticated, the print job is printed.<br />
% Press [<strong>Print</strong> & Login] to enable printing of the job and normal login.<br />
% Press [Login] for the normal login without printing the job. After logging in, open the [ID & <strong>Print</strong> <strong>User</strong><br />
Box] to print the document.<br />
% If there are multiple print jobs, all the jobs are printed. To select the documents to print, press [Login]<br />
and then print the desired documents from the [ID & <strong>Print</strong> <strong>User</strong> Box].<br />
% When the optional Authentication Unit is installed, [ID & PW] and [Auth. Unit] appear. By selecting<br />
a button, the ID & PW or authentication unit can be selected and used as the authentication method.<br />
<strong>Print</strong>ing a document by specifying it from the [ID & <strong>Print</strong> <strong>User</strong> Box]<br />
Reference<br />
- When the [ID & <strong>Print</strong> <strong>User</strong> Box] is frequently used, it will be helpful to configure [Custom Display Settings]<br />
- [<strong>User</strong> Box Settings] of the machine so that [ID & <strong>Print</strong> <strong>User</strong> Box] always appears on the screen.<br />
For details, refer to the [<strong>User</strong>'s Guide Box <strong>Operations</strong>].<br />
1 Enter the [<strong>User</strong> Name] and [Password] from the control panel of the printer.<br />
2 Press [Login].<br />
Log in to the machine.<br />
3 Press the <strong>User</strong> Box key on the control panel.<br />
% Press [<strong>User</strong> Box] when the application menu is displayed.<br />
4 Select [ID & <strong>Print</strong> <strong>User</strong> Box] in [System <strong>User</strong> Box], and then press [Use/File].<br />
<strong>VL</strong>3622c/<strong>VL</strong>2822c/<strong>VL</strong><strong>2222c</strong> 11-27
11<br />
5 Select the document you want to print and then press [<strong>Print</strong>].<br />
% The contents and a preview of the document can be checked in [Document Details].<br />
ID & <strong>Print</strong><br />
% To stop operations, press [Cancel].<br />
6 When a screen confirming the deletion of the job appears, select the processing method.<br />
% Selecting [<strong>Print</strong> & Delete] prints and deletes the document in the [ID & <strong>Print</strong> <strong>User</strong> Box].<br />
The document is printed.<br />
Reference<br />
- When [System Settings] - [<strong>User</strong> Box Settings] - [ID & <strong>Print</strong> Delete after <strong>Print</strong> Setting] is set to [Confirm<br />
with <strong>User</strong>] in [Administrator Settings] of the machine, printing a document by specifying from [ID & <strong>Print</strong><br />
<strong>User</strong> Box] displays the screen to confirm the deletion of the job. For details, refer to page 12-47.<br />
11-28 <strong>VL</strong>3622c/<strong>VL</strong>2822c/<strong>VL</strong><strong>2222c</strong><br />
11.6
11.6 ID & <strong>Print</strong> 11<br />
Logging in using the authentication unit<br />
1 Press [Auth. Unit], and then press [Begin <strong>Print</strong>ing].<br />
2 Touch the authentication unit with the finger or IC card.<br />
Once the user is authenticated, the print job is printed.<br />
% Press [<strong>Print</strong> & Access] to enable printing of the job and a normal login.<br />
% Logging in by pressing [Access] allows you to log in as usual without printing a job. After logging in,<br />
open the [ID & <strong>Print</strong> <strong>User</strong> Box] to print the document.<br />
% If [ID & <strong>Print</strong> Operation Settings] is set to [<strong>Print</strong> All Jobs] when there are multiple jobs, all jobs are<br />
output in a single authentication. If it is set to [<strong>Print</strong> Each Job], the jobs are printed one by one in the<br />
order they have been stored.<br />
Reference<br />
- You can specify [ID & <strong>Print</strong> Operation Settings] in [<strong>User</strong> Authentication/Account Track] - [<strong>User</strong> Authentication<br />
Settings] - [Administrative Setting] - [ID & <strong>Print</strong> Operation Setting] of the [Administrator Settings]<br />
of the machine. For details, refer to page 12-50.<br />
- To select the documents to print when there are multiple print jobs, press [Access] and then print the<br />
desired documents from the [ID & <strong>Print</strong> <strong>User</strong> Box].<br />
- Even when the authentication unit is installed, you can enter the user information and print using [ID &<br />
PW]. For details, refer to page 11-26.<br />
Reference<br />
- For details on the optional Authentication Unit, refer to the [<strong>User</strong>'s Guide Copy <strong>Operations</strong>].<br />
<strong>VL</strong>3622c/<strong>VL</strong>2822c/<strong>VL</strong><strong>2222c</strong> 11-29
11<br />
11.7 <strong>Print</strong>ing from a cellular phone or PDA<br />
<strong>Print</strong>ing from a cellular phone or PDA<br />
Configure settings to wirelessly connect this machine to a cellular phone or PDA with the Bluetooth function<br />
installed and to print data stored in such a terminal or save it in a <strong>User</strong> Box of this machine.<br />
11.7.1 Operating environment<br />
The cellular phones and PDAs that can be connected to this machine and the printable file type must satisfy<br />
the following conditions.<br />
Operating environment<br />
Communication protocol Bluetooth Ver. 2.0 + EDR<br />
Supporting profile OPP/BPP/SPP<br />
Supporting file type PDF/XPS/TIFF/JPEG/XHTML/RepliGo<br />
• For XHTML file types, the machine supports the character code<br />
of UTF-8/Shift-JIS/ISO-8859 and the link file extensions of<br />
JPEG/JPG/PNG.<br />
• This machine supports RepliGo version 2.1.0.9.<br />
Reference<br />
- To print documents from a cellular phone or PDA, the optional Local Interface Kit EK-605 is required.<br />
The settings for enabling a Bluetooth communication are also required. Contact your service representative<br />
in advance.<br />
- If you cannot access the link file when attempting to print an XHTML file, the document will either not<br />
be printed or will be printed in a black frame depending on the setting in [<strong>User</strong> Settings] − [Cellular<br />
Phone/PDA Setting] − [Link File Error Notification]. For details, refer to page 12-35.<br />
- To access the link file for printing an XHTML file, [WebDAV Settings] of this machine is required. To use<br />
a proxy for connection, register a proxy server in [Administrator Settings] − [Network Settings] − [Web-<br />
DAV Settings] − [WebDAV Client Settings] − [Proxy Server Address], and set [<strong>User</strong> Settings] − [Cellular<br />
Phone/PDA Setting] − [Proxy Server Use] to [ON]. For details, refer to page 12-36.<br />
- The communication speed may drop or communication may be interrupted due to obstacles, signal<br />
quality, magnetic field or static electricity.<br />
- Protected documents and image data may not be sent depending on the security setting of the cellular<br />
phone or PDA.<br />
11.7.2 <strong>Print</strong>ing a document<br />
Reference<br />
- To print from a cellular phone or PDA, set [Administrator Settings] − [System Connection] − [Cellular<br />
Phone/PDA Setting] to [Allow] in advance. For details, refer to page 12-57. To use a Bluetooth communication,<br />
[Bluetooth Setting] must be enabled in this machine. For details, refer to the [<strong>User</strong>'s Guide Network<br />
Administrator].<br />
- When [<strong>User</strong> Authentication] is specified on this machine, even a registered user cannot print a document<br />
unless printing from a cellular phone or PDA is allowed in the machine setting. For user authentication,<br />
contact the administrator of the machine.<br />
- For details on the <strong>User</strong> Box functions of the machine, refer to the [<strong>User</strong>'s Guide Box <strong>Operations</strong>].<br />
- For the operation of a cellular phone or PDA, refer to the operation manual of the cellular phone or PDA.<br />
1 Set the cellular phone or PDA to enable Bluetooth communication.<br />
2 Press the <strong>User</strong> Box key on the control panel.<br />
% Press [<strong>User</strong> Box] when the application menu is displayed.<br />
11-30 <strong>VL</strong>3622c/<strong>VL</strong>2822c/<strong>VL</strong><strong>2222c</strong><br />
11.7
11.7 <strong>Print</strong>ing from a cellular phone or PDA 11<br />
3 Select [Mobile/PDA] in [System <strong>User</strong> Box], and press [Use/File].<br />
4 Press [<strong>Print</strong> List].<br />
% To save data in a <strong>User</strong> Box, press [Save in <strong>User</strong> Box], and select the desired <strong>User</strong> Box.<br />
5 Check the displayed PIN code.<br />
6 Select this machine in the cellular phone or PDA.<br />
% Select the data you want to send if it is selectable.<br />
7 Enter the 4-digit PIN code into the cellular phone or PDA.<br />
% You can check the print setting in [Check <strong>Print</strong> Settings].<br />
Once the PIN code is verified, connection is established and data transmission and printing start.<br />
<strong>VL</strong>3622c/<strong>VL</strong>2822c/<strong>VL</strong><strong>2222c</strong> 11-31
11<br />
<strong>Print</strong>ing from a cellular phone or PDA<br />
d Reference<br />
You can configure print settings from the cellular phone or PDA in [<strong>User</strong> Setting] − [Cellular Phone/PDA Setting]<br />
− [<strong>Print</strong>]. For details, refer to page 12-38.<br />
11-32 <strong>VL</strong>3622c/<strong>VL</strong>2822c/<strong>VL</strong><strong>2222c</strong><br />
11.7
11.8 Specifying the encryption passphrase by the user 11<br />
11.8 Specifying the encryption passphrase by the user<br />
The machine and the printer driver communicate with each other by encrypting a user password, account<br />
password or secure document password using a common encryption key.<br />
Although an encryption passphrase for generating the common encryption key is preset as a default setting,<br />
it can also be generated with a user-defined encryption passphrase.<br />
To specify a user-defined encryption passphrase, specify the same encryption passphrase both for the machine<br />
and the printer driver.<br />
Reference<br />
- If different values are used for the encryption passphrase for the machine and the printer driver, the machine<br />
cannot decrypt the encrypted user password, account password or secure document password,<br />
and printing cannot be performed.<br />
- The common encryption key is automatically generated by the [Encryption Passphrase]. The common<br />
encryption key cannot be specified directly.<br />
11.8.1 Settings for the machine<br />
Go to Administrator Settings to configure the settings for the machine.<br />
1 In the [Administrator Settings] screen, press [Security Settings].<br />
2 In the [Security Settings] screen, press [Driver Password Encryption Setting].<br />
3 Press [<strong>User</strong>-Defined].<br />
% If you do not specify a user-defined [Encryption Passphrase], press [Use Factory Default].<br />
4 Press [Encryption Passphrase].<br />
<strong>VL</strong>3622c/<strong>VL</strong>2822c/<strong>VL</strong><strong>2222c</strong> 11-33
11<br />
Specifying the encryption passphrase by the user<br />
5 Press [Encryption Passphrase], and then enter the encryption passphrase.<br />
% Enter the [Encryption Passphrase] with 20 alphanumeric letters. Specify the same [Encryption Passphrase]<br />
for the machine and the printer driver.<br />
% An encryption passphrase using a series of the same letters (for example, "1111") is invalid.<br />
6 Press [Encryption Passphrase Confirmation], and then enter the encryption passphrase again.<br />
7 Press [OK].<br />
This sets the encryption passphrase.<br />
11-34 <strong>VL</strong>3622c/<strong>VL</strong>2822c/<strong>VL</strong><strong>2222c</strong><br />
11.8
11.8 Specifying the encryption passphrase by the user 11<br />
11.8.2 Setting the printer driver<br />
The following four printer drivers support this feature.<br />
- PCL <strong>Print</strong>er Driver for Windows (PCL driver)<br />
- PostScript <strong>Print</strong>er Driver for Windows (PS driver)<br />
- XPS <strong>Print</strong>er Driver for Windows (XPS driver)<br />
- PostScript PPD <strong>Print</strong>er Driver for Mac OS X<br />
For Windows<br />
1 Display the Properties window.<br />
% The Properties window can be displayed by opening the [<strong>Print</strong>ers] or [<strong>Print</strong>ers and Faxes] window<br />
and right-clicking the icon of the installed printer, and then clicking [Properties].<br />
2 Click the [Configure] tab.<br />
3 Select the [Encrypt. Passphrase] check box, and then enter the encryption passphrase.<br />
% If you do not specify a user-defined [Encrypt. Passphrase], clear the [Encrypt. Passphrase] check<br />
box.<br />
% Enter the [Encrypt. Passphrase] with 20 alphanumeric letters. Specify the same [Encrypt. Passphrase]<br />
for the machine and the printer driver.<br />
% An encryption passphrase using a series of the same letters is invalid.<br />
% When OpenAPI is used and SSL is enabled, it is possible for the machine to obtain the common<br />
encryption key provided that the device information of the printer driver can be obtained automatically.<br />
4 Click [OK].<br />
<strong>VL</strong>3622c/<strong>VL</strong>2822c/<strong>VL</strong><strong>2222c</strong> 11-35
11<br />
For Mac OS X<br />
1 Display the [Output Method] window.<br />
2 Click [Detail Settings...].<br />
The [Detail Settings] window appears.<br />
3 Select [Administrator Settings], and then click [Settings...].<br />
The [Administrator Settings] dialog box appears.<br />
Specifying the encryption passphrase by the user<br />
4 Select the [Encryption Passphrase:] check box, and then enter the encryption passphrase.<br />
% If you do not specify a user-defined [Encryption Passphrase:], clear the [Encryption Passphrase:]<br />
check box.<br />
% Enter the [Encryption Passphrase:] with 20 alphanumeric letters. Specify the same [Encryption<br />
Passphrase:] for the machine and the printer driver.<br />
% An encryption passphrase using a series of the same letters is invalid.<br />
5 Click [OK].<br />
11-36 <strong>VL</strong>3622c/<strong>VL</strong>2822c/<strong>VL</strong><strong>2222c</strong><br />
11.8
11.9 Specifying the ICC profile 11<br />
11.9 Specifying the ICC profile<br />
The printer driver has a function to specify the ICC profile registered on the machine when printing.<br />
Reference<br />
- The default setting for the ICC profile registered on the machine can be specified in [ICC Profile Settings].<br />
For details, refer to page 12-27.<br />
- To utilize the ICC profiles added to the machine, the ICC profiles on the machine must be registered in<br />
the printer driver in advance. For details, refer to page 11-39.<br />
11.9.1 Setting the printer driver<br />
The following two printer drivers support this feature.<br />
- PostScript <strong>Print</strong>er Driver for Windows (PS driver)<br />
- PostScript PPD <strong>Print</strong>er Driver for Mac OS X<br />
For Windows<br />
1 Click to display the [Quality] tab.<br />
2 Click [Quality Adjustment...].<br />
The [Quality] dialog box appears.<br />
3 Click to display the [ICC Profile] tab.<br />
4 Click [Detail] and select a document type.<br />
5 Configure the settings for [RGB Color], [Destination Profile], and [Simulation Profile].<br />
% The ICC profiles registered in the printer driver can be selected.<br />
When printing, color processing is performed according to the selected ICC profiles.<br />
6 Click [OK].<br />
<strong>VL</strong>3622c/<strong>VL</strong>2822c/<strong>VL</strong><strong>2222c</strong> 11-37
11<br />
For Mac OS X<br />
1 Display the [Quality] window.<br />
Specifying the ICC profile<br />
2 Click [Quality Adjustment...].<br />
The [Quality Adjustment] dialog box appears.<br />
3 Configure the settings for [RGB Color:], [Destination Profile:], and [Simulation Profile:] according to the<br />
type of the document to be printed.<br />
% The ICC profiles registered in the printer driver can be selected.<br />
When printing, color processing is performed according to the selected ICC profiles.<br />
4 Click [OK].<br />
11-38 <strong>VL</strong>3622c/<strong>VL</strong>2822c/<strong>VL</strong><strong>2222c</strong><br />
11.9
11.10 Registering the ICC profiles in the printer driver 11<br />
11.10 Registering the ICC profiles in the printer driver<br />
Additional ICC profiles downloaded and added to the machine can be registered in the printer driver.<br />
A registered ICC profile can be specified when printing.<br />
Reference<br />
- The ICC profiles are registered to the machine using the "Download Manager" application. For details,<br />
refer to the Help for the application software.<br />
11.10.1 Setting the printer driver<br />
The following two printer drivers support this feature.<br />
- PostScript <strong>Print</strong>er Driver for Windows (PS driver)<br />
- PostScript PPD <strong>Print</strong>er Driver for Mac OS X<br />
For Windows<br />
0 The [Color Profile Management] function communicates with the machine to read the ICC profiles available<br />
to the machine. This function is available only when your computer is connected to and can communicate<br />
with this machine.<br />
0 If connected via a USB connector, the ICC profiles available to the machine cannot be read.<br />
1 Click to display the [Quality] tab.<br />
2 Click [Quality Adjustment...].<br />
The [Quality Adjustment] dialog box appears.<br />
3 Click [Manage Profile].<br />
The [Color Profile Management] dialog box appears.<br />
% Clicking [Download Manager] launches the "Download Manager" application. This function is available<br />
only when "Download Manager" is installed.<br />
<strong>VL</strong>3622c/<strong>VL</strong>2822c/<strong>VL</strong><strong>2222c</strong> 11-39
11<br />
Registering the ICC profiles in the printer driver<br />
4 Check that a list of available profiles that are additionally registered on the machine is displayed.<br />
5 Click the tab and select a color profile type.<br />
11-40 <strong>VL</strong>3622c/<strong>VL</strong>2822c/<strong>VL</strong><strong>2222c</strong><br />
11.10<br />
6 Select a desired profile from the [Available Profile] list, and then click [Add Sel].<br />
Click [Remove] to delete an unnecessary ICC profile.<br />
% To register the current driver settings as the profile, click [New], and then enter the [File Name] and<br />
[Profile Name].<br />
% The profile name can be changed in [Edit].<br />
The selected profile is added to [Driver Profile List] and it can be selected in the ICC Profile entries in<br />
the [Quality Adjustment] dialog box.<br />
7 Click [OK].<br />
For Mac OS X<br />
0 The [Color Profile Management] function communicates with the machine to read the profiles available<br />
to the machine. This function is available only when your computer is connected to and can communicate<br />
with this machine.<br />
1 Display the [Quality] window.<br />
2 Click [Quality Adjustment...].<br />
The [Quality Adjustment] dialog box appears.<br />
3 Click [Manage Profile].
11.10 Registering the ICC profiles in the printer driver 11<br />
The [Color Profile Management] dialog box appears.<br />
% Clicking [Download Manager] launches the "Download Manager" application. This function is available<br />
only when "Download Manager" is installed.<br />
4 Check that a list of available profiles that are additionally registered on the machine is displayed.<br />
5 Select a color profile type from the drop-down list.<br />
6 Select a desired profile from the [Available Profile] list, and then click [Add Sel].<br />
Click [Delete] to delete an unnecessary ICC profile.<br />
% To register the current driver settings as the profile, click [New], and then enter the [File Name] and<br />
[Profile Name].<br />
% The profile name can be changed in [New/Edit].<br />
The selected profile is added to [Driver Profile List] and it can be selected in the ICC Profile entries in<br />
the [Quality Adjustment] dialog box.<br />
7 Click [OK].<br />
<strong>VL</strong>3622c/<strong>VL</strong>2822c/<strong>VL</strong><strong>2222c</strong> 11-41
11<br />
11.11 Banner printing function<br />
11.11.1 Paper<br />
Banner printing function<br />
On this machine, paper size up to 47-1/4 inches (1200 mm) in length can be loaded into the bypass tray for<br />
printing, by configuring on the control panel.<br />
In the following sections, loading long paper and printing on it are referred to as banner printing.<br />
Applicable paper<br />
Paper width Paper length Paper weight<br />
8-1/4 to 11-11/16 inches<br />
(210 to 297 mm)<br />
11.11.2 <strong>Print</strong>er drivers and supported operating systems<br />
The following drivers support banner printing.<br />
- PCL Driver for Windows (PCL driver)<br />
- PostScript Driver for Windows (PS driver)<br />
- XPS <strong>Print</strong>er Driver for Windows (XPS driver)<br />
11.11.3 Configuring the printer driver<br />
18 to 47-1/4 inches (457.3 to<br />
1200 mm)<br />
Specify the output paper size as a custom paper size.<br />
11-42 <strong>VL</strong>3622c/<strong>VL</strong>2822c/<strong>VL</strong><strong>2222c</strong><br />
11.11<br />
33-13/16 to 55-7/8 lb (127 g/m 2 to<br />
210 g/m 2 )<br />
(Using the printer driver, select the paper<br />
type appropriate for the weight of the<br />
banner paper to be used.<br />
33-13/16 lb to 41-3/4 lb (127 g/m 2 to<br />
157 g/m 2) : Thick 1, Thick 1 (Side 2)<br />
42 lb to 55-5/8 lb (158 g/m 2 to 209 g/m 2 ):<br />
Thick 2, Thick 2 (Side 2)<br />
55-7/8 lb (210 g/m 2 ): Thick 3, Thick 3<br />
(Side 2))<br />
1 Click the [Basic] tab.<br />
% With the PCL Driver, custom size setting can also be registered in advance on the [Settings] tab of<br />
the printer driver accessed from the Windows' [<strong>Print</strong>ers] ([<strong>Print</strong>ers and Faxes] for Windows XP/Server<br />
2003) window.<br />
2 Select [Custom Size] from [Original Size] or [Paper Size].<br />
The [Custom Size Settings] dialog box appears.<br />
3 Select the width and the length of the custom size according to the unit you use and then click [OK].<br />
The [Confirm setting changes] dialog box appears.<br />
4 Click [Yes].<br />
5 If necessary, configure [Paper Settings for Each Tray...], [Bypass Tray], [Paper Type], and other settings.<br />
6 Click [OK].
11.11 Banner printing function 11<br />
11.11.4 <strong>Print</strong>ing<br />
1 Press the Utility/Counter key on the control panel.<br />
2 Press [Banner <strong>Print</strong>ing].<br />
3 Press [Allow], and then the [OK].<br />
4 Check that the screen shows the machine is waiting for the banner printing job before sending the document<br />
data of the banner size to be printed from the computer.<br />
% If data of non-banner size is sent, the job will be discarded.<br />
5 Open the Bypass Tray.<br />
6 Install the Mount Kit to the Bypass Tray.<br />
<strong>VL</strong>3622c/<strong>VL</strong>2822c/<strong>VL</strong><strong>2222c</strong> 11-43
11<br />
7 Set the Guidance of the Mount Kit.<br />
Banner printing function<br />
8 With the side to be printed on facing down, insert the paper as far as possible into the feed slot.<br />
Place as many sheets as the specified number of copies to be printed into the tray.<br />
9 Slide the Lateral Guide of the Bypass Tray to make it fit to the size of paper being loaded.<br />
10 When the following screen appears, press [Complete].<br />
<strong>Print</strong>ing of the data starts.<br />
<strong>Print</strong> while holding by hand the paper to be printed and output.<br />
To print another document successively, send its data from the computer.<br />
11-44 <strong>VL</strong>3622c/<strong>VL</strong>2822c/<strong>VL</strong><strong>2222c</strong><br />
11.11
11.11 Banner printing function 11<br />
11 To finish printing, press [Exit].<br />
12 Press [Yes].<br />
<strong>VL</strong>3622c/<strong>VL</strong>2822c/<strong>VL</strong><strong>2222c</strong> 11-45
11<br />
Banner printing function<br />
11.11<br />
11-46 <strong>VL</strong>3622c/<strong>VL</strong>2822c/<strong>VL</strong><strong>2222c</strong>
12 Settings<br />
on the Control Panel
12.1 Basic operations of <strong>User</strong> Settings 12<br />
12 Settings on the Control Panel<br />
This chapter describes the printer-related functions that can be specified from the control panel.<br />
12.1 Basic operations of <strong>User</strong> Settings<br />
12.1.1 Displaying the <strong>User</strong> Settings screen<br />
1 Press the Utility/Counter key.<br />
2 Press [<strong>User</strong> Settings].<br />
<strong>VL</strong>3622c/<strong>VL</strong>2822c/<strong>VL</strong><strong>2222c</strong> 12-3
12<br />
The <strong>User</strong> Settings screen appears.<br />
Basic operations of <strong>User</strong> Settings<br />
% It can also be selected by pressing the key in the keypad of the number indicated on the desired<br />
button.<br />
For [<strong>User</strong> Settings], press the 2 key in the keypad.<br />
% To finish configuring the Utility mode settings, press the Utility/Counter key. You can also exit the<br />
Utility screen by pressing [Close] until either the Copy, Fax/Scan or <strong>User</strong> Box screen appears.<br />
% To return through the hierarchy of the Utility menu, press [Close] until the desired screen appears.<br />
Alternatively, press an item in the upper hierarchy in the sub-menu area to return to the item.<br />
12-4 <strong>VL</strong>3622c/<strong>VL</strong>2822c/<strong>VL</strong><strong>2222c</strong><br />
12.1
12.2 <strong>User</strong> settings 12<br />
12.2 <strong>User</strong> settings<br />
12.2.1 PDL Setting<br />
Configure settings for the Page Description Language. (Default: [Auto])<br />
- [Auto]: Select this option to automatically switch between PCL and PS.<br />
- [PCL]: Select this option to use PCL only.<br />
- [PS]: Select this option to use PS only.<br />
1 In the <strong>User</strong> Settings screen, press [<strong>Print</strong>er Settings].<br />
% For details on displaying the <strong>User</strong> Settings screen, refer to page 12-3.<br />
2 Press [Basic Settings].<br />
3 Press [PDL Setting].<br />
<strong>VL</strong>3622c/<strong>VL</strong>2822c/<strong>VL</strong><strong>2222c</strong> 12-5
12<br />
4 Press the desired button.<br />
12.2.2 Number of Copies<br />
Specify the default number of sets. (Default: 1)<br />
1 In the <strong>User</strong> Settings screen, press [<strong>Print</strong>er Settings].<br />
% For details on displaying the <strong>User</strong> Settings screen, refer to page 12-3.<br />
2 Press [Basic Settings].<br />
3 Press [Number of Copies].<br />
<strong>User</strong> settings<br />
4 Press the C key to clear the value, and then use the keypad to enter the number of sets. (1 to 9999)<br />
% If a value outside of the allowable range is specified, the message "Input error" appears. Enter a<br />
number within the allowable range.<br />
12-6 <strong>VL</strong>3622c/<strong>VL</strong>2822c/<strong>VL</strong><strong>2222c</strong><br />
12.2
12.2 <strong>User</strong> settings 12<br />
5 Press [OK].<br />
The number of sets is specified.<br />
12.2.3 Original Direction<br />
Specify the default image direction. (Default: [Portrait])<br />
- [Portrait]: Select this option to print the image vertically.<br />
- [Landscape]: Select this option to print the image horizontally.<br />
1 In the <strong>User</strong> Settings screen, press [<strong>Print</strong>er Settings].<br />
% For details on displaying the <strong>User</strong> Settings screen, refer to page 12-3.<br />
2 Press [Basic Settings].<br />
3 Press [Original Direction].<br />
4 Press the desired button.<br />
<strong>VL</strong>3622c/<strong>VL</strong>2822c/<strong>VL</strong><strong>2222c</strong> 12-7
12<br />
12.2.4 Spool <strong>Print</strong> Jobs in HDD before RIP<br />
<strong>User</strong> settings<br />
Specify the spool function. (Default: [ON])<br />
- [ON]: When the next job is received while processing a job, the print data is stored in HDD.<br />
- [OFF]: The print data is not stored in HDD.<br />
Reference<br />
- Normally, do not change this setting to [OFF]. Otherwise, normal printing may be interfered.<br />
1 In the <strong>User</strong> Settings screen, press [<strong>Print</strong>er Settings].<br />
% For details on displaying the <strong>User</strong> Settings screen, refer to page 12-3.<br />
2 Press [Basic Settings].<br />
3 Press [Spool <strong>Print</strong> Jobs in HDD before RIP].<br />
4 Press the desired button.<br />
12-8 <strong>VL</strong>3622c/<strong>VL</strong>2822c/<strong>VL</strong><strong>2222c</strong><br />
12.2
12.2 <strong>User</strong> settings 12<br />
12.2.5 A4/A3LTR/LGR Auto Switch<br />
When the paper of the size specified with the printer driver is not loaded on the tray, size conversion between<br />
A4 and Letter, or A3 and Ledger is executed to use paper of the next most similar size. (Default: [OFF])<br />
Reference<br />
- The image may be affected since printing is forced.<br />
1 In the <strong>User</strong> Settings screen, press [<strong>Print</strong>er Settings].<br />
% For details on displaying the <strong>User</strong> Settings screen, refer to page 12-3.<br />
2 Press [Basic Settings].<br />
3 Select [A4/A3LTR/LGR Auto Switch].<br />
4 Press the desired button.<br />
<strong>VL</strong>3622c/<strong>VL</strong>2822c/<strong>VL</strong><strong>2222c</strong> 12-9
12<br />
12.2.6 Banner Sheet Setting<br />
<strong>User</strong> settings<br />
Specify whether to print the banner page (cover page) showing the sender or title of the print job. (Default:<br />
[OFF])<br />
- [ON]: Select this option to print the banner page.<br />
- [OFF]: Select this option to not print the banner page.<br />
1 In the <strong>User</strong> Settings screen, press [<strong>Print</strong>er Settings].<br />
% For details on displaying the <strong>User</strong> Settings screen, refer to page 12-3.<br />
2 Press [Basic Settings].<br />
3 Switch the page by pressing [ ] or [ ], and then press [Banner Sheet Setting].<br />
4 Press the desired button.<br />
12-10 <strong>VL</strong>3622c/<strong>VL</strong>2822c/<strong>VL</strong><strong>2222c</strong><br />
12.2
12.2 <strong>User</strong> settings 12<br />
12.2.7 Binding Direction Adjustment<br />
Specify the method for paper arrangement (adjusting the binding position) for 2-sided printing. (Default: [Finishing<br />
Priority])<br />
To increase the print efficiency, specify [Productivity Priority]. If the desired binding position and width cannot<br />
be achieved, specify [Finishing Priority].<br />
- [Finishing Priority]: All pages can be processed to an optimum condition because the machine adjusts<br />
the binding positions after receiving the print data.<br />
- [Productivity Priority]: <strong>Print</strong>ing is performed efficiently because the printer processes data while receiving<br />
or printing concurrently.<br />
- [Control Adjustments]: The printer follows the settings configured in the printer driver without adjusting<br />
the binding position.<br />
1 In the <strong>User</strong> Settings screen, press [<strong>Print</strong>er Settings].<br />
% For details on displaying the <strong>User</strong> Settings screen, refer to page 12-3.<br />
2 Press [Basic Settings].<br />
3 Switch the page by pressing [ ] or [ ], and then press [Binding Direction Adjustment].<br />
4 Press the desired button.<br />
<strong>VL</strong>3622c/<strong>VL</strong>2822c/<strong>VL</strong><strong>2222c</strong> 12-11
12<br />
12.2.8 Line Width Adjustment<br />
<strong>User</strong> settings<br />
Line width can be adjusted so that thin lines and small letters become easy to see. (Default: [Thin])<br />
- [Thin]: Select this option to draw letters and lines sharply. Details of letters and figures are printed elaborately.<br />
- [Normal]: Select this option to draw letters and lines with a normal thickness.<br />
- [Thick]: Select this option to draw letters and lines thickly. Letters and figures are printed clearly.<br />
1 In the <strong>User</strong> Settings screen, press [<strong>Print</strong>er Settings].<br />
% For details on displaying the <strong>User</strong> Settings screen, refer to page 12-3.<br />
2 Press [Basic Settings].<br />
3 Switch the page by pressing [ ] or [ ], and then press [Line Width Adjustment].<br />
4 Press the desired button.<br />
12-12 <strong>VL</strong>3622c/<strong>VL</strong>2822c/<strong>VL</strong><strong>2222c</strong><br />
12.2
12.2 <strong>User</strong> settings 12<br />
12.2.9 Gray Background Text Correction<br />
Letters or lines on a gray background may look thicker than those on a non-gray background. This feature<br />
allows you to correct the line width setting.<br />
- [ON]: Select this option to make the width of letters and lines on a gray background identical to that of<br />
those letters and lines on a non-gray background.<br />
- [OFF]: Select this option to not make a correction.<br />
1 In the <strong>User</strong> Settings screen, press [<strong>Print</strong>er Settings].<br />
% For details on displaying the <strong>User</strong> Settings screen, refer to page 12-3.<br />
2 Press [Basic Settings].<br />
3 Switch the page by pressing [ ] or [ ], and then press [Gray Background Text Correction].<br />
4 Press the desired button.<br />
<strong>VL</strong>3622c/<strong>VL</strong>2822c/<strong>VL</strong><strong>2222c</strong> 12-13
12<br />
12.2.10 Paper Tray<br />
Specify the default paper tray setting. (Default: [Auto])<br />
1 In the <strong>User</strong> Settings screen, press [<strong>Print</strong>er Settings].<br />
% For details on displaying the <strong>User</strong> Settings screen, refer to page 12-3.<br />
2 Press [Paper Setting].<br />
3 Press [Paper Tray].<br />
4 Press the button for the desired paper tray.<br />
% To select the paper tray automatically, press [Auto].<br />
5 Press [OK].<br />
<strong>User</strong> settings<br />
12-14 <strong>VL</strong>3622c/<strong>VL</strong>2822c/<strong>VL</strong><strong>2222c</strong><br />
12.2
12.2 <strong>User</strong> settings 12<br />
12.2.11 Paper Size<br />
Specify the default paper size setting. (Default: Varies depending on the area. )<br />
1 In the <strong>User</strong> Settings screen, press [<strong>Print</strong>er Settings].<br />
% For details on displaying the <strong>User</strong> Settings screen, refer to page 12-3.<br />
2 Press [Paper Setting].<br />
3 Select [Paper Size].<br />
4 Press the desired button.<br />
% When selecting other paper size, press [ ] or [ ] to switch the page.<br />
5 Press [OK].<br />
<strong>VL</strong>3622c/<strong>VL</strong>2822c/<strong>VL</strong><strong>2222c</strong> 12-15
12<br />
12.2.12 2-Sided <strong>Print</strong><br />
Configure the default 2-sided printing setting. (Default: [OFF])<br />
1 In the <strong>User</strong> Settings screen, press [<strong>Print</strong>er Settings].<br />
% For details on displaying the <strong>User</strong> Settings screen, refer to page 12-3.<br />
2 Press [Paper Setting].<br />
3 Press [2-Sided <strong>Print</strong>].<br />
4 Press the desired button.<br />
<strong>User</strong> settings<br />
12-16 <strong>VL</strong>3622c/<strong>VL</strong>2822c/<strong>VL</strong><strong>2222c</strong><br />
12.2
12.2 <strong>User</strong> settings 12<br />
12.2.13 Binding Position<br />
Specify the default binding position for 2-sided printing. (Default: [Left Bind])<br />
1 In the <strong>User</strong> Settings screen, press [<strong>Print</strong>er Settings].<br />
% For details on displaying the <strong>User</strong> Settings screen, refer to page 12-3.<br />
2 Press [Paper Setting].<br />
3 Press [Binding Position].<br />
4 Press the desired button.<br />
<strong>VL</strong>3622c/<strong>VL</strong>2822c/<strong>VL</strong><strong>2222c</strong> 12-17
12<br />
12.2.14 Staple<br />
<strong>User</strong> settings<br />
Configure the staple setting when the data to be printed has no staple setting information. (Default: [OFF])<br />
1 In the <strong>User</strong> Settings screen, press [<strong>Print</strong>er Settings].<br />
% For details on displaying the <strong>User</strong> Settings screen, refer to page 12-3.<br />
2 Press [Paper Setting].<br />
3 Press [Staple].<br />
4 Press the desired button.<br />
Reference<br />
- The staple function is available only when the optional Finisher FS-527 or Finisher FS-529 is installed.<br />
12-18 <strong>VL</strong>3622c/<strong>VL</strong>2822c/<strong>VL</strong><strong>2222c</strong><br />
12.2
12.2 <strong>User</strong> settings 12<br />
12.2.15 Punch<br />
Configure the punch setting when the data to be printed has no punch setting information. (Default: [OFF])<br />
1 In the <strong>User</strong> Settings screen, press [<strong>Print</strong>er Settings].<br />
% For details on displaying the <strong>User</strong> Settings screen, refer to page 12-3.<br />
2 Press [Paper Setting].<br />
3 Switch the page by pressing [ ] or [ ], and then press [Punch].<br />
4 Press the desired button.<br />
Reference<br />
- The punch function is available only when the punch kit is installed on the optional Finisher FS-527.<br />
<strong>VL</strong>3622c/<strong>VL</strong>2822c/<strong>VL</strong><strong>2222c</strong> 12-19
12<br />
12.2.16 Banner Sheet Paper Tray<br />
Specify the paper tray used to print banner pages. (Default: [Auto])<br />
1 In the <strong>User</strong> Settings screen, press [<strong>Print</strong>er Settings].<br />
% For details on displaying the <strong>User</strong> Settings screen, refer to page 12-3.<br />
2 Press [Paper Setting].<br />
3 Switch the page by pressing [ ] or [ ], and then press [Banner Paper Tray].<br />
4 Press the desired button.<br />
5 Press [OK].<br />
<strong>User</strong> settings<br />
12-20 <strong>VL</strong>3622c/<strong>VL</strong>2822c/<strong>VL</strong><strong>2222c</strong><br />
12.2
12.2 <strong>User</strong> settings 12<br />
12.2.17 Font Settings<br />
Configure the default font setting. (Default: Courier)<br />
1 In the <strong>User</strong> Settings screen, press [<strong>Print</strong>er Settings].<br />
% For details on displaying the <strong>User</strong> Settings screen, refer to page 12-3.<br />
2 Press [PCL Settings].<br />
3 Press [Font Settings].<br />
4 Press [Resident Font].<br />
% If downloaded fonts are available, [Download Font] can also be selected.<br />
<strong>VL</strong>3622c/<strong>VL</strong>2822c/<strong>VL</strong><strong>2222c</strong> 12-21
12<br />
5 Press the desired font name.<br />
% Switch the page by pressing [ ] or [ ], and then press the desired font name.<br />
% You can check the font number and the font size unit of the selected font.<br />
6 Press [OK].<br />
12.2.18 Symbol Set<br />
Configure the default font symbol set setting. (Default: Varies depending on the area.)<br />
1 In the <strong>User</strong> Settings screen, press [<strong>Print</strong>er Settings].<br />
% For details on displaying the <strong>User</strong> Settings screen, refer to page 12-3.<br />
2 Press [PCL Settings].<br />
3 Press [Symbol Set].<br />
<strong>User</strong> settings<br />
12-22 <strong>VL</strong>3622c/<strong>VL</strong>2822c/<strong>VL</strong><strong>2222c</strong><br />
12.2
12.2 <strong>User</strong> settings 12<br />
4 Press the desired symbol set name.<br />
% Switch the page by pressing [ ] or [ ], and then press the desired symbol set name.<br />
5 Press [OK].<br />
12.2.19 Font Size<br />
Specify the default font size value. (Default: [Scalable Font] - 12.00 Point/[Bitmap Font] - 10.00 Pitch)<br />
- [Scalable Font]: Specify the font size in points.<br />
- [Bitmap Font]: Specify the width of the bitmap font in pitches.<br />
1 In the <strong>User</strong> Settings screen, press [<strong>Print</strong>er Settings].<br />
% For details on displaying the <strong>User</strong> Settings screen, refer to page 12-3.<br />
2 Press [PCL Settings].<br />
3 Press [Font Size].<br />
<strong>VL</strong>3622c/<strong>VL</strong>2822c/<strong>VL</strong><strong>2222c</strong> 12-23
12<br />
<strong>User</strong> settings<br />
4 Press the C key to clear the value, and then use the keypad to enter the size. (Scalable font: 4.00 Point<br />
- 999.75 Point, Bitmap Font: 0.44 Pitch - 99.00 Pitch)<br />
% If a value outside of the allowable range is specified, the message "Input error" appears. Enter a<br />
number within the allowable range.<br />
5 Press [OK].<br />
The font size is set.<br />
12.2.20 Line/Page<br />
Specify the number of lines per page when printing text. (Default: Varies depending on the area.)<br />
1 In the <strong>User</strong> Settings screen, press [<strong>Print</strong>er Settings].<br />
% For details on displaying the <strong>User</strong> Settings screen, refer to page 12-3.<br />
2 Press [PCL Settings].<br />
3 Press [Line/Page].<br />
12-24 <strong>VL</strong>3622c/<strong>VL</strong>2822c/<strong>VL</strong><strong>2222c</strong><br />
12.2
12.2 <strong>User</strong> settings 12<br />
4 Press the C key to clear the value, and then use the keypad to enter the number of lines. (5 lines to 128<br />
lines)<br />
% If a value outside of the allowable range is specified, the message "Input error" appears. Enter a<br />
number within the allowable range.<br />
5 Press [OK].<br />
The number of lines is set.<br />
12.2.21 CR/LF Mapping<br />
Specify the CR/LF substitution method when printing text data. (Default: [No])<br />
- [Mode 1]: Select this option to substitute CR with CR-LF.<br />
- [Mode 2]: Select this option to substitute LF with CR-LF.<br />
- [Mode 3]: Select this option to substitute with CR-LF.<br />
- [No]: Select this option not to perform substitution.<br />
1 In the <strong>User</strong> Settings screen, press [<strong>Print</strong>er Settings].<br />
% For details on displaying the <strong>User</strong> Settings screen, refer to page 12-3.<br />
2 Press [PCL Settings].<br />
3 Press [CR/LF Mapping].<br />
<strong>VL</strong>3622c/<strong>VL</strong>2822c/<strong>VL</strong><strong>2222c</strong> 12-25
12<br />
<strong>User</strong> settings<br />
4 Select [Yes] or [No]. If [Yes] is selected, be sure to also press the button for the desired setting.<br />
5 Press [OK].<br />
12.2.22 <strong>Print</strong> PS Errors<br />
Specify whether to print the error message when an error occurs during PS rasterization. (Default: [OFF])<br />
1 In the <strong>User</strong> Settings screen, press [<strong>Print</strong>er Settings].<br />
% For details on displaying the <strong>User</strong> Settings screen, refer to page 12-3.<br />
2 Press [PS Setting].<br />
3 Press [<strong>Print</strong> PS Errors].<br />
12-26 <strong>VL</strong>3622c/<strong>VL</strong>2822c/<strong>VL</strong><strong>2222c</strong><br />
12.2
12.2 <strong>User</strong> settings 12<br />
4 Press the desired button.<br />
12.2.23 ICC Profile Settings<br />
Configure the default profile setting to be displayed in the printer driver.<br />
d Reference<br />
For details on selecting the ICC profiles on the printer driver, refer to page 11-37.<br />
1 In the <strong>User</strong> Settings screen, press [<strong>Print</strong>er Settings].<br />
% For details on displaying the <strong>User</strong> Settings screen, refer to page 12-3.<br />
2 Press [PS Setting].<br />
3 Press [ICC Profile Settings].<br />
<strong>VL</strong>3622c/<strong>VL</strong>2822c/<strong>VL</strong><strong>2222c</strong> 12-27
12<br />
4 Press the desired setting item.<br />
5 Press the desired profile name.<br />
6 Press [OK].<br />
<strong>User</strong> settings<br />
12-28 <strong>VL</strong>3622c/<strong>VL</strong>2822c/<strong>VL</strong><strong>2222c</strong><br />
12.2
12.2 <strong>User</strong> settings 12<br />
12.2.24 Auto Trapping<br />
Select this option to superimpose neighboring colors to print so as to prevent white space being generated<br />
around a picture. (Default: [OFF])<br />
- [ON]: Adjacent colors are overprinted. If white lines appear at borders of colors on a graph or figure,<br />
select [ON].<br />
- [OFF]: The data is printed as is without being trap-processed.<br />
Reference<br />
- If color-dulling results at the border of colors when [ON] is selected, change it to [OFF].<br />
- Trapping process is sometimes specifiable with the application. When the trapping process is specified<br />
in the application, specify [OFF] on the machine side.<br />
1 In the <strong>User</strong> Settings screen, press [<strong>Print</strong>er Settings].<br />
% For details on displaying the <strong>User</strong> Settings screen, refer to page 12-3.<br />
2 Press [PS Setting].<br />
3 Press [Auto Trapping].<br />
4 Press the desired button.<br />
<strong>VL</strong>3622c/<strong>VL</strong>2822c/<strong>VL</strong><strong>2222c</strong> 12-29
12<br />
12.2.25 Black Overprint<br />
<strong>User</strong> settings<br />
Select this option to print with no white space around black characters or figures. (Default: [OFF])<br />
- [Text/Figure]: Adjacent portion between a text and figure is overprinted with black. Use this setting<br />
when a white line appears around the black portion in a graph or figure.<br />
- [Text]: Black is overprinted on the adjacent colors in the text portion. Use this setting when a white line<br />
appears around the text.<br />
- [OFF]: The data is printed as is without overprinting with black.<br />
Reference<br />
- If color-dulling results around the black portion when [ON] is selected, change it to [OFF].<br />
- The black overprinting process is sometimes specifiable with the application. When the trapping process<br />
is specified in the application, specify [OFF] on the machine side.<br />
1 In the <strong>User</strong> Settings screen, press [<strong>Print</strong>er Settings].<br />
% For details on displaying the <strong>User</strong> Settings screen, refer to page 12-3.<br />
2 Press [PS Setting].<br />
3 Press [Black Overprint].<br />
4 Press the desired button.<br />
12-30 <strong>VL</strong>3622c/<strong>VL</strong>2822c/<strong>VL</strong><strong>2222c</strong><br />
12.2
12.2 <strong>User</strong> settings 12<br />
12.2.26 Verify XPS Digital Signature<br />
Specify whether to perform digital signature verification in XPS printing. When [ON] is specified for the signature<br />
verification, the document without a valid digital signature is not printed. (Default: [OFF])<br />
1 In the <strong>User</strong> Settings screen, press [<strong>Print</strong>er Settings].<br />
% For details on displaying the <strong>User</strong> Settings screen, refer to page 12-3.<br />
2 Press [XPS Settings].<br />
% If an error is detected in the signature verification while [<strong>Print</strong> XPS Errors] is specified to print the<br />
information, the error information is printed. For details, refer to page 12-54.<br />
3 Press [Verify XPS Digital Signature].<br />
4 Press the desired button.<br />
<strong>VL</strong>3622c/<strong>VL</strong>2822c/<strong>VL</strong><strong>2222c</strong> 12-31
12<br />
12.2.27 <strong>Print</strong> Reports<br />
<strong>User</strong> settings<br />
<strong>Print</strong> reports. The following four types of reports can be output. The following describes the report output<br />
method taking the PCL font list output process as an example.<br />
- [Configuration Page]: Select this option to output the list of settings of the machine.<br />
- [Demo Page]: Select this option to output a test page.<br />
- [PCL Font List]: Select this option to output the PCL font list.<br />
- [PS Font List]: Select this option to output the PS font list.<br />
1 In the <strong>User</strong> Settings screen, press [<strong>Print</strong>er Settings].<br />
% For details on displaying the <strong>User</strong> Settings screen, refer to page 12-3.<br />
2 Press [<strong>Print</strong> Reports].<br />
12-32 <strong>VL</strong>3622c/<strong>VL</strong>2822c/<strong>VL</strong><strong>2222c</strong><br />
12.2
12.2 <strong>User</strong> settings 12<br />
3 Press the desired button.<br />
4 Press the button of the desired paper tray, and then either 1-Sided or 2-Sided button.<br />
5 Press [Start] or the Start key to print the report.<br />
% To stop operations, press [Cancel].<br />
12.2.28 TIFF Image Paper Setting<br />
Select this option to configure how to determine the paper size when directly printing TIFF or JPEG image<br />
data. (Default: [Auto Paper Select])<br />
Direct print is used to print documents using the direct print function of Web Connection or from external<br />
memory, or cellular phone/PDA.<br />
- [Auto Paper Select]: Select this option to calculate the size of the image based on its resolution and the<br />
number of pixels to print the image on paper that fits the image size.<br />
Select this option to print images on paper of the same size as the image.<br />
- [Priority Paper Size]: Select this option to print on paper of the paper size specified on the machine. If<br />
the image size is larger than the paper size, it is automatically reduced.<br />
You can specify the paper size in [<strong>User</strong> Settings] − [<strong>Print</strong>er Settings] − [Paper Setting] − [Paper Size].<br />
1 In the <strong>User</strong> Settings screen, press [<strong>Print</strong>er Settings].<br />
% For details on displaying the <strong>User</strong> Settings screen, refer to page 12-3.<br />
<strong>VL</strong>3622c/<strong>VL</strong>2822c/<strong>VL</strong><strong>2222c</strong> 12-33
12<br />
2 Press [TIFF Image Paper Setting].<br />
3 Press [Paper Selection].<br />
4 Press the desired button.<br />
<strong>User</strong> settings<br />
12-34 <strong>VL</strong>3622c/<strong>VL</strong>2822c/<strong>VL</strong><strong>2222c</strong><br />
12.2
12.2 <strong>User</strong> settings 12<br />
12.2.29 Link File Error Notification<br />
This function enables you to specify processing to be performed if the machine cannot access a link file when<br />
attempting to print an XHTML file from a cellular phone or PDA. (Default: [ON])<br />
- [ON]: <strong>Print</strong>s a link file part in a black frame.<br />
- [OFF]: Does not print a link file part.<br />
Reference<br />
- Cellular Phone/PDA Setting is displayed when the optional Local Interface Kit EK-605 is installed<br />
while [Bluetooth Setting] is enabled in this machine and [Cellular Phone/PDA Setting] is enabled in Administrator<br />
Settings For details, refer to page 12-57.<br />
1 In the <strong>User</strong> Settings screen, press [Cellular Phone/PDA Setting].<br />
% For details on displaying the <strong>User</strong> Settings screen, refer to page 12-3.<br />
% [Cellular Phone/PDA Setting] is displayed in the 2/2 screen. Press [Forward ] to switch the screen.<br />
2 Press [Link File Error Notification].<br />
<strong>VL</strong>3622c/<strong>VL</strong>2822c/<strong>VL</strong><strong>2222c</strong> 12-35
12<br />
3 Press the desired button.<br />
12.2.30 Use Proxy Server<br />
<strong>User</strong> settings<br />
This function enables you to specify whether the machine uses a proxy server to access a link file when printing<br />
an XHTML file from a cellular phone or PDA. (Default: [OFF])<br />
- [ON]: Uses a proxy server.<br />
- [OFF]: Does not use a proxy server.<br />
Reference<br />
- Cellular Phone/PDA Setting is displayed when the optional Local Interface Kit EK-605 is installed<br />
while [Bluetooth Setting] is enabled in this machine and [Cellular Phone/PDA Setting] is enabled in Administrator<br />
Settings For details, refer to page 12-57.<br />
- When using a proxy server for connection, select [Administrator Settings] - [Network Settings] - [Web-<br />
DAV Settings] - [WebDAV Client Settings] - [Proxy Server Address] to register the desired proxy server.<br />
For details, refer to the [<strong>User</strong>'s Guide Network Administrator].<br />
1 In the <strong>User</strong> Settings screen, press [Cellular Phone/PDA Setting].<br />
% For details on displaying the <strong>User</strong> Settings screen, refer to page 12-3.<br />
% [Cellular Phone/PDA Setting] is displayed in the 2/2 screen. Press [Forward ] to switch the screen.<br />
12-36 <strong>VL</strong>3622c/<strong>VL</strong>2822c/<strong>VL</strong><strong>2222c</strong><br />
12.2
12.2 <strong>User</strong> settings 12<br />
2 Press [Proxy Server Use].<br />
3 Press the desired button.<br />
<strong>VL</strong>3622c/<strong>VL</strong>2822c/<strong>VL</strong><strong>2222c</strong> 12-37
12<br />
12.2.31 <strong>Print</strong><br />
<strong>User</strong> settings<br />
Specify print conditions to print a document from a cellular phone or PDA. (Default: [1-Sided], [Full Color],<br />
[Finishing]-None)<br />
- Basic - <strong>Print</strong>: Select 1-Sided or 2-Sided.<br />
- Basic - Full Color: Select Full Color or Black.<br />
- Basic - Paper: Select the printing paper size if the sent data does not contain paper size information.<br />
- Basic - Finishing: Specify Fold/Bind, Staple, or Punch.<br />
- Application - Margin: Select the margin position.<br />
- Application - Stamp/Composition: Composes the following contents when printing.<br />
Item Description<br />
[Date/Time] The date and time of printing are printed on the pages.<br />
[Page Number] A page number is printed on all pages of a document.<br />
[Stamp] A preset character string such as "URGENT" is printed on pages.<br />
[Copy Security] A pattern to prevent unauthorized copying is printed on pages.<br />
[Copy Protect]: <strong>Print</strong>s hidden text.<br />
[Copy Guard]: <strong>Print</strong>s a Copy Guard pattern.<br />
[Password Copy]: <strong>Print</strong>s a password for Password Copy.<br />
[Stamp Repeat] Text or an image is repeatedly printed on all pages.<br />
Reference<br />
- Cellular Phone/PDA Setting is displayed when the optional Local Interface Kit EK-605 is installed<br />
while [Bluetooth Setting] is enabled in this machine and [Cellular Phone/PDA Setting] is enabled in Administrator<br />
Settings For details, refer to page 12-57.<br />
- [Copy Guard] or [Password Copy] is displayed when the optional Security Kit SC-507 is installed. For<br />
details, refer to the [<strong>User</strong>'s Guide Copy <strong>Operations</strong>].<br />
1 In the <strong>User</strong> Settings screen, press [Cellular Phone/PDA Setting].<br />
% For details on displaying the <strong>User</strong> Settings screen, refer to page 12-3.<br />
% [Cellular Phone/PDA Setting] is displayed in the 2/2 screen. Press [Forward ] to switch the screen.<br />
12-38 <strong>VL</strong>3622c/<strong>VL</strong>2822c/<strong>VL</strong><strong>2222c</strong><br />
12.2
12.2 <strong>User</strong> settings 12<br />
2 Press [<strong>Print</strong>].<br />
3 Press the desired button.<br />
<strong>VL</strong>3622c/<strong>VL</strong>2822c/<strong>VL</strong><strong>2222c</strong> 12-39
12<br />
12.3 Basic operations in Administrator Settings<br />
12.3.1 Displaying the Administrator Settings screen<br />
1 Press the Utility/Counter key.<br />
2 Press [Administrator Settings].<br />
Basic operations in Administrator Settings<br />
3 Enter the password, and then press [OK].<br />
% For details on setting or changing the password, refer to the [<strong>User</strong>'s Guide Copy <strong>Operations</strong>].<br />
12-40 <strong>VL</strong>3622c/<strong>VL</strong>2822c/<strong>VL</strong><strong>2222c</strong><br />
12.3
12.3 Basic operations in Administrator Settings 12<br />
The Administrator Settings screen appears.<br />
% It can also be selected by pressing the key in the keypad of the number indicated on the desired<br />
button. For [Administrator Settings], press the 3 key on the keypad.<br />
% To finish configuring the Utility mode settings, press the Utility/Counter key. You can also exit the<br />
Utility screen by pressing [Close] until either the Copy, Fax/Scan or <strong>User</strong> Box screen appears.<br />
% To return through the hierarchy of the Utility menu, press [Close] until the desired screen appears.<br />
Alternatively, press an item in the upper hierarchy in the sub-menu area to return to the item.<br />
<strong>VL</strong>3622c/<strong>VL</strong>2822c/<strong>VL</strong><strong>2222c</strong> 12-41
12<br />
12.4 Administrator Settings<br />
12.4.1 <strong>Print</strong>/Fax Output Setting<br />
Administrator Settings<br />
Specify the timing for printing; to print data when it is received, after the reception is completed, or simultaneously<br />
as it is being received.<br />
This setting can be configured separately between for printer and for fax. (Default: [<strong>Print</strong>] - [Page <strong>Print</strong>], [Fax]<br />
- [Batch <strong>Print</strong>])<br />
1 In the Administrator Settings screen, press [System Settings].<br />
% For details on displaying the Administrator Settings screen, refer to page 12-40.<br />
2 In the System Settings screen, press [Output Settings].<br />
3 In the Output Settings screen, press [<strong>Print</strong>/Fax Output Setting].<br />
The <strong>Print</strong>/Fax Output Setting screen appears.<br />
4 Press [<strong>Print</strong>] or [Fax].<br />
5 Press the desired button.<br />
The timing for printing data is set.<br />
% If Batch <strong>Print</strong> is selected, printing starts after all the data is received. If Page <strong>Print</strong> is selected, printing<br />
starts when the data for the first page is received.<br />
Reference<br />
- If the [Administrator Security Levels] is set to [Level 2], this setting item can be specified in the <strong>User</strong><br />
Settings as well. Press [<strong>User</strong> Settings] - [System Settings] - [Output Settings] - [<strong>Print</strong>/Fax Output Settings]<br />
to display the <strong>Print</strong>/Fax Output Setting screen.<br />
- For details on the administrator security levels, refer to the [<strong>User</strong>'s Guide Copy <strong>Operations</strong>].<br />
12-42 <strong>VL</strong>3622c/<strong>VL</strong>2822c/<strong>VL</strong><strong>2222c</strong><br />
12.4
12.4 Administrator Settings 12<br />
12.4.2 Output Tray Settings<br />
Configure the default output tray settings. (Default: [<strong>Print</strong>] - [Tray 2])<br />
1 In the Administrator Settings screen, press [System Settings].<br />
% For details on displaying the Administrator Settings screen, refer to page 12-40.<br />
2 In the System Settings screen, press [Output Settings].<br />
3 In the Output Settings screen, press [Output Tray Settings].<br />
The Output Tray Settings screen appears.<br />
4 Press the desired button.<br />
5 Press [OK].<br />
The output tray is set.<br />
<strong>VL</strong>3622c/<strong>VL</strong>2822c/<strong>VL</strong><strong>2222c</strong> 12-43
12<br />
12.4.3 Delete Secure <strong>Print</strong> Documents<br />
This function deletes all the secure print documents saved.<br />
Administrator Settings<br />
1 In the Administrator Settings screen, press [System Settings].<br />
% For details on displaying the Administrator Settings screen, refer to page 12-40.<br />
2 In the System Settings screen, press [<strong>User</strong> Box Settings].<br />
3 In the <strong>User</strong> Box Settings screen, press [Delete Secure <strong>Print</strong> Documents].<br />
4 To delete the secure print documents, press [Yes].<br />
5 Press [OK].<br />
12-44 <strong>VL</strong>3622c/<strong>VL</strong>2822c/<strong>VL</strong><strong>2222c</strong><br />
12.4
12.4 Administrator Settings 12<br />
12.4.4 Auto Delete Secure Document<br />
Specify the length of time for deleting a secure document after it is saved. (Default: [1 day])<br />
1 In the Administrator Settings screen, press [System Settings].<br />
% For details on displaying the Administrator Settings screen, refer to page 12-40.<br />
2 In the System Settings screen, press [<strong>User</strong> Box Settings].<br />
3 In the <strong>User</strong> Box Settings screen, press [Auto Delete Secure Document].<br />
4 Press the desired button.<br />
% To specify the time manually, press [Time] and then enter the time from the keypad.<br />
5 Press [OK].<br />
<strong>VL</strong>3622c/<strong>VL</strong>2822c/<strong>VL</strong><strong>2222c</strong> 12-45
12<br />
12.4.5 ID & <strong>Print</strong> Delete Time<br />
Administrator Settings<br />
Specify the length of time for deleting an ID & print document after it is saved. (Default: [1 day])<br />
Reference<br />
- [ID & <strong>Print</strong> Delete Time] is displayed when the user authentication is enabled on the machine.<br />
1 In the Administrator Settings screen, press [System Settings].<br />
% For details on displaying the Administrator Settings screen, refer to page 12-40.<br />
2 In the System Settings screen, press [<strong>User</strong> Box Settings].<br />
3 In the <strong>User</strong> Box Settings screen, press [ID & <strong>Print</strong> Delete Time].<br />
4 Press the desired button.<br />
% To specify the time manually, press [Time] and then enter the time from the keypad.<br />
5 Press [OK].<br />
12-46 <strong>VL</strong>3622c/<strong>VL</strong>2822c/<strong>VL</strong><strong>2222c</strong><br />
12.4
12.4 Administrator Settings 12<br />
12.4.6 ID & <strong>Print</strong> Delete after <strong>Print</strong> Setting<br />
Specify whether to delete the ID & <strong>Print</strong> document after it is printed. (Default: [Confirm with <strong>User</strong>])<br />
- [Confirm with <strong>User</strong>]: Select this option to display the screen where the user can select whether the document<br />
printed from the ID & <strong>Print</strong> <strong>User</strong> Box is deleted after it is printed. Select this option if you want to<br />
leave the document.<br />
- [Always Delete]: Select this option to delete the document after printing. Deletion is not confirmed with<br />
user.<br />
1 In the Administrator Settings screen, press [System Settings].<br />
% For details on displaying the Administrator Settings screen, refer to page 12-40.<br />
2 In the System Settings screen, press [<strong>User</strong> Box Settings].<br />
3 In the <strong>User</strong> Box Settings screen, press [ID & <strong>Print</strong> Delete after <strong>Print</strong> Setting].<br />
4 Press the desired button.<br />
5 Press [OK].<br />
<strong>VL</strong>3622c/<strong>VL</strong>2822c/<strong>VL</strong><strong>2222c</strong> 12-47
12<br />
12.4.7 Skip Job Operation Settings<br />
Administrator Settings<br />
Specify whether to start processing for the next job when the current job stops due to running out of paper<br />
in the paper tray. (Default: [Yes])<br />
- [Yes]: Select this option to give precedence to processing of other job while maintaining the stopped<br />
job in the queued state. The queued job is processed after the problem is solved. This function is helpful<br />
because it prevents other jobs from queuing for simple reasons such as paper in a specific paper tray<br />
running out.<br />
- [No]: If a single job is stopped, all other jobs are queued for processing as well. All jobs are processed<br />
after the problem is solved.<br />
1 In the Administrator Settings screen, press [System Settings].<br />
% For details on displaying the Administrator Settings screen, refer to page 12-40.<br />
2 In the System Settings screen, switch the page by pressing [<br />
Operation Settings].<br />
] or [ ], and then press [Skip Job<br />
3 Press [Fax] or [Other than Fax].<br />
4 Press the desired button.<br />
12-48 <strong>VL</strong>3622c/<strong>VL</strong>2822c/<strong>VL</strong><strong>2222c</strong><br />
12.4
12.4 Administrator Settings 12<br />
12.4.8 ID & <strong>Print</strong> Settings<br />
Specify whether to use the ID & <strong>Print</strong> function on the machine that performs user authentication or account<br />
track. (Default: [OFF])<br />
- ID & <strong>Print</strong> [ON]: Select this option to save all the normal printing jobs and ID & <strong>Print</strong> jobs performed by<br />
a registered user in the [ID & <strong>Print</strong> <strong>User</strong> Box].<br />
- ID & <strong>Print</strong> [OFF]: Select this option to save the ID & <strong>Print</strong> jobs performed by a registered user in the [ID<br />
& <strong>Print</strong> <strong>User</strong> Box]. The Normal <strong>Print</strong> job is output without being saved in the <strong>User</strong> Box.<br />
- Public <strong>User</strong> [<strong>Print</strong> Immediately]: Select this option to output the public user jobs or jobs without user<br />
authentication information without saving.<br />
- Public <strong>User</strong> [Save]: Select this option to save the public user jobs or jobs without user authentication<br />
information in the [ID & <strong>Print</strong> <strong>User</strong> Box].<br />
Reference<br />
- A public user job is printed or saved when public user printing is enabled.<br />
- A user-unauthorized job is printed or saved when [<strong>Print</strong> without Authentication] is enabled.<br />
1 In the Administrator Settings screen, press [<strong>User</strong> Authentication/Account Track].<br />
% For details on displaying the Administrator Settings screen, refer to page 12-40.<br />
2 In the <strong>User</strong> Authentication/Account Track screen, press [<strong>User</strong> Authentication Settings].<br />
3 In the <strong>User</strong> Authentication Settings screen, press [Administrative Setting].<br />
4 In the Administrative Settings screen, press [ID & <strong>Print</strong> Settings].<br />
<strong>VL</strong>3622c/<strong>VL</strong>2822c/<strong>VL</strong><strong>2222c</strong> 12-49
12<br />
5 Specify [ID&<strong>Print</strong>] and [Public <strong>User</strong>].<br />
6 Press [OK].<br />
12.4.9 ID & <strong>Print</strong> Operation Settings<br />
Administrator Settings<br />
Specify the printing method when using the ID & <strong>Print</strong> function on an optional Authentication Unit. (Default:<br />
[<strong>Print</strong> All Jobs])<br />
- [<strong>Print</strong> All Jobs]: Select this option to print all the documents authenticated at one setting when multiple<br />
documents are saved in the ID & <strong>Print</strong> <strong>User</strong> Box.<br />
- [<strong>Print</strong> Each Job]: Select this option to print a document for each authentication when multiple documents<br />
are saved in the ID & <strong>Print</strong> <strong>User</strong> Box.<br />
Reference<br />
- The ID & <strong>Print</strong> Operation Settings appears on the screen only when an optional Authentication Unit is<br />
installed.<br />
1 In the Administrator Settings screen, press [<strong>User</strong> Authentication/Account Track].<br />
% For details on displaying the Administrator Settings screen, refer to page 12-40.<br />
2 In the <strong>User</strong> Authentication/Account Track screen, press [<strong>User</strong> Authentication Settings].<br />
3 In the <strong>User</strong> Authentication Settings screen, press [Administrative Setting].<br />
4 In the Administrative Settings screen, press [ID & <strong>Print</strong> Operation Settings].<br />
12-50 <strong>VL</strong>3622c/<strong>VL</strong>2822c/<strong>VL</strong><strong>2222c</strong><br />
12.4
12.4 Administrator Settings 12<br />
5 Press the desired button.<br />
12.4.10 <strong>Print</strong> without Authentication<br />
Specify whether to allow the print jobs without authentication specified when the machine is performing user<br />
authentication or account track. (Default: [Restrict])<br />
- [Allow]: Select this option to allow the print jobs to be printed when an ID and password for user authentication<br />
or an account name and password for account track are not specified. <strong>Print</strong>ing is counted<br />
as a public job.<br />
- [Restrict]: Select this option not to allow the print jobs to be printed when an ID and password for user<br />
authentication or an account name and password for account track are not specified.<br />
Reference<br />
- If the print jobs without authentication specified are permitted to be printed, printing can be performed<br />
on this machine performing user authentication or account track, even if user authentication or account<br />
track is not specified in the printer driver. Select Restrict if you want to control usage for the counter<br />
management or security reasons.<br />
- A print job without authentication specified means a job that performed printing without enabling <strong>User</strong><br />
Authentication or Account Track in the printer driver. In Windows, it means a job for which <strong>User</strong> Authentication<br />
or Account Track is set to [Disable] in [Configure] tab - [Device Option] in the Properties window.<br />
In Macintosh OS X, it means a job for which the <strong>User</strong> Authentication or Account Track check box is not<br />
selected in the [Output Method] window.<br />
1 In the Administrator Settings screen, press [<strong>User</strong> Authentication/Account Track].<br />
% For details on displaying the Administrator Settings screen, refer to page 12-40.<br />
2 In the <strong>User</strong> Authentication/Account Track screen, press [<strong>Print</strong> without Authentication].<br />
3 Press the desired button.<br />
4 Press [OK].<br />
The print without authentication is specified.<br />
<strong>VL</strong>3622c/<strong>VL</strong>2822c/<strong>VL</strong><strong>2222c</strong> 12-51
12<br />
12.4.11 Single Color > 2 Color Output Management<br />
Administrator Settings<br />
Configure whether to manage the output of a single color or 2 colors as color print or black print.<br />
When managing it as black print, even a user who is restricted from performing color printing can create a<br />
single color or 2 color output. (Default: [Color])<br />
- [Color]: Select this option to count the printing done in a single color or 2 colors as color printing.<br />
- [Black]: Select this option to count the printing done in a single color or 2 color as black printing.<br />
1 In the Administrator Settings screen, press [<strong>User</strong> Authentication/Account Track].<br />
% For details on displaying the Administrator Settings screen, refer to page 12-40.<br />
2 In the <strong>User</strong> Authentication/Account Track screen, press [<strong>User</strong>/Account Common Setting].<br />
3 In the <strong>User</strong>/Account Common Setting screen, press [Single Color > 2 Color Output Management].<br />
4 Press the desired button.<br />
12-52 <strong>VL</strong>3622c/<strong>VL</strong>2822c/<strong>VL</strong><strong>2222c</strong><br />
12.4
12.4 Administrator Settings 12<br />
12.4.12 I/F timeout setting<br />
Specify the time until a communication timeout occurs for each of the USB or network interface. (Default: 60<br />
sec.)<br />
1 In the Administrator Settings screen, press [<strong>Print</strong>er Settings].<br />
% For details on displaying the Administrator Settings screen, refer to page 12-40.<br />
2 In the <strong>Print</strong>er Settings screen, press the interface to specify.<br />
3 Press the C key to clear the value, and then use the keypad to enter the time. (10 to 1,000 sec.)<br />
% If a value outside of the allowable range is specified, the message "Input error" appears. Enter a<br />
number within the allowable range.<br />
The time until a communication timeout occurs is set.<br />
<strong>VL</strong>3622c/<strong>VL</strong>2822c/<strong>VL</strong><strong>2222c</strong> 12-53
12<br />
12.4.13 <strong>Print</strong> XPS Errors<br />
Administrator Settings<br />
Specify whether to print the error message when an error occurs during XPS printing. (Default: [No])<br />
1 In the Administrator Settings screen, press [<strong>Print</strong>er Settings].<br />
% For details on displaying the Administrator Settings screen, refer to page 12-40.<br />
2 Press [<strong>Print</strong> XPS Errors].<br />
3 Press the desired button.<br />
12-54 <strong>VL</strong>3622c/<strong>VL</strong>2822c/<strong>VL</strong><strong>2222c</strong><br />
12.4
12.4 Administrator Settings 12<br />
12.4.14 Web Connection Direct <strong>Print</strong><br />
Specify whether to allow the direct print from Web Connection. (Default: [Yes])<br />
- [Yes]: Select this option to allow direct print from Web Connection.<br />
- [No]: Select this option not to allow direct print from Web Connection.<br />
1 In the Administrator Settings screen, press [<strong>Print</strong>er Settings].<br />
% For details on displaying the Administrator Settings screen, refer to page 12-40.<br />
2 Press [Web Connection Direct <strong>Print</strong>].<br />
3 Press the desired button.<br />
<strong>VL</strong>3622c/<strong>VL</strong>2822c/<strong>VL</strong><strong>2222c</strong> 12-55
12<br />
12.4.15 Configuring Authentication under OpenAPI Settings<br />
Administrator Settings<br />
When user authentication is performed or when acquiring the device information with the Authentication<br />
Manager, set the Authentication setting of the OpenAPI Setting screen of the machine to [OFF]. (Default:<br />
[OFF])<br />
1 In the Administrator Settings screen, press [System Connection].<br />
% For details on displaying the Administrator Settings screen, refer to page 12-40.<br />
2 In the System Connection screen, press [OpenAPI Settings].<br />
3 In the OpenAPI Settings screen, press [Authentication].<br />
4 Set [Authentication] to [OFF].<br />
5 Press [OK].<br />
The authentication settings are configured.<br />
12-56 <strong>VL</strong>3622c/<strong>VL</strong>2822c/<strong>VL</strong><strong>2222c</strong><br />
12.4
12.4 Administrator Settings 12<br />
12.4.16 Configuring the cellular phone or PDA settings<br />
You can specify whether to allow printing from a cellular phone or PDA and saving in a <strong>User</strong> Box. (Default:<br />
[Restrict])<br />
- [Allow]: Allow printing from a cellular phone or PDA, and saving in a <strong>User</strong> Box.<br />
- [Restrict]: Not allow printing from a cellular phone or PDA, or saving in a <strong>User</strong> Box.<br />
Reference<br />
- Cellular Phone/PDA Setting is displayed when the optional Local Interface Kit EK-605 is installed<br />
while [Bluetooth Setting] is enabled in this machine. For details, refer to the [<strong>User</strong>'s Guide Network Administrator].<br />
To enable a Bluetooth communication, contact your service representative in advance.<br />
1 In the Administrator Settings screen, press [System Connection].<br />
% For details on displaying the Administrator Settings screen, refer to page 12-40.<br />
2 In the System Connection screen, press [Cellular Phone/PDA Setting].<br />
3 Press the desired button.<br />
4 Press [OK].<br />
The Mobile/PDA Settings is specified.<br />
<strong>VL</strong>3622c/<strong>VL</strong>2822c/<strong>VL</strong><strong>2222c</strong> 12-57
12<br />
12.4.17 <strong>Print</strong> Data Capture<br />
Specify whether to allow or prohibit data capturing of a print job. (Default: [Allow])<br />
Reference<br />
- For details on capturing data of a print job, contact the technical representative.<br />
Administrator Settings<br />
1 In the Administrator Settings screen, press [Security Settings].<br />
% For details on displaying the Administrator Settings screen, refer to page 12-40.<br />
2 In the Security Settings screen, press [Security Details].<br />
3 In the Security Details screen, press [<strong>Print</strong> Data Capture].<br />
4 Press the desired button.<br />
Whether to allow or prohibit data capturing of a print job is specified.<br />
% For details, contact your technical representative.<br />
12-58 <strong>VL</strong>3622c/<strong>VL</strong>2822c/<strong>VL</strong><strong>2222c</strong><br />
12.4
12.4 Administrator Settings 12<br />
12.4.18 Secure <strong>Print</strong> Only<br />
Specify whether the printing from the computer should be limited only to the security document. (Default:<br />
[No])<br />
Whenever printing is done from the printer driver, the data must be transmitted using the secure printing. Because<br />
this setting requires ID/password for every print job, your job is protected from intercepting by a third<br />
party.<br />
- [Yes]: Select this option to limit the printing only to the secure documents.<br />
- [No]: Select this option not to limit the printing to the secure documents.<br />
Reference<br />
- When you print a document on the machine with [Secure <strong>Print</strong> Only] set to [Yes], specify [Secure <strong>Print</strong><br />
Only] on the printer driver so that only the [Secure <strong>Print</strong>] jobs are transmitted.<br />
- If a normal print job is sent to the machine where [Secure <strong>Print</strong> Only] is set to [Yes], the print job is deleted.<br />
d Reference<br />
For details on secure printing, refer to page 11-6.<br />
1 In the Administrator Settings screen, press [Security Settings].<br />
% For details on displaying the Administrator Settings screen, refer to page 12-40.<br />
2 In the Security Settings screen, press [Security Details].<br />
3 Switch the page by pressing [ ] or [ ], and then press [Secure <strong>Print</strong> Only].<br />
4 Press the desired button.<br />
Whether the printing should be limited to security documents is specified.<br />
<strong>VL</strong>3622c/<strong>VL</strong>2822c/<strong>VL</strong><strong>2222c</strong> 12-59
12<br />
12.4.19 Driver Password Encryption Setting<br />
Administrator Settings<br />
For the common encryption key to be added to print jobs, specify whether to use the factory default setting<br />
or to change to a user-defined encryption passphrase. (Default: [Use Factory Default])<br />
- [<strong>User</strong>-Defined]: Specify an encryption passphrase. Enter an encryption passphrase of 20 characters.<br />
- [Use Factory Default]: Select this option to use the encryption passphrase preset at shipping.<br />
Reference<br />
- An encryption passphrase must be specified using 20 characters.<br />
- <strong>User</strong>, account, and secure document passwords are encrypted by the common encryption key.<br />
- When [<strong>User</strong>-Defined] is selected for the encryption passphrase, select the check box for the encryption<br />
passphrase in the printer driver to enable it, and then enter the same value.<br />
If different values are used for the encryption passphrase for the machine and the printer driver, the machine<br />
cannot decrypt the encrypted user password, account password or secure document password,<br />
and printing cannot be performed. For details, refer to page 11-33.<br />
- When OpenAPI is used and SSL is enabled, it is possible for the machine to obtain the common encryption<br />
key provided that the device information of the printer driver can be obtained automatically.<br />
1 In the Administrator Settings screen, press [Security Settings].<br />
% For details on displaying the Administrator Settings screen, refer to page 12-40.<br />
2 In the Security Settings screen, press [Driver Password Encryption Setting].<br />
3 Press the desired button.<br />
d Reference<br />
For details on selecting [<strong>User</strong>-Defined] for the encryption passphrase, refer to page 11-33.<br />
12-60 <strong>VL</strong>3622c/<strong>VL</strong>2822c/<strong>VL</strong><strong>2222c</strong><br />
12.4
13 Web<br />
Connection
13.1 Using Web Connection 13<br />
13 Web Connection<br />
13.1 Using Web Connection<br />
Web Connection is a device control utility provided by the HTTP server built in the printer controller. Using<br />
a Web browser on a computer connected to the network, you can change machine settings and check the<br />
status of the machine. Using this utility, you can configure some settings, which are to be handled in the control<br />
panel of this machine, through your computer, and also smoothly enter characters.<br />
13.1.1 Operating environment<br />
Operating environment<br />
Network Ethernet (TCP/IP)<br />
Applications on compu- Web browser:<br />
ter<br />
<br />
• Microsoft Internet Explorer Ver. 6/7 (JavaScript and Cookies enabled)<br />
• Netscape Navigator 7.02 or later (JavaScript and Cookies enabled)<br />
• Mozilla Firefox 1.0 or later (JavaScript and Cookies enabled)<br />
<br />
• Netscape Navigator 7.02 or later (JavaScript and Cookies enabled)<br />
• Mozilla Firefox 1.0 or later (JavaScript and Cookies enabled)<br />
<br />
• Netscape Navigator 7.02 or later (JavaScript and Cookies enabled)<br />
• Mozilla Firefox 1.0 or later (JavaScript and Cookies enabled<br />
Adobe ® Flash ® Player:<br />
• Plug-in Ver.7.0 or later required to select Flash as the display format.<br />
• Plug-in Ver.9.0 or later required to use the Data Management Utility<br />
(font/macro data management).<br />
13.1.2 Accessing Web Connection<br />
0 Start the Web browser to access Web Connection.<br />
0 If <strong>User</strong> Authentication is enabled, enter the user name and password. For details, refer to page 13-10.<br />
0 For details on setting the IP address of this machine, refer to [<strong>User</strong>'s Guide Network Administrator].<br />
0 Web Connection has two view modes: Flash and HTML. For details, refer to page 13-8.<br />
1 Start the Web browser.<br />
2 Enter the IP address of the machine in the URL field, and then press [Enter].<br />
http:///<br />
Example: When the IP address of this machine is 192.168.1.20:<br />
- http://192.168.1.20/<br />
When IPv6 is set to [ON] while a browser other than Internet Explorer is used:<br />
- Enter the IPv6 address enclosed in brackets [ ] to access Web Connection.<br />
– http://[IPv6 address of this machine]/<br />
Example: When the IPv6 address of this machine is fe80::220:6bff:fe10:2f16:<br />
- http://[fe80::220:6bff:fe10:2f16]/<br />
- If IPv6 is set to [ON] while Internet Explorer is used, add "fe80::220:6bff:fe10:2f16IPv6 IPv6_MFP_1" to<br />
the hosts file in advance, and specify the address with the domain name.<br />
The main menu or login page appears.<br />
<strong>VL</strong>3622c/<strong>VL</strong>2822c/<strong>VL</strong><strong>2222c</strong> 13-3
13<br />
13.1.3 Web browser cache<br />
Using Web Connection<br />
The Web browser has the cache function; therefore, the latest information may not be shown in the page displayed<br />
using Web Connection. Using the cache function may result in an operation failure. When using Web<br />
Connection, disable the cache function on the Web browser.<br />
Reference<br />
- Some Web browser versions may provide different menus and item names. For details, refer to the Help<br />
for the Web browser.<br />
- With the cache function enabled, timeout occurs in the administrator mode, and after that, how many<br />
time you try to access, just timeout recurs. It results in the control panel of this machine being locked,<br />
and you cannot handle the control panel. In this case, turn the main power off, and then turn it on again.<br />
To avoid this problem, disable the cache function.<br />
For Internet Explorer<br />
1 Select [Internet Options] in the [Tools] menu.<br />
2 In the [General] tab, select [Temporary Internet files] - [Settings].<br />
3 Select [Every visit to the page], and click [OK].<br />
For Netscape Navigator<br />
1 Select [Preferences] in the [Edit] menu.<br />
2 In [Category] on the left, select [Advanced ] - [Cache].<br />
3 In [Document in cache is compared to document on network], select [Every time].<br />
For Mozilla Firefox<br />
1 Select [Options] in the [Tools] menu.<br />
2 Select [Privacy], and then click [Settings] in the Private Data section.<br />
3 Select the [Cache] check box under [Private Data] select the [Clear private data when closing Firefox]<br />
check box under [Settings], and then click [OK].<br />
13-4 <strong>VL</strong>3622c/<strong>VL</strong>2822c/<strong>VL</strong><strong>2222c</strong><br />
13.1
13.2 Login and Logout 13<br />
13.2 Login and Logout<br />
13.2.1 Login and logout flows<br />
Accessing with Web Connection displays the login page when <strong>User</strong> Authentication or Account Track is enabled,<br />
and displays the login page in the public user mode when <strong>User</strong> Authentication or Account Track is not<br />
enabled. When re-logging in to this machine as a different user or as an administrator, log out once, and log<br />
in again.<br />
When user authentication or account track is not enabled<br />
You are automatically logged in as a public user.<br />
The top menu page appears.<br />
To log in as an administrator, log out once.<br />
<strong>VL</strong>3622c/<strong>VL</strong>2822c/<strong>VL</strong><strong>2222c</strong> 13-5
13<br />
Login as an administrator again.<br />
When <strong>User</strong> Authentication or Account Track is enabled<br />
Login and Logout<br />
If Authentication Manager is used for authentication, ask your server administrator about the login procedure.<br />
The <strong>User</strong> Authentication or Account Track page appears. Enter the required items to log in.<br />
To log in as a different user or as an administrator, log out once.<br />
13-6 <strong>VL</strong>3622c/<strong>VL</strong>2822c/<strong>VL</strong><strong>2222c</strong><br />
13.2
13.2 Login and Logout 13<br />
Log in again.<br />
13.2.2 Logout<br />
Click [Logout] or [To Login Screen] at the upper right of the window. A logout confirmation page appears.<br />
Click [OK] to return to the login page.<br />
Reference<br />
- The login page that appears differs depending on whether Authentication is enabled in this machine.<br />
- When logged in as a public user, [To Login Screen] appears. When logged in as a registered user or an<br />
administrator, [Logout] appears.<br />
- If timeout occurred because no operation was performed for the specified period during login or if authentication<br />
setting was changed using the control panel while logging in to the user mode, you will automatically<br />
log out of the mode.<br />
- For details on how to specify the timeout period of the user or administrator modes, refer to page 13-22.<br />
<strong>VL</strong>3622c/<strong>VL</strong>2822c/<strong>VL</strong><strong>2222c</strong> 13-7
13<br />
13.2.3 Login<br />
Login and Logout<br />
Web Connection provides the user or administrator mode depending on how to log in. If necessary, you can<br />
log in to the user mode as an administrator or <strong>User</strong> Box administrator depending on user authentication or<br />
<strong>User</strong> Box administrator setting.<br />
Reference<br />
- You can log in as a <strong>User</strong> Box administrator when the <strong>User</strong> Box administrator is enabled using the control<br />
panel. For details on the <strong>User</strong> Box administrator settings, permissions and password settings, refer<br />
to the [<strong>User</strong>'s Guide Box <strong>Operations</strong>].<br />
- When logged in to the user mode as an administrator, jobs that could not be deleted in the administrator<br />
mode can be deleted.<br />
- In the login page, select the desired Data Management Utility. For details on Data Management Utility,<br />
refer to the [<strong>User</strong>'s Guide Network Administrator].<br />
Login options<br />
You can select items as required when logging in.<br />
Item Description<br />
[Language] Select the display language.<br />
[View Mode] Select Flash or HTML.<br />
• If the screen reader software is used, we recommend selecting [HTML] as the<br />
view mode.<br />
• In an IPv6 environment, select [HTML].<br />
• Flash Player is required when selecting [Flash].<br />
[<strong>User</strong> Assist] Select the [Display dialog box in case of warning.] check box to display the dialog<br />
box when a warning has occurred or during operation after login.<br />
Reference<br />
- If [Flash] is selected in [View Mode], the following items are displayed using Flash.<br />
– Status icons and messages<br />
– Status of [Paper Tray] in the page displayed when [Device Information] is selected on the Information<br />
tab<br />
– Page display of [Job]<br />
13-8 <strong>VL</strong>3622c/<strong>VL</strong>2822c/<strong>VL</strong><strong>2222c</strong><br />
13.2
13.2 Login and Logout 13<br />
Logging in as a public user<br />
If user authentication is not enabled on the machine, you will be logging in as a public user. In the login page,<br />
select [Public <strong>User</strong> Access], and click [Login].<br />
<strong>VL</strong>3622c/<strong>VL</strong>2822c/<strong>VL</strong><strong>2222c</strong> 13-9
13<br />
Logging in as a registered user<br />
Login and Logout<br />
Specify the registered user name and password to log in when <strong>User</strong> Authentication is enabled in this machine.<br />
% In the login page, enter the user name and the password, and click [Login].<br />
Reference<br />
- If Account Track is enabled, also enter the account name and password.<br />
- To select a user name from a list, click [<strong>User</strong> List].<br />
- If External Server Authentication is enabled, select a server.<br />
- To log in to the user mode as an administrator, select [Administrator] - [Administrator (<strong>User</strong> Mode)], and<br />
enter the administrator password.<br />
- If [Prohibited Functions When Authentication Error] in Administrator Settings is set to [Mode 2] and a<br />
user enters an incorrect password the specified number of times, that user is locked out and can no<br />
longer use the printer. Contact your administrator to cancel operation restrictions.<br />
- [<strong>User</strong> List] is available only when [<strong>User</strong> Name List] is set to [ON]. For details, refer to the [<strong>User</strong>'s Guide<br />
Copy <strong>Operations</strong>].<br />
13-10 <strong>VL</strong>3622c/<strong>VL</strong>2822c/<strong>VL</strong><strong>2222c</strong><br />
13.2
13.2 Login and Logout 13<br />
Logging in to the administrator mode<br />
To configure the system or network setting, log in to the administrator mode.<br />
% In the login page, select [Administrator] and click [Login].<br />
% Enter the administrator password in the page that appears, and then click [OK].<br />
Reference<br />
- To log in to the user mode as an administrator, select [Administrator] - [Administrator (<strong>User</strong> Mode)], and<br />
enter the administrator password.<br />
- Logging in to the administrator mode locks the control panel of this machine, and you will not be able<br />
to use it.<br />
- Depending on the status of this machine, you may not be able to log in to the administrator mode.<br />
- If [Prohibited Functions When Authentication Error] in the Administrator Settings is set to [Mode 2] and<br />
an incorrect password is entered the specified number of times, it is no longer possible to log in to the<br />
administrator mode. For details on the Prohibited Functions When Authentication Error parameter, refer<br />
to the [<strong>User</strong>'s Guide Copy <strong>Operations</strong>].<br />
- The password entry page varies depending on the machine settings.<br />
<strong>VL</strong>3622c/<strong>VL</strong>2822c/<strong>VL</strong><strong>2222c</strong> 13-11
13<br />
Logging in as the <strong>User</strong> Box Administrator<br />
Login and Logout<br />
You can log in to the user mode as an administrator to delete a job when <strong>User</strong> Authentication is enabled in<br />
this machine. If necessary, you can log in to the user mode as a <strong>User</strong> Box administrator when the <strong>User</strong> Box<br />
administrator is enabled using the control panel.<br />
% In the login page, select [Administrator] and click [Login].<br />
% To log in to the user mode as a <strong>User</strong> Box administrator, select [<strong>User</strong> Box Administrator], and enter<br />
the <strong>User</strong> Box administrator's password.<br />
Reference<br />
- To log in to the user mode as an administrator, select [Administrator] - [Administrator (<strong>User</strong> Mode)], and<br />
enter the administrator password.<br />
- If [Prohibited Functions When Authentication Error] in the Administrator Settings is set to [Mode 2] and<br />
an incorrect password is entered the specified number of times, it is no longer possible to log in to the<br />
administrator mode. For details on the Prohibited Functions When Authentication Error parameter, refer<br />
to the [<strong>User</strong>'s Guide Copy <strong>Operations</strong>].<br />
- The password entry page varies depending on the machine settings.<br />
- You can display the explanation of functions (Help) when necessary. To display Help, select [ON] in Display<br />
Setting.<br />
– [On Mouse]: Point the cursor to display Help.<br />
– [On Focus]: Select an item to display Help.<br />
13-12 <strong>VL</strong>3622c/<strong>VL</strong>2822c/<strong>VL</strong><strong>2222c</strong><br />
13.2
13.3 Structure of pages 13<br />
13.3 Structure of pages<br />
Clicking an item in the top menu after logging in to Web Connection shows the linked information in the following<br />
configuration. The following shows an example of the page displayed when Device Information is selected<br />
in the Information tab.<br />
Reference<br />
- The contents of the Web Connection pages vary depending on the options installed in this machine or<br />
the settings of this machine.<br />
8<br />
9<br />
10<br />
No. Item Description<br />
1 Login user name Displays the current login mode icon and user name (public, administrator,<br />
<strong>User</strong> Box administrator, registered user, or account). Click<br />
the user name to display the login user name.<br />
2 Status display Displays the status of the printer and scanner sections of this machine<br />
with icons and messages. Clicking the desired icon when an<br />
error occurs displays the information (Consumable Info, Paper Tray,<br />
or user registration page) associated with the icon to enable you to<br />
check the status.<br />
3 Message display Displays the operating status of this machine.<br />
4 [To Login Screen]/ [Logout]<br />
1 2 3 4 5<br />
Click this button to log out the current mode and log in again. When<br />
logged in as a public user, [To Login Screen] appears. When logged<br />
in as a registered user or an administrator, [Logout] appears.<br />
5 [Change Password] Click this button to jump to the user password change page. This<br />
button appears only in the user mode page in which you logged in<br />
as a registered user.<br />
<strong>VL</strong>3622c/<strong>VL</strong>2822c/<strong>VL</strong><strong>2222c</strong> 13-13<br />
6<br />
7
13<br />
No. Item Description<br />
Structure of pages<br />
6 Help Click this icon to display the page specified in the Online Help Website.<br />
For the specified pages, refer to [Online Assistance] in<br />
page 13-21.<br />
7 Refresh Click this icon to refresh the information displayed in the page.<br />
8 Icon Select the category of the item to be displayed. The following icons<br />
are displayed in the user mode.<br />
• Information<br />
• Job<br />
• <strong>User</strong> Box<br />
• Direct <strong>Print</strong><br />
• Store Address<br />
• Customize<br />
9 Menu Displays information and setting for the selected icon. The menu that<br />
appears in this area varies depending on which icon was selected.<br />
10 Information and settings Displays the details of the item selected in the menu.<br />
13-14 <strong>VL</strong>3622c/<strong>VL</strong>2822c/<strong>VL</strong><strong>2222c</strong><br />
13.3
13.4 Overview of the user mode 13<br />
13.4 Overview of the user mode<br />
After logging in to Web Connection in the user mode, the following functions can be specified.<br />
13.4.1 Information<br />
d Reference<br />
For other information on the user mode, refer to Web Connection Help in Utilities DVD-ROM.<br />
Item Description<br />
[Device Information]<br />
[Online Assistance]<br />
[Change <strong>User</strong><br />
Password]<br />
[Function Permission<br />
Information]<br />
[Network Setting<br />
Information]<br />
[<strong>Print</strong> Setting Information]<br />
Enables you to check the components, options, consumables, and meter counts of<br />
this machine.<br />
Enables you to check the online assistance about this product.<br />
Changes the password of the login user.<br />
Enables you to check the function permission information about the user or account.<br />
Enables you to check the network settings of this machine.<br />
Enables you to check the printer controller settings of this machine.<br />
[<strong>Print</strong> Information] <strong>Print</strong>s font or configuration information.<br />
<strong>VL</strong>3622c/<strong>VL</strong>2822c/<strong>VL</strong><strong>2222c</strong> 13-15
13<br />
13.4.2 Job<br />
13.4.3 <strong>User</strong> Box<br />
Overview of the user mode<br />
Item Description<br />
[Current Jobs] Enables you to check the currently executed job or queued jobs.<br />
[Job History] Enables you to check the executed jobs.<br />
[Communication<br />
List]<br />
Enables you to check the completed transmission and reception jobs.<br />
d Reference<br />
For details on the operating procedures for <strong>User</strong> Boxes, refer to the [<strong>User</strong>'s Guide Box <strong>Operations</strong>].<br />
Item Description<br />
[Open <strong>User</strong> Box] Opens the currently created <strong>User</strong> Box (Public, Personal, or Group <strong>User</strong> Box) to enable<br />
you to print, send, or download a document saved in the <strong>User</strong> Box or to change<br />
the <strong>User</strong> Box setting.<br />
[Create <strong>User</strong> Box] Enables to create a new <strong>User</strong> Box.<br />
13-16 <strong>VL</strong>3622c/<strong>VL</strong>2822c/<strong>VL</strong><strong>2222c</strong><br />
13.4
13.4 Overview of the user mode 13<br />
Item Description<br />
[Open System<br />
<strong>User</strong> Box]<br />
[Create System<br />
<strong>User</strong> Box]<br />
13.4.4 Direct print<br />
Displayed when the optional Fax Kit is installed. This function opens the System<br />
<strong>User</strong> Box (Bulletin Board, Polling TX, Memory RX, or Relay <strong>User</strong> Box) to enable you<br />
to handle a document saved in the <strong>User</strong> Box or change the <strong>User</strong> Box setting.<br />
Displayed when the optional Fax Kit is installed. This function enables you to create<br />
a new Bulletin Board or Relay <strong>User</strong> Box.<br />
Item Description<br />
[Direct <strong>Print</strong>] Specify a file saved in the computer to print it using this machine. If necessary, you<br />
can select Application to save a document in the specified <strong>User</strong> Box.<br />
Reference<br />
- [Direct <strong>Print</strong>] may not be displayed depending on settings in the administrator mode.<br />
<strong>VL</strong>3622c/<strong>VL</strong>2822c/<strong>VL</strong><strong>2222c</strong> 13-17
13<br />
13.4.5 Address Registration<br />
Overview of the user mode<br />
[Store Address] may not be displayed depending on settings in the administrator mode.<br />
Item Description<br />
[Address Book] Enables you to check the address book registered in this machine or to register and<br />
change an address.<br />
[Group] Enables you to check the group address book registered in this machine or to register<br />
and change an address.<br />
[Program] Enables you to check the program address book registered in this machine or to<br />
register and change an address.<br />
[Temporary One-<br />
Touch]<br />
Enables you to check the temporary program address book registered in this machine<br />
or to register and change an address.<br />
[Subject] Allows you to register or change up to 10 subjects when sending E-mails.<br />
[Text] Allows you to register or change up to 10 body messages when sending E-mails.<br />
13-18 <strong>VL</strong>3622c/<strong>VL</strong>2822c/<strong>VL</strong><strong>2222c</strong><br />
13.4
13.4 Overview of the user mode 13<br />
13.4.6 Customize<br />
This function enables you to specify the initial screen after logging in.<br />
Item Description<br />
[Option] Enables you to configure the settings displayed in the initial page after logging in to<br />
this machine.<br />
<strong>VL</strong>3622c/<strong>VL</strong>2822c/<strong>VL</strong><strong>2222c</strong> 13-19
13<br />
13.5 Administrator mode overview<br />
Logging in to the administrator mode enables you to use the following functions.<br />
Administrator mode overview<br />
d Reference<br />
For details on the administrator mode, refer to the [<strong>User</strong>'s Guide Network Administrator].<br />
13.5.1 Maintenance<br />
Item Description<br />
[Meter Count] Enables you to check the meter count of this machine.<br />
[ROM Version] Enables you to check the ROM version.<br />
[Import/Export] Saves (exports) setting information of this machine as a file, or writes (imports) it<br />
from a file to this machine.<br />
[Status Notifica- Configure the function to be reported to a registered user when an error has oction<br />
Setting] curred in this machine. Specify the destination and items to notify a registered user<br />
of an error.<br />
[Total Counter<br />
Notification Setting]<br />
[Date/Time Setting]<br />
Configure the setting to notify the target user of the total counter by E-mail, and register<br />
the E-mail address of the destination.<br />
Specify the date and time displayed in this machine.<br />
[Timer Setting] Configure Power Save or Weekly Timer Setting in this machine.<br />
[Network Error Specify whether to display the network error code.<br />
Code Display<br />
Setting]<br />
13-20 <strong>VL</strong>3622c/<strong>VL</strong>2822c/<strong>VL</strong><strong>2222c</strong><br />
13.5
13.5 Administrator mode overview 13<br />
Item Description<br />
[Reset] Clears all settings for the network, controller and destinations.<br />
[License Settings] Allows you to issue a license and enable functions. Also, a request code can be issued.<br />
[Edit Font/Macro] Adds font or macro.<br />
[Job Log] Allows you to create and download log data of the jobs that were executed in this<br />
machine.<br />
13.5.2 System Settings<br />
Reference<br />
- To use this machine as a scanner with the application software under TWAIN, install the dedicated driver<br />
software "TWAIN". For details, refer to the TWAIN driver manual in the DVD supplied together with<br />
this machine.<br />
Item Description<br />
[Machine Setting] Changes the registration information of this machine.<br />
[Register Sup- Specify support information (such as contact name, corporate URL, or online manport<br />
Information] ual URL) of this machine. To display this information, select [Information] - [Online<br />
Assistance].<br />
[Network TWAIN] Specify the time to release the operation lock when scanning (excluding push-scanning).<br />
If necessary, configure settings to enable saving or reading a document in or from<br />
the external memory.<br />
[<strong>User</strong> Box Setting] Define the <strong>User</strong> Box functions such as deleting an unnecessary <strong>User</strong> Box or specifying<br />
the document deletion time.<br />
If necessary, configure settings to enable saving or reading a document in or from<br />
the external memory.<br />
[Stamp Settings] Register a header or footer.<br />
[Blank Page <strong>Print</strong><br />
Settings]<br />
[Skip Job Operation<br />
Settings]<br />
[Flash Display<br />
Setting]<br />
[System Connection<br />
Setting]<br />
[Outline PDF Setting]<br />
Specify whether to print contents configured in "Stamp/Composition" on blank pages.<br />
Specify whether to skip a job.<br />
Specify whether to allow or restrict the flash display.<br />
Configure the automatic setting of Prefix/Suffix or the setting for printing data in a<br />
cellular phone.<br />
Specify whether to outline text.<br />
<strong>VL</strong>3622c/<strong>VL</strong>2822c/<strong>VL</strong><strong>2222c</strong> 13-21
13<br />
13.5.3 Security<br />
Administrator mode overview<br />
Item Description<br />
[PKI Settings] Register device certificates and configure the SSL, protocol, or external certificate<br />
settings.<br />
[Certificate Verifi- Specify the items to validate a certificate.<br />
cation Settings]<br />
[Address Reference<br />
Setting]<br />
[Restrict <strong>User</strong> Access]<br />
When giving destination access permission, specify a reference allowed group<br />
name or access allowed level.<br />
Specify the function to restrict user operations.<br />
[Copy Security] Specify whether to use the copy guard or password copy function.<br />
[Auto Logout] Specify the time to automatically log out the administrator or user mode.<br />
[Administrator Specify the password to log in to the administrator mode.<br />
Password Setting]<br />
[Administrator Password Setting] is not displayed when:<br />
- The SSL certificate is not installed<br />
- [Enhanced Security Mode] is enabled.<br />
- [Mode using SSL/TLS] is set to [None] in [Security] - [PKI Settings] - [SSL Setting] even though a device<br />
certificate is already registered<br />
13-22 <strong>VL</strong>3622c/<strong>VL</strong>2822c/<strong>VL</strong><strong>2222c</strong><br />
13.5
13.5 Administrator mode overview 13<br />
13.5.4 <strong>User</strong> authentication/Account track<br />
Item Description<br />
[Authentication<br />
Method]<br />
[<strong>User</strong> Authentication<br />
Setting]<br />
[Account Track<br />
Settings]<br />
[External Server<br />
Settings]<br />
[Public <strong>User</strong> Box<br />
Setting]<br />
[<strong>User</strong>/Account<br />
Common Setting]<br />
[Scan to Home<br />
Settings]<br />
[Scan to Authorized<br />
Folder Settings]<br />
Configure the <strong>User</strong> Authentication or Account Track setting in this machine. To enable<br />
authentication, configure the number of assigned counters or the When<br />
Number of Jobs Reach Maximum setting.<br />
When enabling <strong>User</strong> Authentication, register the target user or configure user setting.<br />
When enabling Account Track, register and edit the target account.<br />
When enabling external server authentication, register the external server.<br />
Specify the upper limit of the number of <strong>User</strong> Boxes.<br />
Specify whether to print data in single color or two-color mode.<br />
Configure the setting to send a file to the Home folder.<br />
Configure settings to restrict manual transmission destination.<br />
<strong>VL</strong>3622c/<strong>VL</strong>2822c/<strong>VL</strong><strong>2222c</strong> 13-23
13<br />
13.5.5 Network<br />
Administrator mode overview<br />
Item Description<br />
[TCP/IP Setting] Configure the TCP/IP setting when connecting this machine via network.<br />
[E-mail Setting] Configure the settings to send or receive E-mails (including Internet fax), and specify<br />
the extension function such as E-mail authentication.<br />
[LDAP Setting] Configure the settings to register the LDAP server.<br />
[IPP Setting] Configure the IPP print setting.<br />
[FTP Setting] Configure the settings to use this machine as an FTP client or server.<br />
[SNMP Setting] Configure SNMP settings.<br />
[SMB Setting] Configure the SMB client, WINS, or SMB print setting.<br />
[Web Service Settings]<br />
Configure the settings to perform scanning or printing using Web services.<br />
[Bonjour Setting] Configure Bonjour settings.<br />
[NetWare Setting] Configure NetWare settings.<br />
[AppleTalk Setting]<br />
Configure AppleTalk settings.<br />
[Network Fax Setting]<br />
[WebDAV Settings]<br />
[OpenAPI Settings]<br />
[TCP Socket Setting]<br />
Configure the direct SMTP TX or direct SMTP RX settings.<br />
Configure the WebDAV settings.<br />
Configure the OpenAPI settings.<br />
Configure the TCP Socket settings to have a data communication between this machine<br />
and the application software in your computer.<br />
13-24 <strong>VL</strong>3622c/<strong>VL</strong>2822c/<strong>VL</strong><strong>2222c</strong><br />
13.5
13.5 Administrator mode overview 13<br />
13.5.6 <strong>User</strong> Box<br />
Item Description<br />
[IEEE802.1x AuthenticationSetting]<br />
Configure IEEE802.1X authentication settings.<br />
[LLTD Setting] Select whether to enable or disable LLTD.<br />
[SSDP Settings] Configure the SSDP settings.<br />
[Bluetooth Set- Select whether to enable or disable Bluetooth.<br />
ting]<br />
• To enable a Bluetooth communication, contact your service representative in advance.<br />
Logging in to the administrator mode enables you to handle a <strong>User</strong> Box without entering the password when<br />
opening it.<br />
Item Description<br />
[Open <strong>User</strong> Box] Opens the currently created <strong>User</strong> Box (Public, Group, or Personal <strong>User</strong> Box) to enable<br />
you to change the <strong>User</strong> Box setting.<br />
• Document operations are not available in the administrator mode.<br />
• <strong>User</strong> Box operations are available even if a password is specified for the target<br />
<strong>User</strong> Box.<br />
[Create <strong>User</strong> Box] Enables to create a new <strong>User</strong> Box.<br />
[Open System<br />
<strong>User</strong> Box]<br />
[Create System<br />
<strong>User</strong> Box]<br />
Enables you to open the System <strong>User</strong> Box (Bulletin Board, Relay, or Annotation <strong>User</strong><br />
Box) to enable you to handle a document saved in the <strong>User</strong> Box or change the <strong>User</strong><br />
Box setting.<br />
• The Bulletin Board and Relay <strong>User</strong> Boxes are available when the optional Fax Kit<br />
FK-502 is installed.<br />
Enables you to create a new Bulletin Board, Relay, or Annotation <strong>User</strong> Box.<br />
<strong>VL</strong>3622c/<strong>VL</strong>2822c/<strong>VL</strong><strong>2222c</strong> 13-25
13<br />
13.5.7 <strong>Print</strong>er Setting<br />
Administrator mode overview<br />
Item Description<br />
[Basic Setting] Specify the default values of the printer.<br />
[PCL Setting] Specify the default values in the PCL mode.<br />
[PS Setting] Specify the default values in the PS mode.<br />
[TIFF Setting] Specify the paper to print TIFF images.<br />
[XPS Settings] Configure the XPS print settings.<br />
[Interface Setting] Specify the timeout period of the interface.<br />
[Direct <strong>Print</strong> Settings]<br />
Configure the settings to enable direct printing using Web Connection.<br />
13-26 <strong>VL</strong>3622c/<strong>VL</strong>2822c/<strong>VL</strong><strong>2222c</strong><br />
13.5
13.5 Administrator mode overview 13<br />
13.5.8 Address Registration<br />
Item Description<br />
[Address Book] Enables you to check the address book registered in this machine or to register and<br />
change an address.<br />
[Group] Enables you to check the group address book registered in this machine or to register<br />
and change an address.<br />
[Program] Enables you to check the program address book registered in this machine or to<br />
register and change an address.<br />
[Temporary One-<br />
Touch]<br />
Enables you to check the temporary program address book registered in this machine<br />
or to register and change an address.<br />
[Subject] Registers up to 10 subjects when sending E-mails.<br />
[Text] Registers up to 10 body messages to be used when sending E-mails.<br />
[Application Reg- Registers application settings and server addresses when using the applications<br />
istration]<br />
such as RightFax Server registered in the external server. Registering applications<br />
and servers enables you to automatically connect to the server of the selected application.<br />
• [Application Registration] is not displayed when the optional Fax Kit is installed.<br />
[Prefix/Suffix] Registers Prefix or Suffix to be added as destination information when E-mailing.<br />
<strong>VL</strong>3622c/<strong>VL</strong>2822c/<strong>VL</strong><strong>2222c</strong> 13-27
13<br />
13.5.9 Fax Settings<br />
Administrator mode overview<br />
Item Description<br />
[Header/Footer<br />
Position]<br />
Configure the setting to print the sender or receiving information.<br />
[Line Parameter<br />
Setting]<br />
Specify the fax line such as Dialing Method.<br />
[TX/RX Settings] Configure the paper, <strong>User</strong> Box, and other settings for sending or receiving data.<br />
[Function Setting] Configure the fax settings for Memory RX or Network Fax.<br />
[PBX Connection<br />
Setting]<br />
Specify the outside line at PBX connection.<br />
[Report Settings] Configure the setting for a report, for example, Activity Report, to be output when<br />
sending or receiving data.<br />
[Multi Line Settings]<br />
[Network Fax Setting]<br />
[Header Information]<br />
Specify the parameters and functions of the extended line.<br />
• This item is displayed when a line is extended.<br />
Configure the setting to use network fax.<br />
Registers sender information and fax number when sending data.<br />
13-28 <strong>VL</strong>3622c/<strong>VL</strong>2822c/<strong>VL</strong><strong>2222c</strong><br />
13.5
13.5 Administrator mode overview 13<br />
13.5.10 Setting for each purpose<br />
Configure the settings according to the instructions shown in the window for items requiring multiple settings.<br />
The available setting items are as follows.<br />
- Configure the settings for sending a scanned document<br />
- Configure the network print settings<br />
- Restrict users using this machine<br />
Reference<br />
- As the setting procedure proceeds, its progress flow is displayed on the left.<br />
- If setting is cancelled, you will return to the Setting for each purpose screen after the items that were<br />
configured before cancellation have been applied.<br />
<strong>VL</strong>3622c/<strong>VL</strong>2822c/<strong>VL</strong><strong>2222c</strong> 13-29
13<br />
Administrator mode overview<br />
13-30 <strong>VL</strong>3622c/<strong>VL</strong>2822c/<strong>VL</strong><strong>2222c</strong><br />
13.5
14 Troubleshooting
14.1 Cannot print 14<br />
14 Troubleshooting<br />
14.1 Cannot print<br />
This section describes how to solve issues and problems that you may encounter while using the printer.<br />
If you cannot print even when you have completed the printing procedure, check the following items in order<br />
from beginning to end.<br />
Problem Possible Cause Remedy<br />
A message saying "<strong>Print</strong>er is not<br />
connected" or "<strong>Print</strong> Error" appears<br />
on the computer screen.<br />
A postscript error appears on<br />
the computer screen.<br />
<strong>Print</strong> processing on the computer<br />
finished, but printing does<br />
not start.<br />
The printer driver specified<br />
when printing may not be supported<br />
by the printer controller.<br />
The network or USB cable may<br />
be disconnected.<br />
An error may have occurred on<br />
this machine.<br />
Check the specified printer name.<br />
Check that the cable is correctly<br />
connected.<br />
Check the control panel of this<br />
machine.<br />
Memory may be insufficient. Perform a test printing to check<br />
whether printing is possible.<br />
Memory of the computer may<br />
be insufficient.<br />
There may be an error in the application<br />
software settings.<br />
The file printing settings may be<br />
incorrect.<br />
The printer driver specified<br />
when printing may not be supported<br />
by the printer controller.<br />
The network or USB cable may<br />
be disconnected.<br />
An error may have occurred on<br />
this machine.<br />
Unprocessed jobs may remain<br />
on this machine and be waiting<br />
to be processed.<br />
When executing the print job,<br />
[Save in <strong>User</strong> Box] may have<br />
been specified.<br />
When executing the print job,<br />
[Secure <strong>Print</strong> Only] may have<br />
been specified.<br />
[Secure <strong>Print</strong> Only] may be<br />
specified on the machine.<br />
When the account track is enabled,<br />
you may have entered an<br />
unregistered account track<br />
code or password.<br />
Perform a test printing to check<br />
whether printing is possible.<br />
Refer to the user's manual of the<br />
application software to check the<br />
settings.<br />
Change the settings and try to<br />
print again.<br />
Check the specified printer name.<br />
Check that the cable is correctly<br />
connected.<br />
Check the control panel of this<br />
machine.<br />
Check the processing order for<br />
the job using Job List on the control<br />
panel of this machine.<br />
When [Skip Job Operation Settings]<br />
is enabled in the [Administrator<br />
Settings] of this machine,<br />
only the jobs without a problem<br />
are processed.<br />
Check from the control panel of<br />
the machine whether the intended<br />
print job is held in a <strong>User</strong> Box.<br />
Check from the control panel of<br />
the machine whether the intended<br />
print job is held in the [Secure<br />
<strong>Print</strong> <strong>User</strong> Box].<br />
Use [Secure <strong>Print</strong>] when executing<br />
the print job.<br />
Enter the correct account track<br />
code and password.<br />
<strong>VL</strong>3622c/<strong>VL</strong>2822c/<strong>VL</strong><strong>2222c</strong> 14-3
14<br />
Problem Possible Cause Remedy<br />
<strong>Print</strong>ing order is disturbed - a<br />
job sent later is printed before<br />
the preceding jobs.<br />
When the user authentication is<br />
enabled, you may have entered<br />
an unregistered user name or<br />
password.<br />
Different encryption passphrases<br />
may be specified for the<br />
printer driver and the machine.<br />
Memory of the computer may<br />
be insufficient.<br />
Network connection with the<br />
printer controller is not established<br />
(when connecting via the<br />
network).<br />
This machine may be in the enhanced<br />
security mode.<br />
An error may have occurred on<br />
the printer for a reason such as<br />
running out of paper.<br />
Secure print is not available. The password rules may be enabled<br />
on the machine.<br />
Jobs saved in a <strong>User</strong> Box have<br />
disappeared.<br />
<strong>Print</strong>ing in the user authentication<br />
or account track mode is<br />
not available.<br />
<strong>Print</strong>ing is not available when<br />
you have selected [Public <strong>User</strong>]<br />
in user authentication.<br />
Different encryption passphrases<br />
may be specified for the<br />
printer driver and the machine.<br />
Jobs saved in a <strong>User</strong> Box may<br />
be deleted due to the settings<br />
on the machine.<br />
The user name, account name<br />
or password is incorrect.<br />
<strong>User</strong> authentication or account<br />
track may be disabled on the<br />
printer driver.<br />
Different encryption passphrases<br />
may be specified for the<br />
printer driver and the machine.<br />
The entered user name or account<br />
name may not be authorized.<br />
<strong>Print</strong>ing by public users may be<br />
prohibited on the machine.<br />
Cannot print<br />
Enter the correct user name or<br />
password.<br />
Specify the same encryption<br />
passphrase for the machine and<br />
the printer driver.<br />
Perform a test printing to check<br />
whether printing is possible.<br />
When the above troubleshooting does not eliminate the problem, refer to the [<strong>User</strong>'s Guide Copy <strong>Operations</strong>].<br />
14-4 <strong>VL</strong>3622c/<strong>VL</strong>2822c/<strong>VL</strong><strong>2222c</strong><br />
14.1<br />
Contact your network administrator.<br />
Configure authentication settings<br />
in the enhanced security mode.<br />
For details, contact the printer administrator.<br />
When [Skip Job Operation Settings]<br />
is enabled in the [Administrator<br />
Settings] of the printer, only<br />
the jobs without a problem are<br />
processed and those with any<br />
problem are held in queue.<br />
Specify a password according to<br />
the password rules.<br />
Specify the same encryption<br />
passphrase for the machine and<br />
the printer driver.<br />
Check the <strong>User</strong> Box settings for<br />
the machine. For details, refer to<br />
the [<strong>User</strong>'s Guide Box <strong>Operations</strong>].<br />
Enter the correct user name, account<br />
name and password.<br />
Enable user authentication or account<br />
track on the printer driver.<br />
Specify the same encryption<br />
passphrase for the machine and<br />
the printer driver.<br />
Check with the administrator<br />
whether the user name or account<br />
name concerned is authorized<br />
for printing.<br />
Check with the administrator<br />
whether printing by public users<br />
is permitted.
14.2 Cannot configure the settings/Cannot print according to the settings 14<br />
14.2 Cannot configure the settings/Cannot print according to the settings<br />
Check the following items when you cannot configure settings of the printer driver or cannot print according<br />
to the settings you have configured.<br />
Reference<br />
- Some items for the printer driver may not be configured simultaneously.<br />
14.2.1 The printer driver settings have no effect<br />
Problem Possible Cause Remedy<br />
Cannot select items in the printer<br />
driver.<br />
A "conflict" message saying<br />
"unable to configure" or "function<br />
will be canceled" appears.<br />
Cannot print according to the<br />
settings you have configured.<br />
The watermark cannot be printed.<br />
The staple function cannot be<br />
specified.<br />
Some functions cannot be combined.<br />
You are trying to configure the<br />
functions that cannot be combined.<br />
The settings may not be configured<br />
correctly.<br />
The selected functions can be<br />
combined in the printer driver,<br />
but may not be combined in this<br />
machine.<br />
The paper size or paper orientation<br />
specified in the application<br />
may take precedence over the<br />
settings in the printer driver<br />
when printing.<br />
The watermark settings may not<br />
be configured correctly.<br />
The density of the watermark<br />
may be too light.<br />
Some graphic applications do<br />
not print watermarks.<br />
The staple function cannot be<br />
used if the Paper Type is set to<br />
Thick or Transparency.<br />
The staple function requires the<br />
optional Finisher FS-527 or<br />
Finisher FS-529.<br />
Cannot staple. When printing a large number of<br />
pages, stapling cannot be performed.<br />
The stapling position is not as<br />
expected.<br />
Cannot specify the punch function.<br />
If the document contains pages<br />
of different sizes, stapling cannot<br />
be performed.<br />
The orientation setting is not<br />
correct.<br />
The hole punching cannot be<br />
specified when Booklet, Transparency,<br />
Thick 2, Thick 3, or Envelope<br />
is selected as the paper<br />
type.<br />
The optional Finisher FS-527<br />
and Punch Kit are required.<br />
Grayed out items cannot be configured.<br />
Check carefully the functions you<br />
have specified, and then specify<br />
the functions that can be combined.<br />
Check the setting of each item of<br />
the printer driver.<br />
Configure settings in the application<br />
correctly.<br />
Check the watermark settings.<br />
Check the density setting.<br />
When using such a program, the<br />
watermark cannot be printed.<br />
Check the setting of each item of<br />
the printer driver.<br />
Install the required options and<br />
enable them on the printer driver.<br />
Change the number of pages to<br />
be printed.<br />
Check the document.<br />
Check the stapling position in the<br />
printer driver settings.<br />
Check the setting of each item of<br />
the printer driver.<br />
Install the required options and<br />
enable them on the printer driver.<br />
<strong>VL</strong>3622c/<strong>VL</strong>2822c/<strong>VL</strong><strong>2222c</strong> 14-5
14<br />
14.2.2 Others<br />
Cannot configure the settings/Cannot print according to the settings<br />
Problem Possible Cause Remedy<br />
Cannot punch. <strong>Print</strong>ed pages may be fed out<br />
without being punched if the paper<br />
is loaded into the paper<br />
source with an incorrect orientation.<br />
The punch position is not as expected.<br />
Combination fails; pages are not<br />
combined, but are printed separately.<br />
The overlay is not printed properly.<br />
14.2.3 Error message<br />
The orientation setting is not<br />
correct.<br />
Originals having different orientations<br />
are combined.<br />
Memory of the computer may<br />
be insufficient.<br />
Overlay data was created in<br />
color.<br />
Images are not printed properly. Memory of the computer may<br />
be insufficient.<br />
Paper is not fed from the specified<br />
paper source.<br />
The user authentication or account<br />
track setting field is<br />
grayed out and cannot be specified.<br />
Paper will not be fed from the<br />
specified paper source if that<br />
paper source is loaded with paper<br />
of a different size or orientation.<br />
<strong>User</strong> authentication or account<br />
track may be disabled on the<br />
Windows printer driver.<br />
Problem Possible Cause Remedy<br />
Cannot install the printer driver. It has already been installed in<br />
Windows Vista/Server 2008 as a<br />
printer compatible with the Web<br />
service print function.<br />
Message Cause and remedy<br />
Check the orientation setting.<br />
Check the punching position in<br />
the printer driver settings.<br />
14-6 <strong>VL</strong>3622c/<strong>VL</strong>2822c/<strong>VL</strong><strong>2222c</strong><br />
14.2<br />
Align the orientations of the original.<br />
Simplify the overlay to reduce the<br />
data size.<br />
For color overlay data, the overlay<br />
is printed in color even if Gray<br />
Scale is selected with the PCL<br />
driver.<br />
Simplify the images to reduce the<br />
data size.<br />
Load the paper of the appropriate<br />
size and orientation into the desired<br />
paper source.<br />
In the [Configure] tab, enable user<br />
authentication or account track.<br />
If you try to install a printer driver<br />
in Windows Vista/Server 2008 by<br />
use of the Web service print function,<br />
it is recognized as installed<br />
before the actual installation is<br />
completed. Uninstall the printer in<br />
the [Network] Window, and then<br />
install it again.<br />
Cannot connect to the network A connection to the network was not able to be established. Make<br />
sure that the network cable is correctly connected. In addition, make<br />
sure that [Network Settings] in [Administrator Settings] have been correctly<br />
configured.
15 Appendix
15.1 Product specifications 15<br />
15 Appendix<br />
15.1 Product specifications<br />
Item Specifications<br />
Type Built-in printer controller<br />
Power supply Common with the machine<br />
RAM 2,048 MB<br />
HDD <strong>VL</strong>3622c/<strong>VL</strong>2822c: 250GB<br />
<strong>VL</strong><strong>2222c</strong>: Option<br />
I/F Ethernet (1000Base-T/100Base-TX/10Base-T)<br />
USB 2.0<br />
Frame type Ethernet 802.2<br />
Ethernet 802.3<br />
Ethernet II<br />
Ethernet SNAP<br />
Supported protocols TCP/IP (IPv4/IPv6), BOOTP, ARP, ICMP, DHCP, DHCPv6, AutoIP, SLP,<br />
SNMP, FTP, LPR/LPD, RAW Socket, SMB over, TCP/IP, IPP, HTTP, POP,<br />
SMTP, LDAP, NTP, SSL, IPX/SPX, AppleTalk, Bonjour, NetBEUI, WebDAV,<br />
DPWS, S/MIME, IPsec, DNS, DynamicDNS, LLMNR, LLTD<br />
<strong>Print</strong>er language PCL5/c6 Emulation<br />
PCL XL ver. 2.1 Emulation<br />
PostScript 3 Emulation (3016)<br />
XPS ver.1.0<br />
Operating environment<br />
conditions<br />
Resolution Data<br />
processing<br />
Temperature: 10 to 30 degrees Centigrade<br />
Humidity: 15 to 85%RH<br />
600 e 600 dpi (<strong>Print</strong> and Fax functions)<br />
400 e 400 dpi (Fax function)<br />
200 e 200 dpi (Fax function)<br />
<strong>Print</strong> 600 dpi e 600 dpi<br />
Supported paper sizes Maximum standard size<br />
(For banner printing: Paper width 8-1/4 to 11-11/16 inches (210 to 297 mm)<br />
e paper length 18 to 47-1/4 inches (457.3 to 1200 mm)<br />
Fonts (Built-in fonts) <br />
European 80 fonts<br />
<br />
European 137 fonts<br />
Compatible computer IBM PC or compatible, and Macintosh (PowerPC, Intel Processor: Intel<br />
Processor is for Mac OS X 10.4/10.5 only)<br />
<strong>VL</strong>3622c/<strong>VL</strong>2822c/<strong>VL</strong><strong>2222c</strong> 15-3
15<br />
Product specifications<br />
Item Specifications<br />
<strong>Print</strong>er driver PCL Driver (PCL driver) Windows NT Workstation Version 4.0 (Service<br />
Pack 6 or later)<br />
Windows NT Server Version 4.0 (Service Pack<br />
6 or later)<br />
Windows 2000 Professional (Service Pack 4 or<br />
later)<br />
Windows 2000 Server (Service Pack 3 or later)<br />
Windows XP Home Edition (Service Pack 1 or<br />
later)<br />
Windows XP Professional (Service Pack 1 or<br />
later)<br />
Windows Server 2003, Standard Edition (Service<br />
Pack 1 or later)<br />
Windows Server 2003, Enterprise Edition<br />
(Service Pack 1 or later)<br />
Windows Server 2003 R2, Standard Edition<br />
Windows Server 2003 R2, Enterprise Edition<br />
Windows XP Professional e64 Edition<br />
Windows Server 2003, Standard e64 Edition<br />
Windows Server 2003, Enterprise e64 Edition<br />
Windows Server 2003 R2, Standard e64 Edition<br />
Windows Server 2003 R2, Enterprise e64 Edition<br />
Windows Vista Business *<br />
Windows Vista Enterprise *<br />
Windows Vista Home Basic *<br />
Windows Vista Home Premium *<br />
Windows Vista Ultimate *<br />
Windows Server 2008 Standard *<br />
Windows Server 2008 Enterprise *<br />
*<br />
Supports 32-bit (e86)/64-bit (e64) environment.<br />
PostScript Driver (PS<br />
driver)<br />
15-4 <strong>VL</strong>3622c/<strong>VL</strong>2822c/<strong>VL</strong><strong>2222c</strong><br />
15.1<br />
Windows 2000 Professional (Service Pack 4 or<br />
later)<br />
Windows 2000 Server (Service Pack 3 or later)<br />
Windows XP Home Edition (Service Pack 1 or<br />
later)<br />
Windows XP Professional (Service Pack 1 or<br />
later)<br />
Windows Server 2003, Standard Edition (Service<br />
Pack 1 or later)<br />
Windows Server 2003, Enterprise Edition<br />
(Service Pack 1 or later)<br />
Windows Server 2003 R2, Standard Edition<br />
Windows Server 2003 R2, Enterprise Edition<br />
Windows XP Professional e64 Edition<br />
Windows Server 2003, Standard e64 Edition<br />
Windows Server 2003, Enterprise e64 Edition<br />
Windows Server 2003 R2, Standard e64 Edition<br />
Windows Server 2003 R2, Enterprise x64 Edition<br />
Windows Vista Business *<br />
Windows Vista Enterprise *<br />
Windows Vista Home Basic *<br />
Windows Vista Home Premium *<br />
Windows Vista Ultimate *<br />
Windows Server 2008 Standard *<br />
Windows Server 2008 Enterprise *<br />
*<br />
Supports 32-bit (e86)/64-bit (e64) environment.
15.1 Product specifications 15<br />
Item Specifications<br />
XPS Driver (XPS driver) Windows Vista Business *<br />
Windows Vista Enterprise *<br />
Windows Vista Home Basic *<br />
Windows Vista Home Premium *<br />
Windows Vista Ultimate *<br />
Windows Server 2008 Standard *<br />
Windows Server 2008 Enterprise *<br />
* Supports 32-bit (e86)/64-bit (e64) environment.<br />
PostScript PPD driver<br />
(PS-PPD)<br />
Mac OS 9.2 or later<br />
Mac OS X 10.2.8/10.3/10.4/10.5<br />
Fax driver Windows NT Workstation Version 4.0 (Service<br />
Pack 6 or later)<br />
Windows NT Server Version 4.0 (Service Pack<br />
6 or later)<br />
Windows 2000 Professional (Service Pack 4 or<br />
later)<br />
Windows 2000 Server (Service Pack 3 or later)<br />
Windows XP Home Edition (Service Pack 1 or<br />
later)<br />
Windows XP Professional (Service Pack 1 or<br />
later)<br />
Windows Server 2003, Standard Edition (Service<br />
Pack 1 or later)<br />
Windows Server 2003, Enterprise Edition<br />
(Service Pack 1 or later)<br />
Windows Server 2003 R2, Standard Edition<br />
Windows Server 2003 R2, Enterprise Edition<br />
Windows XP Professional e64 Edition<br />
Windows Server 2003, Standard e64 Edition<br />
Windows Server 2003, Enterprise e64 Edition<br />
Windows Server 2003 R2, Standard e64 Edition<br />
Windows Server 2003 R2, Enterprise e64 Edition<br />
Windows Vista Business *<br />
Windows Vista Enterprise *<br />
Windows Vista Home Basic *<br />
Windows Vista Home Premium *<br />
Windows Vista Ultimate *<br />
Windows Server 2008 Standard *<br />
Windows Server 2008 Enterprise *<br />
* Supports 32-bit (e86)/64-bit (e64) environment.<br />
Utility Web Connection<br />
Compatible Web browsers:<br />
<br />
• Microsoft Internet Explorer Ver. 6/7 (JavaScript and Cookies enabled)<br />
• Netscape Navigator 7.02 or later (JavaScript and Cookies enabled)<br />
Mozilla Firefox 1.0 or later (JavaScript and Cookies enabled)<br />
<br />
• Netscape Navigator 7.02 or later (JavaScript and Cookies enabled)<br />
• Mozilla Firefox 1.0 or later (JavaScript and Cookies enabled)<br />
<br />
• Netscape Navigator 7.02 or later (JavaScript and Cookies enabled)<br />
• Mozilla Firefox 1.0 or later (JavaScript and Cookies enabled)<br />
Adobe ® Flash ® Player :<br />
• Plug-in Ver.7.0 or later required to select Flash as the display format.<br />
• Plug-in Ver.9.0 or later required to use the Data Management Utility<br />
(font/macro data management).<br />
<strong>VL</strong>3622c/<strong>VL</strong>2822c/<strong>VL</strong><strong>2222c</strong> 15-5
15<br />
Item Specifications<br />
MetaFrame operating environment<br />
Product specifications<br />
The operation of this driver has been confirmed only in the following environments.<br />
Server OS: Windows 2000 Advanced server/Windows 2003 Enterprise<br />
Server<br />
MetaFrame: Citrix ® MetaFrame ® Presentation Server 3.0<br />
Citrix ® MetaFrame ® Presentation Server 4.0<br />
Client OS: Windows 2000/Windows XP<br />
ICAClient: ICA32bit<br />
* For operating in an environment other than those described above, consult<br />
the dealer.<br />
15-6 <strong>VL</strong>3622c/<strong>VL</strong>2822c/<strong>VL</strong><strong>2222c</strong><br />
15.1
15.2 <strong>Print</strong>ing reports 15<br />
15.2 <strong>Print</strong>ing reports<br />
15.2.1 Configuration page<br />
<strong>VL</strong>3622c/<strong>VL</strong>2822c/<strong>VL</strong><strong>2222c</strong> 15-7
15<br />
15.2.2 PCL font list<br />
<strong>Print</strong>ing reports<br />
15-8 <strong>VL</strong>3622c/<strong>VL</strong>2822c/<strong>VL</strong><strong>2222c</strong><br />
15.2
15.2 <strong>Print</strong>ing reports 15<br />
15.2.3 PS font list<br />
<strong>VL</strong>3622c/<strong>VL</strong>2822c/<strong>VL</strong><strong>2222c</strong> 15-9
15<br />
15.2.4 GDI demo page<br />
<strong>Print</strong>ing reports<br />
15-10 <strong>VL</strong>3622c/<strong>VL</strong>2822c/<strong>VL</strong><strong>2222c</strong><br />
15.2
15.3 PPD driver (For Linux and applications) 15<br />
15.3 PPD driver (For Linux and applications)<br />
15.3.1 PPD driver types<br />
The PPD driver contains the PPD information for Mac OS 9, Linux, and applications.<br />
- Driver for Linux: Install for use with Linux (Contains PPD for Linux and PPD for OpenOffice)<br />
- Driver for applications: Install when using applications such as Adobe PageMaker that require the PPD<br />
driver.<br />
15.3.2 PPD driver for Linux<br />
Operating environment<br />
The PPD driver operates in the environment where systems are combined as follows.<br />
- OS:Red Hat Enterprise Linux 4 -CupsVersion:1.1<br />
- OS:SuSE Linux 10.1 -CupsVersion:1.2<br />
- OpenOffice v1.1.5<br />
Registering the PPD driver for Linux<br />
1 Copy the PPD file to the CUPS model directory. (/usr/share/cups/model for major Linux)<br />
2 In [Add <strong>Print</strong>er] of the CUPS printing system, specify PPD to add this machine.<br />
% For details on CUPS, refer to [Help] in the CUPS Web management page.<br />
Configuring the PPD driver for Linux<br />
In [Configure <strong>Print</strong>er] of the CUPS printing system, configure the functions.<br />
Registering the PPD driver for OpenOffice<br />
1 In [Add <strong>Print</strong>er] of the CUPS printing system, specify PPD to add this machine.<br />
2 Open the OpenOffice<strong>Print</strong>erAdministrator tool.<br />
3 Click [New <strong>Print</strong>er].<br />
4 In the [Choose a device type] window, select [add a printer], and then click [Next].<br />
5 In the [Choose a driver] window, click [import].<br />
6 Select [36C-1 OpenOffice PPD], and then click [OK].<br />
7 From the [Please Select a Suitable driver.] list, select [36C-1 OpenOffice PPD], and then click [Next].<br />
8 In the [Choose a command line] window, select the printer registered to CUPS, and then click [Next].<br />
9 Click [Finish].<br />
<strong>VL</strong>3622c/<strong>VL</strong>2822c/<strong>VL</strong><strong>2222c</strong> 15-11
15<br />
<strong>Print</strong>ing with OpenOffice<br />
1 In OpenOffice, select File-<strong>Print</strong>.<br />
2 Select [36C-1 OpenOffice PPD] in [<strong>Print</strong>er name].<br />
3 Click [Properties].<br />
PPD driver (For Linux and applications)<br />
4 Select the desired setting in [Page size], and then click [OK].<br />
To configure settings other than Page Size, click [Configure <strong>Print</strong>er] in CUPS.<br />
5 Click [OK] in the OpenOffice print window to print.<br />
15.3.3 PPD driver for applications<br />
PPD registration destination (Example: Adobe PageMaker)<br />
- For PageMaker 6.0:<br />
Copy the PPD file to RSRCPPD4 under the folder to which PageMaker is installed.<br />
- For PageMaker 6.5 and 7.0:<br />
Copy the PPD file to RSRCPPD4 under the folder to which PageMaker is installed.<br />
How to print<br />
1 Select [File] - [<strong>Print</strong>].<br />
2 From the [PPD] box in the print window, select this machine.<br />
3 Configure the [Paper] and [Features] settings for the printer.<br />
4 Click the [<strong>Print</strong>] button to print.<br />
15-12 <strong>VL</strong>3622c/<strong>VL</strong>2822c/<strong>VL</strong><strong>2222c</strong><br />
15.3
15.4 Glossary 15<br />
15.4 Glossary<br />
Term Description<br />
10Base-T/<br />
100Base-TX/<br />
1000Base-T<br />
A set of specifications under the Ethernet standards. Those cables that consist of<br />
twisted copper wire pairs are used. The transmission rates of 10Base-T,<br />
100Base-TX and 1000Base-T are respectively 10Mbps, 100Mpbs and<br />
1000Mbps.<br />
Adobe ® Flash ® Software or its file format developed by Adobe Systems Inc. (formerly by Macromedia,<br />
Inc.), used to create a content by compiling vector-graphic animations<br />
and sounds.<br />
The software allows handling interactive contents using keyboard or mouse. The<br />
files can be kept relatively compact and accessed from a Web browser with dedicated<br />
plug-in software.<br />
AppleTalk The generic name for the protocol suite developed by Apple Computer for computer<br />
networking.<br />
bit The abbreviation for binary digit. The smallest unit of information (data quantity)<br />
handled by a computer or printer. A bit uses only a 0 or a 1 to indicate data.<br />
BMP The abbreviation for bitmap. This is a file format for saving image data. (The file<br />
extension is ".bmp".)<br />
Commonly used on Windows platforms. BMP covers the color depth from monochrome<br />
(2 values) to full color (16,777,216 colors). BMP images are not suitable<br />
for compressed storage.<br />
Bonjour A Macintosh network technology, automatically detecting a device connected to<br />
the network for automatic configuration. Previously called "Rendezvous", and<br />
has been changed to "Bonjour" since Mac OS X v10.4.<br />
BOOTP The abbreviation for Bootstrap Protocol. The protocol is used for a client computer<br />
on the TCP/IP network to load network configuration automatically from a<br />
server. Instead of BOOTP, DHCP, an advanced protocol based on BOOTP, is<br />
typically used today.<br />
Byte A byte indicates a unit of information (data quantity) handled by a computer or<br />
printer. A byte consists of eight bits.<br />
CMYK The acronym for Cyan, Magenta, Yellow, and Black. The colors in the toner or ink<br />
used for color printing. Changing the mixing ratio of the four CMYK colors allows<br />
creating any type of full colors.<br />
Default Gateway A device, such as a computer or router, used as a "gateway" to access computers<br />
on different LANs.<br />
DHCP The acronym for Dynamic Host Configuration Protocol. The protocol is used for<br />
a client computer on the TCP/IP network to load network configuration automatically<br />
from a server. Just using a DHCP server to centrally manage IP addresses<br />
of the DHCP clients enables you to construct a network without IP address conflicts<br />
or other troubles.<br />
DNS The acronym for Domain Name System. DNS allows for obtaining the IP address<br />
corresponding to a host name in network environments. This system enables a<br />
user to access other computers on the network by specifying host names instead<br />
of elusive and non-intuitive IP addresses.<br />
DPI (dpi) The acronym for Dots Per Inch. A unit of resolution used for printers and scanners.<br />
This indicates the number of dots used to represent an inch. The higher this<br />
value, the higher the resolution.<br />
FTP The acronym for File Transfer Protocol. This is a protocol used for transferring<br />
files via the Internet, an intranet or other TCP/IP network.<br />
HTTP The acronym for HyperText Transfer Protocol. This is a protocol used to send or<br />
receive data between a Web server and a client (such as a Web browser). HTTP<br />
can exchange files such as images, sounds, and movies that are associated with<br />
documents, including their presentation formats and other information.<br />
IPP The acronym for Internet <strong>Print</strong>ing Protocol. This is a protocol used to send or receive<br />
print data or control printers via the Internet or other TCP/IP network. IPP<br />
can also send and print data to printers in remote areas via the Internet.<br />
IPX One of the protocols used for NetWare. IPX runs in the network layer of the OSI<br />
reference model.<br />
<strong>VL</strong>3622c/<strong>VL</strong>2822c/<strong>VL</strong><strong>2222c</strong> 15-13
15<br />
Term Description<br />
Glossary<br />
IPX/SPX The abbreviation for Internetwork Packet Exchange/Sequenced Packet Exchange.<br />
This is a protocol developed by Novell, Inc., typically used in NetWare<br />
environments.<br />
IP Address An address or a code used to identify an individual network device on the Internet.<br />
IPv4 (Internet Protocol version 4), a protocol widely used today, adopts a 32bit<br />
number for an IP address separated into four sections. An example of an IPv4<br />
IP address is: 192.168.1.10. On the other hand, IPv6 (Internet Protocol version 6),<br />
the next generation protocol, adopts 128-bit IP addresses. An IP address is assigned<br />
to every computer or other device connected to the Internet.<br />
LAN The acronym for Local Area Network. This is a network constructed by connecting<br />
computers on the same floor, in the same building, or in neighboring buildings.<br />
LPD The acronym for Line <strong>Print</strong>er Daemon. This is a platform-independent printer protocol<br />
running on the TCP/IP network. The protocol was originally developed for<br />
BSD UNIX, and has become one of the printing protocols typically used among<br />
general computers.<br />
LPR/LPD The acronym for Line <strong>Print</strong>er Request/Line <strong>Print</strong>er Daemon. This is a printing<br />
method implemented via networks, used for Windows NT or UNIX based systems.<br />
It uses TCP/IP to output printing data from Windows or UNIX to a printer<br />
on the network.<br />
MAC address MAC is the acronym for Media Access Control. A MAC address is an ID number<br />
unique to each Ethernet card, enabling sending or receiving data to or from other<br />
Ethernet cards. A Mac address is a 48-bit number. The first 24 bits are controlled<br />
by IEEE and used to allocate a unique number to each manufacture, whereas the<br />
latter 24 bits are used by each manufacturer to assign a unique number to each<br />
card.<br />
NDPS The acronym for Novell Distributed <strong>Print</strong> Services. This provides a high performance<br />
printing solution in NDS environments. Using NDPS for the print server simplifies<br />
and automates complicated management activities related to printer use.<br />
For example, you can print to a desired printer or automatically download the<br />
printer driver for a newly installed printer. NDPS print servers also integrate management<br />
related to the network printers.<br />
NDS The acronym for Novell Directory Services. This allows the centralized management<br />
in a hierarchical structure of shared resources such as servers, printers and<br />
users information on the network, as well as the access privilege and other information<br />
related to the users.<br />
NetBIOS The abbreviation for Network Basic Input Output System. This is a communication<br />
interface developed by IBM.<br />
NetBEUI The abbreviation for NetBIOS Extended <strong>User</strong> Interface. This is a network protocol<br />
developed by IBM. NetBEUI enables you to construct a small-scale network simply<br />
by configuring computer names.<br />
NetWare A network operating system developed by Novell. This uses NetWare IPX/SPX for<br />
the communication protocol.<br />
Nprinter/<br />
A remote printer support module used when using a printer server in NetWare en-<br />
Rprinter<br />
vironments. Rprinter is used for NetWare 3.x, and Nprinter for NetWare 4.x.<br />
OHP/OHT A transparent sheet used for OHP (Overhead projector). This is used for presentations.<br />
OS The acronym for Operating System. This is base software used to control the system<br />
of a computer. Windows, MacOS, or UNIX is an OS.<br />
PDF The acronym for Portable Document Format. This is an electronically formatted<br />
document with file extension of ".pdf". PDF is a PostScript based format, and can<br />
be viewed using Adobe Acrobat Reader, a free viewer software.<br />
PDL The acronym for Page Description Language. This is a language used to instruct<br />
a page printer about images being printed on each page.<br />
PostScript A typical page-descriptive language developed by Adobe and commonly used<br />
for high quality printing.<br />
PPD The acronym for PostScript <strong>Print</strong>er Description. This is a file with the description<br />
of resolution, available paper sizes, and other information specific to a PostScript<br />
printer model.<br />
15-14 <strong>VL</strong>3622c/<strong>VL</strong>2822c/<strong>VL</strong><strong>2222c</strong><br />
15.4
15.4 Glossary 15<br />
Term Description<br />
Proxy server A server that is installed to act as an intermediary connection between each client<br />
and different servers to effectively ensure security over the entire system for Internet<br />
connections.<br />
PServer A print server module available in NetWare environments. This module monitors,<br />
changes, pauses, restarts, or cancels print jobs.<br />
RIP The acronym for Raster Image Processor. RIP extracts picture images from text<br />
data created using PostScript or other page description language. This processor<br />
is usually integrated into a printer.<br />
RGB The acronym for Red, Green, and Blue. The RGB are the primary three colors<br />
used for monitor and other devices, producing any of the full colors by changing<br />
their brightness ratio.<br />
Samba UNIX server software which uses SMB (Server Message Block) to make UNIX<br />
system resources available to Windows environments.<br />
SLP The acronym for Service Location Protocol. This is a protocol that provides capabilities<br />
such as finding services or automatic client configuration on the TCP/IP<br />
network.<br />
SMB The acronym for Server Message Block. This is a protocol for sharing files and<br />
printers mainly over the Windows network.<br />
SMTP The acronym for Simple Mail Transfer Protocol. It is a protocol used to transmit<br />
or transfer E-mail messages.<br />
SNMP The acronym for Simple Network Management Protocol. This is a management<br />
protocol in the TCP/IP network environments.<br />
TCP/IP The acronym for Transmission Control Protocol/Internet Protocol. It is a de facto<br />
standard protocol widely used for the Internet. An IP address is used to identify<br />
each network device.<br />
TrueType A type of outline font developed by Apple and Microsoft, and currently used as a<br />
standard font type for Macintosh and Windows. This type of font can be used<br />
both for display and printing.<br />
USB The acronym for Universal Serial Bus. This is a general-purpose interface defined<br />
for connecting a mouse, printer, and other devices with a computer.<br />
WINS The acronym for Windows Internet Naming Service. This is a service, available in<br />
Windows environments, to call the name server responsible for conversion between<br />
a computer name and an IP address.<br />
XPS The abbreviation for XML Paper Specification. This is one of the electronic document<br />
formats developed by Microsoft Corporation. It is first supported in Windows<br />
Vista.<br />
Outline font A type of fonts represented using lines and curves to display an outline of a character.<br />
Larger-size characters can be displayed on a screen or printed with no jagged<br />
edges.<br />
Uninstallation To delete software installed on a computer<br />
Ethernet A standard for LAN transmission lines.<br />
<strong>Print</strong> job A print request transmitted from a computer to a printing device.<br />
Install To install hardware, operating systems, applications, printer drivers, or other software<br />
on to a computer.<br />
Web browser Software used to view Web pages.<br />
Typical Web browsers include Internet Explorer and Netscape Navigator.<br />
Resolution The resolution value indicates how much detail of an object can be reproduced<br />
precisely on an image or a print matter.<br />
Color matching A technology for minimizing the difference in colors among different devices such<br />
as scanners, displays and printers.<br />
Brightness Brightness of a display or other screen.<br />
Queue name • A name assigned to each device for allowing printing to the device via network.<br />
• A logical printer name required for LPD/LPR printing.<br />
<strong>VL</strong>3622c/<strong>VL</strong>2822c/<strong>VL</strong><strong>2222c</strong> 15-15
15<br />
Term Description<br />
Glossary<br />
Shared printer A printer connected to a server on the network and configured to be used by multiple<br />
computers.<br />
Client A computer using services provided by servers via the network.<br />
Gray scale A form of presenting monochrome image by using the gradation information shifting<br />
from black to white.<br />
Gateway Hardware and software used as the point where a network is connected to a network.<br />
A gateway not only connects networks but also changes data formats, addresses,<br />
and protocols according to the connected networks.<br />
Subnet mask A value used to divide a TCP/IP network into small networks (subnetworks). This<br />
is used to identify how many higher-order bits of an IP address are used for the<br />
network address.<br />
Screen font A type of fonts used for displaying characters and symbols on a CRT or other<br />
monitor.<br />
Spool The acronym for Simultaneous Peripheral Operation On-Line. Data to be output<br />
to a printer is not sent directly to the printer, but is temporarily stored in another<br />
location. The stored data is then sent collectively to the printer.<br />
Touch & <strong>Print</strong> A feature that allows documents sent from the printer driver to be printed simply<br />
by placing your finger or IC card on the authentication unit connected to the printer<br />
when the user authentication is enabled. In order to use the Touch & <strong>Print</strong> feature,<br />
an authentication unit must be connected to this machine, and the vein<br />
patterns or the ID of the IC card for each user must be registered.<br />
Driver Software that works as a bridge between a computer and a peripheral device.<br />
Hard disk A large capacity storage device for storing data.<br />
The data is retained even after the power is turned off.<br />
Peer-to-peer A type of network where the connected devices can be communicate with each<br />
other without using a dedicated server.<br />
Plug and play A mechanism used to immediately detect a peripheral device when it is plugged<br />
into a computer, and search for an appropriate driver automatically, so that the<br />
device becomes operable.<br />
<strong>Print</strong>er driver Software that works as a bridge between a computer and a printer.<br />
<strong>Print</strong>er buffer A memory area temporarily used for processing data of print jobs.<br />
<strong>Print</strong> queue A software system used by a spooler to save generated print jobs.<br />
Frame type A type of communication format used in NetWare environments. For mutual communication,<br />
the same frame type is required.<br />
Preview A function allowing you to view a result image before being actually processed<br />
for printing or scanning.<br />
Protocol A rule enabling a computer to communicate with other computers or peripherals.<br />
Property Attribute information. When using a printer driver, different functions can be configured<br />
by utilizing its properties. By using properties of a file, you can check the<br />
attribute information about the file.<br />
Profile A color attribute file. This contains overall input and output correlation data of primary<br />
colors, specifically used by the color input and output devices to reproduce<br />
colors.<br />
Host name The name used to identify a device on a network.<br />
Memory A storage device used for storing data temporarily. Some types of memory retain<br />
data even after the power is turned off, while others not.<br />
Local printer A printer connected to a parallel or USB port of a computer.<br />
15-16 <strong>VL</strong>3622c/<strong>VL</strong>2822c/<strong>VL</strong><strong>2222c</strong><br />
15.4
16 Index
16.1 Index by item 16<br />
16 Index<br />
16.1 Index by item<br />
Numerics<br />
2-sided printing 12-16<br />
A<br />
Accessing 13-3<br />
Account track 11-20, 13-6<br />
Adding a printer 4-3, 4-11, 4-17, 4-22<br />
Address registration 13-18, 13-27<br />
Administrator mode 13-11, 13-20<br />
Administrator settings 9-13, 12-40<br />
AppleTalk 3-8, 3-9, 5-5, 5-10, 5-13<br />
Authentication 12-56<br />
Authentication and printing 11-23<br />
Authentication unit 11-29<br />
Auto size switching between A4/A3 and LTR/LGR<br />
12-9<br />
Auto trapping 8-24, 9-24, 10-8, 12-29<br />
B<br />
Back cover 8-15, 9-17, 10-8<br />
Banner printing 11-42<br />
Banner sheet paper tray 12-20<br />
Banner sheet setting 12-10<br />
Basic tab 8-11<br />
Binding direction adjustment 12-11<br />
Binding margin 8-13<br />
Binding position 8-13, 9-15, 10-8, 12-17<br />
Black over print 8-24, 9-24, 10-8, 12-30<br />
Bonjour 3-8, 5-4<br />
C<br />
Cannot configure the settings 14-5<br />
Cannot print 14-3<br />
Capturing print data 12-58<br />
Cellular phone or PDA 11-30<br />
Cellular phone or PDA settings 12-57<br />
Center stapling and folding 8-14, 9-15<br />
Checking jobs 13-16<br />
Collated 9-11, 10-7<br />
Collating 8-12, 9-11<br />
Color settings 8-24, 9-24, 10-8<br />
Combination 8-13, 10-8<br />
Configure tab 8-5<br />
Connection diagram 2-8<br />
Connection methods 3-6<br />
Control panel 2-5<br />
Copy security 8-17, 8-20, 9-20<br />
Cover mode tab 8-15<br />
Cover mode/transparency interleave 9-17<br />
CR/LF mapping 12-25<br />
Custom page sizes 10-6<br />
Custom size 8-11, 9-9<br />
Customizing 13-19<br />
<strong>VL</strong>3622c/<strong>VL</strong>2822c/<strong>VL</strong><strong>2222c</strong> 16-3<br />
D<br />
Date 8-17, 9-20<br />
Date/time 8-22, 9-22<br />
Default settings 8-5, 9-5, 10-4<br />
Deleting secure print documents 12-44<br />
Device option 8-5<br />
Direct printing 13-17<br />
Driver password encryption setting 12-60<br />
E<br />
Edge enhancement 8-24, 9-24<br />
Encryption passphrase 8-6, 9-14, 11-33<br />
Error message 14-6<br />
Ethernet 2-8<br />
F<br />
Fax driver 3-5<br />
Fax settings 13-28<br />
Finish tab 8-14<br />
Finishing options 10-8<br />
Flow of printing 2-4<br />
Folding 8-14, 9-15, 10-8<br />
Font settings 12-21<br />
Font size 12-23<br />
Front cover 8-15, 9-17, 10-8<br />
G<br />
GDI demo page 15-10<br />
General settings 10-7<br />
Glossary 15-13<br />
Glossy mode 8-24, 9-23, 10-8<br />
Gray background text correction 12-13<br />
H<br />
Header/footer 8-17, 9-20, 9-23<br />
I<br />
ICC profile 11-37<br />
ICC profile settings 12-27<br />
ID & print deletion time 12-46<br />
ID & print operation settings 12-50<br />
ID & print settings 12-49<br />
ID & print settings for deletion after printing 12-47<br />
Image compression 8-24<br />
Image shift 8-14, 9-15<br />
Installing 5-3<br />
Interfaces 2-8
16<br />
Interleaving OHP transparencies 8-16, 9-18, 10-8<br />
IPP 3-6, 4-6, 4-14, 4-20, 5-7, 5-12<br />
IPPS 3-6, 4-6, 4-14, 4-20<br />
L<br />
Layout 10-7<br />
Layout tab 8-13<br />
Layout/finishing 9-14<br />
Line width adjustment 12-12<br />
Line/page 12-24<br />
Linux 15-11<br />
Local connection 2-10, 4-10, 4-16, 4-21<br />
Logging in 13-5, 13-8<br />
Logging out 13-5, 13-7<br />
LPD 5-6, 5-11, 5-14<br />
LPR 3-6, 4-3, 4-11, 4-17, 4-22, 5-6, 5-11, 5-14<br />
M<br />
Mac 3-8<br />
Mac OS 9.2 3-9<br />
Macintosh 2-7, 5-3, 7-5<br />
Maintenance 13-20<br />
Mode 1 11-9<br />
Mode 2 11-11<br />
My tab 8-9<br />
N<br />
NetWare 3-9, 6-3<br />
Network 13-24<br />
Network connection 2-9<br />
Network window 4-8<br />
Number of copies 8-12, 9-11, 10-7, 12-6<br />
Number of copies and pages 9-11<br />
O<br />
Offsetting 8-12, 9-11, 10-8<br />
OpenAPI settings 12-56<br />
Operating environment 2-7, 13-3<br />
Operating system 2-7<br />
Option 9-5, 10-4<br />
Orientation 9-10, 10-6<br />
Original direction 12-7<br />
Original orientation 8-11<br />
Original size 8-11<br />
OS 2-7<br />
OS 10.2 3-8, 5-3<br />
OS 10.3 3-8, 5-3<br />
OS 10.4 3-8, 5-3<br />
OS 10.5 3-8, 5-3<br />
OS 9 2-7<br />
OS 9.2 5-13, 7-5, 10-3<br />
OS X 2-7, 5-3, 7-5, 9-3<br />
Other tab 8-25<br />
Output method 8-12, 9-11, 9-12, 10-8<br />
Output tray 8-15, 9-16, 10-8<br />
Output tray settings 12-43<br />
Overlap width line 9-15<br />
Overlay 8-17, 8-19<br />
Index by item<br />
16-4 <strong>VL</strong>3622c/<strong>VL</strong>2822c/<strong>VL</strong><strong>2222c</strong><br />
P<br />
Page attributes 9-10, 10-6<br />
Page number 8-17, 8-22, 9-20, 9-22<br />
Pages 9-11, 10-7<br />
Paper 10-6<br />
Paper arrangement 8-15, 9-15<br />
Paper size 8-11, 9-10, 12-15<br />
Paper source 10-7<br />
Paper tray 8-11, 9-16, 12-14<br />
Paper tray/output tray 9-16<br />
Paper type 8-11, 9-16<br />
Paper view 9-8<br />
Parameter details 8-9, 9-10, 10-6<br />
Pattern 8-24<br />
PCL driver 3-4, 8-3<br />
PCL font list 15-8<br />
PDL setting 12-5<br />
Per page setting 8-15, 9-18<br />
Plug and play 4-10, 4-16, 4-21<br />
Port 9100 3-6, 4-3, 4-11, 4-17<br />
Poster mode 9-15<br />
PostScript 3-4<br />
PPD driver 3-4, 15-11<br />
<strong>Print</strong> 8-3<br />
<strong>Print</strong> type 8-13, 9-15, 10-8<br />
<strong>Print</strong>/fax output setting 12-42<br />
<strong>Print</strong>er controller 2-3<br />
<strong>Print</strong>er driver 14-5<br />
<strong>Print</strong>er drivers 3-4<br />
<strong>Print</strong>er setting 13-26<br />
<strong>Print</strong>er specific options 10-8<br />
<strong>Print</strong>ing 2-7, 9-3, 10-3, 11-43<br />
<strong>Print</strong>ing PS errors 12-26<br />
<strong>Print</strong>ing reports 12-32, 15-7<br />
<strong>Print</strong>ing without authentication 12-51<br />
<strong>Print</strong>ing XPS errors 12-54<br />
Product specifications 15-3<br />
Proof print 11-3<br />
Properties 8-5<br />
PS driver 3-4, 8-3<br />
PS font list 15-9<br />
Public user 13-9<br />
Punching 8-14, 9-15, 10-8, 12-19<br />
Q<br />
Quality 9-23<br />
Quality tab 8-22<br />
16.1
16.1 Index by item 16<br />
R<br />
Recalling jobs 11-4, 11-8, 11-15, 11-26<br />
Registered user 13-10<br />
Rendezvous 5-9<br />
Rotating 180 degrees 8-13, 9-15<br />
S<br />
Saving in user boxes 11-13<br />
Scale 9-10, 10-6<br />
Secure documents auto deletion time setting 12-45<br />
Secure print only 12-59<br />
Secure printing 11-6<br />
Security 13-22<br />
Selecting a printer 5-4, 5-13<br />
Selecting colors 8-23, 9-23, 10-8<br />
Separating chapters 8-13, 9-15<br />
Setting for each purpose 13-29<br />
Settings 12-3<br />
Setup 2-9<br />
Single color and 2 color output management 12-52<br />
Skip job operation settings 12-48<br />
Skipping blank pages 8-13<br />
SMB 3-6, 4-3, 4-13, 4-19<br />
Spool settings 12-8<br />
Stamp/composition 9-19<br />
Stamp/composition tab 8-16<br />
Stapling 8-14, 9-15, 10-8, 12-18<br />
Structure of pages 13-13<br />
Symbol set 12-22<br />
System settings 13-21<br />
T<br />
TIFF image paper setting 12-33<br />
Time 8-17, 9-20<br />
Timeout 12-53<br />
Toner Save 8-24, 9-23<br />
Troubleshooting 14-3<br />
U<br />
Uninstalling 7-3<br />
USB 2-8, 3-6<br />
<strong>User</strong> authentication 11-17, 13-6<br />
<strong>User</strong> authentication/account track 13-23<br />
<strong>User</strong> box 13-16, 13-25<br />
<strong>User</strong> box administrator 13-12<br />
<strong>User</strong> mode 13-15<br />
<strong>User</strong> settings 12-3<br />
V<br />
Verifying XPS digital signatures 12-31<br />
Viewing information 13-15<br />
<strong>VL</strong>3622c/<strong>VL</strong>2822c/<strong>VL</strong><strong>2222c</strong> 16-5<br />
W<br />
Watermark 8-16, 8-18<br />
Web browser 13-4<br />
Web Connection 13-3<br />
Web Connection direct printing 12-55<br />
Web service 3-6, 4-8<br />
Windows 2-7, 7-3<br />
Windows 2000 3-7, 4-17<br />
Windows NT 4.0 3-8, 4-22<br />
Windows Server 2003 3-7, 4-11<br />
Windows Server 2008 3-6, 4-3<br />
Windows Vista 3-6, 4-3<br />
Windows XP 3-7, 4-11<br />
X<br />
XPS driver 3-4, 8-3<br />
Z<br />
Zoom 8-11
16<br />
16.2 Index by button<br />
Numerics<br />
2-Sided <strong>Print</strong> 12-16<br />
A<br />
A4/A3LTR/LGR Auto Switch 12-9<br />
Account Track 9-12<br />
Acquire Device Information 8-5, 8-17, 8-19, 8-21<br />
Add a printer 4-4<br />
Administrator Settings 12-40<br />
Auth. Unit 11-26<br />
Authentication 12-56<br />
Authentication/Account Track 8-12, 11-20<br />
Auto Delete Secure Document 12-45<br />
Auto Trapping 12-29<br />
B<br />
Banner Paper Tray 12-20<br />
Banner <strong>Print</strong>ing 11-43<br />
Banner Sheet Setting 12-10<br />
Basic Settings 12-5<br />
Binding Direction Adjustment 12-11<br />
Binding Margin Settings 8-14<br />
Binding Position 12-17<br />
Black Overprint 12-30<br />
C<br />
Cellular Phone/PDA Settings 12-57<br />
Combination Details 8-13<br />
Configuration Page 12-32<br />
CR/LF Mapping 12-25<br />
D<br />
Delete Secure <strong>Print</strong> Documents 12-44<br />
Demo Page 12-32<br />
Detail Settings 9-12<br />
Driver Password Encryption Setting 11-33, 12-60<br />
E<br />
Edit My Tab 8-10<br />
Editing watermark 8-18<br />
F<br />
Font Settings 12-21<br />
Font Size 12-23<br />
G<br />
Gray Background Text Correction 12-13<br />
I<br />
ICC Profile Settings 12-27<br />
ID & <strong>Print</strong> Delete after <strong>Print</strong> Setting 12-47<br />
ID & <strong>Print</strong> Delete Time 12-46<br />
ID & <strong>Print</strong> Operation Settings 12-50<br />
ID & <strong>Print</strong> Settings 12-49<br />
ID & <strong>Print</strong> <strong>User</strong> Box 11-27<br />
Image Shift Settings 8-14<br />
Index by button<br />
16-6 <strong>VL</strong>3622c/<strong>VL</strong>2822c/<strong>VL</strong><strong>2222c</strong><br />
L<br />
Line Width Adjustment 12-12<br />
Line/Page 12-24<br />
Login 11-26, 13-9<br />
Logout 13-7<br />
M<br />
Mobile/PDA 11-31<br />
N<br />
Network Timeout 12-53<br />
Number of Copies 12-6<br />
O<br />
OpenAPI Settings 12-56<br />
Original Direction 12-7<br />
Output Tray Settings 12-43<br />
P<br />
Paper Setting 12-14<br />
Paper Size 12-15<br />
Paper Tray 12-14<br />
Paper Tray Information 8-5<br />
Paper View 8-8<br />
PCL Font List 12-32<br />
PCL Settings 12-21<br />
PDL Setting 12-5<br />
Preferences 8-3<br />
<strong>Print</strong> 8-3, 9-3, 10-3<br />
<strong>Print</strong> & Login 11-26<br />
<strong>Print</strong> Data Capture 12-58<br />
<strong>Print</strong> PS Errors 12-26<br />
<strong>Print</strong> Reports 12-32<br />
<strong>Print</strong> without Authentication 12-51<br />
<strong>Print</strong> XPS Errors 12-54<br />
<strong>Print</strong>/Fax Output Setting 12-42<br />
<strong>Print</strong>er Settings 12-5, 12-53<br />
<strong>Print</strong>er View 8-8<br />
Properties 8-3<br />
PS Font List 12-32<br />
PS Setting 12-26<br />
PSWC Direct <strong>Print</strong> 12-55<br />
Punch 12-19<br />
Q<br />
Quality Adjustment 8-23, 9-24<br />
S<br />
16.2<br />
Save Custom Size 8-7<br />
Secure <strong>Print</strong> Only 12-59<br />
Secure <strong>Print</strong> <strong>User</strong> Box 11-8<br />
Single Color > 2 Color Output Management 12-52<br />
Skip Job Operation Settings 12-48<br />
Spool <strong>Print</strong> Jobs in HDD before RIP 12-8<br />
Staple 12-18<br />
Symbol Set 12-22
16.2 Index by button 16<br />
T<br />
TIFF Image Paper Setting 12-33<br />
To Login Screen 13-7<br />
U<br />
Uninstall 7-5<br />
USB Timeout 12-53<br />
<strong>User</strong> Authentication 9-12<br />
<strong>User</strong> Box 11-8, 11-26<br />
<strong>User</strong> Settings 8-12, 12-3<br />
Utility/Counter 12-3<br />
V<br />
Verify XPS Digital Signature 12-31<br />
X<br />
XPS Setting 12-31<br />
<strong>VL</strong>3622c/<strong>VL</strong>2822c/<strong>VL</strong><strong>2222c</strong> 16-7
16<br />
Index by button<br />
16-8 <strong>VL</strong>3622c/<strong>VL</strong>2822c/<strong>VL</strong><strong>2222c</strong><br />
16.2
Reader's comment sheet<br />
Reader's comment sheet<br />
Questions<br />
Have you found this manual to be accurate?<br />
O Yes<br />
O No<br />
Were you able to operate the product, after reading this manual?<br />
O Yes<br />
O No<br />
Does this manual provide sufficient background information?<br />
O Yes<br />
O No<br />
Is the format of this manual convenient in size, readability and arrangement (page<br />
layout, chapter order, etc.)?<br />
O Yes<br />
O No<br />
Could you find the information you were looking for?<br />
O Always<br />
O Most of the times<br />
O Sometimes<br />
O Not at all<br />
What did you use to find the required information?<br />
O Table of contents<br />
O Index<br />
Are you satisfied with this manual?<br />
O Yes<br />
O No<br />
Thank you for evaluating this manual.<br />
If you have other comments or concerns, please explain or suggest improvements<br />
overleaf or on a separate sheet.<br />
Comments:<br />
----------------------------------------------------------------------------------------------------<br />
----------------------------------------------------------------------------------------------------<br />
----------------------------------------------------------------------------------------------------<br />
----------------------------------------------------------------------------------------------------<br />
----------------------------------------------------------------------------------------------------<br />
----------------------------------------------------
Date:<br />
This reader's comment sheet is completed by:<br />
(If you prefer to remain unknown, please do fill in your occupation)<br />
Name:<br />
Occupation:<br />
Company:<br />
Phone:<br />
Address:<br />
City:<br />
Country:<br />
Please return this sheet to:<br />
<strong>Océ</strong>-Technologies B.V.<br />
For the attention of ITC <strong>User</strong> Documentation.<br />
P.O. Box 101,<br />
5900 MA Venlo<br />
The Netherlands<br />
Send your comments by E-mail to: itc-userdoc@oce.com<br />
For the addresses of local <strong>Océ</strong> organisations see: http://www.oce.com<br />
Reader's comment sheet
Addresses of local <strong>Océ</strong> organisations<br />
Addresses of local <strong>Océ</strong> organisations<br />
[1]<br />
<strong>Océ</strong>-Australia Ltd.<br />
P.O. Box 363<br />
Ferntree Gully MDC<br />
Vic 3165<br />
Australia<br />
http://www.oce.com.au/<br />
<strong>Océ</strong>-Belgium N.V./S.A.<br />
J. Bordetlaan 32<br />
1140 Brussel<br />
Belgium<br />
http://www.oce.be/<br />
<strong>Océ</strong>-Canada Inc.<br />
4711 Yonge Street, Suite 1100<br />
Toronto, Ontario M2N 6K8<br />
Canada<br />
http://www.oce.ca/<br />
<strong>Océ</strong>-Czech Republic ltd.<br />
Hanusova 18<br />
140 21 Praha 4<br />
Czech Republic<br />
http://www.oce.cz/<br />
<strong>Océ</strong> Finland OY<br />
Valkjärventie 7 D, PL 3<br />
02130 Espoo<br />
Finland<br />
http://www.oce.fi/<br />
<strong>Océ</strong>-Deutschland GmbH<br />
Solinger Straße 5-7<br />
45481 Mülheim/Ruhr<br />
Germany<br />
http://www.oce.de/<br />
<strong>Océ</strong>-Österreich GmbH<br />
Postfach 95<br />
1233 Vienna<br />
Austria<br />
http://www.oce.at/<br />
<strong>Océ</strong>-Brasil Comércio e Indústria Ltda.<br />
Av. das Nações Unidas, 11.857<br />
Brooklin Novo<br />
São Paulo-SP 04578-000<br />
Brasil<br />
http://www.oce-brasil.com.br/<br />
<strong>Océ</strong> Office Equipment (Beijing) Co., Ltd.<br />
Xu Mu Cheng<br />
Chaoyang District<br />
Beijing 100028<br />
China<br />
http://www.oce.com.cn/<br />
<strong>Océ</strong>-Danmark a/s<br />
Vallensbækvej 45<br />
2605 Brøndby<br />
Denmark<br />
http://www.oce.dk/<br />
<strong>Océ</strong>-France S.A.<br />
32, Avenue du Pavé Neuf<br />
93161 Noisy-le-grand, Cedex<br />
France<br />
http://www.oce.fr/<br />
<strong>Océ</strong>-Hong Kong and China head office<br />
12/F 1202 The Lee Gardens<br />
33 Hysan Avenue<br />
Causeway Bay<br />
Hong Kong<br />
http://www.oce.com.hk/
<strong>Océ</strong>-Hungaria Kft.<br />
1241 Budapest<br />
Pf.: 237<br />
Hungary<br />
http://www.oce.hu/<br />
<strong>Océ</strong>-Italia S.p.A.<br />
Strada Padana Superiore 2/B<br />
20063 Cernusco sul Naviglio (MI)<br />
Italia<br />
http://www.oce.it/<br />
<strong>Océ</strong>-Belgium S.A.<br />
Rue Astrid 2/A<br />
1143 Luxembourg-Belair<br />
http://www.oce.lu/<br />
<strong>Océ</strong>-Mexico S.A. de C.V.<br />
Prolongación Reforma 1236,<br />
4to Piso<br />
Col. Santa Fé, Del. Cuajimalpa<br />
C.P. 05348<br />
México, D.F.<br />
México<br />
http://www.oceusa.com/<br />
<strong>Océ</strong>-Poland Ltd. Sp.z o.o.<br />
ul. Bitwy Warszawskiej 1920 r. nr. 7<br />
02-366 Warszawa<br />
Poland<br />
http://www.oce.com.pl/<br />
<strong>Océ</strong> Singapore Pte Ltd.<br />
190 MacPherson Road<br />
#03-00 Wisma Gulab<br />
Singapore 348548<br />
Addresses of local <strong>Océ</strong> organisations<br />
<strong>Océ</strong>-Ireland Ltd.<br />
3006 Lake Drive<br />
Citywest Business Campus<br />
Saggart<br />
Co. Dublin<br />
Ireland<br />
http://www.oce.ie/<br />
<strong>Océ</strong> Japan Corporation<br />
3-25-1, Nishi Shinbashi<br />
Minato-Ku<br />
Tokyo 105-0003<br />
Japan<br />
http://www.ocejapan.co.jp/<br />
<strong>Océ</strong> Malaysia Sdn. Bhd.<br />
#3.01, Level 3, Wisma Academy<br />
Lot 4A, Jalan 19/1<br />
46300 Petalig Jaya<br />
Selangor Darul Ehsan<br />
Malaysia<br />
http://www.ocemal.com.my/<br />
<strong>Océ</strong>-Norge A.S.<br />
Postboks 4434 Nydalen<br />
Gjerdrums vei 8<br />
0403 Oslo<br />
Norway<br />
http://www.oce.no/<br />
<strong>Océ</strong>-Lima Mayer, S.A.<br />
Av. José Gomes Ferreira, 11 Piso 2 -<br />
Miraflores<br />
1497-139 Algés<br />
Portugal<br />
http://www.oce.pt/<br />
<strong>Océ</strong> <strong>Print</strong>ing Systems (PTY) Ltd.<br />
P.O.Box 629<br />
Rivonia 2128<br />
South Africa
Addresses of local <strong>Océ</strong> organisations<br />
<strong>Océ</strong> España SA<br />
Business Park Mas Blau<br />
Osona, 2 08820 El Prat de Llobregat<br />
Barcelona<br />
Spain<br />
http://www.oce.es/<br />
<strong>Océ</strong>-Schweiz AG<br />
Sägereistrasse 10<br />
CH8152 Glattbrugg<br />
Schweiz<br />
http://www.oce.ch/<br />
<strong>Océ</strong>-Nederland B.V.<br />
P.O.Box 800<br />
5201 AV 's-Hertogenbosch<br />
The Netherlands<br />
http://www.oce.nl/<br />
<strong>Océ</strong> North America Inc.<br />
5450 North Cumberland Avenue<br />
Chicago, IL 60656<br />
USA<br />
http://www.oceusa.com/<br />
<strong>Océ</strong>-Svenska AB<br />
Sollentunavägen 84<br />
191 27 Sollentuna<br />
Sweden<br />
http://www.oce.se/<br />
<strong>Océ</strong> (Thailand) Ltd.<br />
B.B. Building 16/Floor<br />
54 Asoke Road<br />
Sukhumvit 21<br />
Bangkok 10110<br />
Thailand<br />
<strong>Océ</strong> (UK) Limited<br />
<strong>Océ</strong> House<br />
Chatham Way<br />
Brentwood, Essex CM14 4DZ<br />
United Kingdom<br />
http://www.oce.co.uk/<br />
Note: The web site http://www.oce.com gives the current addresses of the local <strong>Océ</strong><br />
organisations and distributors.<br />
Note: The addresses of local <strong>Océ</strong> organisations for information about the Wide<br />
Format <strong>Print</strong>ing Systems and the Production <strong>Print</strong>ing Systems can be different from<br />
the addresses above. Refer to the web site http://www.oce.com for the addresses you<br />
need.
Beyond the Ordinary<br />
© 2009 <strong>Océ</strong>. Illustrations and specifications do not necessarily apply to<br />
products and services offered in each local market. Technical<br />
specifications are subject to change without prior notice. All other<br />
trademarks are the property of their respective owners.<br />
2009-09<br />
GB<br />
o<br />
<strong>Print</strong>ing for<br />
Professionals<br />
<strong>Océ</strong> helps the people who make our world. Companies<br />
everywhere use <strong>Océ</strong> technical documentation systems in<br />
manufacturing, architecture, engineering and<br />
construction. High speed <strong>Océ</strong> printing systems produce<br />
millions of transaction documents each week, such as<br />
bank statements and utility bills. And in offices around<br />
the world, people use <strong>Océ</strong> professional document systems<br />
to keep the wheels of business and government turning.<br />
<strong>Océ</strong> is also at work in publishing on demand, newspaper<br />
production and wide format colour for spectacular<br />
display graphics.<br />
For more information visit us at:<br />
www.oce.com