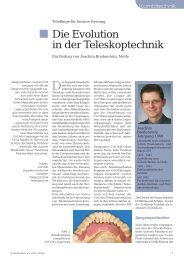
Product catalogue 2012 - SILADENT Dr. Böhme & Schöps GmbH
Product catalogue 2012 - SILADENT Dr. Böhme & Schöps GmbH
Product catalogue 2012 - SILADENT Dr. Böhme & Schöps GmbH

You also want an ePaper? Increase the reach of your titles
YUMPU automatically turns print PDFs into web optimized ePapers that Google loves.
Poster / Handbooks<br />
68<br />
<strong>Dr</strong>. <strong>Böhme</strong> & <strong>Schöps</strong> <strong>GmbH</strong><br />
Duplication model according the <strong>SILADENT</strong>-System<br />
Preparing the model<br />
1. and placing spacers<br />
Caution: do not soak<br />
the model, only<br />
duplicate when dry.<br />
Refer to the full list of<br />
materials which are<br />
incompatible with<br />
silicone.<br />
2. Degreasing and cleaning<br />
If required, the prepared<br />
model should be cleaned and<br />
degreased using Neutrasil<br />
(REF 101693) spray before it<br />
is duplicated.<br />
3. <strong>Dr</strong>ying<br />
Spray and allow to take<br />
effect for 2 minutes.<br />
Then dry carefully with<br />
compressed air.<br />
Placing the patented duplicating<br />
4. adhesive tape round the model<br />
Now place the<br />
duplicating adhesive<br />
tape (REF 101707)<br />
round the prepared,<br />
cleaned and dried<br />
model. Leave a<br />
minimum gap of<br />
5 mm between<br />
the model and tape.<br />
Stabilizer plate<br />
5. for the duplicating mould<br />
Stabilising plates are used for<br />
stabilising the duplicating<br />
mould which are available in<br />
four different sizes.<br />
Size 1 - REF 101703<br />
Size 2 - REF 101704<br />
Size 3 - REF 101705<br />
Size 4 - REF 101706<br />
6. Fixation device 11. Function of the stabilizer plate<br />
Select the appropriate size of stabilizer plate and screw<br />
it onto the threaded rod of the fixation device. Ensure<br />
that the stabilising plate does not come into contact<br />
with the<br />
duplicating<br />
adhesive tape.<br />
7.<br />
Dispensing the silicone<br />
Adisil blue 9:1, Adisil pink 1:1, Adisil rapid 1:1 and<br />
Hydrosil 1:1 duplicating silicones are suitable for use<br />
with the <strong>SILADENT</strong> system. Dispense according to<br />
directions and<br />
adhere to the<br />
instructions for<br />
use.<br />
8.<br />
Mixing the silicone<br />
We recommend mixing the duplicating silicone under<br />
vacuum for 40 sec..<br />
Alternatively, cure the<br />
duplicating silicone under<br />
pressure after dispensing it<br />
from a 1:1 dispenser unit<br />
DA 2000 (REF 111503).<br />
When curing under<br />
pressure, use a duplicating<br />
cross (REF 101702) instead<br />
of the fixation device.<br />
9.<br />
Mixing under vacuum<br />
Mixing under vacuum or curing under pressure ensures<br />
that the duplicating material is as homogenous as<br />
possible.<br />
10. Pouring<br />
the silicone<br />
After mixing the silicone<br />
according to instructions,<br />
pour it in a thin stream from<br />
a height of 40 - 50 cm.<br />
Caution: always pour onto<br />
the centre of the model.<br />
The surface of the silicone should be wetted<br />
to ensure that the surface of the<br />
investment model is free from blows.<br />
Exception:<br />
1. Preparing<br />
the silicone duplicating mould<br />
It is not necessary<br />
to apply wetting<br />
agents to Hydrosil<br />
duplicating moulds,<br />
because this special<br />
silicone has unique hydrophilic properties and<br />
produces perfect models without applying wetting<br />
agent.<br />
3.<br />
Clean and reduce<br />
the surface<br />
tension of the<br />
duplicating<br />
silicone with<br />
Neutrasil<br />
2.<br />
(REF 101603).<br />
Investments for<br />
the duplicate model<br />
Mix the investment selected exactly according to the<br />
instructions (Granisit , Micro, Jet 2000). Follow the<br />
instructions<br />
and advice on<br />
storage and<br />
working<br />
temperatures.<br />
4. Pouring the investment<br />
Place the prepared silicone duplicating<br />
mould onto the vibrator and pour the<br />
contours using high vibration. It<br />
may be helpful to use an<br />
instrument when pouring. If<br />
required, place the mould under<br />
pressure (2.5 – 6.00 bar),<br />
following precisely the<br />
instructions for using the<br />
different investments.<br />
Stabilizer plates are used to stabilise the base of the<br />
flaskless duplication in order to prevent any deformation<br />
when fabricating investment models.<br />
The production of the investment model for CoCr according to the <strong>SILADENT</strong>-System<br />
12.<br />
Placing the patented duplicating<br />
adhesive tape round the mould<br />
Fixation of the stabilizer plate<br />
Lower the stabilizer plate into the silicone until the<br />
silicone flows from the retention holes on the side of the<br />
plate. The stabilizer plate should not be completely<br />
covered by silicone.<br />
13.<br />
Cross-section<br />
Remove the duplicating adhesive tape after curing. Then<br />
remove the model, using compressed air if necessary.<br />
14.<br />
Finishing the<br />
silicone duplicating mould<br />
Remove the silicone<br />
flash from the sides<br />
and check the mould<br />
before pouring the<br />
investment model.<br />
6.<br />
The duplicate model can be removed<br />
from the duplicating mould<br />
approx. 30 min. after<br />
pouring.<br />
Caution: <strong>SILADENT</strong><br />
investment models<br />
should not be dried in<br />
a hot air cabinet or<br />
dipped in hardener.<br />
<strong>Dr</strong>. <strong>Böhme</strong> & <strong>Schöps</strong> <strong>GmbH</strong><br />
<strong>SILADENT</strong> <strong>Dr</strong>. <strong>Böhme</strong> & <strong>Schöps</strong> <strong>GmbH</strong><br />
Im Klei 26 . D-38644 Goslar<br />
Tel.: +49 (0) 53 21/37 79-0<br />
Fax: +49 (0) 53 21/38 96 32<br />
info@sbs-dental.de . www.sbs-dental.de<br />
Investment duplicate model<br />
Apply <strong>SILADENT</strong> wax adhesive (REF 102501) 1 – 2<br />
times thinly on areas where preformed wax patterns<br />
are to be placed.<br />
8.<br />
5.<br />
Setting expansion<br />
begins after 8 – 12<br />
min. depending on<br />
the type of<br />
investment used.<br />
During expansion,<br />
temperatures can<br />
reach 85°C.<br />
Waxing up and<br />
attaching sprues<br />
Setting expansion<br />
7. Applying wax adhesive<br />
Follow the instructions for attaching sprues in the<br />
<strong>SILADENT</strong>-System.<br />
9. Trimming<br />
The investment model can be trimmed (dry) before<br />
the crepe sleeve is placed around it.<br />
Ensure that there is<br />
a uniform gap for<br />
investment of at<br />
least 5 mm between<br />
the model and<br />
sleeve.<br />
the investment model<br />
Place the patented<br />
<strong>SILADENT</strong><br />
disposible ring<br />
tape (REF 102601)<br />
around the model<br />
prepared for<br />
investing.<br />
Wetting agent<br />
is not required.<br />
Mix the investment under<br />
vacuum according to the<br />
instructions and pour<br />
using minimum vibration.<br />
Important!<br />
Switch off the vibrator<br />
immediately after the<br />
wax pattern is covered.<br />
Do not vibrate again.<br />
13.<br />
11.<br />
<strong>Dr</strong>. <strong>Böhme</strong> & <strong>Schöps</strong> <strong>GmbH</strong><br />
10.<br />
12. Investing<br />
Investing diagram<br />
Diagram of model with pressure release and vent<br />
sprues.<br />
Disposible ring tape<br />
Speed or<br />
conventional preheating<br />
Subsequent handling of the casting ring depends on<br />
the investment used. With speed investments, follow<br />
the instructions precisely regarding the time for<br />
placing the casting ring in the hot furnace.<br />
Conventionally preheated<br />
investments are placed in a cold<br />
furnace, with the sprue former<br />
facing down, at least 60 min. after<br />
investing and then preheated<br />
according to the preheating<br />
parameters in the instructions.<br />
<strong>Dr</strong>. <strong>Böhme</strong> & <strong>Schöps</strong> <strong>GmbH</strong><br />
<strong>SILADENT</strong> <strong>Dr</strong>. <strong>Böhme</strong> & <strong>Schöps</strong> <strong>GmbH</strong><br />
Im Klei 26 . D-38644 Goslar<br />
Tel.: +49 (0) 53 21/37 79-0<br />
Fax: +49 (0) 53 21/38 96 32<br />
info@sbs-dental.de . www.sbs-dental.de<br />
The ten gypsum rules<br />
DIN A 3 Poster, free REF 902014<br />
The gypsum model is the basis for a good fit of the restoration.<br />
This poster provides a wealth of information to facilitate<br />
dental gypsum work, covering all stages from preparing to<br />
trimming gypsum models.<br />
<strong>SILADENT</strong> duplicating and investing<br />
techniques<br />
DIN A4 Poster<br />
free REF 902152<br />
Each stage of the <strong>SILADENT</strong> flaskless duplicating technique<br />
and the <strong>SILADENT</strong> system investment model fabrication technique<br />
are illustrated and described in detail.<br />
Handbook for accurate crown and bridge<br />
technique using the <strong>SILADENT</strong> system<br />
Handbook, 36 pages (German/English) REF 902004<br />
With this new edition (update 2009) the dental technician<br />
gets a detailed guide for accurate crown and bridge technique<br />
according the <strong>SILADENT</strong> system. All working steps<br />
are described in details.<br />
Handbook for the investment casting of<br />
partial denture frameworks using the<br />
<strong>SILADENT</strong> system<br />
Handbook, 36 pages REF 902005<br />
With this new edition (2007) the dental technician gets a<br />
detailed guide for the creation of partial denture frameworks<br />
according the <strong>SILADENT</strong> system. The user gets all detailed<br />
informations, beginning from the flaskless duplicating system<br />
thru the investing until the casting.<br />
Handbook SilaPress resin pouring using<br />
the <strong>SILADENT</strong> system<br />
Handbook, 28 pages (German/English) REF 902008<br />
The SilaPress handbook gives the technician a useful and<br />
detailed guideline when performing SilaPress resin pouring<br />
system (1 st Edition 2011).