WhatsUp Gold Database Migration Guide - Ipswitch Documentation ...
WhatsUp Gold Database Migration Guide - Ipswitch Documentation ...
WhatsUp Gold Database Migration Guide - Ipswitch Documentation ...
You also want an ePaper? Increase the reach of your titles
YUMPU automatically turns print PDFs into web optimized ePapers that Google loves.
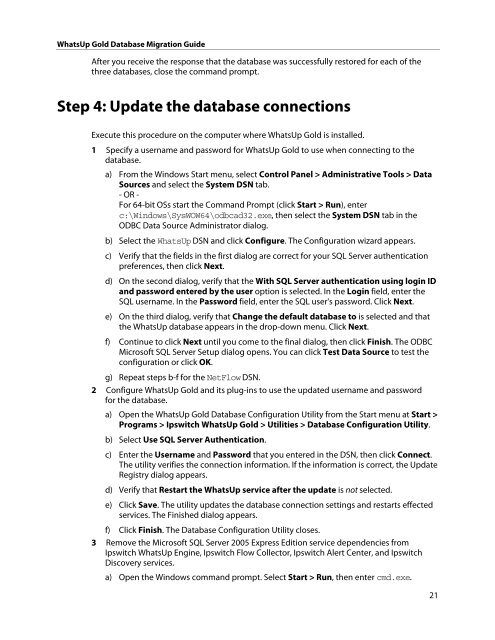
<strong>WhatsUp</strong> <strong>Gold</strong> <strong>Database</strong> <strong>Migration</strong> <strong>Guide</strong><br />
After you receive the response that the database was successfully restored for each of the<br />
three databases, close the command prompt.<br />
Step 4: Update the database connections<br />
Execute this procedure on the computer where <strong>WhatsUp</strong> <strong>Gold</strong> is installed.<br />
1 Specify a username and password for <strong>WhatsUp</strong> <strong>Gold</strong> to use when connecting to the<br />
database.<br />
a) From the Windows Start menu, select Control Panel > Administrative Tools > Data<br />
Sources and select the System DSN tab.<br />
- OR -<br />
For 64-bit OSs start the Command Prompt (click Start > Run), enter<br />
c:\Windows\SysWOW64\odbcad32.exe, then select the System DSN tab in the<br />
ODBC Data Source Administrator dialog.<br />
b) Select the <strong>WhatsUp</strong> DSN and click Configure. The Configuration wizard appears.<br />
c) Verify that the fields in the first dialog are correct for your SQL Server authentication<br />
preferences, then click Next.<br />
d) On the second dialog, verify that the With SQL Server authentication using login ID<br />
and password entered by the user option is selected. In the Login field, enter the<br />
SQL username. In the Password field, enter the SQL user's password. Click Next.<br />
e) On the third dialog, verify that Change the default database to is selected and that<br />
the <strong>WhatsUp</strong> database appears in the drop-down menu. Click Next.<br />
f) Continue to click Next until you come to the final dialog, then click Finish. The ODBC<br />
Microsoft SQL Server Setup dialog opens. You can click Test Data Source to test the<br />
configuration or click OK.<br />
g) Repeat steps b-f for the NetFlow DSN.<br />
2 Configure <strong>WhatsUp</strong> <strong>Gold</strong> and its plug-ins to use the updated username and password<br />
for the database.<br />
a) Open the <strong>WhatsUp</strong> <strong>Gold</strong> <strong>Database</strong> Configuration Utility from the Start menu at Start ><br />
Programs > <strong>Ipswitch</strong> <strong>WhatsUp</strong> <strong>Gold</strong> > Utilities > <strong>Database</strong> Configuration Utility.<br />
b) Select Use SQL Server Authentication.<br />
c) Enter the Username and Password that you entered in the DSN, then click Connect.<br />
The utility verifies the connection information. If the information is correct, the Update<br />
Registry dialog appears.<br />
d) Verify that Restart the <strong>WhatsUp</strong> service after the update is not selected.<br />
e) Click Save. The utility updates the database connection settings and restarts effected<br />
services. The Finished dialog appears.<br />
f) Click Finish. The <strong>Database</strong> Configuration Utility closes.<br />
3 Remove the Microsoft SQL Server 2005 Express Edition service dependencies from<br />
<strong>Ipswitch</strong> <strong>WhatsUp</strong> Engine, <strong>Ipswitch</strong> Flow Collector, <strong>Ipswitch</strong> Alert Center, and <strong>Ipswitch</strong><br />
Discovery services.<br />
a) Open the Windows command prompt. Select Start > Run, then enter cmd.exe.<br />
21


