RUN OF THE MILL - Ruskin Mill Trust
RUN OF THE MILL - Ruskin Mill Trust
RUN OF THE MILL - Ruskin Mill Trust

Create successful ePaper yourself
Turn your PDF publications into a flip-book with our unique Google optimized e-Paper software.
30<br />
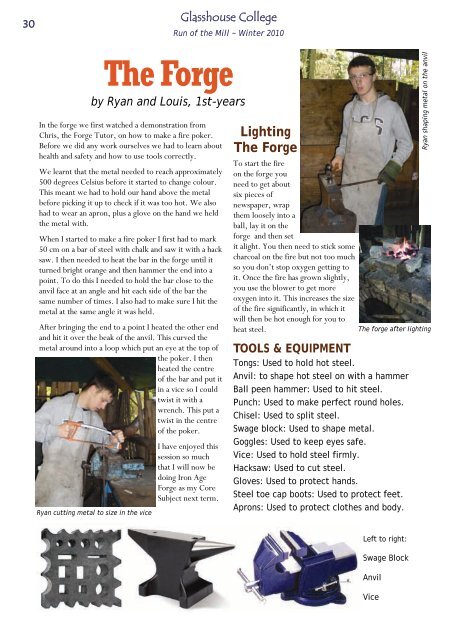
The Forge<br />
by Ryan and Louis, 1st-years<br />
In the forge we first watched a demonstration from<br />
Chris, the Forge Tutor, on how to make a fire poker.<br />
Before we did any work ourselves we had to learn about<br />
health and safety and how to use tools correctly.<br />
We learnt that the metal needed to reach approximately<br />
500 degrees Celsius before it started to change colour.<br />
This meant we had to hold our hand above the metal<br />
before picking it up to check if it was too hot. We also<br />
had to wear an apron, plus a glove on the hand we held<br />
the metal with.<br />
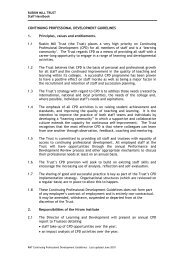
When I started to make a fire poker I first had to mark<br />
50 cm on a bar of steel with chalk and saw it with a hack<br />
saw. I then needed to heat the bar in the forge until it<br />
turned bright orange and then hammer the end into a<br />
point. To do this I needed to hold the bar close to the<br />
anvil face at an angle and hit each side of the bar the<br />
same number of times. I also had to make sure I hit the<br />
metal at the same angle it was held.<br />
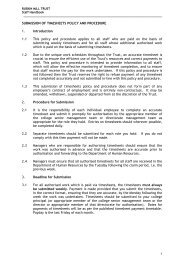
After bringing the end to a point I heated the other end<br />
and hit it over the beak of the anvil. This curved the<br />
metal around into a loop which put an eye at the top of<br />
the poker. I then<br />
heated the centre<br />
of the bar and put it<br />
in a vice so I could<br />
twist it with a<br />
wrench. This put a<br />
twist in the centre<br />
of the poker.<br />
Ryan cutting metal to size in the vice<br />
Glasshouse College<br />
Run of the <strong>Mill</strong> ~ Winter 2010<br />
I have enjoyed this<br />
session so much<br />
that I will now be<br />
doing Iron Age<br />
Forge as my Core<br />
Subject next term.<br />
Lighting<br />
The Forge<br />
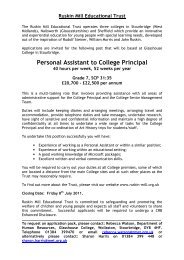
To start the fire<br />
on the forge you<br />
need to get about<br />
six pieces of<br />
newspaper, wrap<br />
them loosely into a<br />
ball, lay it on the<br />
forge and then set<br />
it alight. You then need to stick some<br />
charcoal on the fire but not too much<br />
so you don’t stop oxygen getting to<br />
it. Once the fire has grown slightly,<br />
you use the blower to get more<br />
oxygen into it. This increases the size<br />
of the fire significantly, in which it<br />
will then be hot enough for you to<br />
heat steel.<br />
TOOLS & EQUIPMENT<br />
Tongs: Used to hold hot steel.<br />
Anvil: to shape hot steel on with a hammer<br />
Ball peen hammer: Used to hit steel.<br />
Punch: Used to make perfect round holes.<br />
Chisel: Used to split steel.<br />
Swage block: Used to shape metal.<br />
Goggles: Used to keep eyes safe.<br />
Vice: Used to hold steel firmly.<br />
Hacksaw: Used to cut steel.<br />
Gloves: Used to protect hands.<br />
Steel toe cap boots: Used to protect feet.<br />
Aprons: Used to protect clothes and body.<br />
Left to right:<br />
Swage Block<br />
Anvil<br />
Vice<br />
Ryan shaping metal on the anvil<br />
The forge after lighting