

Manual - Maintenance Electronique / Monitors Service Center
Manual - Maintenance Electronique / Monitors Service Center
Manual - Maintenance Electronique / Monitors Service Center

You also want an ePaper? Increase the reach of your titles
YUMPU automatically turns print PDFs into web optimized ePapers that Google loves.
6 Alignment and Adjustments<br />
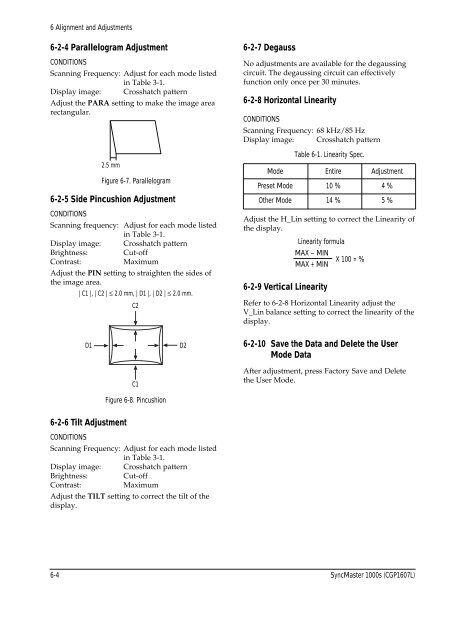
6-2-4 Parallelogram Adjustment<br />
CONDITIONS<br />
Scanning Frequency: Adjust for each mode listed<br />
in Table 3-1.<br />
Display image: Crosshatch pattern<br />
Adjust the PARA setting to make the image area<br />
rectangular.<br />
2.5 mm<br />
Figure 6-7. Parallelogram<br />
6-2-5 Side Pincushion Adjustment<br />
CONDITIONS<br />
Scanning frequency: Adjust for each mode listed<br />
in Table 3-1.<br />
Display image: Crosshatch pattern<br />
Brightness: Cut-off<br />
Contrast: Maximum<br />
Adjust the PIN setting to straighten the sides of<br />
the image area.<br />
| C1 |, | C2 | ≤ 2.0 mm, | D1 |, | D2 | ≤ 2.0 mm.<br />
6-2-6 Tilt Adjustment<br />
C2<br />
D1 D2<br />
C1<br />
Figure 6-8. Pincushion<br />
CONDITIONS<br />
Scanning Frequency: Adjust for each mode listed<br />
in Table 3-1.<br />
Display image: Crosshatch pattern<br />
Brightness: Cut-off<br />
Contrast: Maximum<br />
Adjust the TILT setting to correct the tilt of the<br />
display.<br />
6-2-7 Degauss<br />
No adjustments are available for the degaussing<br />
circuit. The degaussing circuit can effectively<br />
function only once per 30 minutes.<br />
6-2-8 Horizontal Linearity<br />
CONDITIONS<br />
Scanning Frequency: 68 kHz/85 Hz<br />
Display image: Crosshatch pattern<br />
Adjust the H_Lin setting to correct the Linearity of<br />
the display.<br />
Linearity formula<br />
6-2-9 Vertical Linearity<br />
Table 6-1. Linearity Spec.<br />
Mode Entire Adjustment<br />
Preset Mode 10 % 4 %<br />
Other Mode 14 % 5 %<br />
MAX – MIN<br />
MAX + MIN<br />
X 100 = %<br />
Refer to 6-2-8 Horizontal Linearity adjust the<br />
V_Lin balance setting to correct the linearity of the<br />
display.<br />
6-2-10 Save the Data and Delete the User<br />
Mode Data<br />
After adjustment, press Factory Save and Delete<br />
the User Mode.<br />
6-4 SyncMaster 1000s (CGP1607L)