Equipment/DVR/HD Reference Guide - WOW!
Equipment/DVR/HD Reference Guide - WOW!
Equipment/DVR/HD Reference Guide - WOW!
- TAGS
- reference
- guide
- www.wowway.com

Create successful ePaper yourself
Turn your PDF publications into a flip-book with our unique Google optimized e-Paper software.
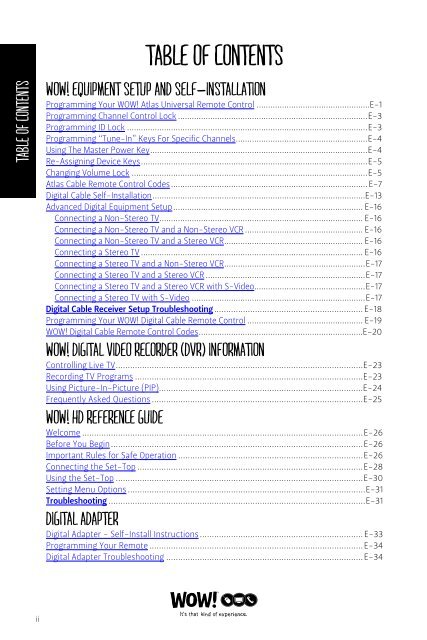
TABLE OF CONTENTS<br />
ii<br />
TABLE OF CONTENTS<br />
<strong>WOW</strong>! EQUIPMENT SETUP AND SELF-INSTALLATION<br />
Programming Your <strong>WOW</strong>! Atlas Universal Remote Control .................................................E-1<br />
Programming Channel Control Lock ..................................................................................E-3<br />
Programming ID Lock ........................................................................................................E-3<br />
Programming “Tune-In” Keys For Specific Channels .........................................................E-4<br />
Using The Master Power Key ..............................................................................................E-4<br />
Re-Assigning Device Keys ..................................................................................................E-5<br />
Changing Volume Lock ......................................................................................................E-5<br />
Atlas Cable Remote Control Codes ..................................................................................... E-7<br />
Digital Cable Self-Installation ............................................................................................E-13<br />
Advanced Digital <strong>Equipment</strong> Setup .................................................................................. E-16<br />
Connecting a Non-Stereo TV ........................................................................................ E-16<br />
Connecting a Non-Stereo TV and a Non-Stereo VCR ................................................... E-16<br />
Connecting a Non-Stereo TV and a Stereo VCR ............................................................ E-16<br />
Connecting a Stereo TV ................................................................................................ E-16<br />
Connecting a Stereo TV and a Non-Stereo VCR .............................................................E-17<br />
Connecting a Stereo TV and a Stereo VCR .....................................................................E-17<br />
Connecting a Stereo TV and a Stereo VCR with S-Video................................................E-17<br />
Connecting a Stereo TV with S-Video ...........................................................................E-17<br />
Digital Cable Receiver Setup Troubleshooting .............................................................. E-18<br />
Programming Your <strong>WOW</strong>! Digital Cable Remote Control .................................................. E-19<br />
<strong>WOW</strong>! Digital Cable Remote Control Codes .......................................................................E-20<br />
<strong>WOW</strong>! DIGITAL VIDEO RECORDER (<strong>DVR</strong>) INFORMATION<br />
Controlling Live TV .......................................................................................................E-23<br />
Recording TV Programs ...............................................................................................E-23<br />
Using Picture-In-Picture (PIP) .....................................................................................E-24<br />
Frequently Asked Questions ........................................................................................E-25<br />
<strong>WOW</strong>! <strong>HD</strong> REFERENCE GUIDE<br />
Welcome .....................................................................................................................E-26<br />
Before You Begin .........................................................................................................E-26<br />
Important Rules for Safe Operation .............................................................................E-26<br />
Connecting the Set-Top ..............................................................................................E-28<br />
Using the Set-Top .......................................................................................................E-30<br />
Setting Menu Options ...................................................................................................E-31<br />
Troubleshooting ...........................................................................................................E-31<br />
DIGITAL ADAPTER<br />
Digital Adapter - Self-Install Instructions .................................................................... E-33<br />
Programming Your Remote .........................................................................................E-34<br />
Digital Adapter Troubleshooting ..................................................................................E-34
<strong>WOW</strong>! EQUIPMENT SETUP AND SELF-INSTALLATION<br />
Programming Your <strong>WOW</strong>! Atlas Universal Remote Control<br />
The Atlas Universal Remote Control is preprogrammed to operate your cable converter, an<br />
RCA TV, an RCA VCR, and a Pioneer audio receiver. To control devices other than the default<br />
brands, perform the following steps:<br />
NOTES: To control a DVD player, program the VCR key. To control a PVR, program the VCR key. To<br />
control a stereo amplifier or receiver, program the AUD key. For TV/VCR Combo control, skip this<br />
section and perform the instructions under Programming TV/VCR Combo on page E-2.<br />
1 Turn on a device and, if applicable, insert video media, (e.g., cassette or disc).<br />
NOTE: Please read steps 2-4 completely before proceeding. Highlight or write down the codes<br />
and device you wish to program before moving on to step 2.<br />
2 On the remote control, press a device key once (e.g., AUD, VCR, TV, or CBL). Press and hold<br />
SETUP until the selected device key blinks twice, then release SETUP.<br />
3 Use the Manufacturer’s Codes (starting on page E-7) to locate the type of device and brand<br />
name and then enter the first four-digit code for your device. If performed correctly, the<br />
selected mode key will blink twice.<br />
NOTE: If the selected mode key emits a long blink, the code is invalid. Repeat steps 2 through 3<br />
and try entering the same code again.<br />
For the most current <strong>WOW</strong>! Atlas remote programming, please visit<br />
www.wowway.com/referenceguide<br />
4 Aim the remote control at the device and press POWER once. The device should turn off. If it<br />
does not, repeat steps 2-3, trying each code for your brand until you find one that works.<br />
NOTE: If the device does not have a POWER key, press the (Play) key.<br />
5 Repeat steps 1 through 4 for each device you want the remote control to control. For future<br />
reference, write down each working device code in the boxes below:<br />
After programming, the Atlas Universal Remote Control will be able to control the following<br />
types of devices:<br />
DEVICE KEY CONTROLS THESE TYPES OF DEVICES<br />
VCR,TV/VCR Combo, PVR (Personal Video Recorder), or extra DVD Player<br />
DVD Player<br />
Audio Amplifier, Tuner, or Receiver<br />
Television<br />
Cable Box (Converter)<br />
E-1<br />
EQUIPMENT/SELF-INSTALLATION
EQUIPMENT/SELF-INSTALLATION<br />
E-2<br />
Programming TV/VCR Combo<br />
1 Turn on your TV/VCR combo and insert a video cassette.<br />
2 On the remote control, press VCR once. Press and hold SETUP until the VCR key blinks twice,<br />
then release SETUP.<br />
3 Use the Setup Codes For TV/VCR combos visit our URL at www.wowway.com/referenceguide<br />
to locate the brand name and then enter the first four-digit code for your TV/VCR combo. If<br />
you perform this procedure correctly, the VCR key will blink twice.<br />
NOTE: If the VCR key did not blink twice after entering the code’s last digit, then repeat steps 2<br />
through 3 and try entering the same code again.<br />
If you’ve located a TV/VCR setup code that works your TV/VCR combo and a separate TV code is<br />
also listed, you’ll need to program this code into the remote control to access volume control.<br />
4 Aim the remote control at your TV/VCR combo and press POWER once. The device should turn<br />
off. If it does not respond, repeat steps 2-3, trying each code listed for your brand until you<br />
find one that works.<br />
5 For future reference, write down each working device code in the boxes below:<br />
Searching for Your Code<br />
If your home entertainment device does not respond to the Atlas Universal Remote Control<br />
after trying all of the codes listed for your brand or if your brand is not listed at all, try<br />
searching for your code. For example, to search for a code for your TV:<br />
1 Turn on your TV.<br />
2 On the remote control, press TV once; it will blink once. Then press and hold SETUP until the TV<br />
key blinks twice, then release SETUP.<br />
3 Enter 9 - 9 - 1. The TV key will blink twice.<br />
4 Aim the remote control at the TV and slowly alternate between pressing PWR and TV.<br />
Stop when the TV turns off.<br />
NOTE: In the search mode, the remote control will send IR codes from its library to the selected<br />
device, starting with the most popular code first.<br />
5 Press SETUP once to lock in the code. The TV key will blink twice.<br />
6 To search for the codes of your other devices, repeat steps 1 through 5, but substitute the<br />
appropriate key (e.g., AUX, DVD, AUD, or CBL) for the device you are searching for.<br />
Checking the Codes<br />
If you have set up the Atlas Universal Remote Control using the Searching For Your Code<br />
procedure, you may need to find out which four-digit code is operating your equipment.<br />
For example, to find out which code is operating your TV:<br />
1 On the remote control, press TV once; it will blink once. Then press and hold SETUP until the TV<br />
key blinks twice, then release SETUP.<br />
2 Enter 9 - 9 - 0. The TV key will blink twice.<br />
3 To view the code for the first digit, press 1 once. Wait 3 seconds and count the number of times<br />
the TV key blinks (e.g., 3 blinks = 3).<br />
NOTE: If a code digit is “0”, the selected mode key will not blink.<br />
4 Repeat step 3 three more times for the remaining digits. Use 2 for the second digit, 3 for the<br />
third digit, and 4 for the fourth digit.<br />
5 To check for other device codes, repeat steps 1 through 4, but substitute the appropriate key<br />
(e.g., AUX, DVD, AUD, or CBL) for the device you are checking.
Programming Channel Control Lock<br />
By default, the remote control’s channel-control capabilities are locked to the cable<br />
converter. The affected keys* are 0-9, CH+, CH-, ENTER, and LAST. This will guarantee<br />
that you do not inadvertently change a channel on your TV or VCR. However, you can<br />
de-activate this feature to allow full access to these keys in the TV and VCR modes.<br />
*NOTE: This feature does not affect the AUD mode.<br />
To De-Activate Channel Control Lock:<br />
1 On the remote control, press CBL once; it will blink once. Then press and hold SETUP until the<br />
CBL key blinks twice, then release SETUP.<br />
2 Enter 9 -7- 3. The CBL key will blink twice.<br />
3 Press CH- once. The CBL key will blink four times.<br />
4 Now, the remote control will provide TV and VCR channel-control capabilities while in the TV or<br />
VCR mode.<br />
To Re-Activate Channel Control Lock:<br />
1 On the remote control, press CBL once; it will blink once. Then press and hold SETUP until the<br />
CBL key blinks twice, then release SETUP.<br />
2 Enter 9 -7- 3. The CBL key will blink twice.<br />
3 Press CH+ once. The CBL key will blink twice.<br />
4 Now, regardless of what mode you select (except AUD), only the channel control capability of<br />
your cable converter will be accessible.<br />
Programming ID Lock<br />
The Atlas Universal Remote Control is locked at the factory to operate a Scientific Atlanta<br />
cable converter. However, if you have another brand or model of cable converter or satellite<br />
service that you would like to control, then you’ll need to perform the following steps to<br />
unlock the ID Lock, enter in a new manufacturer’s code, and lock the ID Lock again.<br />
1 Turn on the cable converter.<br />
2 On the remote control, press CBL once; it will blink once. Then press and hold SETUP until the<br />
CBL key blinks twice, then release SETUP.<br />
3 Enter 9 - 8 - 2. The CBL key will blink four times, indicating ID Lock is unlocked.<br />
4 Upon completion, perform the remaining steps (5 and 6 on this page) to again lock the ID Lock.<br />
5 On the remote control, press CBL once; it will blink once. Then press and hold SETUP until the<br />
CBL key blinks twice, then release SETUP.<br />
6 Enter 9 - 8 - 2. The CBL key will blink twice, indicating ID Lock is again locked.<br />
E-3<br />
EQUIPMENT/SELF-INSTALLATION
EQUIPMENT/SELF-INSTALLATION<br />
E-4<br />
Programming “Tune-In” Keys for Specific Channels<br />
The Atlas Universal Remote Control includes three “Tune-In” keys (located directly below<br />
the MUTE and LAST keys). Each can be programmed to remember three of your favorite<br />
cable channel settings for a total of nine channels. If you want to change the cable<br />
channels in a previously-programmed “Tune-In” key, you’ll need to clear the key first.<br />
To Program A “Tune-In” Key:<br />
1 On the remote control, press CBL once; it will blink once. Then press and hold SETUP until the<br />
CBL key blinks twice, then release SETUP.<br />
2 Enter 9 - 9 - 5. The CBL key will blink twice. Then select a “Tune-In”key and press it once.<br />
3 Press CBL once followed by the channel number to be programmed (e.g., 3 - 9).<br />
NOTE: If you are programming a channel for a Digital Cable Converter, you need to enter all<br />
channels in a 3-digit channel format. For example, if the desired channel is 39, then enter it as<br />
0 - 3 - 9.<br />
4 Press and hold SETUP until the CBL key blinks twice, then release SETUP.<br />
5 To add another channel, repeat steps 1 through 4, substituting the new channel to be added in<br />
step 3.<br />
NOTE: Programming more than three channels on the same “Tune-In” key will overwrite<br />
previous settings.<br />
To Clear A “Tune-In” Key:<br />
1 On the remote control, press CBL once; it will blink once. Then press and hold SETUP until the<br />
CBL key blinks twice, then release SETUP.<br />
2 Enter 9 - 9 - 5. The CBL key will blink twice. Then select a “Tune-In”key you want to clear and<br />
press it once.<br />
3 Press and hold SETUP until the CBL key blinks twice, then release SETUP.<br />
4 This “Tune-In” key is now clear and ready for reprogramming. If desired, repeat steps 1 though<br />
3 in this section to clear another “Tune-In” key.<br />
Using the Master Power Key<br />
The Atlas Universal Remote Control has a unique feature that allows you to sequentially<br />
turn on or off up to five of your home entertainment devices with a single key press.<br />
To Program The Master Power Key:<br />
1 On the remote control, press and hold SETUP until the last-selected device key blinks twice,<br />
then release SETUP.<br />
2 Enter 9 - 9 - 5. The last-selected device key will blink twice. Then press PWR once.<br />
3 For the first device you want in the power on sequence, press a device key (e.g.,CBL) once.<br />
Then press PWR once.<br />
4 Repeat step 3 up to four more times to add the second, third, fourth, and fifth device, as<br />
desired.<br />
5 To save the settings and exit the program, press and hold SETUP until the last-selected device<br />
key blinks twice, then release SETUP.
To Operate The Master Power Key:<br />
NOTE: If MASTER POWER is not programmed, pressing it will only command the last-selected device<br />
to power on or off.<br />
1 After programming, point the remote control at the devices and press “CBL” once.<br />
2 Press and hold PWR for at least 2 seconds. You will see the devices power on or off according<br />
to the programmed sequence.<br />
To Clear The Master Power Key:<br />
1 Perform steps 1 and 2 in the first section above, “To Program The Master Power Key.”<br />
2 To clear the settings and exit the program, press and hold SETUP until the last-selected device<br />
key blinks twice, then release SETUP.<br />
Re-Assigning Device Keys<br />
The Atlas Universal Remote Control can be set up to control a second device. For example,<br />
to have the unit control a TV, a Cable Converter, and two DVD Players, you will need to<br />
re-assign the unused AUX key to operate the second DVD Player as follows:<br />
NOTE: AUX is preset at the factory to control an RCA VCR. Performing the below steps will overwrite<br />
those settings.<br />
1 On the remote control, press AUX once; it will blink once. Then press and hold SETUP until the<br />
AUX key blinks twice, then release SETUP.<br />
2 Enter 9 - 9 - 2. The AUX key will blink twice.<br />
3 Press DVD once, then press AUX once. The AUX key will blink twice.<br />
4 The AUX key is now ready to be programmed for your second DVD player.<br />
To re-assign other device keys, repeat steps 1 through 4 and substitute the key sequence<br />
using the following chart:<br />
NOTE: Only one device can be assigned to an unused device key at a time.<br />
To Re-Assign Perform Key Sequence<br />
AUX as 2nd AUD key: AUX - SETUP - 9 - 9 - 2 - AUD - AUX<br />
AUX as 2nd TV key: AUX - SETUP - 9 - 9 - 2 - TV - AUX<br />
AUX as 2nd CBL key: AUX - SETUP - 9 - 9 - 2 - CBL - AUX<br />
AUX back to AUX: AUX - SETUP - 9 - 9 - 2 - AUX - AUX<br />
To re-assign another unused device key, substitute it for the AUX key above and then<br />
perform the sequence. For example, to re-assign an unused AUD key as a second DVD key,<br />
perform AUD - SETUP - 9 - 9 - 2 - DVD - AUD. When a re-assignment is done, the selected<br />
device key (e.g., AUD) will blink twice to confirm your choice.<br />
Changing Volume Lock<br />
On this remote control, Global Volume Lock is set to TV, so you can control TV volume while<br />
in the AUX, DVD, TV or CBL mode. If desired, you can still perform Individual Volume Unlock<br />
on a selected device to set its volume control for independent operation.<br />
NOTE: The audio mode’s volume controls are active regardless of Volume Lock settings. However, if you<br />
lock the volume controls to the AUD mode, you will have control of the audio device’s volume in all<br />
other modes (i.e., AUX, DVD, TV, and CBL).<br />
E-5<br />
EQUIPMENT/SELF-INSTALLATION
EQUIPMENT/SELF-INSTALLATION<br />
E-6<br />
To Unlock Volume Control For A Single Device<br />
(Individual Volume Unlock):<br />
1 Assuming Global Volume Lock is active, select a mode on the remote control that you want<br />
to unlock (e.g.,CBL) and press it once. Next, press and hold SETUP until the device key blinks<br />
twice, then release SETUP.<br />
2 Enter 9 - 9 - 3. The last-selected device key will blink twice.<br />
3 Press VOL- once. The last-selected device key will blink four times.<br />
4 Repeat steps 1 through 3 (of this section) for each device you want volume to be unlocked.<br />
5 Now, after you select a device that has volume unlocked (e.g., CBL), pressing<br />
VOL+, VOL-, or MUTE will control the device’s volume only in its own mode.<br />
To Unlock All Volume Control<br />
(Global Volume Unlock):<br />
NOTE: Performing these instructions will set independent volume control for all programmed devices.<br />
1 On the remote control, press and hold SETUP until the last-selected device key blinks twice,<br />
then release SETUP.<br />
2 Enter 9 - 9 - 3. The last-selected device key will blink twice.<br />
3 Press VOL+ once. The last-selected device key will blink four times.<br />
To Lock Volume Control To One Mode<br />
(Global Volume Lock):<br />
NOTE: The audio mode’s volume controls are active regardless of Volume Lock settings. However, if<br />
you lock the volume controls to the AUD mode, you will have control of the audio device’s volume in<br />
all other modes (i.e., AUX, DVD, TV, and CBL).<br />
1 On the remote control, press and hold SETUP until the last-selected device key blinks twice,<br />
then release SETUP.<br />
2 Enter 9 - 9 - 3. The last-selected device key will blink twice.<br />
3 Select a mode (e.g., TV) where you want to globally lock the volume controls. The selected<br />
device key will blink twice.<br />
4 Now,when you press VOL+, VOL-, or MUTE, the volume of the selected device (e.g., TV) can be<br />
controlled regardless of mode.
<strong>WOW</strong>! Atlas Cable Remote Control Codes<br />
Use these codes if you have the <strong>WOW</strong>! Atlas Remote (page C-3)<br />
For the most current <strong>WOW</strong>! Atlas remote programming, please visit www.wowway.com/referenceguide<br />
SETUP CODES FOR AUDIO AMPLIFIERS:<br />
Adcom 0577, 1100<br />
Bose 0674<br />
Durabrand 1561<br />
Elan 0647<br />
GE 0078<br />
Harman/Kardon 0892<br />
JVC 0331<br />
Left Coast 0892<br />
Lenoxx 1561<br />
Luxman 0165<br />
Marantz 0892, 0321<br />
McIntosh 0251<br />
Nakamichi 0321<br />
NEC 0264<br />
Optimus 0395, 0823<br />
Parasound 0246<br />
Philips 0892<br />
Pioneer 0823<br />
Polk Audio 0892<br />
RCA 0823<br />
Realistic 0395<br />
Sansui 0321<br />
Shure 0264<br />
Sony 0689, 0815, 1126<br />
Soundesign 0078, 0211<br />
Victor 0331<br />
Wards 0078, 0211<br />
Yamaha 0354, 0133<br />
SETUP CODES FOR AUDIO RECEIVERS:<br />
ADC 0531<br />
Aiwa 1405, 0189, 0121,<br />
0405, 1243, 388, 1641<br />
Akai 1512<br />
Alco 1390<br />
Amphion Media Works 1563, 1615<br />
AMW 1563, 1615<br />
Anam 1609, 1074<br />
Apex Digital 1257, 1430, 1774<br />
Arcam 1120<br />
Audiotronic 1189<br />
Audiovox 1390, 1627<br />
B & K 0701, 0820, 0840<br />
BK 0702<br />
Bose 1229, 1629, 1841, 1933<br />
Cambridge Soundworks 1370<br />
Capetronic 0531<br />
Carver 1189, 0189<br />
Classic 1352<br />
Coby 1389<br />
Curtis Mathes 0080<br />
Daewoo 1250<br />
Delphi 1414<br />
Denon 1360, 0004, 1142<br />
Fisher 1801<br />
Gateway 1517<br />
Go Video 1532<br />
Harman/Kardon 0110, 0189, 0891,<br />
1304, 1306<br />
Hitachi 1801<br />
Integra 0135, 1298, 1320<br />
JBL 0110, 1306<br />
JVC 1374, 1495, 1811, 1871<br />
Kenwood 1313, 1570, 1569, 0186<br />
KLH 1390, 1412, 1428<br />
Koss 1366, 1497<br />
Lasonic 1798<br />
LG 1293<br />
Linn 0189<br />
Liquid Video 1497<br />
Magnavox 1189, 1269, 0189,<br />
0391, 0531, 1514<br />
Marantz 1189, 1269, 0189, 1289<br />
Mitsubishi 1393<br />
Norcent 1389<br />
Nova 1389<br />
Onkyo 0135, 0842, 1298,<br />
1320, 1531<br />
Optimus 1023, 0080, 0186,<br />
0531, 0670, 1074<br />
Oritron 1366, 1497<br />
Panasonic 1308, 1518, 0309,<br />
0367, 1288, 1316,<br />
1548, 1633, 1763, 1764<br />
Philips 1189, 1269, 0189,<br />
0391, 1120, 1266<br />
Pioneer 1023, 0014, 0080,<br />
0150, 0244, 0531,<br />
0630, 1384<br />
Polaroid 1508<br />
Polk Audio 0189, 1289, 1414<br />
Proscan 1254<br />
RCA 1023, 1609, 1254,<br />
0080, 0531, 1074,<br />
1390, 1511<br />
Rio 1869<br />
Samsung 1295, 1500<br />
Sansui 0189<br />
Sanyo 1251, 1469, 1801<br />
Sharp 0186, 1286<br />
Sharper Image 1556<br />
Sherwood 1077, 1517, 1653<br />
Sirius 1627, 1811, 1987<br />
Sonic Blue 1532, 1869<br />
Sony 1058, 1441, 1258, 1759,<br />
1622, 0474, 1349,<br />
1406, 1442, 1558,<br />
1658, 1758, 1858<br />
Soundesign 0670<br />
Stereophonics 1023<br />
Sunfire 1313<br />
Teac 1074, 1390, 1528<br />
Technics 1308, 1518, 0309<br />
Thorens 1189<br />
Toshiba 1788<br />
Venturer 1390<br />
Wards 0189, 0014, 0080<br />
XM 1406, 1414<br />
Yamaha 0176, 0186, 1176, 1276,<br />
1331, 1375<br />
Zenith 0857, 1293<br />
SETUP CODES FOR DVD PLAYERS:<br />
Accurian 1072, 1416<br />
Adcom 1094<br />
Advent 1016<br />
Aiwa 0641<br />
Akai 0695, 0770, 0899, 1089<br />
Alco 0790<br />
Allegro 0869<br />
Amphion Media Works 0872, 1245<br />
AMW 0872, 1245<br />
Apex Digital 0672, 0717, 0755,<br />
0794, 0796, 0797,<br />
0830, 1004, 1020,<br />
1056, 1061, 1100<br />
Arrgo 1023<br />
Aspire Digital 1168, 1407<br />
Audiologic 0736<br />
Audiovox 0790, 1041, 1071, 1072,<br />
1121, 1122<br />
Axion 1071, 1072<br />
B & K 0655, 0662<br />
BBK 1224<br />
Bel Canto Design 1571<br />
Blaupunkt 0717<br />
Blue Parade 0571<br />
Broksonic 0695, 0868, 1419<br />
Buffalo 1882<br />
Cary Audio Design 1477<br />
CAVS 1057<br />
Centrios 1577<br />
Cinea 0831<br />
Cinego 1399<br />
CineVision 0876, 0833, 0869<br />
Citizen 1277<br />
Coby 0778, 0852, 1086,<br />
1107, 1165, 1177, 1351<br />
Craig 0831<br />
Curtis Mathes 1087<br />
CyberHome 0816, 0874, 1023, 1024,<br />
1117, 1129, 1502, 1537<br />
D-Link 1881<br />
Daewoo 0784, 0705, 0833,<br />
0869, 1169, 1172, 1234,<br />
1242, 1441, 1443<br />
Denon 0490, 0634<br />
Desay 1407, 1455<br />
Diamond Vision 1316, 1609, 1610<br />
Disney 0675, 1270<br />
Dual 1068, 1085<br />
Durabrand 1127<br />
DVD2000 0521<br />
Emerson 0591, 0675, 0821, 1268<br />
Enterprise 0591<br />
ESA 0821, 1268, 1443<br />
E-7<br />
EQUIPMENT/SELF-INSTALLATION
EQUIPMENT/SELF-INSTALLATION<br />
E-8<br />
Fisher 0670, 1919<br />
Funai 0675, 1268, 1334<br />
Gateway 1073, 1077, 1158<br />
GE 0522, 0815, 0717<br />
Go Video 0744, 0715, 0741,<br />
0783, 0833, 0869,<br />
1044, 1075, 1099, 1144,<br />
1158, 1304, 1443, 1730<br />
Go Vision 1071, 1072<br />
GoldStar 0741<br />
GPX 0699, 0769<br />
Greenhill 0717<br />
Harman/Kardon 0582, 0702<br />
Hitachi 0573, 0664, 1247,<br />
1919<br />
Hiteker 0672<br />
iLo 1348, 1472<br />
Initial 0717, 1472<br />
Innovative Technology 1542<br />
Insignia 1268<br />
Integra 0627<br />
Jaton 1078<br />
JBL 0702<br />
Jensen 1016<br />
JSI 1423<br />
JVC 0558, 0623, 0867,<br />
1164, 1275, 1602, 1863<br />
jWin 1049, 1051<br />
Kawasaki 0790<br />
Kenwood 0490, 0534, 0682,<br />
0737<br />
KLH 0717, 0790, 1020,<br />
1149,1261<br />
Konka 0711, 0719, 0720, 0721<br />
Koss 0651, 0896, 1423<br />
Kreisen 1421<br />
Landel 0826<br />
Lasonic 0798, 1173<br />
Lenoxx 1127<br />
LG 0591, 0741, 0801,<br />
0869,1526<br />
LiteOn 1058, 1158, 1416, 1440<br />
Loewe 0511<br />
Magnavox 0503, 0539, 0646,<br />
0675, 0821, 1268,<br />
1506<br />
Malata 0782, 1159<br />
Marantz 0539<br />
McIntosh 1273<br />
Memorex 0695, 0831, 1270<br />
Microsoft 0522, 1708<br />
Mintek 0839, 0717, 1472<br />
Mitsubishi 1521, 0521<br />
Momitsu 1082<br />
NAD 0741<br />
Nakamichi 1222<br />
NEC 0785<br />
Nesa 0717, 1603<br />
NeuNeo 1454<br />
Next Base 0826<br />
NexxTech 1402<br />
Norcent 1003, 0872, 1107,<br />
1265, 1457<br />
Onkyo 0503, 0627, 0792<br />
Oppo 1224, 1525<br />
OptoMedia Electronics 0896<br />
Oritron 0651<br />
Panasonic 0490, 0632, 0703,<br />
1362, 1462, 1490, 1762<br />
Philips 0503, 0539, 0646, 0675,<br />
0854, 1260, 1267, 1354<br />
Pioneer 0525, 0571, 0631,<br />
0632<br />
Polaroid 1020, 1061, 1086, 1245,<br />
1316, 1478, 1480, 1482<br />
Polk Audio 0539<br />
Portland 0770<br />
Presidian 0675, 1072<br />
Prima 1016<br />
Primare 1467<br />
Princeton 0674<br />
Proscan 0522<br />
ProVision 0778<br />
Qwestar 0651<br />
RCA 0522, 0571, 0717,<br />
0790, 0822, 1022,<br />
1132, 1193<br />
Rio 0869<br />
RJTech 1360<br />
Rotel 0623, 1178<br />
Rowa 0823<br />
Sampo 0698, 0752, 1501<br />
Samsung 0490, 0573, 0820,<br />
0899, 1044, 1075<br />
Sansui 0695<br />
Sanyo 0670, 0695, 0873, 1919<br />
Sensory Science 1158<br />
Sharp 0630, 0675, 0752, 1256<br />
Sharper Image 1117<br />
Sherwood 0633, 0770, 1043,<br />
1077, 1889<br />
Shinsonic 0533, 0839<br />
Sigma Designs 0674<br />
Sonic Blue 0869, 1099<br />
Sony 0533, 1533, 0864,<br />
1033,1431, 1432, 1433,<br />
1548, 1892<br />
Sound Mobile 1298<br />
Sova 1122<br />
Sungale 1074, 1532<br />
Superscan 0821<br />
SVA 0860, 1105<br />
Sylvania 0675, 0821, 1268<br />
Symphonic 0675, 0821<br />
TAG McLaren 0894<br />
Teac 0790, 0809<br />
Technics 0490, 0703<br />
Technosonic 0730<br />
Techwood 0692<br />
Terapin 1031<br />
Theta Digital 0571<br />
Toshiba 0503, 0695, 1045,<br />
1154, 1854<br />
Tredex 0799, 0800, 0803, 0804<br />
Urban Concepts 0503<br />
US Logic 0839<br />
Valor 1298<br />
Venturer 0790<br />
Vialta 1509<br />
Vizio 1064, 1226<br />
Vocopro 1027, 1360<br />
Xbox 0522, 1708<br />
Xwave 1001<br />
Yamaha 0490, 0539, 0545<br />
Zenith 0503, 0591, 0741, 0869<br />
Zoece 1265<br />
SETUP CODES FOR TVS:<br />
A-Mark 0003<br />
Abex 0032<br />
Accurian 1803<br />
Action 0873l<br />
Admira 0093, 0463<br />
Advent 0761, 0783, 0815,<br />
0817, 0842, 1933<br />
Adventura 0046<br />
Aiko 0092<br />
Aiwa 0701<br />
Akai 0812, 0702, 0030,<br />
0098, 0672, 1207,<br />
1903, 1935<br />
Alaron 0179, 0183, 0216<br />
Albatron 0700, 0843<br />
Ambassador 0177<br />
America Action 0180<br />
Ampro 0751<br />
Anam 0180, 0004, 0009, 0068<br />
Anam National 0055, 0161<br />
AOC 0030, 0003, 0019,<br />
0052, 0137, 0185, 1365<br />
Apex Digital 0748, 0879, 0765,<br />
0767, 0890, 1217,<br />
1943<br />
Archer 0003<br />
Astar 1548<br />
Audiovox 0451, 0180, 0092,<br />
0003, 0623, 0710,<br />
0802, 0846, 0875,<br />
1284, 1937, 1951, 1952<br />
Aventura 0171<br />
Axion 1937<br />
Belcor 0019<br />
Bell & Howell 0154, 0016<br />
BenQ 1032, 1315<br />
Bradford 0180<br />
Brockwood 0019<br />
Broksonic 0236, 0463, 0003,<br />
1935, 1938<br />
Byd:sign 1309, 1311<br />
Cadia 1283<br />
Candle 0030, 0046, 0056,<br />
0186<br />
Carnivale 0030<br />
Carver 0054, 0170<br />
CCE 0217, 0329<br />
Celebrity 0000
Celera 0765<br />
Champion 1362<br />
Changhong 0765<br />
Cinego 1986<br />
Citizen 0060, 0030, 0092,<br />
0039, 0046, 0056,<br />
0186, 0280<br />
Clairtone 0185<br />
Clarion 0180<br />
Commercial Solutions 1447, 0047<br />
Concerto 0056<br />
Contec 0180, 0157, 0158, 0185<br />
Craig 0180, 0161<br />
Crosley 0054<br />
Crown 0180, 0039<br />
Curtis Mathes 0047, 0054, 0154,<br />
0451, 0093, 0060,<br />
0702, 0030, 0145,<br />
0166, 1347, 1147, 0747,<br />
0466, 0056, 0039,<br />
0016<br />
CXC 0180<br />
CyberHome 0794<br />
Cytron 1326<br />
Daewoo 0451, 0092, 1661,<br />
0019, 0039, 0066,<br />
0067, 0091, 0623,<br />
0661, 0672<br />
Daytron 0019<br />
Dell 1080, 1178, 1264, 1403<br />
Denon 0145, 0511<br />
Denstar 0628<br />
Diamond Vision 1996, 1997<br />
Dumont 0017, 0019<br />
Durabrand 0463, 0180, 0178,<br />
0171, 1034, 0003<br />
Dwin 0720, 0774<br />
Dynatech 0049<br />
Electroband 0000, 0185<br />
Electrograph 1623, 1755<br />
Electrohome 0381, 0389, 0409<br />
Emerson 0154, 0236, 0463,<br />
0180, 0178, 0171,<br />
1963, 1944, 0623,<br />
0282, 0280, 0270,<br />
0185, 0183, 0182,<br />
0181, 0179, 0177, 0158,<br />
0039, 0038, 0019<br />
Emprex 1422, 1546<br />
Envision 0030, 0813, 1365<br />
Epson 0833, 0840, 1290<br />
ESA 0812, 0171, 1944, 1963<br />
Fisher 0154, 0159<br />
FlexVision 0710<br />
Fujitsu 0179, 0186, 0683,<br />
0809, 0853<br />
Funai 0180, 0171, 0179, 1271,<br />
1963<br />
Futuretech 0180<br />
Gateway 1001, 1002, 1003,<br />
1004, 1755, 1756<br />
GE 1447, 0047, 0051,<br />
0451, 0178, 1347,<br />
0747, 0282, 0279,<br />
0251, 0174, 0138,<br />
0135, 0055, 0029,<br />
0027, 0021<br />
Gibralter 0017, 0030, 0019<br />
Go Video 0886<br />
GoldStar 0178, 0030, 0001,<br />
0002, 0019, 0032,<br />
0106, 0409<br />
Goodmans 0360<br />
Gradiente 0392<br />
Grunpy 0180, 0179<br />
Haier 1034, 0768<br />
Hallmark 0178<br />
Hannspree 1348, 1351, 1352<br />
Hantarex 1338<br />
Harley Davidson 0043, 0179<br />
Harman/Kardon 0054, 0078<br />
Harvard 0180, 0068<br />
Havermy 0093<br />
Helios 0865<br />
Hello Kitty 0451<br />
Hewlett Packard 1088, 1089, 1101,<br />
1494, 1502<br />
Hisense 0748<br />
Hitachi 1145, 0145, 0016,<br />
0032, 0038, 0056,<br />
0095, 0097, 0151,<br />
0173, 0227, 0279,<br />
0409, 0413, 0797,<br />
1960<br />
HP 1088, 1089, 1101,<br />
1494, 1502<br />
Hyundai 0849, 1219, 1294<br />
iLo 1286, 1603, 1990<br />
Infinity 0054<br />
Initial 1603, 1990<br />
Insignia 0171, 1204, 1326, 1517,<br />
1963, 2002<br />
Inteq 0017<br />
Janeil 0046<br />
JBL 0054<br />
JCB 0000<br />
Jensen 0761, 0050, 0815,<br />
0817, 1299, 1933<br />
JVC 0053, 0036, 0069,<br />
0160, 0169, 0182,<br />
0731, 1253<br />
Kamp 0216<br />
Kawasho 0158, 0216, 0308<br />
Kaypani 0052<br />
KEC 0180<br />
Kenwood 0030, 0019<br />
KLH 0765, 0767, 1962<br />
Kloss 0024, 0046, 0078<br />
KMC 0106<br />
Konka 0628, 0632, 0638,<br />
0703, 0707<br />
Kost 1262, 1483<br />
KTV 0180, 0030, 0039,<br />
0183, 0185, 0217,<br />
0280<br />
LG 1265, 0178, 0442,<br />
0700, 0829, 0856,<br />
1178, 1325, 1423, 1758,<br />
1993<br />
Loewe 0136<br />
Logik 0016<br />
Luxman 0056<br />
LXI 0047, 0054, 0154,<br />
0156, 0178, 0148,<br />
0747<br />
Magnavox 1454, 0054, 0030,<br />
0706, 1963, 1944,<br />
1525, 1254, 1198,<br />
0802, 0386, 0230,<br />
0187, 0186, 0179,<br />
0096, 0036, 0028,<br />
0024, 0020<br />
Majestic 0015, 0016<br />
Marantz 0054, 0030, 0444,<br />
0704, 0854, 0855,<br />
1154, 1398<br />
Matsushita 0250, 0650<br />
Maxent 0762, 1211, 1755<br />
Megapower 0700<br />
Megatron 0178, 0145, 0003<br />
MEI 0185<br />
Memorex 0154, 0463, 0150,<br />
0178, 0016, 0106,<br />
0179<br />
MGA 0150, 0178, 0030,<br />
0019, 0155<br />
Midland 0047, 0017, 0051,<br />
0032, 0039, 0135,<br />
0747<br />
Mintek 1603, 1990<br />
Minutz 0021<br />
Mitsubishi 0093, 1250, 0150,<br />
0178, 0014, 0019,<br />
0098, 0155, 0331,<br />
0358, 0836, 0868,<br />
1550<br />
Monivision 0700, 0843<br />
Motorola 0093, 0055, 0835<br />
Moxell 0835<br />
MTC 0060, 0030, 0019,<br />
0049, 0056, 0091,<br />
0185, 0216<br />
Multitech 0180, 0049, 0217<br />
NAD 0156, 0178, 0866<br />
NEC 0030, 0019, 0036,<br />
0056, 0170, 0434,<br />
0497, 0882, 1398,<br />
1704<br />
Neovia 1338<br />
NetTV 0762, 1755<br />
Nikko 0178, 0030, 0092,<br />
0317<br />
Noblex 0430<br />
Norcent 0748, 0824, 1089,<br />
1365, 1589, 1590, 1591<br />
Norwood Micro 1286, 1296, 1303<br />
E-9<br />
EQUIPMENT/SELF-INSTALLATION
EQUIPMENT/SELF-INSTALLATION<br />
Noshi 0018<br />
NTC 0092<br />
Olevia 1144, 1240, 1331, 1610<br />
Olympus 1342<br />
Onwa 0180<br />
Optimus 0154, 0250, 0166, 0650<br />
Optoma 0887<br />
Optonica 0093, 0165<br />
Orion 0236, 0463, 1463, 0179<br />
Panasonic 0250, 0051, 0055,<br />
0162, 0226, 0338,<br />
0375, 0650, 1291,<br />
1410, 1941, 1946, 1947<br />
Penney 0047, 0156, 0051,<br />
0060, 0178, 0030,<br />
1347, 0747, 0309,<br />
0149, 0138, 0135,<br />
0110, 0039, 0032,<br />
0027, 0021, 0019,<br />
0018, 0003, 0002<br />
Petters 1523<br />
Philco 0054, 0030, 0019,<br />
0020, 0028, 0096,<br />
0302<br />
Philips 1454, 0054, 0690,<br />
1154, 1483<br />
Pilot 0030, 0019, 0039<br />
Pioneer 0166, 0038, 0172,<br />
0679, 0866, 1260,<br />
1398<br />
Polaroid 0765, 0865, 1262,<br />
1276, 1314, 1316, 1326,<br />
1327, 1328, 1341, 1498,<br />
1523, 1991, 1992<br />
Portland 0092, 0019, 0039<br />
Prima 0761, 0783, 0815,<br />
0817, 1933<br />
Princeton 0700, 0717<br />
Prism 0051<br />
Proscan 1447, 0047, 0747, 1347<br />
Proton 0178, 0003, 0031,<br />
0052, 0466<br />
Protron 1320, 1323<br />
Proview 0835, 1401, 1498<br />
Pulsar 0017, 0019<br />
Quasar 0250, 0051, 0055,<br />
0165, 0219, 0650<br />
RadioShack 0047, 0154, 0180,<br />
0178, 0030, 0019,<br />
0032, 0039, 0056,<br />
0165, 0409, 0747<br />
RCA 1447, 0047, 2002,<br />
1958, 1953, 1948,<br />
1547, 1347, 1247, 1147,<br />
1047, 0747, 0679,<br />
0278, 0174, 0135,<br />
0090, 0038, 0029,<br />
0019, 0018<br />
Realistic 0154, 0180, 0178,<br />
0030, 0019, 0032,<br />
0039, 0056, 0165<br />
Rhapsody 0183, 0185, 0216<br />
E-10<br />
Runco 0017, 0030, 0251,<br />
0497, 0603, 1398<br />
Sampo 0030, 0032, 0039,<br />
0052, 0100, 0110,<br />
0762, 1755<br />
Samsung 0060, 0812, 0702,<br />
0178, 0030, 1903,<br />
1575, 1395, 1312, 1060,<br />
0814, 0766, 0427,<br />
0408, 0329, 0056,<br />
0032, 0019<br />
Samsux 0039<br />
Sansui 0463, 1409, 1935<br />
Sanyo 0154, 0088, 0107,<br />
0146, 0159, 0232,<br />
0484, 0799, 0893,<br />
1142<br />
Sceptre 0878, 1217, 1360, 1599<br />
Scimitsu 0019<br />
Scotch 0178<br />
Scott 0236, 0180, 0178,<br />
0019, 0179, 0309<br />
Sears 0047, 0054, 0154,<br />
0156, 0178, 0171, 0015,<br />
0056, 0146, 0148,<br />
0149, 0159, 0168,<br />
0179, 0281, 0747<br />
Sharp 0093, 0039, 0153,<br />
0157, 0165, 0220,<br />
0281, 0386, 0398,<br />
0491, 0688, 0689,<br />
0818, 0851, 1602<br />
Sheng Chia 0093<br />
Sherwood 1399<br />
Shogun 0019<br />
Signature 0016<br />
Signet 1262<br />
SIM2 Multimedia 1297<br />
Simpson 0186, 0187<br />
Sony 1100, 0000, 0011,<br />
0080, 0111, 0273,<br />
0353, 0810, 0834,<br />
1317<br />
Soundesign 0180, 0178, 0179, 0186<br />
Sova 1320, 1952<br />
Soyo 1520<br />
Spectricon 0003, 0137<br />
Squareview 0171<br />
SSS 0180, 0019<br />
Starlite 0180<br />
Studio Experience 0843<br />
Superscan 0093, 0864<br />
Supre-Macy 0046<br />
Supreme 0000<br />
SVA 0748, 0587, 0768,<br />
0865, 0870, 0871,<br />
0872<br />
Sylvania 0054, 0030, 0171,<br />
0020, 0028,0065,<br />
0096, 0381, 1271,<br />
1944, 1963<br />
Symphonic 0180, 0171, 1944<br />
Syntax 1144, 1240, 1331<br />
Tandy 0093<br />
Tatung 0003, 0049, 0055,<br />
0396, 1101, 1285,<br />
1286, 1287, 1288, 1361,<br />
1756<br />
Technics 0250, 0051<br />
Technol Ace 0179<br />
Technovox 0007<br />
Techview 0847<br />
Techwood 0051, 0003, 0056<br />
Teknika 0054, 0180, 0150,<br />
0060, 0092, 0016,<br />
0019, 0039, 0056,<br />
0175, 0179, 0186,<br />
0312, 0322<br />
Telefunken 0702, 0056, 0074<br />
Tera 0031<br />
Thomson 0209, 0210<br />
TMK 0178, 0056, 0177<br />
TNCi 0017<br />
Toshiba 0154, 1256, 0156,<br />
1265, 0060, 1945,<br />
1935, 1704, 1656,<br />
1635, 1356, 1343, 1325,<br />
1306, 1156, 0845,<br />
0832, 0650, 0149,<br />
0036<br />
Tosonic 0185<br />
Totevision 0039<br />
Trical 0157<br />
TVS 0463<br />
Ultra 0391, 1323<br />
Universal 0027<br />
Universum 1337<br />
US Logic 1286, 1303<br />
Vector Research 0030<br />
Victor 0053<br />
Video Concepts 0098<br />
Vidikron 0054, 0242, 1398<br />
Vidtech 0178, 0019, 0036<br />
Viewsonic 0797, 0857, 0864,<br />
0885, 1330, 1342,<br />
1578, 1627, 1755<br />
Viking 0046, 0312<br />
Viore 1207<br />
Visart 1336<br />
Vizio 0864, 0885, 1499,<br />
1756, 1758<br />
Wards 0054, 0178, 0030,<br />
1156, 0866, 0202,<br />
0179, 0174, 0165, 0111,<br />
0096, 0080, 0056,<br />
0029, 0028, 0027,<br />
0021, 0020, 0019,<br />
0016<br />
Waycon 0156<br />
Westinghouse 0885, 0889, 0890,<br />
1282, 1577<br />
White Westinghouse 0463, 0623<br />
Wyse 1365<br />
Yamaha 0030, 0019, 0769,
0797, 0833, 0839<br />
Zenith 0017, 0463, 1265,<br />
0178, 0092, 0016<br />
Zonda 0003<br />
SETUP CODES FOR TVS (DLP)<br />
Hewlett Packard 1494<br />
HP 1494<br />
LG 1265<br />
Magnavox 1525<br />
Mitsubishi 1250<br />
Optoma 0887<br />
Panasonic 1291<br />
RCA 1447<br />
Samsung 0812, 1060, 1312<br />
SVA 0872<br />
Toshiba 1265, 1306<br />
Vizio 1499<br />
SETUP CODES FOR TVS (<strong>HD</strong>TV)<br />
Advent 0842<br />
Hitachi 1960<br />
Marantz 0854<br />
Mitsubishi 0150<br />
Panasonic 0250, 0650, 1291<br />
Pioneer 0679<br />
Princeton 0717<br />
RCA 1447<br />
Samsung 0812, 0702<br />
Sharp 0688, 0689<br />
Toshiba 1256<br />
SETUP CODES FOR TVS (LCD)<br />
Accurian 1803<br />
Action 0873<br />
Akai 1935<br />
AOC 1365<br />
Apex Digital 0890, 1217<br />
Astar 1548<br />
Audiovox 0180, 0710, 0802,<br />
0846, 0875, 1284,<br />
1937, 1951, 1952<br />
BenQ 1315<br />
Byd:sign 1309, 1311<br />
Cadia 1283<br />
CyberHome 0794<br />
Dell 1080, 1178, 1264<br />
Emprex 1422, 1546<br />
Envision 0813, 1365<br />
FlexVision 0710<br />
Funai 0171<br />
Go Video 0886<br />
Hannspree 1348, 1351<br />
Hewlett Packard 1088<br />
HP 1088<br />
Hyundai 0849, 1219, 1294<br />
iLo 1286, 1603, 1990<br />
Initial 1603, 1990<br />
Insignia 1204, 1517, 2002<br />
Jensen 1299<br />
Kost 1262<br />
LG 0856, 1178, 1993<br />
Magnavox 1454, 0802, 1198<br />
Marantz 0855<br />
Maxent 0762, 1211<br />
Mintek 1603, 1990<br />
Mitsubishi 1250<br />
NetTV 0762<br />
Norcent 1365, 1589, 1591<br />
Norwood Micro 1286, 1296<br />
Olevia 1144, 1240, 1331, 1610<br />
Panasonic 0650, 1941<br />
Petters 1523<br />
Philips 1454, 1483<br />
Polaroid 1262, 1276, 1316, 1341,<br />
1498, 1523<br />
Protron 1320, 1323<br />
Proview 1401<br />
RCA 0047, 1958<br />
Sampo 0762<br />
Samsung 0812, 0766, 0814,<br />
1395, 1575<br />
Sansui 1409<br />
Sanyo 1142<br />
Sceptre 0878, 1217, 1360, 1599<br />
Sharp 0093, 0818, 1602<br />
Sherwood 1399<br />
Signet 1262<br />
Sony 0810<br />
Sova 1320<br />
Soyo 1520<br />
Superscan 0864<br />
SVA 0587, 0870, 0871<br />
Sylvania 0171, 1271<br />
Symphonic 0171<br />
Syntax 1144, 1240, 1331<br />
Tatung 1286<br />
Techview 0847<br />
Toshiba 0845, 1343, 1635, 1656<br />
Ultra 1323<br />
US Logic 1286<br />
Vidikron 1398<br />
Viewsonic 0857, 0864, 0885,<br />
1330,1578, 1627<br />
Visart 1336<br />
Vizio 0864, 0885, 1756<br />
Westinghouse 0885, 0889, 0890,<br />
1282, 1577<br />
Wyse 1365<br />
Zenith 1265<br />
SETUP CODES FOR VCRs<br />
ABS 1972<br />
Admiral 0048, 0209<br />
Adventura 0000<br />
Aiko 0278<br />
Aiwa 0037, 0000, 0124,<br />
0307, 0468<br />
Akai 0041, 0049, 0053,<br />
0061, 0106, 0175<br />
Alienware 1972<br />
America Action 0278<br />
American High 0035<br />
Asha 0240<br />
Audiovox 0037, 0278<br />
Beaumark 0240<br />
Bell & Howell 0104<br />
Broksonic 0184, 0121, 0209,<br />
0002, 0211, 0295,<br />
0361, 0479, 1479, 1815<br />
Calix 0037<br />
Canon 0035, 0102<br />
Capehart 0020<br />
Carver 0081<br />
CCE 0072, 0278<br />
Citizen 0037, 0278, 1278<br />
Colt 0072<br />
Craig 0037, 0047, 0240,<br />
0072, 0271<br />
Curtis Mathes 0060, 0035, 0162,<br />
0041, 0760, 1035<br />
Cybernex 0240, 0051<br />
CyberPower 1972<br />
Daewoo 0045, 0278, 0020,<br />
0561, 0637, 1278<br />
Daytron 0020<br />
Dell 1972<br />
Denon 0042<br />
DirecTV 0739<br />
Durabrand 0039, 0038<br />
Dynatech 0000<br />
Electrohome 0037<br />
Electrophonic 0037<br />
Emerex 0032<br />
Emerson 0037, 0184, 0000,<br />
0121, 0043, 0209,<br />
0002, 0278, 1479,<br />
1278, 0637, 1593,<br />
0593, 0561, 0510,<br />
0479, 0361, 0295,<br />
0294, 0212, 0211,<br />
0208, 0088, 0068,<br />
0061, 0036<br />
Fisher 0047, 0104, 0054,<br />
0066<br />
Fuji 0035, 0033<br />
Funai 0000, 0593, 1593<br />
Garrard 0000<br />
Gateway 1972<br />
GE 0060, 0035, 0240,<br />
0065, 0202, 0760,<br />
0761, 0807, 1035,<br />
1060<br />
Go Video 0232, 0279, 0432,<br />
0526, 0643<br />
GoldStar 0037, 0038, 0018,<br />
1237<br />
Gradiente 0000, 0408<br />
Grundig 0195<br />
Harley Davidson 0000<br />
Harman/Kardon 0081, 0038, 0075<br />
Harwood 0072, 0068<br />
Headquarter 0046<br />
E-11<br />
EQUIPMENT/SELF-INSTALLATION
EQUIPMENT/SELF-INSTALLATION<br />
Hewlett Packard 1972<br />
HI-Q 0047<br />
Hitachi 0000, 0042, 0041,<br />
0065, 0082, 0089,<br />
0105, 0166<br />
Howard Computers 1972<br />
HP 1972<br />
Hughes Network Systems 0042, 0739<br />
Humax 0739<br />
Hush 1972<br />
iBUYPOWER 1972<br />
Jensen 0041<br />
JVC 0067, 0041, 0008,<br />
0206, 0207, 0384,<br />
1707<br />
KEC 0037, 0278<br />
Keen 0693<br />
Kenwood 0067, 0041, 0038, 0384<br />
KLH 0072<br />
Kodak 0035, 0037<br />
LG 1037<br />
Linksys 1972<br />
Lloyd’s 0000, 0208<br />
Logik 0072<br />
LXI 0037<br />
Magnasonic 0593, 1278<br />
Magnavox 0035, 0039, 0081,<br />
0000, 0149, 0110,<br />
0563, 0593, 1593, 1781<br />
Magnin 0240<br />
Marantz 0035, 0081<br />
Marta 0037<br />
Matsushita 0035, 0162, 1162<br />
Media Center PC 1972<br />
MEI 0035<br />
Memorex 0035, 0162, 0037,<br />
0048, 0039, 0047,<br />
0240, 0000, 0104,<br />
0209, 0046, 0307,<br />
0454, 0479, 1037,<br />
1162, 1237, 1262<br />
MGA 0240, 0043, 0061<br />
MGN Technology 0240<br />
Microsoft 1972<br />
Mind 1972<br />
Minolta 0042, 0105<br />
Mitsubishi 0067, 0043, 0061,<br />
0075, 0173, 0443, 0807<br />
Motorola 0035, 0048<br />
MTC 0240, 0000<br />
Multitech 0000, 0072<br />
NAD 0058<br />
NEC 0104, 0067, 0041,<br />
0038, 0040, 0050,<br />
0082<br />
Nikko 0037<br />
Nikon 0034<br />
Niveus Media 1972<br />
Noblex 0240<br />
Northgate 1972<br />
Olympus 0035, 0226<br />
Onkyo 0222<br />
E-12<br />
Optimus 1062, 0162, 0037,<br />
0048, 0104, 0058,<br />
0432, 0454, 0593,<br />
1048, 1162, 1262<br />
Optonica 0062<br />
Orion 0184, 0209, 0002,<br />
0295, 0479, 1479<br />
Panasonic 1062, 0035, 0162,<br />
0077, 0102, 0225,<br />
0226, 0227, 0378,<br />
0454, 0616, 1035,<br />
1162, 1262<br />
Penney 0035, 0037, 0240,<br />
0042, 0038, 0040,<br />
0054, 1035, 1237<br />
Pentax 0042, 0065, 0105<br />
Philco 0035<br />
Philips 0035, 0081, 0062,<br />
0110, 0618, 0739,<br />
1081, 1181<br />
Pilot 0037<br />
Pioneer 0067, 0058<br />
Polk Audio 0081<br />
Portland 0020<br />
Presidian 1593<br />
Profitronic 0240<br />
Proscan 0060, 0202, 0760,<br />
0761, 1060<br />
Protec 0072<br />
Pulsar 0039, 0051<br />
Quarter 0046<br />
Quartz 0046<br />
Quasar 0035, 0162, 0077,<br />
0454, 1035, 1162<br />
RadioShack 0000, 1037<br />
Radix 0037<br />
Randex 0037<br />
RCA 0060, 0240, 0042,<br />
0149, 0058, 0065,<br />
0077, 0105, 0106,<br />
0202, 0760, 0761,<br />
0807, 0880, 1035,<br />
1060<br />
Realistic 0035, 0037, 0048,<br />
0047, 0000, 0104,<br />
0046, 0062, 0066<br />
ReplayTV 0614, 0616<br />
Ricavision 1972<br />
Ricoh 0034<br />
Runco 0039<br />
Salora 0075<br />
Samsung 0240, 0045, 0051,<br />
0053, 0739, 1014<br />
Samtron 0643<br />
Sanky 0048, 0039<br />
Sansui 0000, 0067, 0209,<br />
0041, 0082, 0271,<br />
0479, 1479<br />
Sanyo 0047, 0240, 0104,<br />
0046, 0159<br />
Scott 0184, 0045, 0121,<br />
0043, 0210, 0211, 0212<br />
Sears 0035, 0037, 0047,<br />
0000, 0042, 0104,<br />
0046, 0054, 0066,<br />
0105, 1237<br />
Sharp 0048, 0062, 0807,<br />
0848<br />
Shintom 0072<br />
Shogun 0240, 0051<br />
Singer 0072<br />
Sonic Blue 0614, 0616<br />
Sony 0035, 0032, 0033,<br />
0000, 0011, 0034,<br />
0636, 1032, 1232,<br />
1972<br />
Stack 9 1972<br />
STS 0042<br />
Sylvania 0035, 0081, 0000,<br />
0043, 0110, 0593,<br />
1593, 1781<br />
Symphonic 0000, 0593, 1593<br />
Systemax 1972<br />
Tagar Systems 1972<br />
Tatung 0041<br />
Teac 0000, 0041<br />
Technics 0035, 0162<br />
Teknika 0035, 0037, 0000,<br />
0052<br />
Thomas 0000<br />
Tivo 0618, 0636, 0739,<br />
1996<br />
TMK 0240, 0036, 0208<br />
Toshiba 0045, 0043, 0066,<br />
0210, 0212, 0366,<br />
0845, 1008, 1145,<br />
1972, 1996<br />
Totevision 0037, 0240<br />
Touch 1972<br />
Unitech 0240<br />
Vector 0045<br />
Vector Research 0038, 0040<br />
Video Concepts 0045, 0040, 0061<br />
Videomagic 0037<br />
Videosonic 0240<br />
Viewsonic 1972<br />
Villain 0000<br />
Voodoo 1972<br />
Wards 0060, 0035, 0048,<br />
0047, 0081, 0240,<br />
0000, 0042, 0072,<br />
0149, 0062, 0212,<br />
0760<br />
White Westinghouse 0209, 0072, 0637<br />
XR-1000 0035, 0000, 0072<br />
Yamaha 0038<br />
Zenith 0039, 0033, 0000,<br />
0209, 0034, 0479,<br />
0637, 1139, 1479<br />
ZT Group 1972
Digital Cable Self-Installation<br />
We’ve included everything you’ll need to hook up your new <strong>WOW</strong>! Digital Cable service,<br />
including all the equipment and step-by-step, easy-to-follow instructions.<br />
Digital Cable Self-Start Checklist<br />
Please go through the contents of this kit and familiarize yourself with each item. If any<br />
equipment is missing please call <strong>WOW</strong>! toll free at 1-866-4<strong>WOW</strong>-NOW (1-866-496-9669).<br />
The Digital Cable Self-Start kit contains:<br />
Digital Cable Receiver<br />
Digital Remote Control (with batteries)<br />
Receiver Power Cord<br />
(2) 4ft. Cable (Coaxial) Cords<br />
(1) 5ft. Cable (Coaxial) Cord<br />
1 RCA Cord (Video/Audio Cable)<br />
Digital Cable Receiver<br />
Getting Started<br />
IMPORTANT! Please review the “Important Rules for Safe Operation” section on page 56.<br />
Step 1: Disconnect Your Digital Adapter (existing cable box)<br />
If you do not currently have a Digital Adapter connected, please proceed to Step 2.<br />
• Turn off your Digital Adapter, TV and VCR.<br />
• Unplug the Digital Adapter from the power source (wall electrical outlet).<br />
• Unscrew and remove the main cable cord from the input plug on the back of your Digital<br />
Adapter (the other end of this cable cord should come from your wall/floor).<br />
• Unscrew and disconnect the cable from the output plug on the back of your Digital Adapter<br />
(the other end of this cable cord should still be connected to your TV or VCR).<br />
Your Digital Adapter is now disconnected and safe to remove.<br />
Step 2: Position the Digital Cable Receiver<br />
• Take your new Digital Cable receiver out of the kit, remove any plastic wrapping, and place it<br />
where you’d like it to go in close proximity to your TV and VCR.<br />
• Make sure you have enough room to make the necessary connections in the back of<br />
the receiver.<br />
The Digital Cable Receiver<br />
E-13<br />
EQUIPMENT/SELF-INSTALLATION
EQUIPMENT/SELF-INSTALLATION<br />
E-14<br />
Step 3: Connect the Digital Cable Receiver<br />
• Determine the type of TV and VCR you have (stereo or non-stereo). If you have either a stereo<br />
TV or VCR please proceed to Step 3a; if not, please continue.<br />
• Plug the main cable cord (coming from the wall/floor) into the “Cable In” outlet on the back of<br />
your Digital Cable receiver (receiver diagram Position 3, page E-13).<br />
• Take the cable (coaxial) cord still connected to the TV/VCR and insert into the “Cable Out”<br />
outlet on the back of your Digital Cable receiver (receiver diagram Position 2, page E-13).<br />
If you do not have a Digital Adapter:<br />
From your kit, gather the 3 cable cords. There are two different lengths. Choose the<br />
cord that will best reach between the Digital Cable receiver and your TV/VCR.<br />
If you are connecting a TV with a VCR:<br />
• Take one cable (coaxial) cord and insert one end into the “Cable Out” outlet of the<br />
Digital Cable receiver and the other end into the “In” outlet of the VCR.<br />
• Take another cable (coaxial) cord and insert one end into the “Out” outlet of the<br />
VCR and the other end into the “Cable/Antenna” outlet of the TV. (See “Advanced<br />
<strong>Equipment</strong> Setup”, page E-16, Diagram B).<br />
If you are connecting a TV only:<br />
• Take one cable (coaxial) cord and insert one end into the cable/antenna outlet on<br />
the TV and the other end into the “Cable Out” outlet on the Digital Cable receiver.<br />
(See “Advanced <strong>Equipment</strong> Setup”, page E-16, Diagram A).<br />
• In your installation kit, find the power cord and plug it into the 120V AC outlet on the back<br />
of the Digital Cable receiver (receiver diagram Position 4, page E-13). If your Digital Receiver<br />
already has a power cord attached, leave outlet empty.<br />
• Take the other end of the power cord and plug it into the power source (electrical outlet). A<br />
series of codes will appear on the front panel then the green bypass button should light up.<br />
• Wait for the time to display on the front panel of the Digital Cable receiver (about 2 minutes).<br />
NOTE: If you have a more advanced setup, please refer to additional connection diagrams in<br />
“Advanced <strong>Equipment</strong> Setup,” on pages E-16 to E-17.<br />
You are now ready to turn on your system.<br />
• Manually turn on your TV. Tune to Channel 3 (Channel 4 in Cleveland).<br />
• Press the POWER button on your Digital Cable receiver. You should now have a clear picture<br />
on your TV. If you don’t have a clear picture, please see “Digital Cable Receiver Setup<br />
Troubleshooting” on page E-18.<br />
Step 3a: Stereo TV/VCR Connection<br />
You will need to follow the steps below if you have a stereo TV or VCR.<br />
• Find the RCA Cord in your Self-Start kit. The RCA Cord is the cable with three colored prongs at<br />
the end: yellow for Video In/Out, white for Audio In/Out L and red for<br />
Audio In/Out R.
If you are connecting a stereo TV and a non-stereo VCR:<br />
• Take one end of the RCA cord and plug into the Audio Out R (red), Audio Out L (white) and Video<br />
Out (yellow) outlets on the back of the Digital Cable receiver.<br />
• Plug the other end of the RCA cord into the Video In (yellow), Audio In L (white), and Audio In R<br />
(red) outlets on the back of your TV. (See “Advanced <strong>Equipment</strong> Setup”, page E-17, Diagram E).<br />
If you are connecting a stereo TV and a stereo VCR:<br />
IMPORTANT: You will need two RCA cords to complete this setup. You may purchase an additional RCA cord at any electronics store.<br />
• Take one of the RCA cords and plug into the Audio Out R (red), Audio Out L (white) and Video<br />
Out (yellow) outlets on the back of the Digital Cable receiver.<br />
• Plug the other end of the same RCA cord into the Video In (yellow), Audio In L (white) and Audio<br />
In R (red) outlets on the back of your VCR.<br />
• Take the second RCA cord and plug into the Audio Out R (red), Audio Out L (white) and Video<br />
Out (yellow) outlets on the back of your VCR.<br />
• Plug the other end of the second RCA cord into the Video In (yellow), Audio In L (white), and<br />
Audio In R (red) outlets on the back of your TV. (See “Advanced <strong>Equipment</strong> Setup”, page E-17<br />
Diagram F).<br />
NOTE: You will not need to use any other cable cords for setting up the Digital Cable receiver.<br />
• Plug the main cable cord (coming from the wall/floor) into the Cable In outlet on the back of<br />
your Digital Cable receiver.<br />
• Take the cable cord still connected to the TV/VCR and insert into the Cable Out outlet on the<br />
back of your Digital Cable receiver (only if you did not use two RCA cords or an S-Video cable in<br />
your setup).<br />
• In your installation kit, find the power cord and plug it into the 120V AC outlet on the back of<br />
the Digital Cable receiver (receiver diagram Position 4, page E-13).<br />
• Take the other end of the power cord and plug it into the power source (wall/electrical outlet).<br />
A series of codes will appear on the front panel then the green bypass button should light up.<br />
• Wait for the time to display on the front panel of the Digital Cable receiver (about 2 minutes).<br />
NOTE: If you have a more advanced setup, please refer to additional connection diagrams in<br />
“Advanced <strong>Equipment</strong> Setup” on pages E-16 and E-17.<br />
You are now ready to turn on your system.<br />
• Manually turn on your TV and your VCR. Tune your TV to Video 1 or Line In.<br />
• Tune your VCR to Channel 3 (Channel 4 in Cleveland).<br />
• Press the POWER button on your Digital Cable receiver. You should now have a clear picture on<br />
your TV. If you don’t have a clear picture, please see Digital Cable Receiver Troubleshooting on<br />
page E-18.<br />
E-15<br />
EQUIPMENT/SELF-INSTALLATION
EQUIPMENT/SELF-INSTALLATION<br />
Advanced Digital <strong>Equipment</strong> Setup<br />
Determine what electronic equipment you are connecting to your new digital system.<br />
Identify whether or not this equipment has stereo (TV/VCR will have Audio Out L and R<br />
outlets) or S-Video (TV/VCR will have an S-Video outlet) inputs.<br />
Diagram A: Connecting a Non-Stereo TV – Required Cables: 1 Coaxial Cable<br />
NOTE: Audio output from the cable out is monaural (non-stereo).<br />
E-16<br />
Diagram B: Connecting a Non-Stereo TV and a Non-Stereo VCR – Required Cables: 2 Coaxial Cables<br />
NOTE: Audio output from the Cable Out is monaural (non-stereo).<br />
Diagram C: Connecting a Non-Stereo TV and a Stereo VCR – Required Cables: 2 Coaxial Cables<br />
NOTE: This setup provides monaural (non-stereo) sound only.<br />
Diagram D: Connecting a Stereo TV – Required Cables: 1 Set of RCA Cords
Diagram E: Connecting a Stereo TV and a Non-Stereo VCR – Required Cables: 1 Set of RCA<br />
Cords, 2 Coaxial Cables<br />
NOTE: If you connect to S-Video Out, you must connect the Left and Right Audio Out to the Left and Right Audio In connectors on your TV, VCR or stereo (this diagram<br />
shows a stereo TV connection). Audio output from the Cable Out is monaural (nonstereo). Audio output from the Cable Out Left and Right is stereo.<br />
Diagram F: Connecting a Stereo TV and a Stereo VCR – Required Cables: 2 Sets of RCA Cords<br />
IMPORTANT: You will need two RCA cords to complete this setup. You may purchase an additional RCA cord at any electronics store.<br />
Diagram G: Connecting a Stereo TV and a Stereo VCR with S-Video – Required Cables: 2<br />
S-Video Cables, 2 Stereo Audio Cables<br />
NOTE: If you connect to S-Video Out, you must connect the Left and Right Audio Out to the Left and Right Audio In connectors on your TV, VCR or stereo.<br />
Diagram H: Connecting a Stereo TV with S-Video – Required Cables: 1 S-Video Cable,<br />
1 Stereo Audio Cable<br />
NOTE: If you connect to S-Video Out, you must connect the Left and Right Audio Out to the Left and Right Audio In connectors on your<br />
TV, VCR or stereo.<br />
E-17<br />
EQUIPMENT/SELF-INSTALLATION
EQUIPMENT/SELF-INSTALLATION<br />
Digital Cable Receiver Setup Troubleshooting<br />
Please walk through the troubleshooting solutions below if you do not have a picture, have<br />
a distorted picture, have no sound, or your Digital Cable receiver does not respond.<br />
No Picture<br />
• Turn the TV on.<br />
• Tune the TV to channel 3 (channel 4 in Cleveland) or Video 1, Line 1 if you used an RCA cord.<br />
• Check to see if your TV, VCR and Digital Cable receiver are plugged into an electrical outlet that<br />
is controlled by a wall switch. If it is, make sure the switch is turned on.<br />
• Verify that all cable cords are properly connected. You may want to walk through your<br />
connection diagram again.<br />
• If you are using an RCA cord, make sure the VCR is on (set to Video 1 or Line 1).<br />
Distorted Picture or Picture “Ghosting”<br />
• Tune the TV to channel 3 (channel 4 in Cleveland) or Video 1, Line 1 if you used an RCA cord.<br />
• Verify that all cable cords are properly connected and tightened. You may want to walk<br />
through your connection diagram again.<br />
No Sound<br />
• Check to make sure the volume is turned up on both the TV and the Digital Receiver.<br />
• Press the TV button then the mute button. Verify that neither the mute button nor the SAP<br />
feature is activated.<br />
• Review all suggestions from “No Picture”above.<br />
Digital Cable Receiver Does not Respond<br />
• Check to see if your TV, VCR and Digital Cable receiver are plugged into an electrical outlet that<br />
is controlled by a wall switch. If so, make sure the switch is turned on.<br />
• Verify that all cable cords are properly connected.<br />
• Press the POWER button on the Digital Cable receiver.<br />
If the Remote Control Isn’t Working<br />
This is usually because the remote control needs new batteries. Replace the existing<br />
batteries with two new AAA batteries. The Atlas remote (shown on page C-3) uses two<br />
AA batteries.<br />
IMPORTANT: Replace batteries within 2 minutes of removing old ones to avoid losing programmed settings.<br />
If you are still experiencing problems, please contact <strong>WOW</strong>! toll free at 1-866-4<strong>WOW</strong>-NOW<br />
(1-866-496-9669).<br />
E-18
Programming Your Digital Cable Remote Control<br />
The Digital Remote Control is a universal remote designed to operate the features of the<br />
Digital Cable receiver. Plus, it can be programmed to control most of the basic functions of<br />
many TVs, VCRs and other devices. Inspect the front of the Digital Remote. Across the top<br />
are four buttons labeled CBL, TV, VCR, AUX (for DVDs, stereos, etc.). Pressing any of these<br />
buttons will determine which device is being controlled. The CBL button has already been<br />
pre-programmed to control the Digital Cable receiver. You will now be instructed, step-bystep,<br />
how to program the TV and VCR functions.<br />
1 Check the brand names of all the devices you will be connecting to your Digital Cable system (TV,<br />
VCR, DVD, etc.). You will need the 3-digit code to program your devices. Find the codes for each<br />
device on the following pages. Write your codes here for quick reference:<br />
TV VCR OTHER<br />
2 Repeat the following steps to program each of your devices (TV, VCR, DVD, etc.).<br />
• Turn on the device that you want to program (using the ON/OFF button on the front of the<br />
device).<br />
• Press the specific device button (TV, VCR, AUX) on the remote and the SELECT button at the<br />
same time and hold for 4 seconds (the device button on the remote will light up to indicate<br />
it’s ready for programming).<br />
• Point the Digital Remote toward the device you are programming and enter the first 3-digit<br />
code on the list for that device using the keypad number buttons. If the device is still on, try<br />
the next code listed for your brand. Continue entering codes, one at a time, until your device<br />
turns off.<br />
• Store the code by pressing the device button on the remote again (the device button on the<br />
remote will blink twice to confirm the code has been stored).<br />
To Program Your Remote to Power On Multiple Devices At Once (Power Macro)<br />
1 Push the CBL button on the remote.<br />
2 Simultaneously hold down SEL and ON/OFF until the CBL button lights up.<br />
3 Press the device button(s) that you want to turn on (i.e. TV, VCR, and/or AUX).<br />
4 Press the ON/OFF button.<br />
5 Press the CH + button to store the information. Now when you press and hold down the ON/<br />
OFF button, all the devices that are programmed in will power on simultaneously.<br />
E-19<br />
EQUIPMENT/SELF-INSTALLATION
EQUIPMENT/SELF-INSTALLATION<br />
<strong>WOW</strong>! Digital Cable Remote Control Codes<br />
If you’re not sure which remote you have, please refer to diagrams on pages C-1 & C-3.<br />
Codes for the <strong>WOW</strong>! Atlas Remote shown on page C-3, can be found starting on page E-7.<br />
TV BRAND CODES<br />
A Mark 112<br />
Admiral 072 081 161<br />
AKAI 001 146<br />
AMPRO 073 167<br />
ANAM 043 056 080 104 108 112<br />
118 121<br />
AOC 001 004 112<br />
Candle 001 003 004<br />
Cetronic 043<br />
Citizen 001 003 004 101 143<br />
Classic 043<br />
Concerto 004<br />
Contec 043<br />
Coronado 143<br />
Crown 143<br />
Curtis Mathis 001 101 004 143<br />
CXC 043<br />
Daewoo 076 103 004 114 127 143<br />
Daytron 004 143<br />
Dynasty 043<br />
Dynatech 062<br />
Electrohome 024 143<br />
Emerson 028 048 043 155 005 096<br />
001 004 143 151 153 154<br />
Fisher 007 057<br />
Funai 028 043<br />
Futuretech 043<br />
GE 160 161 144 004 130 073<br />
008 034 056 074 155<br />
Goldstar 004 106 110 112 113 119<br />
127 143<br />
Hall Mark 004<br />
Hitachi 163 007 004 010 011 023<br />
075 143 158<br />
Infinity 164<br />
JBL 164<br />
JCP 001<br />
JC Penney 004 008 024 030 065 101<br />
143 160<br />
JVC 038 007 083 034<br />
Kenwood 001 070<br />
Kloss 059<br />
KTV 043 143 154<br />
Lodgenet 072<br />
Loewe 164<br />
Logik 072<br />
Luxman 004<br />
LXI 004<br />
Magnavox 164 059 001 003 004<br />
022 060 061 063 064<br />
127<br />
Marantz 001 164<br />
Matsui 164<br />
Memorex 007 072 004<br />
MGA 001 004 024 042<br />
Mitsubishi 004 024 040 042 109<br />
146 191<br />
E-20<br />
MTC 001 004 062 101<br />
NAD 015 025<br />
NEC 001 130 134 040 024<br />
056 019<br />
Nikei 043<br />
Onking 043<br />
ONWA 043<br />
Optonica 019 081<br />
Panasonic 034 056 080 164<br />
Philco 001 003 024 056 059<br />
060 063 064 127 143 164<br />
004<br />
Philips 164 093 038 005 001<br />
003 004 059<br />
Pioneer 025 135 004 023 076<br />
Portland 004 143<br />
Proscan 144 160 161 167<br />
Proton 171 173 004 143<br />
Quasar 034 056<br />
Radio Shack 004 019 043 127 143<br />
RCA 016 161 065 156 144 001<br />
004 023 024 056 074<br />
152<br />
Realistic 007 019<br />
Runco 072 169<br />
Sampo 001 004 192<br />
Samsung 004 101 127 133 143 160<br />
Sanyo 007 057 082<br />
Scott 004 028 043 048 143<br />
Sears 094 015 028 030 004<br />
007 057 082 143 160<br />
Sharp 019 081 028 014 004<br />
022 143 175<br />
Signature 072<br />
Sony 070 085 139 126<br />
Soundesign 028 004 003 043<br />
Spectricon 112<br />
SSS 004 043<br />
Sylvania 001 003 059 060 063<br />
064 164 160 127<br />
Symphonic 052<br />
Tandy 081<br />
Tatung 056 062<br />
Technics 034 080<br />
Techwood 004<br />
Teknika 003 004 024 028 043<br />
072 101 143<br />
Telerent 072<br />
Tera 172<br />
TMK 004<br />
Toshiba 015 003 040 062 101<br />
Totevision 143<br />
Universal 008<br />
Video Concepts 146<br />
Vidikron 174<br />
Vidtech 004<br />
Wards 004 008 019 028 060<br />
061<br />
064 072 074 164<br />
Yamaha 004<br />
York 004<br />
Yupiteru 043<br />
Zenith 072 073 095 103<br />
Zonda 112<br />
VCR BRAND CODE<br />
AIWA 034 161<br />
AKAI 043 046 124 142 146<br />
AMPRO 072<br />
ANAM 031<br />
Audio Dynamics 012 023 043<br />
Broksonic 035 037 129<br />
Canon 028 031<br />
Capehart 108<br />
Craig 001 040 135<br />
Curtis Mathis 031 041<br />
Daewoo 117 005 010 017 108 111<br />
Daytron 108<br />
DBX 012 023 043<br />
Dynatech 034 053<br />
Electrohome 059<br />
Emerson 006 029 035 153 017<br />
025 027 031 034 036<br />
037 046 101 129 131 138<br />
Fisher 001 009 010<br />
Funai 034<br />
GE 031 063 072 107 109 144<br />
147<br />
Go Video 132 136 003<br />
Goldstar 004 112 020 101 123<br />
Harmon Kardon 012 045<br />
Hitachi 026 150 018 034 043<br />
063 137<br />
Instantreplay 031<br />
JCL 031<br />
JC Penney 004 012 040 101<br />
Jenson 043<br />
JVC 031 043 048 055 060<br />
130 150 152 012<br />
Kenwood 014 034 048 047<br />
Lloyd 034<br />
LXI 034 001 004 009 017 101<br />
Magin 040<br />
VCR BRAND CODE<br />
Magnavox 067 031 034 041 068 154<br />
156<br />
Marantz 067 069 012 031<br />
Marta 101<br />
Matsui 027<br />
MEI 031<br />
Memorex 040 101 001 010 014 031<br />
034 053 072 134 139<br />
MGA 045 046 059<br />
Minolta 004 020<br />
Mitsubishi 059 061 004 020 046
051 142<br />
MTC 034 040<br />
Multitech 024 034<br />
NEC 012 023 043 048<br />
Nordemende 043<br />
Optonica 053 054<br />
Panasonic 031 070 133 140<br />
Pentax 004 002 031 063<br />
Philco 031 034 067<br />
Philips 031 067 034 054 101<br />
Pilot 101<br />
Pioneer 004 021 048<br />
Portland 108<br />
Pulsar 072<br />
Quartz 014<br />
Quasar 031 070 140<br />
Radio Shack 101 123<br />
RCA 144 147 107 109 031 004<br />
020 034 040 041 141<br />
158<br />
Realistic 001 008 010 014 031<br />
034 040 053 054 101<br />
Ricoh 058<br />
Runco 072<br />
Salora 014<br />
Samsung 017 040 107 109 113 115<br />
124<br />
VCR BRAND CODE<br />
Sansui 043 048 135<br />
Sanyo 001 010 040 014 134<br />
Scott 017 037 129 131<br />
Sears 017 081 001 004 008<br />
009 010 014 020 101<br />
Sharp 053 031 054 157 159<br />
Shintom 024<br />
Sony 056 057 058 001 009<br />
031 052 053 155 002<br />
Soundesign 034<br />
STS 004<br />
Sylvania 031 034 059 067<br />
Symphonic 034<br />
Tandy 010 034<br />
Tatung 043<br />
TEAC 034 043<br />
Technics 031 070<br />
Teknika 031 034 101<br />
Thomas 034<br />
TMK 006<br />
Toshiba 017 131 004 008 059<br />
082 150 047<br />
Totevision 040 101<br />
Unitech 040<br />
Vector Research 012<br />
Video Concepts 012 034 043 141<br />
Videosonic 040<br />
Wards 001 004 017 024 031<br />
034 040 053 054 131<br />
Yamaha 012 034 043<br />
Zenith 072 034 048 056 058<br />
080 101 153<br />
STEREO BRAND CODE<br />
3M 123<br />
ADC 200<br />
ADCOM 072 082 092 161<br />
AIWA 025 071 104 114 170<br />
AKAI 138<br />
AMC 125 126 127<br />
ANAM 019 081<br />
Angstrom 142<br />
Arcam 141<br />
Audio Access 147<br />
Audio Alchemy 135<br />
Audiofile 203<br />
B&K 096 097<br />
Bose 070 071<br />
BSR 210<br />
California Audio 205<br />
Capetronic 215<br />
Carver 003 008 027 028 053<br />
061 099 151 212<br />
Casio 204 208 211 213 223 224<br />
Chiro 140<br />
Cinema Sound 001 134<br />
Citation 148<br />
Clarinette 208 211 224<br />
Clarion 026<br />
Curtis Mathis 204<br />
CXC 043<br />
Denon 001 105 155 196 199<br />
Eiger 149<br />
Fisher 008 151<br />
Fosgate Audionics 062 157<br />
Fraba 213 226<br />
Genexxa 206 214<br />
Haitai 005<br />
Harmon Kardon 028 153 154 157 162<br />
Hitachi 020<br />
Inkel 005<br />
JC Penney 102204<br />
Jensen 058<br />
JVC 013 163 176 177 178<br />
Kenwood 005 008 057 146 166<br />
Krell 150<br />
Kyocera 200<br />
Lexicon 120 167 171 172<br />
Linn 124<br />
Luxman 035 137 139 165<br />
LXI 078 204<br />
Magnavox 152 164 212<br />
Marantz 027 036 087 212<br />
Mcintosh 173<br />
MCS 204<br />
Memorex 214 219<br />
MGA 202<br />
Mission 212<br />
Mitsubishi 180 202<br />
Modulaire 208 211 224<br />
NAD 048<br />
Nakamichi 111 182 183<br />
Niles 185<br />
NSM 212<br />
Onkyo 046 107 108<br />
Optimus 206 214 219<br />
Panasonic 007 195 205<br />
Parasound 129 130 132<br />
Philips 087 188 189 191 212<br />
Pioneer 014 033 039 045 050<br />
054 069 090 160 068<br />
206 214 219<br />
Proceed 144<br />
Proton 207 212<br />
Quasar 205<br />
Radio Shack 211 224<br />
RCA 010 117 156<br />
Realistic 078 081 208 209<br />
Runco 072 169<br />
Rotel 074 083 085 212<br />
SAE 212<br />
Samsung 201<br />
Sansui 027 110 111 119 198 212<br />
Sanyo 151<br />
Scott 019 081<br />
Sears 204<br />
Sharp 026 057 094<br />
Sherwood 024 038<br />
Sony 018 052 055 084 101 186<br />
187<br />
Soundesign 036<br />
SSI 068<br />
STS 200<br />
Sylvania 212<br />
STEREO BRAND CODE<br />
Symphonic 209<br />
Tandy 214 219<br />
TEAC 019 059 081 111<br />
Technics 007 076 088 122 193<br />
205<br />
TOSHIBA 112<br />
VICTOR 013 063<br />
WARDS 008<br />
YAMAHA 021 026 031 067 192<br />
YORX 208 211 224<br />
ZENITH 143<br />
E-21<br />
EQUIPMENT/SELF-INSTALLATION
EQUIPMENT/SELF-INSTALLATION<br />
DVD BRAND CODE<br />
Alpine 145<br />
Apex Digital 194 218<br />
Denon 169 244<br />
GE 248 249<br />
Harmon Kardon 184<br />
Hitachi 154<br />
JVC 255<br />
LG 175 217 253<br />
Magnavox 222 243<br />
Marantz 181 221<br />
Mitsubishi 245<br />
Myryad 158<br />
NAD 197<br />
Nakamichi 159<br />
Onkyo 179 251<br />
Panasonic 246 252<br />
Philips 221 243<br />
Pioneer 241 247 146<br />
Proceed 190<br />
Proscan 248 249<br />
RCA 248 249<br />
Samsung 242 254<br />
Sharp 220<br />
Sony 250<br />
Tatung 158<br />
Thompson 248 249<br />
Toshiba 174 251<br />
Yamaha 216 252<br />
Zenith 175 217 253<br />
E-22<br />
<strong>WOW</strong>! Digital Cable Remote Control Codes Continued<br />
LDP BRAND CODE<br />
Daewoo 023<br />
Denon 236<br />
Goldstar 233<br />
Kenwood 231<br />
Lotte 232<br />
Magnavox 232<br />
Optimus 238<br />
Panasonic 227<br />
Philips 232<br />
Pioneer 226<br />
RCA 237<br />
Realistic 238<br />
Samsung 229<br />
Sharp 231<br />
Sony 228<br />
Technics 227<br />
Toshiba 231<br />
Yamaha 239<br />
TIVO BRAND CODE<br />
Philips 133<br />
Sony 136
<strong>WOW</strong>! DIGITAL VIDEO RECORDER (<strong>DVR</strong>) INFORMATION<br />
Controlling Live TV<br />
Control a Live Program You Are Watching<br />
The PAUSE, REWIND, FAST-FORWARD, PLAY, INSTANT REPLAY, and LIVE keys on the remote<br />
control are used to control the live program in the Main screen (also known as full-screen<br />
TV). These same keys are known as the dedicated <strong>DVR</strong> keys. For example, when you are<br />
watching your favorite program and the telephone rings, press PAUSE to pause the program<br />
for up to 1 hour, and then press REWIND or FAST-FORWARD to reverse or advance one<br />
frame at a time. To resume watching your favorite program, press PLAY, and then press<br />
REWIND or FAST-FORWARD to cycle through three different speeds of rewind or fastforward.<br />
To replay the last 8 seconds of a program, press INSTANT REPLAY. And to watch<br />
the live program currently in progress, press LIVE.<br />
Note: Use these same dedicated <strong>DVR</strong> keys to control the reduced screen (also known as the quarter screen) in the<br />
program guide and in all <strong>DVR</strong> screens.<br />
Pause a Live Program<br />
The paused status bar appears when you press PAUSE.<br />
Recording TV Programs<br />
Record a TV Program You Are Watching<br />
1 Press RECORD.<br />
2 While in the Confirm Recording screen, press SELECT to record your TV program.<br />
Note: The Record Indicator is lit on the front panel of the <strong>DVR</strong> receiver<br />
3 To stop recording, press STOP and then follow the on-screen choices.<br />
Record a TV Program From the Program <strong>Guide</strong><br />
1 Press GUIDE.<br />
2 Press the arrow keys to highlight a TV program,<br />
and then press RECORD.<br />
3 In the Confirm Recording screen, press A to<br />
record the TV program. Note: The recording<br />
program is highlighted in the program guide.<br />
E-23<br />
DIGITAL VIDEO RECORDER
DIGITAL VIDEO RECORDER<br />
E-24<br />
Record Episodes of a TV Program<br />
1 To record a single episode or all episodes of a TV<br />
program, press GUIDE.<br />
2 Highlight a TV program, and then press RECORD.<br />
3 While in the Confirm Recording screen, press to<br />
select more recording options.<br />
4 While in the Edit Recording screen, press the arrow<br />
keys to make your selections.<br />
Note: The title of the fourth column will change<br />
based upon your selections of single episode or all<br />
episodes.<br />
5 Press the “A” button to save your selections.<br />
Using Picture-In-Picture (PIP)<br />
Activate PIP On Your TV<br />
While watching a program, press the dedicated<br />
PIP ON key to activate the PIP screen.<br />
Notes:<br />
• You can only use the dedicated <strong>DVR</strong> keys to<br />
control the program shown in the Main screen.<br />
• To change the channel in the PIP screen, use the<br />
dedicated PIP CH+ and CH- keys.<br />
• To pause or record the video in the PIP screen,<br />
swap it to the Main screen.<br />
Activate PIP From The Program <strong>Guide</strong><br />
From the program guide, press EXIT to close the<br />
program guide, and then press PIP ON.<br />
Swap The Main and PIP Screens<br />
To swap the TV program that is in the PIP screen to<br />
the Main screen, press the dedicated PIP SWAP key.<br />
Note: You will only hear the audio for the program<br />
shown in the Main screen.<br />
Move The PIP Screen<br />
To move the PIP screen to a different corner of the<br />
Main screen, press the dedicated PIP MOVE key.<br />
You can move the PIP screen to any of the four<br />
corners of the Main screen.
Frequently Asked Questions<br />
How far back can I rewind live TV?<br />
The length of time you can rewind live TV depends on how long you have been watching<br />
a single channel. Each time you change channels, a new copy is stored to the built-in<br />
recorder. If you have been watching the same channel for 15 minutes, you can rewind for<br />
15 minutes.<br />
Can I record the video in the PIP screen?<br />
Yes, but swap it into the Main screen first. After pressing RECORD and confirming the<br />
recording, you can swap it back into the PIP screen and it will continue recording. You can<br />
also press the dedicated PIP OFF key and the video will continue to record.<br />
If I’ve been tuned to a program since it started, do I have to rewind to the beginning to record<br />
the entire program?<br />
No, if you have been tuned to the program since its beginning, just press RECORD from any<br />
point in the program to record the entire program.<br />
How will I know the Digital Video Recorder is almost out of recording space?<br />
When you are viewing the list of your recorded programs, press the “B” (Preferences)<br />
button. This will show you how much recording space has been used.<br />
Can you playback more than one recording?<br />
No, you cannot playback more than one recording at a time.<br />
What happens if my Digital Video Recorder loses power temporarily?<br />
Everything you have recorded is saved, based on the save time selected in the Edit<br />
Recording screen. Your scheduled recordings during the time the Digital Video Recorder lost<br />
power are the only recordings you may miss.<br />
Do my Program <strong>Guide</strong> Parental Controls carry over to <strong>DVR</strong> recordings?<br />
Yes, if you block programs by channel or rating in General Settings, those settings are<br />
carried over to <strong>DVR</strong> recordings. For example, if you decide to block all R-rated programs<br />
in General Settings, the R-rated programs will still be recorded, but you cannot play them<br />
back until you enter the correct PIN.<br />
Do I need my remote control to set or playback a recording?<br />
No, you can use the front panel of the Digital Video Recorder to schedule a recording from<br />
the program guide, or press the LIST key to access and playback your recorded programs.<br />
Can I copy recorded programs to a VCR?<br />
Yes. Simply choose Copy to VCR from the Recorded Program Options menu and follow the<br />
onscreen instructions to record to your VCR. (Note: <strong>WOW</strong>! does not provide the cables for<br />
this type of connection, please refer to your VCR manual for the correct cables to use with<br />
your VCR).<br />
Can I record only new episodes of my favorite show?<br />
Yes. Just choose New first-run episodes on this channel from the Recording Options menu<br />
to record new episodes only.<br />
Why do I have to power on my <strong>DVR</strong> each morning?<br />
The <strong>DVR</strong> has a power saving mode. Between 1:15 am and 6:00 am the <strong>DVR</strong> will enter a power<br />
saving mode if it is inactive. This will not affect the scheduled recordings that may be set.<br />
Will the <strong>DVR</strong> automatically erase programs I have recorded?<br />
The <strong>DVR</strong> can be set to auto erase the oldest programs that are recorded if desired. To turn<br />
this feature on, access the Preferences menu and select Turn ON Auto-Erase.<br />
E-25<br />
DIGITAL VIDEO RECORDER
HIGH DEFINITION<br />
E-26<br />
<strong>WOW</strong>! <strong>HD</strong> REFERENCE GUIDE<br />
Welcome!<br />
Congratulations on adding the <strong>WOW</strong>! <strong>HD</strong> Set-top to your television viewing experience!<br />
<strong>WOW</strong>! <strong>HD</strong> Set-tops provide you the ability to view cable television programming for<br />
high-definition television (<strong>HD</strong>TV) as well as standard-definition television (SDTV).<br />
Before you Begin<br />
• Read the IMPORTANT RULES FOR SAFE OPERATION below.<br />
• If you plug the set-top into an outlet that is controlled by a wall switch, keep the switch in the<br />
ON position. The on-screen guide is updated nightly. If the wall switch is in the OFF position,<br />
your set-top will not receive the latest programming updates.<br />
• Keep the top of the set-top free of all objects and electronic devices, including your TV.<br />
• It is recommended that you connect a surge protector to your cable equipment and electronic<br />
devices.<br />
Important Rules for Safe Operation<br />
Read and Retain These Instructions<br />
• Read all of the instructions before you operate the set-top. Give particular attention to all<br />
safety precautions. Retain the instructions for future reference.<br />
• Comply with all warning and caution statements in the instructions. Observe all warning and<br />
caution symbols that are affixed to this set-top.<br />
• Comply with all instructions that accompany the set-top.<br />
Placement<br />
Place this set-top in a location that is close enough to an electrical outlet to accommodate<br />
the length of the power cord. Place set-top on a stable surface. The surface must support<br />
the size and weight of the set-top.<br />
Ventilation<br />
This set-top has openings for ventilation that protect it from overheating. To ensure the<br />
reliability of the set-top, follow these guidelines to avoid obstruction the openings:<br />
• Do not place other equipment, lamps, books, or any other object on the top of this set-top.<br />
• Do not place this set-top in any of the following locations:<br />
--On a bed, sofa, rug or similar surface<br />
--Over a radiator or a heat register<br />
-- In an enclosure, such as a bookcase or equipment rack, unless the installation provides<br />
proper ventilation.
Cleaning the Set-Top<br />
Before cleaning this set-top, unplug it from the electrical outlet. Use a damp cloth to clean.<br />
Do not use a liquid cleaner or an aerosol cleaner. Do not use a magnetic/static cleaning<br />
device (dust remover).<br />
Object and Liquid Entry<br />
Never push objects of any kind into this product through openings as they may touch<br />
dangerous voltage points or short out parts that could result in a fire or electric shock. Do<br />
not expose this set-top to liquid or moisture. Do not place set-top on a wet surface. Do not<br />
spill liquids on or near set-top.<br />
Accessories<br />
Do not use accessories with this set-top unless recommended by your cable service provider.<br />
Overloading<br />
Do not overload electrical outlets, extension cords, or integral convenience receptacles, as<br />
this can result in a risk of fire or electric shock. For equipment that requires battery power<br />
or other sources to operate, refer to the operating instructions for that equipment.<br />
Lightning and Power Surges<br />
Ground your cable system to provide some protection against voltage surges and built-up<br />
static charges. Plug your set-top into a surge protector to reduce the risk of damage from<br />
lightning strikes and power surges. If you have questions, call <strong>WOW</strong>! at 1-866-4<strong>WOW</strong>-NOW<br />
(1-866-496-9669).<br />
Power Cord Protection<br />
Arrange all power cords so that people cannot walk on the cords, place objects on the<br />
cords, or place objects against the cords, which can damage the cords. Give particular<br />
attention to the cords at the point at which the cord connects to the plug, at electrical<br />
outlets, and at the places where the cords exit the set-top.<br />
Power Sources<br />
A label on this set-top indicates the correct power source for this set-top. Operate this<br />
set-top only from an electrical outlet that has the voltage and frequency that the label<br />
indicates. If you are unsure of the type of power supply to your residence, consult your<br />
cable service provider or your local power company.<br />
Grounding<br />
This set-top has a two-prong plug. Properly ground this set-top by inserting the plug into<br />
a grounded electrical, two-socket outlet. If this plug is polarized, it has one wide prong and<br />
one narrow prong. This plug fits only one way.<br />
CAUTION:<br />
To prevent electric shock, match wide blade<br />
of plug to the wide slot, and then fully insert.<br />
If you are unable to insert this plug fully into the outlet, contact an electrician to replace<br />
your obsolete outlet.<br />
E-27<br />
HIGH DEFINITION
HIGH DEFINITION<br />
Servicing<br />
Do not open the cover of this set-top. If you open the cover, your warranty will be void.<br />
Refer all servicing to qualified personnel only. Contact us for instructions.<br />
Damage that Requires Service<br />
For damage that requires service, unplug this set-top<br />
from the electrical outlet. Contact <strong>WOW</strong>! when any of<br />
the following occurs:<br />
• There is damage to the power cord or plug<br />
• Liquid enters the set-top<br />
• There is exposure to rain or water<br />
• Operation is not normal (the instructions in this guide describe the proper operation)<br />
• Set-top is dropped or damaged<br />
• Set-top exhibits a distinct change in performance<br />
Upon completion of any service or repairs to this set-top, the <strong>WOW</strong>! service technician will<br />
perform safety checks to determine that the equipment is in proper operating condition.<br />
Screen Burn-In Warning<br />
Please refer to the user’s guide that came with your high-definition television (<strong>HD</strong>TV) for an<br />
important message regarding images being permanently “burned in” to your <strong>HD</strong>TV screen.<br />
Connecting the Set-Top<br />
Follow these steps using the connection diagrams on the following pages to connect your<br />
<strong>HD</strong> Set-top box to your <strong>HD</strong>TV and other devices.<br />
E-28<br />
WARNING:<br />
Electric Shock hazard! Unplug all electronic devices<br />
before connecting or disconnecting any device cables.<br />
1 Unplug all electronic devices before connecting the set-top.<br />
2 Connect the set-top to your <strong>HD</strong>TV, VCR, and other devices as shown in the diagrams later in this<br />
guide.<br />
(The diagrams in this guide do not cover every possible wiring combination.)<br />
3 Connect the set-top to the coaxial cable coming from the wall.<br />
4 Plug the set-top and the TV into an AC power source, but do not turn on your set-top or <strong>HD</strong>TV<br />
yet.<br />
5 Wait for the front of your set-top to display one of the following:<br />
• Current time<br />
• Four dashes(----)<br />
Important: It may take several minutes for the set-top to receive the latest software, programming and<br />
service information. When the front panel displays the time or four dashes, the update is complete.<br />
6 After the update is complete, press POWER to turn on your set-top.<br />
7 Turn on the power to your <strong>HD</strong>TV.<br />
8 Press the Input or TV/Video key on the <strong>HD</strong>TV remote or on the <strong>HD</strong>TV and scroll to the video<br />
input you chose for the connection. For example: Video 6.
Wiring a <strong>HD</strong> Receiver<br />
The following 2 diagrams display how a <strong>HD</strong> Receiver should be connected to a <strong>HD</strong>TV.<br />
<strong>HD</strong>TV Formats<br />
Most <strong>HD</strong>TVs include YPbPr connectors for component video inputs, and your <strong>HD</strong> Set-Top<br />
includes a YPbPr cable for these inputs. However, some <strong>HD</strong>TVs only have RGB inputs. If you<br />
have one of these <strong>HD</strong>TVs, you may need an RGB adapter. Check with us for information<br />
about receiving an RGB adapter. Also, some SDRVs include YPbPr inputs. Your <strong>HD</strong> set-top<br />
will function correctly with these inputs only when outputting in 480i mode.<br />
E-29<br />
HIGH DEFINITION
HIGH DEFINITION<br />
Audio Output<br />
To hear stereo sound, you must do one of the following:<br />
• Connect stereo audio cables from the AUDIO OUT LEFT and RIGHT connectors on the set-top to<br />
the AUDIO IN LEFT and RIGHT connectors on your <strong>HD</strong>TV.<br />
• Connect an RCA cable from the DIGITAL AUDIO OUT on your set-top to the DIGITAL AUDIO IN on<br />
your <strong>HD</strong>TV (if equipped) or stereo receiver.<br />
In addition, you may also connect an S-Video cable from the S-VIDEO OUT connector<br />
on the set-top to the S-VIDEO connector on the <strong>HD</strong>TV or VCR. However, the S-VIDEO<br />
connection does not supply audio. You must also use audio cables with the S-Video cable.<br />
If you connect the set-top to your <strong>HD</strong>TV using only the coaxial cable at the CABLE OUT<br />
connection, your <strong>HD</strong>TV will not receive stereo sound from your set-top.<br />
Note: S-Video and coaxial cables only deliver SDTV programming. They do not deliver <strong>HD</strong>TV<br />
programming.<br />
Using the Set-Top<br />
After you set up your <strong>HD</strong> Set-Top, and the front panel displays the current time, you can<br />
turn on the set-top and begin watching TV. Press the POWER button on the front of the<br />
set-top to turn it on. We will send nightly programming updates to your set-top (such as<br />
program guide information). You should leave your set-top on at all times so that it can<br />
receive these updates.<br />
E-30<br />
Basic Remote Control Keys<br />
• To turn the set-top on, press TV and then POWER.<br />
• To change the channel, use CH+ and CH-.<br />
• To adjust the volume, use VOL+ and VOL-.<br />
• To view more information about the current program, press INFO.<br />
Interactive Program <strong>Guide</strong><br />
The Interactive Program <strong>Guide</strong> organizes programs and events into listing by channel,<br />
theme, or title. The current channel continues to display in the upper right corner of the<br />
guide. The upper left corner displays information about the highlighted program.<br />
• To view or hide the guide, press <strong>Guide</strong>.<br />
• To view information about a program, use the arrow keys on the<br />
remote control to highlight program.<br />
• To view more information about the highlighted program press INFO.<br />
• To view the highlighted program, press SELECT.<br />
• The keys provide additional functions that vary, based on the current<br />
menu screen.<br />
The functions assigned to each of these keys is shown on the bottom of the screen.<br />
• To format the picture size if you have <strong>WOW</strong>! <strong>HD</strong>, please refer to the gray box on page C-7.
Setting Menu Options<br />
Set-Top Menu Settings<br />
The <strong>HD</strong> Set-Top offers the following two menu settings that you can use to configure your<br />
set-top features, based on your preferences:<br />
• The Quick Settings menu gives you quick access to the more commonly used settings such as<br />
parental control, favorite channel lists, and sleep times.<br />
• The General Settings menu gives you access to all of the quick settings plus advanced settings,<br />
such as on-screen languages and Personal Identification Numbers (PINs)<br />
To Access the Menus:<br />
• Press SETTINGS once to view the Quick Settings menu. Press SETTINGS again to view the<br />
General settings menu. Press SETTINGS a third time to hide both settings menus.<br />
• Use the arrow keys to scroll through the settings options.<br />
• Press SELECT to change the highlighted setting.<br />
• Press INFO to learn more about the highlighted setting.<br />
Troubleshooting<br />
If your set-top does not function as expected, read the following conditions and<br />
suggestions. If the situation persists, contact your cable service provider.<br />
Questions About the Set-Top<br />
If your set-top does not perform as expected, check the following conditions:<br />
• Verify that the power to your TV is turned on.<br />
• If plugged into a wall switch, verify the switch is in the ON position.<br />
• Verify that all cables are properly connected.<br />
• Verify that your TV is connected to the proper TV input port.<br />
If your set-top does not perform as expected after checking the power, the cables, and the<br />
output channel, check the following conditions:<br />
No picture<br />
• If your system includes a VCR or stereo, verify that you have properly connected them to the<br />
set-top.<br />
• Verify that the set-top Power light is on and the Bypass light is off.<br />
No color<br />
• Verify that the current TV program is broadcast in color.<br />
• Adjust the TV color controls.<br />
No sound<br />
• If your setup includes a VCR or stereo, verify that you have properly connected them to the set-top<br />
• Verify that the volume is turned up.<br />
• Verify that the Bypass feature is disabled.<br />
The TV Screen displays a message indicating that the set-top is automatically updating its<br />
software. Wait for the time to appear on the front panel of your set-top before continuing<br />
with the installation process. When the front panel displays the time, the update is<br />
complete.<br />
E-31<br />
HIGH DEFINITION
HIGH DEFINITION<br />
United States FCC Compliance<br />
This equipment has been tested and found to comply with the applicable limits of Part 15<br />
of FCC Rules. These limits are designed to provide reasonable protection against harmful<br />
interference in residential installation. This equipment generates, uses, and can radiate<br />
radio frequency energy and, if not installed and used in accordance with the instructions,<br />
may cause harmful interference to radio or TV reception, which can be determined by<br />
turning the equipment off and on. The user is encouraged to try to correct the interference<br />
by one or more of the following measures:<br />
• Increase the distance between the equipment and receiver.<br />
• Connect the equipment into an outlet on a circuit different from that to which the receiver is<br />
connected.<br />
• Consult an experienced radio/TV technician or <strong>WOW</strong>! for help.<br />
Any changes or modifications not expressly approved by Scientific-Atlanta could void the<br />
user’s authority to operate the equipment.<br />
Important: The information shown in the FCC Declaration of Conformity paragraph below is a<br />
requirement of the FCC and is intended to supply you with information regarding the FCC approval<br />
of this device. The phone numbers listed are for FCC-related questions only and not intended for<br />
questions regarding the connection or operation for this device. Please contact <strong>WOW</strong>! for any<br />
questions you may have regarding the operations or installation of this device.<br />
Software and Firmware Use<br />
Scientific-Atlanta, Inc. owns copyrights to the software included in your set-top and<br />
furnishes the software to your cable service provider under a license agreement. You may<br />
only use or copy this software in accordance with the terms of your cable service provider.<br />
Scientific-Atlanta, Inc. owns copyrights to the firmware in this equipment. You may only<br />
use the firmware in the equipment in which it is provided. Any reproduction or distribution<br />
of this firmware, or any portion of it, without the express written consent of Scientific-<br />
Atlanta, Inc. is prohibited.<br />
Trademarks<br />
Explorer, Scientific-Atlanta, and the Scientific-Atlanta, Inc. VCR Commander and “Bringing<br />
the Interactive Experience Home” are trademarks of Scientific-Atlanta, Inc.<br />
FCC Declaration of Conformity<br />
This device complies with Part 15 of FCC Rules. Operation is subject to the following two<br />
conditions:<br />
1 the device may not cause harmful interference, and<br />
2 the device must accept any interference received, including interference that may cause<br />
undesired operation.<br />
E-32<br />
Explorer®Digital Interactive Set-Top model: Model 3250<strong>HD</strong><br />
Manufactured by: Scientific-Atlanta, Inc.; • 5030 Sugarloaf Parkway; • Lawrenceville, Georgia 30042; USA<br />
Telephone 770-236-1077 • (Terms and Conditions Revised as of September 2004)
DIGITAL ADAPTER – SELF-INSTALL INSTRUCTIONS<br />
It’s simple to install the Digital Adapter. Just follow the five easy steps and you’ll be on your<br />
way to enjoying the digital experience.<br />
Step A: Connect the Digital Adapter<br />
to the cable outlet<br />
1. Find the coax cable that runs from the cable<br />
wall outlet to your TV.<br />
2. Disconnect the coax cable from your TV.<br />
3. Connect this cable to the “Cable In” port on<br />
the back of the Digital Adapter.<br />
4. Leave the other end of this cable plugged To Cable Wall Outlet<br />
into the cable wall outlet.<br />
Step B: Connect the coax cable from<br />
the Digital Adapter to the TV<br />
1. Take the coax cable provided in your<br />
self-install kit.<br />
2. Connect one end to the “To TV” port<br />
on your Digital Adapter and connect<br />
the other end to the “Cable In” or<br />
“RF In” port on your TV.<br />
Step C: Connect the power cord<br />
1. Take the power cord provided in your<br />
self-install kit.<br />
2. Connect the power cord to the<br />
electrical wall outlet and the “+5V DC<br />
In” port on the<br />
Digital Adapter.<br />
Step D: Set the channel<br />
1. Turn on your TV and tune it to<br />
channel 3 (Channel 4 in Cleveland<br />
area).<br />
2. Make sure the channel “3/4” switch<br />
on the Digital Adapter is set to the<br />
same channel as your TV.<br />
If you don’t have a picture after<br />
completing the activation steps,<br />
you may need to switch your TV and<br />
Digital Adapter to channel 4.<br />
To Cable Wall Outlet<br />
To Cable Wall Outlet<br />
To TV<br />
To TV<br />
CABLE IN<br />
CAB BL BLE<br />
IN<br />
To Electrical Outlet<br />
03<br />
E-33<br />
DIGITAL ADAPTER
DIGITAL ADAPTER<br />
Step E: Activating your Digital Adapter<br />
Once you have connected your Digital Adapter(s), they are ready to be activated, which will<br />
authorize your Digital Adapter(s) to begin receiving signals from <strong>WOW</strong>!’s network and send<br />
cable channels to your TV. Once your Digital Adapter(s) are activated you will be able to<br />
enjoy your <strong>WOW</strong>! Cable.<br />
All Digital Adapter’s must be connected prior to activation.<br />
To activate your Digital Adapter(s), visit www.wowdigitaladapter.com or call 1-888-268-5872.<br />
Programming Your Remote<br />
Program your remote to sync with your TV model.<br />
1. Get remote instructions manual from self-install kit. Find the brand name and 3-digit<br />
device code number of your TV. For example, Panasonic TV: 005, 006, 007, 008.<br />
2. Manually turn on the TV.<br />
3. Confirm the batteries are correctly inserted in the remote.<br />
4. Press and hold the “Set” button. Then, while holding down “Set”, press the Power<br />
button. The LED light will turn red, indicating the remote is in program mode. Release<br />
both buttons.<br />
5. Enter the 3-digit Device Code (for example: code 005 under Panasonic TV). The red<br />
LED light turns off if the code has been accepted by the remote control.<br />
6. If the LED light flashes twice, it means the code entered is incorrect, and the remote<br />
control remains in program mode. Re-enter the correct code number again. The<br />
remote will exit program mode if the code is not entered within 10 seconds.<br />
7. Point the remote towards the TV and press the Power button. If the TV turns off, the<br />
remote is now programmed to operate the TV.<br />
8. If the TV fails to turn off, go back to Step 1 and enter the next code listed under the TV<br />
brand.<br />
Digital Adapter Troubleshooting<br />
How do I program my VCR to record using a <strong>WOW</strong>! Digital Adapter?<br />
To record a program using your Digital Adapter and VCR:<br />
1. Set your VCR to record channel 3 (4 in Cleveland) for the time the program is airing.<br />
2. Tune the Digital Adapter to the channel you want to record.<br />
The VCR can only record the channel that your Digital Adapter is tuned to. To record different<br />
programs at different times, you will need to change the channel on your Digital Adapter.<br />
My Digital Adapter takes too long to change the channels. What can you do about that?<br />
We understand that the experience may be different from what you are used to.<br />
Unfortunately, there may be a slight delay when you are changing channels as the Adapter<br />
works to tune from one digital signal to the next.<br />
My Digital Adapter remote stopped working, loses its programming or won’t power off/on.<br />
If your remote loses its programmed codes, try replacing the batteries with high quality<br />
Alkaline batteries. When replacing the batteries, try not to push any buttons, and the codes<br />
should remain intact.<br />
For a list of Frequently Asked Questions, visit wowway.com.<br />
E-34