MultiBox - Geovent
MultiBox - Geovent
MultiBox - Geovent
- TAGS
- multibox
- geovent
- geovent.dk

Create successful ePaper yourself
Turn your PDF publications into a flip-book with our unique Google optimized e-Paper software.
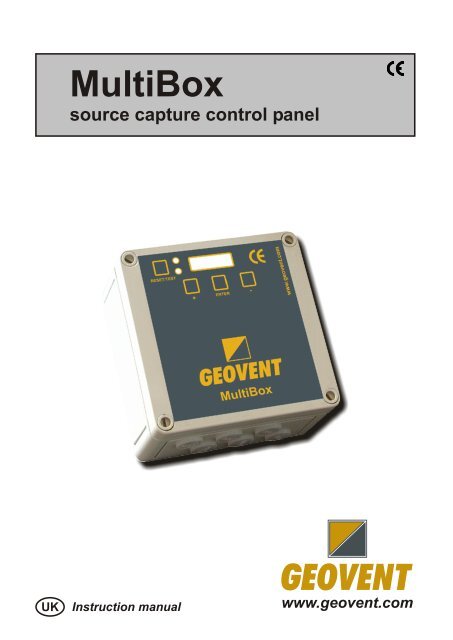
<strong>MultiBox</strong><br />
source capture control panel<br />
UK Instruction manual<br />
www.geovent.com
Instruction Manual for <strong>MultiBox</strong><br />
1.0 General safety precautions<br />
IMPORTANT – Please study all the<br />
instructions before mounting and<br />
commissioning.<br />
Please keep these instructions in a safe<br />
place and instruct all users in the function<br />
and operation of the product.<br />
Installation and service should only be<br />
implemented after studying the wiring<br />
diagram thoroughly.<br />
Avoid the dismantling of any factorymounted<br />
parts, since it impedes the<br />
commissioning of the equipment.<br />
All electrical installations must be carried<br />
out by an authorised electrician.<br />
1.1 Danger<br />
Dismantling parts on the <strong>MultiBox</strong> whilst in<br />
operation could be deadly dangerous.<br />
Always disconnect the <strong>MultiBox</strong> from the<br />
mains, when removing the cover.<br />
2.0 Adjustment of parameters<br />
The <strong>MultiBox</strong> contains 8 software<br />
programs (530, 535, 540, 545, 550, 555,<br />
560 and 565), which controls how the<br />
<strong>MultiBox</strong> behaves. The <strong>MultiBox</strong> is by<br />
default set to 560.<br />
1. Connect the <strong>MultiBox</strong> to 230 Volts<br />
as shown in the diagram<br />
2. The Display will show “P0” on<br />
power-up<br />
3. Press “ENTER” and select the<br />
appropriate software program by<br />
scrolling with the “+” and “-“ keys<br />
and the press “ENTER” once<br />
more.<br />
4. Shift to P1 (the set point<br />
parameter) by using the “+” key<br />
and the press “ENTER” – adjust<br />
the value to your desired set point<br />
pressure (in Pascals) and press<br />
“ENTER” once more.<br />
5. Use the “+” until you get to P10.<br />
6. Keep the “ENTER” key pressed<br />
until you get a beep (tells you that<br />
the changes you have made are<br />
now saved in EEPROM).<br />
7. In case of failure – cut the power<br />
for at least 20 seconds and put it<br />
back on. The <strong>MultiBox</strong> is now reset<br />
and you must start the<br />
programming procedure again.<br />
20-05-2005 ver. 1.0 www.geovent.com Side 1/5
Instruction Manual for <strong>MultiBox</strong><br />
3.0 Basic installation of the <strong>MultiBox</strong><br />
(program 560/565) Constant pressure<br />
regulation<br />
1. Connect the long piece of the<br />
supplied 4mm hose to the “-<br />
“connection on the built-in pressure<br />
transducer. Connect the other end<br />
to a critical spot on the duct - often<br />
around one of the remotest<br />
arms/reels (in relation to the<br />
extraction fan). NB! Avoid bends!!<br />
2. Connect the short section of the<br />
4mm hose to the “+”connection on<br />
the built-in pressure transducer. Let<br />
the other end of the hose hang<br />
outside the <strong>MultiBox</strong>. NB! Avoid<br />
bends!!<br />
3. Select the right software program<br />
(i.e. 560 for pressures between<br />
200-10000Pa and 565 for<br />
pressures between 10-1000Pa) and<br />
adjust your set point (P1).<br />
4. Connect the T4 terminal to an<br />
external switch (hood switch or reel<br />
switch) or short circuit it. T4 = Open<br />
=> The <strong>MultiBox</strong> is disabled - T4 =<br />
closed => The <strong>MultiBox</strong> is enabled.<br />
5. Connect the T10 terminal (0-10<br />
VDC analogue output signal) to the<br />
frequency inverter.<br />
4.0 Installation of the extra <strong>MultiBox</strong><br />
features<br />
These features are not needed if you only<br />
want to use the <strong>MultiBox</strong> for constant<br />
pressure regulation.<br />
You can connect the NO/NC CTS-relay to<br />
the frequency inverter drive in order to<br />
disable/enable the drive. Function: T4 =<br />
Open => the CTS-relay is either closed or<br />
opened depending on the wiring - T4 =<br />
closed => the CTS-relay is either opened<br />
or closed depending on the wiring.<br />
T5 and T6 can be connected to a 24 Volt<br />
Max 18W motor damper. The T5/6 are<br />
activated via T4, T8 or T9.<br />
You can connect the T7 to an external<br />
alarm lamp (24 Volt Max 18W).<br />
T8 can be connected to a power detector.<br />
(T4, T8 or T9 are all interrelated)<br />
T9 can be connected to a IR-sensor (T4,<br />
T8 or T9 are all interrelated)<br />
20-05-2005 ver. 1.0 www.geovent.com Side 2/5
Instruction Manual for <strong>MultiBox</strong><br />
5.0 Wiring for Multibox<br />
20-05-2005 ver. 1.0 www.geovent.com Side 3/5
Instruction Manual for <strong>MultiBox</strong><br />
6.0 Wiring diagram for Multibox and DigiDrive<br />
20-05-2005 ver. 1.0 www.geovent.com Side 4/5
Instruction Manual for <strong>MultiBox</strong><br />
7.0 Liability<br />
Warranty<br />
<strong>Geovent</strong> A/S grants a warranty for products, which<br />
are defective; when it can be proved that the<br />
defects are due to poor manufacture or materials<br />
on the part of <strong>Geovent</strong>. The warranty comprises<br />
remedial action (reparation or exchange) until one<br />
year after date of shipment. No claims can be<br />
made against <strong>Geovent</strong> A/S in relation to loss of<br />
earnings or consequential loss as a result of<br />
defects on products from <strong>Geovent</strong>.<br />
User liability<br />
In order for <strong>Geovent</strong> to be capable of granting the<br />
declared warranty, the user/fitter must follow this<br />
Instruction Manual in all respects.<br />
Under no circumstances may the products be<br />
changed in any way, without prior written<br />
agreement with <strong>Geovent</strong> A/S.<br />
8.0 Declaration of conformity<br />
The manufacturer: GEOVENT A/S<br />
HOVEDGADEN 86<br />
DK-8831 LØGSTRUP<br />
hereby declares that:<br />
The product: <strong>MultiBox</strong><br />
has been manufactured in compliance with the<br />
directions of the Directive Council of 14 June<br />
1989 in common approximation to the legislation<br />
of the member states regarding machine safety<br />
(89/392/EEC amended by the directive<br />
91/368/EEC) with special reference to appendix 1<br />
in the Directive regarding basic health and safety<br />
requirements in connection with the construction<br />
and manufacturing of machinery.<br />
GEOVENT A/S • HOVEDGADEN 86 • DK-8831<br />
LØGSTRUP<br />
Position: Managing Director<br />
Name: Steen Molsen<br />
Date: 20/05/2005<br />
Signature: ____________________________<br />
20-05-2005 ver. 1.0 www.geovent.com Side 5/5