Healthstream Aurora Treadmill - Owner's Manual - The Fitness ...
Healthstream Aurora Treadmill - Owner's Manual - The Fitness ...
Healthstream Aurora Treadmill - Owner's Manual - The Fitness ...

You also want an ePaper? Increase the reach of your titles
YUMPU automatically turns print PDFs into web optimized ePapers that Google loves.
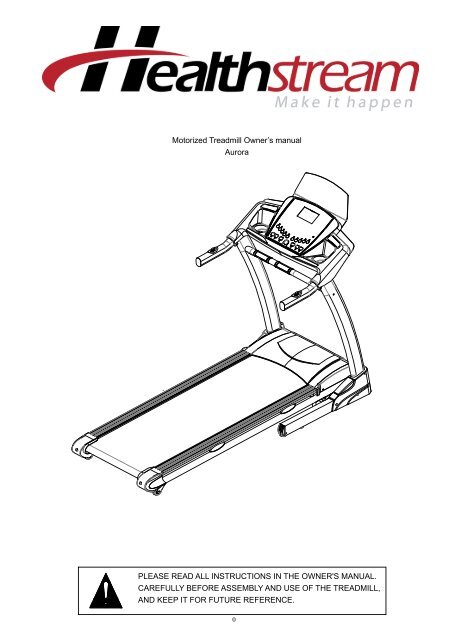
Motorized <strong>Treadmill</strong> Owner’s manual<br />
<strong>Aurora</strong><br />
PLEASE READ ALL INSTRUCTIONS IN THE OWNER'S MANUAL.<br />
CAREFULLY BEFORE ASSEMBLY AND USE OF THE TREADMILL,<br />
AND KEEP IT FOR FUTURE REFERENCE.<br />
0
CONTENTS---------------------------------------------------------------------------1<br />
IMPORTANT SAFETY PRECAUTIONS---------------------------------------2<br />
ASSEMBLY INSTRUCTIONS----------------------------------------------- ---3-5<br />
FOLDING & UNFOLDING INSTRUCTIONS----------------------------------5<br />
INCLINE INSTRUCTIONS-------------------------------------------------------- 6<br />
GROUNDING METHODS----------------------------------------------------------7<br />
OPERATION GUIDE-------------------------------------------------------------8-12<br />
GETTING STARTED GUIDE ------------------------------------------------13-14<br />
WARM-UP EXERCISE-------------------------------------------------------------14<br />
MAINTENANCE INSTRUCTIONS-------------------------------------------15-16<br />
BELT ADJUSTMENT----------------------------------------------------------------17<br />
EXPLODED DRAWING------------------------------------------------------------18<br />
PARTS LIST-----------------------------------------------------------------------19-21<br />
ERROR CODES AND SIGNIFICANCE------------------------------------21-22<br />
1
Important Safety Precautions<br />
Before starting any exercise Programme, consult with your physician or health<br />
professional.<br />
This applies especially to persons above 35 years old or to people who have had<br />
health problems before.<br />
Please do not turn on the power to the <strong>Treadmill</strong> until assembly is completely finished<br />
and the motor cover is attached.<br />
Please do not plug any electrical or other equipment or items into any parts of this<br />
equipment, or damage may result.<br />
When using this <strong>Treadmill</strong>, keep the safety pull pin lanyard attached to your clothes or<br />
belt. In case of unforeseen circumstances or accidents, the <strong>Treadmill</strong> will come to a<br />
complete stop when the pull pin is disengaged from the console.<br />
If you are using the <strong>Treadmill</strong> for the first time, please hold the handrail until you feel<br />
comfortable with running on the running belt.<br />
Never start the <strong>Treadmill</strong> while you are standing on the walking belt, and always stand<br />
on the foot rails on the sides of the frame until the belt is moving.<br />
Do not wear long, loose fitting clothing that could become caught in the <strong>Treadmill</strong>.<br />
Always wear running or aerobic shoes with rubber soles.<br />
<strong>Treadmill</strong>s should only be used unsupervised by adults; If a child wishes to use a<br />
<strong>Treadmill</strong> they should have adult supervision.<br />
Please do not let small children or pets approach the <strong>Treadmill</strong> during operation.<br />
Position the <strong>Treadmill</strong> on a clear, level surface. Do not place the <strong>Treadmill</strong> on thick<br />
carpet as it may interfere with proper ventilation of the machine.<br />
When the <strong>Treadmill</strong> is not in use, the power cable should be unplugged and the safety<br />
pull pin removed.<br />
Please note that the power cable for this <strong>Treadmill</strong> specially made, and if it is broken,<br />
please contact your distributor quickly to obtain a new one.<br />
Please do not exercise for the first 40 minutes after eating a meal.<br />
Please turn off any music when you are testing your Pulse rate with a wireless chest<br />
belt.<br />
2
WHEN YOU OPEN THE CARTON, YOU WILL FIND THE PARTS ILLUSTTATED BELOW, IF ANY<br />
PARTS ARE MISSING – PLEASE CONTACT YOUR DEALER IMMEDIATELY.<br />
1 10 21 36<br />
MAIN FRAME<br />
1pc<br />
SAFETY KEY<br />
1pc<br />
3<br />
FRONT COVER<br />
37 45 48 63<br />
SCREW<br />
DRIVER<br />
1pc<br />
POWER CORD<br />
1pc<br />
2pc<br />
CHEST BELT<br />
86 91 96 97<br />
INNER<br />
WASHER<br />
8PCS<br />
FIXING TOOLS<br />
MP3 LINE<br />
1PC<br />
1pc<br />
ALLEN<br />
WRENCH<br />
1PC<br />
5# ALLEN WRENCH 1 pc、 6# ALLEN WRENCH 1 pc、<br />
WRENCH W/SCREW DRIVER S=13、14、17 1 pc<br />
ASSEMBLY STEPS:<br />
STEP 1:<br />
ALLEN<br />
WRENCH<br />
1pc<br />
BOLT M8*15<br />
8PCS<br />
BOLT M4*15<br />
6PCS
STEP 2:<br />
STEP 3:<br />
4
ATTENTION: Please double check that all assembly steps are completed and that all<br />
bolts and screws are tight. Please read these instructions carefully before starting the<br />
<strong>Treadmill</strong>.<br />
Folding Instructions:<br />
Unfolding Instructions:<br />
Lift up the bed of the machine and continue<br />
to lift until you hear a "click" that is made by<br />
the safety casing engaging the pneumatic<br />
cylinder.<br />
Holding the bed of the machine with both<br />
hands, use your foot to kick the safety sleeve<br />
lightly, to disengage it. <strong>The</strong>n pull down the<br />
bed in the same direction as the arrow. You<br />
can now let go of the bed and it will fall<br />
slowly and smoothly to the ground.<br />
5
INCLINE INSTRUCTIONS<br />
Buttons marked【INCLINE+】【 INCLINE-】and【 + 】【 - 】on the left handrail are incline add and<br />
subtract buttons in 1 increments. To adjust the incline when the treadmill is running, press the button<br />
for more than 2 seconds, to add or subtract inclination.<br />
<strong>The</strong> computer also has shortcut keys 3, 6, 9 and 12<br />
Picture A shows incline “0”, Picture B shows incline “12”.<br />
PICTURE A<br />
PICTURE B<br />
6
Grounding<br />
This product must be grounded. If the machine should malfunction or breakdown, the<br />
grounding will provide a path of least resistance for the electric current thus reducing the risk<br />
of electric shock. This product is equipped with a power cord having an equipment-grounding<br />
conductor and a grounding plug. <strong>The</strong> plug must be plugged into an appropriate outlet that is<br />
properly installed and grounded in accordance with all local codes and ordinances.<br />
DANGER – Improper connection of the equipment-grounding conductor can result in risk of<br />
electric shock. Check with a qualified electrician or serviceman if you are in doubt as to<br />
whether the product is properly grounded. Do not modify the plug provided with the product – if<br />
it will not fit the outlet, please have a proper outlet installed by a qualified electrician.<br />
This machine is for use on a nominal 230-volt circuit and has a grounding plug illustrated in the<br />
sketch below. Please make sure that the machine is connected to an outlet having the same<br />
configuration as the plug. No adapter should be used with this product.<br />
7
WINDOWS DISPLAYS<br />
SPEED WINDOW:<br />
� In manual mode, the screen displays the current SPEED, the range is 1.0-18KM/H.<br />
� In the built-in Program, the screen displays Program numbers (P01-P16)<br />
DISTANCE WINDOW:<br />
This screen displays running distance. Forward count is 0.00-99.9, and then beyond that, forward count will<br />
return to 0; Countdown starts from setting the start value to 0, and when countdown reaches 0, the treadmill<br />
will slow down smoothly until stopped. In countdown mode the window will flash to prompt the user to set the<br />
distance.<br />
PULSE/INCLINE WINDOW:<br />
Displays the pulse rate value when holding the hand pulse sensors, the pulse rate is displayed in this window,<br />
and the corresponding lamp will be lit. <strong>The</strong> pulse rate value is 50-200 beats/minute. This data is only for<br />
reference and can not be as medical data.<br />
Displays incline value when pulse rate is not being used. Incline range: 0-12%<br />
Note: if you are testing the pulse rate, the pulse rate value will be displayed preferentially than the incline.<br />
TIME WINDOW:<br />
Displays your actual running time. Forward count is 0:00-99:59. When the time reaches 99:59, (ninety nine<br />
minutes and fifty nine seconds) the treadmill will slow down smoothly until it comes to a stop. Countdown starts<br />
from the setting value to 0:00 and ends when countdown reaches 0:00, and the treadmill slows down smoothly<br />
until stopped.<br />
CALORIES WINDOW:<br />
Displays the calorie value. Forward count is 0-999 and when reaching 999 it will return to zero. Countdown<br />
starts from setting the value to 0, and when countdown is 999, the treadmill will slow down smoothly until<br />
8
stopped. In countdown mode the window will flash to prompt the user to set the calorie value.<br />
BUTTON FUNCTIONS<br />
START BUTTON:<br />
Press this button to start. After a 3 second countdown, the treadmill will start with the lowest speed of 1KM/H<br />
or default speed.<br />
STOP BUTTON:<br />
Press this button to stop.<br />
PROGRAM BUTTON:<br />
For choosing your Program. Available Programs are: P01-P16, U1-U2, FAT, HRC<br />
MODE BUTTON:<br />
To choose between manual mode and countdown modes: TIME COUNTDOWN, DISTANCE COUNTDOWN<br />
and CALORIE COUNTDOWN.<br />
SPEED + - BUTTON:<br />
SPEED + & SPEED – Set default count; to adjust the speed when treadmill starts, the scope is 0.1 km/Hr in<br />
KMH.<br />
SPEED SHORTCUT BUTTON:<br />
4 6 8 12 adjusts the speed when the treadmill running.<br />
INCLINE + - BUTTON:<br />
INCLINE + & INCLINE –Set default count; to adjust incline when treadmill starts, the scope is 1% increments。<br />
INCLINE SHORTCUT BUTTON:<br />
3 6 9 12 adjustable incline.<br />
SHORTCUT KEY on the left handrail: adjusts the incline.<br />
SHORTCUT KEY on the right handrail: adjusts the speed.<br />
MAIN FUNCTIONS<br />
Turn on the power, all windows will light for 2 seconds, then the machine will enter standby condition.<br />
QUICK START (MANUAL MODE)<br />
Put on the red safety lock and press the start button. After 3 seconds, the treadmill will start at the lowest<br />
speed. Click "SPEED (+ -)", “4 6 8 12 ” or “shortcut keys on the left handrail” to adjust the speed . Press<br />
“INCLINE (+-)”, “3 6 9 12” or use the shortcut keys on the left handrail to adjust the incline. When the<br />
display value reaches “0”, the treadmill slows down to a stop. Press the "STOP" button, or remove the safety<br />
lock to stop.<br />
COUNTDOWN MODE<br />
Press the "MODE" button, choose: time countdown、distance countdown、or heat countdown. Windows will<br />
then display a default value and light up.<br />
Click the "SPEED + -" button to adjust to the necessary values. Press START button. After 3 seconds, the<br />
treadmill will start with the lowest speed. Click "SPEED + -", “4 6 8 12” or use the shortcut keys on the left<br />
handrail to adjust the speed .<br />
Press “INCLINE (+-)”, “3 6 9 12” or shortcut keys on the left handrail to adjust incline. When countdown<br />
reaches 0, the treadmill will stop slowly.<br />
TIME COUNTDOWN MODE:<br />
<strong>The</strong> TIME” window will display a default value of 30:00, press “SPEED+-”, “INCLINE+-” or rotate the handrails<br />
around to adjust to the time you prefer.<br />
HEAT COUNTDOWN MODE<br />
<strong>The</strong> “CAL” window will display a default value of 50, press “SPEED+-”, “INCLINE+-” or rotate the handrails<br />
9
around to adjust the calories you want to burn.<br />
DISTANCE COUNTDOWN MODE:<br />
<strong>The</strong> “DIST” window will display a default value 1.0, press “SPEED+-”, “INCLINE+-” or rotate the handrails<br />
around to adjust the distance you plan to exercise.<br />
BUILT-IN PROGRAMS P01-P16<br />
With the treadmill stopped, press the Program button, the speed window will display “P01-P16”. Choose any<br />
Program from P01 to P16. <strong>The</strong> time window shows default value 30:00 and flickers. Press the "SPEED + -" or<br />
“INCLINE+-” button to adjust to the time you need. Press the "START" button to start built-in Program. <strong>The</strong>re<br />
are 16 built-in Programs and the running time of each one is set to time/16. <strong>The</strong> system’s speed will change<br />
according to the Program. And you can also adjust the speed with “SPEED +-“ when running. But when<br />
entering the Program next section the speed will change back to the Program section’s default speed.<br />
Program setting interface<br />
SPEED: displays speed of this Program section<br />
TIME: displays the default value 30:00 and flashes, to prompt the user to set the time with SPEED+- or<br />
INCLINE+-.<br />
DIST: displays initial distance 0.0.<br />
INCL/PULSE: displays incline and pulse, the default display is pulse. This screen will display incline when you<br />
aren’t testing your pulse.<br />
CALORIES: displays 0<br />
USER DEFINED PROGRAMS (U1-U2)<br />
For User Defined Programs setting:<br />
� Press PROG until it shows the user Program (U1, U2).<br />
� Choose one and enter it.<br />
� Press MODE enter into time set, the range is 5:00-99:00<br />
� Press MODE again and use "SPEED +/-" or "INCLINE +/-" to select your desired speed or incline,<br />
press MODE once more and your choice will be set, then the next workout segment will flash.<br />
� Please go through the same set up as you completed with segment one to complete all 16 segments.<br />
� When all the data is entered, the computer will flash OK and your personal user Program is now saved<br />
and ready to use.<br />
� When using your user Program the screen will switch from incline to speed and your set Programmed<br />
levels will be displayed.<br />
HRC (Heart Rate Control) PROGRAM<br />
For Heart Rate Controlled Programs Setting:<br />
� With the treadmill stopped, press PROG to choose HRC.<br />
� Press MODE to set your age, range 18-50.<br />
� Press MODE again to set the heart rate, range 80-(220-AGE)x0.9.<br />
� Press MODE to set the time, then you can start the treadmill.<br />
� Press the START key to start. <strong>The</strong> belt will begin running after 3 seconds.<br />
Speed is 3.0KM with no incline, Run 1 minute at 3.0KM/H.<br />
� Count the rate data( Target heart rate-user heart rate), and compare to 30(follow below):<br />
(Target heart rate-user heart rate)>30, then speed add 2km/h<br />
(Target heart rate-user heart rate)30, then speed less 1km/h<br />
(User heart rate-target heart rate)
� Repeat above action after 30 seconds.<br />
� <strong>The</strong> machine will slow down to 1km/h directly for 15 seconds and alter every second when the user<br />
heart rate is over the date(220-age) at any time, then stop.<br />
� <strong>The</strong> speed will not change if there is no heart rate sign or hand pulse. <strong>The</strong> machine will slow down to<br />
1km/h directly for 15 seconds and alert every second.<br />
Please note: You must use the heart belt to test your pulse, the belt must put on your chest tightly.<br />
ATTENTION:<br />
Please do not use Heart rate Functions or the Heart Rate Belt with MP3 applications, due to the possibility of<br />
interference.<br />
PULSE FUNCTION<br />
� When the treadmill is running, hold the handle pulse sensors firmly for about 5 seconds, after which<br />
the screen will display pulse data.<br />
� When displaying pulse; the screen will show heart-shaped graphics.<br />
� To get a more accurate pulse rate, please test again with the treadmill stopped, and hold the hand<br />
pulse sensors for more than 30 seconds.<br />
Notes:<br />
1. This data is only for reference and cannot be used as medical data.<br />
2. When you are wearing wireless chest belt, the computer system will display the data tested by the belt<br />
and will not read data from the hand pulse sensors.<br />
3. Although this data is more accurate, it’s easily disturbed by MP3 functions.<br />
4. For accurate readings its best to keep the distance between you and the computer to less than one<br />
meter.<br />
BODY TESTER(FAT)<br />
� Press PROGRAM and continue until you reach the FAT body fat tester section.<br />
� <strong>The</strong> window will now display “FAT”.<br />
� Press MODE and enter F-1 SEX (01=male, 02=female), F-2 AGE (default is 25), F-3 HEIGHT (default<br />
is 170), F-4 WEIGHT (default is 70KG)<br />
� <strong>The</strong>n press F-5 FAT TESTER.<br />
� Press SPEED + or SPEED - to set.<br />
� Press MODE to set F-5, grasp the hand pulse sensors firmly<br />
� <strong>The</strong> window will display your body quality index in approximately 5 seconds.<br />
� <strong>The</strong> body quality index is basically the relationship between height and weight.<br />
DATA RANGE:<br />
01 Sex 01 man 02 woman<br />
02 Age 10------99<br />
03 Height 100----200<br />
04 Weight 20-----150<br />
05 FAT ≤19 Under weight<br />
FAT = (20---25) Normal weight<br />
FAT = (25---29) Over weight<br />
FAT ≥30 Obesity<br />
POWER SAVING MODE<br />
This system includes a power saving mode, When the treadmill is not running, If there is no button input for 10<br />
11
minutes, the system will enter power saving mode and close the display down. Press any button to awaken the<br />
system.<br />
SAFETY LOCK FUNCTION<br />
<strong>The</strong> treadmill will stop quickly when the safety lock is taken away. By replacing the safety lock, you can<br />
operate the treadmill again immediately.<br />
MP3 MUSIC AUDIO AMPLIFIER FUNCTIONS<br />
Insert the MP3 jack plug into the MP3 socket on the console.<br />
PROGRAM EXERCISE CHART<br />
TIME INTERVAL<br />
MODE<br />
P1<br />
P2<br />
P3<br />
P4<br />
P5<br />
P6<br />
P7<br />
P8<br />
P9<br />
P10<br />
P11<br />
P12<br />
P13<br />
P14<br />
P15<br />
SET TIME / 10 = EVERY GRADE TIME<br />
1 2 3 4 5 6 7 8 9 10<br />
SPEED 3 3 6 5 5 4 4 4 4 3<br />
INCLINE 0 3 3 3 4 4 4 1 1 0<br />
SPEED 3 3 4 4 5 5 5 6 6 4<br />
INCLINE 2 2 2 3 3 3 3 4 4 2<br />
SPEED 2 4 6 8 7 8 6 2 3 2<br />
INCLINE 3 5 4 4 3 4 4 3 4 2<br />
SPEED 3 3 5 6 7 6 5 4 3 3<br />
INCLINE 0 3 3 2 2 5 5 3 3 2<br />
SPEED 3 6 6 6 8 7 7 5 5 4<br />
INCLINE 3 5 3 4 2 3 4 2 3 2<br />
SPEED 2 6 5 4 8 7 5 3 3 2<br />
INCLINE 3 4 5 6 3 5 5 6 4 3<br />
SPEED 2 9 9 7 7 6 5 3 2 2<br />
INCLINE 0 3 3 3 4 4 4 1 1 0<br />
SPEED 2 4 4 4 5 6 8 8 6 2<br />
INCLINE 1 1 4 4 4 5 5 4 3 2<br />
SPEED 2 4 5 5 6 5 6 3 3 2<br />
INCLINE 3 5 3 4 2 3 4 2 3 2<br />
SPEED 2 5 7 5 8 6 5 2 4 3<br />
INCLINE 1 5 6 8 12 9 10 9 5 3<br />
SPEED 2 5 6 7 8 9 10 5 3 2<br />
INCLINE 3 5 6 8 6 5 8 7 5 2<br />
SPEED 2 3 5 6 8 6 9 6 5 3<br />
INCLINE 5 7 5 8 6 5 9 10 6 2<br />
SPEED 2 5 6 9 7 8 5 2 3 2<br />
INCLINE 3 3 4 4 3 4 4 3 4 2<br />
SPEED 3 4 5 6 7 8 5 4 3 3<br />
INCLINE 0 3 3 2 2 4 4 3 3 2<br />
SPEED 3 5 7 7 8 7 7 5 5 4<br />
INCLINE 3 3 3 3 2 3 4 2 3 2<br />
P16 SPEED 2 4 5 6 8 7 9 3 3 2<br />
12
INCLINE 3 4 5 5 3 5 5 6 4 3<br />
Getting Started<br />
PREPARATION<br />
If you are around 35 years old or more, or have health problems, or if this is your first time to do fitness<br />
exercises, please consult doctor or professional before using the <strong>Treadmill</strong>.<br />
Learn the Machine:<br />
Before doing any exercise, please stand on the side to learn how to operate the <strong>Treadmill</strong>, practicing things<br />
such as start, stop, and speed/incline adjustments. After that stand on the deck of the <strong>Treadmill</strong>, hold the<br />
handrails firmly. Start at low speeds 1.6--3.2 km/h, stand straight, look forward, one foot try to do few times,<br />
then stand on the belt to do some trial exercise. After learning the functions and adapting to the motion of the<br />
machine, you can adjust the speed to 3--5 km/h and keep going for gradually lengthening periods.<br />
BEGINNING EXERCISE<br />
To walk 1 km at constant speed needs about 15-25 minutes depending on your comfort level, so please try this<br />
then record it. Next, try walking 1km at 4.8 km/h which should take about 12 minutes. If you can do this easily<br />
a few times, then you can adjust the speed and incline, and go on to do 30 minutes.<br />
AMOUNT OF EXERCISE<br />
SHORTCUT - <strong>The</strong> best way to save time is do 15-20 minutes exercise.<br />
Warm up for 2 minutes at 4.8 km/h, and then adjust the speed to 5.3 km/h and then to 5.8 km/h, and continue<br />
to exercise for 2 more minutes. <strong>The</strong>n add 0.3 km/h per 2mins speed increase, until you feel breathing<br />
quickening but you are not breathing hard. Keep this speed to do exercise, if feels uncomfortable at any time<br />
then please reduce the speed to a more comfortable level.<br />
CONSUMPTION OF CALORIES – This is a good way to eat up some calories<br />
Warm up for 5 minutes by at 4 to 4.8 km/h speed, then add 0.3 km/h per 2 minutes increasing speed, then you<br />
can do 45mins exercise at the speed that you feel is comfortable but challenging. In order to gain strength, do<br />
more exercise. For example, you can run 1 hour at this speed watching TV and then maybe add 0.3 km/h<br />
speed when the advertisements come up. <strong>The</strong>n, maybe return the speed the original setting when the next<br />
programme comes on. This type of exercise regime is a real calorie burner but please remember to keep the 4<br />
minutes reducing the speed.<br />
EXERCISE FREQUENCY<br />
Target is 3--5 times per week, doing 15-60 minutes each time. It is much better to make and keep to a time<br />
schedule, and not just exercise when you feel like it. If you feel the need for more strenuous exercise, then<br />
please use the speed and incline controls. However, we'd suggest that you do not set incline when starting the<br />
exercise period.<br />
Please consult professional staff before doing exercises. <strong>The</strong>y will help with recommendations on exercise<br />
rate/intensity and time according to your age and health condition. When running, if you feel chest tightness or<br />
chest pain, irregular heartbeat, shortness of breath, dizziness or other symptoms, please stop immediately<br />
If you have no experience or can't be sure of the exercise speed for you, then you can reference the below<br />
standards:<br />
Speed 1-3.0 km people with weaker constitutions.<br />
Speed 3.0-4.5 km sedentary people who do not often exercise.<br />
Speed 4.5-6.0 km moderately fast walking people.<br />
Speed 6.0-7.5 km fast walking people.<br />
13
Speed 7.5-9.0 km joggers.<br />
Speed 9.0-12.0 km intermediate speed runners.<br />
More than 12.0 km excellent runners.<br />
ATTENTION : It is OK for walkers to choose less than or equal to 6 km speed.<br />
It is OK for runners to choose more than or equal to 8.0 km speed.<br />
Warm Up Exercises:<br />
It is better to do some warm-up exercise. Warm the<br />
muscles by easy stretching, and use 5-10 minutes to warm-up.<br />
<strong>The</strong>n stop and the illustrated methods do stretch exercises<br />
repeating five times, and then for each foot do 10 seconds or<br />
more every time. After running, repeat these stretch exercises.<br />
1. Reach Downs: Knees slightly bent and body slowly bent<br />
forward, back and shoulders relax, trying to touch your toes.<br />
Keep 10-15 seconds, and relax. Repeat 3 times (See picture l).<br />
2. Hamstring Stretches: Sitting on a soft cushion, put one leg<br />
straight, the other inward and close to the inside of the straight<br />
leg. Try to touch your toes by hand. Keeping 10-15 seconds,<br />
and relax. Repeat 3 times for each leg (See picture 2).<br />
3. Crus and Feet Tendon Stretches Standing with two hands on<br />
the wall, one leg behind. Keeping your legs straight and the heel<br />
on the ground, tilt to the wall or tree. Keep 10-15 seconds, and<br />
relax. Repeat 3 times for each leg (See picture 3).<br />
4. Quadriceps Stretches keeping your balance with your left<br />
hand holding on the wall or table, then stretch your right heel<br />
toward your buttocks slowly, until you feel very tense in the front<br />
of your thigh. Keep10-15 seconds, and relax. Repeat 3 times for<br />
each leg (See picture 4).<br />
5. Sartorius (Inner Muscles of the Thigh) Muscle Stretches<br />
Sitting down with your soles opposite and knees outward. Pull<br />
feet toward groin Keep 10-15 seconds, and relax. Repeat 3<br />
times (See picture 5).<br />
14
Maintenance Instructions:<br />
Checking Belt Tension:<br />
If you feel the running belt has occasional pause when you are running, the running belt or motor<br />
belt is probably too loose and you’ll need to adjust it.<br />
Judgment methods:<br />
Step 1: Open the motor cover then let the <strong>Treadmill</strong> work at the slowest speed.<br />
Step 2: Stand on the running belt and move together with it, hang on to the handrails<br />
and try your best to press down and stop the running belt with your feet.<br />
Step 3: If the running belt doesn’t stop when you press it, then it’s working and adjusted<br />
fine.<br />
If the running belt stops when you press it, but the front roller doesn’t stop, then you<br />
need to adjust the belt tension.<br />
If the running belt and front roller stop when pressing down on the belt, then the motor<br />
drive belt is too loose and you’ll need to adjust it.<br />
Motor Drive Belt Adjustment method:<br />
Step 1: Remove the power plug from the wall and then remove the motor cover.<br />
Step 2: Loosen the four motor attachment bolts, then adjust the threaded bar with 6#<br />
Allen wrench.<br />
As a quick test, if you can use one hand to twist the motor belt by 120°or more, then the<br />
motor belt is too loose. It should be adjusted tightly. Tighten until you can only twist the<br />
belt by about 60°, then the motor belt is just right.<br />
Step 3: Re-tighten the motor attachment bolts and replace the motor cover.<br />
WARNING<br />
Please make sure to remove the power plug before cleaning or maintaining the<br />
<strong>Treadmill</strong>.<br />
15
CLEANING<br />
� General cleaning of the unit will greatly prolong the <strong>Treadmill</strong>'s life.<br />
� Keep the <strong>Treadmill</strong> clean by dusting regularly.<br />
� Be sure to clean the exposed parts of the deck on either side of the walking belt, and<br />
also the side rails as this reduces the buildup of foreign material underneath the<br />
walking belt.<br />
� Make sure your running shoes are clean.<br />
� <strong>The</strong> top of the belt may be cleaned with a wet soapy cloth but be careful to keep the<br />
cleaning liquid away from inside the motorized <strong>Treadmill</strong> frame or from underneath<br />
the belt.<br />
� At least once a year remove the motor cover and vacuum inside.<br />
� This <strong>Treadmill</strong>'s walking belt and deck are equipped with a pre-lubricated, low<br />
maintenance deck system. <strong>The</strong> belt/ deck friction may play a major role in the<br />
function and life of your <strong>Treadmill</strong>, thus requiring periodic lubrication. We recommend<br />
a periodic inspection of the deck.<br />
� We recommend lubrication of the deck according to the following timetable:<br />
Light user (less than 3 hours/ week) annually<br />
Medium user (3-5 hours/ week) every 6 months<br />
Heavy user (more than 5 hours/ week) every 3 months<br />
We suggest you buy lubricating oil from local distributors or contact our company directly.<br />
For other maintenance please ask professionals for help.<br />
16
Adjusting the Running Belt:<br />
Place the <strong>Treadmill</strong> on a level surface then set it to run at approximately 6-8 km/h.<br />
Observe the running belt deviation to the right or left.<br />
If the belt is drifting to the right, unplug the safety lock<br />
and power switch, and turn the right adjusting bolt 1/4<br />
turn clockwise, then insert the power switch and safety<br />
lock, run the <strong>Treadmill</strong> and observe the running belt<br />
deviation condition. Repeat above steps until the<br />
running belt rolls nicely in the middle. See picture A<br />
If the <strong>Treadmill</strong> belt is drifting left, then repeat the steps<br />
above steps until the belt is centered. See picture B<br />
<strong>The</strong> <strong>Treadmill</strong> belt tension will gradually relax after a<br />
prolonged period of use. In this case, unplug the safety<br />
lock, and turn off the power. <strong>The</strong>n turn the two adjusting<br />
bolts, one on each foot clockwise 1 / 4 turn. <strong>The</strong>n turn<br />
on the safety lock and power and run the <strong>Treadmill</strong>.<br />
Stand on the belt to confirm the tightness. Repeat the<br />
above steps until the belt reaches moderate tightness.<br />
See picture C<br />
17
Exploded Diagram<br />
18
Parts List<br />
NO. DESCRIPTION REMARK QTY NO. DESCRIPTION REMARK QTY<br />
1 MAIN FRAME 1 22 SENSOR 1<br />
2 BASE FRAME 1 23 SMALL COVER 1<br />
3<br />
INCLINE<br />
BRACKET<br />
1 24 ADJUSTABLE<br />
WHEEL<br />
19<br />
∮9* ∮62*23.5<br />
4L\R UPRIGHT/LEFT 1 25 HANDLE BAR CAP 30*60*t1.5 2<br />
5<br />
MOTOR<br />
BRACKET<br />
1 26<br />
WHEEL CASING<br />
PLUG<br />
40*80*t1.8 2<br />
6 FRONT<br />
ROLLER<br />
1 27 SIDE RAIL 36*79*365 2<br />
7 REAR ROLLER 1 28 BOOKCASE 1<br />
8<br />
9<br />
COMPUTER<br />
BRACKET<br />
HANDLE BAR<br />
POST<br />
1 29 FLAT FOOD PAD 6<br />
1 30 CUSHION ∮30* ∮6.5*16<br />
2<br />
10 SAFETY KEY 1 31 WIRE PLUG 2<br />
11<br />
RUNNING<br />
STRENGTH<br />
TUBE<br />
1 32 SAFETY CASING 1<br />
12 WASHER 8 33 CUSHION RUBBER 4<br />
13<br />
14<br />
RUNNING<br />
BOARD<br />
RUNNING<br />
BELT<br />
1 34 HANDRAIL FOAM A ∮48* ∮54*295<br />
2<br />
1 35 SMALL CUSHION 2<br />
15 MOTOR BELT 200-J7 1 36 ALLEN WRENCH S5 1<br />
16<br />
17<br />
18<br />
19<br />
MOTOR TOP<br />
COVER<br />
MOTOR<br />
BOTTOM<br />
COVER<br />
COMPUTER<br />
SURROUND<br />
COMPUTER<br />
BOTTOM<br />
COVER<br />
1 37 SCREW DRIVER 1<br />
1 38 EVA CUSHION t3.0*20*565 1<br />
1 39 CYLINDER 1<br />
1 40 PLUG SOCKET 1<br />
20 END CAP 2 41 DC MOTOR 1<br />
6
NO<br />
.<br />
21 SIDE COVER 2 42 INCLINE MOTOR 1<br />
DESCRIPTION REMARK QT NO<br />
DESCRIPTION REMARK QTY<br />
Y .<br />
43 POWER SWITCH 1 63<br />
44 OVERLOADE SWITCH 1 64<br />
45 POWER CODE 1 65<br />
46 SPEAKER COVER 2 66<br />
47 COMPUTER<br />
OVERLAY<br />
1 67<br />
48 CHEST BELT 1 68<br />
49 SINGLE WIRE 3 69<br />
50 CONTROLLER 1 70<br />
51 HAND PULSE 2 71<br />
52 QUICK BUTTOM 2 72<br />
53<br />
CROSS HEAD SELF<br />
TAPPING BOLT<br />
ST4.0*10 2 73<br />
54 HEX BOLT M10*45 1 74<br />
55<br />
56<br />
57<br />
58<br />
59<br />
60<br />
61<br />
62<br />
HALF ROUND HEAD<br />
HEX BOLT<br />
ROUND<br />
BOLT<br />
HEAD HEX<br />
ROUND<br />
BOLT<br />
HEAD HEX<br />
HALF ROUND HEAD<br />
HEX BOLT<br />
HALF ROUND HEAD<br />
HEX BOLT<br />
HALF ROUND HEAD<br />
HEX BOLT<br />
HALF ROUND HEAD<br />
HEX BOLT<br />
HALF ROUND HEAD<br />
HEX BOLT<br />
M10*45 4 75<br />
20<br />
HALF ROUND HEAD<br />
HEX BOLT<br />
HALF ROUND HEAD<br />
HEX BOLT<br />
HALF ROUND HEAD<br />
HEX BOLT<br />
ROUND<br />
BOLT<br />
HEAD HEX<br />
ROUND<br />
BOLT<br />
HEAD HEX<br />
ROUND<br />
BOLT<br />
HEAD HEX<br />
ROUND<br />
BOLT<br />
HEAD HEX<br />
ROUND<br />
BOLT<br />
HEAD HEX<br />
ROUND<br />
BOLT<br />
HEAD HEX<br />
CROSE<br />
BOLT<br />
FLAT HEAD<br />
CROSS<br />
BOLT<br />
FLAT HEAD<br />
CROSE<br />
BOLT<br />
FLAT HEAD<br />
CROSS HEAD SELF<br />
TAPPING BOLT<br />
M8*15 8<br />
M6*35 4<br />
M6*45 4<br />
M6*60 2<br />
M6*45 1<br />
M6*15 2<br />
M8*35 2<br />
M8*20 2<br />
M10*30 2<br />
ST4*50 4<br />
ST4*25 3<br />
ST4*15 23<br />
ST3.0*23 4<br />
M8*85 1 76 GASKET HEAD BOLT M5*10 9<br />
M8*75 1 77<br />
M8*60 2 78<br />
M8*55 2 79<br />
M8*50 2 80<br />
CROSS HEAD SELF<br />
TAPPING BOLT<br />
CROSS<br />
COUNTERSUNK HEAD<br />
BOLT<br />
CROSS<br />
COUNTERSUNK HEAD<br />
BOLT<br />
CROSS<br />
COUNTERSUNK HEAD<br />
BOLT<br />
M4*15 20<br />
M6*25 2<br />
M6*45 2<br />
M5*30 8<br />
M8*40 4 81 LOCKNUT M10 5<br />
M8*25 3 82 LOCK NUT M8 8
NO. DESCRIPTION REMARK<br />
ERROR CODES AND SIGNIFICANCE:<br />
Q<br />
T<br />
NO<br />
.<br />
83 HEX NUT M5 8 93 COMPUTER<br />
MIDDLE WIRE<br />
84 FLAT WASHER ∮11* ∮20*t2<br />
10 94 COMPUTER<br />
BOTTOM WIRE<br />
85<br />
86<br />
87<br />
88<br />
FLAT<br />
WASHER<br />
INNER<br />
WASHER<br />
SPRING<br />
WASHER<br />
HALF ROUND<br />
HEAD HEX<br />
BOLT<br />
∮9* ∮16*t1.6<br />
22 95 MANUAL<br />
STORAGE<br />
21<br />
DESCRIPTION REMARK QTY<br />
∮8.4* ∮14.5*t0.8<br />
8 96 ALLEN WREHCH S6 1<br />
∮8.1* ∮12.3*t2.1<br />
6 97<br />
CROSS FLAT<br />
HEAD BOLT<br />
1<br />
1<br />
1<br />
M4*15 6<br />
M8*45 3 98 SPEAKER 2<br />
89 CABLE TIE 5 99 HORSESHOE<br />
FOOT PAD<br />
90<br />
COMPUTER<br />
CHIP<br />
1 100 REACTOR 1<br />
91 MP3 LINE 1 101 FILTER 1<br />
92<br />
COMPUTER<br />
UPPER WIRE<br />
1 102 BRACKET 1<br />
Fault Code Fault Description Fault Processing<br />
E1<br />
Communication<br />
abnormal: <strong>The</strong><br />
control board and<br />
computer are not<br />
communicating correctly<br />
Stops and goes into fault Status. <strong>The</strong> machine will not run, the<br />
computer shows fault code “E1”, and the alarm Beeps three<br />
times.<br />
Possible Reasons: Check all the connection points between the<br />
console and controller. Make sure every line is well connected.<br />
Check all the wires are not damaged. If that fails, change the<br />
connector wires.<br />
2
E2<br />
E3<br />
Unusual Voltage<br />
condition:Some unusual<br />
condition of power or<br />
voltage that can cause<br />
damage to the motor<br />
drive circuit.<br />
No Speed Wireless<br />
Sensor Network<br />
Over-Current Protection<br />
E4 Incline self-learning fault<br />
E5 Incline sensor fault<br />
E6<br />
Explosion-Proof<br />
Protection:Some<br />
unusual condition of<br />
power or voltage that<br />
cause damage to the<br />
motor drive circuit.<br />
Start and stop fault status. <strong>The</strong> computer will Beep 9 times and<br />
shows the “E2” code on the screen. Go into the ready mode and<br />
restart the <strong>Treadmill</strong>.<br />
Possible reason: <strong>The</strong> power or voltage is not enough or the<br />
controller is faulty. Make sure that all of the wires are connected<br />
correctly<br />
Stops and go into fault status. Computer shows fault code“E2”.<br />
Other areas show blank. After 10 seconds the machine will go<br />
into ready mode, and can be restarted.<br />
Possible Reasons:Computer is not receiving motor speed sensor<br />
feedback for more than 3 seconds, please check sensor plug and<br />
motor connection wires. Check the controller.<br />
Stops and goes into fault status, computer shows fault<br />
code“E3”.Other areas show blank. After 10 seconds the machine<br />
will go into ready mode, and can be restarted.<br />
Possible Reasons:Overvoltage spike makes the system go to<br />
self-preservation. Machine parts are seized or not moving for<br />
some reason. Check and adjust the machine and restart. Check<br />
the DC motor or controller for any signs of burning smells. If<br />
detected, please change the burned motor or controller.<br />
Check incline motor sense wire and AC wire are inserted well; AC<br />
wire is right inserted according to the indentify in the incline<br />
motor; make sure the incline motor wire without damager; after<br />
check those, press the button on controller, then start<br />
self-learning again.<br />
Check incline motor sense wire and AC wire are inserted well; AC<br />
wire is right inserted according to the indentify in the incline<br />
motor; make sure the incline motor wire without damager; after<br />
check those, press the button on controller, then start<br />
self-learning again.<br />
Start and stop fault status. <strong>The</strong> computer will buzz 9 times and<br />
show the “E6” code on the screen. Go into the ready mode and re<br />
start the treadmill.<br />
Possible reason: <strong>The</strong> power or voltage is not enough or the<br />
controller is faulty. Make sure that all of the wires are connected<br />
correctly<br />
22