wireless 150n usb adapter quick install guide - Amazon Web Services
wireless 150n usb adapter quick install guide - Amazon Web Services
wireless 150n usb adapter quick install guide - Amazon Web Services

You also want an ePaper? Increase the reach of your titles
YUMPU automatically turns print PDFs into web optimized ePapers that Google loves.
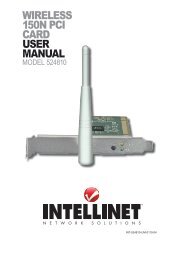
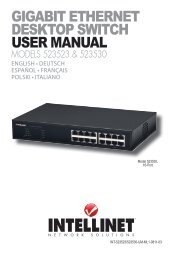
Wireless<br />
150N UsB<br />
AdApter<br />
qUick<br />
iNstAll<br />
gUide<br />
Model 524438<br />
English<br />
DEutsch<br />
Español<br />
FRançais<br />
polsKi<br />
italiano<br />
INT-524438-QIG-ML1-0709-05-0
thank you for purchasing the intEllinEt nEtWoRK solutions Wireless 150N USB Adapter • Quick Install Guide English<br />
Wireless<br />
<strong>150n</strong> usB <strong>adapter</strong>, Model 524438.<br />
this <strong>quick</strong> <strong>install</strong> <strong>guide</strong> presents the basic steps for setting up and operating<br />
this device. For detailed instructions and specifications, refer to the user manual<br />
on the cD enclosed with this product or at www.intellinet-network.com.<br />
Package Contents<br />
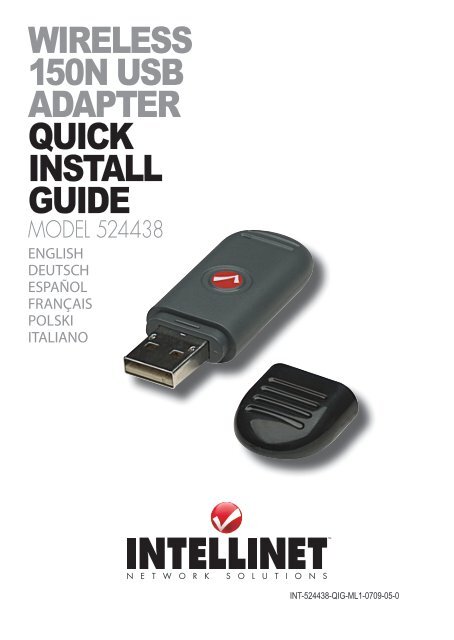
• Wireless 150N USB Adapter<br />
• USB extension cable<br />
• Quick <strong>install</strong>ation <strong>guide</strong> and setup CD with user manual<br />
NOTE: some screen images have been modified to fit the format of this<br />
<strong>guide</strong>. screen images on all compatible operating systems are similar.<br />
ADAPTER INSTALLATION<br />
1. With the computer on, gently insert the <strong>adapter</strong><br />
into a usB 2.0 port. if it doesn’t easily slide into the<br />
port, flip the <strong>adapter</strong> over and try again.<br />
2. the Welcome to the<br />
Found new hardware<br />
Wizard screen will<br />
display automatically.<br />
click “cancel” to<br />
continue.<br />
2<br />
English
3. place the included setup cD in your cD/DVD-RoM drive and run the<br />
“Setup.exe” program. When the License Agreement displays, select “I<br />
accept the terms of the license agreement” and click “Next” to continue.<br />
4. the first of two setup type screens will display. if the <strong>adapter</strong> is being<br />
<strong>install</strong>ed for the first time, it’s recommended that you select “<strong>install</strong> driver<br />
and intEllinEt Wlan utility.” to simply update the driver, select “<strong>install</strong><br />
driver only.” Click “Next” to continue.<br />
5. the second setup type screen presents two options for configuring the<br />
<strong>adapter</strong>. “intEllinEt configuration tool” is recommended, as it provides<br />
full access to all of the <strong>adapter</strong>’s functions. if you prefer to use the <strong>wireless</strong><br />
configuration tool provided by Windows Xp or Vista, select “Microsoft Zero<br />
Configuration Tool.” Click “Next.”<br />
English<br />
3
6. When the Ready to <strong>install</strong> the program screen displays, click “<strong>install</strong>.” to<br />
change any previous selections/settings, click “Back”; to exit the wizard,<br />
click “cancel.” NOTE: if the Found new hardware Wizard screen displays<br />
again, wait until the <strong>install</strong>shield Wizard complete screen displays.<br />
7. When the <strong>install</strong>shield Wizard complete screen displays, click “Finish.”<br />
WIRELESS AP cONNEcTION<br />
the configuration utility is a powerful application that helps you configure<br />
the <strong>adapter</strong> and monitor link status and statistics during the communication<br />
process.<br />
1. once the <strong>adapter</strong>’s <strong>install</strong>ation process is complete, the icon for the<br />
<strong>wireless</strong> configuration<br />
utility will automatically<br />
appear on the computer<br />
desktop and at the<br />
lower-right corner of the<br />
system tray. Right-click the icon and select the configuration utility or<br />
switch the <strong>adapter</strong> to ap mode (refer to the user manual for details).<br />
2. the configuration utility will scan for <strong>wireless</strong> access points and access any<br />
unencrypted <strong>wireless</strong> access points automatically. to connect to one,<br />
highlight it and click “connect.” NOTE: if a <strong>wireless</strong> access point you want<br />
to connect to doesn’t appear in the ap list field, click “Rescan.”<br />
3. if the <strong>wireless</strong> access point uses encryption, you need to input a WEp key<br />
or Wpa preshared key. obtain it from the owner of the <strong>wireless</strong> access<br />
point you want to connect to, enter it in the corresponding text field, and<br />
4<br />
English
click “oK.” NOTE: the authentication type is selected automatically and<br />
shouldn’t be changed.<br />
4. When a <strong>wireless</strong> access point is successfully connected, a blue pointer<br />
appears to the left of its name on the ap list.<br />
For details about advanced settings and configuration instructions for the<br />
many additional features of the Wireless <strong>150n</strong> usB <strong>adapter</strong>, refer to the user<br />
manual on the included setup cD.<br />
English<br />
5
Wireless 150N USB Adapter • Kurzanleitung Deutsch<br />
Vielen Dank für den Kauf des Wireless <strong>150n</strong> usB <strong>adapter</strong>s (Modell 524438)<br />
von intEllinEt nEtWoRK solutions.<br />
Diese Kurzanleitung zeigt die grundlegenden schritte zur Einrichtung und<br />
inbetriebnahme dieses gerätes. Weitere informationen finden sie im handbuch<br />
auf der beiliegenden cD oder auf www.intellinet-network.com.<br />
Lieferumfang<br />
• Wireless 150N USB Adapter<br />
• USB-Verlängerungskabel<br />
• Kurzanleitung und Installations-CD mit Handbuch<br />
HINWEIS: Einige abbildungen wurden an das Format dieser Kurzanleitung<br />
angepasst. Die grafiken sind auf allen kompatiblen Betriebsystemen ähnlich.<br />
ADAPTER-INSTALLATION<br />
1. nach dem Einschalten des computers, stecken sie<br />
den <strong>adapter</strong> in einen usB 2.0 port. sollte er nicht<br />
einfach einrasten, drehen sie ihn um und<br />
versuchen sie es erneut.<br />
2. Der assistent zur<br />
hardware<strong>install</strong>ation<br />
wird automatisch<br />
geöffnet. Klicken sie<br />
auf “cancel”.<br />
6<br />
DEutsch
3. legen sie die beiliegende <strong>install</strong>ations-cD in ihr laufwerk und starten das<br />
“Setup.exe”-Programm. Wenn das Lizenzabkommen erscheint, wählen Sie<br />
“I accept the terms of the license agreement” und klicken Sie auf “Next”.<br />
4. Es folgen zwei <strong>install</strong>ationsoptionen. Wird der <strong>adapter</strong> zum ersten Mal<br />
<strong>install</strong>iert, empfehlen wir die auswahl “<strong>install</strong> driver and intEllinEt Wlan<br />
utility.” um lediglich den treiber zu aktualisieren, wählen sie “<strong>install</strong> driver<br />
only.” Klicken Sie dann auf “Next”.<br />
5. Der nächste schritt bietet zwei optionen zur Konfiguration des <strong>adapter</strong>s.<br />
Wir empfehlen“intEllinEt configuration tool”, da dieses vollen Zugriff<br />
auf alle <strong>adapter</strong>funktionen ermöglicht. Möchten sie lieber die entsprech<br />
ende software von Windows Xp oder Vista verwenden, wählen sie “Micro<br />
soft Zero Configuration Tool.” Klicken Sie dann auf “Next.”<br />
DEutsch<br />
7
6. sobald der “Ready to <strong>install</strong>” Bildschirm erscheint, klicken sie auf “<strong>install</strong>.”<br />
um Einstellungen zu ändern, klicken sie auf “Back”; um den assistenten zu<br />
verlassen, klicken sie auf “cancel.” HINWEIS: Wird der hardwareassistent<br />
erneut gestartet, warten sie bis zur Einblendung “<strong>install</strong>ation complete”.<br />
7. auf dem “<strong>install</strong>ation complete”-Bildschirm, klicken sie auf “Finish.”<br />
WIRELESS AP VERbINDuNg<br />
Die vielseitige Konfigurationssoftware lässt sie Einstellungen am <strong>adapter</strong><br />
vornehmen sowie Verbindungsstatus und statistiken des Übertragungsvorgangs<br />
einsehen.<br />
1. sobald die <strong>install</strong>ation abgeschlossen ist, wird das symbol automatisch im<br />
infobereich rechts unten<br />
auf ihrem Desktop<br />
angezeigt. Rechtsklicken<br />
sie auf das symbol und<br />
wählen sie “launch config<br />
utility” aus oder schalten sie den <strong>adapter</strong> auf den “ap Mode” (weitere<br />
infomationen dazu im handbuch).<br />
2. Die Konfigurationssoftware sucht nach Wireless access points und greift<br />
auf unverschlüsselte access points automatisch zu. Für eine Verbindung,<br />
markieren sie den ap und klicken sie auf “connect.” HINWEIS: sollte ihr<br />
gewünschter ap nicht in der liste erscheinen, klicken sie auf “Rescan.”<br />
3. ist der Wireless access point verschlüsselt, müssen sie einen WEp-oder<br />
Wpa-schlüssel eingeben. Diesen erhalten sie vom Besitzer ihres gewünschten<br />
Wireless ap. geben sie den schlüssel im entsprechenden Feld ein und<br />
8<br />
DEutsch
klicken sie auf “oK.” HINWEIS: Die authentifizierungsart wird automatisch<br />
ausgewählt und sollte nicht geändert werden.<br />
4. sobald ein Wireless access point erfolgreich verbunden wurde, erscheint<br />
ein blauer pfeil links neben dessen namen in der ap-liste.<br />
Für weitere informationen über die <strong>install</strong>ation und erweiterte Einstellungen<br />
zu den zahlreichen Eigenschaften des Wireless <strong>150n</strong> usB <strong>adapter</strong>s, lesen sie<br />
bitte das handbuch auf der beiliegenden <strong>install</strong>ations-cD.<br />
DEutsch<br />
9
gracias por comprar el adaptador inalámbrico usB <strong>150n</strong> de intEllinEt<br />
nEtWoRK solutions Adaptador Inalámbrico USB 150N • Guía de Instalación Rápida Español<br />
, Modelo 524438.<br />
Esta guia rapida de instalción presenta los pasos basicos para la configuración<br />
de este dispositivo. para obtener intrucciones detalladas y especificicaciones,<br />
consulte el manual de usuario incluido en el cD adjunto con este producto o<br />
en www.intellinet-network.com.<br />
Contenido del Paquete<br />
• Wireless 150N USB Adapter<br />
• Cable USB extension<br />
• Guía de instalación rápida y CD de instalación con manual de usuario<br />
NOTA: algunas imagenes de pantalla han sido modificadas para ajustarse al<br />
formato de esta guia. las imagenes de las pantallas en todos los sistemas<br />
operativos compatibles son similares.<br />
INSTALAcION DEL ADAPTADOR<br />
1. con la pc encendida, inserte el adaptador suavemente<br />
en el puerto usB 2.0. si no lo hace facilmente, gire<br />
el adaptador e intente de nuevo.<br />
2. se mostrara la pantalla<br />
de bienvenida del<br />
asistente para agregar<br />
nuevo hardware, haga<br />
click en continuar.<br />
10<br />
Español
3. coloque el cD de intalación incluido en su unidad de cD/DVD-RoM y ejecute<br />
el “Setup.exe”. Cuando se muestre el contrato de licencia seleccione “I<br />
accept the terms of the license agreement” y haga clic en siguiente.<br />
4. la primera de las dos pantallas de la instalación se mostrara y si es la primera<br />
vez que se instala el adaptador seleccione “<strong>install</strong> driver and intEllinEt<br />
Wlan utility.” para actualizar solo el driver, seleccione “<strong>install</strong> driver only.”<br />
haga clic en siguiente para continuar.<br />
5. la segunda pantalla de instalacion presenta dos opciones para configurar<br />
el adaptador, es recomendable elije “intEllinEt configuration tool”, ya que<br />
proporciona el acceso a todas las funciones del adaptador. si prefiere utilizar<br />
la herramienta proporcionada por Windows Xp o Vista, seleccione<br />
“Microsoft Zero configuration tool.” haga clic en siguiente.<br />
Español<br />
11
6. cuando este preparado para instalar el programa , haga clic en “<strong>install</strong>.” para<br />
cambiar la seleccion previa, haga clic en “Back”; para salir del asistente,<br />
haga clic en “cancel.” NOTA: si el asistente para agregar nuevo hardware se<br />
muestra de nuevo, espere hasta que aparezca la pantalla del asistente.<br />
7. cuando se muestre la pantalla instalación completa, haga click en “Finish.”<br />
cONExION INALAmbRIcA AP<br />
la utilidad de configuración es una potente aplicación que le ayuda a configurar<br />
el adaptador y monitorear el status del enlace y las estadisticas durante el<br />
proceso de comunicación.<br />
1. una vez concluido el proceso de instalacion, el icono de la utilieria de<br />
configuración automatica<br />
aparecera en el escritorio<br />
y en la esquina inferior<br />
derecha de la barra de<br />
sistema. haga clic derecho<br />
en el icono y seleccione config utility ó el switch para cambiar a modo ap<br />
(consulte el manual de usuario para mas detalles).<br />
2. la utileria de configuracion buscara los puntos de acceso inalambrico y<br />
cualquier punto de acceso abierto de forma automatica. para conectarse<br />
a una, seleccionelo y haga clic en “connect.” NOTA: si un punto de acceso<br />
no aparece en la lista,haga clic “Rescan” para volver a buscar.<br />
3. si el punto de acceso usa encryptacion, necesita introducirla clave WEp ó<br />
Wpa. puede obtenerla con el propietario del punto de acesso al que se<br />
desea conectar, escriba la clave en el campo de texto correspondiente, y<br />
12<br />
Español
haga click “oK.” NOTA: El tipo de autentificación de selecciona de forma<br />
automatica y no debe cambiarse.<br />
4. cuando el punto de acceso esta correctamente conectado, un puntero azul<br />
aparce a la izquierda del nombre de la lista de ap.<br />
para obtener mas información acerca de la configuracion avanzada y las<br />
intrucciones de configuracion de las carcateristicas del adaptador inalambrico<br />
usB <strong>150n</strong> , consulte el manual de usuario en el cD de instalación incluido.<br />
Español<br />
13
Merci d’avoir acheté intEllinEt nEtWoRK solutions Adaptateur USB sans fil 150N • Guide de Demarrage Rapide Français<br />
adaptateur <strong>150n</strong><br />
usB sans fil, modèle 524438.<br />
ce <strong>guide</strong> décrit les bases pour configurer et utiliser cet appareil. pour des<br />
instructions et spécifications détailées, veuillez lire le manuel de l’utilisateur<br />
sur le cD inclus ou sur www.intellinet-network.com.<br />
Contenu de la livraison<br />
• Adaptateur 150N USB<br />
• Rallonge USB<br />
• Guide d’<strong>install</strong>ation succinct et CD d’<strong>install</strong>ation avec manuel<br />
NOTE: Quelques images ont été adaptés au format de ce <strong>guide</strong>. Les images<br />
sur tous systèmes d’exploitation sont similaires.<br />
INSTALLATION DE L’ADAPTATEuR<br />
1. après avoir démarré l’ordinateur, connectez<br />
l’adaptateur à un port usB. si ça ne marche pas<br />
facilement tournez-le et essayez à nouveau.<br />
2. l’assistant de matériel<br />
apparaît<br />
automatiquement.<br />
cliquez “cancel” afin de<br />
continuer.<br />
14<br />
FRançais
3. Insérez le CD d’<strong>install</strong>ation et démarrez le programme “Setup.exe”. Dés que<br />
le contrat de license licence apparaît, choissisez “i accept the terms of the<br />
license agreement” et cliquez “Next” afin de continuer.<br />
4. Les deux premières options d’<strong>install</strong>ation apparaissent. Si l’adaptateur est<br />
<strong>install</strong>é la première fois, nous recommandons que vous choissisez “<strong>install</strong><br />
driver and intEllinEt Wlan utility.” afin de seulement mettre à jour le<br />
pilote, choissisez “Install driver only.” Cliquez “Next” afin de continuer.<br />
5. La deuxième étape présente deux options pour configurer l’adaptateur.<br />
nous recommandons “intEllinEt configuration tool” qui permet l’accès<br />
complet à toutes les fonctions de l’adaptateur. si vous préférez utiliser le<br />
logiciel de configuration correspondant de Windows Xp ou Vista, choissisez<br />
“Microsoft Zero Configuration Tool.” Puis cliquez “Next.”<br />
FRançais<br />
15
6. Dès que le programme “Ready to <strong>install</strong>” apparaît, cliquez “<strong>install</strong>.” afin de<br />
changer des paramètres préalables, cliquez “Back”; afin de quitter l’assistant,<br />
cliquez “cancel.” NOTE: si l’assistant de matériel apparaît à nouveau, attendez<br />
jusqu’ au message “<strong>install</strong>ation complete”.<br />
7. sur l’affichage-écran “<strong>install</strong>ation complete”, cliquez “Finish.”<br />
cONNExION POINT D’AccèS SANS fIL<br />
le logiciel de configuration vous permet à configurer l’adaptateur et voir l’état<br />
de la connexion et des statistiques du processus de transmission.<br />
1. Dès que l’<strong>install</strong>ation est complète, le symbole de la configuration apparaît<br />
automatiquement en bas à droite sur votre base de données. cliquez-droit<br />
le symbole et choissisez<br />
“launch config utility”<br />
ou commutez<br />
l’adaptateur au mode ap<br />
(pour des instructions<br />
complémentaires, veuillez lire le manuel de l’utilisateur sur le cD).<br />
2. Le logiciel de configuration cherche des points d’accès et accède aux non<br />
codés automatiquement. afin de connecter à un, marquez-le et cliquez<br />
“connect.” NOTE: si votre point d’accès voulu n’apparaît pas dans la liste,<br />
cliquez sur “Rescan.”<br />
3. si le point d’accès utilise de l’encodage, vous devez entrer une clé WEp ou<br />
Wpa. obtenez-la du possesseur du point d’accès sans fil auquel vous<br />
voudriez connecter et entrez-la dans le champ correspondant et cliquez<br />
16<br />
FRançais
“oK.” NOTE: le type d’authentification est choisi automatiquement et ne<br />
devrait pas être changé.<br />
4. Dès qu’un point d’accès est connecté, un flèche bleu apparaît à gauche de<br />
son nom dans la liste.<br />
pour des informations complémentaires sur l’<strong>install</strong>ation, la configuration et<br />
les fonctions de l’adaptateur <strong>150n</strong> usB sans fil, veuillez lire le manuel de<br />
l’utilisateur sur le cD inclus.<br />
FRançais<br />
17
Dziękujemy za zakup bezprzewodowej karty usB <strong>150n</strong> intEllinEt nEtWoRK<br />
solutions Bezprzewodowa karta USB 150N • Instrukcja szybkiej instalacji Polski<br />
Wireless <strong>150n</strong> usB <strong>adapter</strong>, Model 524438.<br />
niniejsza instrukcja szybkiej instalacji przedstawia podstawowe kroki potrzebne<br />
do uruchomienia i obsługi urządzenia. aby uzyskać szczegółowe informacje<br />
techniczne oraz podręcznik użytkownika, zapoznaj się z zawartością dołączonej<br />
płyty cD lub odwiedź stronę www.intellinet-network.com.<br />
Zawartość opakowania<br />
• Bezprzewodowa karta USB 150N<br />
• Przedłużacz USB<br />
• Instrukcja szybkiej instalacji oraz płyta CD ze sterownikiem i podręcznikiem<br />
użytkownika<br />
UWAGA: niektóre przedstawione tutaj obrazy zostały zmienione w celu<br />
dopasowania do niniejszego dokumentu. obrazy<br />
wyświetlane przez wszystkie kompatybilne z<br />
urządzeniem systemy operacyjne są bardzo podobne.<br />
INSTALAcJA uRZĄDZENIA<br />
1. gdy komputer jest<br />
włączony, podłącz<br />
kartę do wolnego<br />
portu usB 2.0<br />
komputera.<br />
2. W oknie kreatora<br />
znajdowania nowego<br />
sprzętu należy kliknąć<br />
„anuluj”, aby<br />
kontynuować<br />
instalację.<br />
3. umieść dołączoną płytę<br />
cD w napędzie cD/DVD<br />
komputera. otwórz<br />
zawartość płyty oraz<br />
uruchom program<br />
18<br />
polsKi
Setup.exe. Kiedy pojawi się okno z umową licencyjną, wybierz „Akceptuję<br />
warunki umowy licencyjnej” i kliknij „Dalej”, aby kontynuować instalację.<br />
4. na pierwszym z dwóch obrazów wyświetlone zostanę dwa typy instalacji.<br />
Jeśli karta instalowana jest po raz pierwszy, zaleca się wybranie opcji „instaluj<br />
sterownik oraz intEllinEt Wlan utility”. aby jedynie zaktualizować<br />
sterownik, wybierz opcję „instaluj tylko sterownik”.<br />
5. na drugim z obrazów wyświetlone zostaną dwie opcje konfiguracyjne<br />
<strong>adapter</strong>a. Zaleca się wybranie opcji „intEllinEt configuration tool”, ponieważ<br />
zapewnia ona pełny dostęp do wszystkich funkcji karty. Jeśli wolisz skorzystać<br />
z narzędzia do konfiguracji sieci bezprzewodowej dostarczonego wraz z<br />
systemem Windows Xp lub Vista, wybierz opcję „Microsoft Zero configuration<br />
tool”. Wciśnij przycisk „Dalej”.<br />
POLSKI<br />
19
6. W kolejnym oknie wybierz przycisk „instaluj”. aby dokonać zmian we<br />
wcześniejszych opcjach konfiguracyjnych, wciśnij „Wstecz”. aby przerwać<br />
instalację, wciśnij „anuluj”. UWAGA: Jeśli ponownie pojawi się kreator znajdowania<br />
nowego sprzętu, poczekaj aż system dokończy instalację sterownika.<br />
7. aby zakończyć instalację, w kolejnym oknie wciśnij „Zakończ”.<br />
POŁĄcZENIE bEZPRZEWODOWE Z AccESS POINTEm<br />
narzędzie do obsługi urządzenia jest potężną aplikacją, która jest bardzo<br />
pomocna podczas konfiguracji <strong>adapter</strong>a oraz do monitorowania stanu<br />
połączenia i statystyk podczas procesu komunikacji.<br />
1. po zakończeniu procesu instalacji urządzenia, ikona programu do obsługi<br />
<strong>adapter</strong>a automatycznie<br />
zostanie wyświetlona w<br />
obszarze powiadamiania,<br />
w prawym dolnym rogu<br />
ekranu. Kliknij prawym<br />
przyciskiem myszy na ikonie i wybierz „launch config utility” lub przełącz<br />
urządzenie w tryb ap – „switch to ap Mode” (zapoznaj się z podręcznikiem<br />
użytkownika, aby uzyskać szczegóły).<br />
2. oprogramowanie do obsługi <strong>adapter</strong>a wyszuka wszystkie bezprzewodowe<br />
punkty dostępowe, podłączenie do niezabezpieczonej sieci następuje<br />
automatycznie. aby połączyć się z określoną siecią, zaznacz ją i wciśnij<br />
przycisk „połącz”. UWAGA: Jeśli na liście nie ma punktu dostępowego, do<br />
którego masz zamiar się podłączyć, wciśnij przycisk „skanuj”.<br />
20<br />
polsKi
3. Jeśli punkt dostępowy wykorzystuje szyfrowanie, musisz wprowadzić klucz<br />
WEp lub Wpa preshared Key. Klucz uzyskasz od administratora sieci. Wprowadź<br />
go w odpowiednie pole tekstowe i wciśnij „oK”. UWAGA: Wybór typu<br />
uwierzytelniania jest automatyczny i nie powinien być zmieniany.<br />
4. Jeśli połączenie z punktem dostępowym zostało ustanowione w sposób<br />
prawidłowy, zostanie przy nim wyświetlony niebieski wskaźnik na liście<br />
dostępnych sieci.<br />
aby uzyskać informacje na temat zaawansowanych opcji konfiguracyjny<br />
oraz wielu dodatkowych funkcji bezprzewodowej karty usB <strong>150n</strong>, zapoznaj<br />
się z podręcznikiem użytkownika, znajdującym się na dołączonej płycie cD.<br />
POLSKI<br />
21
grazie per aver acquistato l’adattatore Wireless <strong>150n</strong> usB intEllinEt nEtWoRK<br />
solutions Adattatore Wireless 150N USB • Guida rapida all’<strong>install</strong>azione Italiano<br />
, Modello 524438.<br />
Questa guida rapida all’<strong>install</strong>azione fornisce le informazioni basilari per il<br />
settaggio e il funzionamento di questa periferica. per istruzioni e specifiche<br />
dettagliate, far riferimento al manuale d’istruzioni contenuto nel cD incluso<br />
al prodotto o al sito www.intellinet-network.com.<br />
Contenuto della confezione<br />
• Adattatore Wireless 150N USB<br />
• Cavo prolunga USB<br />
• Guida rapida all’<strong>install</strong>azione e CD per il settaggio con il manuale d’istruzioni<br />
NOTA: alcune immagini dello schermo sono state modificate per adattarle<br />
allo dimensioni di questa guida. le immagini che compaiono sullo schermo<br />
su tutti i sistemi operativi compatibili sono similari.<br />
INSTALLAZIONE ADATTATORE<br />
1. con il computer acceso, inserire<br />
delicatamente l’adattatore<br />
all’interno della porta usB 2.0.<br />
se questo non dovesse<br />
scivolare agevolmente<br />
all’interno della porta, ruota<br />
l’adattatore e riprova<br />
nuovamente.<br />
2. il messaggio di benvenuto<br />
della procedura di<br />
<strong>install</strong>azione guidata del<br />
nuovo hardware rilevato<br />
apparirà automaticamente<br />
sullo schermo. cliccare<br />
“cancel (=cancella)” per<br />
continuare.<br />
3. inserire il cD di settaggio<br />
incluso nel lettore CD/DVD-ROM e avviare il programma “Setup.exe”.<br />
Quando appare la Richiesta di accettazione della Licenza, selezionare “I<br />
22<br />
ITALIANO
accept the terms of the license agreement (=accetto i termini del contratto<br />
di licenza)” e cliccare “Next (successivo)” per continuare.<br />
4. comparirà il primo dei due schermi di settaggio. se l’adattatore viene <strong>install</strong>ato<br />
per la prima volta, si raccomanda di selezionare “<strong>install</strong> driver and intellinet<br />
Wlan utility (=<strong>install</strong>a driver e intellinet Wlan utility).” per semplicemente<br />
aggiornare il driver, selezionare “<strong>install</strong> driver only (=<strong>install</strong>a solo il driver).”<br />
Cliccare “Next (=successive)” per continuare.<br />
5. la seconda schermata per il settaggio presenta due possibilità di configurazione<br />
dell’adattatore. “intellinet configuration tool” è consigliato, poiché fornisce<br />
un completo accesso a tutte le funzioni dell’adattatore. se preferite usare<br />
lo strumento di configurazione <strong>wireless</strong> fornito da Windows Xp o Vista,<br />
selezionare “Microsoft Zero Configuration Tool.” Cliccare “Next.”<br />
ITALIANO<br />
23
6. Quando compare sullo schermo che il programma è pronto per l’<strong>install</strong>azione,<br />
cliccare“<strong>install</strong> (=<strong>install</strong>a).” per cambiare qualsiasi precedente selezione o<br />
settaggio, cliccare “Back (=indietro)”; per uscire dall’applicazione di<br />
<strong>install</strong>azione guidata, cliccare “cancel (=cancella).” NOTA: se riappare sullo<br />
schermo il messaggio della procedura d’<strong>install</strong>azione guidata relativa al<br />
nuovo hardware rilevato, attendere fino alla comparsa sullo schermo del<br />
messaggio di completamento dell’<strong>install</strong>azione.<br />
7. Quando appare sullo schermo che l’<strong>install</strong>azione della procedura guidata è<br />
completa, cliccare su “Finish (finito).”<br />
cONNESSIONE WIRELESS AP<br />
l’utility di configurazione è una potente applicazione che aiuta a configurare<br />
l’adattatore e a monitorare lo stato e le statistiche di connessione durante il<br />
processo di comunicazione.<br />
1. non appena il processo di <strong>install</strong>azione è completo, l’icona per l’utility di<br />
configurazione <strong>wireless</strong><br />
apparirà automaticamente<br />
sulla desktop del computer<br />
e nell’angolo in basso a<br />
destra della barra di sistema.<br />
cliccare sull’icona con il tasto destro del mouse per selezionare l’utility di<br />
configurazione o per passare alla modalità ap (fare riferimento al manuale<br />
d’istruzione per ulteriori dettagli).<br />
2. l’utility di configurazione farà la scansione dei punti di accesso e accede ai<br />
evidenziarlo e cliccare su “connect (=connettere).” NOTA: se un punto di<br />
24<br />
ITALIANO
punti di accesso non criptati automaticamente. per collegarsi ad uno di questi,<br />
accesso <strong>wireless</strong> a cui desiderate connettervi non dovesse apparire nella<br />
lista degli ap, cliccare “Rescan (=nuova scansione) .”<br />
3. se il punto di accesso <strong>wireless</strong> è criptato, è necessario inserire una chiave di<br />
cripta tura WEp o Wpa. ottenere ciò dal proprietario del punto di accesso<br />
<strong>wireless</strong> al quale si desidera connettersi, inserirla nel corrispondente campo<br />
di testo, e cliccare “oK.” NOTA: il tipo di autentificazione è selezionato<br />
automaticamente e non può essere modificato.<br />
4. Quando il punto di accesso <strong>wireless</strong> è connesso con successo, un indicatore<br />
blu appare sulla sinistra del nome presente nella lista dei ap.<br />
per ulteriori dettagli in merito ad un settaggio avanzato e alle istruzioni di<br />
configurazione per molte caratteristiche aggiuntive di questo adattatore di<br />
rete Wireless <strong>150n</strong> usB, fare riferimento al manuale d’istruzione all’interno<br />
del cD di settaggio incluso.<br />
ITALIANO<br />
25
26<br />
WASTE ELECTRICAL & ELECTRONIC EQUIPMENT<br />
Disposal of Electric and Electronic Equipment<br />
(applicable in the European Union and other European countries with separate collection systems)<br />
ENgLISH<br />
this symbol on the product or its packaging indicates that this product shall not be treated as household waste.<br />
instead, it should be taken to an applicable collection point for the recycling of electrical and<br />
electronic equipment. By ensuring this product is disposed of correctly, you will help prevent<br />
potential negative consequences to the environment and human health, which could otherwise<br />
be caused by inappropriate waste handling of this product. if your equipment contains easily<br />
removable batteries or accumulators, dispose of these separately according to your local<br />
requirements. the recycling of materials will help to conserve natural resources. For more<br />
detailed information about recycling of this product, contact your local city office, your household waste<br />
disposal service or the shop where you purchased this product. In countries outside of the EU: if you wish<br />
to discard this product, contact your local authorities and ask for the correct manner of disposal.<br />
DEuTScH<br />
Dieses auf dem produkt oder der Verpackung angebrachte symbol zeigt an, dass dieses produkt nicht mit<br />
dem hausmüll entsorgt werden darf. in Übereinstimmung mit der Richtlinie 2002/96/Eg des Europäischen<br />
parlaments und des Rates über Elektro- und Elektronik-altgeräte (WEEE) darf dieses Elektrogerät nicht<br />
im normalen hausmüll oder dem gelben sack entsorgt werden. Wenn sie dieses produkt entsorgen<br />
möchten, bringen sie es bitte zur Verkaufsstelle zurück oder zum Recycling-sammelpunkt ihrer gemeinde.<br />
ESPAñOL<br />
Este símbolo en el producto o su embalaje indica que el producto no debe tratarse como residuo doméstico.<br />
De conformidad con la Directiva 2002/96/cE de la uE sobre residuos de aparatos eléctricos y electrónicos<br />
(RaEE), este producto eléctrico no puede desecha se con el resto de residuos no clasificados. Deshágase<br />
de este producto devolviéndolo al punta de venta o a un punta de recogida municipal para su reciclaje.<br />
fRANçAIS<br />
ce symbole sur ie produit ou son emballage signifie que ce produit ne doit pas être traité comme un<br />
déchet ménager. conformément à la Directive 2002/96/Ec sur les déchets d’équipements électriques<br />
et électroniques (DEEE), ce produit électrique ne doit en aucun cas être mis au rebut sous forme de<br />
déchet municipal non trié. Veuillez vous débarrasser de ce produit en ie renvoyant à son point<br />
de vente ou au point de ramassage local dans votre municipalité, à des fins de recyclage.<br />
ITALIANO<br />
Questo simbolo sui prodotto o sulla relativa confezione indica che il prodotto non va trattato come un rifiuto<br />
domestico. in ottemperanza alla Direttiva uE 2002/96/Ec sui rifiuti di apparecchiature elettriche ed<br />
elettroniche (RaEE), questa prodotto elettrico non deve essere smaltito come rifiuto municipale misto. si<br />
prega di smaltire il prodotto riportandolo al punto vendita o al punto di raccolta municipale locale per un<br />
opportuno riciclaggio.<br />
POLSkI<br />
Jeśli na produkcie lub jego opakowaniu umieszczono ten symbol, wówczas w czasie utylizacji nie wolno<br />
wyrzucać tego produktu wraz z odpadami komunalnymi. Zgodnie z Dyrektywą nr 2002/96/WE w sprawie<br />
zużytego sprzętu elektrycznego i elektronicznego (WEEE), niniejszego produktu elektrycznego nie wolno<br />
usuwać jako nie posortowanego odpadu komunalnego. prosimy o usuniecie niniejszego produktu<br />
poprzez jego zwrot do punktu zakupu lub oddanie do miejscowego komunalnego punktu zbiórki<br />
odpadów przeznaczonych do recyklingu.
WARRANTY INFORMATION<br />
ENgLISH — For warranty information, go to www.intellinet-network.com/warranty.<br />
DEuTScH — garantieinformationen finden sie hier unter www.intellinet-network.com/warranty.<br />
ESPAñOL — Si desea obtener información sobre la garantía, visite<br />
www.intellinet-network.com/warranty.<br />
fRANçAIS — pour consulter les informations sur la garantie, rendezvous à l’adresse<br />
www.intellinet-network.com/warranty.<br />
POLSkI — informacje dotyczące gwarancji znajdują się na stronie<br />
www.intellinet-network.com/warranty.<br />
ITALIANO — per informazioni sulla garanzia, accedere a www.intellinet-network.com/warranty.<br />
EN méxIcO: poliza de garantia intEllinEt — Datos del importador y responsable ante el consumidor<br />
IC Intracom México, S.A. de C.V. • av. interceptor poniente # 73, col. parque industrial la Joya, cuautitlan<br />
Izcalli, Estado de México, C.P. 54730, México. • tel. (55)1500-4500<br />
La presente garantía cubre este producto por 3 años contra cualquier defecto de fabricación en sus<br />
materiales y mano de obra, bajo las siguientes condiciones:<br />
1. Todos los productos a que se refiere esta garantía, ampara su cambio físico, sin ningún cargo para<br />
el consumidor.<br />
2. El comercializador no tiene talleres de servicio, debido a que los productos que se garantizan no<br />
cuentan con reparaciones, ni refacciones, ya que su garantía es de cambio físico.<br />
3. La garantía cubre exclusivamente aquellas partes, equipos o sub-ensambles que hayan sido instaladas<br />
defábrica y no incluye en ningún caso el equipo adicional o cualesquiera que hayan sido adicionados<br />
al mismo por el usuario o distribuidor.<br />
Para hacer efectiva esta garantía bastara con presentar el producto al distribuidor en el domicilio donde<br />
fue adquirido o en el domicilio de IC Intracom México, S.A. de C.V., junto con los accesorios contenidos<br />
en su empaque, acompañado de su póliza debidamente llenada y sellada por la casa vendedora<br />
(indispensable el sello y fecha de compra) donde lo adquirió, o bien, la factura o ticket de compra<br />
original donde se mencione claramente el modelo, numero de serie (cuando aplique) y fecha de<br />
adquisición. Esta garantia no es valida en los siguientes casos: si el producto se hubiese utilizado<br />
en condiciones distintas a las normales; si el producto no ha sido operado conforme a los instructivos<br />
de uso; ó si el producto ha sido alterado o tratado de ser reparado por el consumidor ó terceras personas.<br />
27
28<br />
FEDERAL COMMUNICATIONS COMMISSION<br />
REGULATORY STATEMENT<br />
fcc class b<br />
this equipment has been tested and found to comply with the limits for<br />
a class B digital device, pursuant to part 15 of Federal communications<br />
commission (Fcc) Rules. these limits are designed to provide reasonable<br />
protection against harmful interference in a residential <strong>install</strong>ation. this<br />
equipment generates, uses and can radiate radio frequency energy and,<br />
if not <strong>install</strong>ed and used in accordance with the instructions, may cause<br />
harmful interference to radio communications. however, there is no guarantee<br />
that interference will not occur in a particular <strong>install</strong>ation. if this<br />
equipment does cause harmful interference to radio or television reception,<br />
which can be determined by turning the equipment off and on,<br />
the user is encouraged to try to correct the interference by one or more of the<br />
following measures:<br />
• Reorient or relocate the receiving antenna.<br />
• Increase the separation between the equipment and the receiver.<br />
• Connect the equipment to an outlet on a circuit different from the receiver.<br />
• Consult the dealer or an experienced radio/TV technician for help.<br />
R&TTE<br />
ENgLISH<br />
this device complies with the requirements of the R&ttE Directive 1999/5/Ec.<br />
DEuTScH<br />
Dieses gerät enspricht der Direktive R&ttE Direktive 1999/5/Ec.<br />
ESPAñOL<br />
Este dispositivo cumple con los requerimientos de la Directiva R&ttE 1999/5/Ec.<br />
fRANçAIS<br />
Cet appareil satisfait aux exigences de la directive R&TTE 1999/5/CE.<br />
POLSkI<br />
urządzenie spełnia wymagania dyrektywy R&ttE 1999/5/Ec.<br />
ITALIANO<br />
Questo dispositivo è conforme ai requisiti della direttiva 1999/5/EC R&TTE.
intEllinEt nEtWoRK solutions offers a complete line of active and passive networking products.<br />
ask your local computer dealer for more information or visit www.intellinet-network.com.<br />
all products mentioned are trademarks or registered trademarks of their respective owners.<br />
intEllinEt nEtWoRK solutions bietet ein vollständiges sortiment aktiver und passiver<br />
netzwerkkomponenten. Für weitere informationen wenden sie sich bitte an ihren händler oder<br />
nutzen sie die <strong>Web</strong>seite www.intellinet-network.com.<br />
alle erwähnten produkte sind registrierte Marken und Eigentum ihrer jeweiligen Besitzer.<br />
intEllinEt nEtWoRK solutions ofrece una línea completa de productos de red activa y pasiva.<br />
pregunte a su distribuidor para obtener mayor informacion o visite:<br />
www.intellinet-network.com.<br />
todos los productos mencionados son marcas comerciales o marcas registradas de sus respectivos propietarios.<br />
intEllinEt nEtWoRK solutions offre un assortiment complet de produits de réseau actifs et<br />
passifs. pour plus d’informations veuillez contacter votre commerçant ou utiliser la page d’accueil<br />
www.intellinet-network.com.<br />
tous les produits mentionnés sont des marques commerciales ou des marques déposées de leurs<br />
propriétaires respectifs.<br />
intEllinEt nEtWoRK solutions to kompletna linia aktywnych oraz pasywnych komponentów<br />
sieciowych. poproś lokalnego dealera o więcej informacji lub odwiedź stronę<br />
www.intellinet-network.com.<br />
Wszystkie nazwy handlowe i towarów są nazwami i znakami towarowymi<br />
zastrzeżonymi odpowiednich firm odnośnych właścicieli.<br />
intEllinEt nEtWoRK solutions offre una linea completa di prodotti di rete attivi e passivi.<br />
chiedi maggiori informazioni al tuo rivenditore di computer o visita il sito<br />
www.intellinet-network.com.<br />
tutti i prodotti sopracitati sono marchi di fabbrica o marchi registrati depositati dai proprietari.<br />
29
copyright © intEllinEt nEtWoRK solutions