Reocor S - BIOTRONIK USA - News
Reocor S - BIOTRONIK USA - News
Reocor S - BIOTRONIK USA - News

Create successful ePaper yourself
Turn your PDF publications into a flip-book with our unique Google optimized e-Paper software.
Cardiac Rhythm Management<br />
External Devices<br />
Gebrauchsanweisung<br />
Technical Manual<br />
Manual técnico<br />
Manuel technique<br />
Manuale tecnico di istruzione<br />
Manual técnico<br />
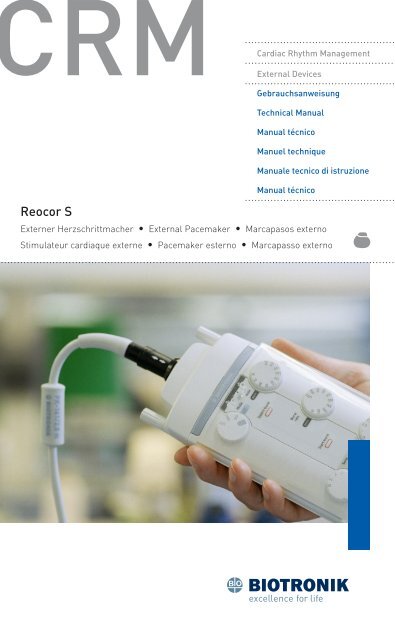
<strong>Reocor</strong> S<br />
Externer Herzschrittmacher • External Pacemaker • Marcapasos externo<br />
Stimulateur cardiaque externe • Pacemaker esterno • Marcapasso externo
3<br />
<br />
Inhalt<br />
Allgemeine Beschreibung ........................................................................5<br />
Produktbeschreibung .................................................5<br />
Indikationen ................................................................6<br />
Kontraindikationen .....................................................6<br />
Mögliche Nebenwirkungen ........................................7<br />
Hinweise zur Handhabung .........................................7<br />
Optische und akustische Signale .............................13<br />
Bedienungshinweise ..............................................................................14<br />
Allgemeine Anmerkungen .......................................14<br />
Bedienelemente und LEDs ......................................16<br />
Bedienfeldabdeckung ..............................................17<br />
Elektrodenanschluss ................................................19<br />
Inbetriebnahme ........................................................26<br />
Befestigung ..............................................................27<br />
Batteriewechsel .......................................................28<br />
Stimulationsarten und Parameter .........................................................30<br />
Stimulationsarten ....................................................30<br />
Frequenz ...................................................................31<br />
Impulsamplitude und -dauer ...................................31<br />
Empfindlichkeit ........................................................31<br />
Interferenzintervall ..................................................32<br />
Burst .........................................................................32<br />
Handhabung, Wartung und Pflege .........................................................34<br />
<strong>Reocor</strong> S ...................................................................34<br />
Wiederverwendbare Patientenkabel .......................35<br />
Wartung, Service, Inspektionen ...............................36<br />
Entsorgung ...............................................................36<br />
Technische Sicherheit ............................................................................38<br />
Technische Daten ...................................................................................39<br />
Konformität gemäß IEC 60601-1-2 .........................................................42<br />
Lieferumfang und Zubehör ....................................................................47<br />
Legende zum Etikett ..............................................................................50<br />
Deutsch<br />
368703--G
Deutsch<br />
4
5 Allgemeine Beschreibung<br />
Allgemeine Beschreibung<br />
Produktbeschreibung<br />
<strong>Reocor</strong> S ist ein batteriebetriebener, externer Einkammer-Herzschrittmacher<br />
für den Einsatz in<br />
Kliniken, der an temporäre Schrittmacherelektroden<br />
(einschließlich myokardialer Herzdrähte und transvenöse<br />
implantierbare Katheter) angeschlossen wird. <br />
Der Anschluss erfolgt direkt oder über ein separates<br />
Patientenkabel und ggf. Adapter.<br />
Es stehen drei Stimulationsarten zur Verfügung: SSI,<br />
S00, SST sowie eine Burst-Funktion.<br />
Einstellbar sind Stimulationsart, Frequenz, Empfindlichkeit,<br />
Impulsamplitude und die Burst-Frequenz.<br />
Leuchtdioden (LEDs) zeigen die Wahrnehmung<br />
(Sense), Stimulation (Pace) und Batteriezustand <br />
(Low battery) an. <br />
Ein akustisches Signal warnt, wenn sehr hohe Frequenzen<br />
oder sehr niedrige Empfindlichkeitswerte<br />
eingestellt sind sowie bei nicht optimaler Elektrodenimpedanz.<br />
Ein Defekt des Geräts (Selbsttest nach Einschalten<br />
des Geräts nicht bestanden) wird durch dauerhaft<br />
leuchtende LEDs und ein getaktetes Tonsignal angezeigt.<br />
Wenn der Selbsttest nach dem Einschalten des<br />
Geräts keinen Fehler entdeckt hat, gehen die akustischen<br />
und optischen Signale nach ein paar Sekunden<br />
aus.<br />
Zu den Sicherheitsmerkmalen von <strong>Reocor</strong> S gehören:<br />
• Optische Anzeige von wahrgenommenen und<br />
stimulierten Ereignissen<br />
• Mikroprozessorgesteuerte Stimulationsparameter<br />
• Überwachung der Elektrodenimpedanz<br />
• Optische Warnung bei bevorstehender Erschöpfung<br />
der Batterie<br />
Deutsch
6 Allgemeine Beschreibung<br />
Deutsch<br />
• Eine verschiebbare, transparente Abdeckung der<br />
Bedienelemente, um unbeabsichtigte Änderungen<br />
der Parameter zu vermeiden.<br />
Temporäre Katheter, Herzdrähte, Elektroden mit<br />
2-mm-Steckern können direkt an <strong>Reocor</strong> S angeschlossen<br />
werden. Ferner stehen verschiedene<br />
Patientenkabel und Adapter zur Verfügung. Dieses<br />
System bietet einen sicheren Anschluss von transvenösen<br />
Kathetern und myokardialen Elektroden, die<br />
entweder unipolar oder bipolar angewendet werden.<br />
Indikationen<br />
Die temporäre Stimulation mit <strong>Reocor</strong> S eignet sich<br />
für folgende Anwendungen an Patienten jeden Alters:<br />
• Behandlung von Arrhythmien und Herzblock<br />
• Symptomatische Sinusbradykardie<br />
• Sinusknotensyndrom<br />
• prä-, intra- und postoperative Stimulation von<br />
Patienten mit einer Herzoperation<br />
• Terminierung supraventrikulärer Tachyarrhythmien<br />
• prophylaktische Stimulation zur Prävention von<br />
Arrhythmien<br />
• Notfallstimulation<br />
• Prüfung der Reizschwellen<br />
Kontraindikationen<br />
• <strong>Reocor</strong> S kann nicht sterilisiert werden und ist<br />
daher nicht für die Verwendung innerhalb der<br />
sterilen Patientenumgebung geeignet.<br />
• Die atriale Einkammerstimulation ist kontrandiziert<br />
bei Patienten mit bereits bestehenden <br />
AV-Leitungsstörungen.<br />
• Die Verwendung eines externen Schrittmachers<br />
ist kontraindiziert in Gegenwart eines aktiven,<br />
implantierten Herzschrittmachers.
7 Allgemeine Beschreibung<br />
Mögliche Nebenwirkungen<br />
Zu den möglichen Komplikationen bei der Anwendung<br />
der temporären externen Stimulation gehören unter<br />
anderem Asystolen nach abrupter Beendigung der<br />
Stimulation (z. B. durch unbeabsichtigtes Lösen des<br />
Patientenkabels, Lösen der Elektrode, fehlerhafte<br />
Einstellungen) oder eine Abhängigkeit vom Herzschrittmacher.<br />
Zu den Komplikationen beim Einführen transvenöser<br />
Elektroden gehören u. a.: Wundinfektion, arterielle<br />
Punktion, perikardiale Reibungen, kardiale Perforation<br />
und Dysrhythmie nach Elektrodeninsertion.<br />
Deutsch<br />
Hinweise zur Handhabung<br />
Je nach Stimulationseinstellungen und der zu Grunde<br />
liegenden Erkrankung des Patienten kann die Stimulation<br />
Arrhythmien induzieren. Um die Sicherheit des<br />
Patienten zu gewährleisten, sollten bestimmte Verfahrensweisen<br />
beachtet und Vorsichtsmaßnahmen<br />
ergriffen werden, die im Folgenden aufgelistet sind.<br />
Weitergehende Verfahren und Vorsichtsmaßnahmen<br />
sollten in entsprechenden medizinischen Publikationen<br />
nachgelesen werden.<br />
Anwenderkreis • <strong>Reocor</strong> S darf nur eingesetzt werden von<br />
Personen mit Kenntnissen der Kardiologie, die in<br />
die Handhabung des Geräts eingewiesen wurden.<br />
Potentielle Anwender sind technisch-medizinisches<br />
Fachpersonal eines Krankenhauses und<br />
Ärzte.<br />
Wirkungsweise • <strong>Reocor</strong> S interagiert mit dem menschlichen<br />
Herzen. Ferner findet eine Wechselwirkung mit<br />
der Haut und den Blutgefäßen des Patienten statt.<br />
Bestimmungsgemäßer<br />
Gebrauch<br />
• <strong>Reocor</strong> S und die mit dem Gerät zugelassenen<br />
Kabel und Zubehör dürfen nur nach Maßgabe<br />
dieser Gebrauchsanweisung verwendet werden.<br />
• <strong>Reocor</strong> S darf nicht an andere elektromedizinische<br />
Geräte angeschlossen werden.<br />
• <strong>Reocor</strong> S darf nicht in Bereichen verwendet<br />
werden, in denen Explosionsgefahr besteht.
8 Allgemeine Beschreibung<br />
Deutsch<br />
Geräte<br />
bereithalten<br />
• Bereitzuhalten sind externer Defibrillator, Sauerstoff,<br />
Intubationsausrüstung und Notfallmedikamente.<br />
Veränderungsverbot<br />
Ersatzteile und<br />
Zubehör<br />
Verhalten vor<br />
dem Einsatz<br />
Elektrodenanschluss<br />
• Bei Schrittmacherabhängigkeit des Patienten ist<br />
ein Notfallstimulator bereitzuhalten.<br />
• Die Instandsetzung, Erweiterung oder Modifizierung<br />
des Geräts dürfen nur durch den Hersteller<br />
<strong>BIOTRONIK</strong> oder durch einen vom Hersteller ausdrücklich<br />
dazu autorisierten Betrieb erfolgen.<br />
• Originalersatzteile und von <strong>BIOTRONIK</strong> autorisiertes<br />
Zubehör dienen Ihrer Sicherheit. Die Verwendung<br />
anderer Komponenten hebt die Haftung für<br />
die daraus entstehenden Folgen auf, Garantie und<br />
Gewährleistung erlöschen.<br />
• Vor der Anwendung ist <strong>Reocor</strong> S durch Augenschein<br />
hinsichtlich Beschädigungen und Verschmutzungen<br />
zu untersuchen.<br />
• Niemals ein beschädigtes Gerät oder ein Gerät,<br />
das Anomalien aufweist, verwenden. Tauschen Sie<br />
Kabel aller Art bereits bei geringfügigen erkennbaren<br />
Beschädigungen aus.<br />
• Vor dem Einsatz von <strong>Reocor</strong> S, der Patienten-<br />
kabel oder Elektroden sollte der Anwender den<br />
Patienten berühren, um elektrische Potenzialdifferenzen<br />
auszugleichen.<br />
• Es wird dringend empfohlen, dass der Anwender<br />
jeden eingestellten Parameter prüft, bevor die<br />
Elektroden an <strong>Reocor</strong> S angeschlossen werden.<br />
• Obwohl <strong>Reocor</strong> S gegen Tropfwasser geschützt ist,<br />
sollten alle Stecker und das Gerät sauber und<br />
trocken gehalten werden.<br />
• <strong>Reocor</strong> S kann nicht sterilisiert werden.<br />
• Die Anschlüsse von <strong>Reocor</strong> S und der temporären<br />
Stimulationselektroden müssen gesichert und<br />
regelmäßig überprüft werden.<br />
• Das Patientenkabel muss zuerst an <strong>Reocor</strong> S,<br />
dann an die Elektroden angeschlossen werden.
9 Allgemeine Beschreibung<br />
Verhalten während<br />
des Einsatzes<br />
Stimulation mit<br />
hohen Frequenzen<br />
• Die temporären Elektroden, an die <strong>Reocor</strong> S<br />
angeschlossen ist, stellen für elektrischen Strom<br />
eine niederohmige Zuleitung zum Myokard dar.<br />
Deshalb müssen netzbetriebene Geräte, die in <br />
der Nähe des Patienten betrieben werden, vorschriftsmäßig<br />
geerdet sein.<br />
• Bei der Handhabung von bereits implantierten<br />
Elektroden dürfen deren Kontaktstifte und metallischen<br />
Kontaktflächen nicht berührt werden oder<br />
in Kontakt mit elektrisch leitenden oder feuchten<br />
Oberflächen kommen.<br />
• Falls sich das Kabel vom <strong>Reocor</strong> S gelöst hat,<br />
muss es sofort wieder angeschlossen und die<br />
Sicherheit der Verbindung kontrolliert werden.<br />
• Bei der Verwendung unipolarer Elektroden<br />
müssen für eine wirksame Stimulation zwei unipolare<br />
Elektroden verwendet werden.<br />
• Während des Gebrauchs von <strong>Reocor</strong> S muss die<br />
Bedienfeldabdeckung vollständig geschlossen<br />
sein, um ein versehentliches Verändern der<br />
Programmparameter zu verhindern.<br />
• <strong>Reocor</strong> S entweder liegend auf einer horizon-<br />
talen, rutschfesten Unterlage oder mit der Armmanschette<br />
am Patienten fixiert oder mit Hilfe der<br />
Aufhängeöse auf der Geräterückseite an einem<br />
Infusionsständer hängend betreiben.<br />
• <strong>Reocor</strong> S darf nicht direkt auf der Haut getragen<br />
werden.<br />
• Während der Verwendung von <strong>Reocor</strong> S ist die<br />
Herzfrequenz des Patienten mit einem EKG-<br />
Monitor mit Alarmfunktion zu überwachen.<br />
• Bei Störungen infolge elektromagnetischer Interferenz<br />
(EMI) geht <strong>Reocor</strong> S bei Überschreitung<br />
bestimmter Grenzwerte in die Betriebsart S00<br />
über.<br />
• Eine Stimulation des Herzens mit Frequenzen von<br />
mehr als 180 ppm über einen längeren Zeitraum<br />
kann schwere hämodynamische Komplikationen<br />
verursachen. Eine Stimulation mit hohen Frequenzen<br />
sollte nur durchgeführt werden, wenn<br />
eine kontinuierliche Überwachung gewährleistet<br />
ist.<br />
Deutsch
10 Allgemeine Beschreibung<br />
Deutsch<br />
Verhalten nach<br />
dem Einsatz<br />
• Nach einer Defibrillation oder Kauterisation ist<br />
das Gerät einem Funktionstest zu unterziehen.<br />
• Wird das Gerät längere Zeit gelagert und nicht<br />
benutzt, ist die Batterie herauszunehmen, um<br />
Schäden durch Auslaufen zu verhindern.<br />
• Zur Reinigung kann ein feuchtes Tuch und eine<br />
milde Seife verwendet werden. Starke Reinigungsmittel<br />
oder organische Lösungsmittel sind<br />
zu vermeiden, da sie das Kunststoffgehäuse<br />
angreifen können.<br />
• Inspektionen und Wartungsarbeiten sind entsprechend<br />
Seite 34 duchzuführen.<br />
Batteriebetrieb • Benutzen Sie keine wiederaufladbaren Batterien<br />
(Akkus). Die Betriebszeit dieser Batterien ist<br />
schwer abzuschätzen, so dass es zu einem unvorhersehbaren<br />
Überschreiten des ERI 1) -Zeitpunktes<br />
mit plötzlichem Ausbleiben der Stimulation<br />
kommen kann.<br />
Es dürfen nur 9-Volt-Batterien mit dem internationalen<br />
Code IEC 6LR61 verwendet werden. <br />
Bei der Verwendung der Batterie Typ MN 1604<br />
Duracell ® Procell ® ist eine externe Stimulation<br />
von mindestens 600 Stunden möglich, bevor ein<br />
Batteriewechsel erforderlich wird.<br />
Ein Batteriewechsel im laufenden Betrieb ist<br />
möglich. Bei herausgenommener Batterie bleibt<br />
<strong>Reocor</strong> S bei einer Umgebungstemperatur von<br />
20 ± 2 °C noch für ca. 30 s betriebsbereit.<br />
Aus Sicherheitsgründen sollte jedoch der Patient<br />
anderweitig versorgt werden.<br />
Elektrokauterisation<br />
• Eine Elektrokauterisation sollte auf keinen Fall im<br />
Umkreis von weniger als 15 cm um die Elektroden<br />
durchgeführt werden, da die Gefahr besteht, dass<br />
ein Kammerflimmern induziert oder der Schrittmacher<br />
beschädigt wird.<br />
Der Schrittmacher sollte auf asynchrone Stimulation<br />
eingestellt werden, um eine Schrittmacherinhibierung<br />
durch Interferenzsignale zu vermeiden.<br />
Während der Behandlung sollte der peri-<br />
1) Mit dem Signal ERI (LED Low battery blinkt) erinnert <strong>Reocor</strong> S an<br />
den Batterieaustausch
11 Allgemeine Beschreibung<br />
phere Puls des Patienten fortlaufend kontrolliert<br />
werden. Nach der Behandlung muss die Schrittmacherfunktion<br />
überprüft werden.<br />
Defibrillation • Die Schaltkreise von <strong>Reocor</strong> S sind gegen die<br />
Schockenergie, die durch eine Defibrillation induziert<br />
werden kann, geschützt. Dennoch sollten,<br />
wenn möglich, folgende Vorsichtsmaßnahmen<br />
getroffen werden:<br />
— Die eingestellte Energie sollte nicht höher sein<br />
als für die Defibrillation erforderlich.<br />
— Die Abstände der Elektroden des Defibrillators<br />
zu den Elektroden von <strong>Reocor</strong> S sollten mindestens<br />
10 cm betragen.<br />
— Nach einer Defibrillation muss <strong>Reocor</strong> S ausund<br />
wieder eingeschaltet werden, damit das<br />
Gerät einen vollständigen Selbsttest durchführen<br />
kann.<br />
Außerdem müssen nach der Defibrillation Schrittmacherfunktion<br />
und Reizschwelle überprüft und<br />
über einen ausreichend langen Zeitraum überwacht<br />
werden.<br />
Störsicherheit • <strong>Reocor</strong> S ist gegen Störungen infolge elektromagnetischer<br />
Strahlung, elektrostatischer Entladung<br />
und gegen übergeleitete Störungen geschützt.<br />
Auch die von <strong>Reocor</strong> S emittierte Strahlung wurde<br />
minimiert. Damit erfüllt das Gerät die Anforderungen<br />
nach IEC 60601-1-2. Dennoch ist es möglich,<br />
dass starke elektromagnetische Felder, wie<br />
sie z. B. in der unmittelbaren Nähe von Elektromotoren,<br />
Transformatoren, Stromleitungen und<br />
anderen elektrischen Geräten auftreten können,<br />
die Funktion von <strong>Reocor</strong> S beeinträchtigen.<br />
Elektromagnetische Störungen können zu<br />
folgenden Fehlern führen:<br />
— Unerwartetes Zurücksetzen (Selbsttest wird<br />
durchgeführt).<br />
— Kardiale Ereignisse werden wahrgenommen,<br />
erscheinen aber nicht auf dem EKG-Monitor.<br />
— <strong>Reocor</strong> S zeigt ein unerklärliches Verhalten.<br />
Deutsch
12 Allgemeine Beschreibung<br />
Deutsch<br />
Maßnahmen zur Wiederherstellung der korrekten<br />
Funktion von <strong>Reocor</strong> S:<br />
— Verbindung zwischen Gerät und temporären<br />
Stimulationselektroden überprüfen und ggf.<br />
korrigieren.<br />
— Empfindlichkeit am <strong>Reocor</strong> S richtig justieren:<br />
Oft führt der halbe Wert der durchschnittlichen<br />
Amplitude des intrinsischen Signals zu einer<br />
korrekten Empfindlichkeitseinstellung.<br />
— Alle elektrischen Geräte in der Nähe von<br />
<strong>Reocor</strong> S ausschalten, wenn diese<br />
elektromagnetische Störungen verursachen<br />
können und ihr Betrieb nicht unbedingt nötig<br />
ist.<br />
— Die Störquelle an einen Ort verbringen, von<br />
dem aus keine Störungen wirksam werden.<br />
— Wenn gefahrlos möglich: <strong>Reocor</strong> S aus- und<br />
wieder einschalten, um so den Schrittmacher<br />
in den ungestörten Betrieb zurückzusetzen.<br />
— Bei weiter bestehender Fehlfunktion wenden<br />
Sie sich an <strong>BIOTRONIK</strong>.
13 Allgemeine Beschreibung<br />
Optische und akustische Signale<br />
• Während des Selbsttests nach dem Einschalten<br />
von <strong>Reocor</strong> S leuchten alle LEDs auf und kurze<br />
akustische Signale sind zu hören. Nach wenigen<br />
Sekunden ist der Selbstest beendet.<br />
• Wenn der Selbsttest keinen Fehler findet,<br />
erlöschen die LEDs und die Warnsignale.<br />
• Wenn der Selbsttest einen Defekt findet, blinken<br />
alle LEDs dauerhaft und Warnsignale ertönen.<br />
• Ein erforderlicher Batteriewechsel wird durch die<br />
rot blinkende LED Low battery angezeigt.<br />
• Die grüne LED Sense signalisiert die Wahrnehmung<br />
einer P-Welle oder R-Zacke.<br />
• Die gelbe LED Pace signalisiert die Impulsabgabe.<br />
• Die LEDs und die akustischen Signale liefern<br />
außerdem folgende Warnhinweise im Betrieb:<br />
Deutsch<br />
Warnhinweis Bedeutung Störbeseitigung<br />
Akustisches Signal<br />
für 2 s<br />
Schnelle Tonfolge<br />
Akustisches Signal<br />
und Blinken der<br />
LEDs Pace und<br />
Sense<br />
LED Low battery<br />
blinkt<br />
Es ist eine Impulsamplitude<br />
1 V oder eine Frequenz<br />
180 ppm eingestellt<br />
Impedanz außerhalb des<br />
zulässigen Bereichs<br />
High Rate Protection wurde<br />
ausgelöst;<br />
Selbsttest nicht bestanden<br />
ERI erreicht<br />
a) Bei der Verwendung der Batterie Typ MN 1604 Duracell® , Procell®<br />
Prüfen Sie, ob die eingestellten<br />
Werte für<br />
den Patienten geeignet<br />
sind.<br />
Prüfen Sie, ob alle<br />
Stecker fest aufgesteckt<br />
sind.<br />
Prüfen Sie, ob die Elektroden<br />
die gewünschte<br />
Lage haben.<br />
Schalten Sie das Gerät<br />
aus und schicken Sie<br />
es an <strong>BIOTRONIK</strong>.<br />
Wechseln Sie die<br />
Batterie. Es verbleiben<br />
noch etwa 36 Stunden a)<br />
Betriebszeit.
14 Bedienungshinweise<br />
Deutsch<br />
Achtung!<br />
Selbsttest<br />
Warnmeldungen<br />
Bedienungshinweise<br />
Allgemeine Anmerkungen<br />
Die Anschlüsse von <strong>Reocor</strong> S und der temporären<br />
Stimulationselektroden müssen gesichert und regelmäßig<br />
überprüft werden.<br />
Nach dem Einschalten führt <strong>Reocor</strong> S für wenige<br />
Sekunden einen Selbsttest durch. Dazu gehören:<br />
• Überprüfung des Programm-Codes und des<br />
Mikroprozessors<br />
• Speichertest<br />
• Funktionstest der LEDs und der akustischen<br />
Signale<br />
• Prüfung der Stimulations- und Sensing-Fähigkeit<br />
• Prüfung der Wirksamkeit der High Rate Protection<br />
Wenn der Selbsttest einen Defekt findet, blinken alle<br />
LEDs dauerhaft und akustische Warnsignale ertönen.<br />
In diesem Fall muss der Schrittmacher ausgeschaltet<br />
und an <strong>BIOTRONIK</strong> geschickt werden.<br />
Wenn der Selbsttest keinen Fehler entdeckt hat,<br />
erlöschen die LEDs und die Warnsignale und <strong>Reocor</strong> S<br />
beginnt entsprechend der eingestellten Parameter<br />
Stimulationsimpulse abzugeben. Die negative Elektrode<br />
(Kathode) sollte deshalb erst angeschlossen<br />
werden, wenn sichergestellt ist, dass Stimulationsart,<br />
Stimulationsfrequenz, Impulsamplitude und<br />
Empfindlichkeit korrekt eingestellt sind.<br />
Wenn der Drehschalter für die Betriebsart auf OFF<br />
gestellt ist, wird verhindert, dass sofort mit Anschließen<br />
der Elektroden Stimulationsimpulse an den<br />
Patienten abgegeben werden.<br />
Während des Betriebs können folgende Warnmeldungen<br />
auftreten:<br />
• Ein erforderlicher Batteriewechsel wird durch die<br />
blinkende LED Low battery angezeigt.
15 Bedienungshinweise<br />
• Wenn die Elektrodenimpedanz nicht innerhalb<br />
eines zulässigen Bereiches liegt (z. B. infolge<br />
einer gebrochenen Elektrode, eines losen Kontakts),<br />
ertönt eine schnelle Tonfolge frühestens 5 s<br />
nach dem Einschalten.<br />
• Wenn die Impulsamplitude auf Werte 1 V oder die<br />
Frequenz auf Werte 180 ppm eingestellt wird,<br />
ertönt für etwa 2 s ein akustisches Signal.<br />
• Bei einer zu hohen Frequenz (siehe S. 40 “High<br />
Rate Protection”) sowie bei nicht bestandenem<br />
Selbsttest ertönt dauerhaft ein akustisches Signal<br />
und die LEDs Pace und Sense blinken.<br />
Deutsch
16 Bedienungshinweise<br />
Deutsch<br />
Bedienelemente und LEDs<br />
Bild 1:<br />
Bedienfeld <strong>Reocor</strong> S
17 Bedienungshinweise<br />
Bezeichnung<br />
1 Patientenanschluss<br />
INDIFF.+; DIFF.-<br />
Funktion<br />
Für Kabel mit 2-mm-Stecker <br />
oder für Redel-Adapter<br />
(rot = plus; blau = minus)<br />
2 Batteriefach Für Blockbatterie 9 V<br />
3 LED Low battery Warnt vor zu niedriger Batteriespannung<br />
4 LED Pace Gelbe Anzeige für stimuliertes Ereignis<br />
5 LED Sense Grüne Anzeige für wahrgenommenes Ereignis<br />
6 Drehregler Ampl. Einstellung der Impulsamplitude<br />
7 Drehregler Sens. Einstellung der Empfindlichkeit<br />
8 Start burst Start der Burst-Funktion<br />
9 Gurthalterung Befestigung <strong>Reocor</strong> S an Patient, Bett oder <br />
Infusionsständer<br />
10 Drehregler Burst rate Einstellung der Burst-Frequenz<br />
11 Select burst Wahl der Burst-Funktion<br />
12 Drehregler Rate Einstellung der Stimulationsfrequenz<br />
13 Drehschalter Mode Wahl der Stimulationsart und Ausschalter<br />
Tabelle 1: Beschreibung der Elemente im Bild 1<br />
Deutsch<br />
Fette Beschriftung von Bedienelementen kennzeichnet<br />
für die Zweckbestimmung des Geräts sichere<br />
Werte.<br />
Bedienfeldabdeckung<br />
Die Bedienfeldabdeckung ist verriegelt, wenn die<br />
Bedienfeldabdeckung über zwei Rastpunkte bis zum<br />
Anschlag geschoben wurde und die Verriegelung über<br />
dem Steg sitzt (siehe Bild 2).<br />
Richtig:<br />
Falsch:<br />
Bild 2:<br />
Korrekter Sitz der Bedienfeldabdeckung
18 Bedienungshinweise<br />
Deutsch<br />
Um die Bedienfeldabdeckung zu entriegeln (siehe<br />
Bild 3):<br />
Drücken Sie mit einer Hand den Verriegelungshebel<br />
nach oben.<br />
Schieben Sie gleichzeitig mit der anderen Hand<br />
die Bedienfeldabdeckung nach unten.<br />
Achtung!<br />
Bild 3: Entriegeln der Bedienfeldabdeckung<br />
Um die Bedienfeldabdeckung zu verriegeln:<br />
Schieben Sie die Bedienfeldabdeckung über den<br />
Steg nach oben bis zum Anschlag (siehe Bild 2).<br />
Zur Reinigung können Sie die Bedienfeldabdeckung<br />
vollständig abnehmen. Schieben Sie dazu die Abdeckung<br />
nach unten bis zum Anschlag. Schieben Sie<br />
anschliessend die Abdeckung über den Anschlag<br />
hinaus.<br />
Während des Gebrauchs von <strong>Reocor</strong> S muss die<br />
Bedienfeldabdeckung verriegelt sein, um ein versehentliches<br />
Verstellen der Drehschalter und -regler<br />
und damit der Programmparameter zu verhindern.
19 Bedienungshinweise<br />
Hinweis:<br />
Elektrodenanschluss<br />
<strong>Reocor</strong> S verfügt über 2 Buchsen für den direkten<br />
Anschluss von Elektroden mit berührungsgeschützten<br />
2-mm-Steckern.<br />
Für den Anschluss von Kabeln mit Redel-Stecker<br />
muss der Redel-Adapter seitenrichtig aufgesteckt<br />
und verschraubt werden (Bild 4). Der Redel-Adapter<br />
ist seitenrichtig aufgesteckt, wenn Sie ihn am<br />
<strong>Reocor</strong> S verschrauben können.<br />
Ausschließlich wenn der Redel-Adapter seitenrichtig<br />
aufgesteckt ist, ist seine Funktion gewährleistet!<br />
Deutsch<br />
Bild 4:<br />
Redel-Adapter für <strong>Reocor</strong> S
20 Bedienungshinweise<br />
Deutsch<br />
<strong>Reocor</strong> S kann mit folgenden Patientenkabeln und<br />
Adaptern verwendet werden:<br />
• Patientenkabel PK-83-B mit zwei Schraubklemmen<br />
für temporäre Elektroden auf der Patientenseite<br />
und Redel-Stecker auf der <strong>Reocor</strong>-Seite<br />
(Redel-Adapter benutzen).<br />
Bild 5:<br />
Patientenkabel PK-83-B<br />
• Patientenkabel PK-83 mit zwei isolierten<br />
Schraubklemmen für temporäre Elektroden auf<br />
der Patientenseite und zwei berührungsgeschützten<br />
2-mm-Steckern auf der <strong>Reocor</strong>-<br />
Seite.<br />
Bild 6: Patientenkabel PK-83<br />
• Patientenkabel PK-82 mit zwei isolierten Krokodilklemmen<br />
für temporäre Elektroden auf der<br />
Patientenseite und zwei berührungsgeschützten<br />
2-mm-Steckern auf der <strong>Reocor</strong>-Seite.<br />
Bild 7:<br />
Patientenkabel PK-82
21 Bedienungshinweise<br />
• Patientenkabel PK-67-L und PK-67-S<br />
Die Patientenkabel PK-67-L (2,6 m) und PK-67-S<br />
(0,8 m) unterscheiden sich nur in ihrer Länge. Sie<br />
haben auf der <strong>Reocor</strong>-Seite einen Redel-Stecker<br />
(Redel-Adapter benutzen) und auf der Patientenseite<br />
eine Aufnahme für die Adapter nach Bild 13 und für<br />
die Einmalkabel nach Bild 9.<br />
Deutsch<br />
Bild 8: Patientenkabel PK-67-L und PK-67-S<br />
• Kabel zum einmaligen Gebrauch<br />
Die Einmalkabel Remington 301-CG (nur <strong>USA</strong>) und<br />
PK-155 mit Krokodilklemmen werden über das Kabel<br />
PK-67-S mit dem Patienten verbunden.<br />
Bild 9: Einmalkabel PK-155 und 301-CG (nur <strong>USA</strong>)<br />
Nur für <strong>USA</strong>: Die Einmalkabel S-101-97 und<br />
FL-601-97 von Remington Medical Inc. werden über<br />
das wiederverwendbare Adapterkabel ADAP-2R an<br />
<strong>Reocor</strong> S angeschlossen (Bild 10).<br />
Bild 10:<br />
Nur <strong>USA</strong>: Remington-Einmalkabel und Adapter
22 Bedienungshinweise<br />
Deutsch<br />
<strong>Reocor</strong> S kann auch mit Patientenkabeln mit vier<br />
Anschlüssen für Zweikammerschrittmacher verwendet<br />
werden. Von diesen Kabeln benutzt <strong>Reocor</strong> S nur<br />
den ventrikulären Kanal.<br />
Folgende Kabel sind möglich:<br />
• Patientenkabel PK-141 mit vier Krokodilklemmen<br />
auf der Patientenseite und Redel-Stecker auf der<br />
<strong>Reocor</strong>-Seite (Redel-Adapter benutzen).<br />
Der ventrikuläre Kanal ist durch den Aufdruck<br />
Vent Diff/Indiff auf den Berührschutztüllen<br />
gekennzeichnet.<br />
Bild 11: Patientenkabel PK-141<br />
• Patientenkabel PK-175 mit vier Schraubklemmen<br />
auf der Patientenseite und Redel-Stecker auf der<br />
<strong>Reocor</strong>-Seite (Redel-Adapter benutzen). Der ventrikuläre<br />
Kanal ist mit Ventricle gekennzeichnet.<br />
Bild 12:<br />
Patientenkabel PK-175
23 Bedienungshinweise<br />
• Adapter<br />
Bild 13 zeigt Adapter für den Anschluss von temporären<br />
Elektroden an <strong>Reocor</strong> S über das Zweikammer-<br />
Patientenkabel PK-67-L/S.<br />
Die Elektroden sind mit dem ventrikulären Anschluss<br />
des Adapters (Kennzeichnung V) zu verbinden.<br />
Deutsch<br />
PK-67-L/-S<br />
Bild 13: Adapter für die Patientenkabel PK-67-L und <br />
PK-67-S<br />
PA-1-B und PA-1-C zum Anschluss von berührungsgeschützten<br />
2-mm-Steckern oder MHW-Adaptern<br />
(Adapter für Herzdrähte)<br />
PA-2 IS-1<br />
PA-4 mit Krokodilklemmen
24 Bedienungshinweise<br />
Deutsch<br />
WARNUNG!<br />
WARNUNG!<br />
WARNUNG!<br />
Achtung!<br />
Hinweis:<br />
Hinweis:<br />
Hinweis:<br />
Anschließen<br />
Gefährdung des Patienten durch beschädigte Kabel.<br />
Beschädigte Kabel beeinträchtigen deren Funktion<br />
und bringen den Patienten in Gefahr. Benutzen Sie<br />
keine beschädigten Kabel.<br />
Gefährdung durch Funktionsverlust. <br />
Feuchte Kabel können deren Funktion beeinträchtigen<br />
und den Patienten in Gefahr bringen. Benutzen<br />
Sie keine feuchten Kabel.<br />
Gefährdung durch elektrische Ströme. <br />
Ungenutzte Kabelkontakte können elektrische Ströme<br />
in den Patienten leiten. Befestigen Sie ungenutzte<br />
Kabelkontakte in der Nähe des Patienten.<br />
Allergische Reaktionen und Entzündungen. <br />
Vermeiden Sie, dass Kabel mit Wunden und der Haut<br />
des Patienten in Berührung kommen.<br />
Achten Sie vor Benutzung der Kabel auf den richtigen<br />
Sitz der Isoliertüllen.<br />
Bei Verwendung von Kabeln oder Adaptern für Zweikammerapplikationen<br />
müssen die Elektroden an den<br />
ventrikulären Kanal angeschlossen werden (Kennzeichnung<br />
Ventrikel bzw. V).<br />
Das Patientenkabel nicht an die temporäre Stimulationselektrode<br />
des Patienten anschließen, bevor der<br />
Anschluss am <strong>Reocor</strong> S hergestellt ist.<br />
Direktanschluss<br />
Wenn <strong>Reocor</strong> S ohne den Redel-Adapter betrieben<br />
wird, können temporäre Katheter und Herzdrähte mit<br />
den Patientenkabeln PK-82 und PK-83 direkt an die<br />
Buchsen INDIFF.+ und DIFF.- angeschlossen werden.<br />
Patientenkabel<br />
Über ein Redel-Adapter am <strong>Reocor</strong> S wird das Patientenkabel<br />
angeschlossen.<br />
Stecken Sie den Redel-Adapter auf <strong>Reocor</strong> S.<br />
Schrauben Sie diesen fest.<br />
Stecken Sie den Redel-Stecker des Patientenkabels<br />
in die Redel-Buchse des Adapters.
25 Bedienungshinweise<br />
Anschlussvarianten<br />
Temporäre Katheter mit 2-mm-Steckern oder <br />
Herzdraht mit 2-mm-Adapter<br />
Sie haben die Möglichkeit, ohne weitere Kabel oder<br />
Adapter, <strong>Reocor</strong> S direkt an einen temporären Katheder<br />
mit berührungsgeschützten 2-mm-Stecker oder<br />
einen Herzdraht mit 2-mm-Adapter anzuschließen.<br />
Alle weiteren Anschlussvarianten entnehmen Sie der<br />
folgenden Tabelle.<br />
Deutsch<br />
Anschluss<br />
patientenseitig<br />
<strong>BIOTRONIK</strong> Kabel Anschluss<br />
geräteseitig<br />
Empfohlene Anschlüsse<br />
<strong>Reocor</strong> S<br />
Anschluss<br />
direkter Anschluss (ohne <strong>BIOTRONIK</strong> Kabel)<br />
2-mm-Buchsen<br />
2 mm PK-67-S/L mit PA-1-C Redel-Stecker Redel-Adapter<br />
Schraubklemmen PK-83B mit TC Adapt Redel-Stecker 2-mm-Buchsen<br />
Schraubklemmen PK-83 mit TC Adapt 2-mm-Stecker 2-mm-Buchsen<br />
Mögliche Anschlüsse<br />
2 mm PK-67-S/L mit PA-1-B Redel-Stecker Redel-Adapter<br />
Krokodilklemmen PK-141 Redel-Stecker Redel-Adapter<br />
Krokodilklemmen PK-67-S/L mit PA-4 Redel-Stecker Redel-Adapter<br />
Krokodilklemmen PK-67-S/L mit PK-155 Redel-Stecker Redel-Adapter<br />
Krokodilklemmen PK-82 2-mm-Stecker 2-mm-Buchsen<br />
Anschluss<br />
patientenseitig<br />
Herzdraht mit Breakoff-Nadel oder mit<br />
flexiblem Ende (max. 2,3 mm Durchmesser)<br />
<strong>BIOTRONIK</strong> Kabel Anschluss<br />
geräteseitig<br />
Empfohlene Anschlüsse<br />
<strong>Reocor</strong> S<br />
Anschluss<br />
Schraubklemmen PK-83B Redel-Stecker Redel-Adapter<br />
Schraubklemmen PK-83 2-mm-Stecker 2-mm-Buchsen<br />
Mögliche Anschlüsse<br />
Schraubklemmen PK-175 Redel-Stecker Redel-Adapter<br />
Krokodilklemmen PK-141 Redel-Stecker Redel-Adapter<br />
Krokodilklemmen PK-67-S/L mit PA-4 Redel-Stecker Redel-Adapter<br />
Krokodilklemmen PK-67-S/L mit PK-155 Redel-Stecker Redel-Adapter<br />
Krokodilklemmen PK-82 2-mm-Stecker 2-mm-Buchsen
26 Bedienungshinweise<br />
Implantierte Elektrode mit IS-1 Stecker<br />
Deutsch<br />
Anschluss<br />
patientenseitig<br />
<strong>BIOTRONIK</strong> Kabel Anschluss<br />
geräteseitig<br />
Empfohlene Anschlüsse<br />
<strong>Reocor</strong> S<br />
Anschluss<br />
IS-1 Buchse PK-67-S/L mit PA-2 Redel-Stecker Redel-Adapter<br />
Mögliche Anschlüsse<br />
Krokodilklemmen PK-141 Redel-Stecker Redel-Adapter<br />
Krokodilklemmen PK-67-S/L mit PA-4 Redel-Stecker Redel-Adapter<br />
Krokodilklemmen PK-67-S/L mit PK-155 Redel-Stecker Redel-Adapter<br />
Krokodilklemmen PK-82 2-mm-Stecker 2-mm-Buchsen<br />
Hinweis:<br />
Bei den 2-Kammer-Kabeln (PK-141, PK-175, PK-67-<br />
S/L) benutzt <strong>Reocor</strong> S nur den ventrikulären Kanal!<br />
Polarität<br />
<strong>Reocor</strong> S stimuliert grundsätzlich bipolar, kann aber<br />
mit bipolaren oder mit unipolaren temporären Stimulationselektroden<br />
verwendet werden.<br />
Bei Verwendung von unipolaren Elektroden müssen <br />
2 Elektroden angeschlossen werden.<br />
Anschlüsse trennen<br />
Patientenkabel von den temporären Stimulationselektroden<br />
des Patienten abklemmen bzw. den<br />
direkten Anschluss lösen.<br />
Redelstecker trennen<br />
• Ziehen Sie den Überwurfring am Redel-Stecker<br />
zurück und ziehen Sie den Redel-Stecker aus der<br />
Redel-Buchse ab.<br />
Inbetriebnahme<br />
Die Bedienung von <strong>Reocor</strong> S ist für alle Betriebsarten<br />
identisch. Die Bedienschritte sollten in der folgenden<br />
Reihenfolge durchgeführt werden (die Zahlen in<br />
Klammern beziehen sich auf Bild 1 auf Seite 16 dieser<br />
Gebrauchsanweisung).<br />
• Batterie einlegen<br />
• Bedienfeldabdeckung nach unten schieben
27 Bedienungshinweise<br />
Achtung!<br />
• Patienten vorbereiten: Elektroden legen, jedoch<br />
noch nicht an den Schrittmacher anschließen.<br />
• <strong>Reocor</strong> vorbereiten:<br />
Die Stimulationsfrequenz mit dem Drehregler<br />
Rate (12) einstellen.<br />
Die Stimulationsamplitude mit dem Drehregler<br />
Ampl. (6) einstellen.<br />
• Mit dem Drehschalter Mode (13) die Stimulationsart<br />
wählen. Gleichzeitig wird das Gerät damit eingeschaltet.<br />
• Nach erfolgreichem Abschluss des internen<br />
Selbsttests blinken die LEDs auf dem Bedienfeld<br />
gleichzeitig zweimal auf.<br />
• Wenn die LED Low battery (3) blinkt, muss die<br />
Batterie gewechselt werden (Batteriewechsel<br />
siehe Seite 28).<br />
• Elektroden anschließen, die gelbe LED Pace (4)<br />
blinkt synchron mit dem Stimulationsimpuls.<br />
• Empfindlichkeit mit dem Drehregler Sens. (7) so<br />
einstellen, dass die grüne LED Sense (5) synchron<br />
mit jedem wahrgenommenen Ereignis blinkt.<br />
• Es sollte eine ausreichende Sicherheitsmarge<br />
berücksichtigt werden, um eine zuverlässige<br />
Wahrnehmung zu gewährleisten.<br />
• Das EKG des Patienten überwachen und ggf.<br />
Amplitude und Empfindlichkeit anpassen.<br />
Während der Verwendung von <strong>Reocor</strong> S muss die<br />
Herzfrequenz des Patienten mit einem EKG-Monitor<br />
mit Alarmfunktion überwacht werden.<br />
Deutsch<br />
Befestigung<br />
<strong>Reocor</strong> S muss entweder liegend auf einer horizontalen,<br />
rutschfesten Unterlage oder mit der Armmanschette<br />
am Patienten fixiert oder mit Hilfe der<br />
Aufhängeöse auf der Geräterückseite an einem<br />
Infusionsständer hängend betrieben werden.
28 Bedienungshinweise<br />
Deutsch<br />
Um <strong>Reocor</strong> S an einem Infusionsständer befestigen zu<br />
können, drehen Sie die Aufhängeöse auf der Geräterückseite<br />
heraus. Damit gewährleisten Sie einen<br />
sicheren Gebrauch und entlasten die Patientenkabel.<br />
Batteriewechsel<br />
Wenn die LED Low battery (3) anfängt zu blinken, ist<br />
die Batterie nahezu erschöpft. Bei der Verwendung<br />
der Batterie Typ MN 1604 Duracell ® Procell ® verbleiben<br />
noch etwa 36 Stunden Betriebszeit. Dennoch<br />
sollte die Batterie so schnell wie möglich ausgewechselt<br />
werden.<br />
<strong>Reocor</strong> S muss mit einer 9-Volt-Batterie, internationaler<br />
Code IEC 6LR61, betrieben werden. Es sollten<br />
nur auslaufsichere Alkali-Mangan-Batterien verwendet<br />
werden. Bei der Verwendung der Batterie Typ <br />
MN 1604 Duracell ® Procell ® ist bei 20 ± 2 °C eine<br />
externe Stimulation für mindestens 600 Stunden<br />
möglich, bevor ein Batteriewechsel erforderlich wird.<br />
Ein Batteriewechsel im laufenden Betrieb ist möglich.<br />
Bei herausgenommener Batterie bleibt <strong>Reocor</strong> S bei<br />
einer Umgebungstemperatur von 20 ± 2 °C noch für<br />
ca. 30 s betriebsbereit.<br />
Aus Sicherheitsgründen sollte jedoch der Patient<br />
anderweitig versorgt werden.<br />
Benutzen Sie keine wiederaufladbaren Batterien<br />
(Akkus). Die Betriebszeit dieser Batterien ist schwer<br />
abzuschätzen, so dass es zu einem unvorhersehbaren<br />
Überschreiten von ERI mit plötzlichem Ausbleiben der<br />
Stimulation kommen kann.<br />
Das Batteriefach (2) befindet sich rechts an der Seite<br />
des Geräts und wird geöffnet, indem der blaue Schieber<br />
nach oben gedrückt und die Lade nach rechts herausgezogen<br />
wird. Batterie vorsichtig herausnehmen.<br />
Zum Schutz der Batteriepole kann auf der neuen<br />
Batterie ein Gummistopfen gesteckt sein. Ziehen Sie<br />
diesen ab, bevor Sie die neue Batterie einsetzen.
29 Bedienungshinweise<br />
Achtung!<br />
Im Batteriefach ist eine Markierung mit der bevorzugten<br />
Polung. Jedoch müssen Sie beim Einsetzen<br />
der neuen Batterie lediglich beachten, dass die<br />
Batteriepole zur Gehäusemitte zeigen. Die Position<br />
des Plus- bzw. Minuspols ist frei wählbar.<br />
Legen Sie die neue Batterie mit dem Boden (Bild 14)<br />
nach unten zuerst in das Batteriefach.<br />
Deutsch<br />
Hinweis:<br />
Bild 14: Einsetzen der Batterie<br />
Schließen Sie die Lade und drücken Sie den blauen<br />
Schieber nach unten, bis er hörbar einrastet.<br />
Wird der Schrittmacher längere Zeit gelagert oder<br />
nicht benutzt, wird empfohlen, die Batterie herauszunehmen,<br />
um Schäden durch Auslaufen zu verhindern.
30 Stimulationsarten und Parameter<br />
Deutsch<br />
Stimulationsarten und<br />
Parameter<br />
Stimulationsarten<br />
Modus S00<br />
Modus SSI<br />
Modus SST<br />
Hochfrequente<br />
Stimulation<br />
Es stehen drei Stimulationsarten zur Verfügung: S00,<br />
SSI, SST sowie hochfrequente Stimulation (Burst).<br />
Bei Störungen infolge elektromagnetischer Interferenz<br />
(EMI) fällt <strong>Reocor</strong> S bei Überschreitung<br />
bestimmter Grenzwerte für die Dauer der Störung in<br />
die Stimulationsart S00.<br />
Der Schrittmacher gibt Impulse konstanter Frequenz<br />
ab. Die Impulse sind asynchron, d.h. nicht mit den<br />
intrinsischen Herzschlägen synchronisiert.<br />
Dieser Modus funktioniert beim Anschluss an den<br />
Ventrikel als V00, beim Anschluss an das Atrium als<br />
A00.<br />
Der Schrittmacher inhibiert Impulse, wenn intrakardiale<br />
Potenziale wahrgenommen werden. Er gibt<br />
Impulse ab, wenn innerhalb eines der gewählten<br />
Frequenz entsprechenden Intervalls kein Ereignis<br />
wahrgenommen wird.<br />
Dieser Modus funktioniert beim Anschluss an den<br />
Ventrikel als VVI, beim Anschluss an das Atrium<br />
als AAI.<br />
Die getriggerten Stimulationsarten SST entsprechen<br />
den Stimulationsarten SSI mit dem Unterschied, dass<br />
bei Wahrnehmung eines Ereignisses außerhalb der<br />
Refraktärperiode keine Impulsinhibierung, sondern<br />
eine sofortige Impulsabgabe in der jeweiligen Kammer<br />
erfolgt.<br />
Die Frequenz der Burst-Funktion kann mit dem Drehregler<br />
(10) zwischen 60 ppm und 1000 ppm gewählt<br />
werden. <br />
Die Aktivierung dieser Funktion erfolgt mit 2 Tastern:<br />
Zuerst ist der Taster (11) Select burst zu drücken und<br />
danach innerhalb von 2 Sekunden der Taster (8)<br />
Start burst. Die Impulsabgabe erfolgt dann solange<br />
dieser Taster gedrückt wird.
31 Stimulationsarten und Parameter<br />
WARNUNG!<br />
Frequenz<br />
Die Frequenz kann mit dem Drehregler Rate (12) kontinuierlich<br />
von 30 ppm bis 250 ppm verstellt werden.<br />
Wenn ein Wert von mehr als 180 ppm eingestellt wird,<br />
gibt das Gerät 2 Sekunden lang einen Warnton ab.<br />
Eine Stimulation des Herzens mit Frequenzen von<br />
mehr als 180 ppm über einen längeren Zeitraum kann<br />
schwere hämodynamische Komplikationen verursachen.<br />
Eine Stimulation mit hohen Frequenzen sollte<br />
nur durchgeführt werden, wenn eine kontinuierliche<br />
Überwachung gewährleistet ist.<br />
Deutsch<br />
Impulsamplitude und -dauer<br />
Die Impulsamplitude kann mit dem Drehregler <br />
Ampl. (6) im Bereich von 0,1 V bis 17 V verstellt werden.<br />
Wenn ein Wert von unter 1 V eingestellt wird, gibt<br />
das Gerät 2 Sekunden lang einen Warnton ab.<br />
Die Impulsdauer beträgt 1 ms.<br />
Die Stimulation sollte in regelmäßigen Abständen<br />
überprüft werden, um zu gewährleisten, dass die<br />
Stimulation wirksam und eine ausreichende Sicherheitsmarge<br />
eingestellt ist.<br />
Empfindlichkeit<br />
Die Empfindlichkeit kann mit dem Drehregler Sens.<br />
(7) zwischen 1 mV und 20 mV eingestellt werden. Sie<br />
sollte in regelmäßigen Abständen überprüft werden,<br />
um zu gewährleisten, dass eine korrekte Wahrnehmung<br />
vorhanden und eine ausreichende Sicherheitsmarge<br />
eingestellt ist.
32 Stimulationsarten und Parameter<br />
Deutsch<br />
Interferenzintervall<br />
Das Interferenzintervall wird sowohl von stimulierten<br />
als auch wahrgenommenen Ereignissen gestartet.<br />
Das Intervall wird zurückgesetzt, wenn während der<br />
Intervalldauer von 80 ms ein Rauschen wahrgenommen<br />
wird, was zu einer asynchronen Stimulation mit<br />
der programmierten Frequenz führt, solange die<br />
Interferenz besteht.<br />
Burst<br />
WARNUNG!<br />
Die Frequenz der atrialen Burst rate atrium-Funktion<br />
kann mit dem Drehregler (10) zwischen 60 ppm und<br />
1000 ppm gewählt werden.<br />
Die Aktivierung dieser Funktion erfolgt mit 2 Tastern:<br />
Zuerst ist der Taster (11) Select burst zu drücken und<br />
danach innerhalb von 2 Sekunden der Taster (8)<br />
Start burst. Die Impulsabgabe erfolgt dann, solange<br />
dieser Taster gedrückt wird.<br />
Eine Stimulation des Herzens mit Frequenzen von<br />
mehr als 180 ppm über einen längeren Zeitraum kann<br />
schwere hämodynamische Komplikationen verursachen.<br />
Eine Stimulation mit hohen Frequenzen sollte<br />
nur durchgeführt werden, wenn eine kontinuierliche<br />
Überwachung gewährleistet ist.<br />
Der Modus zur hochfrequenten Stimulation dient zur<br />
Terminierung bestimmter supraventrikulärer Tachykardien<br />
(SVT) und sollte nur für atriale Anwendungen<br />
in Betracht gezogen werden. Die Anwendung asynchroner<br />
hochfrequenter Stimuli kann eine SVT durch<br />
Depolarisierung von Teilen eines Reentry-Pfades<br />
unterbrechen. Auch wenn ein ektopischer atrialer<br />
Fokus für eine SVT verantwortlich ist, kann die Applikation<br />
hochfrequenter Stimuli am Atrium zu einer<br />
verstärkten Unterdrückung des ektopen Zentrums<br />
führen.<br />
In Verbindung mit der hochfrequenten atrialen Stimulation<br />
sind verschiedene Risiken zu berücksichtigen.<br />
Dazu gehören mögliche ventrikuläre Stimulation und<br />
ventrikuläre Tachykardie oder Fibrillation. Dies kann
33 Stimulationsarten und Parameter<br />
durch eine schlechte Platzierung der Elektroden oder<br />
das Vorhandensein anomaler Erregungsleitungswege<br />
verursacht werden, die die normale atrioventrikuläre<br />
Erregungsleitung umgehen (z. B. Wolff-Parkinson-<br />
White-Syndrom). Weitere mögliche Probleme können<br />
Unbehagen des Patienten und Asystolen nach einer<br />
hochfrequenten Stimulation sein.<br />
Deutsch
34 Handhabung, Wartung und Pflege<br />
Deutsch<br />
WARNUNG!<br />
Achtung!<br />
Reinigung<br />
Desinfektion<br />
Handhabung, Wartung und Pflege<br />
<strong>Reocor</strong> S<br />
<strong>Reocor</strong> S ist ein hochentwickeltes Präzisionsgerät,<br />
das mit Sorgfalt behandelt werden sollte. Durch<br />
mechanische Einwirkung, z. B. durch Herunterfallen,<br />
kann seine Funktion beeinträchtigt werden.<br />
Senden Sie das Gerät in diesem Fall an <strong>BIOTRONIK</strong>.<br />
Vor dem Gebrauch muss der Schrittmacher mindestens<br />
2 Stunden unter den für den Betrieb angegebenen<br />
Umgebungsbedingungen (s. S. 40) gelagert<br />
werden.<br />
Gehäuse, Bedienelemente, Anschlüsse und Patientenkabel<br />
müssen vor jeder Anwendung visuell auf<br />
mechanische Beschädigung, Deformierung, lose<br />
Teile, Sprünge und Verschmutzung visuell geprüft<br />
werden.<br />
Niemals ein beschädigtes Gerät oder ein Gerät, das<br />
Anomalien aufweist, verwenden, insbesondere wenn<br />
es fallengelassen wurde oder durch Hochfrequenzoder<br />
Defibrillationsspannung beschädigt sein könnte.<br />
<strong>Reocor</strong> S entweder liegend auf einer horizontalen,<br />
rutschfesten Unterlage oder mit der Armmanschette<br />
am Patienten fixiert oder mit Hilfe der Aufhängeöse<br />
auf der Geräterückseite an einem Infusionsständer<br />
hängend betreiben.<br />
<strong>Reocor</strong> S darf nicht direkt auf der Haut getragen werden.<br />
Zur Reinigung von <strong>Reocor</strong> S kann ein feuchtes Tuch<br />
und ggf. eine milde Seife verwendet werden. Starke<br />
Reinigungsmittel oder organische Lösungsmittel wie<br />
z. B. Äther oder Benzin sind zu vermeiden, da sie das<br />
Kunststoffgehäuse angreifen können.<br />
Zur Desinfektion wischen Sie das Gerät mit einem<br />
Tuch ab, das mit einer Desinfektionslösung getränkt<br />
ist (z. B. Aerodesin 2000 oder Lysoform D). Beachten<br />
Sie beim Ansetzen der Lösung das vom Hersteller<br />
angegebene Maß der Verdünnung.
35 Handhabung, Wartung und Pflege<br />
Hinweis:<br />
Sterilisation<br />
Achtung!<br />
Nach einer Reinigung oder Desinfektion darf <strong>Reocor</strong> S<br />
eine Stunde lang nicht benutzt werden.<br />
<strong>Reocor</strong> S kann nicht sterilisiert werden. Falls das<br />
Gerät in einer sterilen Umgebung verwendet werden<br />
muss, kann es in einen sterilen Überzug gepackt werden.<br />
Jährliche Überprüfungen des Geräts durch vom Hersteller<br />
autorisierte Techniker werden empfohlen.<br />
Obwohl <strong>Reocor</strong> S gegen Tropfwasser geschützt ist,<br />
sollte das Gerät sauber und trocken gehalten werden.<br />
Deutsch<br />
Reinigung<br />
Desinfektion<br />
Sterilisation<br />
Wiederverwendbare Patientenkabel<br />
Die Verpackung eines sterilen Kabels ist vor dem<br />
Öffnen auf Beschädigungen zu untersuchen, um feststellen<br />
zu können, ob die Sterilität gewährleistet ist.<br />
Die wiederverwendbaren Patientenkabel lassen sich<br />
nach vielen verschiedenen Methoden mit Krankenhaus-Reinigungsmitteln<br />
reinigen und desinfizieren.<br />
Dabei dürfen jedoch keinesfalls scharfe Chemikalien<br />
wie etwa Aceton verwendet werden.<br />
Als Reinigungsmethode für die Kabel wird die<br />
Verwendung eines Wischtuchs mit gewöhnlicher,<br />
alkoholfreier Handseife oder dem Reinigungsmittel<br />
Stabimed der Fa. Braun empfohlen. Anschließend<br />
sind die Kabel mit elektrolytfreiem Wasser von<br />
Rückständen des Reinigungsmittels zu befreien und<br />
danach mit einem sauberen, trockenen Tuch<br />
abzuwischen.<br />
Für eine Desinfektion in einem Desinfektionsmittelbad<br />
ist ein Instrumentendesinfektionsmittel auf Aldehydbasis<br />
(z. B. Lysoformin 3000) oder Alkoholbasis<br />
(z. B. Aerodesin 2000) nach den Angaben des Herstellers<br />
und unter Beachtung der entsprechenden Krankenhausrichtlinien<br />
zu verwenden.<br />
Nach der Desinfektion muss das Kabel durch Spülen<br />
in elektrolytfreiem Wasser von Resten des Desinfektionsmittels<br />
befreit werden.<br />
Eine Dampfsterilisation kann bei 121 °C und 1,1 bar<br />
für 20 min durchgeführt werden.
36 Handhabung, Wartung und Pflege<br />
Deutsch<br />
Prüfung vor<br />
Gebrauch<br />
Inspektion<br />
Wartung, Service, Inspektionen<br />
Die einzige erforderliche Wartungsmaßnahme ist der<br />
Batteriewechsel (siehe Seite 28).<br />
Weitere Wartungsarbeiten sind nicht notwendig.<br />
Vor jedem Gebrauch soll eine kurze Prüfung des<br />
Geräts durchgeführt werden. Sie umfasst eine visuelle<br />
Prüfung und eine einfache Funktionsprüfung.<br />
Visuelle Prüfung:<br />
• Prüfung des Gehäuses auf mechanische Beschädigungen,<br />
Verformung, lose Teile, Risse etc.<br />
• Prüfung des Kabelanschlussbereichs auf mechanische<br />
Beschädigungen<br />
• Prüfung der Beschriftung auf Lesbarkeit<br />
Funktionsprüfung:<br />
Das Ergebnis des Selbsttests, der automatisch nach<br />
dem Einschalten abläuft, ist zu beachten.<br />
Die Inspektion sollte durchgeführt werden<br />
• nach gemeinsamer Anwendung mit HF-Chirurgiegeräten<br />
oder Defibrillatoren,<br />
• bei Verdacht auf Funktionsstörungen,<br />
• einmal im Jahr.<br />
Diese Inspektion muss gemäß den Herstellerangaben<br />
erfolgen. Diese werden auf Nachfrage zur Verfügung<br />
gestellt. Darin aufgeführt sind alle erforderlichen<br />
Prüfschritte sowie die dazu benötigten Geräte.<br />
Entsorgung<br />
<strong>Reocor</strong> S ist mit dem Symbol einer durchkreuzten<br />
Abfalltonne auf dem Typenschild gekennzeichnet.<br />
Dieses Symbol zeigt an, dass für Rücknahme und<br />
Entsorgung des Geräts die Europäische Richtlinie<br />
2002/96/EG über Elektro- und Elektronik-Altgeräte<br />
(WEEE-Richtlinie) gilt.
37 Handhabung, Wartung und Pflege<br />
Hinweis:<br />
Alte Geräte und nicht mehr benötigtes Zubehör, <br />
wie z. B. Patientenkabel und Adapter, sollten an<br />
<strong>BIOTRONIK</strong> geschickt werden. Dadurch wird sichergestellt,<br />
dass die Entsorgung in Übereinstimmung mit<br />
den nationalen Ausführungen der WEEE-Richtlinie<br />
geschieht.<br />
Zu entsorgende Kabel, die in Kontakt mit Blut gekommen<br />
sind, müssen umweltgerecht als kontaminierter<br />
medizinischer Abfall entsorgt werden. Nicht kontaminierte<br />
Kabel müssen im Sinne der Richtlinie 2002/96/<br />
EG über Elektro-und Elektronik-Altgeräte (WEEE)<br />
entsorgt werden.<br />
Verbrauchte Batterien müssen als Sondermüll<br />
behandelt werden und sind durch den Anwender zu<br />
entsorgen.<br />
Bei Fragen wenden Sie sich bitte an <strong>BIOTRONIK</strong>.<br />
Deutsch
38 Technische Sicherheit<br />
Deutsch<br />
WARNUNG!<br />
Technische Sicherheit<br />
Der externe Schrittmacher <strong>Reocor</strong> S entspricht den<br />
internationalen Standards für die Sicherheit von elektromedizinischen<br />
Geräten nach IEC 60601-1 und<br />
IEC 60601-1-2, ebenso wie dem internationalen Standard<br />
IEC 60601-2-31 für temporäre, externe Schrittmacher.<br />
Die folgenden speziellen Merkmale bieten Sicherheit<br />
für den Patienten:<br />
• Keine Metallteile gemäß Definition nach IEC, die<br />
berührt werden können.<br />
• Die Konstruktion entspricht den Standards für<br />
Geräteklasse CF (cardiac floating) und ist für die<br />
direkte Behandlung des Herzens zugelassen. Der<br />
Schrittmacher erfüllt die von den internationalen<br />
Standards vorgeschriebenen Anforderungen für<br />
den Defibrillationsschutz.<br />
• Die geschlossene Bedienfeldabdeckung schützt<br />
den Schrittmacher vor Tropfwasser.<br />
Die temporären Elektroden, die an <strong>Reocor</strong> S angeschlossen<br />
sind, stellen für elektrischen Strom eine<br />
niederohmige Zuleitung zum Myokard dar. Deshalb<br />
müssen netzbetriebene Geräte, die in der Nähe des<br />
Patienten betrieben werden, vorschriftsmäßig geerdet<br />
sein.<br />
Der Schrittmacher darf nicht in Bereichen verwendet<br />
werden, in denen Explosionsgefahr besteht.<br />
Alle weiterführenden Wartungsarbeiten und Reparaturen<br />
sollten nur von <strong>BIOTRONIK</strong> ausgeführt werden.
39 Technische Daten<br />
Symbole<br />
Technische Daten<br />
Deutsch<br />
Hinweise in der Gebrauchsanweisung beachten<br />
Markierung der Batterieposition im Batteriefach<br />
Entsorgung nach WEEE-Richtlinie<br />
Klassifikation Anwendungsteil: CF (Cardiac Floating),<br />
defibrillationsgeschützt<br />
IP31<br />
OFF<br />
Wasserabweisend, Schutzart IP31<br />
Aus (auf dem Drehschalter Mode)<br />
Einstellbare Parameter<br />
Stimulationsarten S00, SSI, SST<br />
Grundfrequenz (30 ... 250 ppm) 1 ppm Bei einer Frequenz 180 ppm<br />
ertönt ein Warnsignal<br />
Impulsamplitude 0,1 ... 17 V max (50 mV, 10 %) Bei einer Impulsamplitude<br />
1 V ertönt ein Warnsignal<br />
Empfindlichkeit) 1 ... 20 mV 15 % Bzgl. 40 ms sin 2 -Impuls<br />
Burst-Frequenz (A) (60 ... 1000 ppm) 20 ppm<br />
Feste Parameter<br />
Impulsdauer 1 ms 5 %<br />
Auto short nach Pace 20 ms 10%<br />
Interferenzintervall 80 ms 5 ms<br />
In Channel Blanking 110 ms 3 ms<br />
Refraktärperiode<br />
(30 ... 150) ppm<br />
(151 ... 200) ppm<br />
(201 ... 250) ppm<br />
<br />
225 ms 5 ms<br />
200 ms 5 ms<br />
175 ms 5 ms
40 Technische Daten<br />
Deutsch<br />
Feste Parameter<br />
High Rate Protection<br />
1 ... 180 ppm<br />
<br />
181 ... 250 ppm<br />
Impulsform<br />
<br />
286 ms 10 %<br />
<br />
214 ms 10 %<br />
Asymmetrisch, biphasisch<br />
<br />
286 ms = 210 ppm, gilt nicht<br />
bei Burst<br />
214 ms = 280 ppm, gilt nicht<br />
bei Burst<br />
Überwachung Elektrodenimpedanz<br />
Akustische Warnung Ab 2000 15 %, bei 5 V Amplitude<br />
Elektrodenanschluss Berührungsgeschützte 2-mm-Buchsen;<br />
Redel-Buchse, 6-polig mittels Redel-Adapter<br />
Elektrische Daten/Batterie<br />
Batterie<br />
• Alkali-Mangan-Typ: IEC 6LR61 / ANSI 1604A<br />
• 9 V, auslaufsicher<br />
• Z. B. MN1604 Duracell ® Procell ®a)<br />
Polarität<br />
Verpolschutz<br />
Stromverbrauch<br />
Betriebszeit mit neuer<br />
Batterie b)<br />
Ende der Betriebszeit<br />
(EOS)<br />
Verbleibende Betriebszeit<br />
nach ERI-Signal b)<br />
Verhalten während des<br />
Batteriewechsels<br />
Kathodisch<br />
Keiner: Polarität ist unerheblich<br />
Typisch 1 mA (70 ppm, 5,0 V, 500 )<br />
• 600 h (10 %) bei 20 °C ( 2°C)<br />
• Bei: 70 ppm, 5 V, Mode VVI, 500 Ohm<br />
• Bis: ERI-Signal (EOS-Warnung)<br />
Blinkende LED “Low battery”<br />
• 36 Stunden<br />
• Bei: 70 ppm, 5 V, Mode VVI, 500 Ohm<br />
• Gerät bleibt bei herausgenommener Batterie noch<br />
mindestens 30 s betriebsbereit.<br />
• Der eingestellte Mode bleibt erhalten.<br />
a) Eingetragenes Warenzeichen von Duracell Inc., Bethel, CT 06801<br />
b) Bei der Verwendung der Batterie Typ MN 1604 Duracell ® , Procell ®<br />
Umgebungsbedingungen<br />
Temperaturbereich für Betrieb +10 °C ... +40 °C<br />
Temperaturbereich für Lagerung 0 °C ... +50 °C<br />
Relative Luftfeuchtigkeit<br />
30% ... 75%, nicht kondensierend<br />
Luftdruck<br />
700 hPa ... 1060 hPa<br />
Geräuschpegel<br />
50 dB
41 Technische Daten<br />
Abmessungen, Gewicht, Material<br />
Abmessungen <strong>Reocor</strong> S 160 mm x 75 mm x 35 mm 2 mm (ohne Redel-Adapter)<br />
Gewicht <strong>Reocor</strong> S Mit Batterie, mit Redel-Adapter: 305 g 10 %<br />
Ohne Batterie, mit Redel-Adapter: 260 g 10 %<br />
Ohne Batterie, ohne Redel-Adapter: 225 g 10 %<br />
Abmessungen Redeladapter<br />
für <strong>Reocor</strong> S<br />
76 mm x 35,5 mm x 29,4 mm<br />
Gewicht Redeladapter 35 g 10 %<br />
für <strong>Reocor</strong> S<br />
Gehäusematerial Babyblend FR 3000 (PC-ABS)<br />
Deutsch<br />
Klassifikation<br />
Klassifikation Anwendungsteil<br />
Schutzklasse<br />
Schutzart<br />
Defibrillationsfestigkeit<br />
Betriebsart<br />
CF (cardiac floating), defibrillationsgeschützt<br />
II b<br />
IP31 (wasserabweisend)<br />
5 kV<br />
Dauerbetrieb<br />
Erwartete Lebensdauer<br />
a) (gemäß <br />
EN 60601-1:2007, 4.4)<br />
12 Jahre<br />
a) Die Lebensdauer ist die erwartete maximale Betriebs-Lebensdauer des Geräts<br />
nach Inverkehrbringen. Die erwartete maximale Betriebs-Lebensdauer ist nicht<br />
von Testdaten gestützt.
42 Konformität gemäß IEC 60601-1-2<br />
Deutsch<br />
Konformität<br />
gemäß IEC 60601-1-2<br />
Leitlinien und Erklärung des Herstellers -<br />
Elektromagnetische Aussendungen <br />
(IEC 60601-1-2: Tabelle 1)<br />
Das Gerät ist für den Betrieb in der unten beschriebenen<br />
elektromagnetischen Umgebung vorgesehen.<br />
Der Anwender sollte gewährleisten, dass das Gerät in<br />
einer solchen Umgebung verwendet wird.<br />
Emissionstest<br />
HF-Aussendung <br />
nach CISPR 11<br />
HF- Aussendung<br />
nach CISPR 11<br />
Aussendung von Oberschwingungen<br />
nach IEC 61000-3-2<br />
Spannungsschwankungen<br />
<br />
nach IEC 61000-3-3<br />
Übereinstimmungspegel<br />
Gruppe 1<br />
Klasse B<br />
Nicht <br />
anwendbar<br />
Nicht <br />
anwendbar<br />
Leitlinien zur elektromagnetischen<br />
Umgebung<br />
Das Gerät benutzt HF-Energie ausschließlich<br />
für seine eigene Funktion. Deshalb ist<br />
die Aussendung hochfrequenter Störgrößen<br />
sehr gering ebenso wie die Wahrscheinlichkeit,<br />
andere in der Nähe betriebene<br />
elektronische Geräte zu stören.<br />
Das Gerät ist für die Anwendung in allen<br />
Einrichtungen außer der häuslichen<br />
Umgebung und solchen Gebäuden geeignet,<br />
die direkt an das öffentliche Versorgungsnetz<br />
angeschlossen sind.
43 Konformität gemäß IEC 60601-1-2<br />
Leitlinien und Erklärung des Herstellers -<br />
Elektromagnetische Störfestigkeit <br />
(IEC 60601-1-2: Tabelle 2)<br />
Das Gerät ist für den Betrieb in der unten beschriebenen<br />
elektromagnetischen Umgebung vorgesehen.<br />
Der Anwender des Geräts sollte gewährleisten, dass<br />
es in einer solchen Umgebung verwendet wird.<br />
Deutsch<br />
Prüfung der <br />
Störfestigkeit<br />
Entladung statischer<br />
Elektrizität<br />
(ESD) nach<br />
IEC 61000-4-2<br />
Schnelle transiente<br />
elektrische<br />
Störgrößen/<br />
Bursts nach <br />
IEC 61000-4-4<br />
Stoßspannungen <br />
(Surges) nach<br />
IEC 61000-4-5<br />
Spannungseinbrüche,<br />
Kurzzeitunterbrechungen<br />
und<br />
Schwankungen <br />
der Versorgungsspannung<br />
nach<br />
IEC 61000-4-11<br />
Magnetfeld bei <br />
den Versorgungsfrequenzen<br />
<br />
(50/60 Hz) nach <br />
IEC 61000-4-8<br />
Prüfpegel<br />
nach <br />
IEC 60601<br />
± 6 kV Kontaktentladung<br />
± 8 kV Luftentladung<br />
Nicht <br />
anwendbar<br />
Nicht <br />
anwendbar<br />
Nicht <br />
anwendbar<br />
Übereinstimmungspegel<br />
± 6 kV Kontaktentladung<br />
± 15 kV Luftentladung<br />
Leitlinien zur elektro-<br />
magnetischen Umgebung<br />
Fußböden sollten aus Holz,<br />
Beton oder Keramikfliesen<br />
bestehen. Wenn der Fußboden<br />
aus synthetischem Material<br />
besteht, muss die relative<br />
Luftfeuchtigkeit mindestens<br />
30% betragen.<br />
3 A/m 30 A/m Die magnetische Feldstärke<br />
sollte dem in der Geschäftsund<br />
Krankenhausumgebung<br />
vorzufindenden typischen<br />
Wert entsprechen.
44 Konformität gemäß IEC 60601-1-2<br />
Deutsch<br />
Leitlinien und Erklärung des Herstellers –<br />
Elektromagnetische Störfestigkeit für alle externen<br />
Herzschrittmachermodelle <br />
(IEC 60601-1-2: Tabelle 3)<br />
Das Gerät ist für den Betrieb in der unten beschriebenen<br />
elektromagnetischen Umgebung vorgesehen.<br />
Der Anwender des Geräts sollte gewährleisten, dass<br />
es in einer solchen Umgebung verwendet wird.<br />
Prüfung der <br />
Störfestigkeit<br />
Geleitete HF-<br />
Störgrößen nach<br />
IEC 61000-4-6<br />
Gestrahlte HF-<br />
Störgrößen nach<br />
IEC 61000-4-3<br />
Prüfpegel nach<br />
IEC 60601<br />
Übereinstimmungspegel<br />
Leitlinien zur elektromagnetischen<br />
Umgebung<br />
10 V rms<br />
10 V rms<br />
10 kHz bis 80 MHz<br />
d = 0,35 P<br />
außerhalb von ISM-<br />
Bändern a<br />
10 V rms<br />
10 V rms<br />
10 kHz bis 80 MHz<br />
d = 1,2 P<br />
innerhalb von ISM-<br />
Bändern a)<br />
10 V/m<br />
10 V/m<br />
800 MHz bis 2,5 GHz<br />
d = 1,2 P<br />
Tragbare und mobile Funkgeräte<br />
werden nicht näher an<br />
einem beliebigen Teil des<br />
Geräts, einschließlich Kabeln,<br />
verwendet, als der empfohlene<br />
Schutzabstand.<br />
Empfohlener Schutzabstand:<br />
für 80 MHz bis <br />
800 MHz<br />
d = 2,3<br />
P<br />
für 800 MHz bis <br />
2,5 GHz
45 Konformität gemäß IEC 60601-1-2<br />
Prüfung der <br />
Störfestigkeit<br />
Prüfpegel nach<br />
IEC 60601<br />
Übereinstimmungspegel<br />
Leitlinien zur elektromagnetischen<br />
Umgebung<br />
Darin ist P die maximale Nennleistung<br />
des Senders in Watt<br />
[W] gemäß Angaben des<br />
Senderherstellers und d der<br />
empfohlene Schutzabstand in<br />
Meter [m] b) .<br />
Deutsch<br />
Die Feldstärke stationärer<br />
Funksender muss bei allen<br />
Frequenzen gemäß einer<br />
Untersuchung vor Ort c) geringer<br />
sein als der Übereinstimmungspegel<br />
d) .<br />
In der Umgebung von Geräten,<br />
die das folgende Bildzeichen<br />
tragen, sind Störungen möglich.<br />
ANMERKUNG: Diese Leitlinien gelten möglicherweise nicht in allen Fällen. <br />
Die Ausbreitung elektromagnetischer Wellen wird durch Absorption und Reflexion<br />
durch Gebäude, Gegenstände und Menschen beeinflusst.<br />
a) Die ISM-Bänder (für industrielle, wissenschaftliche und medizinische Anwendungen)<br />
zwischen 150 kHz und 80 MHz sind 6,765 MHz bis 6,795 MHz; 13,553 MHz<br />
bis 13,567 MHz; 26,957 MHz bis 27,283 MHz und 40,66 MHz bis 40,70 MHz.<br />
b) Die Übereinstimmungspegel in den ISM-Frequenzbändern zwischen 150 kHz und<br />
80 MHz und im Frequenzbereich 80 MHz bis 2,5 GHz sollen die Wahrscheinlichkeit<br />
verringern, dass mobile Kommunikationsgeräte Störungen verursachen, wenn sie<br />
unbeabsichtigt in Patientenbereiche gebracht werden. Deshalb wird in diesen<br />
Frequenzbereichen ein höherer Schutzabstand empfohlen (Faktor 1,2 statt 0,35).<br />
c) Die Feldstärken stationärer Sender, wie z. B. Basisstationen für Mobiltelefone und<br />
mobile Landfunkgeräte, Amateurfunkstationen, Rundfunk- und Fernsehsender<br />
können nicht genau vorherbestimmt werden. Zur Beurteilung der elektromagnetischen<br />
Umgebung durch feste HF-Sender sollte eine Studie des Standorts erwogen<br />
werden. Wenn die gemessene Feldstärke an dem Ort, an dem das Gerät verwendet<br />
wird, den obigen HF-Übereinstimmungspegel überschreitet, muss das<br />
Gerät beobachtet werden, um die ordnungsgemäße Funktion zu gewährleisten.<br />
Gegebenenfalls müssen zusätzliche Maßnahmen getroffen werden, wie z. B. eine<br />
andere Ausrichtung oder ein anderer Standort des externen Schrittmachers.<br />
d) Im Frequenzbereich von 150 kHz bis 80 MHz sollten die Feldstärken weniger als<br />
10 V/m betragen.
46 Konformität gemäß IEC 60601-1-2<br />
Deutsch<br />
Empfohlene Schutzabstände zu tragbaren und<br />
mobilen HF-Telekommunikationsgeräten<br />
(IEC 60601-1-2: Tabelle 5)<br />
Das Gerät ist für den Betrieb in einer elektromagnetischen<br />
Umgebung vorgesehen, in der die HF-Störgrößen<br />
kontrolliert sind. Der Anwender des Geräts<br />
kann helfen, elektromagnetische Störungen zu vermeiden,<br />
indem er den Schutzabstand zu mobilen <br />
HF-Kommunikationsgeräten (Sendern) - abhängig<br />
von der Ausgangsleistung des Kommunikationsgeräts,<br />
wie unten angegeben - einhält.<br />
Nennleistung<br />
des Senders<br />
P [W]<br />
Schutzabstand d [m] entsprechend Sendefrequenz<br />
150 kHz bis<br />
80 MHz außerhalb<br />
von ISM-<br />
Bändern<br />
150 kHz bis<br />
80 MHz innerhalb<br />
von ISM-<br />
Bändern<br />
80 MHz bis<br />
800 MHz<br />
800 MHz bis<br />
2,5 GHz<br />
d = 0,35 P d = 1,2 P d = 1,2 P d = 2,3 P<br />
0,01 0,04 0,12 0,12 0,23<br />
0,10 0,11 0,38 0,38 0,73<br />
1,00 0,35 1,20 1,20 2,30<br />
10,00 1,11 3,79 3,79 7,27<br />
100,00 3,50 12,00 12,00 23,00<br />
Für Sender, deren Nennleistung nicht in obiger Tabelle angegeben ist, kann der<br />
Schutzabstand anhand der für die jeweilige Senderfrequenz angegebenen Formel<br />
berechnet werden. Dabei ist P die Nennleistung des Senders in Watt [W] und d der<br />
Schutzabstand in Meter [m].<br />
ANMERKUNG 1: Die ISM-Bänder (für industrielle, wissenschaftliche und medizinische<br />
Anwendungen) zwischen 150 kHz und 80 MHz sind 6,765 MHz bis 6,795 MHz;<br />
13,553 MHz bis 13,567 MHz; 26,957 MHz bis 27,283 MHz und 40,66 MHz bis<br />
40,70 MHz.<br />
ANMERKUNG 2: Die Übereinstimmungspegel in den ISM-Frequenzbändern zwischen<br />
150 kHz und 80 MHz und im Frequenzbereich 80 MHz bis 2,5 GHz sind dazu<br />
bestimmt, die Wahrscheinlichkeit zu verringern, dass mobile Kommunikationsgeräte<br />
Störungen verursachen, wenn sie unbeabsichtigt in den Patientenbereich<br />
gebracht werden. Deshalb wird in diesen Frequenzbereichen ein höherer Schutzabstand<br />
empfohlen (Faktor 1,2 statt 0,35).<br />
ANMERKUNG 3: Diese Leitlinien gelten möglicherweise nicht in allen Fällen. Die<br />
Ausbreitung elektromagnetischer Wellen wird durch Absorption und Reflexion<br />
durch Gebäude, Gegenstände und Menschen beeinflusst.
47 Lieferumfang und Zubehör<br />
Hinweis:<br />
Lieferumfang und Zubehör<br />
Deutsch<br />
Auslieferungsumfang<br />
Artikelbezeichnung Anzahl Bemerkung Bestell-Nr.<br />
<strong>Reocor</strong> S 1 365528<br />
Batterie 1 Duracell Plus, 6LR61 –<br />
Armmanschette<br />
– für Japan<br />
1 Kurz 391843<br />
– für alle anderen Länder<br />
1 Standard 103704<br />
Redel-Adapter 1 371263<br />
Bedienfeldabdeckung 1 378007<br />
Multilinguale Gebrauchsanweisung 1 368703<br />
(DE, EN, ES, FR, IT,PT)<br />
Gebrauchsanweisung ZH 368704<br />
Kurzanleitung DE 1 370125<br />
Kurzanleitung EN 371305<br />
Kurzanleitung ES 371306<br />
Kurzanleitung FR 371307<br />
Kurzanleitung IT 371308<br />
Kurzanleitung PT 372231<br />
Kurzanleitung ZH 371309<br />
Tasche 1 379384<br />
Zubehör<br />
<strong>Reocor</strong> S darf nur mit dem für diesen Schrittmacher<br />
entwickelten und getesteten Zubehör verwendet werden.<br />
Artikel<br />
Bestell-<br />
Nr.<br />
Beschreibung<br />
PK-82 128564 Patientenkabel mit zwei isolierten<br />
Krokodilklemmen, resterilisierbar<br />
PK-83 (2,5 m) 128563 Patientenkabel mit zwei isolierten<br />
Schraubklemmen, resterilisierbar<br />
PK-83 (1,5 m) 128562 Patientenkabel mit zwei isolierten<br />
Schraubklemmen, resterilisierbar<br />
PK-83-B (2,5 m) 347485 Patientenkabel mit zwei isolierten<br />
2,3 mm Schraubklemmen<br />
PK-83-B (1,5 m) 347606 Patientenkabel mit zwei isolierten<br />
2,3 mm Schraubklemmen<br />
PK-175 333959 Patientenkabel, mit vier Schraubklemmen<br />
zum Anschließen temporärer<br />
Elektroden, resterilisierbar<br />
Anschluss<br />
Direktanschluss<br />
Direktanschluss<br />
Direktanschluss<br />
Redel-<br />
Adapter<br />
Redel-<br />
Adapter<br />
Redel-<br />
Adapter
48 Lieferumfang und Zubehör<br />
Deutsch<br />
Artikel<br />
PK-67-L 123672 Patientenkabel, resterilisierbar, für<br />
Kombination mit Adapter PA-1-B, PA-2,<br />
PA-4<br />
<strong>Reocor</strong> Manschette<br />
kurz<br />
Bestell-<br />
Nr.<br />
391843<br />
Beschreibung<br />
Armmanschette mit geringerem<br />
Umfang. Für schmale Arme geeignet.<br />
Anschluss<br />
Redel-<br />
Adapter<br />
Redel-<br />
Adapter<br />
PK-67-S 128085 Patientenkabel, resterilisierbar, für<br />
Kombination mit PK-155 und <br />
Remington Model 301-CG<br />
PK-141 (2,8 m) 353181 Patientenkabel, resterilisierbar, mit<br />
vier berührungsgeschützten Krokodilklemmen<br />
<strong>Reocor</strong> Manschette 103704<br />
standard<br />
Standard Armmanschette –<br />
Redel-<br />
Adapter<br />
–<br />
Nur für die <strong>USA</strong><br />
Artikel Hersteller Beschreibung Anschluss<br />
ADAP-2R<br />
(0,24 m)<br />
Remington<br />
Medical Inc.<br />
Wiederverwendbarer Adapter für Kabel<br />
Model S-101-97 und Model FL-601-97<br />
Redel-<br />
Adapter<br />
Artikel<br />
Bestell-<br />
Nr.<br />
PA-1-B 123751<br />
PA-1-C 349723<br />
PA-2 123157<br />
PA-4 123090<br />
PK-155<br />
(Set mit 2 Kabeln)<br />
Adapter für PK-67-S und PK-67-L<br />
Beschreibung<br />
Zum Anschluss an 2-mm-Adapter oder MHW-<br />
Adapter (Adapter für Herzdrähte), resterilisierbar<br />
Zum Anschluss an 2-mm-Adapter oder MHW-<br />
Adapter (Adapter für Herzdrähte), resterilisierbar<br />
Zum Anschluss an IS-1-Stecker, resterilisierbar<br />
Mit Krokodilklemmen, resterilisierbar<br />
337358 Steriles Patientenkabel, 2-adrig, mit Krokodilklemmen<br />
für einmaligen Gebrauch
49 Lieferumfang und Zubehör<br />
Adapter für PK-67-S und PK-67-L (nur für <strong>USA</strong>)<br />
Artikel Hersteller Beschreibung<br />
Model 301-CG<br />
Remington<br />
Medical Inc.<br />
Steriles Patientenkabel, 2-adrig, mit Krokodilklemmen<br />
für einmaligen Gebrauch<br />
Deutsch<br />
Artikel Hersteller Beschreibung<br />
Model 301-CG Remington Steriles Patientenkabel, 2-adrig, mit Krokodilklemmen<br />
Medical Inc.<br />
für einmaligen Gebrauch<br />
Model S-101-97<br />
(2,5 m)<br />
Model FL-601-97<br />
(2,0 m)<br />
Adapter für ADAP-2R (nur für <strong>USA</strong>)<br />
Remington<br />
Medical Inc.<br />
Remington<br />
Medical Inc.<br />
Patientenkabel, 2-adrig, mit Krokodilklemmen für<br />
einmaligen Gebrauch<br />
Patientenkabel, 2-adrig, mit Schraubanschlüssen<br />
für einmaligen Gebrauch
50 Legende zum Etikett<br />
Deutsch<br />
Legende zum Etikett<br />
Die Symbole auf dem Etikett haben folgende Bedeutung:<br />
Symbol<br />
Bedeutung<br />
<strong>Reocor</strong> S<br />
Redel-Adapter<br />
<strong>BIOTRONIK</strong>-Bestellnummer<br />
Seriennummer des Geräts<br />
Herstellerdatum des Geräts<br />
D<br />
S<br />
Erlaubter Temperaturbereich für die Lagerung<br />
Erlaubter Luftdruckbereich für die Lagerung<br />
Erlaubter Luftfeuchtigkeitsbereich für die Lagerung<br />
Patient mit implantierter Elektrode<br />
Inhalt<br />
Entsorgungszeichen<br />
Gebrauchsanweisung beachten!<br />
Achtung: Laut Bundesgesetz (<strong>USA</strong>) darf das Produkt nur<br />
von einem Arzt oder auf Anweisung eines Arztes verkauft<br />
werden.<br />
CE-Zeichen
51<br />
<br />
Contents<br />
General Description ...............................................................................53<br />
Product Description .................................................53<br />
Indications ................................................................54<br />
Contraindications .....................................................54<br />
Potential Side Effects ...............................................54<br />
Handling Instructions ...............................................55<br />
Visual and Acoustic Signals .....................................60<br />
Operating Notes .....................................................................................61<br />
General Remarks .....................................................61<br />
Operating Devices and LEDs ....................................63<br />
Protective Cover .......................................................64<br />
Lead Connection ......................................................65<br />
Start Up ....................................................................72<br />
Attachment ...............................................................73<br />
Battery Exchange .....................................................74<br />
Pacing Modes and Parameters ...............................................................76<br />
Pacing Modes ...........................................................76<br />
Rate ..........................................................................77<br />
Pulse Amplitude and Pulse Width ...........................77<br />
Sensitivity .................................................................77<br />
Interference interval ................................................77<br />
Burst .........................................................................78<br />
Handling, Care and Maintenance ............................................................79<br />
<strong>Reocor</strong> S ...................................................................79<br />
Reusable Patient Cables ..........................................80<br />
Maintenance, Service, Inspections ..........................81<br />
Disposal ....................................................................82<br />
Technical Safety .....................................................................................83<br />
Technical Data ........................................................................................84<br />
Conformity According to IEC 60601-1-2 .................................................87<br />
Scope of Delivery and Accessories .........................................................92<br />
Legend for the Label ..............................................................................95<br />
Deutsch English
English<br />
52
53 General Description<br />
General Description<br />
Product Description<br />
<strong>Reocor</strong> S is a battery-powered, external single-chamber<br />
pacemaker for in-clinic use. The pacemaker is<br />
connected to temporary pacemaker leads (including<br />
myocardial heart wires and transvenous implantable<br />
catheters). <br />
The connection is made directly or via a separate<br />
patient cable and adapter, if necessary.<br />
There are three pacing modes available: SSI, S00, SST<br />
as well as a burst function.<br />
Pacing mode, rate, sensitivity, pulse amplitude and<br />
burst rate are adjustable.<br />
LEDs display the sense (Sense), pace (Pace) and<br />
battery status (Low battery). <br />
An acoustic signal sounds when a very high frequency<br />
or very low sensitivity value is set and when the lead<br />
impedance is not optimal.<br />
A defect of the device (failed self-test after the device<br />
was switched on) is indicated by continuously lit LEDs<br />
and an intermittent acoustic signal. If the self-test<br />
does not find any errors, the acoustic and visual<br />
signals will turn off after a few seconds.<br />
The safety features of <strong>Reocor</strong> S include:<br />
• Visual display of sensed and paced events<br />
• Microprocessor-controlled pacing parameters<br />
• Lead impedance monitoring<br />
• Visual warning when the battery is almost<br />
depleted<br />
• A movable, transparent cover of the controls to<br />
prevent accidental changes of the programmed<br />
parameters<br />
Temporary catheters, heart wires, leads with 2-mm<br />
plugs can be connected directly to <strong>Reocor</strong> S. Additional<br />
patient cables and adapters are available, too.<br />
English
54 General Description<br />
This system offers a secure connection of transvenous<br />
catheters and myocardial leads, which are applied<br />
either as unipolar or bipolar.<br />
Indications<br />
English<br />
Temporary pacing with <strong>Reocor</strong> S is suitable for the<br />
following applications for patients of any age:<br />
• Treatment of arrhythmias and heart block<br />
• Symptomatic sinus bradycardia<br />
• Sick sinus syndrome<br />
• Pre-, intra- and postoperative pacing of patients<br />
with heart surgery<br />
• Termination of supraventricular tachyarrhythmias<br />
• Prophylactic pacing for prevention of arrhythmias<br />
• Emergency pacing<br />
• Checking the pacing thresholds<br />
Contraindications<br />
• <strong>Reocor</strong> S cannot be sterilized and is therefore not<br />
suitable for use within the sterile field.<br />
• Atrial single-chamber pacing is contraindicated<br />
for patients with existing AV conduction disturbances.<br />
• The use of an external pacemaker is contraindicated<br />
in the presence of an active, implanted<br />
pacemaker.<br />
Potential Side Effects<br />
Potential complications associated with the application<br />
of temporary external pacing include asystole<br />
after abrupt cessation of pacing (e.g., if the patient<br />
cable is inadvertently disconnected, the leads are<br />
loosened or the settings are incorrect) or pacemaker<br />
dependency.
55 General Description<br />
Complications when inserting transvenous leads<br />
include: Wound infection, arterial puncture, pericardial<br />
friction, cardiac perforation and dysrhythmia after<br />
lead insertion.<br />
Handling Instructions<br />
Depending on the pacing settings and the patient's<br />
underlying illness, pacing can induce arrhythmias. To<br />
ensure the patient's safety, certain procedures should<br />
be observed and the precautionary measures listed<br />
below taken. Please read about additional procedures<br />
and precautionary measures in appropriate medical<br />
publications.<br />
Users • <strong>Reocor</strong> S may only be used by persons with<br />
knowledge of cardiology who were trained in the<br />
handling of the device. Potential users are technical<br />
and medical hospital staff and physicians.<br />
Mode of action • <strong>Reocor</strong> S interacts with the human heart. There is<br />
also an interaction with the patient's skin and<br />
blood vessels.<br />
Intended use • <strong>Reocor</strong> S and the cables and accessories approved<br />
along with the device may only be used in accordance<br />
with this technical manual.<br />
Changes not<br />
permitted<br />
Replacement parts<br />
and accessories<br />
Devices<br />
on hand<br />
• <strong>Reocor</strong> S must not be connected to other electromedical<br />
devices.<br />
• <strong>Reocor</strong> S must not be used in areas with a danger<br />
of explosion.<br />
• Only the manufacturer or a party expressly <br />
authorized by <strong>BIOTRONIK</strong> may perform corrective<br />
maintenance, enhancements or modifications to<br />
the device.<br />
• To ensure safety compliance, use only original<br />
replacement parts and accessories authorized by<br />
<strong>BIOTRONIK</strong>. Using any other parts voids the <br />
manufacturer's liability for any consequences,<br />
guarantee and warranty.<br />
• In case of pacemaker dependency of the patient,<br />
an emergency pacemaker should be kept on hand.<br />
English
56 General Description<br />
English<br />
Behavior<br />
before use<br />
• Keep an external defibrillator, oxygen, intubation<br />
equipment and emergency drugs on hand.<br />
• Before use, <strong>Reocor</strong> S should be visually inspected<br />
for damages and dirt.<br />
• Never use a device that is damaged or shows<br />
abnormal behavior. Replace any cable that shows<br />
even slight damage.<br />
• Before using <strong>Reocor</strong> S, the patient cable or leads,<br />
the user should touch the patient to equalize electrical<br />
potentials.<br />
• It is strongly recommended to examine all set<br />
parameters before the leads are connected to<br />
<strong>Reocor</strong> S.<br />
• Even though <strong>Reocor</strong> S is protected from dripping<br />
water, the device and all plugs should be kept<br />
clean and dry.<br />
• <strong>Reocor</strong> S cannot be sterilized.<br />
Lead connection • The connections of <strong>Reocor</strong> S and the temporary<br />
pacing leads must be secured and checked regularly.<br />
• The patient cable must first be connected to<br />
<strong>Reocor</strong> S and then to the leads.<br />
• The temporary leads, to which the <strong>Reocor</strong> S is connected,<br />
represent a low-impedance conductor to<br />
the myocardium for electric current. Therefore<br />
line-powered devices that are operated in the<br />
patient's vicinity must be grounded in accordance<br />
with established guidelines.<br />
• When handling already implanted leads, their connector<br />
pins and metal contact surfaces must not<br />
touch or come into contact with electrically conductive<br />
or wet surfaces.<br />
• If the cable is disconnected from the <strong>Reocor</strong> S, it<br />
must be reconnected immediately and the security<br />
of the connection has to be examined.<br />
• When using unipolar leads, two unipolar leads<br />
must be used for effective pacing.
57 General Description<br />
Behavior<br />
during use<br />
Pacing with<br />
high rates<br />
• During use of <strong>Reocor</strong> S, the protective cover must<br />
be completely closed to prevent accidental resetting<br />
of the programmed parameters.<br />
• Secure <strong>Reocor</strong> S either horizontally on a non-slip<br />
surface or on the patient with an armband, or<br />
operate it from a hanging position on the infusion<br />
stand using the hanger on the back of the device.<br />
• <strong>Reocor</strong> S must not be worn directly on the skin.<br />
• During use of <strong>Reocor</strong> S, the heart rate of the<br />
patient must be monitored with an ECG monitor<br />
with alarm function.<br />
• In case of disturbances caused by electromagnetic<br />
interference (EMI), <strong>Reocor</strong> S will switch to operating<br />
mode S00 when certain limits are exceeded.<br />
• Pacing the heart with rates higher than 180 ppm<br />
over a long period of time can cause severe hemodynamic<br />
complications. Pacing with high rates<br />
should only be performed when continuous monitoring<br />
is ensured.<br />
Behavior after use • After a defibrillation or cauterization, the device<br />
should be subjected to a function test.<br />
• If the device will be stored for a long period of time,<br />
the battery should be removed to prevent damage<br />
due to leakage.<br />
• A damp cloth and mild soap can be used for cleaning.<br />
Strong cleaning agents or organic solvents<br />
should be avoided, as these can corrode the<br />
plastic housing.<br />
• Inspection and maintenance work should be<br />
performed according to page 79.<br />
Battery operation • Do not use rechargeable batteries. The service<br />
time of these batteries is difficult to estimate,<br />
making it possible to inadvertently exceed the<br />
ERI 1) time, resulting in sudden cessation of pacing.<br />
English<br />
1) <strong>Reocor</strong> S reminds you to replace the battery with the ERI signal (Low Battery LED flashes).
58 General Description<br />
English<br />
Only 9-volt batteries with the international code<br />
IEC 6LR61 must be used. When using the battery<br />
type MN 1604 Duracell ® Procell ® , external pacing<br />
is possible for at least 600 hours before the battery<br />
must be replaced.<br />
It is possible to exchange a battery while <strong>Reocor</strong> S<br />
is in use. The device remains ready for use for at<br />
least 30 s at the ambient temperature (20 ± 2°C)<br />
when the battery is removed.<br />
For safety reasons, the patient should be paced by<br />
another source during the battery replacement.<br />
Electrocautery • Electrocautery should definitely not be performed<br />
at a distance less than 15 cm from the leads, as it<br />
is possible that ventricular fibrillation will be<br />
induced or the pacemaker could be damaged.<br />
The pacemaker should be set to asynchronous<br />
pacing to avoid pacemaker inhibition due to interference<br />
signals. During treatment, the peripheral<br />
pulse of the patient should be continuously monitored.<br />
After treatment, the pacemaker function<br />
must be inspected.<br />
Defibrillation • The circuitry of <strong>Reocor</strong> S is protected from the<br />
shock energy that can be induced by a defibrillation.<br />
Nonetheless, the following precautionary<br />
measures should be taken, if possible:<br />
— The set energy should not be higher than<br />
necessary for defibrillation.<br />
— The distance between the leads of the cardiac<br />
defibrillator and the leads of <strong>Reocor</strong> S should<br />
be at least 10 cm.<br />
— After a defibrillation, <strong>Reocor</strong> S must be<br />
switched off and then on again so that the<br />
device can perform a complete self-test.<br />
Additionally, after defibrillation the pacemaker<br />
function and pacing threshold must be checked<br />
and monitored for a sufficient period of time.
59 General Description<br />
Interference<br />
resistance<br />
• <strong>Reocor</strong> S is protected against interference due to<br />
electromagnetic radiation, electrostatic discharge<br />
and transferred interference. The radiation emitted<br />
by <strong>Reocor</strong> S has also been minimized. Thus,<br />
the device meets the requirements of IEC 60601-<br />
1-2. However, it is still possible that strong electromagnetic<br />
fields, which can occur (e.g., in the direct<br />
vicinity of electric motors, transformers, power<br />
lines and other electric devices), may impair the<br />
function of <strong>Reocor</strong> S.<br />
Electromagnetic interference can lead to the<br />
following errors:<br />
— Unexpected reset (self-test is executed).<br />
— Cardiac events are sensed but do not appear<br />
on the ECG monitor.<br />
— <strong>Reocor</strong> S exhibits unexpected behavior.<br />
Measures to restore proper function of <strong>Reocor</strong> S:<br />
— Check the connection between device and<br />
temporary pacing leads and adjust, if necessary.<br />
— Correctly adjust the sensitivity of the <strong>Reocor</strong> S:<br />
Often, the sensitivity safety margin is half the<br />
average intrinsic signal amplitude.<br />
— Turn off all electric devices in the vicinity of<br />
<strong>Reocor</strong> S if they can cause electromagnetic<br />
interference and their operation is not absolutely<br />
necessary.<br />
— Move the interference source to a location<br />
where the interference cannot have an affect<br />
on the <strong>Reocor</strong> S.<br />
— If safe to do: Switch <strong>Reocor</strong> S off and on again<br />
to reset the pacemaker to interference-free<br />
operation.<br />
— If the technical failure persists, please contact<br />
<strong>BIOTRONIK</strong>.<br />
English
60 General Description<br />
Visual and Acoustic Signals<br />
English<br />
• During the self-test after switching on <strong>Reocor</strong> S,<br />
all LEDs light up and brief acoustic signals can be<br />
heard. The self-test is finished after a few seconds.<br />
• If the self-test does not find any errors, the LEDs<br />
and warning signals turn off.<br />
• When the self-test finds a defect, all LEDs flash<br />
continuously and warning signals sound.<br />
• A required battery replacement is indicated by the<br />
flashing red Low battery LED.<br />
• The Sense (green) LED signals sensing of a P wave<br />
or R wave.<br />
• The Pace (yellow) LED signals pulse delivery.<br />
• The LEDs and acoustic signals also provide the<br />
following warnings during operation:<br />
Warning Meaning Error correction<br />
Acoustic signal for<br />
two seconds<br />
Fast sequence of<br />
sounds<br />
Acoustic signal and<br />
flashing of the Pace<br />
and Sense LEDs<br />
Low battery LED<br />
flashes.<br />
A pulse amplitude of 1 V or<br />
a rate of 180 ppm is programmed.<br />
Impedance outside of the<br />
permissible range<br />
High rate protection has<br />
been triggered;<br />
self-test failed.<br />
Check whether the set<br />
values are suitable for<br />
the patient.<br />
Check whether all connectors<br />
are securely<br />
plugged in.<br />
Check whether the<br />
leads have the desired<br />
position.<br />
Turn the device off and<br />
return it to <strong>BIOTRONIK</strong>.<br />
ERI has been reached. Replace the battery;<br />
and about 36 hours a) of<br />
a) When using the battery type MN 1604 Duracell ® , Procell ®<br />
service time remain.
61 Operating Notes<br />
Operating Notes<br />
General Remarks<br />
Caution!<br />
Self-test<br />
Warning messages<br />
The connections of <strong>Reocor</strong> S and the temporary<br />
pacing leads must be secured and checked regularly.<br />
After the device is switched on, <strong>Reocor</strong> S performs<br />
a self-test for a few seconds. This includes:<br />
• Check of the program code and the microprocessor<br />
• Memory test<br />
• Function test of the LEDs and the acoustic signals<br />
• Test of the pacing and sensing capability<br />
• Test of the efficacy of high rate protection<br />
When the self-test finds a defect, all LEDs flash continuously<br />
and acoustic warning signals sound. In this<br />
case, the pacemaker must be turned off and sent to<br />
<strong>BIOTRONIK</strong>.<br />
If the self-test did not find any errors, the LEDs and<br />
warning signals turn off and <strong>Reocor</strong> S starts to deliver<br />
pacing pulses in accordance with the programmed<br />
parameters. The negative electrode (cathode) should<br />
therefore only be connected when it has been ensured<br />
that the pacing mode, pacing rate, pulse amplitude<br />
and sensitivity have been programmed correctly.<br />
Setting the rotary switch for the operating mode to<br />
OFF prevents pacing pulses from being delivered to<br />
the patient immediately after connecting the leads.<br />
The following warnings can appear during use:<br />
• A required battery replacement is indicated by the<br />
flashing Low battery LED.<br />
• If the lead impedance is not within a permissible<br />
range (e.g. due to a fractured lead or a loose contact),<br />
a rapid sequence of sounds can be heard no<br />
earlier than 5 seconds after activation.<br />
English
62 Operating Notes<br />
English<br />
• If the pulse amplitude is set to values 1 V or the<br />
rate to values 180 ppm, an acoustic signal<br />
sounds for about two seconds.<br />
• If the rate is too high (see page 85 “High rate<br />
protection”) or if the self-test has not passed, <br />
a continuous acoustic signal sounds and the <br />
Pace and Sense LEDs flash.
63 Operating Notes<br />
Operating Devices and LEDs<br />
English<br />
Figure 1: <strong>Reocor</strong> S operating panel
64 Operating Notes<br />
English<br />
Designation<br />
1 Patient connection<br />
INDIFF.+; DIFF.-<br />
Function<br />
For cables with 2-mm plug <br />
or for Redel adapters<br />
(red = plus; blue = minus)<br />
2 Battery compartment For 9-V block battery<br />
3 Low battery LED Provides a warning when the battery voltage is too low<br />
4 LED Pace Yellow display for stimulated event<br />
5 LED Sense Green display for sensed event<br />
6 Ampl. control dial Setting the pulse amplitude<br />
7 Sens. control dial Setting the sensitivity<br />
8 Start burst Starting the burst function<br />
9 Velcro harness Secures <strong>Reocor</strong> S to patient, bed or infusion stand<br />
10 Burst rate control dial Setting the burst rate<br />
11 Select burst Selection of the burst function<br />
12 Rate control dial Setting the pacing rate<br />
13 Mode dial Selection of the pacing mode and off switch<br />
Table 1: Description of elements in Figure 1<br />
Bold labels of the operating devices indicate safe<br />
values for the intended use of the device.<br />
Protective Cover<br />
The protective cover is locked when the cover has<br />
been pushed to the stop, passing two snap-in points<br />
and when the lever is resting on the rail (see Figure 2).<br />
Correct:<br />
False:<br />
Figure 2: Correct positioning of the protective cover
65 Operating Notes<br />
To release the protective cover (see Figure 3):<br />
Push the release lever up with one hand.<br />
At the same time, use your other hand to slide<br />
down the protective cover.<br />
English<br />
Figure 3: Unlocking the protective cover<br />
Caution!<br />
To lock the protective cover:<br />
Slide the protective cover upwards along the rail<br />
until it locks into place (see Figure 2).<br />
The protective cover can be removed completely for<br />
cleaning. Push the cover all the way down to the stop<br />
and then remove it.<br />
During use of <strong>Reocor</strong> S, the protective cover must be<br />
locked to prevent inadvertent resetting of the rotary<br />
switch and control dial, and thus of the programmed<br />
parameters.<br />
Lead Connection<br />
Note:<br />
<strong>Reocor</strong> S has two connector ports for direct connection<br />
of leads with touch-proof 2-mm plugs.<br />
To connect cables with Redel plugs, the Redel adapter<br />
must be fitted on the correct side and screwed in<br />
(Figure 4). The Redel adapter is attached to the correct<br />
side if it can be screwed on to the <strong>Reocor</strong> S.<br />
The function of the Redel adapter is only guaranteed if<br />
it is attached to the correct side!
English<br />
<br />
66 Operating Notes<br />
Figure 4: Redel adapter for <strong>Reocor</strong> S<br />
<strong>Reocor</strong> S can be used with the following patient cables<br />
and adapters:<br />
• Patient cable PK-83-B with two screw terminals<br />
for temporary leads on the patient side and Redel<br />
plug on the <strong>Reocor</strong> S side (use the Redel adapter).<br />
Figure 5: Patient cable PK-83-B
67 Operating Notes<br />
• Patient cable PK-83 with two insulated screw<br />
terminals for temporary leads on the patient side<br />
and two touch-proof 2-mm plugs on the <strong>Reocor</strong> S<br />
side.<br />
English<br />
Figure 6: Patient cable PK-83<br />
• Patient cable PK-82 with two insulated alligator<br />
clips for temporary leads on the patient side and<br />
two touch-proof 2-mm plugs on the <strong>Reocor</strong> S side.<br />
Figure 7: Patient cable PK-82<br />
• Patient cable PK-67-L and PK-67-S<br />
Patient cable PK-67-L (2.6 m) and PK-67-S (0.8 m) differ<br />
only in length. On the <strong>Reocor</strong> S side you have a Redel<br />
plug (use the Redel adapter) and on the patient side a<br />
connection for the adapter according to Figure 13 and<br />
for the single-use cable according to Figure 9.<br />
Figure 8: Patient cable PK-67-L and PK-67-S<br />
• Cable for single use<br />
The single-use cables Remington 301-CG (<strong>USA</strong> only)<br />
and PK-155 with alligator clips are connected to the<br />
patient via the cable PK-67-S.<br />
Figure 9: Single-use cables PK-155 and 301-CG (<strong>USA</strong> only)
English<br />
<br />
68 Operating Notes<br />
Only for <strong>USA</strong>: The single-use cables S-101-97 and<br />
FL-601-97 by Remington Medical Inc. are connected<br />
via the reusable adapter cable ADAP-2R to the<br />
<strong>Reocor</strong> S (Figure 10).<br />
Figure 10: <strong>USA</strong> only: Remington single-use cable and adapter<br />
<strong>Reocor</strong> S can also be used with patient cables with <br />
4 connections for dual-chamber pacemakers.<br />
<strong>Reocor</strong> S only uses the ventricular channel of these<br />
cables.<br />
The following cables are possible:<br />
• Patient cable PK-141 with 4 alligator clips on the<br />
patient side and Redel plug on the <strong>Reocor</strong> S side<br />
(use the Redel adapter).<br />
The ventricular channel is indicated by the label<br />
Vent Diff/Indiff on the protective sleeves.<br />
Figure 11: Patient cable PK-141
69 Operating Notes<br />
• Patient cable PK-175 with four screw terminals on<br />
the patient side and Redel plug on the <strong>Reocor</strong> S<br />
side (use the Redel adapter). The ventricular<br />
channel is labeled with Ventricle.<br />
English<br />
Figure 12: Patient cable PK-175<br />
• Adapter<br />
Figure 13 shows adapters for connection of temporary<br />
leads to <strong>Reocor</strong> S through the dual-chamber patient<br />
cable PK-67-L/S.<br />
The leads should be connected with the ventricular<br />
connection of the adapter (labeled V).<br />
Figure 13: Adapters for the patient cables PK-67-L and PK-67-S<br />
PA-1-B and PA-1-C for the connection of touch-proof<br />
2-mm plugs or MHW adapters (adapters for heart<br />
wires)<br />
PA-2 IS-1<br />
PA-4 with alligator clips
70 Operating Notes<br />
English<br />
WARNING!<br />
WARNING!<br />
WARNING!<br />
Caution!<br />
Note:<br />
Note:<br />
Note:<br />
Connection<br />
Danger to patient by damaged cables. <br />
Damaged cables are limited in functionality and pose<br />
a danger to patients. Do not use damaged cables.<br />
Danger from loss of function.<br />
Damp cables have limited functionality and pose a<br />
danger to patients. Do not use damp cables.<br />
Danger from electrical currents.<br />
Unused cable contacts can conduct electrical currents<br />
to patients. Adhere unused cable contacts close to the<br />
patient.<br />
Allergic reactions and inflammations.<br />
Prevent the cable from coming into contact with the<br />
patient's wounds or skin.<br />
Ensure correct fitting of the insulators prior to using<br />
the cables.<br />
For use of cables or adapters for dual-chamber applications,<br />
the leads must be connected to the ventricular<br />
channel (labeled Ventricle or V).<br />
Do not connect the patient cable to the temporary<br />
pacing lead of the patient before the connection has<br />
been established to the <strong>Reocor</strong> S.<br />
Direct connection<br />
If <strong>Reocor</strong> S is used without the Redel adapter, temporary<br />
catheters and heart wires can be connected to<br />
the patient cables PK-82 and PK-83 directly at the<br />
connector ports INDIFF.+ and DIFF.-.<br />
Patient cable<br />
The patient cable is connected via a Redel adapter to<br />
the <strong>Reocor</strong> S.<br />
Fit the Redel adapter to <strong>Reocor</strong> S.<br />
Screw the adapter in tight.<br />
Insert the Redel plug of the patient cable into the<br />
Redel port of the adapter.
71 Operating Notes<br />
Connection Variants<br />
Temporary catheters with 2-mm plugs or <br />
heart wire with 2-mm adapter<br />
Patient-side<br />
connection<br />
You have the option to connect <strong>Reocor</strong> S directly to a<br />
temporary catheter with touch-proof 2-mm plug or to<br />
a heart wire with 2-mm adapter, without any other<br />
cables or adapters. All other connection options are<br />
listed in the following table:<br />
<strong>BIOTRONIK</strong> cable Device-side<br />
connection<br />
Recommended connections<br />
<strong>Reocor</strong> S connection<br />
Direct connection (without <strong>BIOTRONIK</strong> cables)<br />
2-mm connector port<br />
2 mm PK-67-S/L with PA-1-C Redel plug Redel adapter<br />
Screw terminals PK-83B with TC Adapt Redel plug 2-mm connector port<br />
Screw terminals PK-83 with TC Adapt 2-mm plug 2-mm connector port<br />
Possible connections<br />
2 mm PK-67-S/L with PA-1-B Redel plug Redel adapter<br />
Alligator clips PK-141 Redel plug Redel adapter<br />
Alligator clips PK-67-S/L with PA-4 Redel plug Redel adapter<br />
Alligator clips PK-67-S/L with PK-155 Redel plug Redel adapter<br />
Alligator clips PK-82 2-mm plug 2-mm connector port<br />
English<br />
Patient-side<br />
connection<br />
Heart wire with break-off needle or with<br />
flexible end (max. 2.3 mm in diameter)<br />
<strong>BIOTRONIK</strong> cable Device-side<br />
connection<br />
Recommended connections<br />
<strong>Reocor</strong> S connection<br />
Screw terminals PK-83B Redel plug Redel adapter<br />
Screw terminals PK-83 2-mm plug 2-mm connector port<br />
Possible connections<br />
Screw terminals PK-175 Redel plug Redel adapter<br />
Alligator clips PK-141 Redel plug Redel adapter<br />
Alligator clips PK-67-S/L with PA-4 Redel plug Redel adapter<br />
Alligator clips PK-67-S/L with PK-155 Redel plug Redel adapter<br />
Alligator clips PK-82 2-mm plug 2-mm connector port
72 Operating Notes<br />
Implanted lead with IS-1 connector<br />
English<br />
Connection<br />
patient-side<br />
IS-1 connector<br />
port<br />
<strong>BIOTRONIK</strong> cable Connection<br />
device-side<br />
Recommended connections<br />
<strong>Reocor</strong> S<br />
connection<br />
PK-67-S/L with PA-2 Redel plug Redel adapter<br />
Possible connections<br />
Alligator clips PK-141 Redel plug Redel adapter<br />
Alligator clips PK-67-S/L with PA-4 Redel plug Redel adapter<br />
Alligator clips PK-67-S/L with PK-155 Redel plug Redel adapter<br />
Alligator clips PK-82 2-mm plug 2-mm connector port<br />
Note:<br />
For dual-chamber cables (PK-141, PK-175, <br />
PK-67-S/L), <strong>Reocor</strong> S uses only the ventricular<br />
channel!<br />
Polarity<br />
<strong>Reocor</strong> S principally paces in bipolar mode, but it can<br />
be used with bipolar or unipolar temporary pacing<br />
leads.<br />
If unipolar leads are used, two leads must be connected.<br />
Separating connections<br />
Disconnect patient cables from the temporary pacing<br />
leads of the patient or disengage the direct connection.<br />
Separating Redel plug<br />
• Retract the retaining ring at the Redel plug and<br />
pull the Redel plug off the Redel port.<br />
Start Up<br />
The operation of <strong>Reocor</strong> S is identical for all operating<br />
modes. The operating steps should be carried out in<br />
the following order (the numbers in parentheses refer<br />
to Figure 1 on page 63).<br />
• Insert battery.<br />
• Push protective cover down.
73 Operating Notes<br />
Caution!<br />
• Prepare patient: Place the leads but do not<br />
connect them to the pacemaker yet.<br />
• Prepare <strong>Reocor</strong> S:<br />
• Set the pacing rate with the Rate control dial (12).<br />
• Set the pacing amplitude with the Ampl. control<br />
dial (6).<br />
• Select the pacing mode with the dial Mode (13).<br />
The device will be activated at the same time.<br />
• After the internal self-test has been completed<br />
successfully, the LEDs on the operating panel<br />
simultaneously flash twice.<br />
• If the Low battery LED (3) flashes, the battery<br />
needs to be replaced (for battery exchange, see<br />
page 74).<br />
• Connect leads; the yellow Pace LED (4) flashes in<br />
synchrony with the pacing pulses.<br />
• Set the sensitivity with the Sens. control dial (7) so<br />
that the green Sense LED (5) flashes in synchrony<br />
with every sensed event.<br />
• A sufficient safety margin should be considered to<br />
ensure reliable sensing.<br />
• Monitor the ECG of the patient and adjust amplitude<br />
and/or sensitivity, if necessary.<br />
During use of <strong>Reocor</strong> S, the heart rate of the patient<br />
must be monitored with an ECG monitor with alarm<br />
function.<br />
English<br />
Attachment<br />
<strong>Reocor</strong> S must be operated either horizontally on a<br />
non-slip surface or affixed to the patient with an armband,<br />
or from a hanging position on the infusion stand<br />
using the hanger on the back of the device.<br />
To attach <strong>Reocor</strong> S to an infusion stand, unscrew the<br />
hanger from the back of the device. This ensures safe<br />
operation and unburdens the patient cables.
74 Operating Notes<br />
Battery Exchange<br />
English<br />
Caution!<br />
When the Low battery LED (3) starts flashing, it indicates<br />
that the battery is almost depleted. When using<br />
the battery type MN 1604 Duracell ® Procell ® approximately<br />
36 hours of service time remain. However, the<br />
battery should be replaced as soon as possible.<br />
<strong>Reocor</strong> S must be operated with a 9-V battery, international<br />
code IEC 6LR61. Only leakproof alkaline manganese<br />
batteries should be used. When using the battery<br />
type MN 1604 Duracell ® Procell ® , external pacing is<br />
possible for at least 600 hours at 20 ± 2°C before the<br />
battery must be replaced.<br />
It is possible to exchange a battery while <strong>Reocor</strong> S is in<br />
use. The device remains ready for use for at least 30 s<br />
at the ambient temperature (20 ± 2°C) when the<br />
battery is removed.<br />
For safety reasons, the patient should be paced by<br />
another source during the battery replacement.<br />
Do not use rechargeable batteries. The service time of<br />
these batteries is difficult to estimate, making it possible<br />
to inadvertently exceed the ERI, resulting in a<br />
sudden loss of pacing.<br />
The battery compartment (2) is located on the right<br />
side of the device, and can be opened by pushing the<br />
blue slider upwards and pulling out the drawer<br />
towards the right. Remove the battery carefully.<br />
To protect the battery poles, a rubber plug can be put<br />
on the new battery. Remove it before you insert the<br />
new battery.<br />
The preferred pole orientation is marked in the battery<br />
compartment. When inserting the new battery you<br />
only need to ensure that the battery poles point to the<br />
middle of the housing. The position of the plus and<br />
minus pole can be selected freely.
75 Operating Notes<br />
Insert the new battery with the bottom (Figure 14)<br />
down first into the battery compartment.<br />
English<br />
Figure 14: Inserting the battery<br />
Note:<br />
Close the drawer and press the blue slider down until<br />
it snaps in place with an audible click.<br />
If the pacemaker is stored or will not be used for a<br />
long period of time, it is recommended to remove the<br />
battery to prevent damage due to leakage.
76 Pacing Modes and Parameters<br />
Pacing Modes and Parameters<br />
Pacing Modes<br />
English<br />
Mode S00<br />
Mode SSI<br />
Mode SST<br />
High-frequency<br />
pacing<br />
WARNING!<br />
There are three pacing modes available: S00, SSI, SST<br />
as well as high-frequency pacing (Burst).<br />
For disturbances caused by electromagnetic interference<br />
(EMI), after certain limits are exceeded<br />
<strong>Reocor</strong> S will switch to operating mode S00 for the<br />
duration of the disturbance.<br />
The pacemaker sends pulses with a constant rate. The<br />
pulses are asynchronous, i.e. not synchronized with<br />
the intrinsic heartbeats.<br />
This mode functions when connected to the ventricle<br />
as V00 and to the atrium as A00.<br />
The pacemaker inhibits pulses when intracardiac<br />
potentials are sensed. It sends pulses if no event is<br />
sensed within one of the intervals corresponding to<br />
the selected frequency.<br />
This mode functions when connected to the ventricle<br />
as VVI and when connected to the atrium as AAI.<br />
The triggered pacing mode SST corresponds to the<br />
pacing modes SSI with the following distinction: no<br />
pulse inhibition takes place upon sensing of an event<br />
outside of the refractory period, instead pulse delivery<br />
is carried out immediately in the respective chamber.<br />
The rate of the burst function can be selected with the<br />
control dial (10) from 60 ppm to 1000 ppm. <br />
This function is activated with two key buttons: First<br />
the Select burst key button (11) must be pressed and<br />
then, within two seconds, the Start burst key button<br />
(8) must be pressed. The pulse delivery then lasts as<br />
long as the Start burst key button is pressed.<br />
After a burst stimulation in the atrium, the ventricular<br />
blanking interval can prevent sensing of intrinsic signals<br />
and lead to asynchronous pacing in the ventricle.
77 Pacing Modes and Parameters<br />
Rate<br />
WARNING!<br />
The rate can be continuously adjusted from 30 ppm to<br />
250 ppm with the Rate control dial (12). If a value<br />
greater than 180 ppm is set, the device will sound a<br />
warning signal for two seconds.<br />
Pacing the heart with rates higher than 180 ppm over<br />
a long time period can cause severe hemodynamic<br />
complications. Pacing with high rates should only be<br />
performed when continuous monitoring is ensured.<br />
English<br />
Pulse Amplitude and Pulse Width<br />
The pulse amplitude can be set with the Ampl. control<br />
dial (6) within a range from 0.1 V to 17 V. If a value less<br />
than 1 V is set, the device will sound a warning signal<br />
for two seconds.<br />
The pulse width is 1 ms.<br />
Pacing should be checked regularly to ensure that<br />
pacing is effective and that a sufficient safety margin<br />
has been set.<br />
Sensitivity<br />
The sensitivity can be adjusted with the Sens. control<br />
dial (7) between 1 mV and 20 mV. It should be checked<br />
regularly to ensure that correct sensing takes place<br />
and that a sufficient safety margin has been set.<br />
Interference interval<br />
The interference interval is started both by paced and<br />
sensed events.<br />
The interval is reset if noise is sensed during the<br />
interval length of 80 ms, leading to asynchronous<br />
pacing at the programmed rate for as long as the<br />
interference lasts.
78 Pacing Modes and Parameters<br />
Burst<br />
English<br />
The rate of the atrial Burst rate function can be<br />
selected with the control dial (10) between 60 ppm and<br />
1000 ppm.<br />
This function is activated with two key buttons: First<br />
the Select burst key button (11) must be pressed and<br />
then, within two seconds, the Start burst key button<br />
(8). The pulse delivery then lasts as long as the Start<br />
burst key button is pressed.<br />
Pacing the heart with rates higher than 180 ppm over<br />
a long time period can cause severe hemodynamic<br />
complications. Pacing at high rates should only be<br />
performed when continuous monitoring is ensured.<br />
The mode for high-frequency pacing is used to terminate<br />
certain supraventricular tachycardias (SVT) and<br />
should only be considered for atrial applications. The<br />
application of asynchronous high-frequency stimuli<br />
can interrupt an SVT by depolarizing portions of a<br />
reentry path. When an ectopic atrial focus is responsible<br />
for an SVT, the application of high-frequency<br />
stimuli in the atrium can also lead to increased<br />
suppression of the ectopic center.<br />
Various risks have to be considered in association with<br />
high-frequency atrial pacing. The risks possible ventricular<br />
pacing and ventricular tachycardia or fibrillation.<br />
This can be caused by poor placement of the<br />
leads or the presence of anomalous stimulus conduction<br />
paths that circumvent the normal atrioventricular<br />
stimulus conduction (e.g. Wolff-Parkinson-White Syndrome).<br />
Patient discomfort and asystole after highfrequency<br />
pacing are other possible problems.
79 Handling, Care and Maintenance<br />
Handling, Care and Maintenance<br />
<strong>Reocor</strong> S<br />
WARNING!<br />
Caution!<br />
Cleaning<br />
Disinfection<br />
Note:<br />
<strong>Reocor</strong> S is a highly developed precision device that<br />
must be treated with care. Mechanical impact, e.g. by<br />
dropping the device, can impair its function.<br />
Please return the device to <strong>BIOTRONIK</strong> in case of<br />
damage or impaired function.<br />
Prior to use, the pacemaker should be stored at least<br />
two hours under the ambient conditions specified for<br />
operation (see page 85).<br />
Housing, operating devices, connections, and patient<br />
cables must be visually inspected for mechanical<br />
damage, deformation, loose parts, cracks, and dirt<br />
before each use.<br />
Never use a damaged device or a device that exhibits<br />
abnormal behavior; especially if it has been dropped<br />
or could have been damaged by high-frequency or<br />
defibrillation voltage.<br />
Secure <strong>Reocor</strong> S either horizontally on a non-slip surface<br />
or on the patient with an armband, or operate it<br />
from a hanging position on the infusion stand using<br />
the hanger on the back of the device.<br />
<strong>Reocor</strong> S must not be worn directly on the skin.<br />
A moist cloth and, if necessary, mild soap can be used<br />
to clean <strong>Reocor</strong> S. Strong cleaning agents or organic<br />
solvents (such as ether or gasoline) should be<br />
avoided, as these can corrode the plastic housing.<br />
For disinfection, wipe the device with a cloth soaked<br />
with a disinfectant solution (e.g. Aerodesin 2000 or<br />
Lysoform D). When mixing the solution, follow the<br />
dilution measure stated by the manufacturer.<br />
After cleaning or disinfection, <strong>Reocor</strong> S must not be<br />
used for one hour.<br />
English
80 Handling, Care and Maintenance<br />
English<br />
Sterilization<br />
Caution!<br />
Cleaning<br />
Disinfection<br />
Sterilization<br />
<strong>Reocor</strong> S cannot be sterilized. If the device needs to be<br />
used in a sterile environment, it can be packed into a<br />
sterile cover.<br />
Annual checks of the device by manufacturer-authorized<br />
technicians are recommended.<br />
Even though <strong>Reocor</strong> S is protected from dripping<br />
water, the device should be kept clean and dry.<br />
Reusable Patient Cables<br />
Prior to opening, the package of a sterile cable must<br />
be inspected for damage to determine whether sterility<br />
has been compromised.<br />
The reusable patient cables can be cleaned and disinfected<br />
with hospital cleaning agents following many<br />
different methods. However, aggressive chemicals<br />
(such as acetone) may never be used.<br />
The use of a wiping cloth with regular, alcohol-free<br />
hand soap or the cleaning agent Stabimed by Braun is<br />
the recommended cleaning method for the cables.<br />
Subsequently, the cables must be cleaned from<br />
cleaning agent residue with electrolyte-free water and<br />
then wiped with a clean, dry cloth.<br />
For disinfection in a disinfectant bath, an aldehydebased<br />
(e.g. Lysoformin 3000) or alcohol-based<br />
(e.g. Aerodesin 2000) disinfectant agent must be used<br />
in accordance with the manufacturer information and<br />
in accordance to the respective hospital guidelines.<br />
After disinfection, the cable must be cleaned from<br />
residues of the disinfectant by rinsing it in electrolytefree<br />
water.<br />
A steam sterilization can be carried out at 121°C and<br />
1.1 bar for 20 min.
81 Handling, Care and Maintenance<br />
Maintenance, Service, Inspections<br />
Test before use<br />
Inspection<br />
The only required maintenance action is the replacement<br />
of the battery (see page 74).<br />
No other maintenance work is required.<br />
A short test should be performed prior to each use of<br />
the device. It consists of a visual inspection and a<br />
simple function test.<br />
Visual inspection:<br />
• Inspect the housing for mechanical damage,<br />
deformation, loose parts, cracks, etc.<br />
• Inspect the cable connection area for mechanical<br />
damage.<br />
• Inspect the labeling for legibility.<br />
Function test:<br />
The result of the self-test that runs automatically<br />
after activation must be heeded.<br />
Inspections should be performed:<br />
• after an application together with high-frequency<br />
surgical instruments or defibrillators,<br />
• when malfunctions are suspected,<br />
• once a year.<br />
The inspection should follow the manufacturer specifications.<br />
These are made available upon request. The<br />
specification lists all required test steps and the<br />
necessary equipment.<br />
English
82 Handling, Care and Maintenance<br />
Disposal<br />
English<br />
Note:<br />
<strong>Reocor</strong> S is marked with the symbol of a crossed-out<br />
garbage can on its type plate. The symbol indicates<br />
that the European guideline 2002/96/EC on waste<br />
electrical and electronic equipment (WEEE directive)<br />
applies to the disposal method of the device.<br />
Old devices and accessories that are no longer<br />
needed, such as patient cables and adapters, should<br />
be returned to <strong>BIOTRONIK</strong>. This ensures that proper<br />
disposal will be carried out in accordance with the<br />
national implementations of the WEEE directive.<br />
Cables to be disposed of due to contact with blood<br />
must be disposed of as medical waste, in accordance<br />
with environmental regulations. Non-contaminated<br />
cables must be disposed of in accordance with the<br />
European Directive 2002/96/EC regarding waste <br />
electrical and electronic equipment (WEEE).<br />
Depleted batteries must be treated as hazardous<br />
waste and disposed of by the user.<br />
If you have any questions, please contact <strong>BIOTRONIK</strong>.
83 Technical Safety<br />
Technical Safety<br />
WARNING!<br />
The external pacemaker <strong>Reocor</strong> S meets the international<br />
standards for the safety of electro-medical<br />
devices according to IEC 60601-1 and IEC 60601-1-2,<br />
as well as the international standard IEC 60601-2-31<br />
for temporary, external pacemakers.<br />
The following special features offer safety for the<br />
patient:<br />
• No metal parts that can be touched, according to<br />
the definition of the IEC.<br />
• The design meets the standard for the device class<br />
CF (cardiac floating) and is approved for direct<br />
treatment of the heart. The pacemaker complies<br />
with the requirements for defibrillation protection<br />
stipulated in the international standards.<br />
• The closed protective cover protects the pacemaker<br />
against dripping water.<br />
The temporary leads that are connected to <strong>Reocor</strong> S<br />
represent a low-impedance conductor to the myocardium<br />
for electric current. Therefore line-powered<br />
devices that are operated in the patient's vicinity must<br />
be grounded in accordance with established guidelines.<br />
The pacemaker must not be used in areas at risk for<br />
explosion.<br />
All additional maintenance work and repairs should<br />
only be performed by <strong>BIOTRONIK</strong>.<br />
English
84 Technical Data<br />
Technical Data<br />
Symbols<br />
Follow the instructions for use in the technical manual.<br />
English<br />
Indication of the placement of the battery in the<br />
compartment<br />
Disposal according to the WEEE directive<br />
Applied part classification: CF (cardiac floating),<br />
defibrillation protected<br />
IP31<br />
OFF<br />
Water-repellent, protection degree IP31<br />
Off (on the Mode dial)<br />
Adjustable parameters<br />
Pacing modes S00, SSI, SST<br />
Basic rate (30 … 250 ppm) ± 1 ppm At a rate of 180 ppm a warning<br />
tone is emitted<br />
Pulse amplitude 0.1 … 17 V ± max. (50 mV,<br />
10%)<br />
At a pulse amplitude of 1 V<br />
a warning tone is emitted<br />
Sensitivity 1 … 20 mV ± 15% With respect to 40 ms sin 2<br />
pulse<br />
Burst rate (A) (60 … 1000 ppm) ± 20 ppm<br />
Fixed parameters<br />
Pulse width 1 ms ± 5%<br />
Auto short after pace < 20 ms ± 10%<br />
Interference interval 80 ms ± 5 ms<br />
In channel blanking 110 ms ± 3 ms<br />
Refractory period<br />
(30 … 150) ppm<br />
(151 … 200) ppm<br />
(201 … 250) ppm<br />
<br />
225 ms ± 5 ms<br />
200 ms ± 5 ms<br />
175 ms ± 5 ms<br />
Upper rate 260 ppm ± 10%
85 Technical Data<br />
Fixed parameters<br />
High rate protection<br />
1 … 180 ppm<br />
<br />
181 … 250 ppm<br />
Pulse waveform<br />
<br />
286 ms ± 10%<br />
<br />
214 ms ± 10%<br />
Asymmetric, biphasic<br />
<br />
286 ms = 210 ppm, does not<br />
apply for Burst<br />
214 ms = 280 ppm, does not<br />
apply for Burst<br />
Lead impedance monitoring<br />
Acoustic warning Above 2000 15%, at 5 V amplitude<br />
Lead connection Touch-proof 2-mm connector ports;<br />
Redel port, 6-pin via Redel adapter<br />
English<br />
Electrical data/battery<br />
Battery<br />
Polarity<br />
Inverse-polarity<br />
protection<br />
Power consumption<br />
Service time with new<br />
battery b)<br />
End of service (EOS)<br />
Remaining service time<br />
after ERI signal b)<br />
Behavior during<br />
battery exchange<br />
• Alkaline-manganese type: IEC 6LR61 / ANSI 1604A<br />
• 9 V leak-proof<br />
• E.g. MN1604 Duracell ® Procell ®a)<br />
Cathodic<br />
None: Polarity is irrelevant<br />
Typically 1 mA (70 ppm, 5.0 V, 500 )<br />
• 600 h (-10%) at 20°C (± 2°C)<br />
• At: 70 ppm, 5 V, mode VVI, 500 ohm<br />
• Until: ERI signal (EOS warning)<br />
Flashing “Low battery” LED<br />
• 36 hours<br />
• At: 70 ppm, 5 V, mode VVI, 500 ohm<br />
• Device remains ready for use for at least 30 s when the<br />
battery is removed.<br />
• The set Mode is retained.<br />
a) Registered trademark of Duracell Inc., Bethel, CT 06801<br />
b) When using the battery type MN 1604 Duracell ® , Procell ®<br />
Ambient conditions<br />
Temperature range for operation<br />
Temperature range for storage<br />
Relative humidity<br />
Atmospheric pressure<br />
Noise level<br />
+10°C … +40°C<br />
0°C … +50°C<br />
30% … 75%, non-condensing<br />
700 hPa … 1060 hPa<br />
50 dB
86 Technical Data<br />
English<br />
Dimensions, weight, material<br />
<strong>Reocor</strong> S dimensions 160 mm x 75 mm x 35 mm ±2 mm (without Redel adapter)<br />
<strong>Reocor</strong> S weight With battery, with Redel adapter: 305 g ± 10%<br />
Without battery, with Redel adapter: 260 g ± 10%<br />
Without battery, without Redel adapter: 225 g ± 10%<br />
Dimensions of the Redel 76 mm x 35.5 mm x 29.4 mm<br />
adapter for <strong>Reocor</strong> S<br />
Weight of Redel adapter 35 g ± 10%<br />
for <strong>Reocor</strong> S<br />
Housing material Babyblend FR 3000 (PC-ABS)<br />
Classification<br />
Applied part<br />
CF (cardiac floating), defibrillation protected<br />
classification<br />
Safety class<br />
II b<br />
Protection degree IP31 (water-repellent)<br />
Defibrillation-proof level 5 kV<br />
Operating mode Continuous operation<br />
Estimated service life a)<br />
(according to <br />
EN 60601-1:2007, 4.4)<br />
12 years<br />
a) The service life describes the expected maximum operating life time of the device<br />
after distribution. The expected maximum operating life time is not supported by<br />
any test data.
87 Conformity According to IEC 60601-1-2<br />
Conformity According<br />
to IEC 60601-1-2<br />
Manufacturer guidelines and declaration -<br />
electromagnetic radiation <br />
(IEC 60601-1-2: Table 1)<br />
The device is intended for use in an electromagnetic<br />
environment as described below. The user should<br />
make sure that the device is used in such an environment.<br />
English<br />
Emissions test Compliance<br />
level<br />
HF emission Group 1<br />
according to CISPR 11<br />
HF emission<br />
according to CISPR 11<br />
Emission of harmonic<br />
oscillations according<br />
to IEC 61000-3-2<br />
Voltage fluctuations<br />
according to<br />
IEC 61000-3-3<br />
Class B<br />
Not applicable<br />
Not applicable<br />
Guidelines for the electromagnetic<br />
environment<br />
The device uses HF energy exclusively for<br />
its own function. Therefore, the high-frequency<br />
interference is very low and not<br />
likely to cause any interference in nearby<br />
electronic equipment.<br />
The device is suitable for use in all areas,<br />
excluding residential areas and buildings<br />
that are connected directly to the public<br />
power supply.
88 Conformity According to IEC 60601-1-2<br />
Manufacturer guidelines and declaration –<br />
resistance to electromagnetic interference <br />
(IEC 60601-1-2: Table 2)<br />
English<br />
Test of<br />
resistance to<br />
interference<br />
Electrostatic<br />
discharge (ESD)<br />
according to<br />
IEC 61000-4-2<br />
The device is intended for use in an electromagnetic<br />
environment as described below. The user of the<br />
device should make sure that it is used in such an<br />
environment.<br />
Test level<br />
according to<br />
IEC 60601<br />
±6 kV contact discharge<br />
±8 kV air discharge<br />
Fast transient Not applicable<br />
electric interference/bursts<br />
according to<br />
IEC 61000-4-4<br />
Surges voltages Not applicable<br />
(surges)<br />
according to<br />
IEC 61000-4-5<br />
Voltage drops, Not applicable<br />
brief interruptions<br />
and fluctuations<br />
in the<br />
supply voltage<br />
according to<br />
IEC 61000-4-11<br />
Magnetic field<br />
at the supply<br />
frequencies<br />
(50/60 Hz)<br />
according to<br />
IEC 61000-4-8<br />
Compliance<br />
level<br />
±6 kV contact<br />
discharge<br />
±15 kV air<br />
discharge<br />
Guidelines for the electro-<br />
magnetic environment<br />
Floors should be made of<br />
wood, cement or ceramic tiles.<br />
When the floor consists of a<br />
synthetic material, the relative<br />
humidity must be at least 30%.<br />
3 A/m 30 A/m The magnetic field strength<br />
should correspond to the<br />
typical value in business and<br />
hospital environments.
89 Conformity According to IEC 60601-1-2<br />
Manufacturer guidelines and declaration –<br />
resistance to electromagnetic interference for<br />
all external pacemaker models <br />
(IEC 60601-1-2: Table 3)<br />
Test of<br />
resistance to<br />
interference<br />
Conducted HF<br />
interferences<br />
according to<br />
IEC 61000-4-6<br />
The device is intended for use in an electromagnetic<br />
environment as described below. The user of the<br />
device should make sure that it is used in such an<br />
environment.<br />
Test level<br />
according to<br />
IEC 60601<br />
Compliance<br />
level<br />
10 V rms<br />
10 kHz to 80 MHz<br />
outside of the ISM<br />
bands a d = 0.35 P<br />
Guidelines for the<br />
electromagnetic environment<br />
Portable and mobile radio<br />
devices are not used closer <br />
to any part of the device,<br />
including cables, than the<br />
recommended safe distance.<br />
Recommended safe distance:<br />
English<br />
Radiated HF<br />
interference<br />
according to<br />
IEC 61000-4-3<br />
10 V rms<br />
10 kHz to 80 MHz<br />
inside of the ISM<br />
bands a) d = 1.2 P<br />
10 V/m<br />
10 V/m<br />
800 MHz to 2.5 GHz<br />
d = 1.2 P<br />
for 80 MHz to <br />
800 MHz<br />
d = 2.3<br />
P<br />
for 800 MHz to <br />
2.5 GHz
90 Conformity According to IEC 60601-1-2<br />
English<br />
Test of<br />
resistance to<br />
interference<br />
Test level<br />
according to<br />
IEC 60601<br />
Compliance<br />
level<br />
Guidelines for the<br />
electromagnetic environment<br />
P is the maximum rated power<br />
of the transmitter in watts [W]<br />
according to the information<br />
from the transmitter manufacturer<br />
and d is the recommended<br />
safe distance in<br />
meters [m] b) .<br />
The field strength of stationary<br />
transmitting devices must be<br />
measured on site c) and must be<br />
lower than the compliance<br />
level at all frequencies d) .<br />
Interference can occur in<br />
devices that have the following<br />
warning sign.<br />
COMMENT: These guidelines do not necessarily apply in all situations. The spread of<br />
electromagnetic waves is influenced by absorption and reflection from buildings,<br />
objects, and humans.<br />
a) The ISM bands (for industrial, scientific and medical applications) between<br />
150 kHz and 80 MHz are 6.765 MHz to 6.795 MHz; 13.553 MHz to 13.567 MHz;<br />
26.957 MHz to 27.283 MHz and 40.66 MHz to 40.70 MHz.<br />
b) The compliance level in the ISM frequency bands between 150 kHz and 80 MHz<br />
and in the frequency range 80 MHz to 2.5 GHz is designed to reduce the likelihood<br />
that mobile communication devices cause interference if they are unintentionally<br />
brought into the patient area. For this reason a greater safety distance is recommended<br />
in these frequency ranges (factor 1.2 instead of 0.35).<br />
c) The field strengths of stationary transmitters, such as base stations for cellular<br />
phones and land mobile radios, amateur radio stations and radio and TV broadcasts<br />
cannot be predicted with accuracy. To assess the electromagnetic environment<br />
by fixed HF transmitters, a study of the location should be considered. If the<br />
measured field strength exceeds the HF compliance level at the location where<br />
the device is used, the device must be observed to ensure correct functioning.<br />
Additional measures may be necessary, such as re-orienting or relocating the<br />
external pacemaker.<br />
d) In the frequency range of 150 kHz to 80 MHz the field strengths should be less<br />
than 10 V/m.
91 Conformity According to IEC 60601-1-2<br />
Recommended safe distances to portable and mobile<br />
RF communications equipment <br />
(IEC 60601-1-2: Table 5)<br />
The device is intended for use in an electromagnetic<br />
environment, in which the RF interference is controllable.<br />
The user of the device can help to prevent electromagnetic<br />
interference by maintaining the safe<br />
distance to mobile RF communication equipment<br />
(transmitters) - depending on the power output of the<br />
communication equipment.<br />
English<br />
Rated power of<br />
the transmitter<br />
P [W]<br />
Safe distance d [m] corresponding to transmission frequency<br />
150 kHz to<br />
80 MHz outside<br />
the ISM bands<br />
150 kHz to<br />
80 MHz inside<br />
the ISM bands<br />
80 MHz to<br />
800 MHz<br />
800 MHz to<br />
2.5 GHz<br />
d = 0.35 P d = 1.2 P d = 1.2 P d = 2.3 P<br />
0.01 0.04 0.12 0.12 0.23<br />
0.10 0.11 0.38 0.38 0.73<br />
1.00 0.35 1.20 1.20 2.30<br />
10.00 1.11 3.79 3.79 7.27<br />
100.00 3.50 12.00 12.00 23.00<br />
For transmitters whose rated power is not specified in the table above, the safe distance<br />
can be calculated using the specified formula for the corresponding frequency.<br />
Here P is the rated power of the transmitter in watts [W] and d is the safe distance<br />
in meters [m].<br />
COMMENT 1: The ISM bands (for industrial, scientific and medical applications)<br />
between 150 kHz and 80 MHz are 6.765 MHz to 6.795 MHz; 13.553 MHz to<br />
13.567 MHz; 26.957 MHz to 27.283 MHz and 40.66 MHz to 40.70 MHz.<br />
COMMENT 2: The compliance level in the ISM frequency bands between 150 kHz and<br />
80 MHz and in the frequency range 80 MHz to 2.5 GHz is designed to reduce the likelihood<br />
that mobile communication devices cause interference if they are unintentionally<br />
brought into the patient area. For this reason a greater safety distance is<br />
recommended in these frequency ranges (factor 1.2 instead of 0.35).<br />
COMMENT 3: These guidelines do not necessarily apply in all situations. The spread<br />
of electromagnetic waves is influenced by absorption and reflection from buildings,<br />
objects, and humans.
92 Scope of Delivery and Accessories<br />
Scope of Delivery and<br />
Accessories<br />
Note:<br />
<strong>Reocor</strong> S may only be used with the accessories<br />
developed and tested for this pacemaker.<br />
English<br />
Scope of delivery<br />
Item description Number of Comments Order no.<br />
<strong>Reocor</strong> S 1 365528<br />
Battery 1 Duracell Plus, 6LR61 –<br />
Armband<br />
- For Japan<br />
1 Short 391843<br />
– For all other countries<br />
1 Standard 103704<br />
Redel adapter 1 371263<br />
Protective cover 1 378007<br />
Multilingual technical manual 1 368703<br />
(DE, EN, ES, FR, IT,PT)<br />
Quick Reference Guide DE 370125<br />
Quick Reference Guide EN 1 371305<br />
Quick Reference Guide ES 371306<br />
Quick Reference Guide FR 371307<br />
Quick Reference Guide IT 371308<br />
Quick Reference Guide PT 372231<br />
Quick Reference Guide ZH 371309<br />
Case 1 379384<br />
Accessories<br />
Item Order no. Description Connection<br />
PK-82 128564 Patient cable with two insulated<br />
alligator clips, can be resterilized<br />
PK-83 (2.5 m) 128563 Patient cable with two insulated screw<br />
connections, can be resterilized<br />
PK-83 (1.5 m) 128562 Patient cable with two insulated screw<br />
connections, can be resterilized<br />
PK-83-B (2.5 m) 347485 Patient cable with two insulated 2.3<br />
mm screw connections<br />
PK-83-B (1.5 m) 347606 Patient cable with two insulated 2.3<br />
mm screw connections<br />
PK-175 333959 Patient cable, with 4 screw connections<br />
for connection of temporary<br />
leads, can be resterilized<br />
Direct<br />
connection<br />
Direct<br />
connection<br />
Direct<br />
connection<br />
Redel<br />
adapter<br />
Redel<br />
adapter<br />
Redel<br />
adapter
93 Scope of Delivery and Accessories<br />
Item Order no. Description Connection<br />
PK-67-L 123672 Patient cable, can be resterilized, for<br />
combination with adapter PA-1-B,<br />
PA-2, PA-4<br />
PK-67-S 128085 Patient cable, can be resterilized, for<br />
combination with PK-155 and <br />
Remington model 301-CG<br />
PK-141 (2.8 m) 353181 Patient cable, can be resterilized, with<br />
4 touch-proof alligator clips<br />
<strong>Reocor</strong> armband, 103704 Standard armband<br />
standard<br />
<strong>Reocor</strong> armband,<br />
short<br />
391843<br />
Smaller-sized armband. Suitable for<br />
small arms.<br />
Redel<br />
adapter<br />
Redel<br />
adapter<br />
Redel<br />
adapter<br />
–<br />
–<br />
English<br />
Only for the <strong>USA</strong><br />
Item Manufacturer Description Connection<br />
ADAP-2R<br />
(0.24 m)<br />
Remington<br />
Medical Inc.<br />
Reusable adapter for cable model S-101-97<br />
and model FL-601-97<br />
Redel<br />
adapter<br />
Item<br />
Order no. Description<br />
PA-1-B 123751 For connection to 2-mm adapter or MHW adapter<br />
(adapter for heart wires), can be resterilized<br />
PA-1-C 349723 For connection to 2-mm adapter or MHW adapter<br />
(adapter for heart wires), can be resterilized<br />
PA-2 123157 For connection to IS-1 connector, can be <br />
resterilized<br />
PA-4 123090 With alligator clips, can be resterilized<br />
PK-155<br />
(set with two cables) 337358<br />
Adapters for PK-67-S and PK-67-L<br />
Sterile patient cable, 2-wire with alligator clips for<br />
single use
94 Scope of Delivery and Accessories<br />
Adapters for PK-67-S and PK-67-L (<strong>USA</strong> only)<br />
Item<br />
Model 301-CG<br />
Manufacturer Description<br />
Remington<br />
Medical Inc.<br />
Sterile patient cable, 2-wire with alligator clips<br />
for single use<br />
English<br />
Item<br />
Model 301-CG<br />
Model S-101-97<br />
(2.5 m)<br />
Model FL-601-97<br />
(2.0 m)<br />
Adapters for ADAP-2R (<strong>USA</strong> only)<br />
Manufacturer Description<br />
Remington<br />
Medical Inc.<br />
Remington<br />
Medical Inc.<br />
Remington<br />
Medical Inc.<br />
Sterile patient cable, 2-wire with alligator clips<br />
for single use<br />
Patient cable, 2-wire with alligator clips for single<br />
use<br />
Patient cable, 2-wire with screw terminals for<br />
single use
95 Legend for the Label<br />
Legend for the Label<br />
The label icons symbolize the following:<br />
Symbol<br />
Meaning<br />
<strong>Reocor</strong> S<br />
Redel adapter<br />
English<br />
<strong>BIOTRONIK</strong> order number<br />
Serial number of the device<br />
Date of manufacture of the device<br />
D<br />
S<br />
Acceptable temperature range for storage<br />
Acceptable atmospheric pressure range for storage<br />
Acceptable relative humidity range for storage<br />
Patient with implanted lead<br />
Contents<br />
Disposal sign<br />
Follow the instructions for use!<br />
Caution: Federal (U.S.A.) law restricts this product to sale<br />
by, or on the order of, a physician.<br />
CE mark
English<br />
<br />
96 Legend for the Label
97<br />
<br />
Contenido<br />
Descripción general ...............................................................................99<br />
Descripción del producto .........................................99<br />
Indicaciones ............................................................100<br />
Contraindicaciones .................................................100<br />
Posibles efectos secundarios ................................ 101<br />
Instrucciones de uso .............................................. 101<br />
Señales acústicas y ópticas ...................................107<br />
Instrucciones de uso ............................................................................108<br />
Observaciones generales ....................................... 108<br />
Elementos de mando y LEDs .................................110<br />
Tapa del panel de mando ....................................... 111<br />
Conexión de los electrodos .................................... 113<br />
Puesta en servicio .................................................. 121<br />
Fijación ................................................................... 122<br />
Cambio de pila ........................................................ 122<br />
Modos de estimulación y parámetros ..................................................124<br />
Modos de estimulación ..........................................124<br />
Frecuencia ..............................................................125<br />
Amplitud y duración del impulso ........................... 125<br />
Sensibilidad ............................................................125<br />
Intervalo de interferencia ....................................... 125<br />
Ráfaga .....................................................................126<br />
Manejo, mantenimiento y cuidado ........................................................127<br />
<strong>Reocor</strong> S ................................................................. 127<br />
Cables del paciente reutilizables ...........................128<br />
Mantenimiento, reacondicionamiento, <br />
inspecciones ........................................................... 129<br />
Desecho .................................................................. 130<br />
Seguridad técnica ................................................................................131<br />
Datos técnicos ......................................................................................132<br />
Conformidad según IEC 60601-1-2 ......................................................135<br />
Volumen de suministro y accesorios ....................................................140<br />
Leyenda de la etiqueta .........................................................................143<br />
Español
Español<br />
98
99 Descripción general<br />
Descripción general<br />
Descripción del producto<br />
El <strong>Reocor</strong> S es un marcapasos unicameral externo<br />
para uso hospitalario que funciona a pilas y que se<br />
conecta a electrodos temporales (incl. electrodos miocárdicos<br />
y catéteres de implantación transvenosa). <br />
Se conecta directamente o mediante un cable del<br />
paciente adicional y, de ser necesario, un adaptador.<br />
Dispone de tres modos de estimulación: SSI, S00, SST,<br />
así como una función de ráfagas.<br />
Pueden configurarse el modo de estimulación, la frecuencia,<br />
la sensibilidad, la amplitud de impulso y la<br />
frecuencia de ráfagas.<br />
Los LEDs indican la detección (“Sense”), la estimulación<br />
(“Pace”) y el estado de carga de la pila (“Low battery”). <br />
Se escuchará una señal acústica en caso de elegir<br />
frecuencias muy altas o sensibilidades muy bajas, así<br />
como cuando la impedancia de los electrodos no sea<br />
óptima.<br />
Si se descubre alguna disfunción en la autocomprobación<br />
que sigue al encendido del dispositivo, ello se<br />
indicará mediante LEDs y una señal acústica intermitente.<br />
Si en la autocomprobación que sigue al encendido<br />
no se descubre ningún error, las señales ópticas<br />
y acústicas se desactivarán tras unos pocos segundos.<br />
Algunas de las funciones de seguridad del <strong>Reocor</strong> S:<br />
• Indicación óptica de la detección y la estimulación<br />
• Parámetros de estimulación controlados por<br />
microprocesador<br />
• Monitorización de impedancia de electrodos<br />
• Advertencia óptica cuando la pila está próxima a<br />
agotarse<br />
• Una tapa corrediza transparente sobre los elementos<br />
de mando evita que puedan modificarse<br />
los parámetros accidentalmente.<br />
Español
100 Descripción general<br />
Al <strong>Reocor</strong> S podrán conectarse directamente catéteres<br />
temporales, electrodos temporales y electrodos<br />
con conectores de 2 mm. Se ofrecen asimismo cables<br />
del paciente y adaptadores. Este sistema permite<br />
conectar de forma segura catéteres transvenosos y<br />
electrodos miocárdicos que podrán aplicarse unipolar<br />
o bipolarmente.<br />
Indicaciones<br />
Español<br />
La estimulación temporal con <strong>Reocor</strong> S es apta para<br />
las siguientes aplicaciones en pacientes de cualquier<br />
edad:<br />
• Tratamiento de arritmias y bloqueos cardíacos<br />
• Bradicardia sinusal sintomática<br />
• Síndrome del nodo sinusal<br />
• Estimulación pre, intra y postoperativa de pacientes<br />
con operación del corazón<br />
• Terminación de taquiarritmias supraventriculares<br />
• Estimulación profiláctica para prevenir arritmias<br />
• Estimulación de urgencia<br />
• Comprobación de umbrales de estimulación<br />
Contraindicaciones<br />
• <strong>Reocor</strong> S no puede esterilizarse y no es, por tanto,<br />
idóneo para usar dentro del entorno esterilizado<br />
del paciente.<br />
• La estimulación auricular unicameral estará contraindicada<br />
en los pacientes que presenten ya<br />
trastornos de conducción AV.<br />
• El uso de un marcapasos externo estará contraindicado<br />
si el paciente tiene un marcapasos activo<br />
implantado.
101 Descripción general<br />
Posibles efectos secundarios<br />
Entre las complicaciones resultantes de la estimulación<br />
externa temporal se incluyen, entre otras, posibles<br />
asistolias tras una interrupción repentina de la<br />
estimulación (p.ej. debido a soltarse accidentalmente<br />
el electrodo o el cable del paciente, o bien a causa de<br />
ajustes incorrectos) y dependencia del marcapasos.<br />
Entre las complicaciones que pueden presentarse al<br />
introducir electrodos por vía transvenosa se incluyen,<br />
entre otras: infección de la herida, punción arterial,<br />
roces pericárdicos, perforación cardíaca y disritmias<br />
tras introducir el electrodo.<br />
Instrucciones de uso<br />
Español<br />
Según la estimulación configurada y la enfermedad<br />
subyacente del paciente, es posible que la estimulación<br />
induzca arritmias. Para salvaguardar la seguridad<br />
del paciente, deberían seguirse determinados<br />
procedimientos y tomar ciertas medidas de precaución,<br />
tal y como se describe a continuación. Las medidas<br />
de precaución y los procedimientos especiales<br />
deberían consultarse en las correspondientes publicaciones<br />
médicas.<br />
Grupo de usuarios • El <strong>Reocor</strong> S únicamente habrá de ser utilizado por<br />
personas con conocimientos de cardiología y que<br />
hayan sido instruidas en el uso del dispositivo. Los<br />
usuarios potenciales son los médicos y el personal<br />
sanitario especializado de un hospital.<br />
Principio de<br />
actuación<br />
Uso conforme a lo<br />
previsto<br />
• El <strong>Reocor</strong> S interactúa con el corazón humano.<br />
Tiene lugar también una interacción con la piel<br />
y los vasos sanguíneos del paciente.<br />
• <strong>Reocor</strong> S y los cables y accesorios del dispositivo<br />
admitidos únicamente podrán usarse tal y como se<br />
especifica en este manual técnico.<br />
• No se permite conectar el <strong>Reocor</strong> S a otros dispositivos<br />
electro-médicos.<br />
• No se permite hacer uso del <strong>Reocor</strong> S en lugares<br />
expuestos a riesgo de explosión.
102 Descripción general<br />
Español<br />
Prohibición de<br />
modificaciones<br />
Recambios y<br />
accesorios<br />
Dispositivos<br />
a tener a mano<br />
Preliminares<br />
antes de usar<br />
Conexión de los<br />
electrodos<br />
• Las operaciones de reparación y ampliación o<br />
modificación del dispositivo solo pueden ser <br />
realizadas por el fabricante <strong>BIOTRONIK</strong> o por una<br />
empresa expresamente autorizada por este <br />
fabricante para ello.<br />
• El uso de recambios originales y de accesorios<br />
autorizados por <strong>BIOTRONIK</strong> es fundamental para<br />
garantizar su seguridad. La utilización de otros<br />
componentes exime al fabricante de toda <br />
responsabilidad por daños resultantes y anula la<br />
garantía.<br />
• Deberá tenerse un estimulador de urgencia para el<br />
supuesto de que el paciente sufra dependencia del<br />
marcapasos.<br />
• Deberán tenerse a mano un desfibrilador externo,<br />
oxígeno, intubación y medicación de emergencia.<br />
• Antes de usarlo, deberá examinarse visualmente<br />
el <strong>Reocor</strong> S y comprobar que esté limpio y libre de<br />
daños.<br />
• Nunca use un dispositivo dañado ni un dispositivo<br />
que presente anomalías. Cambie cualquier tipo de<br />
cable, incluso con mínimos daños reconocibles.<br />
• Antes de aplicar el <strong>Reocor</strong> S, el cable del paciente<br />
o electrodos, el usuario debería tocar primero al<br />
paciente para compensar posibles diferencias de<br />
potencial eléctrico.<br />
• Recomendamos encarecidamente al usuario que<br />
compruebe todos los parámetros antes de conectar<br />
los electrodos al <strong>Reocor</strong> S.<br />
• Aunque <strong>Reocor</strong> S está protegido frente a posibles<br />
gotas de agua, conserve limpios y secos todos los<br />
conectores y el dispositivo.<br />
• El <strong>Reocor</strong> S no puede esterilizarse.<br />
• Las conexiones del <strong>Reocor</strong> S y de los electrodos<br />
temporales de estimulación deberán asegurarse<br />
y comprobarse periódicamente.<br />
• El cable del paciente deberá conectarse<br />
primeramente al <strong>Reocor</strong> S y luego a los electrodos.
103 Descripción general<br />
Comportamiento<br />
durante la<br />
utilización<br />
• Los electrodos temporales a los que se conecta el<br />
<strong>Reocor</strong> S, constituyen una conducción eléctrica de<br />
baja impedancia al miocardio. Por tanto, los aparatos<br />
eléctricos conectados a la red eléctrica que se<br />
usen en las inmediaciones del paciente deberán<br />
tener una puesta a tierra conforme a la normativa<br />
vigente.<br />
• Al intervenir en electrodos ya implantados, habrá<br />
que tener sumo cuidado de no tocar sus pins de<br />
contacto ni sus superficies metálicas e impedir<br />
todo contacto de estos con superficies húmedas<br />
o conductoras.<br />
• Si el cable se ha soltado del <strong>Reocor</strong> S, habrá que<br />
volver a conectarlo inmediatamente y comprobar<br />
la seguridad de la conexión.<br />
• En caso de usar electrodos unipolares, deberán<br />
usarse dos electrodos unipolares para garantizar<br />
una estimulación efectiva.<br />
• Mientras se esté haciendo uso del <strong>Reocor</strong> S, deberá<br />
tenerse completamente cerrada la tapa del<br />
panel de mando para evitar toda modificación<br />
accidental de los parámetros del programa.<br />
• Use el <strong>Reocor</strong> S colocado horizontalmente sobre<br />
una superficie no deslizante o fijado al brazo del<br />
paciente con su manguito o suspendido por la anilla<br />
de la cara trasera del dispositivo a una barra de<br />
sueros.<br />
• No se permite tener el <strong>Reocor</strong> S directamente<br />
sobre la piel.<br />
• Mientras se tenga aplicado el <strong>Reocor</strong> S, deberá<br />
controlarse la frecuencia cardíaca del paciente<br />
mediante un monitor de ECG con función de<br />
alarma.<br />
• En caso de perturbaciones por causa de interferencias<br />
electromagnéticas (IEM), el <strong>Reocor</strong> S<br />
adoptará un estado de estimulación S00 si se<br />
llegan a exceder ciertos valores límite.<br />
Español
104 Descripción general<br />
Español<br />
Estimulación con<br />
altas frecuencias<br />
Comportamiento<br />
tras la utilización<br />
Funcionamiento<br />
a pila<br />
• Una estimulación del corazón con frecuencias<br />
superiores a 180 ppm de forma prolongada puede<br />
causar serias complicaciones hemodinámicas.<br />
Use la estimulación a altas frecuencias sólo en el<br />
supuesto de estar garantizada una monitorización<br />
ininterrumpida.<br />
• Tras una desfibrilación o cauterización, deberá<br />
realizarse una prueba de funcionamiento del dispositivo.<br />
• Si el dispositivo se va a tener guardado y sin usar<br />
durante un tiempo, deberá sacársele la pila para<br />
evitar daños por derrame.<br />
• Para la limpieza puede usarse un paño húmedo y<br />
jabón suave. Evite usar agentes limpiadores fuertes<br />
o disolventes orgánicos, ya que estos podrían<br />
deteriorar la carcasa de plástico.<br />
• Las inspecciones y el mantenimiento deberán realizarse<br />
conforme a lo indicado en la página 127.<br />
• No use pilas recargables (baterías). No es fácil<br />
valorar cuánto durarán tales baterías, por lo que<br />
podría superarse el momento de aviso de recambio<br />
ERI 1) con una posible desaparición de la estimulación<br />
como consecuencia.<br />
Se permiten únicamente pilas de 9 V con el código<br />
internacional IEC 6LR61. La batería tipo MN 1604<br />
Duracell ® Procell ® permite efectuar una estimulación<br />
externa de un mínimo de 600 horas antes de<br />
que se requiera cambiarla.<br />
Mientras se cambia de pila con el <strong>Reocor</strong> S en uso,<br />
éste seguirá aún operativo como mínimo 30 s a una<br />
temperatura ambiente de 20 ± 2 °C.<br />
Sin embargo, por razones de seguridad el paciente<br />
debería ser estimulado con otros medios durante<br />
ese tiempo.<br />
1) Con la señal ERI (LED “Low battery” parpadeante) el <strong>Reocor</strong> S avisa de que debe cambiarse<br />
la pila
105 Descripción general<br />
Electrocauterización<br />
• En ningún caso practique una electrocauterización<br />
a menos de 15 cm de los electrodos, ya que ello<br />
conllevaría el riesgo de inducir una fibrilación<br />
ventricular o de causar daños al marcapasos.<br />
Para evitar la inhibición del marcapasos debido a<br />
interferencias, el mismo debería ponerse en modo<br />
de estimulación asíncrona. Durante el tratamiento<br />
debería tenerse controlado en todo momento el<br />
pulso periférico del paciente. Tras el tratamiento<br />
deberá comprobarse el funcionamiento del marcapasos.<br />
Desfibrilación • Los circuitos del <strong>Reocor</strong> S están protegidos contra<br />
la energía de choque que puede ser inducida por<br />
una desfibrilación. Deberían, no obstante, tomarse<br />
las siguientes precauciones, de ser posible.<br />
— La energía elegida no debería ser mayor que lo<br />
necesario para la desfibrilación.<br />
— Entre los electrodos del desfibrilador y los<br />
electrodos del <strong>Reocor</strong> S debería haber al<br />
menos 10 cm de distancia.<br />
— Tras una desfibrilación, deberá Ud. apagar y<br />
volver a encender el <strong>Reocor</strong> S , para que el<br />
dispositivo realice una autocomprobación<br />
completa.<br />
Inmunidad a<br />
interferencias<br />
Tras una desfibrilación deberá comprobarse<br />
además el funcionamiento del marcapasos y el<br />
umbral de estimulación, monitorizándolos<br />
durante un período suficiente.<br />
• El <strong>Reocor</strong> S está protegido frente a perturbaciones<br />
por emisión electromagnética, descarga<br />
electrostática y perturbaciones transmitidas. Las<br />
interferencias emitidas por el <strong>Reocor</strong> S han sido<br />
asimismo minimizadas. Así, el dispositivo cumple<br />
las exigencias de la norma IEC 60601-1-2. Sin<br />
embargo, es posible que los fuertes campos<br />
electromagnéticos, como p.ej. los que se producen<br />
cerca de motores eléctricos, transformadores,<br />
cables de corriente y otros equipos eléctricos,<br />
menoscaben el funcionamiento del <strong>Reocor</strong> S.<br />
Español
106 Descripción general<br />
Español<br />
Las interferencias electromagnéticas pueden dar<br />
lugar a los siguientes errores:<br />
— Reinicialización inesperada (se ejecuta la autocomprobación).<br />
— Se detectan eventos cardíacos, pero no se<br />
muestran en el monitor de ECG.<br />
— El <strong>Reocor</strong> S reacciona de forma inexplicable.<br />
Medidas para restaurar el correcto funcionamiento<br />
del <strong>Reocor</strong> S:<br />
— Compruebe la conexión entre el dispositivo<br />
y los electrodos de estimulación temporales<br />
y, de ser necesario, corríjala.<br />
— Ajuste correcto de la sensibilidad del <strong>Reocor</strong> S:<br />
a menudo, con la mitad del valor de amplitud<br />
promedio de la señal intrínseca se obtiene un<br />
ajuste correcto de sensibilidad.<br />
— Apague todos los dispositivos eléctricos próximos<br />
al <strong>Reocor</strong> S, en caso de que causen interferencias<br />
electromagnéticas y no sea imprescindible<br />
tenerlos encendidos.<br />
— Coloque la fuente de interferencias en un lugar<br />
desde el que no pueda causar interferencias.<br />
— De ser posible sin ningún riesgo: apague el<br />
<strong>Reocor</strong> S y vuelva a encenderlo para reinicializar<br />
así el marcapasos en el modo operativo sin<br />
interferencias.<br />
— Si no desaparece la disfunción, póngase en<br />
contacto con <strong>BIOTRONIK</strong>.
107 Descripción general<br />
Señales acústicas y ópticas<br />
• Durante la autocomprobación seguido a encender<br />
el <strong>Reocor</strong> S se encenderán todos los LEDs y se<br />
escucharán breves señales acústicas. La autocomprobación<br />
finaliza en unos pocos segundos.<br />
• Si no se descubre ningún fallo en la autocomprobación,<br />
se apagarán los LEDs y dejarán de escucharse<br />
las señales.<br />
• Si se descubre algún fallo en la autocomprobación,<br />
parpadearán todos los LEDs permanentemente y<br />
se escucharán señales acústicas de advertencia.<br />
• La necesidad de cambiar de pila se indica con el<br />
parpadeo del LED rojo “Low battery”.<br />
Español<br />
• El LED verde “Sense” señaliza la detección de una<br />
onda P u onda R.<br />
• El LED amarillo “Pace” señaliza los impulsos de<br />
estimulación.<br />
• Los LEDs y las señales acústicas indican asimismo<br />
las siguientes advertencias durante el funcionamiento:<br />
Advertencia Significado Solución<br />
Señal acústica<br />
durante 2 s<br />
Señales acústicas<br />
en secuencia rápida<br />
Señal acústica y parpadeo<br />
de los LEDs<br />
“Pace” y “Sense”<br />
El LED “Low battery”<br />
parpadea<br />
Se ha ajustado una amplitud<br />
de impulso 1 V o una<br />
frecuencia 180 ppm<br />
Impedancia fuera del ámbito<br />
admisible<br />
Ha disparado la protección<br />
de alta frecuencia.<br />
Autocomprobación fallida.<br />
Aviso ERI alcanzado<br />
a) Si se emplea una batería de tipo MN 1604 Duracell ® , Procell ® .<br />
Compruebe si los valores<br />
ajustados son idóneos<br />
para el paciente.<br />
Compruebe si todos los<br />
conectores están firmemente<br />
conectados.<br />
Compruebe si los electrodos<br />
están en la posición<br />
deseada.<br />
Apague el dispositivo<br />
y devuélvalo a<br />
<strong>BIOTRONIK</strong>.<br />
Cambie la pila. El dispositivo<br />
tendrá aún<br />
reserva para unas <br />
36 horas a)
108 Instrucciones de uso<br />
Instrucciones de uso<br />
Observaciones generales<br />
Español<br />
¡Atención!<br />
Autocomprobación<br />
Las conexiones del <strong>Reocor</strong> S y de los electrodos<br />
temporales de estimulación deberán asegurarse y<br />
comprobarse periódicamente.<br />
Tras encenderlo, el <strong>Reocor</strong> S ejecutará una autocomprobación<br />
que dura unos pocos segundos. Incluye:<br />
• Comprobación del código del programa y del<br />
microprocesador<br />
• Prueba de memoria<br />
• Prueba de funcionamiento de LEDs y señales<br />
acústicas<br />
• Comprobación de la capacidad de detección y<br />
estimulación<br />
• Comprobación de la operatividad de la protección<br />
de alta frecuencia<br />
Si se descubre algún fallo en la autocomprobación,<br />
parpadearán todos los LEDs permanentemente y se<br />
escucharán señales acústicas de advertencia. En tal<br />
caso, apague el marcapasos y envíelo a <strong>BIOTRONIK</strong>.<br />
Si no se descubre ningún fallo en la autocomprobación,<br />
se apagarán los LEDs, dejarán de escucharse las<br />
señales y el <strong>Reocor</strong> S comenzará a generar impulsos<br />
de estimulación conforme a los parámetros configurados.<br />
El electrodo negativo (cátodo) no debería, por<br />
tanto, conectarse hasta verificar que se han ajustado<br />
correctamente el modo y la frecuencia de estimulación,<br />
la amplitud de impulso y la sensibilidad.<br />
Con el selector de modo operativo en posición OFF se<br />
evitará que se emitan impulsos de estimulación al<br />
paciente seguido a conectar los electrodos.
109 Instrucciones de uso<br />
Mensajes de<br />
advertencia<br />
Durante el funcionamiento pueden presentarse los<br />
siguientes mensajes de advertencia:<br />
• La necesidad de cambiar de pila se indica con el<br />
parpadeo del LED “Low battery”.<br />
• Si la impedancia de los electrodos se encuentra<br />
fuera del ámbito admisible (p. ej., porque se ha roto<br />
el electrodo o hay un contacto flojo), suena una<br />
secuencia rápida de tonos como máximo 5 seg.<br />
antes de la conexión.<br />
• Si se han elegido para la amplitud de impulso valores<br />
1 V o para la frecuencia valores 180 ppm,<br />
sonará una señal acústica durante 2 s.<br />
• En caso de una frecuencia excesiva (ver pág. 133<br />
“Protección de alta frecuencia”) o si la autocomprobación<br />
descubre errores, sonará continuamente<br />
una señal acústica y parpadearán los LEDs<br />
“Pace” y “Sense”.<br />
Español
Español<br />
<br />
110 Instrucciones de uso<br />
Elementos de mando y LEDs<br />
Fig. 1:<br />
Panel de mando del <strong>Reocor</strong> S
111 Instrucciones de uso<br />
Designación<br />
1 Conexión del paciente<br />
“INDIFF.+”; “DIFF.-”<br />
Función<br />
Para cables con conector de 2 mm <br />
o para adaptadores Redel<br />
(rojo = positivo; azul = negativo)<br />
2 Compartimento de la pila Para pila rectangular de 9 V<br />
3 LED “Low battery” Avisa de voltaje insuficiente de la pila<br />
4 LED “Pace” Luz amarilla de evento de estimulación<br />
5 LED “Sense” Luz verde de evento de detección<br />
6 Ruedecilla “Ampl.” Ajuste de la amplitud de impulso<br />
7 Ruedecilla “Sens.” Ajuste de la sensibilidad<br />
8 “Start burst” Inicia la función de ráfagas<br />
9 Soporte de correa Fijación del <strong>Reocor</strong> S al paciente, la cama o <br />
soporte de sueros<br />
10 Ruedecilla “Burst rate” Ajuste de la frecuencia de ráfagas<br />
11 “Select burst” Selección de la función de ráfagas<br />
12 Ruedecilla “Rate” Ajuste de la frecuencia de estimulación<br />
13 Selector “Mode” Selección del modo de estimulación y encendido/<br />
apagado<br />
Tabella 1: Descripción de los elementos ilustrados en la figura 1<br />
Español<br />
Los valores de los elementos de mando rotulados en<br />
negrita indican valores seguros para el uso previsto<br />
del dispositivo.<br />
Tapa del panel de mando<br />
La tapa estará bloqueada, si se ha deslizado por<br />
encima de dos retenes hasta el tope y el bloqueo se<br />
encuentra justo sobre la trabilla (véase la Fig. 2).<br />
Correcto:<br />
Incorrecto:<br />
Fig. 2:<br />
Posición correcta de la tapa del panel de mando
Español<br />
<br />
112 Instrucciones de uso<br />
Para desbloquear la tapa del panel de mando (véase la<br />
Fig. 3):<br />
Con una mano, empuje hacia arriba la palanca de<br />
bloqueo.<br />
Con la otra mano, desplace simultáneamente<br />
hacia abajo la tapa del panel de mando.<br />
Fig. 3:<br />
Desbloqueo de la tapa del panel de mando<br />
Para bloquear la tapa del panel de mando:<br />
¡Atención!<br />
Deslice la tapa del panel de mando por encima de<br />
la trabilla hacia arriba hasta el tope <br />
(véase la Fig. 2).<br />
Para la limpieza es posible retirar por completo la tapa<br />
del panel de mando, deslizándola hacia abajo de modo<br />
que traspase el tope.<br />
Durante el empleo del <strong>Reocor</strong> S, la tapa del panel de<br />
mando debe estar bloqueada para evitar un reajuste<br />
accidental de selectores y ruedecillas y, con ello, de los<br />
parámetros del programa.
113 Instrucciones de uso<br />
Conexión de los electrodos<br />
Nota:<br />
El <strong>Reocor</strong> S dispone de dos conectores hembra para<br />
enchufar directamente electrodos con conectores de<br />
2 mm protegidos contra roces.<br />
Para conectar cables con conector Redel deberá<br />
enchufarse el adaptador Redel por el lado correcto<br />
y fijarlo a rosca (fig. 4). El adaptador Redel estará<br />
enchufado por el lado correcto cuando pueda enroscarse<br />
al <strong>Reocor</strong> S.<br />
¡El adaptador Redel funcionará correctamente sólo si<br />
se ha conectado por el lado correcto!<br />
Español<br />
Fig. 4:<br />
Adaptador Redel para <strong>Reocor</strong> S
114 Instrucciones de uso<br />
El <strong>Reocor</strong> S podrá Ud. usarlo con los siguientes adaptadores<br />
y cables del paciente:<br />
• Cable del paciente PK-83-B con dos bornes de<br />
rosca para electrodos temporales del lado del<br />
paciente y conector Redel del lado del <strong>Reocor</strong><br />
(usar adaptador Redel).<br />
Español<br />
Fig. 5:<br />
Cable del paciente PK-83-B<br />
• Cable del paciente PK-83 con dos bornes de rosca<br />
aislados para electrodos temporales del lado del<br />
paciente y dos conectores de 2 mm protegidos<br />
contra roces por el lado del <strong>Reocor</strong>.<br />
Fig. 6:<br />
Cable del paciente PK-83<br />
• Cable del paciente PK-82 con dos pinzas de cocodrilo<br />
aisladas para electrodos temporales del lado<br />
del paciente y dos conectores de 2 mm protegidos<br />
contra roces por el lado del <strong>Reocor</strong>.<br />
Fig. 7:<br />
Cable del paciente PK-82
115 Instrucciones de uso<br />
• Cables del paciente PK-67-L y PK-67-S<br />
Los cables del paciente PK-67-L (2,6 m) y PK-67-S<br />
(0,8 m) se diferencian sólo en su longitud. Del lado del<br />
<strong>Reocor</strong> tienen un conector Redel (usar adaptador<br />
Redel) y del lado del paciente un receptáculo para los<br />
adaptadores (ver figura 13) y para los cables desechables<br />
(ver figura 9).<br />
Fig. 8:<br />
Cables del paciente PK-67-L y PK-67-S<br />
• Cable desechable<br />
Los cables desechables Remington 301-CG (sólo EEUU)<br />
y PK-155 con pinzas de cocodrilo se conectan al<br />
paciente mediante el cable PK-67-S.<br />
Español<br />
Fig. 9:<br />
Cable desechable PK-155 y 301-CG (sólo EEUU)<br />
Sólo para EEUU: Los cables desechables S-101-97 y<br />
FL-601-97 de Remington Medical Inc. se conectan al<br />
<strong>Reocor</strong> S mediante el cable adaptador reutilizable<br />
ADAP-2R (fig. 10).<br />
Fig. 10:<br />
Sólo para EEUU: adaptador y cable desechable Remington<br />
El <strong>Reocor</strong> S podrá Ud. usarlo igualmente con cables<br />
del paciente de cuatro conexiones para marcapasos<br />
bicamerales. El <strong>Reocor</strong> S usará sólo el canal ventricular<br />
de estos cables.
Español<br />
<br />
116 Instrucciones de uso<br />
Son posibles los siguientes cables:<br />
• Cable del paciente PK-141 con cuatro pinzas de<br />
cocodrilo del lado del paciente y conector Redel del<br />
lado del <strong>Reocor</strong> (usar adaptador Redel).<br />
El canal ventricular está señalizado con la inscripción<br />
“Vent Diff/Indiff” en las canillas de protección<br />
de roces.<br />
Fig. 11:<br />
Cable del paciente PK-141<br />
• Cable del paciente PK-175 con cuatro bornes de<br />
rosca del lado del paciente y conector Redel del<br />
lado del <strong>Reocor</strong> (usar adaptador Redel). El canal<br />
ventricular está señalizado con la inscripción<br />
“Ventricle”.<br />
Fig. 12:<br />
Cable del paciente PK-175
117 Instrucciones de uso<br />
• Adaptador<br />
En la figura 13 se ilustran adaptadores para conectar<br />
electrodos temporales al <strong>Reocor</strong> S mediante el cable<br />
del paciente bicameral PK-67-L/S.<br />
Los electrodos deberá Ud. conectarlos a la conexión<br />
ventricular del adaptador (señalizada con “V”).<br />
Español<br />
Fig. 13:<br />
Adaptadores para cables del paciente PK-67-L y PK-67-S<br />
PA-1-B y PA-1-C para enchufar conectores de 2 mm<br />
protegidos contra roces o adaptadores MHW (adaptadores<br />
para electrodos temporales)<br />
PA-2 IS-1<br />
PA-4 con pinzas de cocodrilo<br />
¡ADVERTENCIA!<br />
¡ADVERTENCIA!<br />
¡ADVERTENCIA!<br />
¡Atención!<br />
Conectar<br />
Peligro para el paciente a causa de cables dañados.<br />
Los cables dañados afectan al funcionamiento y <br />
suponen un peligro para los pacientes. No emplee bajo<br />
ningún concepto cables dañados.<br />
Peligro a causa de un funcionamiento anómalo. Los<br />
cables húmedos pueden afectar al funcionamiento y<br />
suponen un peligro para los pacientes. No emplee bajo<br />
ningún concepto cables húmedos.<br />
Peligro a causa de corrientes eléctricas. Los contactos<br />
de cables sin utilizar pueden derivar corrientes eléctricas<br />
al paciente. Fije los contactos de cables sin<br />
utilizar en las inmediaciones del paciente.<br />
Reacciones alérgicas, inflamaciones. Evite que el<br />
cable entre en contacto con heridas o con la piel del<br />
paciente.
118 Instrucciones de uso<br />
Español<br />
Nota:<br />
Nota:<br />
Nota:<br />
Verifique antes de la utilización de los cables <br />
se las fundas protectoras esten correctamente <br />
posicionadas.<br />
Si se usan cables o adaptadores de aplicaciones bicamerales,<br />
los electrodos deberán conectarse al canal<br />
ventricular (señalizado con la palabra “Ventricle” o “V”).<br />
No conecte el cable del paciente al electrodo de estimulación<br />
temporal del paciente antes de conectarlo al<br />
<strong>Reocor</strong> S.<br />
Conexión directa<br />
Si el <strong>Reocor</strong> S se va a usar sin adaptador Redel, <br />
podrán conectarse electrodos temporales y catéteres<br />
temporales al cable del paciente PK-82 o PK-83 <br />
directamente en los conectores hembra “INDIFF.+” y<br />
“DIFF.-”.<br />
Cable del paciente<br />
El cable del paciente se conecta al <strong>Reocor</strong> S mediante<br />
un adaptador Redel.<br />
Conecte el adaptador Redel al <strong>Reocor</strong> S.<br />
Enrósquelo para que quede firme.<br />
Enchufe el conector Redel del cable del paciente al<br />
conector Redel hembra del adaptador.
119 Instrucciones de uso<br />
Variantes de conexión<br />
Catéter temporal con conectores de 2 mm o <br />
electrodo temporal con adaptador de 2 mm<br />
Usted podrá conectar el <strong>Reocor</strong> S sin más cables ni<br />
adaptadores directamente a un catéter temporal con<br />
conector de 2 mm protegido contra roces o a un electrodo<br />
temporal con adaptador de 2 mm. Todas las<br />
demás variantes de conexión figuran en la siguiente<br />
tabla.<br />
Conexión por el<br />
lado del paciente<br />
Cable <strong>BIOTRONIK</strong> Conexión por el<br />
lado del dispositivo<br />
Conexiones recomendadas<br />
Conexión del<br />
<strong>Reocor</strong> S<br />
Conexión directa (sin cable <strong>BIOTRONIK</strong>)<br />
Conectores<br />
hembra de 2 mm<br />
2 mm PK-67-S/L con PA-1-C Conector Redel Adaptador Redel<br />
Bornes de rosca PK-83B con TC Adapt Conector Redel Conectores<br />
hembra de 2 mm<br />
Bornes de rosca PK-83 con TC Adapt Conectores de<br />
2 mm<br />
Conexiones posibles<br />
Conectores<br />
hembra de 2 mm<br />
2 mm PK-67-S/L con PA-1-B Conector Redel Adaptador Redel<br />
Pinzas de cocodrilo PK-141 Conector Redel Adaptador Redel<br />
Pinzas de cocodrilo PK-67-S/L con PA-4 Conector Redel Adaptador Redel<br />
Pinzas de cocodrilo PK-67-S/L con PK-155 Conector Redel Adaptador Redel<br />
Pinzas de cocodrilo PK-82<br />
Conectores de<br />
2 mm<br />
Conectores<br />
hembra de 2 mm<br />
Español<br />
Conexión por el<br />
lado del paciente<br />
Electrodo temporal con aguja separable o con<br />
extremo flexible (máx. 2,3 mm de diámetro)<br />
Cable <strong>BIOTRONIK</strong> Conexión por el<br />
lado del dispositivo<br />
Conexiones recomendadas<br />
Conexión del<br />
<strong>Reocor</strong> S<br />
Bornes de rosca PK-83B Conector Redel Adaptador Redel<br />
Bornes de rosca PK-83 Conectores de<br />
2 mm<br />
Conexiones posibles<br />
Conectores<br />
hembra de 2 mm<br />
Bornes de rosca PK-175 Conector Redel Adaptador Redel<br />
Pinzas de cocodrilo PK-141 Conector Redel Adaptador Redel<br />
Pinzas de cocodrilo PK-67-S/L con PA-4 Conector Redel Adaptador Redel<br />
Pinzas de cocodrilo PK-67-S/L con PK-155 Conector Redel Adaptador Redel<br />
Pinzas de cocodrilo PK-82<br />
Conectores de<br />
2 mm<br />
Conectores<br />
hembra de 2 mm
120 Instrucciones de uso<br />
Electrodo implantado con conector IS-1<br />
Español<br />
Conexión por el<br />
lado del paciente<br />
Nota:<br />
Cable <strong>BIOTRONIK</strong> Conexión por el<br />
lado del dispositivo<br />
Conexiones recomendadas<br />
Conexión del<br />
<strong>Reocor</strong> S<br />
Conector hembra PK-67-S/L con PA-2 Conector Redel Adaptador Redel<br />
IS-1<br />
Conexiones posibles<br />
Pinzas de cocodrilo PK-141 Conector Redel Adaptador Redel<br />
Pinzas de cocodrilo PK-67-S/L con PA-4 Conector Redel Adaptador Redel<br />
Pinzas de cocodrilo PK-67-S/L con PK-155 Conector Redel Adaptador Redel<br />
Pinzas de cocodrilo PK-82<br />
Conectores de<br />
2 mm<br />
Conectores<br />
hembra de 2 mm<br />
¡Si se usan cables bicamerales (PK-141, PK-175,<br />
PK-67-S/L), el <strong>Reocor</strong> S usará sólo el canal ventricular!<br />
Polaridad<br />
De forma básica, el <strong>Reocor</strong> S estimula bipolarmente.<br />
Sin embargo, podrá usarse tanto con electrodos de<br />
estimulación temporales bipolares como unipolares.<br />
Si se usa con electrodos unipolares, deberán conectarse<br />
2 electrodos.<br />
Separación de las conexiones<br />
Desemborne el cable del paciente del electrodo de<br />
estimulación temporal del paciente o suelte la<br />
conexión directa.<br />
Separación del conector Redel<br />
• Tire hacia atrás del anillo de unión del conector<br />
Redel y desenchufe el conector Redel del conector<br />
hembra Redel.
121 Instrucciones de uso<br />
Puesta en servicio<br />
¡Atención!<br />
El uso del <strong>Reocor</strong> S es idéntico en todos los modos<br />
operativos. A la hora de usar el dispositivo, siga este<br />
orden (los números entre paréntesis se refieren a la<br />
figura 1 de la página 110 de este manual técnico).<br />
• Colocación de la pila<br />
• Deslizar hacia abajo la tapa del panel de mando<br />
• Preparación del paciente: colocar los electrodos,<br />
pero sin conectarlos aún al marcapasos.<br />
• Preparación del <strong>Reocor</strong>:<br />
Ajustar la frecuencia de estimulación con la ruedecilla<br />
“Rate” (12).<br />
Ajustar la amplitud de estimulación con la ruedecilla<br />
“Ampl.” (6).<br />
• Elegir el modo de estimulación con el selector<br />
“Mode” (13). Éste sirve además como botón de<br />
encendido del dispositivo.<br />
• Si la autocomprobación es correcta, parpadearán<br />
simultáneamente dos veces los LEDs del panel de<br />
mando.<br />
• Si el LED “Low battery” (3) parpadea, deberá cambiarse<br />
la pila (para cambiar la pila, ver página 122).<br />
• Conectar los electrodos. El LED “Pace” amarillo (4)<br />
parpadeará al unísono con cada impulso de estimulación.<br />
• Ajustar la sensibilidad con la ruedecilla “Sens.” (7)<br />
de forma tal que el LED verde “Sense” (5) parpadee<br />
con cada evento de detección.<br />
• Debería configurarse un margen de seguridad<br />
suficiente que garantice una detección fiable.<br />
• Controlar el ECG del paciente y, de ser necesario,<br />
reajustar la amplitud y la sensibilidad.<br />
Mientras se tenga aplicado el <strong>Reocor</strong> S, deberá controlarse<br />
la frecuencia cardíaca del paciente mediante<br />
un monitor de ECG con función de alarma.<br />
Español
122 Instrucciones de uso<br />
Fijación<br />
El <strong>Reocor</strong> S se usará colocado horizontalmente sobre<br />
una superficie no deslizante o fijado al brazo del<br />
paciente con su manguito o suspendido por la anilla de<br />
la cara trasera del dispositivo a una barra de sueros.<br />
Para fijar el <strong>Reocor</strong> S a un soporte de sueros, gire<br />
hacia afuera la anilla de su cara trasera. Así se podrá<br />
usar de forma segura y el cable del paciente no estará<br />
sometido a fuerzas de tracción.<br />
Español<br />
Cambio de pila<br />
Si el LED “Low battery” (3) empieza a parpadear, <br />
ello indica que la pila está próxima a agotarse. Si se<br />
emplea una batería del tipo MN 1604 Duracell ® <br />
Procell ® , el tiempo de servicio restante es aproximadamente<br />
de 36 horas. No obstante, debería cambiarse<br />
la batería sin la menor dilación.<br />
El <strong>Reocor</strong> S deberá usarse con una pila de 9 V con<br />
código internacional IEC 6LR61. Emplee exclusivamente<br />
pilas alcalinas de manganeso a prueba de<br />
interrupciones. La batería tipo MN 1604 Duracell ®<br />
Procell ® permite efectuar a una temperatura de<br />
20 ± 2 °C una estimulación externa de un mínimo de<br />
600 horas antes de que se requiera cambiarla.<br />
Mientras se cambia de pila con el <strong>Reocor</strong> S en uso,<br />
éste seguirá aún operativo unos 30 s a una temperatura<br />
ambiente de 20 ± 2 °C.<br />
Sin embargo, por razones de seguridad el paciente<br />
debería ser estimulado con otros medios durante ese<br />
tiempo.<br />
No use pilas recargables (baterías). No es fácil valorar<br />
cuánto durarán tales baterías, por lo que podría superarse<br />
el momento de aviso de recambio ERI, con una<br />
posible desaparición de la estimulación como consecuencia.<br />
El compartimento de la pila (2) se halla en el lateral<br />
derecho del dispositivo. Para abrirlo, oprima la pestaña<br />
azul hacia arriba al tiempo que extrae el compartimento<br />
hacia la derecha. Saque la pila con cuidado.
123 Instrucciones de uso<br />
¡Atención!<br />
Es posible que la nueva pila tenga un capuchón de<br />
goma que protege sus polos. Retire éste antes de<br />
colocar la nueva pila.<br />
Una marca en el compartimento de la pila indica la<br />
polaridad recomendada. Sin embargo, lo único que<br />
deberá observarse necesariamente es que los polos<br />
de la pila miren hacia el centro de la carcasa. La posición<br />
de los polos negativo y positivo es de libre elección.<br />
Introduzca la nueva pila colocando primeramente su<br />
parte inferior (la contraria a los polos) en el compartimento<br />
(fig 14).<br />
Español<br />
Fig. 14:<br />
Colocación de la pila<br />
Introduzca el compartimento y oprima la pestaña azul<br />
hacia abajo hasta escuchar cómo encastra.<br />
Nota:<br />
Si el marcapasos se va a tener guardado y sin usar<br />
durante un tiempo, es aconsejable sacarle la pila para<br />
evitar daños por derrame.
124 Modos de estimulación y parámetros<br />
Modos de estimulación<br />
y parámetros<br />
Modos de estimulación<br />
Español<br />
Modo S00<br />
Modo SSI<br />
Modo SST<br />
Estimulación de AF<br />
Dispone de tres modos de estimulación: S00, SSI, SST<br />
y estimulación de alta frecuencia (Burst).<br />
En caso de perturbaciones por causa de interferencias<br />
electromagnéticas (IEM), el <strong>Reocor</strong> S adoptará el<br />
modo de estimulación S00 si se llegan a exceder<br />
ciertos valores límite y se mantendrá en ese estado<br />
mientras dure la perturbación.<br />
El marcapasos genera impulsos de frecuencia<br />
constante. Los impulsos son asíncronos, es decir, no<br />
sincronizados con los latidos intrínsecos del corazón.<br />
Este modo funcionará como V00 al conectarse al<br />
ventrículo y como A00 al conectarse a la aurícula.<br />
El marcapasos inhibirá los impulsos en caso de detectar<br />
potenciales intracardíacos. Generará impulsos<br />
cuando no detecte eventos dentro de un intervalo<br />
correspondiente a la frecuencia elegida.<br />
Este modo funcionará como VVI al conectarse al<br />
ventrículo y como AAI al conectarse a la aurícula.<br />
Los modos de estimulación con desencadenante SST<br />
equivalen a los modos SSI, con la diferencia de que al<br />
detectar un evento fuera del período refractario no<br />
tendrá lugar una inhibición de impulsos sino que se<br />
generará inmediatamente un impulso para la cámara<br />
correspondiente.<br />
La frecuencia de la función de ráfagas podrá Ud. elegirla<br />
con la ruedecilla (10) en un rango entre 60 ppm<br />
y 1000 ppm. <br />
Para activar esta función se deben pulsar dos botones:<br />
primero se pulsará el botón “Select burst” (11) y luego,<br />
antes de que pasen 2 segundos, el botón “Start burst”<br />
(8). Se emitirá el impulso mientras se tenga pulsado<br />
este botón.
125 Modos de estimulación y parámetros<br />
Frecuencia<br />
¡ADVERTENCIA!<br />
La frecuencia podrá Ud. regularla con la ruedecilla<br />
“Rate” (12) desde 30 ppm hasta 250 ppm. Si elige Ud.<br />
un valor de más de 180 ppm, el dispositivo emitirá una<br />
señal acústica de advertencia durante 2 s.<br />
Una estimulación del corazón con frecuencias superiores<br />
a 180 ppm de forma prolongada puede causar<br />
serias complicaciones hemodinámicas. Use la estimulación<br />
a altas frecuencias sólo en el supuesto de<br />
estar garantizada una monitorización ininterrumpida.<br />
Amplitud y duración del impulso<br />
La amplitud de impulso podrá Ud. regularla con la<br />
ruedecilla “Ampl.” (6) en un rango entre 0,1 V y 17 V. <br />
Si elige Ud. un valor de menos de 1 V, el dispositivo<br />
emitirá una señal acústica de advertencia durante 2 s.<br />
La duración del impulso es de 1 ms.<br />
La estimulación debería comprobarse a intervalos<br />
regulares, para asegurarse de que hay estimulación<br />
efectiva y que se ha elegido un margen de seguridad<br />
adecuado.<br />
Español<br />
Sensibilidad<br />
La sensibilidad podrá Ud. regularla con la ruedecilla<br />
“Sens.” (7) en un rango entre 1 mV y 20 mV. Debería<br />
comprobarla a intervalos regulares, para asegurarse<br />
de que hay una correcta detección y que se ha elegido<br />
un margen de seguridad adecuado.<br />
Intervalo de interferencia<br />
El intervalo de interferencia es iniciado tanto por los<br />
eventos de detección como por los de estimulación.<br />
El intervalo se reinicializa en caso de detectar ruido<br />
durante los 80 ms de duración del intervalo, lo que<br />
dará lugar a una estimulación asíncrona con la frecuencia<br />
programada mientras dure la interferencia.
126 Modos de estimulación y parámetros<br />
Ráfaga<br />
Español<br />
¡ADVERTENCIA!<br />
La frecuencia de la función auricular “Burst rate”<br />
podrá Ud. regularla con la ruedecilla (10) en un rango<br />
entre 60 ppm y 1000 ppm.<br />
Para activar esta función se deben pulsar dos botones:<br />
primero se pulsará el botón “Select burst” (11) y luego,<br />
antes de que pasen 2 segundos, el botón “Start burst”<br />
(8). Se emitirá el impulso mientras se tenga pulsado<br />
este botón.<br />
Una estimulación del corazón con frecuencias superiores<br />
a 180 ppm de forma prolongada puede causar<br />
serias complicaciones hemodinámicas. Use la estimulación<br />
a altas frecuencias sólo en el supuesto de<br />
estar garantizada una monitorización ininterrumpida.<br />
El modo con estimulación de alta frecuencia sirve para<br />
terminar determinadas taquicardias supraventriculares<br />
(TSV) y debería tomarse en consideración únicamente<br />
para aplicaciones auriculares. La aplicación <br />
de estímulos asíncronos de alta frecuencia puede<br />
interrumpir una TSV mediante la despolarización de<br />
partes de una vía de reentrada. Aun cuando un foco<br />
ectópico auricular sea el causante de una TSV, la aplicación<br />
de estímulos de alta frecuencia a la aurícula<br />
puede dar lugar a una mayor supresión del centro<br />
ectópico.<br />
En conjunción con la estimulación auricular de alta<br />
frecuencia habrá que tener en cuenta diversos riesgos.<br />
Entre ellos tenemos posibles estimulaciones ventriculares<br />
y fibrilación o taquicardia ventricular. Esto<br />
puede ser causado por una mala colocación de los<br />
electrodos o por la existencia de vías anormales de<br />
conducción de excitación que dejan a un lado la conducción<br />
normal de excitación AV (p.ej. en el síndrome<br />
de Wolff-Parkinson-White). Pueden surgir otros problemas,<br />
tales como malestar del paciente o asistolias<br />
tras una estimulación de alta frecuencia.
127 Manejo, mantenimiento y cuidado<br />
Manejo, mantenimiento y cuidado<br />
<strong>Reocor</strong> S<br />
¡ADVERTENCIA!<br />
¡Atención!<br />
Limpieza<br />
Desinfección<br />
El <strong>Reocor</strong> S es un dispositivo de precisión altamente<br />
desarrollado que debería ser tratado con el debido<br />
cuidado. Sus funciones pueden verse menoscabadas<br />
por efecto de fuerzas mecánicas (p.ej. si llega a caerse<br />
al suelo).<br />
En tales casos devuelva el dispositivo a <strong>BIOTRONIK</strong>.<br />
Antes de usarlo, el marcapasos deberá haber estado<br />
al menos dos horas a las condiciones ambientales<br />
especificadas para su uso (véase página 134).<br />
Cada vez que se vaya a usar, deberá comprobarse primeramente<br />
que la carcasa, los elementos de mando,<br />
las conexiones y el cable del paciente no presenten<br />
daños mecánicos ni deformaciones, que no haya partes<br />
sueltas, dislocadas ni sucias.<br />
Nunca use un dispositivo dañado ni un dispositivo que<br />
presente anomalías, particularmente si se le ha caído<br />
al suelo o si ha sufrido daños por voltaje de desfibrilación<br />
o de altas frecuencias.<br />
Use el <strong>Reocor</strong> S colocado horizontalmente sobre una<br />
superficie no deslizante o fijado al brazo del paciente<br />
con su manguito o suspendido por la anilla de la cara<br />
trasera del dispositivo a una barra de sueros.<br />
No se permite tener el <strong>Reocor</strong> S directamente sobre la<br />
piel.<br />
Para limpiar el <strong>Reocor</strong> S puede usarse un paño húmedo<br />
y, de ser necesario, jabón suave. Evite usar agentes<br />
limpiadores fuertes o disolventes orgánicos, como<br />
p.ej. éter o bencina, ya que estos podrían deteriorar la<br />
carcasa de plástico.<br />
Para desinfectar el dispositivo, pásele un paño previamente<br />
humedecido con una solución desinfectante<br />
(p.ej. Aerodesin 2000 o Lysoform D). Al preparar la<br />
solución, observe las proporciones de dilución especificadas<br />
por el fabricante.<br />
Español
128 Manejo, mantenimiento y cuidado<br />
Nota:<br />
Esterilización<br />
¡Atención!<br />
Tras limpiarlo o desinfectarlo, no se permite hacer uso<br />
del <strong>Reocor</strong> S hasta que transcurra una hora.<br />
El <strong>Reocor</strong> S no puede esterilizarse. Si el dispositivo<br />
debe usarse en un entorno estéril, podrá Ud. introducirlo<br />
en una funda esterilizada.<br />
Se recomienda encargar la revisión anual del dispositivo<br />
a técnicos autorizados por el fabricante.<br />
Aunque <strong>Reocor</strong> S está protegido frente a posibles<br />
gotas de agua, procure conservar el dispositivo limpio<br />
y seco.<br />
Español<br />
Limpieza<br />
Desinfección<br />
Cables del paciente reutilizables<br />
Antes de abrir el envase de un cable estéril, deberá<br />
examinarse que el envase esté intacto, para constatar<br />
si de hecho la esterilidad está garantizada.<br />
Los cables del paciente reutilizables podrán limpiarse<br />
y desinfectarse de diversas formas con agentes de<br />
limpieza hospitalarios. No se permite, sin embargo,<br />
usar sustancias agresivas como p.ej. la acetona.<br />
Como método de limpieza de los cables se recomienda<br />
usar un paño humedecido con jabón de manos libre de<br />
alcohol o con el agente limpiador Stabimed de la<br />
marca Braun. A continuación deberán enjuagarse con<br />
agua libre de electrolitos para eliminar todo resto del<br />
agente limpiador y luego secarse con un paño seco y<br />
limpio.<br />
Para desinfectarlos sumergiéndolos en un baño se<br />
usará un agente desinfectante de instrumental médico<br />
de base aldehídica (p.ej. Lysoformin 3000) o de base<br />
alcohólica (p.ej. Aerodesin 2000), tal y como indique el<br />
fabricante del producto y cumpliendo las correspondientes<br />
directivas hospitalarias.<br />
Tras desinfectarlos, los cables deberán enjuagarse<br />
con agua libre de electrolitos para eliminar así todo<br />
resto del agente desinfectante.<br />
Esterilización Puede realizarse una esterilización al vapor a 121 °C<br />
y 1,1 bar de presión durante 20 minutos.
129 Manejo, mantenimiento y cuidado<br />
Mantenimiento, reacondicionamiento,<br />
inspecciones<br />
Comprobación<br />
previa al uso<br />
Inspección<br />
La única operación de mantenimiento necesaria es el<br />
cambio de pila (ver página 122).<br />
No es necesario realizar otros trabajos de mantenimiento.<br />
Cada vez que vaya a usar el dispositivo, debería Ud.<br />
examinarlo brevemente. Se trata de una comprobación<br />
visual y una sencilla prueba de funcionamiento.<br />
Comprobación visual:<br />
• Ver si en la carcasa hay daños mecánicos, deformaciones,<br />
piezas sueltas, agrietamientos, etc.<br />
• Ver si en la zona de conexión de cables hay daños<br />
mecánicos<br />
• Comprobar la legibilidad de las rotulaciones<br />
Prueba de funcionamiento:<br />
Observe el resultado de la rutina de autocomprobación<br />
que el dispositivo realiza automáticamente tras<br />
encenderlo.<br />
Debería realizarse una inspección<br />
• Tras haber usado el dispositivo junto con instrumental<br />
quirúrgico de AF o desfibriladores<br />
• Si se sospecha de anomalías en el dispositivo<br />
• Una vez al año<br />
Dicha inspección deberá realizarse conforme a las<br />
instrucciones del fabricante. Estas instrucciones<br />
podrá Ud. pedirlas en caso de necesitarlas. En ellas se<br />
relacionan todos los pasos de comprobación necesarios<br />
y el equipamiento requerido a tal efecto.<br />
Español
130 Manejo, mantenimiento y cuidado<br />
Desecho<br />
Español<br />
Nota:<br />
El <strong>Reocor</strong> S lleva grabado en la placa de características<br />
el símbolo de un contenedor de basura tachado.<br />
Este símbolo indica que para la recepción y el desecho<br />
del dispositivo rige la directiva europea 2002/96/CEE<br />
de residuos de aparatos eléctricos y electrónicos<br />
(directiva de RAEE).<br />
Los dispositivos usados y los accesorios descartados,<br />
como p.ej. cables del paciente y adaptadores, debería<br />
Ud. devolverlos a <strong>BIOTRONIK</strong>. Así se garantizará que<br />
tales residuos se desechen en consonancia con la aplicación<br />
nacional de la directiva de RAEE.<br />
Los cables que se vayan a eliminar y hayan estado <br />
en contacto con sangre deben desecharse conforme <br />
a la normativa medioambiental vigente para residuos<br />
médicos contaminados. Los cables que no estén <br />
contaminados deben eliminarse conforme a la <br />
Directiva europea 2002/96/CE sobre residuos de <br />
aparatos eléctricos y electrónicos (RAEE).<br />
Las pilas usadas deberán tratarse como basura especial<br />
y será responsabilidad del usuario desecharlas<br />
correctamente.<br />
En caso de tener alguna duda, consulte a <strong>BIOTRONIK</strong>.
131 Seguridad técnica<br />
Seguridad técnica<br />
¡ADVERTENCIA!<br />
El marcapasos externo <strong>Reocor</strong> S cumple las normativas<br />
internacionales de seguridad de dispositivos electromédicos<br />
conforme a IEC 60601-1 y IEC 60601-1-2,<br />
así como la normativa internacional IEC 60601-2-31<br />
relativa a marcapasos externos temporales.<br />
Las siguientes características especiales proporcionan<br />
mayor seguridad al paciente:<br />
• Sin elementos metálicos (según indica la normativa<br />
IEC) que puedan tocarse.<br />
• Su diseño cumple las normativas para la clase de<br />
dispositivos CF (cardiac floating) y está homologado<br />
para el tratamiento directo del corazón.<br />
El marcapasos cumple las exigencias de las normas<br />
internacionales en materia de protección de<br />
desfibrilación.<br />
• La tapa cerrada de la unidad de mando protege al<br />
marcapasos frente a salpicaduras de agua.<br />
Los electrodos temporales que están conectados al<br />
<strong>Reocor</strong> S constituyen una conducción eléctrica de baja<br />
impedancia al miocardio. Por tanto, los aparatos eléctricos<br />
conectados a la red eléctrica que se usen en las<br />
inmediaciones del paciente deberán tener una puesta<br />
a tierra conforme a la normativa vigente.<br />
No se permite hacer uso del marcapasos en lugares<br />
expuestos a riesgo de explosión.<br />
Todos los demás trabajos de mantenimiento y reparación<br />
deberían ser realizados únicamente por<br />
<strong>BIOTRONIK</strong>.<br />
Español
132 Datos técnicos<br />
Datos técnicos<br />
Símbolos<br />
Observar las instrucciones del manual técnico<br />
Marca de la posición de la pila en su compartimento<br />
Español<br />
A desechar como ordena la directiva de residuos de<br />
aparatos eléctricos y electrónicos<br />
Clasificación del componente de aplicación: CF<br />
(cardiac floating), a prueba de desfibrilación<br />
IP31<br />
OFF<br />
Hidrófugo, grado de protección IP31<br />
Apagado (con el selector “Mode”)<br />
Parámetros configurables<br />
Modos de estimulación S00, SSI, SST<br />
Frecuencia básica (30 … 250 ppm) ± 1 ppm A frecuencias 180 ppm<br />
sonará una señal de advertencia<br />
Amplitud de impulso 0,1 … 17 V ± máx (50 mV, 10 %) A una amplitud de impulso<br />
1 V sonará una señal de<br />
advertencia<br />
Sensibilidad 1 … 20 mV ± 15 % Para impulso de 40 ms sen 2<br />
Frecuencia de ráfaga (A) (60 … 1000 ppm) ± 20 ppm<br />
Parámetros fijos<br />
Duración del impulso 1 ms ± 5 %<br />
Auto Short tras<br />
< 20 ms ±10 %<br />
estimulación<br />
Intervalo de<br />
80 ms ± 5 ms<br />
interferencia<br />
Blanking en canal activo 110 ms ± 3 ms<br />
Período refractario<br />
(30 … 150) ppm<br />
(151 … 200) ppm<br />
(201 … 250) ppm<br />
<br />
225 ms ± 5 ms<br />
200 ms ± 5 ms<br />
175 ms ± 5 ms
133 Datos técnicos<br />
Parámetros fijos<br />
Protección de alta<br />
frecuencia<br />
1 … 180 ppm<br />
<br />
181 … 250 ppm<br />
Forma del impulso<br />
<br />
<br />
286 ms ± 10 %<br />
<br />
214 ms ± 10 %<br />
Asimétrico, bifásico<br />
<br />
<br />
286 ms = 210 ppm, no válido<br />
en caso de “Burst”<br />
214 ms = 280 ppm, no válido<br />
en caso de “Burst”<br />
Monitorización de impedancia de electrodos<br />
Aviso acústico<br />
A partir de 2000 15%, con 5 V de amplitud<br />
Conexión de los electrodos Conectores hembra de 2 mm protegidos contra roces;<br />
conector hembra Redel de seis polos mediante adaptador<br />
Redel<br />
Español<br />
Datos eléctricos/pila<br />
Pila<br />
Polaridad<br />
Protección contra<br />
polaridad inversa<br />
Consumo de energía<br />
Tiempo de servicio con pila<br />
nueva b)<br />
Catódica<br />
No: la polaridad es irrelevante<br />
Típicamente 1 mA (70 ppm, 5,0 V, 500 )<br />
Fin del tiempo de uso (EOS) LED parpadeante “Low battery”<br />
Tiempo de servicio • 36 horas<br />
restante tras señal de ERI b) • A 70 ppm, 5 V, modo VVI, 500 ohmios<br />
Comportamiento durante<br />
el cambio de pila<br />
• Tipo alcalino manganeso: IEC 6LR61/ANSI 1604A<br />
• 9 V a prueba de interrupciones<br />
• p. ej. MN1604 Duracell ® Procell ®a)<br />
• 600 h (-10 %) a 20 °C (± 2 °C)<br />
• A 70 ppm, 5 V, modo VVI, 500 ohmios<br />
• Hasta señal ERI (advertencia EOS)<br />
• Al sacar la pila, el dispositivo permanecerá<br />
operativo aún 30 s más como mínimo.<br />
• El modo activo en ese momento permanecerá<br />
habilitado.<br />
a) Marca registrada de Duracell Inc., Bethel, CT 06801<br />
b) Si se emplea una batería de tipo MN 1604 Duracell ® , Procell ®
134 Datos técnicos<br />
Condiciones del entorno<br />
Temperaturas de uso +10 °C … +40 °C<br />
Temperaturas de almacenamiento 0 °C … +50 °C<br />
Humedad relativa del aire 30 % … 75 %, sin condensación<br />
Presión atmosférica<br />
700 hPa … 1060 hPa<br />
Nivel de ruido<br />
50 dB<br />
Español<br />
Dimensiones, peso, material<br />
Dimensiones del <strong>Reocor</strong> S<br />
160 mm x 75 mm x 35 mm ± 2 mm <br />
(sin adaptador Redel)<br />
Peso del <strong>Reocor</strong> S Con pila, con adaptador Redel: 305 g ± 10%<br />
Sin pila, con adaptador Redel: 260 g ± 10%<br />
Sin pila, sin adaptador Redel: 225 g ± 10%<br />
Dimensiones del adaptador Redel 76 mm x 35,5 mm x 29,4 mm<br />
para <strong>Reocor</strong> S<br />
Peso del adaptador Redel para 35 g ± 10 %<br />
<strong>Reocor</strong> S<br />
Material de la carcasa<br />
Babyblend FR 3000 (PC-ABS)<br />
Clasificación<br />
Clasificación del componente de<br />
aplicación<br />
Clase de protección<br />
Grado de protección<br />
Resistencia a la desfibrilación<br />
Modo operativo<br />
CF (cardiac floating), a prueba de desfibrilación<br />
II b<br />
IP31 (hidrófugo)<br />
5 kV<br />
Régimen de uso continuo<br />
Vida útil estimada a) (según <br />
EN 60601-1:2007, 4.4)<br />
12 años<br />
a) La vida útil se entiende como la vida máxima esperada de servicio del dispositivo<br />
tras la primera puesta en funcionamiento. La vida máxima esperada de servicio<br />
no es comprobada por datos de prueba.
135 Conformidad según IEC 60601-1-2<br />
Conformidad<br />
según IEC 60601-1-2<br />
Directrices y declaración del fabricante –<br />
Emisiones electromagnéticas <br />
(IEC 60601-1-2: Tabla 1)<br />
Prueba de emisión<br />
Emisión de AF <br />
según CISPR 11<br />
Emisión de AF<br />
según CISPR 11<br />
Emisión de armónicos<br />
según la norma<br />
IEC 61000-3-2<br />
Fluctuaciones de tensión<br />
según la norma<br />
IEC 61000-3-3<br />
El dispositivo va destinado a su uso en un entorno<br />
electromagnético como el que se describe a continuación.<br />
El usuario debería asegurarse de que el dispositivo<br />
se usará siempre en un entorno tal.<br />
Nivel de<br />
conformidad<br />
Grupo 1<br />
Clase B<br />
No aplicable<br />
No aplicable<br />
Directrices sobre el entorno<br />
electromagnético<br />
El dispositivo usa energía de AF exclusivamente<br />
para su propio funcionamiento. Por<br />
tal razón, la generación de interferencias<br />
de alta frecuencia así como la probabilidad<br />
de interferir con otros dispositivos electrónicos<br />
próximos son mínimas.<br />
El dispositivo es apto para ser utilizado en<br />
todo tipo de instalaciones que no sean de<br />
tipo residencial y edificios que estén directamente<br />
conectados a la red pública de<br />
abastecimiento.<br />
Español
136 Conformidad según IEC 60601-1-2<br />
Directrices y declaración del fabricante –<br />
Inmunidad a interferencias electromagnéticas <br />
(IEC 60601-1-2: Tabla 2)<br />
El dispositivo va destinado a su uso en un entorno<br />
electromagnético como el que se describe a continuación.<br />
El usuario del dispositivo debería garantizar que<br />
éste se usará en un entorno tal.<br />
Español<br />
Comprobación de la<br />
inmunidad a<br />
interferencias<br />
Descarga de electricidad<br />
estática (ESD)<br />
según <br />
IEC 61000-4-2<br />
Perturbaciones<br />
transitorias rápidas<br />
y ráfagas según<br />
IEC 61000-4-4<br />
Sobretensiones <br />
(picos) según<br />
IEC 61000-4-5<br />
Caídas de tensión,<br />
interrupciones breves<br />
y fluctuaciones<br />
de la tensión de alimentación<br />
según<br />
IEC 61000-4-11<br />
Campo magnético<br />
para las frecuencias<br />
de alimentación <br />
(50/60 Hz) según<br />
IEC 61000-4-8<br />
Nivel de<br />
comprobación<br />
según<br />
IEC 60601<br />
±6 kV de descarga<br />
de contacto<br />
±8 kV de descarga<br />
aérea<br />
No aplicable<br />
No aplicable<br />
No aplicable<br />
Nivel de<br />
conformidad<br />
±6 kV de descarga<br />
de contacto<br />
±15 kV de descarga<br />
aérea<br />
Directrices para el entorno<br />
electromagnético<br />
Los suelos deberían ser de<br />
madera, hormigón o losas<br />
cerámicas. Si el suelo es de<br />
material sintético, la humedad<br />
relativa del aire deberá ser<br />
como mínimo del 30 %.<br />
3 A/m 30 A/m La intensidad de campo magnético<br />
debería estar dentro de<br />
los valores típicos de centros<br />
comerciales y hospitalarios.
137 Conformidad según IEC 60601-1-2<br />
Directrices y declaración del fabricante – Inmunidad<br />
a interferencias de todos los modelos de marcapasos<br />
externos (IEC 60601-1-2: Tabla 3)<br />
El dispositivo va destinado a su uso en un entorno<br />
electromagnético como el que se describe a continuación.<br />
El usuario del dispositivo debería garantizar que<br />
éste se usará en un entorno tal.<br />
Comprobación<br />
de la inmunidad<br />
a interferencias<br />
Interferencias de<br />
AF inducidas<br />
según<br />
IEC 61000-4-6<br />
Nivel de<br />
comprobación<br />
según IEC 60601<br />
Nivel de<br />
conformidad<br />
10 V rms<br />
10 kHz – 80 MHz<br />
fuera de bandas<br />
ISM a 10 V rms<br />
d = 0,35 P<br />
Directrices sobre el entorno<br />
electromagnético<br />
No se usarán teléfonos u<br />
otros equipos móviles o inalámbricos<br />
a una distancia<br />
menor a la de seguridad respecto<br />
a cualquier parte del<br />
dispositivo, cables incluidos.<br />
Distancia de seguridad<br />
recomendada:<br />
Español<br />
Interferencias de<br />
AF emitidas<br />
según<br />
IEC 61000-4-3<br />
10 V rms<br />
10 V rms<br />
10 kHz – 80 MHz<br />
d = 1,2 P<br />
dentro de bandas<br />
ISM a)<br />
10 V/m<br />
10 V/m<br />
800 MHz – 2,5 GHz<br />
d = 1,2 P<br />
para 80 MHz – 800 MHz<br />
d = 2,3<br />
P<br />
para 800 MHz – 2,5 GHz
138 Conformidad según IEC 60601-1-2<br />
Comprobación<br />
de la inmunidad<br />
a interferencias<br />
Nivel de<br />
comprobación<br />
según IEC 60601<br />
Nivel de<br />
conformidad<br />
Directrices sobre el entorno<br />
electromagnético<br />
“P” es la potencia nominal<br />
máxima del emisor, en vatios<br />
[W], especificada por su<br />
fabricante y “d” es la distancia<br />
de seguridad, en metros<br />
[m] b) .<br />
Español<br />
La intensidad de campo de<br />
los emisores inalámbricos<br />
estacionarios debería ser<br />
(según una evaluación in<br />
situ) c) menor que el nivel de<br />
conformidad d) .<br />
Es posible que se produzcan<br />
interferencias cerca de dispositivos<br />
que tengan grabado<br />
el siguiente símbolo gráfico:<br />
OBSERVACIÓN: es posible que no para todos los casos sean válidas estas directrices.<br />
La propagación de ondas electromagnéticas se ve influida por la absorción y<br />
reflexión de edificios, objetos y personas.<br />
a) Las bandas ISM (de uso industrial, científico y médico) entre 150 kHz y 80 MHz son<br />
6,765 MHz hasta 6,795 MHz; 13,553 MHz hasta 13,567 MHz; 26,957 MHz hasta<br />
27,283 MHz y 40,66 MHz hasta 40,70 MHz.<br />
b) Los niveles de conformidad en las bandas de frecuencias ISM entre 150 kHz y<br />
80 MHz y en el rango de frecuencias desde 80 MHz hasta 2,5 GHz tienen como<br />
objetivo reducir la posibilidad de que se produzcan interferencias debido a la presencia<br />
inesperada de dispositivos de comunicación móviles en el entorno del<br />
paciente. Por tanto, en dichos rangos de frecuencias es recomendable una mayor<br />
distancia de seguridad (factor de seguridad 1,2 en lugar de 0,35).<br />
c) Es imposible predecir las intensidades de campo de emisores estacionarios,<br />
como p.ej. bases de teléfonos inalámbricos, cargadores de radios terrestres,<br />
estaciones de radioaficionados, emisoras de AM/FM y de TV. Para evaluar el<br />
entorno electromagnético generado por emisores fijos de AF, sería conveniente<br />
realizar un estudio del lugar. Si la intensidad de campo medida en el lugar donde<br />
se hace uso del dispositivo sobrepasa el nivel de conformidad de AF arriba especificado,<br />
deberá observarse el dispositivo para garantizar su correcto funcionamiento.<br />
De ser necesario, deberán tomarse otras medidas correctoras, como p.ej.<br />
colocarlo en otra orientación o elegir otro lugar de uso para el marcapasos<br />
externo.<br />
d) En el rango de frecuencias desde 150 kHz hasta 80 MHz, las intensidades de<br />
campo deberían ser menores a 10 V/m.
139 Conformidad según IEC 60601-1-2<br />
Distancias de seguridad recomendadas a aparatos de<br />
telecomunicación inalámbricos/celulares de AF<br />
(IEC 60601-1-2: Tabla 5)<br />
El dispositivo ha sido diseñado para ser utilizado en<br />
entornos electromagnéticos con interferencias de AF<br />
controladas. El usuario contribuirá a evitar interferencias<br />
electromagnéticas en la medida que respete la<br />
distancia de seguridad a equipos de comunicación de<br />
AF (emisores) en función de la potencia de salida del<br />
respectivo equipo de comunicación, como se especifica<br />
a continuación.<br />
Potencia<br />
nominal del<br />
emisor P [W]<br />
Distancia de seguridad d [m] según frecuencia de emisión<br />
150 kHz hasta<br />
80 MHz fuera<br />
de bandas ISM<br />
150 kHz hasta<br />
80 MHz dentro<br />
de bandas ISM<br />
80 MHz hasta<br />
800 MHz<br />
800 MHz –<br />
2,5 GHz<br />
Español<br />
d = 0,35 P d = 1,2 P d = 1,2 P d = 2,3 P<br />
0,01 0,04 0,12 0,12 0,23<br />
0,10 0,11 0,38 0,38 0,73<br />
1,00 0,35 1,20 1,20 2,30<br />
10,00 1,11 3,79 3,79 7,27<br />
100,00 3,50 12,00 12,00 23,00<br />
Para los emisores cuya potencia nominal no figure en la tabla de arriba, la distancia<br />
de seguridad podrá calcularse con ayuda de la fórmula especificada en base a la frecuencia<br />
concreta del emisor. “P” es la potencia nominal del emisor, en vatios [W],<br />
mientras que “d” es la distancia de seguridad, en metros [m].<br />
OBSERVACIÓN 1: Las bandas ISM (de uso industrial, científico y médico) entre<br />
150 kHz y 80 MHz son 6,765 MHz hasta 6,795 MHz; 13,553 MHz hasta 13,567 MHz;<br />
26,957 MHz hasta 27,283 MHz y 40,66 MHz hasta 40,70 MHz.<br />
OBSERVACIÓN 2: Los niveles de conformidad en las bandas de frecuencias ISM entre<br />
150 kHz y 80 MHz y en el rango de frecuencias desde 80 MHz hasta 2,5 GHz tienen<br />
como objetivo reducir la posibilidad de que se produzcan interferencias debido a la<br />
presencia inesperada de dispositivos de comunicación móviles en el entorno del<br />
paciente. Por tanto, en dichos rangos de frecuencias es recomendable una mayor<br />
distancia de seguridad (factor de seguridad 1,2 en lugar de 0,35).<br />
OBSERVACIÓN 3: Es posible que no para todos los casos sean válidas estas directrices.<br />
La propagación de ondas electromagnéticas se ve influida por la absorción y<br />
reflexión de edificios, objetos y personas.
140 Volumen de suministro y accesorios<br />
Volumen de suministro<br />
y accesorios<br />
Nota:<br />
El <strong>Reocor</strong> S deberá utilizarse únicamente con los<br />
accesorios fabricados y probados para este marcapasos.<br />
Volumen de suministro<br />
Español<br />
Denominación del artículo Cantidad Comentario Nº de referencia<br />
<strong>Reocor</strong> S 1 365528<br />
Pila 1 Duracell Plus, 6LR61 –<br />
Manguito de brazo<br />
– Para Japón<br />
1 Corto 391843<br />
– Para los demás países 1 Estándar 103704<br />
Adaptador Redel 1 371263<br />
Tapa del panel de mando 1 378007<br />
Manual técnico plurilingüe 1 368703<br />
(DE, EN, ES, FR, IT,PT)<br />
Manual técnico ZH 368704<br />
Guía rápida DE 370125<br />
Guía rápida EN 371305<br />
Guía rápida ES 1 371306<br />
Guía rápida FR 371307<br />
Guía rápida IT 371308<br />
Guía rápida PT 372231<br />
Guía rápida ZH 371309<br />
Bolsa 1 379384<br />
Accesorios<br />
Artículo<br />
Nº de<br />
referencia<br />
Descripción<br />
PK-82 128564 Cable del paciente con dos pinzas de<br />
cocodrilo aisladas, reesterilizable<br />
PK-83 (2,5 m) 128563 Cable del paciente con dos bornes de<br />
rosca aislados, reesterilizable<br />
PK-83 (1,5 m) 128562 Cable del paciente con dos bornes de<br />
rosca aislados, reesterilizable<br />
PK-83-B (2,5 m) 347485 Cable del paciente con dos bornes de<br />
rosca aislados de 2,3 mm<br />
PK-83-B (1,5 m) 347606 Cable del paciente con dos bornes de<br />
rosca aislados de 2,3 mm<br />
PK-175 333959 Cable del paciente con cuatro bornes de<br />
rosca para conectar electrodos temporales,<br />
reesterilizable<br />
Conexión<br />
Conexión<br />
directa<br />
Conexión<br />
directa<br />
Conexión<br />
directa<br />
Adaptador<br />
Redel<br />
Adaptador<br />
Redel<br />
Adaptador<br />
Redel
141 Volumen de suministro y accesorios<br />
Artículo<br />
PK-67-L 123672 Cable del paciente reesterilizable para<br />
combinar con adaptador PA-1-B, PA-2,<br />
PA-4<br />
PK-67-S 128085 Cable del paciente reesterilizable <br />
para combinar con PK-155 y <br />
modelo Remington 301-CG<br />
PK-141 (2,8 m) 353181 Cable del paciente reesterilizable con<br />
cuatro pinzas de cocodrilo protegidas<br />
contra roces<br />
Manguito 103704 Manguito de brazo estándar<br />
estándar <strong>Reocor</strong><br />
Manguito corto<br />
<strong>Reocor</strong><br />
Nº de<br />
referencia<br />
391843<br />
Descripción<br />
Manguito de brazo de tamaño reducido.<br />
Indicado para brazos estrechos.<br />
Sólo para EEUU<br />
Conexión<br />
Adaptador<br />
Redel<br />
Adaptador<br />
Redel<br />
Adaptador<br />
Redel<br />
–<br />
–<br />
Español<br />
Artículo Fabricante Descripción Conexión<br />
ADAP-2R<br />
(0,24 m)<br />
Remington<br />
Medical Inc.<br />
Adaptador reutilizable para cables de los<br />
modelos S-101-97 y FL-601-97<br />
Adaptador<br />
Redel<br />
Adaptadores para cables PK-67-S y PK-67-L<br />
Artículo<br />
Nº de Descripción<br />
referencia<br />
PA-1-B 123751 Para conectar a adaptador de 2 mm o adaptador<br />
MHW (para electrodos temporales), reesterilizable<br />
PA-1-C 349723 Para conectar a adaptador de 2 mm o adaptador<br />
MHW (para electrodos temporales), reesterilizable<br />
PA-2 123157 Para conectar a conector IS-1, reesterilizable<br />
PA-4 123090 Con pinzas de cocodrilo, reesterilizable<br />
PK-155<br />
(set con dos cables)<br />
337358 Cable estéril de dos hilos del paciente con pinzas<br />
de cocodrilo, desechable
142 Volumen de suministro y accesorios<br />
Adaptadores para cables PK-67-S y PK-67-L<br />
(sólo para EEUU)<br />
Artículo Fabricante Descripción<br />
Modelo 301-CG<br />
Remington<br />
Medical Inc.<br />
Cable estéril de dos hilos del paciente con pinzas<br />
de cocodrilo, desechable<br />
Adaptador para ADAP-2R (sólo para EEUU)<br />
Español<br />
Artículo Fabricante Descripción<br />
Modelo 301-CG Remington Cable estéril de dos hilos del paciente con pinzas<br />
Medical Inc. de cocodrilo, desechable<br />
Modelo S-101-97<br />
(2,5 m)<br />
Modelo FL-601-97<br />
(2,0 m)<br />
Remington<br />
Medical Inc.<br />
Remington<br />
Medical Inc.<br />
Cable de dos hilos del paciente con pinzas de<br />
cocodrilo, desechable<br />
Cable de dos hilos del paciente con bornes de<br />
rosca, desechable
143 Leyenda de la etiqueta<br />
Leyenda de la etiqueta<br />
Los símbolos de la etiqueta significan lo siguiente:<br />
Símbolo<br />
Significado<br />
<strong>Reocor</strong> S<br />
Adaptador Redel<br />
Nº de referencia de <strong>BIOTRONIK</strong><br />
Número de serie del dispositivo<br />
Español<br />
Fecha de fabricación del dispositivo<br />
D<br />
S<br />
Temperaturas de almacenamiento admisibles<br />
Presiones atmosféricas de almacenamiento admisibles<br />
Humedades de almacenamiento admisibles<br />
Paciente con electrodo implantado<br />
Contenido<br />
Símbolo de desecho<br />
Observe las instrucciones del manual técnico<br />
Atención: La ley federal de EEUU restringe la venta de este<br />
producto mediante, o a través de la petición de, un médico.<br />
Marcado CE
Español<br />
<br />
144 Leyenda de la etiqueta
145<br />
<br />
Contenu<br />
Description générale ............................................................................147<br />
Description de l'appareil ........................................147<br />
Indications ..............................................................148<br />
Contre-indications .................................................. 148<br />
Effets secondaires potentiels .................................149<br />
Instructions de manipulation .................................149<br />
Signaux optiques et acoustiques ........................... 155<br />
Instructions de commande ...................................................................156<br />
Remarques générales ............................................156<br />
Éléments de commande et DEL ............................158<br />
Couvercle du panneau de commande .................... 159<br />
Connexion des sondes ........................................... 161<br />
Mise en service ....................................................... 169<br />
Fixation ................................................................... 170<br />
Remplacement de la pile ....................................... 170<br />
Modes de stimulation et paramètres ...................................................173<br />
Modes de stimulation ............................................. 173<br />
Fréquence ............................................................... 174<br />
Amplitude et durée d'impulsion ............................ 174<br />
Sensibilité ............................................................... 174<br />
Intervalle d'interférence ......................................... 174<br />
Rafale ...................................................................... 175<br />
Manipulation, maintenance et entretien ..............................................176<br />
<strong>Reocor</strong> S ................................................................. 176<br />
Câbles patient réutilisables ...................................177<br />
Maintenance, service, inspections .........................178<br />
Élimination ............................................................. 179<br />
Sécurité technique ...............................................................................180<br />
Spécifications techniques ....................................................................181<br />
Conformité à CEI 60601-1-2 .................................................................184<br />
Équipement fourni et accessoires ........................................................189<br />
Légende de l'étiquette .........................................................................192<br />
Français
Français<br />
146
147 Description générale<br />
Description générale<br />
Description de l'appareil<br />
Le stimulateur cardiaque externe <strong>Reocor</strong> S est un<br />
stimulateur simple chambre destiné à être utilisé<br />
dans un environnement clinique avec des sondes<br />
temporaires (y compris des sondes myocardiques et<br />
des cathéters intraveineux). <br />
Il est raccordé directement ou avec un câble patient et<br />
un adaptateur correspondant si nécessaire.<br />
Trois types de stimulation sont disponibles : SSI, S00,<br />
SST, ainsi qu'une fonction de rafales.<br />
Le mode de stimulation, la fréquence, la sensibilité,<br />
l'amplitude d'impulsion et la fréquence de rafales<br />
sont les paramètres réglables.<br />
Des diodes électroluminescentes (DEL) indiquent la<br />
détection (Sense), la stimulation (Pace) et l'état de la<br />
pile (Low battery). <br />
Un signal sonore avertit si des fréquences très<br />
élevées ou des valeurs de sensibilité très basses ont<br />
été réglées, ou si l'impédance de la sonde n'est pas<br />
parfaite.<br />
Un défaut de l'appareil (échec de l'auto-test suivant la<br />
mise sous tension de l'appareil) est indiqué par un<br />
allumage prolongé des DEL et un signal acoustique<br />
intermittent. Si l'auto-test n'a détecté aucune erreur<br />
après la mise sous tension de l'appareil, les signaux<br />
acoustiques et sonores s'interrompent après quelques<br />
secondes.<br />
Les caractéristiques de sécurité du <strong>Reocor</strong> S sont<br />
entre autres :<br />
• Affichage optique des événements détectés <br />
et stimulés<br />
• Paramètres de stimulation contrôlés par <br />
microprocesseur<br />
• Surveillance de l'impédance de sonde<br />
• Avertissement optique en cas d'épuisement<br />
proche de la pile<br />
Français
148 Description générale<br />
• Couvercle transparent coulissant sur les éléments<br />
de commande pour éviter toute modification accidentelle<br />
des paramètres<br />
Il est possible de raccorder directement des cathéters<br />
temporaires, des sondes myocardiques temporaires,<br />
des sondes avec des connecteurs de 2 mm sur le<br />
<strong>Reocor</strong> S. Différents câbles patients et adaptateurs<br />
sont également disponibles. Ce système assure une<br />
connexion solide des cathéters intraveineux et des<br />
sondes myocardiques, qu'il s'agisse de modèles unipolaires<br />
ou bipolaires.<br />
Indications<br />
Français<br />
La stimulation temporaire délivrée par le <strong>Reocor</strong> S<br />
répond aux indications suivantes sur des patients de<br />
tous âges :<br />
• Traitement d'arythmies et de bloc cardiaque<br />
• Bradycardie sinusale symptomatique<br />
• Maladie du sinus<br />
• Stimulation temporaire avant, pendant et après<br />
une opération cardiaque<br />
• Arrêt de tachyarythmies supraventriculaires<br />
• Stimulation prophylactique de prévention des<br />
arythmies<br />
• Stimulation d'urgence<br />
• Contrôle des seuils de stimulation<br />
Contre-indications<br />
• <strong>Reocor</strong> S ne peut être stérilisé, il est par conséquent<br />
inadapté à une utilisation dans un entourage<br />
stérile du patient.<br />
• La stimulation simple chambre auriculaire est<br />
contre-indiquée chez les patients présentant déjà<br />
des troubles de conduction AV.<br />
• L'utilisation d'un stimulateur externe est contreindiquée<br />
lorsque le patient est équipé d'un stimulateur<br />
cardiaque implanté fonctionnel.
149 Description générale<br />
Effets secondaires potentiels<br />
Des asystoles suivant un arrêt abrupt de la stimulation<br />
(par ex. une déconnexion accidentelle du câble<br />
patient, une déconnexion de la sonde, des réglages<br />
erronés) ou une dépendance vis à vis du stimulateur<br />
cardiaque font partie des complications possibles<br />
inhérentes à l'utilisation d'un stimulateur externe.<br />
L'introduction de sondes intraveineuses, pour sa part,<br />
peut provoquer entre autres une infection de la plaie,<br />
des frottements péricardiques, une perforation cardiaque<br />
ou une dysrythmie suivant l'implantation de la<br />
sonde.<br />
Instructions de manipulation<br />
Groupe<br />
d'utilisateurs<br />
La stimulation peut induire des arythmies, en fonction<br />
des paramètres de stimulation et de la maladie dont<br />
souffre le patient. Afin de garantir la sécurité du<br />
patient, il convient de respecter certaines procédures<br />
et mesures de précaution énumérées ci-dessous. <br />
Des informations plus détaillées concernant ces<br />
méthodes et mesures de précaution se trouvent dans<br />
les publications médicales correspondantes.<br />
• Seules des personnes disposant de connaissances<br />
en cardiologie et formées au maniement de<br />
l'appareil sont autorisées à utiliser <strong>Reocor</strong> S. <br />
Le personnel technico-médical d'un hôpital et <br />
les médecins sont des utilisateurs potentiels de<br />
l'appareil.<br />
Fonctionnement • <strong>Reocor</strong> S agit en interaction avec le cœur du<br />
patient. Une interaction a également lieu avec <br />
la peau et les vaisseaux sanguins du patient.<br />
Utilisation<br />
conforme<br />
• Le <strong>Reocor</strong> S ainsi que les câbles et les accessoires<br />
qui y sont rattachés ne doivent être utilisés que<br />
conformément aux dispositions de ce manuel<br />
technique.<br />
• Il est interdit de raccorder <strong>Reocor</strong> S à d'autres<br />
appareils électriques médicaux.<br />
• Il est interdit d'utiliser <strong>Reocor</strong> S dans des zones<br />
présentant un risque d'explosion.<br />
Français
150 Description générale<br />
Français<br />
Interdiction de<br />
modifier<br />
Pièces de rechange<br />
et accessoires<br />
Appareils<br />
à portée de main<br />
Comportement<br />
avant<br />
l'utilisation<br />
Connexion des<br />
sondes<br />
• La réparation, la mise à jour ainsi que l'ajout de<br />
module supplémentaire sur l'appareil sont effectués<br />
uniquement par <strong>BIOTRONIK</strong> ou par un tiers<br />
autorisé expressément par <strong>BIOTRONIK</strong>.<br />
• Les pièces de rechange d'origine et accessoires<br />
autorisés par <strong>BIOTRONIK</strong> servent à votre sécurité.<br />
L'utilisation de tout autre composant entraîne la<br />
suppression de la responsabilité pour les conséquences<br />
qui en résultent et l'annulation de tout<br />
droit à la garantie.<br />
• Si un patient est dépendant d'un stimulateur cardiaque,<br />
il doit toujours disposer d'un stimulateur<br />
de secours à portée de la main.<br />
• Il convient de toujours avoir à portée de main un<br />
défibrillateur externe, de l'oxygène, un équipement<br />
d'intubation et des médicaments d'urgence.<br />
• Avant d'utiliser le <strong>Reocor</strong> S, procéder à un contrôle<br />
visuel de l'appareil pour s'assurer de l'absence de<br />
dommages ou de souillures.<br />
• Ne jamais utiliser un appareil endommagé ni un<br />
appareil présentant des anomalies. Remplacez<br />
tout câble dès que des traces d'usure ou <br />
d'endommagement sont détectées.<br />
• Avant d'utiliser le <strong>Reocor</strong> S, le câble patient ou les<br />
sondes, l'utilisateur doit toucher le patient afin<br />
d'éliminer les différences de potentiel électriques<br />
existantes.<br />
• Nous recommandons instamment à l'utilisateur<br />
de contrôler soigneusement tous les paramètres<br />
configurés avant de raccorder les sondes au<br />
<strong>Reocor</strong> S.<br />
• Bien que le <strong>Reocor</strong> S soit protégé contre les gouttelettes<br />
d'eau, veiller à toujours maintenir l'appareil<br />
et les connecteurs de sonde propres et secs.<br />
• Le <strong>Reocor</strong> S n'est pas stérilisable.<br />
• Il convient de protéger et de contrôler à intervalles<br />
réguliers les connexions du <strong>Reocor</strong> S et des sondes<br />
temporaires de stimulation.<br />
• Le câble patient doit d'abord être connecté au<br />
<strong>Reocor</strong> S avant de brancher les sondes.
151 Description générale<br />
Comportement<br />
au cours de<br />
l'utilisation<br />
Stimulation à<br />
fréquences élevées<br />
• Les sondes temporaires auxquelles le <strong>Reocor</strong> S<br />
est raccordé font office de conducteur de basse<br />
impédance vers le myocarde pour le courant électrique.<br />
Les appareils reliés au secteur et situés à<br />
proximité du patient doivent donc impérativement<br />
être équipés d'une mise à la terre réglementaire.<br />
• Lors de la manipulation de sondes déjà implantées<br />
ne pas toucher leurs broches ni leurs<br />
contacts métalliques et les tenir à l'écart de surfaces<br />
conductrices ou humides.<br />
• Si le câble se sépare du <strong>Reocor</strong> S, il convient de le<br />
reconnecter immédiatement puis de vérifier que<br />
la connexion est sécurisée.<br />
• Si des sondes unipolaires sont utilisées, deux sondes<br />
sont nécessaires afin d'obtenir une stimulation<br />
efficace.<br />
• Pendant le fonctionnement du <strong>Reocor</strong> S, le couvercle<br />
du panneau de commande doit être parfaitement<br />
fermé afin d'éviter toute modification<br />
inopinée des paramètres du programme.<br />
• Le <strong>Reocor</strong> S doit être utilisé soit posé à plat sur<br />
une surface horizontale non glissante, soit fixé au<br />
bras du patient à l'aide du brassard, soit accroché<br />
à un pied à perfusion par l'œillet de suspension<br />
situé au dos.<br />
• Il est interdit de porter le <strong>Reocor</strong> S directement<br />
sur la peau.<br />
• Pendant l'utilisation du <strong>Reocor</strong> S, la fréquence<br />
cardiaque du patient doit être surveillée sur un<br />
moniteur ECG à fonction d'alarme.<br />
• En présence de perturbations provoquées par <br />
des interférences électromagnétiques (IEM), <br />
le <strong>Reocor</strong> S passe en mode de fonctionnement S00<br />
en cas de dépassement de certaines valeurs<br />
limite.<br />
• Une stimulation cardiaque à des fréquences supérieures<br />
à 180 cpm pendant une période prolongée<br />
peut provoquer de graves complications hémodynamiques.<br />
Il est recommandé de ne procéder à<br />
une stimulation à fréquence élevée que si une surveillance<br />
permanente est garantie.<br />
Français
152 Description générale<br />
Français<br />
Comportement<br />
après l'utilisation<br />
Fonctionnement<br />
de la pile<br />
Électrocautérisation<br />
• Après une défibrillation ou une cautérisation, <br />
le dispositif doit être soumis à un test de fonctionnement.<br />
• Si le dispositif est stocké, et donc non utilisé, <br />
pendant une période prolongée, il convient d'en<br />
extraire la pile afin d'éviter tout dommage provoqué<br />
par des coulures éventuelles.<br />
• Utiliser un détergent doux et un chiffon humide<br />
pour nettoyer le dispositif. Éviter d'utiliser des<br />
détergents agressifs ou des solvants organiques,<br />
car ils risquent d'attaquer le boîtier en plastique<br />
de l'appareil.<br />
• Les opérations d'inspection et de maintenance<br />
doivent être effectuées conformément aux<br />
instructions de la page 176.<br />
• Ne jamais utiliser de piles rechargeables (accus).<br />
Il est difficile d'évaluer la durée de vie de ces piles,<br />
il peut donc arriver que le moment de l'ERI 1) soit<br />
dépassé de manière accidentelle, interrompant<br />
alors brutalement la stimulation.<br />
Utiliser uniquement des piles 9 V correspondant<br />
au code international CEI 6LR61. L'utilisation<br />
d'une pile de type MN 1604 Duracell ® Procell ®<br />
permet au moins 600 heures de stimulation<br />
externe avant de devoir remplacer la pile.<br />
Si le changement de pile est effectué alors que<br />
<strong>Reocor</strong> S est en service, à température ambiante<br />
de 20 °C ± 2 °C, le dispositif demeure opérationnel<br />
pendant encore au moins 30 secondes.<br />
Pour des raisons de sécurité, il est recommandé<br />
de prendre en charge le patient autrement lors du<br />
changement de la pile.<br />
• Il est interdit d'entreprendre une électrocautérisation<br />
dans un rayon de moins de 15 cm autour des<br />
sondes, car elle peut induire une fibrillation ventriculaire<br />
ou une détérioration du stimulateur.<br />
Afin d'éviter une inhibition du stimulateur par des<br />
signaux d'interférence, il convient de régler le<br />
1) Le signal ERI (la DEL Low battery clignote) rappelle que le remplacement de la pile du<br />
<strong>Reocor</strong> S est nécessaire
153 Description générale<br />
stimulateur sur une stimulation asynchrone. Pendant<br />
le traitement, contrôler le pouls périphérique<br />
du patient en permanence. Contrôler le fonctionnement<br />
du stimulateur une fois le traitement<br />
terminé.<br />
Défibrillation • Les circuits du <strong>Reocor</strong> S sont protégés contre<br />
l'énergie du choc susceptible d'être induite par<br />
une défibrillation. Cependant, dans la mesure du<br />
possible, les mesure de précaution suivantes<br />
doivent être prises :<br />
— L'énergie réglée ne doit pas dépasser celle<br />
requise pour la défibrillation.<br />
— La distance entre les sondes du défibrillateur<br />
et celles du <strong>Reocor</strong> S doit être supérieure<br />
à 10 cm.<br />
— Après une défibrillation, le <strong>Reocor</strong> S doit être<br />
arrêté et remis en marche afin qu'il puisse<br />
procéder à un auto-test complet.<br />
Résistance aux<br />
perturbations<br />
D'autre part, il convient de contrôler le fonctionnement<br />
du stimulateur et le seuil de stimulation<br />
après la défibrillation ; la surveillance doit s'étendre<br />
sur une période suffisamment longue.<br />
• Le <strong>Reocor</strong> S est protégé contre les perturbations<br />
provoquées par des radiations électromagnétiques<br />
et des décharges électrostatiques, ainsi que<br />
contre les perturbations transmises. Les radiations<br />
émises par le <strong>Reocor</strong> S ont-elles aussi été<br />
réduites. L'appareil satisfait donc aux exigences<br />
de la norme CEI 60601-1-2. Cependant il est possible<br />
que des champs électromagnétiques de forte<br />
intensité, similaires à ceux pouvant être générés à<br />
proximité immédiate de moteurs électriques, de<br />
transformateurs, de lignes électriques ou d'autres<br />
appareils électriques, puissent perturber le fonctionnement<br />
du <strong>Reocor</strong> S.<br />
Des interférences électromagnétiques peuvent<br />
engendrer les erreurs suivantes :<br />
— Remise à zéro inopinée (un auto-test est <br />
exécuté).<br />
— Détection d'événements cardiaques, sans<br />
qu'ils apparaissent sur le moniteur ECG.<br />
— Comportement incompréhensible du<br />
<strong>Reocor</strong> S.<br />
Français
154 Description générale<br />
Français<br />
Mesures pour rétablir le fonctionnement normal<br />
du <strong>Reocor</strong> S :<br />
— Vérifier la connexion entre le dispositif et les<br />
sondes temporaires de stimulation, la corriger<br />
si nécessaire.<br />
— Réajuster la sensibilité du <strong>Reocor</strong> S : la demivaleur<br />
de l'amplitude moyenne du signal<br />
intrinsèque conduit souvent à un réglage correct<br />
de la sensibilité.<br />
— Mettre hors tension tous les appareils électriques<br />
situés à proximité du <strong>Reocor</strong> S s'ils sont<br />
en mesure de provoquer des interférences<br />
électromagnétiques et si leur fonctionnement<br />
n'est pas indispensable.<br />
— Déplacer la source parasite dans un endroit où<br />
les interférences n'auront pas d'effet sur<br />
l'appareil.<br />
— Si cette opération ne présente pas le moindre<br />
risque, arrêter et remettre en marche le<br />
<strong>Reocor</strong> S afin de réinitialiser le stimulateur en<br />
mode non perturbé.<br />
— Si le dysfonctionnement persiste, contacter<br />
<strong>BIOTRONIK</strong>.
155 Description générale<br />
Signaux optiques et acoustiques<br />
• Lors de l'auto-test suivant la mise sous tension du<br />
<strong>Reocor</strong> S, toutes les DEL s'allument et de courts<br />
signaux acoustiques sont audibles. L'auto-test ne<br />
dure que quelques secondes.<br />
• Si l'auto-test ne détecte pas d'erreur, les DEL<br />
s'éteignent et les signaux acoustiques disparaissent.<br />
• Si l'auto-test détecte un défaut, toutes les DEL <br />
clignotent de manière persistante et des signaux<br />
sonores retentissent.<br />
• La DEL rouge clignotante Low battery indique<br />
qu'un remplacement de la pile est nécessaire.<br />
• La DEL verte Sense signale la détection d'une<br />
onde P ou d'une onde R.<br />
• La DEL jaune Pace signale l'émission d'impulsions.<br />
• Les DEL et les signaux acoustiques fournissent<br />
également les mises en garde suivantes au cours<br />
du fonctionnement :<br />
Français<br />
Mise en garde Signification Remède<br />
Signal acoustique<br />
pendant 2 s<br />
Signaux acoustiques<br />
rapprochés<br />
Signal acoustique et<br />
clignotement des<br />
DEL Pace et Sense<br />
DEL Low battery <br />
clignote<br />
Une amplitude d'impulsion<br />
1 V ou une fréquence<br />
180 cpm est réglée<br />
Impédance hors de la plage<br />
admise<br />
Protection haute fréquence<br />
déclenchée ;<br />
l'auto-test a échoué<br />
ERI atteint<br />
Vérifier si les valeurs<br />
réglées conviennent au<br />
patient.<br />
Vérifier si tous les<br />
connecteurs sont solidement<br />
enfichés.<br />
Vérifier si les sondes<br />
sont en position souhaitée.<br />
Désactiver l'appareil <br />
et l'expédier à<br />
<strong>BIOTRONIK</strong>.<br />
Remplacer la pile.<br />
Il reste alors environ<br />
36 heures a) de service <br />
a) Lors de l'utilisation d'une pile de type MN 1604 Duracell ® , Procell ®<br />
à l'appareil.
156 Instructions de commande<br />
Instructions de commande<br />
Remarques générales<br />
Français<br />
Attention !<br />
Auto-test<br />
Il convient de protéger et de contrôler à intervalles<br />
réguliers les connexions du <strong>Reocor</strong> S et des sondes<br />
temporaires de stimulation.<br />
Dès que le <strong>Reocor</strong> S est sous tension, il procède à un<br />
auto-test de quelques secondes. Ce test comprend les<br />
étapes suivantes :<br />
• Contrôle du code de programme et du microprocesseur<br />
• Test de la mémoire<br />
• Test de fonctionnement des DEL et des signaux<br />
acoustiques<br />
• Contrôle de la capacité de stimulation et de <br />
détection<br />
• Contrôle de l'efficacité de la protection haute <br />
fréquence<br />
Si l'auto-test détecte un défaut, toutes les DEL clignotent<br />
de manière persistante et des signaux acoustiques<br />
retentissent. Dans ce cas le stimulateur <br />
cardiaque doit être arrêté et expédié à la société<br />
<strong>BIOTRONIK</strong>.<br />
Si l'auto-test ne détecte pas d'erreur, les DEL s'éteignent<br />
et les signaux acoustiques disparaissent,<br />
le <strong>Reocor</strong> S commence à émettre des impulsions de<br />
stimulation conformément aux paramètres réglés.<br />
Il convient donc de raccorder l'électrode négative<br />
(cathode) uniquement après avoir vérifié que le mode<br />
de stimulation, la fréquence de stimulation, l'amplitude<br />
d'impulsion et la sensibilité sont correctement<br />
réglés.<br />
Si le commutateur rotatif de mode de fonctionnement<br />
est positionné sur OFF, cela empêche que des impulsions<br />
de stimulation soient délivrées au patient dès<br />
que les sondes sont connectées.
157 Instructions de commande<br />
Messages<br />
d'avertissement<br />
Les alarmes suivantes peuvent se déclencher au<br />
cours du fonctionnement :<br />
• La DEL clignotante Low battery indique qu'un<br />
remplacement de la pile est nécessaire.<br />
• Si l'impédance électrique n'est pas comprise dans<br />
une plage admise (par ex. à la suite d'une rupture<br />
de sonde ou d'un mauvais contact), une succession<br />
rapide de signaux sonores retentit dans un<br />
délai de 5 s après la mise sous tension.<br />
• Si l'amplitude d'impulsion est réglée sur des<br />
valeurs 1 V ou la fréquence sur des valeurs<br />
180 cpm, un signal sonore retentit pendant <br />
environ 2 s.<br />
• Si la fréquence est trop élevée (voir page 182<br />
« Protection haute fréquence ») ou en cas d'échec<br />
de l'auto-test, un signal sonore continu retentit et<br />
les DEL Pace et Sense clignotent.<br />
Français
Français<br />
<br />
158 Instructions de commande<br />
Éléments de commande et DEL<br />
Figure 1 : panneau de commande du <strong>Reocor</strong> S
159 Instructions de commande<br />
Désignation<br />
1 Connexion patient<br />
INDIFF.+; DIFF.-<br />
Fonction<br />
2 Compartiment de pile Pour pile 9 V<br />
Tableau 1 : description des éléments de la figure 1<br />
Pour câble avec connecteur de 2 mm <br />
ou adaptateur Redel<br />
(rouge = plus ; bleu = moins)<br />
3 DEL Low battery Avertit lorsque la tension de la pile est faible<br />
4 LED Pace Voyant jaune d'événement stimulé<br />
5 LED Sense Voyant vert d'événement détecté<br />
6 Molette de réglage Ampl. Réglage de l'amplitude d'impulsion<br />
7 Molette de réglage Sens. Réglage de la sensibilité<br />
8 Start burst Démarrage de la fonction de rafales<br />
9 Étui pour ceinture Fixation du <strong>Reocor</strong> S au patient, au lit ou <br />
au pied à perfusion<br />
10 Molette de réglage Réglage de la fréquence des rafales<br />
Burst rate<br />
11 Select burst Sélection de la fonction de rafales<br />
12 Molette de réglage Rate Réglage de la fréquence de stimulation<br />
13 Molette de réglage Mode Sélection du mode stimulation et arrêt<br />
Français<br />
Les valeurs en gras sur les éléments de commande<br />
représentent les paramètres sûrs pour l'objectif<br />
médical de l'appareil.<br />
Couvercle du panneau de commande<br />
Le couvercle du panneau de commande est verrouillé<br />
lorsque vous l'aurez glissé sur les deux points de blocage<br />
jusqu'à la butée et que le verrouillage est placé<br />
au-dessus de la saillie (voir Fig. 2).<br />
Correct : Faux :<br />
Figure 2 : Position correcte du couvercle du panneau de commande
160 Instructions de commande<br />
Pour déverrouiller le couvercle du panneau de commande<br />
(voir Fig. 3):<br />
Tirez le levier de déverrouillage d'une main vers <br />
le haut.<br />
Faites simulanément glisser le couvercle du panneau<br />
de commande de l'autre main vers le bas.<br />
Français<br />
Figure 3 : Déverrouillage du couvercle du panneau de commande<br />
Attention !<br />
Pour verrouiller le couvercle du panneau de <br />
commande:<br />
Glissez le couvercle du panneau de commande<br />
par-dessus la saillie et poussez-le vers le haut<br />
jusqu'à la butée (voir Fig. 2).<br />
Il est possible de retirer complètement le couvercle<br />
pour pouvoir le nettoyer. Pour ce faire, glissez le couvercle<br />
vers le bas jusqu'à la butée. Après le nettoyage,<br />
glissez le couvercle au-delà de la butée.<br />
Pendant le fonctionnement du <strong>Reocor</strong> S, le couvercle<br />
du panneau de commande doit être fermé afin<br />
d'empêcher toute manipulation involontaire des<br />
commutateurs rotatifs et molettes de réglage, et par<br />
conséquent des paramètres du programme.
161 Instructions de commande<br />
Connexion des sondes<br />
Remarque :<br />
<strong>Reocor</strong> S est équipé de deux bornes destinées au<br />
raccordement direct de sondes avec des connecteurs<br />
de 2 mm isolés.<br />
Le raccordement des câbles avec des connecteurs<br />
Redel requiert d'enficher et de visser l'adaptateur<br />
Redel du côté approprié (fig. 4). L'adaptateur Redel<br />
est enfiché du bon côté lorsqu'il est possible de le<br />
visser sur le <strong>Reocor</strong> S.<br />
l'adaptateur Redel peut fonctionner uniquement<br />
s'il est enfiché correctement sur l'appareil.<br />
Français<br />
Figure 4 : adaptateur Redel pour <strong>Reocor</strong> S
162 Instructions de commande<br />
Il est possible d'utiliser <strong>Reocor</strong> S avec les câbles<br />
patients et les adaptateurs suivants :<br />
• Câble patient PK-83-B avec deux bornes à vis<br />
pour sondes temporaires, côté patient, et connecteur<br />
Redel côté <strong>Reocor</strong> (utiliser l'adaptateur<br />
Redel).<br />
PK-83-B<br />
Figure 5 : câble patient PK-83-B<br />
Français<br />
• Câble patient PK-83 avec deux bornes à vis<br />
isolées pour sondes temporaires côté patient et<br />
deux connecteurs de 2 mm isolés côté <strong>Reocor</strong>.<br />
Figure 6 : câble patient PK-83<br />
• Câble patient PK-82 avec deux pinces crocodile<br />
isolées pour sondes temporaires côté patient et<br />
deux connecteurs de 2 mm isolés côté <strong>Reocor</strong>.<br />
Figure 7 : câble patient PK-82
163 Instructions de commande<br />
• Câbles patient PK-67-L et PK-67-S<br />
Les câbles patient PK-67-L (2,6 m) et PK-67-S (0,8 m)<br />
diffèrent uniquement dans la longueur. Ils possèdent<br />
un connecteur Redel côté <strong>Reocor</strong> (utiliser l'adaptateur<br />
Redel) et côté patient, un logement pour les<br />
adaptateurs conformément à la figure 13 et pour le<br />
câble à usage unique conformément à la figure 9.<br />
Figure 8 : câbles patient PK-67-L et PK-67-S<br />
• Câbles à usage unique<br />
Les câbles à usage unique Remington 301-CG (États-<br />
Unis uniquement) et PK-155 avec pinces crocodile<br />
sont reliés au patient à l'aide du câble PK-67-S.<br />
sur PK-67-S<br />
Pinces crocodile<br />
301-CG (États-Unis uniquement)<br />
Figure 9 : câbles à usage unique PK-155 et 301-CG (États-Unis uniquement)<br />
Français<br />
Uniquement pour les États-Unis : les câbles à usage<br />
unique 101-97 et FL-601-97 de Remington Medical<br />
Inc. sont reliés au <strong>Reocor</strong> S à l'aide du câble d'adaptation<br />
ADAP-2R (fig. 10).<br />
Figure 10 : États-Unis uniquement : câble à usage unique et adaptateur Remington
164 Instructions de commande<br />
Il est également possible d'utiliser le <strong>Reocor</strong> S avec<br />
des câbles patients à 4 connecteurs pour les stimulateurs<br />
double chambres. Le <strong>Reocor</strong> S n'utilise que le<br />
canal ventriculaire de ces câbles.<br />
Les câbles suivants peuvent être utilisés :<br />
• Câble patient PK-141 avec quatre pinces crocodile<br />
côté patient et des connecteurs Redel côté <strong>Reocor</strong><br />
(utiliser les adaptateurs Redel).<br />
Le canal ventriculaire est indiqué par la mention<br />
« Vent Diff/Indiff » sur la gaine de protection.<br />
Français<br />
Figure 11 : câble patient PK-141<br />
• Câble patient PK-175 avec quatre bornes à vis<br />
pour sondes temporaires, côté patient, et connecteur<br />
Redel côté <strong>Reocor</strong> (utiliser l'adaptateur<br />
Redel). Le canal ventriculaire est indiqué par la<br />
mention « Ventricle ».<br />
Figure 12 : câble patient PK-175
165 Instructions de commande<br />
• Adaptateur<br />
La figure 13 illustre l'adaptateur pour le branchement<br />
de sondes temporaires sur le <strong>Reocor</strong> S par le biais<br />
d'un câble patient double chambre PK-67-L/S.<br />
Les sondes doivent être branchées sur le raccord<br />
ventriculaire de l'adaptateur (marqué d'un V).<br />
Figure 13 : adaptateur pour les câbles patient PK-67-L et PK-67-S<br />
Français<br />
PA-1-B et PA-1-C pour raccorder des connecteurs de<br />
2 mm isolés ou des adaptateurs MHW (adaptateurs<br />
pour sondes myocardiques temporaires)<br />
PA-2 IS-1<br />
PA-4 avec pinces crocodile<br />
AVERTISSEMENT !<br />
AVERTISSEMENT !<br />
AVERTISSEMENT !<br />
Connexion<br />
Les câbles défectueux mettent le patient en danger.<br />
Les câbles défectueux altèrent leur fonctionnement et<br />
mettent le patient en danger. N'utilisez pas de câbles<br />
défectueux.<br />
Mise en danger liée à une perte de fonction.<br />
Les câbles humides peuvent altérer leur fonctionnement<br />
et mettre le patient en danger. N'utilisez pas de<br />
câbles humides.<br />
Mise en danger liée aux courants électriques.<br />
Les contacts de câbles non utilisés peuvent induire<br />
des courants électriques dans le corps du patient.<br />
Attachez les contacts de câbles non utilisés à proximité<br />
du patient.
166 Instructions de commande<br />
Français<br />
Attention !<br />
Remarque :<br />
Remarque :<br />
Remarque :<br />
Réactions allergiques, inflammations.<br />
Évitez que les câbles n'entrent en contact avec des<br />
plaies ou la peau du patient.Ne pas raccorder le câble<br />
patient à la sonde temporaire de stimulation avant<br />
d'avoir établi la connexion sur le <strong>Reocor</strong> S.<br />
avant d'utiliser les câbles , veillez à la position<br />
correcte des gaines isolantes.<br />
en cas d'utilisation de câbles ou d'adaptateurs pour<br />
des applications double chambres les sondes doivent<br />
être branchées sur le canal ventriculaire (marqué<br />
Ventricule ou V).<br />
ne pas raccorder le câble patient à la sonde temporaire<br />
de stimulation avant d'avoir établi la connexion<br />
sur le <strong>Reocor</strong> S.<br />
Connexion directe<br />
Si <strong>Reocor</strong> S est utilisé sans adaptateur Redel, il est<br />
possible de raccorder directement des cathéters et<br />
des sondes myocardiques temporaires aux bornes<br />
INDIFF.+ et DIFF. à l'aide des câbles patient PK-82 <br />
et PK-83.<br />
Câble patient<br />
Le câble patient est raccordé au <strong>Reocor</strong> S via un adaptateur<br />
Redel.<br />
Enficher l'adaptateur Redel sur le <strong>Reocor</strong> S.<br />
Visser à fond.<br />
Enficher le connecteur Redel du câble patient<br />
dans la borne Redel de l'adaptateur.
167 Instructions de commande<br />
Raccordements possibles<br />
Cathéter temporaire avec connecteurs de 2 mm ou <br />
Sonde myocardique temporaire avec adaptateur de<br />
2 mm<br />
Il est possible, sans utiliser de câble ni d'adaptateur<br />
supplémentaire, de raccorder directement le<br />
<strong>Reocor</strong> S à un cathéter temporaire avec un connecteur<br />
de 2 mm ou à une sonde myocardique temporaire<br />
avec un adaptateur de 2 mm. Le tableau ci-dessous<br />
présente tous les autres branchements possibles.<br />
Raccordement<br />
côté patient<br />
Câble <strong>BIOTRONIK</strong> Connexion<br />
côté appareil<br />
Connexions recommandées<br />
Raccordement direct (sans câble <strong>BIOTRONIK</strong>)<br />
2 mm PK-67-S/L avec PA-1-C Connecteur<br />
Redel<br />
Bornes à vis PK 83B avec adapt. TC Connecteur<br />
Redel<br />
Bornes à vis PK 83 avec adapt. TC Connecteur <br />
de 2 mm<br />
Raccords possibles<br />
2 mm PK-67-S/L avec PA-1-B Connecteur<br />
Redel<br />
Pinces crocodile PK-141 Connecteur<br />
Redel<br />
Pinces crocodile PK-67-S/L avec PA-4 Connecteur<br />
Redel<br />
Pinces crocodile PK-67-S/L avec PK-155 Connecteur<br />
Redel<br />
Pinces crocodile PK-82 Connecteur<br />
de 2 mm<br />
Connexion<br />
<strong>Reocor</strong> S<br />
Bornes de 2 mm<br />
Adaptateur Redel<br />
Bornes de 2 mm<br />
Bornes de 2 mm<br />
Adaptateur Redel<br />
Adaptateur Redel<br />
Adaptateur Redel<br />
Adaptateur Redel<br />
Bornes de 2 mm<br />
Français<br />
Sonde myocardique temporaire avec aiguille<br />
sectionnable ou avec extrémité flexible <br />
(diamètre max. 2,3 mm)<br />
Raccordement<br />
côté patient<br />
Câble <strong>BIOTRONIK</strong> Connexion <br />
côté appareil<br />
Connexions recommandées<br />
Bornes à vis PK-83B Connecteur<br />
Redel<br />
Bornes à vis PK-83 Connecteur de<br />
2 mm<br />
Connexion<br />
<strong>Reocor</strong> S<br />
Adaptateur<br />
Redel<br />
Bornes de 2 mm
168 Instructions de commande<br />
Raccordement<br />
côté patient<br />
Câble <strong>BIOTRONIK</strong><br />
Connexion <br />
côté appareil<br />
Raccords possibles<br />
Bornes à vis PK-175 Connecteur<br />
Redel<br />
Pinces crocodile PK-141 Connecteur<br />
Redel<br />
Pinces crocodile PK-67-S/L avec PA-4 Connecteur<br />
Redel<br />
Pinces crocodile PK-67-S/L avec PK-155 Connecteur<br />
Redel<br />
Pinces crocodile PK-82 Connecteur de<br />
2 mm<br />
Connexion<br />
<strong>Reocor</strong> S<br />
Adaptateur<br />
Redel<br />
Adaptateur<br />
Redel<br />
Adaptateur<br />
Redel<br />
Adaptateur<br />
Redel<br />
Bornes de 2 mm<br />
Sonde implantée avec connecteur IS-1<br />
Français<br />
Connecteur<br />
côté patient<br />
Câble <strong>BIOTRONIK</strong> Connecteur<br />
côté appareil<br />
Connexions recommandées<br />
Borne IS-1 PK-67-S/L avec PA-2 Connecteur<br />
Redel<br />
Raccords possibles<br />
Pinces crocodile PK-141 Connecteur<br />
Redel<br />
Pinces crocodile PK-67-S/L avec PA-4 Connecteur<br />
Redel<br />
Pinces crocodile PK-67-S/L avec PK-155 Connecteur<br />
Redel<br />
Pinces crocodile PK-82 Connecteur <br />
de 2 mm<br />
<strong>Reocor</strong> S<br />
Connecteur<br />
Adaptateur<br />
Redel<br />
Adaptateur<br />
Redel<br />
Adaptateur<br />
Redel<br />
Adaptateur<br />
Redel<br />
Bornes <br />
de 2 mm<br />
Remarque :<br />
sur les câbles double chambre (PK-141, PK-175, <br />
PK-67-S/L) <strong>Reocor</strong> S n'utilise que le canal<br />
ventriculaire !<br />
Polarité<br />
En règle générale, <strong>Reocor</strong> S stimule en mode bipolaire,<br />
mais il peut être utilisé au choix avec des sondes<br />
de stimulation temporaires bipolaires ou unipolaires.<br />
Lorsque des sondes unipolaires sont utilisées, deux<br />
sondes doivent être connectées.
169 Instructions de commande<br />
Déconnexion<br />
Débrancher le câble patient des sondes temporaires<br />
de stimulation du patient ou de la connexion directe.<br />
Déconnexion du connecteur Redel<br />
• Tirer la bague d'accouplement du connecteur<br />
Redel puis débrancher le connecteur de la borne<br />
Redel.<br />
Mise en service<br />
La commande du <strong>Reocor</strong> S est identique dans tous les<br />
modes de fonctionnement. Les différentes étapes de<br />
commande doivent se dérouler dans l'ordre suivant<br />
(les chiffres entre parenthèses renvoient à la figure 1,<br />
page 158 de ce Manuel technique).<br />
• Mettre la pile en place.<br />
• Repousser le couvercle du panneau de commande<br />
vers le bas.<br />
• Préparer le patient : mettre les sondes en place,<br />
mais sans les raccorder au stimulateur.<br />
• Préparer le <strong>Reocor</strong> :<br />
Régler la fréquence de stimulation avec la molette<br />
de réglage Rate (12).<br />
Régler les amplitudes de stimulation avec la<br />
molette de réglage Ampl. (6).<br />
• Sélectionner le mode de stimulation avec le commutateur<br />
rotatif Mode (13). Cette manipulation<br />
active également l'appareil.<br />
• Une fois l'auto-test interne terminé avec succès,<br />
les DEL du panneau de commande clignotent<br />
simultanément deux fois.<br />
• Si la DEL Low battery (3) clignote, il est nécessaire<br />
de remplacer la pile (le changement de pile est<br />
décrit à la page 170).<br />
• Raccorder les sondes, la DEL jaune Pace (4) clignote<br />
de manière synchronisée avec l'impulsion<br />
de stimulation.<br />
Français
170 Instructions de commande<br />
Attention !<br />
• Régler la sensibilité avec la molette de réglage<br />
Sens. (7) de sorte que la DEL verte Sense (5)<br />
clignote de manière synchronisée avec chaque<br />
événement détecté.<br />
• Prévoir une marge de sécurité suffisante afin de<br />
garantir la fiabilité de la détection.<br />
• Surveiller l'ECG du patient et adapter, le cas<br />
échéant, les valeurs de l'amplitude et de la <br />
sensibilité.<br />
Pendant l'utilisation du <strong>Reocor</strong> S, la fréquence cardiaque<br />
du patient doit être surveillée sur un moniteur<br />
ECG avec fonction d'alarme.<br />
Fixation<br />
Français<br />
Le <strong>Reocor</strong> S doit être utilisé soit posé à plat sur une<br />
surface horizontale non glissante, soit fixé au bras du<br />
patient à l'aide du brassard, soit accroché à un pied à<br />
perfusion par l'œillet de suspension situé au dos.<br />
Pour pouvoir accrocher le <strong>Reocor</strong> S à un pied de perfusion,<br />
tourner l'œillet de suspension situé au dos de<br />
l'appareil. Vous garantissez ainsi une utilisation sure<br />
de l'appareil tout en délestant le câble patient.<br />
Remplacement de la pile<br />
Lorsque la pile est presque vide la DEL Low battery (3)<br />
commence à clignoter. Lorsqu'une pile de type <br />
MN 1604 Duracell ® Procell ® est utilisée, la durée de<br />
service restante est d'environ 36 heures. Il convient<br />
cependant de remplacer la pile dans les meilleurs<br />
délais.<br />
Le <strong>Reocor</strong> S doit être alimenté par une pile 9 V,<br />
de code international CEI 6LR61. Veiller à utiliser uniquement<br />
des piles alcalines au manganèse étanches.<br />
L'utilisation d'une pile de type MN 1604 Duracell ®<br />
Procell ® permet au moins 600 heures de stimulation<br />
externe à une température de 20 ± 2 °C avant de<br />
devoir remplacer la pile.
171 Instructions de commande<br />
Attention !<br />
Si le changement de pile est effectué alors que<br />
<strong>Reocor</strong> S est en service, à température ambiante de<br />
20 ± 2 °C, l'appareil demeure opérationnel pendant<br />
encore 30 s environ.<br />
Pour des raisons de sécurité, il est recommandé de<br />
prendre en charge le patient autrement lors du changement<br />
de la pile.<br />
Ne jamais utiliser de piles rechargeables (accus).<br />
Il est difficile d'évaluer la durée de vie de ces piles,<br />
il peut donc arriver que le moment de l'ERI soit<br />
dépassé accidentellement, ce qui interrompt alors<br />
soudainement la stimulation.<br />
Le compartiment de pile (2) se trouve sur le côté droit<br />
de l'appareil ; pour l'ouvrir, pousser le verrou bleu<br />
vers le haut puis extraire le capot vers la droite.<br />
Extraire prudemment les piles.<br />
Il est possible que les pôles de la pile neuve soient<br />
protégés par un capuchon en caoutchouc. Retirer ce<br />
capuchon avant de mettre la pile neuve en place.<br />
Un marquage indiquant la polarisation recommandée<br />
se trouve dans le compartiment de pile. Lors de la<br />
mise en place de la nouvelle pile, veiller simplement à<br />
ce que les pôles soient orientés vers le centre du<br />
boîtier. La position des pôles positif et négatif n'a pas<br />
d'importance.<br />
Mettre la nouvelle pile en place en insérant sa partie<br />
inférieure en premier dans le compartiment (fig. 14).<br />
Français<br />
Figure 14 : mise en place de la pile
Français<br />
<br />
172 Instructions de commande<br />
Remarque :<br />
Refermer le capot puis repousser le verrou bleu <br />
vers le bas jusqu'à ce qu'il s'encliquète de manière<br />
audible.<br />
si l'appareil est stocké, et donc non utilisé, pendant<br />
une période prolongée, il convient d'en extraire la pile<br />
afin d'éviter tout dommage provoqué par des coulures<br />
éventuelles.
173 Modes de stimulation et paramètres<br />
Modes de stimulation<br />
et paramètres<br />
Modes de stimulation<br />
Mode S00<br />
Mode SSI<br />
Mode SST<br />
Stimulation haute<br />
fréquence<br />
Trois types de stimulation sont disponibles : S00, SSI,<br />
SST ainsi que la stimulation haute fréquence (rafale).<br />
En présence de perturbations provoquées par des<br />
interférences électromagnétiques (IEM), le <strong>Reocor</strong> S<br />
passe en mode S00 pendant la durée de la perturbation<br />
en cas de dépassement de certaines valeurs<br />
limites.<br />
Le stimulateur cardiaque génère des impulsions<br />
d'une fréquence constante. Ces impulsions sont asynchrones,<br />
c.-à-d. qu'elles ne sont pas synchronisées<br />
avec les battements intrinsèques du cœur.<br />
Ce mode fonctionne pour la connexion sur le ventricule<br />
en V00, pour la connexion sur l'oreillette en A00.<br />
Le stimulateur cardiaque inhibe les impulsions lorsque<br />
des potentiels intracardiaques sont détectés.<br />
Il génère des impulsions si aucun événement n'est<br />
détecté pendant un intervalle correspondant à la<br />
fréquence sélectionnée.<br />
Ce mode fonctionne pour la connexion sur le ventricule<br />
en mode VVI, pour la connexion sur l'oreillette en<br />
mode AAI.<br />
Les modes déclenchés SST correspondent aux modes<br />
SSI, sauf qu'en cas de détection d'un événement ventriculaire<br />
hors de la période réfractaire une émission<br />
immédiate d'impulsions dans la cavité correspondante<br />
se produit à la place d'une inhibition de l'impulsion.<br />
La fréquence de la fonction rafales (Burst) peut être<br />
sélectionnée entre 60 cpm et 1000 cpm à l'aide de la<br />
molette de réglage (10). <br />
Cette fonction s'active avec deux touches : appuyer<br />
tout d'abord sur la touche (11) Select burst puis, dans<br />
les 2 secondes suivantes, sur la touche (8) Start burst.<br />
L'émission d'impulsions a lieu tant que la deuxième<br />
touche est enfoncée.<br />
Français
174 Modes de stimulation et paramètres<br />
Fréquence<br />
AVERTISSEMENT !<br />
Il est possible de modifier progressivement la valeur<br />
de la fréquence avec la molette de réglage Rate (12),<br />
de 30 cpm à 250 cpm. Lorsque la valeur réglée est<br />
supérieure à 180 cpm, l'appareil émet un signal<br />
acoustique pendant 2 secondes.<br />
Une stimulation cardiaque à des fréquences supérieures<br />
à 180 cpm pendant une période prolongée<br />
peut provoquer de graves complications. Il est recommandé<br />
de ne procéder à une stimulation à fréquence<br />
élevée que si une surveillance permanente est garantie.<br />
Amplitude et durée d'impulsion<br />
Français<br />
L'amplitude d'impulsion se règle avec la molette de<br />
réglage Ampl. (6) dans une plage comprise entre 0,1 V<br />
et 17 V. Lorsque la valeur réglée est inférieure à 1 V,<br />
l'appareil émet un signal sonore pendant 2 secondes.<br />
L'impulsion dure 1 ms.<br />
Il convient de contrôler la stimulation à intervalles<br />
réguliers afin de garantir que la stimulation est efficace<br />
et que la marge de sécurité réglée est suffisante.<br />
Sensibilité<br />
La sensibilité se règle avec la molette de réglage<br />
Sens. (7) à une valeur comprise entre 1 mV et 20 mV.<br />
Il est nécessaire de la contrôler à intervalles réguliers<br />
afin de garantir qu'une détection correcte a lieu et que<br />
la marge de sécurité réglée est suffisante.<br />
Intervalle d'interférence<br />
L'intervalle d'interférence est déclenché aussi bien<br />
par des événements de stimulation que par des événements<br />
détectés.<br />
L'intervalle est remis à zéro si un bruit est détecté au<br />
cours d'un intervalle de 80 ms, ce qui provoque une<br />
stimulation asynchrone à la fréquence programmée<br />
tant que l'interférence persiste.
175 Modes de stimulation et paramètres<br />
Rafale<br />
AVERTISSEMENT !<br />
La fréquence de la fonction auriculaire Burst rate peut<br />
être sélectionnée entre 60 cpm et 1000 cpm à l'aide<br />
de la molette de réglage (10).<br />
Cette fonction s'active avec deux touches : appuyer<br />
tout d'abord sur la touche (11) Select burst puis, dans<br />
les 2 secondes suivantes, sur la touche (8) Start burst.<br />
L'émission d'impulsions a lieu tant que la deuxième<br />
touche est enfoncée.<br />
Une stimulation cardiaque à des fréquences supérieures<br />
à 180 cpm pendant une période prolongée<br />
peut provoquer de graves complications hémodynamiques.<br />
Il est recommandé de ne procéder à une stimulation<br />
à fréquence élevée que si une surveillance<br />
permanente est garantie.<br />
Le mode de stimulation à hautes fréquences est destiné<br />
à stopper certaines tachycardies supraventriculaires<br />
(TSV) et doit être envisagé uniquement pour des<br />
indications auriculaires. L'utilisation de stimulations<br />
asynchrones à hautes fréquences peut interrompre<br />
une tachycardie supraventriculaire en dépolarisant<br />
des sections d'un vecteur de réentrée. Même si un<br />
foyer ectopique auriculaire est responsable d'une<br />
tachycardie supraventriculaire, l'application d'une<br />
stimulation auriculaire à hautes fréquences peut<br />
provoquer une inhibition massive du foyer ectopique.<br />
L'application d'une stimulation auriculaire à haute<br />
fréquence présente certains risques qui doivent être<br />
pris en considération. Ce sont par exemple une stimulation<br />
ventriculaire, une tachycardie ou fibrillation<br />
ventriculaires. Elles peuvent résulter d'un positionnement<br />
incorrect des sondes ou de parcours de conduction<br />
anormaux de l'excitation, qui n'empruntent pas<br />
les conductions d'excitation AV normales (par ex. dans<br />
le cas du syndrome de Wolff-Parkinson-White).<br />
Une stimulation à haute fréquence peut également<br />
provoquer des malaises des patients ainsi que des<br />
asystoles.<br />
Français
176 Manipulation, maintenance et entretien<br />
Manipulation, maintenance<br />
et entretien<br />
<strong>Reocor</strong> S<br />
Français<br />
AVERTISSEMENT !<br />
Attention !<br />
Nettoyage<br />
Désinfection<br />
Le <strong>Reocor</strong> S est un appareil de haute précision qui <br />
doit être manipulé avec précaution. Une sollicitation<br />
mécanique (provoquée par une chute par ex.),<br />
peut entraver son fonctionnement.<br />
En pareil cas l'appareil doit être renvoyé à la société<br />
<strong>BIOTRONIK</strong>.<br />
Avant utilisation le stimulateur cardiaque doit être<br />
entreposé pendant au moins deux heures dans les<br />
conditions ambiantes indiquées (voir page 183).<br />
Le boîtier, les éléments de commande, les connexions<br />
et câbles patient doivent être contrôlés visuellement<br />
avant chaque utilisation, afin de déceler les dommages<br />
mécaniques, déformations, pièces desserrés,<br />
fêlures ou souillures éventuelles.<br />
Ne jamais utiliser un appareil endommagé ni un<br />
appareil présentant des anomalies, particulièrement<br />
s'il a chuté ou s'il peut avoir été endommagé par une<br />
tension haute fréquence ou de défibrillation.<br />
Le <strong>Reocor</strong> S doit être utilisé soit posé à plat sur une<br />
surface horizontale non glissante, soit fixé au bras du<br />
patient à l'aide du brassard, soit accroché à un pied <br />
à perfusion par l'œillet de suspension situé au dos.<br />
Il est interdit de porter le <strong>Reocor</strong> S directement sur la<br />
peau.<br />
Utiliser un détergent doux et un chiffon humide pour<br />
nettoyer le <strong>Reocor</strong> S. Éviter d'utiliser des détergents<br />
agressifs ou des solvants organiques tels qu'essence<br />
ou éther, car ils risquent d'attaquer le boîtier en plastique<br />
de l'appareil.<br />
Pour le désinfecter, essuyer l'appareil avec un chiffon<br />
imbibé d'une solution désinfectante (par ex. Aerodesin<br />
2000 ou Lysoform D). Tenir compte des indications<br />
du fabricant concernant les proportions de mélange<br />
de la solution.
177 Manipulation, maintenance et entretien<br />
Remarque :<br />
Stérilisation<br />
Attention !<br />
lorsque le <strong>Reocor</strong> S a été nettoyé ou désinfecté, <br />
il est interdit de l'utiliser pendant une heure.<br />
Le <strong>Reocor</strong> S n'est pas stérilisable. Si l'appareil doit<br />
être utilisé dans un environnement stérile, il convient<br />
de l'emballer dans une couverture de protection <br />
stérile.<br />
Il est recommandé de faire contrôler l'appareil chaque<br />
année par un technicien agréé par le constructeur.<br />
Bien que le <strong>Reocor</strong> S soit protégé contre les gouttelettes<br />
d'eau, veiller à toujours le maintenir propre et sec.<br />
Câbles patient réutilisables<br />
Nettoyage<br />
Désinfection<br />
Avant de l'ouvrir, vérifier que l'emballage d'un câble<br />
stérile est intact afin de garantir la stérilité du matériel.<br />
Les câbles patient réutilisables peuvent être nettoyés<br />
et désinfectés avec des détergents hospitaliers selon<br />
différentes méthodes. Pour ce nettoyage il est interdit<br />
d'utiliser des produits chimiques agressifs, comme<br />
l'acétone par exemple.<br />
La méthode de nettoyage recommandée consiste à<br />
utiliser un chiffon humide et un savon normal, sans<br />
alcool, ou le détergent Stabimed de la société Braun.<br />
Les câbles doivent ensuite être rincés avec de l'eau<br />
sans électrolyte pour éliminer les restes de détergent,<br />
puis essuyés avec un chiffon propre et sec.<br />
La désinfection dans un bain s'effectue avec un produit<br />
désinfectant pour instruments médicaux à base<br />
d'aldéhydes (par ex. Lysoformin 3000) ou d'alcool<br />
(par ex. Aerodesin 2000), conformément aux indications<br />
du fabricant et aux prescriptions des directives<br />
hospitalières correspondantes.<br />
Après la désinfection, il convient de rincer le câble<br />
avec de l'eau sans électrolyte pour le débarrasser des<br />
restes de désinfectant.<br />
Stérilisation La stérilisation à la vapeur peut être réalisée à 121 °C<br />
et sous 1,1 bar, pendant 20 min.<br />
Français
178 Manipulation, maintenance et entretien<br />
Maintenance, service, inspections<br />
Français<br />
Contrôle avant<br />
utilisation<br />
Inspection<br />
La maintenance nécessaire se limite au changement<br />
de la pile (voir page 170).<br />
D'autres travaux de maintenance ne sont pas nécessaires.<br />
Procéder à un rapide contrôle de l'appareil avant chaque<br />
utilisation. Ceci doit inclure un contrôle visuel et<br />
un simple contrôle du fonctionnement de l'appareil.<br />
Contrôle visuel :<br />
• Contrôler l'absence de dommages mécaniques,<br />
déformations, pièces mobiles, fissures, etc.<br />
• Contrôler l'absence de dommages mécaniques<br />
sur la zone de connexion des câbles.<br />
• Vérifier que les inscriptions sont parfaitement <br />
lisibles.<br />
Contrôle de fonctionnement :<br />
Tenir compte du résultat de l'auto-test effectué automatiquement<br />
à la mise sous tension de l'appareil.<br />
Procéder à une inspection<br />
• Après une utilisation commune avec des instruments<br />
chirurgicaux haute fréquence ou des défibrillateurs,<br />
• En cas de soupçon de dysfonctionnement,<br />
• Une fois par an.<br />
Cette inspection doit se dérouler conformément aux<br />
indications du constructeur. Ces informations sont<br />
disponibles sur demande. Elles contiennent également<br />
une description des différentes étapes de<br />
contrôle et une liste des appareils requis.
179 Manipulation, maintenance et entretien<br />
Élimination<br />
Remarque :<br />
Le <strong>Reocor</strong> S porte le symbole représentant une poubelle<br />
barrée d'une croix sur la plaque signalétique. <br />
Ce symbole indique que la reprise et l'élimination de<br />
l'appareil sont régies par la directive européenne<br />
2002/96/CE relative aux déchets des équipements<br />
électriques et électroniques (directive DEEE).<br />
Les appareils anciens ainsi que les accessoires obsolètes,<br />
comme par ex. les câbles patient, doivent être<br />
renvoyés à la société <strong>BIOTRONIK</strong>. Il est ainsi garanti<br />
que l'élimination est effectuée en conformité avec les<br />
exécutions nationales de la directive DEEE.<br />
s’ils ont été en contact avec du sang, les câbles doivent<br />
être mis au rebut avec les déchets médicaux<br />
contaminés dans le respect de l'environnement. Mettez<br />
au rebut les câbles non contaminés conformément<br />
à la Directive européenne 2002/96/CE relative aux<br />
déchets d’équipements électriques et électroniques<br />
(DEEE).<br />
Les piles usagées doivent être traitées comme des<br />
déchets spéciaux et doivent être éliminées par <br />
l'utilisateur.<br />
Pour toute question, contacter <strong>BIOTRONIK</strong>.<br />
Français
180 Sécurité technique<br />
Sécurité technique<br />
Français<br />
AVERTISSEMENT !<br />
Le stimulateur cardiaque externe <strong>Reocor</strong> S répond<br />
aux exigences des normes internationales en vigueur<br />
en matière de sécurité des appareils électro-médicaux<br />
CEI 60601-1 et CEI 60601-1-2, ainsi que de la<br />
norme internationale CEI 60601-2-31 concernant les<br />
stimulateurs cardiaques temporaires externes.<br />
Les caractéristiques spéciales suivantes assurent la<br />
sécurité du patient :<br />
• Aucun contact possible avec des pièces métalliques<br />
telles qu'elles sont définies par la CEI.<br />
• La construction répond aux spécifications de la<br />
catégorie de matériel CF (cardiac floating) et est<br />
homologuée pour le traitement cardiaque. Le stimulateur<br />
cardiaque est conforme aux exigences<br />
des normes internationales relatives à la protection<br />
contre les défibrillations.<br />
• Le couvercle du panneau de commande fermé<br />
protège le stimulateur cardiaque des gouttes<br />
d'eau.<br />
Les sondes temporaires auxquelles le <strong>Reocor</strong> S est<br />
raccordé font office de conducteur de basse impédance<br />
vers le myocarde pour le courant électrique. Les<br />
appareils reliés au secteur et situés à proximité du<br />
patient doivent donc impérativement être équipés<br />
d'une mise à la terre réglementaire.<br />
Il est interdit d'utiliser le stimulateur cardiaque dans<br />
des zones présentant un risque d'explosion.<br />
Seuls des techniciens de <strong>BIOTRONIK</strong> sont autorisés à<br />
effectuer tous les autres travaux de maintenance et de<br />
réparation.
181 Spécifications techniques<br />
Spécifications techniques<br />
Symboles<br />
Respecter les indications du manuel technique<br />
Repérage de la position de la pile dans son compartiment<br />
Élimination conformément à la Directive 2002/96/CE du<br />
Parlement européen et du Conseil du 27 janvier 2003 <br />
relative aux déchets d'équipements électriques et <br />
électroniques<br />
IP31<br />
OFF<br />
Classification partie appliquée : CF (Cardiac Floating), <br />
protection contre les chocs de défibrillation<br />
Hydrofuge, degré de protection IP31<br />
Arrêt (commutateur rotatif Mode)<br />
Français<br />
Paramètres réglables<br />
Modes de stimulation S00, SSI, SST<br />
Fréquence de base (30 … 250 cpm) ± 1 cpm Lorsque la fréquence est<br />
180 cpm, un avertissement<br />
sonore retentit<br />
Amplitude d'impulsion 0,1 … 17 V ±max (50 mV, 10 %) Lorsque l'amplitude<br />
d'impulsion est 1 V, <br />
un avertissement sonore<br />
retentit<br />
Sensibilité 1 … 20 mV ± 15 % Pour une impulsion 40 ms<br />
sin 2<br />
Fréquence rafale (A) (60 … 1000 cpm) ± 20 cpm<br />
Paramètres invariables<br />
Durée impulsion 1 ms ± 5 %<br />
Auto short après Pace 20 ms ± 10 %<br />
Intervalle <br />
80 ms ± 5 ms<br />
d'interférence<br />
In Channel Blanking 110 ms ± 3 ms
182 Spécifications techniques<br />
Paramètres invariables<br />
Période réfractaire<br />
(30 … 150) cpm<br />
(151 … 200) cpm<br />
(201 … 250) cpm<br />
Protection haute <br />
fréquence<br />
1 … 180 cpm<br />
<br />
181 … 250 cpm<br />
Forme de l'impulsion<br />
<br />
225 ms ± 5 ms<br />
200 ms ± 5 ms<br />
175 ms ± 5 ms<br />
<br />
<br />
286 ms ± 10 %<br />
<br />
214 ms ± 10 %<br />
Asymétrique, biphasique<br />
<br />
<br />
286 ms = 210 cpm, <br />
sauf en cas de rafales<br />
214 ms = 280 cpm, <br />
sauf en cas de rafales<br />
Surveillance impédance de sonde<br />
Avertissement sonore À partir de 2000 15 %, pour 5 V d'amplitude<br />
Connexion des sondes Bornes isolées de 2 mm ;<br />
plot Redel, 6 pôles, via adaptateur Redel<br />
Français<br />
Caractéristiques électriques/pile<br />
Pile<br />
• Type alcaline au manganèse : CEI 6LR61/ANSI 1604A<br />
• 9 V étanche<br />
• Par ex. MN1604 Duracell ® Procell ® a)<br />
Polarité<br />
Protection contre<br />
inversions de polarité<br />
Consommation <br />
d'énergie<br />
Durée de service avec<br />
pile neuve b)<br />
Fin de la durée <br />
de service (EOS)<br />
Durée de service restante<br />
après signal ERI b)<br />
Comportement durant<br />
le changement de pile<br />
Cathodique<br />
Aucune : polarité sans importance<br />
Caractéristique 1 mA (70 cpm, 5,0 V, 500 )<br />
• 600 h (-10 %) à 20 °C (± 2 °C)<br />
• Avec : 70 cpm, 5 V, mode VVI, 500 ohm<br />
• Jusqu'à : signal ERI (avertissement EOS)<br />
DEL clignotante « Low battery »<br />
• 36 heures<br />
• Avec : 70 cpm, 5 V, mode VVI, 500 ohm<br />
• L'appareil demeure opérationnel pendant au moins<br />
30 s après extraction de la pile<br />
• Le mode réglé est conservé<br />
a) Marque commerciale déposée de Duracell Inc., Bethel, CT 06801<br />
b) Lors de l'utilisation d'une pile de type MN 1604 Duracell ® , Procell ®
183 Spécifications techniques<br />
Conditions ambiantes<br />
Plage de température d'utilisation +10 °C … +40 °C<br />
Plage de température de stockage 0 °C … +50 °C<br />
Humidité relative<br />
30 % … 75 %, sans condensation<br />
Pression atmosphérique<br />
700 hPa … 1060 hPa<br />
Niveau de bruit<br />
50 dB<br />
Dimensions, poids, matériau<br />
Dimensions <strong>Reocor</strong> S 160 mm x 75 mm x 35 mm ±2 mm<br />
(sans adaptateur Redel)<br />
Poids <strong>Reocor</strong> S Avec pile, avec adaptateur Redel : 305 g ± 10 %<br />
Sans pile, avec adaptateur Redel : 260 g ± 10 %<br />
Sans pile, sans adaptateur Redel : 225 g ± 10 %<br />
Dimensions adaptateur 76 mm x 35,5 mm x 29,4 mm<br />
Redel pour <strong>Reocor</strong> S<br />
Poids adaptateur Redel 35 g ± 10 %<br />
pour <strong>Reocor</strong> S<br />
Matériau du boîtier Babyblend FR 3000 (PC-ABS)<br />
Français<br />
Classification<br />
Classification partie CF (cardiac floating), protection contre les chocs <br />
appliquée<br />
de défibrillation<br />
Classe de protection II b<br />
Degré de protection IP31 (hydrofuge)<br />
Résistance aux chocs 5 kV<br />
de défibrillation<br />
Mode de fonctionnement Utilisation permanente<br />
Durée de vie estimée a)<br />
(selon <br />
EN 60601-1:2007, 4.4)<br />
12 ans<br />
a) La durée de vie correspond à la durée de vie de service maximale estimée de<br />
l'appareil après sa mise sur le marché. La durée de vie de service maximale<br />
estimée ne s'appuie pas sur des données de test.
184 Conformité à CEI 60601-1-2<br />
Conformité à CEI 60601-1-2<br />
Directives et déclaration du fabricant –<br />
Émissions électromagnétiques <br />
(CEI 60601-1-2 : Tableau 1)<br />
Le dispositif a été conçu pour être utilisé dans un<br />
environnement électromagnétique similaire à celui<br />
décrit ci-dessous. L'utilisateur doit faire en sorte que<br />
l'appareil soit utilisé dans un tel environnement.<br />
Français<br />
Essai d'émission<br />
Émissions HF <br />
selon CISPR 11<br />
Émissions HF<br />
selon CISPR 11<br />
Émission d'harmoniques<br />
selon <br />
CEI 61000-3-2<br />
Variations de tensions<br />
selon CEI 61000-3-3<br />
Niveau de <br />
conformité<br />
Groupe 1<br />
Classe B<br />
Sans objet<br />
Sans objet<br />
Directives concernant l'environnement<br />
électromagnétique<br />
Le dispositif utilise de l'énergie HF uniquement<br />
pour son propre fonctionnement.<br />
L'émission de hautes fréquences est par<br />
conséquent très faible et ne présente pratiquement<br />
aucun risque de provoquer des<br />
interférences avec des appareils électroniques<br />
fonctionnant à proximité de l'appareil.<br />
Le dispositif peut être utilisé dans tous les<br />
environnements autres que dans les lieux<br />
d'habitation et les lieux directement raccordés<br />
à un réseau d'alimentation public.
185 Conformité à CEI 60601-1-2<br />
Directives et déclaration du fabricant –<br />
Immunité aux interférences électromagnétiques <br />
(CEI 60601-1-2 : Tableau 2)<br />
Le dispositif a été conçu pour être utilisé dans un<br />
environnement électromagnétique similaire à celui<br />
décrit ci-dessous. L'utilisateur doit faire en sorte que<br />
l'appareil soit utilisé dans un tel environnement.<br />
Test d'immunité<br />
aux interférences<br />
Décharge d'électricité<br />
statique selon<br />
CEI 61000-4-2<br />
Perturbations électriques<br />
transitoires<br />
rapides/rafales<br />
selon <br />
CEI 61000-4-4<br />
Tensions transitoires<br />
(surtensions)<br />
selon<br />
CEI 61000-4-5<br />
Chutes de tension,<br />
interruptions de<br />
courte durée et<br />
variations de la<br />
tension d'alimentation<br />
selon <br />
CEI 61000-4-11<br />
Champ magnétique<br />
aux fréquences<br />
d'alimentation <br />
(50/60 Hz) selon<br />
CEI 61000-4-8<br />
Niveau de test<br />
selon<br />
CEI 60601<br />
±6 kV décharge<br />
de contact<br />
±8 kV décharge<br />
dans l'air<br />
Sans objet<br />
Sans objet<br />
Sans objet<br />
Niveau de<br />
conformité<br />
±6 kV décharge<br />
de contact<br />
±15 kV<br />
décharge<br />
dans l'air<br />
Directives concernant l'environnement<br />
électromagnétique<br />
Le sol doit être en bois, en<br />
béton ou en carrelage céramique.<br />
Si le sol est revêtu d'un<br />
matériau synthétique, l'humidité<br />
atmosphérique relative doit<br />
être d'au moins 30 %.<br />
3 A/m 30 A/m L'intensité du champ magnétique<br />
doit être équivalente à celle<br />
d'un environnement commercial<br />
et hospitalier habituel.<br />
Français
186 Conformité à CEI 60601-1-2<br />
Directives et déclaration du fabricant – Immunité<br />
aux interférences électromagnétiques de tous les<br />
modèles de stimulateurs cardiaques externes <br />
(CEI 60601-1-2 : Tableau 3)<br />
Le dispositif a été conçu pour être utilisé dans un<br />
environnement électromagnétique similaire à celui<br />
décrit ci-dessous. L'utilisateur doit faire en sorte que<br />
l'appareil soit utilisé dans un tel environnement.<br />
Français<br />
Test d'immunité<br />
aux interférences<br />
Interférences HF<br />
dirigées selon<br />
CEI 61000-4-6<br />
Niveau de test<br />
selon CEI 60601<br />
Niveau de<br />
conformité<br />
10 V rms<br />
10 kHz à 80 MHz<br />
hors des bandes<br />
ISM a 10 V rms<br />
d = 0,35 P<br />
Directives concernant l'environnement<br />
électromagnétique<br />
Les dispositifs radio portables<br />
et mobiles doivent par conséquent<br />
être utilisés à une distance<br />
de l'appareil en aucun<br />
cas inférieure à la distance de<br />
sécurité recommandée.<br />
Distance de sécurité<br />
recommandée :<br />
Interférences HF<br />
émises selon<br />
CEI 61000-4-3<br />
10 V rms<br />
10 V rms<br />
10 kHz à 80 MHz<br />
d = 1,2 P<br />
dans les bandes<br />
ISM a)<br />
10 V/m<br />
10 V/m<br />
800 MHz à 2,5 GHz<br />
d = 1,2 P<br />
pour 80 MHz à <br />
800 MHz<br />
d = 2,3<br />
P<br />
pour 800 MHz à <br />
2,5 GHz
187 Conformité à CEI 60601-1-2<br />
Test d'immunité<br />
aux interférences<br />
Niveau de test<br />
selon CEI 60601<br />
Niveau de<br />
conformité<br />
Directives concernant l'environnement<br />
électromagnétique<br />
P étant la puissance nominale<br />
maximum de l'émetteur en<br />
watts [W] selon les indications<br />
du fabricant de l'émetteur, et d<br />
étant la distance de sécurité<br />
recommandée en mètres [m] b) .<br />
L'intensité du champ magnétique<br />
d'émetteurs radio stationnaires<br />
doit, conformément aux<br />
examens sur le terrain, et<br />
quelle que soit la fréquence, c)<br />
être inférieure au niveau de<br />
conformité d) .<br />
Des interférences sont possibles<br />
à proximité d'appareils<br />
portant le symbole ci-dessous.<br />
REMARQUE : il se peut que ces directives ne soient pas applicables dans tous les cas<br />
de figure. La propagation des ondes électromagnétiques est affectée par l'absorption<br />
et la réflexion dues aux bâtiments, aux objets et aux personnes.<br />
Français<br />
a) Les bandes ISM (destinées aux applications industrielles, scientifiques et médicales)<br />
comprises entre 150 kHz et 80 MHz sont de 6,765 MHz à 6,795 MHz ;<br />
13,553 MHz à 13,567 MHz ; 26,957 MHz à 27,283 MHz et 40,66 MHz à 40,70 MHz.<br />
b) Les niveaux de conformité existant dans les bandes de fréquence ISM comprises<br />
entre 150 kHz et 80 MHz et dans la gamme de fréquence de 80 MHz à 2,5 GHz sont<br />
destinés à réduire la probabilité que des appareils mobiles de communication<br />
créent des perturbations s'ils parviennent accidentellement dans la zone de traitement<br />
des patients. Il est par conséquent recommandé de respecter une distance<br />
de sécurité plus importante dans ces gammes de fréquence (facteur 1,2 au lieu de<br />
0,35).<br />
c) Il est impossible de prévoir avec précision l'intensité du champ des émetteurs stationnaires<br />
tels que des stations de base pour téléphones portables, appareils radio<br />
terrestres mobiles, appareils de radio amateur, radio et télévision AM et FM. Il est<br />
recommandé de mener une étude du site afin de déterminer quel environnement<br />
électromagnétique est produit par des émetteurs HF fixes. Si l'intensité du champ<br />
mesurée sur le lieu d'utilisation de l'appareil dépasse le niveau de conformité HF<br />
ci-dessus, il convient de surveiller l'appareil afin de garantir qu'il fonctionne correctement.<br />
Si cela est nécessaire, prendre des mesures supplémentaires, par ex.<br />
pour modifier l'orientation ou l'emplacement du stimulateur cardiaque externe.<br />
d) Dans la gamme de fréquence de 150 kHz à 80 MHz, les intensités de champ<br />
doivent être inférieures à 10 V/m.
188 Conformité à CEI 60601-1-2<br />
Distances de sécurité recommandées par rapport<br />
aux appareils de télécommunication HF portables <br />
et mobiles (CEI 60601-1-2 : Tableau 5)<br />
Le dispositif a été conçu pour être utilisé dans un<br />
environnement électromagnétique dans lequel les<br />
interférences HF sont contrôlées. L'utilisateur du dispositif<br />
peut aider à éviter l'apparition d'interférences<br />
électromagnétiques en respectant la distance de<br />
sécurité requise pour les appareils de communication<br />
HF mobiles (émetteurs), en fonction de la puissance<br />
de sortie de l'appareil de communication.<br />
Français<br />
Puissance<br />
nominale de<br />
l'émetteur<br />
P [W]<br />
Distance de sécurité d [m] correspondant à la fréquence de<br />
transmission<br />
150 kHz à 150 kHz à<br />
80 MHz hors 80 MHz dans<br />
des bandes ISM les bandes ISM<br />
80 MHz à<br />
800 MHz<br />
800 MHz à<br />
2,5 GHz<br />
d = 0,35 P d = 1,2 P d = 1,2 P d = 2,3 P<br />
0,01 0,04 0,12 0,12 0,23<br />
0,10 0,11 0,38 0,38 0,73<br />
1,00 0,35 1,20 1,20 2,30<br />
10,00 1,11 3,79 3,79 7,27<br />
100,00 3,50 12,00 12,00 23,00<br />
Pour les émetteurs dont la puissance nominale n'est pas répertoriée ci-dessus, <br />
la distance de sécurité peut être calculée à l'aide de la formule indiquée avec la<br />
fréquence de transmission. P représente la puissance nominale de l'émetteur en<br />
watts [W] et d la distance de sécurité en mètres [m].<br />
REMARQUE 1 : les bandes ISM (destinées aux applications industrielles, <br />
scientifiques et médicales) comprises entre 150 kHz et 80 MHz sont de 6,765 MHz <br />
à 6,795 MHz ; 13,553 MHz à 13,567 MHz ; 26,957 MHz à 27,283 MHz et 40,66 MHz <br />
à 40,70 MHz.<br />
REMARQUE 2 : les niveaux de conformité existant dans les bandes de fréquence ISM<br />
comprises entre 150 kHz et 80 MHz et dans la gamme de fréquence de 80 MHz à <br />
2,5 GHz sont destinés à réduire la probabilité que des appareils mobiles de communication<br />
créent des perturbations s'ils parviennent accidentellement dans la zone<br />
de traitement des patients. Il est par conséquent recommandé de respecter une<br />
distance de sécurité plus importante dans ces gammes de fréquence (facteur 1,2 au<br />
lieu de 0,35).<br />
REMARQUE 3 : il se peut que ces directives ne soient pas applicables dans tous <br />
les cas de figure. La propagation des ondes électromagnétiques est affectée par<br />
l'absorption et la réflexion dues aux bâtiments, aux objets et aux personnes.
189 Équipement fourni et accessoires<br />
Équipement fourni et accessoires<br />
Remarque :<br />
<strong>Reocor</strong> S doit être utilisé uniquement avec les accessoires<br />
développés et testés pour ce dispositif précis.<br />
Équipement fourni<br />
Désignation article Nombre Remarque Référence<br />
<strong>Reocor</strong> S 1 365528<br />
Pile 1 Duracell Plus, 6LR61 –<br />
Brassard<br />
– Pour le Japon<br />
1 Court 391843<br />
– Pour tous les autres pays 1 Standard 103704<br />
Adaptateur Redel 1 371263<br />
Couvercle du panneau <br />
1 378007<br />
de commande<br />
Manuel technique multilingue<br />
1 368703<br />
(DE, EN, ES, FR, IT, PT)<br />
Manuel technique ZH 368704<br />
Guide rapide DE 370125<br />
Guide rapide EN 371305<br />
Guide rapide ES 371306<br />
Guide rapide FR 1 371307<br />
Guide rapide IT 371308<br />
Guide rapide PT 372231<br />
Guide rapide ZH 371309<br />
Sacoche 1 379384<br />
Français<br />
Accessoires<br />
PK-82 128564 Câble patient avec deux pinces<br />
crocodile isolées, restérilisable<br />
PK-83 (2,5 m) 128563 Câble patient avec deux bornes à vis<br />
isolées, restérilisable<br />
PK-83 (1,5 m) 128562 Câble patient avec deux bornes à vis<br />
isolées, restérilisable<br />
PK-83-B (2,5 m) 347485 Câble patient avec deux bornes à vis<br />
isolées de 2,3 mm<br />
PK-83-B (1,5 m) 347606 Câble patient avec deux bornes à vis<br />
isolées de 2,3 mm<br />
Article Référence Description Connecteur<br />
Connexion<br />
directe<br />
Connexion<br />
directe<br />
Connexion<br />
directe<br />
Adaptateur<br />
Redel<br />
Adaptateur<br />
Redel<br />
PK-175 333959 Câble patient avec quatre bornes à vis Adaptateur<br />
pour sondes temporaires, restérilisable Redel
190 Équipement fourni et accessoires<br />
Article Référence Description Connecteur<br />
PK-67-L 123672 Câble patient restérilisable, pour combinaison<br />
avec adaptateurs PA-1-B,<br />
PA-2, PA-4<br />
PK-67-S 128085 Câble patient restérilisable, <br />
pour combinaison avec PK-155 et <br />
Remington, type 301-CG<br />
PK-141 (2,8 m) 353181 Câble patient, restérilisable, <br />
avec quatre pinces crocodile isolées<br />
Brassard 103704 Brassard standard<br />
standard <strong>Reocor</strong><br />
Brassard court<br />
<strong>Reocor</strong><br />
391843<br />
Brassard petit diamètre. Convient aux<br />
bras minces.<br />
Adaptateur<br />
Redel<br />
Adaptateur<br />
Redel<br />
Adaptateur<br />
Redel<br />
–<br />
–<br />
Uniquement pour les États-Unis<br />
Français<br />
ADAP-2R<br />
(0,24 m)<br />
Remington<br />
Medical Inc.<br />
Adaptateur réutilisable pour câbles de type<br />
S-101-97 et de type FL-601-97<br />
Article Fabricant Description Connecteur<br />
Adaptateur<br />
Redel<br />
Article<br />
Référence<br />
PA-1-B 123751<br />
PA-1-C 349723<br />
PA-2 123157<br />
PA-4 123090<br />
PK-155<br />
(jeu de deux câbles)<br />
Adaptateur pour PK-67-S et PK-67-L<br />
Description<br />
Pour raccordement à l'adaptateur de 2 mm ou à<br />
l'adaptateur MHW (adaptateur pour sondes myocardiques<br />
temporaires), restérilisable<br />
Pour raccordement à l'adaptateur de 2 mm ou à<br />
l'adaptateur MHW (adaptateur pour sondes myocardiques<br />
temporaires), restérilisable<br />
Pour raccordement au connecteur IS-1, <br />
restérilisable<br />
Avec pinces crocodile, restérilisable<br />
337358 Câble patient stérile, à 2 brins, avec pinces crocodile,<br />
à usage unique
191 Équipement fourni et accessoires<br />
Adaptateur pour PK-67-S et PK-67-L<br />
(États-Unis uniquement)<br />
Article Fabricant Description<br />
Type 301-CG Remington Câble patient stérile, à 2 brins, avec pinces<br />
Medical Inc. crocodile, à usage unique<br />
Adaptateur pour ADAP-2R<br />
(États-Unis uniquement)<br />
Article Fabricant Description<br />
Type 301-CG Remington Câble patient stérile, à 2 brins, avec pinces<br />
Medical Inc. crocodile, à usage unique<br />
Type S-101-97<br />
(2,5 m)<br />
Type FL-601-97<br />
(2,0 m)<br />
Remington<br />
Medical Inc.<br />
Remington<br />
Medical Inc.<br />
Câble patient, à 2 brins, avec pinces crocodile, <br />
à usage unique<br />
Câble patient, à 2 brins, avec connexions vissées,<br />
à usage unique<br />
Français
192 Légende de l'étiquette<br />
Légende de l'étiquette<br />
Les symboles de l'étiquette ont la signification<br />
suivante :<br />
Symbole<br />
Signification<br />
<strong>Reocor</strong> S<br />
Adaptateur Redel<br />
Numéro de référence <strong>BIOTRONIK</strong><br />
Numéro de série de l'appareil<br />
Français<br />
D<br />
S<br />
Date de fabrication de l'appareil<br />
Plage de température de stockage autorisée<br />
Plage de pression atmosphérique de stockage autorisée<br />
Plage d'humidité atmosphérique de stockage autorisée<br />
Patient avec sonde implantée<br />
Contenu<br />
Symbole d'élimination<br />
Respecter le manuel technique !<br />
Attention : la loi fédérale (des États-Unis) limite la vente de<br />
ce produit aux médecins ou sur ordonnance médicale.<br />
Marquage CE
193<br />
<br />
Contenuto<br />
Descrizione generale ...........................................................................195<br />
Descrizione del prodotto ........................................195<br />
Indicazioni ............................................................... 196<br />
Controindicazioni .................................................... 196<br />
Possibili effetti collaterali ...................................... 197<br />
Istruzioni per l'uso .................................................197<br />
Segnali ottici e acustici ..........................................203<br />
Note per il funzionamento ...................................................................204<br />
Note generali .......................................................... 204<br />
Elementi di comando e LED ...................................206<br />
Copertura del quadro comandi .............................. 207<br />
Connessione degli elettrocateteri ..........................208<br />
Messa in esercizio .................................................. 215<br />
Fissaggio ................................................................ 217<br />
Sostituzione della batteria ..................................... 217<br />
Modi di stimolazione e parametri .........................................................219<br />
Modi di stimolazione .............................................. 219<br />
Frequenza ............................................................... 220<br />
Ampiezza e durata dell'impulso ............................ 220<br />
Sensibilità ............................................................... 220<br />
Intervallo di rumore ............................................... 220<br />
Burst .......................................................................221<br />
Utilizzo, manutenzione e cura ..............................................................222<br />
<strong>Reocor</strong> S ................................................................. 222<br />
Cavi paziente riutilizzabili ...................................... 223<br />
Manutenzione, assistenza, ispezione ..................... 224<br />
Smaltimento ........................................................... 225<br />
Sicurezza tecnica .................................................................................226<br />
Dati tecnici ...........................................................................................227<br />
Conformità alla norma IEC 60601-1-2 ..................................................230<br />
Contenuto della confezione e accessori ...............................................235<br />
Legenda dell'etichetta .........................................................................238<br />
Italiano
Italiano<br />
194
195 Descrizione generale<br />
Descrizione generale<br />
Descrizione del prodotto<br />
<strong>Reocor</strong> S è un pacemaker monocamerale esterno,<br />
funzionante a batteria per uso clinico, che viene collegato<br />
a elettrocateteri temporanei (compresi elettrocateteri<br />
endocardici e cateteri transvenosi impiantabili). <br />
Il collegamento è diretto o mediante un cavo paziente<br />
separato od eventualmente un adattatore.<br />
Sono disponibili tre modi di stimolazione: SSI, S00, SST<br />
e una funzione burst.<br />
È possibile impostare il modo di stimolazione,<br />
la frequenza, la sensibilità, l'ampiezza dell'impulso e<br />
la frequenza burst.<br />
I LED segnalano il sensing (Sense), la stimolazione<br />
(Pace) e lo stato della batteria (Low battery).<br />
Un segnale acustico avverte l'operatore quando sono<br />
impostate frequenze molto elevate o valori di sensibilità<br />
molto bassi e quando l'impedenza dell'elettrocatetere<br />
non è ottimale.<br />
Un difetto del dispositivo (autotest, dopo l'accensione<br />
del dispositivo, non superato) viene indicato<br />
dall'accensione dei LED e da un segnale acustico<br />
cadenzato. Se l'autotest dopo l'accensione del dispositivo<br />
non ha individuato errori i segnali acustici e ottici<br />
cessano dopo qualche secondo.<br />
<strong>Reocor</strong> S presenta le seguenti caratteristiche di sicurezza:<br />
• Indicazione ottica di eventi rilevati e stimolati<br />
• Parametri di stimolazione comandati da microprocessore<br />
• Controllo dell'impedenza degli elettrocateteri<br />
• Avvertimento ottico dell'imminente esaurimento<br />
di carica della batteria<br />
• Una copertura trasparente scorrevole degli elementi<br />
di comando per evitare modifiche accidentali<br />
dei parametri.<br />
Italiano<br />
Italiano
196 Descrizione generale<br />
Al <strong>Reocor</strong> S è possibile collegare direttamente elettrocateteri<br />
con connettori da 2 mm, elettrocateteri endocardici<br />
e cateteri temporanei. Sono inoltre disponibili<br />
diversi cavi paziente e adattatori. Questo sistema permette<br />
una connessione sicura di cateteri transvenosi<br />
ed elettrocateteri endocardici, per applicazioni unipolari<br />
o bipolari.<br />
Indicazioni<br />
Italiano<br />
La stimolazione temporanea con <strong>Reocor</strong> S si presta<br />
per le seguenti applicazioni su pazienti di ogni età:<br />
• Trattamento di aritmie e blocco cardiaco<br />
• Bradicardia sinusale sintomatica<br />
• Sindrome del nodo del seno<br />
• Stimolazione pre, intra e post operatoria di pazienti<br />
soggetti ad intervento al cuore<br />
• Conclusione di tachiaritmie sopraventricolari<br />
• Stimolazione profilattica per la prevenzione di<br />
aritmie<br />
• Stimolazione di emergenza<br />
• Controllo delle soglie di stimolazione<br />
Controindicazioni<br />
• <strong>Reocor</strong> S non può essere sterilizzato e non è quindi<br />
adatto per l'impiego nell'ambiente sterile del<br />
paziente.<br />
• La stimolazione monocamerale atriale è controindicata<br />
nei pazienti che presentano già disturbi di<br />
conduzione AV.<br />
• L'utilizzo di un pacemaker esterno è controindicato<br />
se è già attivo un pacemaker impiantato.
197 Descrizione generale<br />
Possibili effetti collaterali<br />
La stimolazione esterna temporanea può dar luogo a<br />
complicazioni, tra cui asistolie dopo l'improvvisa interruzione<br />
della stimolazione (ad es. quella causata da un<br />
distacco inavvertito del cavo paziente, dell'elettrocatetere<br />
o da impostazioni errate) oppure una dipendenza<br />
dal pacemaker.<br />
Tra le complicazioni derivanti dall'introduzione di elettrocateteri<br />
transvenosi si contano anche: infezione<br />
della ferita, puntura arteriosa, sfregamenti pericardici,<br />
perforazione cardiaca e aritmia dopo l'inserimento<br />
dell'elettrocatetere.<br />
Italiano<br />
Istruzioni per l'uso<br />
Gruppo di<br />
utilizzatori<br />
Principio di<br />
funzionamento<br />
Uso conforme alla<br />
destinazione<br />
A seconda delle impostazioni per la stimolazione e<br />
della malattia di partenza del paziente la stimolazione<br />
può indurre aritmie. Per garantire la sicurezza del<br />
paziente si devono adottare determinate procedure e<br />
misure preventive elencate di seguito. Ulteriori procedure<br />
e misure preventive sono indicate nelle rispettive<br />
pubblicazioni di medicina.<br />
• <strong>Reocor</strong> S può essere impiegato solo da persone<br />
con conoscenze di cardiologia che sono state informate<br />
sul modo di utilizzo del dispositivo. Gli utilizzatori<br />
potenziali sono il personale medico-tecnico<br />
di un ospedale e i medici.<br />
• <strong>Reocor</strong> S interagisce con il cuore umano. Ha inoltre<br />
luogo un'interazione con la pelle e i vasi sanguigni<br />
del paziente.<br />
• <strong>Reocor</strong> S e i cavi ed accessori autorizzati per il<br />
dispositivo vanno utilizzati solo secondo le <br />
istruzioni del presente manuale tecnico.<br />
• <strong>Reocor</strong> S non va collegato ad altri apparecchi<br />
elettromedicali.<br />
• <strong>Reocor</strong> S non può essere utilizzato in aree soggette<br />
al rischio di esplosione.<br />
Divieto di modifiche • Le riparazioni, gli aggiornamenti e le modifiche <br />
al dispositivo devono essere eseguite esclusivamente<br />
dal produttore <strong>BIOTRONIK</strong> o da un rivenditore<br />
espressamente autorizzato da <strong>BIOTRONIK</strong>.<br />
Italiano
198 Descrizione generale<br />
Italiano<br />
Parti di ricambio e<br />
accessori<br />
Dispositivi<br />
a portata di mano<br />
Comportamento<br />
prima dell'uso<br />
Connessione degli<br />
elettrocateteri<br />
• Le parti di ricambio originali e gli accessori <br />
autorizzati da <strong>BIOTRONIK</strong> garantiscono la <br />
sicurezza. L'uso di altri componenti comporta<br />
l'annullamento di qualsiasi responsabilità del <br />
produttore per eventuali conseguenze e <br />
l'annullamento della garanzia e delle prestazioni<br />
di garanzia.<br />
• In caso di dipendenza del paziente dal pacemaker<br />
si deve tenere a portata di mano uno stimolatore di<br />
emergenza.<br />
• Sono da tenere a portata di mano il defibrillatore<br />
esterno, ossigeno, l'attrezzatura per intubazione<br />
e farmaci di emergenza.<br />
• Prima dell'uso si deve controllare se il <strong>Reocor</strong> S<br />
presenta danni e tracce di sporco sottoponendolo<br />
ad un esame visivo.<br />
• Non utilizzare mai un dispositivo danneggiato<br />
o che presenti anomalie. Sostituire i cavi di qualsiasi<br />
tipo, anche in caso di minimi danneggiamenti <br />
visibili.<br />
• Prima dell'uso di <strong>Reocor</strong> S, dei cavi paziente o<br />
degli elettrocateteri l'utilizzatore dovrebbe toccare<br />
il paziente per compensare differenze di potenziale<br />
elettriche.<br />
• Si consiglia caldamente all'utilizzatore di controllare<br />
ogni parametro impostato prima di collegare<br />
gli elettrocateteri al <strong>Reocor</strong> S.<br />
• Sebbene <strong>Reocor</strong> S sia protetto contro le gocce<br />
d'acqua si devono mantenere tutti i connettori e il<br />
dispositivo stesso puliti e asciutti.<br />
• <strong>Reocor</strong> S non può essere sterilizzato.<br />
• Le connessioni di <strong>Reocor</strong> S e degli elettrocateteri<br />
di stimolazione temporanei devono essere protette<br />
e controllate periodicamente.<br />
• Il cavo paziente deve essere collegato prima al<br />
<strong>Reocor</strong> S e poi agli elettrocateteri.<br />
• Gli elettrocateteri temporanei ai quali è collegato il<br />
<strong>Reocor</strong> S costituiscono una linea di alimentazione<br />
a bassa impedenza verso il miocardio per la corrente<br />
elettrica. I dispositivi alimentati dalla rete
199 Descrizione generale<br />
Comportamento<br />
durante l'uso<br />
Stimolazione con<br />
frequenze elevate<br />
Comportamento<br />
dopo l'uso<br />
utilizzati in prossimità del paziente devono pertanto<br />
essere messi a terra in conformità alle<br />
norme vigenti.<br />
• Quando si opera con elettrocateteri già impiantati,<br />
non si devono toccare gli spinotti del connettore e<br />
le superfici di contatto metalliche, né metterli a<br />
contatto con superfici umide o conduttrici.<br />
• Se il cavo del <strong>Reocor</strong> S si è disconnesso occorre<br />
ricollegarlo immediatamente e verificare la sicurezza<br />
del collegamento.<br />
• Quando si utilizzano elettrocateteri unipolari si<br />
devono usare due elettrocateteri unipolari affinché<br />
la stimolazione sia efficace.<br />
• Mentre si usa il <strong>Reocor</strong> S la copertura del quadro<br />
comandi deve rimanere completamente chiusa per<br />
evitare di cambiare inavvertitamente i parametri<br />
del programma.<br />
• Utilizzare <strong>Reocor</strong> S adagiandolo su una superficie<br />
orizzontale antiscivolo oppure fissandolo al<br />
paziente con il bracciale o agganciandone<br />
l'occhiello situato sul lato posteriore ad un'asta<br />
portaflebo.<br />
• <strong>Reocor</strong> S non deve essere fissato a diretto contatto<br />
con la pelle.<br />
• Durante l'utilizzo del <strong>Reocor</strong> S è necessario tenere<br />
sotto controllo la frequenza cardiaca del paziente<br />
con un monitor ECG provvisto di funzione di allarme.<br />
• In caso di rumore dovuto a interferenza elettromagnetica<br />
<strong>Reocor</strong> S passa nel modo di funzionamento<br />
della stimolazione asincrona (S00), quando<br />
vengono superati determinati valori limite.<br />
• Una stimolazione del cuore con frequenze superiori<br />
a 180 bpm per un intervallo di tempo prolungato<br />
può provocare gravi complicazioni emodinamiche.<br />
Una stimolazione con frequenze elevate<br />
deve essere eseguita solo quando è garantito un<br />
monitoraggio continuo.<br />
• Dopo una defibrillazione o una cauterizzazione si<br />
deve sottoporre il dispositivo a un test di funzionamento.<br />
Italiano<br />
Italiano
200 Descrizione generale<br />
Italiano<br />
Alimentazione a<br />
batteria<br />
Elettrocauterizzazione<br />
• Quando il pacemaker viene riposto e non viene utilizzato<br />
per un periodo di tempo prolungato si deve<br />
estrarre la batteria per evitare perdite che lo danneggino.<br />
• Per la pulizia si può usare un panno umido e un<br />
sapone delicato. Va evitato l'impiego di detergenti<br />
aggressivi o solventi organici perché possono<br />
intaccare la cassa di plastica.<br />
• Eseguire ispezioni e lavori di manutenzione come<br />
indicato a pagina 222.<br />
• Non utilizzare batterie ricaricabili (accumulatori).<br />
La durata di servizio di queste batterie non è prevedibile<br />
e può accadere che si superi inaspettatamente<br />
il momento ERI 1) con improvvisa interruzione<br />
della stimolazione.<br />
Si possono usare solo batterie da 9 V con il codice<br />
internazionale IEC 6LR61. Con batterie di tipo <br />
MN 1604 Duracell ® Procell ® la stimolazione<br />
esterna viene garantita per circa 600 ore prima che<br />
si renda necessaria la sostituzione della batteria.<br />
Se il cambio di batteria avviene durante il funzionamento<br />
il <strong>Reocor</strong> S rimane operativo ancora per<br />
ca. 30 secondi se la temperatura ambiente è di<br />
20 °C ± 2 °C.<br />
Per ragioni di sicurezza si dovrebbe tuttavia provvedere<br />
a garantire l'alimentazione in altro modo<br />
per tutelare il paziente.<br />
• Un'elettrocauterizzazione non va eseguita mai ad<br />
una distanza inferiore a 15 cm dagli elettrocateteri,<br />
poiché sussiste il pericolo che venga indotta una<br />
fibrillazione o che il pacemaker subisca dei danni.<br />
Si consiglia di impostare il pacemaker sulla stimolazione<br />
asincrona per evitare un'inibizione del<br />
dispositivo a causa di segnali d'interferenza.<br />
Durante il trattamento si deve controllare costantemente<br />
il battito periferico del paziente. Dopo il<br />
trattamento si deve controllare la funzionalità del<br />
pacemaker.<br />
1) Con il segnale ERI (il LED Low battery lampeggia) <strong>Reocor</strong> S ricorda che occorre sostituire la<br />
batteria
201 Descrizione generale<br />
Defibrillazione • I circuiti di <strong>Reocor</strong> S sono protetti dall'energia di<br />
shock che può essere indotta da una defibrillazione.<br />
Tuttavia è opportuno adottare, se possibile,<br />
le seguenti misure preventive:<br />
— L'energia impostata non deve essere superiore<br />
a quella necessaria per la defibrillazione.<br />
— Le distanze tra gli elettrocateteri del defibrillatore<br />
e gli elettrocateteri di <strong>Reocor</strong> S devono<br />
essere di almeno 10 cm.<br />
— Dopo una defibrillazione si deve spegnere e<br />
riaccendere il <strong>Reocor</strong> S, affinché esso possa<br />
eseguire un autotest completo.<br />
Immunità dalle<br />
interferenze<br />
Dopo la defibrillazione si devono inoltre controllare<br />
la funzionalità del pacemaker e la soglia di<br />
stimolazione e tenerle sotto controllo per un<br />
periodo sufficientemente lungo.<br />
• <strong>Reocor</strong> S è protetto contro interferenze causate da<br />
radiazioni elettromagnetiche, scariche elettrostatiche<br />
e contro le interferenze trasmesse. Anche<br />
la radiazione emessa dal <strong>Reocor</strong> S è stata ridotta<br />
al minimo. Il dispositivo soddisfa quindi i requisiti<br />
previsti dalla IEC 60601-1-2. Tuttavia è possibile<br />
che forti campi elettromagnetici, come quelli che<br />
possono crearsi ad es. nelle immediate vicinanze<br />
di motori elettrici, trasformatori, linee elettriche e<br />
altri apparecchi elettrici, pregiudichino il funzionamento<br />
del <strong>Reocor</strong> S.<br />
Interferenze elettromagnetiche possono provocare<br />
i seguenti errori:<br />
— Reset inaspettato (viene eseguito l'autotest).<br />
— Vengono rilevati eventi cardiaci, che però non<br />
appaiono sul monitor ECG.<br />
— Il <strong>Reocor</strong> S ha un comportamento inspiegabile.<br />
Misure per ripristinare il corretto funzionamento<br />
del <strong>Reocor</strong> S:<br />
— Controllare ed eventualmente correggere il<br />
collegamento tra dispositivo e elettrocateteri di<br />
stimolazione temporanei.<br />
Italiano<br />
Italiano
Italiano<br />
<br />
202 Descrizione generale<br />
— Impostare un'adeguata sensibilità sul<br />
<strong>Reocor</strong> S: spesso metà del valore dell'am-<br />
piezza media del segnale intrinseco permette<br />
di ottenere un'impostazione corretta della<br />
sensibilità.<br />
— Spegnere tutti gli apparecchi elettrici in prossimità<br />
del <strong>Reocor</strong> S, se questi possono provocare<br />
interferenze elettromagnetiche e il loro funzionamento<br />
non è necessario.<br />
— Portare la fonte delle interferenze in un luogo<br />
dal quale non agiscono.<br />
— Se è possibile senza correre pericoli: spegnere<br />
e riaccendere il <strong>Reocor</strong> S, per riportare il pacemaker<br />
ad un funzionamento regolare.<br />
— Se il problema tecnico sussiste rivolgersi a<br />
<strong>BIOTRONIK</strong>.
203 Descrizione generale<br />
Segnali ottici e acustici<br />
• Durante l'autotest dopo l'accensione del <strong>Reocor</strong> S<br />
si illuminano tutti i LED e vengono emessi brevi<br />
segnali acustici. Dopo pochi secondi l'autotest è<br />
concluso.<br />
• Quando l'autotest non rileva errori i LED si spengono<br />
e i segnali cessano.<br />
• Quando l'autotest riscontra un'anomalia lampeggiano<br />
a lungo tutti i LED e vengono emessi segnali<br />
di avvertimento.<br />
• La necessità di sostituire la batteria viene segnalata<br />
dal lampeggio del LED rosso Low battery.<br />
• Il LED verde Sense segnala il sensing di una onda<br />
P o di una onda R.<br />
• Il LED giallo Pace segnala l'emissione<br />
dell'impulso.<br />
• I LED e i segnali acustici forniscono inoltre le<br />
seguenti segnalazioni durante il funzionamento:<br />
Segnalazione Significato Tipo di intervento<br />
Segnale acustico per<br />
2 s<br />
Sequenza di toni<br />
veloce<br />
Segnale acustico e<br />
lampeggio dei LED<br />
Pace e Sense<br />
LED Low battery<br />
lampeggiante<br />
È impostata un'ampiezza<br />
dell'impulso 1 V o una<br />
frequenza 180 bpm<br />
Impedenza al di fuori dei<br />
margini ammessi<br />
È intervenuta la protezione<br />
alta frequenza; non è stato<br />
superato l'autotest<br />
È stato raggiunto l'ERI<br />
Controllare se i valori<br />
impostati sono appropriati<br />
per il paziente.<br />
Controllare se tutti i<br />
connettori sono inseriti<br />
correttamente.<br />
Verificare se gli elettrocateteri<br />
si trovano nella<br />
posizione desiderata.<br />
Spegnere il dispositivo<br />
e spedirlo a<br />
<strong>BIOTRONIK</strong>.<br />
Sostituire la batteria.<br />
Il dispositivo ha ancora<br />
circa 36 ore a) di autonomia.<br />
a) Con batterie di tipo MN 1604 Duracell ® , Procell ®<br />
Italiano<br />
Italiano
204 Note per il funzionamento<br />
Note per il funzionamento<br />
Note generali<br />
Italiano<br />
Attenzione!<br />
Autotest<br />
Le connessioni di <strong>Reocor</strong> S e degli elettrocateteri di<br />
stimolazione temporanea devono essere protette e<br />
controllate periodicamente.<br />
Dopo l'accensione il <strong>Reocor</strong> S esegue un autotest per<br />
alcuni secondi. Questo include:<br />
• Verifica del codice di programma e del <br />
microprocessore<br />
• Test della memoria<br />
• Test di funzionamento dei LED e dei segnali <br />
acustici<br />
• Controllo della capacità di stimolazione e di <br />
sensing<br />
• Controllo dell'efficacia della protezione alta <br />
frequenza<br />
Quando l'autotest riscontra un'anomalia lampeggiano<br />
a lungo tutti i LED e vengono emessi segnali acustici<br />
di avvertimento. In questo caso si deve spegnere il<br />
pacemaker e spedirlo a <strong>BIOTRONIK</strong>.<br />
Quando l'autotest non ha rilevato alcun errore i LED si<br />
spengono, i segnali cessano e il <strong>Reocor</strong> S inizia ad<br />
emettere impulsi di stimolazione rispondenti ai parametri<br />
impostati. L'elettrodo negativo (catodo) deve<br />
pertanto essere collegato solo quando è garantita<br />
un'impostazione corretta del modo di stimolazione,<br />
della frequenza di stimolazione, dell'ampiezza<br />
dell'impulso e della sensibilità.<br />
Quando la manopola di regolazione per il modo di<br />
funzionamento è regolata su OFF si impedisce che<br />
vengano emessi impulsi di stimolazione al paziente<br />
immediatamente dopo il collegamento degli elettrocateteri.
205 Note per il funzionamento<br />
Avvisi<br />
Durante il funzionamento possono essere emessi i<br />
seguenti avvisi:<br />
• La necessità di sostituire la batteria viene segnalata<br />
dal lampeggio del LED Low battery.<br />
• Quando l'impedenza dell'elettrocatetere non è<br />
compresa tra i margini di tolleranza ammessi <br />
(ad es. in seguito alla rottura di un elettrodo, <br />
un contatto allentato) viene emessa una sequenza<br />
di toni veloce dopo almeno 5 s dall'accensione.<br />
• Quando si imposta l'ampiezza dell'impulso su<br />
valori 1 V o la frequenza su valori 180 bpm viene<br />
emesso un segnale acustico per circa 2 s.<br />
• Nel caso di una frequenza troppo elevata (vedere<br />
pag. 228 “Protezione alta frequenza”) e di un mancato<br />
superamento dell'autotest viene emesso un<br />
segnale acustico e lampeggiano i LED Pace e<br />
Sense.<br />
Italiano<br />
Italiano
Italiano<br />
<br />
206 Note per il funzionamento<br />
Elementi di comando e LED<br />
Fig. 1:<br />
quadro comandi <strong>Reocor</strong> S
207 Note per il funzionamento<br />
Denominazione<br />
1 Connessione paziente<br />
INDIFF.+; DIFF.-<br />
Funzione<br />
Tabella 1: descrizione degli elementi della figura 1<br />
Per cavi con spinotto 2 mm <br />
o per adattatori per connettori Redel<br />
(rosso = più; blu = meno)<br />
2 Contenitore delle batterie Per batteria 9 V<br />
3 LED Low battery Voltaggio della batteria troppo basso<br />
4 LED Pace Indicatore giallo di un evento stimolato<br />
5 LED Sense Indicatore verde di un evento rilevato<br />
6 Manopola di regolazione Ampl. Impostazione dell'ampiezza dell'impulso<br />
7 Manopola di regolazione Sens. Impostazione della sensibilità<br />
8 Start burst Avvio della funzione burst<br />
9 Astuccio per cintura Fissaggio del <strong>Reocor</strong> S al paziente, al letto o <br />
all'asta portaflebo<br />
10 Manopola di regolazione Burst Impostazione della frequenza burst<br />
rate atrium<br />
11 Select burst Selezione della funzione burst<br />
12 Manopola di regolazione Rate Impostazione della frequenza di stimolazione<br />
13 Manopola di regolazione Mode Selezione del modo di stimolazione e<br />
disinserimento<br />
Italiano<br />
Le scritte in grassetto sugli elementi di comando<br />
contraddistinguono valori sicuri per l'uso medico del<br />
dispositivo.<br />
Italiano<br />
Copertura del quadro comandi<br />
La copertura del quadro comandi è chiusa quando<br />
viene spinta sui due punti di arresto fino al punto di<br />
bloccaggio e la chiusura si trova oltre la staffa <br />
(vedere Fig. 2).<br />
Corretto:<br />
Errato:<br />
Fig. 2:<br />
Posizione corretta della copertura del quadro comandi
208 Note per il funzionamento<br />
Per aprire la copertura del quadro comandi <br />
(vedere Fig. 3):<br />
Sollevare con una mano la levetta di bloccaggio<br />
verso l'alto.<br />
Contemporaneamente far scorrere con l'altra<br />
mano la copertura del quadro comandi verso il<br />
basso.<br />
Fig. 3:<br />
Apertura della copertura del quadro comandi<br />
Italiano<br />
Attenzione!<br />
Per chiudere la copertura del quadro comandi:<br />
Spingere la copertura del quadro comandi verso<br />
l'alto oltre la staffa fino a bloccarla (vedere Fig. 2).<br />
È possibile smontare completamente la copertura del<br />
quadro comandi per eseguire la pulizia. Far scivolare<br />
la copertura verso il basso fino all'arresto. Spostare<br />
quindi la copertura energica oltre il fermo.<br />
Mentre si usa il <strong>Reocor</strong> S la copertura del quadro<br />
comandi deve rimanere chiusa per evitare di girare<br />
inavvertitamente commutatori rotanti e manopole di<br />
regolazione, modificando i parametri del programma.<br />
Connessione degli elettrocateteri<br />
<strong>Reocor</strong> S dispone di due prese per la connessione<br />
diretta di elettrocateteri con spinotti isolati di 2 mm.<br />
Per la connessione di cavi con connettore Redel si deve<br />
applicare sul lato appropriato l'adattatore per connettori<br />
Redel e avvitarlo (fig. 4). L'adattatore per connettori<br />
Redel è applicato sul lato giusto se si riesce ad<br />
avvitare sul <strong>Reocor</strong> S.
209 Note per il funzionamento<br />
Nota:<br />
La funzione dell'adattatore per connettori Redel è<br />
garantita esclusivamente se applicato sul lato giusto!<br />
Italiano<br />
Fig. 4:<br />
adattatore per connettori Redel per <strong>Reocor</strong> S<br />
<strong>Reocor</strong> S può essere utilizzato con i seguenti cavi<br />
paziente e adattatori:<br />
• Cavo paziente PK-83-B con due connettori filettati<br />
per elettrocateteri temporanei sul lato paziente e<br />
connettore sul lato <strong>Reocor</strong> (con l'adattatore per<br />
connettori Redel).<br />
Italiano<br />
Fig. 5:<br />
cavo paziente PK-83-B
210 Note per il funzionamento<br />
• Cavo paziente PK-83 con due connettori filettati<br />
isolati per elettrocateteri temporanei sul lato<br />
paziente e due spinotti isolati da 2 mm sul lato<br />
<strong>Reocor</strong>.<br />
Fig. 6:<br />
cavo paziente PK-83<br />
• Cavo paziente PK-82 con due morsetti a coccodrillo<br />
isolati per elettrocateteri temporanei sul lato<br />
paziente e due spinotti isolati da 2 mm sul lato<br />
<strong>Reocor</strong>.<br />
Fig. 7:<br />
cavo paziente PK-82<br />
Italiano<br />
• Cavi paziente PK-67-L e PK-67-S<br />
I cavi paziente PK-67-L (2,6 m) e PK-67-S (0,8 m) si<br />
distinguono solo per la loro lunghezza. Sul lato <strong>Reocor</strong><br />
si ha un connettore Redel (da utilizzare con il rispettivo<br />
adattatore) e sul lato paziente la sede per gli adattatori<br />
mostrati in figura 13 e per i cavi monouso in figura 9.<br />
Connettore Redel<br />
Fig. 8:<br />
cavi paziente PK-67-L e PK-67-S<br />
• Cavi monouso<br />
Il cavo monouso Remington 301-CG (solo <strong>USA</strong>) e il<br />
cavo monouso PK-155 con morsetti a coccodrillo vengono<br />
collegati al paziente mediante il cavo PK-67-S.<br />
Fig. 9:<br />
cavi monouso PK-155 e 301-CG (solo <strong>USA</strong>)
211 Note per il funzionamento<br />
Solo per gli <strong>USA</strong>: i cavi monouso S-101-97 e FL-601-97<br />
di Remington Medical Inc. vengono collegati al <strong>Reocor</strong> S<br />
mediante il cavo riutilizzabile ADAP-2R (fig. 10).<br />
Italiano<br />
Fig. 10: solo <strong>USA</strong>: cavi monouso Remington e adattatore<br />
<strong>Reocor</strong> S può anche essere utilizzato con cavi paziente<br />
aventi quattro connettori per pacemaker bicamerale.<br />
Di questi cavi il <strong>Reocor</strong> S utilizza solo il canale ventricolare.<br />
È possibile impiegare i seguenti cavi:<br />
• Cavo paziente PK-141 con quattro morsetti a coccodrillo<br />
sul lato paziente e connettore Redel sul<br />
lato <strong>Reocor</strong> (con l'adattatore per connettori Redel).<br />
Il canale ventricolare presenta la scritta Vent Diff/<br />
Indiff sull isolamento dei cavi.<br />
Italiano<br />
Fig. 11: cavo paziente PK-141
212 Note per il funzionamento<br />
• Cavo paziente PK-175 con quattro connettori filettati<br />
sul lato paziente e connettore Redel sul lato<br />
<strong>Reocor</strong> (con l'adattatore per connettori Redel). Sul<br />
canale ventricolare è presente la scritta Ventricle.<br />
Fig. 12: cavo paziente PK-175<br />
Italiano<br />
• Adattatori<br />
La figura 13 mostra gli adattatori per la connessione<br />
di elettrocateteri temporanei al <strong>Reocor</strong> S mediante il<br />
cavo paziente per applicazioni bicamerali PK-67-L/S.<br />
Gli elettrocateteri devono essere collegati con<br />
l'attacco ventricolare dell'adattatore (sigla V).<br />
Fig. 13: adattatori per i cavi paziente PK-67-L e PK-67-S<br />
PA-1-B e PA-1-C per il collegamento di spinotti isolati<br />
da 2 mm o adattatori MHW (adattatori per elettrocateteri<br />
endocardici)<br />
PA-2 IS-1<br />
PA-4 con morsetti a coccodrillo
213 Note per il funzionamento<br />
AVVERTENZA!<br />
AVVERTENZA!<br />
AVVERTENZA!<br />
Attenzione!<br />
Nota:<br />
Nota:<br />
Nota:<br />
Connessione<br />
Pericolo per il paziente derivante da un cavo <br />
danneggiato.<br />
Un cavo danneggiato può compromettere il funzionamento<br />
e rappresentare un pericolo per il paziente. <br />
Non utilizzare mai cavi danneggiati.<br />
Pericolo derivante da alterazione del funzionamento.<br />
Un cavo umido può compromettere il funzionamento e<br />
rappresentare un pericolo per il paziente. Non utilizzare<br />
mai cavi umidi.<br />
Pericolo derivante da correnti elettriche.<br />
I contatti dei cavi non utilizzati possono convogliare<br />
correnti elettriche nel paziente. Fissare i contatti dei<br />
cavi non utilizzati nelle vicinanze del paziente.<br />
Reazioni allergiche, infiammazioni.<br />
Evitare che il cavo e la testa di programmazione vengano<br />
a contatto con le ferite e la pelle del paziente.<br />
prima dell'uso del cavo far attenzione alla corretta<br />
posizione delle guaine isolanti.<br />
quando si utilizzano cavi o adattatori per applicazioni<br />
bicamerali si devono collegare gli elettrocateteri al<br />
canale ventricolare (scritta Ventricle o V).<br />
non collegare il cavo paziente all'elettrocatetere di<br />
stimolazione temporaneo del paziente prima di aver<br />
realizzato la connessione al <strong>Reocor</strong> S.<br />
Connessione diretta<br />
Quando <strong>Reocor</strong> S funziona senza l'adattatore per connettori<br />
Redel, si possono collegare i cateteri temporanei<br />
e gli elettrocateteri endocardici con i cavi paziente<br />
PK-82 e PK-83 direttamente alle prese INDIFF.+ und<br />
DIFF-.<br />
Cavo paziente<br />
Il cavo paziente viene collegato al <strong>Reocor</strong> S mediante<br />
un adattatore per connettori Redel.<br />
Applicare l'adattatore per connettori Redel sul<br />
<strong>Reocor</strong> S.<br />
Fissarlo stringendo le viti.<br />
Inserire il connettore Redel del cavo paziente nella<br />
presa Redel dell'adattatore.<br />
Italiano<br />
Italiano
214 Note per il funzionamento<br />
Varianti di collegamento<br />
Catetere temporaneo con spinotti 2 mm o <br />
elettrocatetere miocardico con adattatore 2 mm<br />
È possibile collegare il <strong>Reocor</strong> S direttamente ad un<br />
catetere temporaneo mediante spinotti da 2 mm o a un<br />
elettrocatetere miocardico con adattatore da 2 mm,<br />
senza necessità di altri cavi o adattatori. Tutte le altre<br />
varianti di collegamento sono indicate nella seguente<br />
tabella.<br />
Italiano<br />
Connessione lato<br />
paziente<br />
Cavo <strong>BIOTRONIK</strong> Connessione<br />
lato dispositivo<br />
Connessioni raccomandate<br />
Connessione<br />
<strong>Reocor</strong> S<br />
Connessione diretta (senza cavo <strong>BIOTRONIK</strong>)<br />
Prese 2 mm<br />
2 mm PK-67-S/L con PA-1-C Connettore Redel Adattatore Redel<br />
Connettori filettati PK-83B con TC Adapt Connettore Redel Prese 2 mm<br />
Connettori filettati PK-83 con TC Adapt Spinotti 2 mm Prese 2 mm<br />
Connessioni possibili<br />
2 mm PK-67-S/L con PA-1-B Connettore Redel Adattatore Redel<br />
Morsetti a coccodrillo PK-141 Connettore Redel Adattatore Redel<br />
Morsetti a coccodrillo PK-67-S/L con PA-4 Connettore Redel Adattatore Redel<br />
Morsetti a coccodrillo PK-67-S/L con PA-155 Connettore Redel Adattatore Redel<br />
Morsetti a coccodrillo PK-82 Spinotti 2 mm Prese 2 mm<br />
Connessione lato<br />
paziente<br />
Elettrocatetere con punta sezionabile o<br />
con estremità flessibile (diametro max. 2,3 mm)<br />
Cavo <strong>BIOTRONIK</strong> Connessione<br />
lato dispositivo<br />
Connessioni raccomandate<br />
Connessione<br />
<strong>Reocor</strong> S<br />
Connettori filettati PK-83B Connettore Redel Adattatore Redel<br />
Connettori filettati PK-83 Spinotti 2 mm Prese 2 mm<br />
Connessioni possibili<br />
Connettori filettati PK-175 Connettore Redel Adattatore Redel<br />
Morsetti a coccodrillo PK-141 Connettore Redel Adattatore Redel<br />
Morsetti a coccodrillo PK-67-S/L con PA-4 Connettore Redel Adattatore Redel<br />
Morsetti a coccodrillo PK-67-S/L con PA-155 Connettore Redel Adattatore Redel<br />
Morsetti a coccodrillo PK-82 Spinotti 2 mm Prese 2 mm
215 Note per il funzionamento<br />
Elettrocatetere impiantato con connettore IS-1<br />
Connessione<br />
lato paziente<br />
Cavo <strong>BIOTRONIK</strong> Connessione<br />
lato dispositivo<br />
Connessioni raccomandate<br />
<strong>Reocor</strong> S<br />
<strong>Reocor</strong> S<br />
Presa IS-1 PK-67-S/L con PA-2 Connettore Redel Adattatore Redel<br />
Connessioni possibili<br />
Morsetti a coccodrillo PK-141 Connettore Redel Adattatore Redel<br />
Morsetti a coccodrillo PK-67-S/L con PA-4 Connettore Redel Adattatore Redel<br />
Morsetti a coccodrillo PK-67-S/L con PA-155 Connettore Redel Adattatore Redel<br />
Morsetti a coccodrillo PK-82 Spinotti 2 mm Prese 2 mm<br />
Italiano<br />
Nota:<br />
nel caso dei cavi per applicazioni bicamerali (PK-141,<br />
PK-175, PK-67-S/L) <strong>Reocor</strong> S utilizza solo il canale<br />
ventricolare!<br />
Polarità<br />
<strong>Reocor</strong> S produce sostanzialmente una stimolazione<br />
bipolare, ma può essere utilizzato sia con elettrocateteri<br />
di stimolazione temporanea bipolari che con quelli<br />
unipolari.<br />
Quando si utilizzano elettrocateteri unipolari si devono<br />
collegare due elettrocateteri.<br />
Italiano<br />
Scollegamento dei connettori<br />
Staccare i morsetti del cavo paziente dagli elettrocateteri<br />
di stimolazione temporanea del paziente o<br />
staccare la connessione diretta.<br />
Scollegamento del connettore Redel<br />
• Tirare all'indietro l'anello del connettore Redel e<br />
staccarlo dalla presa Redel.<br />
Messa in esercizio<br />
Il comando del <strong>Reocor</strong> S è uguale in tutti i modi di funzionamento.<br />
Si consiglia di effettuare i passi operativi<br />
nel seguente ordine (i numeri tra parentesi si riferiscono<br />
alla figura 1 a pagina 206 del presente manuale<br />
tecnico di istruzione).<br />
• Inserire la batteria<br />
• Far scivolare la copertura del quadro comandi<br />
verso il basso
216 Note per il funzionamento<br />
Italiano<br />
Attenzione!<br />
• Preparare il paziente: applicare gli elettrocateteri,<br />
aspettando però a collegare il pacemaker.<br />
• Preparare il <strong>Reocor</strong>:<br />
Regolare la frequenza di stimolazione con la<br />
manopola di regolazione Rate (12).<br />
Regolare l'ampiezza di stimolazione con la manopola<br />
di regolazione Ampl. (6).<br />
• Selezionare il modo di stimolazione con la manopola<br />
di regolazione Mode (13). Con queste regolazioni<br />
si attiva il dispositivo.<br />
• Una volta concluso senza errori l'autotest interno<br />
lampeggiano contemporaneamente i LED del quadro<br />
comandi per due volte.<br />
• Quando il LED Low battery (3) lampeggia, si deve<br />
cambiare la batteria (per la sostituzione della<br />
batteria vedere pag. 217).<br />
• Collegare gli elettrocateteri; il LED giallo Pace (4)<br />
lampeggia in sincronia con l'impulso di stimolazione.<br />
• Regolare la sensibilità con la manopola di regolazione<br />
Sens. (7) in modo tale che il LED verde Sense<br />
(5) lampeggi in sincronia con ogni evento rilevato.<br />
• È opportuno prevedere un margine di sicurezza<br />
sufficiente per garantire un sensing affidabile.<br />
• Tenere sotto controllo l'elettrocardiogramma del<br />
paziente ed eventualmente adattare l'ampiezza e<br />
la sensibilità.<br />
Durante l'utilizzo del <strong>Reocor</strong> S è necessario tenere<br />
sotto controllo la frequenza cardiaca del paziente con<br />
un monitor ECG provvisto di funzione di allarme.
217 Note per il funzionamento<br />
Fissaggio<br />
Utilizzare <strong>Reocor</strong> S adagiandolo su una superficie<br />
orizzontale antiscivolo oppure fissandolo al paziente<br />
con il bracciale o agganciandone l'occhiello situato sul<br />
lato posteriore ad un'asta portaflebo.<br />
Per poter fissare il <strong>Reocor</strong> S ad un'asta portaflebo<br />
ruotare in fuori l'occhiello di aggancio situato sul lato<br />
posteriore del dispositivo. In questo modo si garantisce<br />
un impiego sicuro evitando la trazione dei cavi paziente.<br />
Italiano<br />
Sostituzione della batteria<br />
Quando il LED Low battery (3) inizia a lampeggiare la<br />
batteria è quasi esaurita. Con batterie di tipo MN 1604<br />
Duracell ® Procell ® restano circa 36 ore di vita di servizio.<br />
Tuttavia, si deve sostituire la batteria il prima<br />
possibile.<br />
<strong>Reocor</strong> S deve funzionare con una batteria da 9 V, con<br />
codice internazionale IEC 6LR61. Vanno utilizzate solo<br />
batterie di tipo alcalino-manganese a prova di perdite.<br />
Con batterie di tipo MN 1604 Duracell ® Procell ® la<br />
stimolazione esterna viene garantita a 20 ± 2 °C per<br />
circa 600 ore prima che si renda necessaria la sostituzione<br />
della batteria.<br />
Se il cambio di batteria avviene durante il funzionamento<br />
il <strong>Reocor</strong> S rimane operativo ancora per ca. 30 s<br />
se la temperatura ambiente è di 20 ± 2 °C.<br />
Per ragioni di sicurezza si dovrebbe tuttavia provvedere<br />
a garantire l'alimentazione in altro modo per<br />
tutelare il paziente.<br />
Non utilizzare batterie ricaricabili (accumulatori).<br />
La durata di servizio di queste batterie non è prevedibile<br />
e può accadere che si superi inaspettatamente il<br />
momento ERI con interruzione improvvisa della stimolazione.<br />
Il contenitore delle batterie (2) si trova sul bordo<br />
laterale destro del dispositivo e si apre spingendo la<br />
copertura blu verso l'alto e tirando il cassetto verso<br />
destra. Estrarre la batteria con delicatezza.<br />
Italiano
218 Note per il funzionamento<br />
Attenzione!<br />
È possibile che sulla nuova batteria sia applicato un<br />
tappo di gomma per proteggerne i poli. Toglierlo prima<br />
di inserire la nuova batteria.<br />
Nel contenitore delle batterie è indicata la polarità<br />
preferibile. Quando si inserisce la batteria nuova si<br />
deve tuttavia solo fare in modo che i poli siano rivolti<br />
verso il centro del contenitore. La posizione del polo<br />
positivo e del polo negativo può essere scelta a piacere.<br />
Inserire la batteria nuova introducendo per primo il<br />
fondo (fig. 14) in modo che sia rivolto verso la base del<br />
contenitore delle batterie.<br />
Italiano<br />
Fig. 14: inserimento della batteria<br />
Nota:<br />
Chiudere il cassetto e spostare la copertura blu verso<br />
il basso finché non scatta in modo udibile.<br />
Quando il pacemaker viene riposto e non viene utilizzato<br />
per un periodo di tempo prolungato si deve<br />
estrarre la batteria per evitare perdite che lo danneggino.
219 Modi di stimolazione e parametri<br />
Modi di stimolazione e parametri<br />
Modo S00<br />
Modo SSI<br />
Modo SST<br />
Stimolazione<br />
ad alta frequenza<br />
Modi di stimolazione<br />
Sono disponibili tre modi di stimolazione: S00, SSI, SST<br />
e stimolazione ad alta frequenza (Burst).<br />
In caso di rumore dovuto a interferenza elettromagnetica<br />
<strong>Reocor</strong> S passa nel modo di funzionamento della<br />
stimolazione asincrona (S00), quando vengono superati<br />
determinati valori limite per la durata dell'interferenza.<br />
Il pacemaker emette impulsi a frequenza costante. Gli<br />
impulsi sono asincroni, vale a dire non sincronizzati<br />
con i battiti cardiaci intrinseci.<br />
Questo modo funziona in caso di connessione al ventricolo<br />
come V00, all'atrio come A00.<br />
Il pacemaker inibisce impulsi quando vengono rilevati<br />
potenziali intracardiaci. Li emette quando non viene<br />
rilevato alcun evento durante l'intervallo corrispondente<br />
alla frequenza selezionata.<br />
Questo modo funziona in caso di connessione al ventricolo<br />
come VVI, all'atrio come AAI.<br />
I modi di stimolazione sincronizzati SST corrispondono<br />
ai modi di stimolazione SSI con la differenza che in<br />
seguito al sensing di un evento al di fuori del periodo<br />
refrattario non ha luogo alcuna inibizione dell'impulso,<br />
bensì un'emissione immediata dell'impulso nella<br />
rispettiva camera.<br />
La frequenza della funzione Burst può essere selezionata<br />
con la manopola di regolazione (10) tra 60 bpm e<br />
1000 bpm. <br />
L'attivazione di questa funzione avviene con 2 pulsanti:<br />
prima si deve premere il pulsante (11) Select burst e<br />
poi, entro 2 secondi, il pulsante (8) Start burst. L'emissione<br />
dell'impulso avviene finché questo pulsante<br />
viene premuto.<br />
Italiano<br />
Italiano
220 Modi di stimolazione e parametri<br />
Frequenza<br />
AVVERTENZA!<br />
La frequenza può essere modificata in modo continuo<br />
con la manopola di regolazione Rate (12) da 30 bpm a<br />
250 bpm. Quando si imposta un valore di oltre<br />
180 bpm, il dispositivo emette un segnale d'allarme<br />
acustico per 2 secondi.<br />
Una stimolazione cardiaca con frequenze superiori<br />
a 180 bpm per un intervallo di tempo prolungato può<br />
provocare gravi complicazioni emodinamiche. Una stimolazione<br />
con frequenze elevate deve essere eseguita<br />
solo quando è garantito un monitoraggio continuo.<br />
Ampiezza e durata dell'impulso<br />
Italiano<br />
L'ampiezza dell'impulso può essere regolata con la<br />
manopola di regolazione Ampl. (6) nel campo compreso<br />
tra 0,1 V e 17 V. Quando si imposta un valore<br />
inferiore a 1 V, il dispositivo emette un segnale<br />
d'allarme acustico per 2 secondi.<br />
La durata dell'impulso è di 1 ms.<br />
È opportuno controllare la stimolazione a intervalli<br />
regolari per garantire che essa abbia luogo e sia impostato<br />
un margine di sicurezza sufficiente.<br />
Sensibilità<br />
La sensibilità può essere impostata con la manopola<br />
di regolazione Sens. (7) tra 1 mV e 20 mV. È opportuno<br />
controllarla a intervalli regolari per garantire che<br />
abbia luogo un sensing corretto e sia impostato un<br />
margine di sicurezza sufficiente.<br />
Intervallo di rumore<br />
L'intervallo di rumore viene avviato sia da eventi<br />
stimolati che da eventi rilevati.<br />
L'intervallo viene azzerato dalla percezione di un<br />
rumore durante l'intervallo di 80 ms, con conseguente<br />
stimolazione asincrona alla frequenza programmata,<br />
della stessa durata dell'interferenza.
221 Modi di stimolazione e parametri<br />
Burst<br />
AVVERTENZA!<br />
La frequenza della funzione atriale Burst rate può<br />
essere selezionata con la manopola di regolazione (10)<br />
tra 60 bpm e 1000 bpm.<br />
L'attivazione di questa funzione avviene con 2 pulsanti:<br />
prima si deve premere il pulsante (11) Select burst e<br />
poi, entro 2 secondi, il pulsante (8) Start burst. L'emissione<br />
dell'impulso avviene finché questo pulsante<br />
viene premuto.<br />
Una stimolazione del cuore con frequenze superiori a<br />
180 bpm per un intervallo di tempo prolungato può<br />
provocare gravi complicazioni emodinamiche. Una stimolazione<br />
con frequenze elevate deve essere eseguita<br />
solo quando è garantito un monitoraggio continuo<br />
Il modo per la stimolazione ad alta frequenza serve<br />
per concludere determinate tachicardie sopraventricolari<br />
(SVT) e dovrebbe essere preso in considerazione<br />
solo per applicazioni atriali. L'applicazione di stimoli<br />
asincroni ad alta frequenza può interrompere una SVT<br />
mediante depolarizzazione di tratti di un percorso da<br />
rientro. Anche quando un focolaio atriale ectopico è<br />
responsabile di una SVT l'applicazione di stimoli ad<br />
alta frequenza all'atrio può tradursi in una soppressione<br />
maggiore del centro ectopico.<br />
Per quanto riguarda la stimolazione atriale a frequenze<br />
elevate si devono considerare diversi rischi.<br />
Tra questi ci sono la possibile stimolazione ventricolare<br />
e la tachicardia ventricolare o fibrillazione. Ciò<br />
può essere causato da un posizionamento sbagliato<br />
degli elettrocateteri o dalla presenza di percorsi di<br />
eccitazione anomali, che aggirano il normale sistema<br />
di conduzione dell'eccitazione atrioventricolare (ad es.<br />
nella sindrome di Wolff-Parkinson-White). Altri possibili<br />
problemi possono essere disagio del paziente e<br />
asistolie dopo una stimolazione ad alta frequenza.<br />
Italiano<br />
Italiano
222 Utilizzo, manutenzione e cura<br />
Utilizzo, manutenzione e cura<br />
<strong>Reocor</strong> S<br />
Italiano<br />
AVVERTENZA!<br />
Attenzione!<br />
Pulizia<br />
Disinfezione<br />
<strong>Reocor</strong> S è un dispositivo di precisione altamente<br />
tecnologico che deve essere usato con cautela. Se<br />
sottoposto a sollecitazioni meccaniche, ad es. in caso<br />
di caduta, la sua funzione può essere pregiudicata.<br />
In questo caso spedire il dispositivo a <strong>BIOTRONIK</strong>.<br />
Prima dell'uso si deve far riposare il pacemaker per<br />
almeno 2 ore alle condizioni ambientali previste per il<br />
funzionamento (v. pag. 229).<br />
Prima di ogni impiego esaminare con un controllo<br />
visivo se la cassa, gli elementi di comando, i punti di<br />
connessione e i cavi paziente hanno subito danneggiamenti<br />
meccanici, deformazioni e se presentano pezzi<br />
staccati, incrinature e tracce di sporco.<br />
Non utilizzare mai un dispositivo danneggiato o che<br />
presenti anomalie, in particolare se è caduto o<br />
potrebbe aver subito danni a causa della tensione<br />
o della defibrillazione ad alta frequenza.<br />
Utilizzare <strong>Reocor</strong> S adagiandolo su una superficie<br />
orizzontale antiscivolo oppure fissandolo al paziente<br />
con il bracciale o agganciandone l'occhiello situato sul<br />
lato posteriore ad un'asta portaflebo.<br />
<strong>Reocor</strong> S non deve essere fissato a diretto contatto con<br />
la pelle.<br />
Per la pulizia di <strong>Reocor</strong> S si può usare un panno umido<br />
ed eventualmente del sapone delicato. Va evitato<br />
l'impiego di detergenti aggressivi o solventi organici,<br />
come ad es. etere o benzina, perché possono intaccare<br />
la cassa di plastica.<br />
Per la disinfezione passare sul dispositivo un panno<br />
imbevuto con una soluzione disinfettante (ad es. Aerodesin<br />
2000 o Lysoform D). Quando si applica la soluzione<br />
attenersi alle quantità indicate dal produttore<br />
riguardanti la diluizione.
223 Utilizzo, manutenzione e cura<br />
Nota:<br />
Sterilizzazione<br />
Attenzione!<br />
Dopo una pulizia o disinfezione <strong>Reocor</strong> S non va utilizzato<br />
per un'ora.<br />
<strong>Reocor</strong> S non può essere sterilizzato. Se il dispositivo<br />
deve essere utilizzato in un ambiente sterile può<br />
essere imballato in un involucro sterile.<br />
Si raccomanda di consegnare il dispositivo a tecnici<br />
autorizzati per l'esecuzione di controlli annuali.<br />
Sebbene <strong>Reocor</strong> S sia protetto contro le gocce d'acqua<br />
va mantenuto pulito e asciutto.<br />
Italiano<br />
Cavi paziente riutilizzabili<br />
Pulizia<br />
Disinfezione<br />
Sterilizzazione<br />
Controllare se la confezione di un cavo sterile è danneggiata,<br />
prima di aprirla, per verificarne la sterilità.<br />
I cavi paziente riutilizzabili possono essere puliti e<br />
disinfettati con molti metodi differenti mediante detergenti<br />
per uso ospedaliero. Non vanno tuttavia mai<br />
usati prodotti chimici aggressivi, come l'acetone.<br />
Il metodo di pulizia da noi consigliato per i cavi è<br />
l'utilizzo di un panno e di un comune sapone per le<br />
mani privo di alcool o del detergente Stabimed della<br />
Braun. Successivamente vanno eliminati i residui di<br />
detergente dai cavi con acqua senza elettroliti e i cavi<br />
devono essere poi asciugati con un panno pulito e<br />
asciutto.<br />
Per un bagno di disinfettante utilizzare un prodotto per<br />
strumenti a base aldeidica (ad es. Lysoformin 3000) o<br />
a base di alcool (ad es. Aerodesin 2000) secondo le<br />
indicazioni del produttore e tenendo conto delle rispettive<br />
direttive ospedaliere.<br />
Dopo la disinfezione il cavo deve essere pulito dai residui<br />
di disinfettante con acqua priva di elettroliti.<br />
Una sterilizzazione a vapore può essere eseguita a<br />
121 °C e 1,1 bar per 20 min.<br />
Italiano
224 Utilizzo, manutenzione e cura<br />
Manutenzione, assistenza, ispezione<br />
Italiano<br />
Controllo prima<br />
dell'uso<br />
Ispezione<br />
L'unico provvedimento di manutenzione necessario<br />
è la sostituzione della batteria (vedere pag. 217).<br />
Altri lavori di manutenzione non sono necessari.<br />
Prima di ogni uso si deve eseguire un breve controllo<br />
del dispositivo. Esso comprende un controllo visivo e<br />
un semplice controllo del funzionamento.<br />
Controllo visivo:<br />
• Controllo della cassa al fine di individuare danni<br />
meccanici, deformazioni, elementi allentati,<br />
incrinature, ecc.<br />
• Controllo della zona di connessione dei cavi per<br />
individuare danni meccanici<br />
• Controllo della leggibilità delle scritte<br />
Controllo del funzionamento:<br />
Tenere conto del risultato dell'autotest che viene<br />
eseguito automaticamente dopo l'accensione.<br />
L'ispezione deve essere eseguita<br />
• dopo l'utilizzo del dispositivo con strumenti chirurgici<br />
ad alta frequenza o defibrillatori,<br />
• in caso di sospetto di disfunzioni,<br />
• una volta l'anno.<br />
Questa ispezione deve avvenire in modo conforme alle<br />
indicazioni del produttore. Esse vengono messe a<br />
disposizione su richiesta. Tali indicazioni comprendono<br />
tutte le operazioni di controllo necessarie e gli<br />
apparecchi richiesti a tale scopo.
225 Utilizzo, manutenzione e cura<br />
Smaltimento<br />
Nota:<br />
<strong>Reocor</strong> S porta sulla targhetta il simbolo di un bidone<br />
dei rifiuti barrato. Questo simbolo significa che per la<br />
ripresa in consegna e lo smaltimento del dispositivo<br />
vale la direttiva europea 2002/96/CE sui rifiuti delle<br />
apparecchiature elettriche ed elettroniche ( Direttiva<br />
2002/96/CE del Parlamento europeo e del Consiglio<br />
del 27 gennaio 2003).<br />
I dispositivi vecchi e gli accessori non più utilizzati,<br />
come ad es. cavi paziente e adattatori, devono essere<br />
spediti a <strong>BIOTRONIK</strong>. In questo modo ci si assicura che<br />
lo smaltimento dei rifiuti avvenga in conformità con<br />
l'applicazione nazionale della direttiva RAEE.<br />
i cavi che sono venuti a contatto con il sangue devono<br />
essere smaltiti correttamente secondo le disposizioni<br />
ambientali per i rifiuti medici contaminati. I cavi non<br />
contaminati devono essere smaltiti secondo la <br />
direttiva europea 2002/96/CE sui rifiuti di apparecchiature<br />
elettriche ed elettroniche (RAEE).<br />
Le batterie esaurite devono essere trattate come rifiuti<br />
speciali e smaltite dall'utilizzatore.<br />
Per eventuali domande, rivolgersi a <strong>BIOTRONIK</strong>.<br />
Italiano<br />
Italiano
226 Sicurezza tecnica<br />
Sicurezza tecnica<br />
Italiano<br />
AVVERTENZA!<br />
Il pacemaker esterno <strong>Reocor</strong> S è conforme agli<br />
standard internazionali per la sicurezza degli apparecchi<br />
elettromedicali previsti da IEC 60601-1 e<br />
IEC 60601-1-2 e allo standard internazionale<br />
IEC 60601-2-31 per pacemaker esterni temporanei.<br />
Le seguenti caratteristiche speciali offrono sicurezza<br />
per il paziente:<br />
• Nessuna parte metallica può essere toccata come<br />
previsto dalla definizione secondo IEC.<br />
• La costruzione è conforme agli standard per la<br />
classe di apparecchi CF (cardiac floating) ed è<br />
omologata per il trattamento diretto del cuore.<br />
Il pacemaker soddisfa i requisiti prescritti dagli<br />
standard internazionali per la protezione dal<br />
rischio di defibrillazione.<br />
• La copertura del quadro comandi chiusa protegge<br />
il pacemaker dalle gocce d'acqua.<br />
Gli elettrocateteri temporanei collegati al <strong>Reocor</strong> S<br />
costituiscono una linea di alimentazione a bassa impedenza<br />
verso il miocardio per la corrente elettrica.<br />
I dispositivi alimentati dalla rete utilizzati in prossimità<br />
del paziente devono pertanto essere messi a terra in<br />
conformità alle norme vigenti.<br />
Il pacemaker non può essere utilizzato in aree soggette<br />
al rischio di esplosione.<br />
Tutti i lavori di manutenzione e le riparazioni ulteriori<br />
devono essere eseguiti da <strong>BIOTRONIK</strong>.
227 Dati tecnici<br />
Dati tecnici<br />
Simboli<br />
Osservare le note contenute nel manuale tecnico di<br />
istruzione<br />
Italiano<br />
Marcatura della posizione della batteria nel contenitore<br />
delle batterie<br />
Smaltimento conforme alla Direttiva 2002/96/CE del Parlamento<br />
europeo e del Consiglio del 27 gennaio 2003 sui rifiuti<br />
di apparecchiature elettriche ed elettroniche<br />
IP31<br />
OFF<br />
Classificazione componente: CF (cardiac floating), protetto<br />
contro gli shock di defibrillazione<br />
Idrorepellente, grado di protezione IP31<br />
Disinserito (sulla manopola di regolazione Mode)<br />
Parametri impostabili<br />
Modi di stimolazione S00, SSI, SST<br />
Frequenza base (30 … 250 bpm) ± 1 bpm Ad una frequenza 180 bpm<br />
viene emesso un segnale di<br />
avvertimento<br />
Ampiezza impulso 0,1 … 17 V ± max (50 mV, 10%) Ad un'ampiezza dell'impulso<br />
1 V viene emesso un<br />
segnale di avvertimento<br />
Sensibilità 1 … 20 mV ± 15% O impulso 40 ms sin 2<br />
Frequenza Burst (A) (60 … 1000 bpm) ± 20 bpm<br />
Italiano<br />
Parametri predefiniti<br />
Durata impulso 1 ms ± 5%<br />
Auto short dopo Pace < 20 ms ± 10%<br />
Intervallo di rumore 80 ms ± 5 ms<br />
In Channel Blanking 110 ms ± 3 ms<br />
Periodo refrattario<br />
(30 … 150) bpm<br />
(151 … 200) bpm<br />
(201 … 250) bpm<br />
<br />
225 ms ± 5 ms<br />
200 ms ± 5 ms<br />
175 ms ± 5 ms
228 Dati tecnici<br />
Parametri predefiniti<br />
Protezione alta<br />
frequenza<br />
1 … 180 bpm<br />
<br />
181 … 250 bpm<br />
Forma dell'impulso<br />
<br />
<br />
286 ms ± 10%<br />
<br />
214 ms ± 10%<br />
Asimmetrica, bifasica<br />
<br />
<br />
286 ms = 210 bpm, non vale<br />
per il Burst<br />
214 ms = 280 bpm, non vale<br />
per il Burst<br />
Controllo dell'impedenza degli elettrocateteri<br />
Avvertimento acustico Da 2000 15%, con 5 V di ampiezza<br />
Connessione degli<br />
elettrocateteri<br />
Prese da 2 mm isolate;<br />
connettore Redel, a 6 poli mediante adattatore per connettori<br />
Redel<br />
Italiano<br />
Dati elettrici/Batteria<br />
Batteria<br />
Polarità<br />
Protezione da inversione<br />
di polarità<br />
Consumo di corrente<br />
Durata di servizio con la<br />
batteria nuova b)<br />
Fine della durata di servizio<br />
(EOS)<br />
Catodica<br />
Nessuna: La polarità è irrilevante<br />
Normalm. 1 mA (70 bpm, 5,0 V, 500 )<br />
• 600 h (-10%) a 20 °C (± 2°C)<br />
• Con: 70 bpm, 5 V, modo VVI, 500 ohm<br />
• Fino a: segnale ERI (avvertimento EOS)<br />
Lampeggio del LED "Low battery"<br />
Durata di servizio residua<br />
dopo il segnale ERI b) • Con: 70 bpm, 5 V, modo VVI, 500<br />
• 36 ore<br />
ohm<br />
Comportamento<br />
durante il cambio della<br />
batteria<br />
• Tipo alcalino-manganese: IEC 6LR61 / ANSI 1604A<br />
• 9 V a prova di perdite<br />
• Ad es. MN1604 Duracell ® Procell ®a)<br />
• Il dispositivo rimane operativo per almeno 30 s dopo<br />
l'estrazione della batteria.<br />
• L'impostazione del modo non viene perduta.<br />
a) Marchio registrato di Duracell Inc., Bethel, CT 06801<br />
b) Con batterie di tipo MN 1604 Duracell ® , Procell ®
229 Dati tecnici<br />
Condizioni ambientali<br />
Campo di temperatura per <br />
il funzionamento<br />
Campo di temperatura per <br />
l'immagazzinamento<br />
Umidità relativa dell'aria<br />
Pressione atmosferica<br />
Livello di rumore<br />
+10 °C … +40 °C<br />
0 °C … +50 °C<br />
30% … 75%, senza condensa<br />
700 hPa … 1060 hPa<br />
50 dB<br />
Italiano<br />
Dimensioni, peso, materiale<br />
Dimensioni <strong>Reocor</strong> S 160 mm x 75 mm x 35 mm ±2 mm<br />
(senza adattatore Redel)<br />
Peso <strong>Reocor</strong> S Con batteria, con adattatore Redel: 305 g ± 10 %<br />
Senza batteria, con adattatore Redel: 260 g ± 10 %<br />
Senza batteria, senza adattatore Redel: 225 g ± 10 %<br />
Dimensioni adattatore 76 mm x 35,5 mm x 29,4 mm<br />
Redel per <strong>Reocor</strong> S<br />
Peso adattatore Redel 35 g ± 10%<br />
per <strong>Reocor</strong> S<br />
Materiale cassa Babyblend FR 3000 (PC e ABS)<br />
Classificazione<br />
Classificazione componente<br />
Classe di protezione<br />
Grado di protezione<br />
Resistenza agli shock di<br />
defibrillazione<br />
Modo di funzionamento<br />
CF (cardiac floating), protetto contro gli shock di<br />
defibrillazione<br />
II b<br />
IP31 (idrorepellente)<br />
5 kV<br />
Funzionamento continuo<br />
Italiano<br />
Durata di servizio<br />
prevista a) <br />
(secondo la norma <br />
EN 60601-1:2007, 4.4)<br />
12 anni<br />
a) La vita di servizio è la durata di servizio prevista per il dispositivo dopo la messa<br />
in funzione. La durata di servizio prevista non è sostenuta da dati di test.
230 Conformità alla norma IEC 60601-1-2<br />
Conformità alla<br />
norma IEC 60601-1-2<br />
Linee guida e spiegazione del produttore –<br />
Emissioni elettromagnetiche <br />
(IEC 60601-1-2: tabella 1)<br />
Il dispositivo è previsto per il funzionamento<br />
nell'ambiente elettromagnetico descritto sotto.<br />
L'utilizzatore deve garantire che il dispositivo venga<br />
utilizzato in questo tipo di ambiente.<br />
Italiano<br />
Test interferenze<br />
Emissione ad alta<br />
frequenza <br />
conforme a CISPR 11<br />
Emissione ad alta<br />
frequenza<br />
conforme a CISPR 11<br />
Emissione di armoniche<br />
a norma<br />
IEC 61000-3-2<br />
Variazioni di tensione a<br />
norma IEC 61000-3-3<br />
Livello di<br />
conformità<br />
Gruppo 1<br />
Classe B<br />
Non applicabile<br />
Non applicabile<br />
Linee guida per l'ambiente<br />
elettromagnetico<br />
Il dispositivo fa uso di energia ad alta frequenza<br />
esclusivamente per il suo funzionamento.<br />
Per questo l'emissione di interferenze<br />
ad alta frequenza è estremamente<br />
bassa e la probabilità di disturbare altri<br />
apparecchi elettronici nelle vicinanze è<br />
scarsa.<br />
Il dispositivo è idoneo per l'uso in tutte le<br />
strutture, tranne l'ambiente abitativo ed<br />
edifici che sono collegati direttamente alla<br />
rete di alimentazione pubblica.
231 Conformità alla norma IEC 60601-1-2<br />
Verifica di<br />
immunità alle<br />
interferenze<br />
Scarica di elettricità<br />
statica (ESD)<br />
a norma<br />
IEC 61000-4-2<br />
Linee guida e spiegazione del produttore –<br />
Immunità alle interferenze elettromagnetiche <br />
(IEC 60601-1-2: tabella 2)<br />
Il dispositivo è previsto per il funzionamento<br />
nell'ambiente elettromagnetico descritto sotto.<br />
L'utilizzatore del dispositivo deve garantire che esso<br />
venga utilizzato in questo tipo di ambiente.<br />
Livello di test a<br />
norma<br />
IEC 60601<br />
±6 kV scarica<br />
dei contatti<br />
±8 kV scarica<br />
dell'aria<br />
Disturbi transitori Non applicabile<br />
elettrici veloci /<br />
burst a norma<br />
IEC 61000-4-4<br />
Tensioni impulsive Non applicabile<br />
(surge) a norma<br />
IEC 61000-4-5<br />
Vuoti di tensione, Non applicabile<br />
brevi interruzioni e<br />
variazioni della tensione<br />
di alimentazione<br />
a norma<br />
IEC 61000-4-11<br />
Campo magnetico<br />
con le frequenze di<br />
alimentazione<br />
(50/60Hz) a norma<br />
IEC 61000-4-8<br />
Livello di<br />
conformità<br />
±6 kV scarica<br />
dei contatti<br />
±15 kV scarica<br />
dell'aria<br />
Linee guida per<br />
l'ambiente elettromagnetico<br />
I pavimenti dovrebbero essere<br />
di legno, cemento o mattonelle<br />
in ceramica. Se il pavimento è<br />
di materiale sintetico, l'umidità<br />
relativa deve essere minimo<br />
del 30%.<br />
3 A/m 30 A/m L'intensità del campo magnetico<br />
dovrebbe corrispondere al<br />
valore standard di un ambiente<br />
commerciale e ospedaliero.<br />
Italiano<br />
Italiano
232 Conformità alla norma IEC 60601-1-2<br />
Linee guida e spiegazione del produttore – immunità<br />
alle interferenze elettromagnetiche per tutti i<br />
modelli di pacemaker esterni <br />
(IEC 60601-1-2: tabella 3)<br />
Il dispositivo è previsto per il funzionamento<br />
nell'ambiente elettromagnetico descritto sotto.<br />
L'utilizzatore del dispositivo deve garantire che esso<br />
venga utilizzato in questo tipo di ambiente.<br />
Italiano<br />
Verifica di<br />
immunità alle<br />
interferenze<br />
Grandezze perturbatrici<br />
condotte<br />
a norma<br />
IEC 61000-4-6<br />
Grandezze perturbatrici<br />
irradiate<br />
a norma<br />
IEC 61000-4-3<br />
Livello di test a<br />
norma IEC 60601<br />
Livello di<br />
conformità<br />
Linee guida per l'ambiente<br />
elettromagnetico<br />
Gli apparecchi radio portatili<br />
e mobili, compresi i cavi, non<br />
devono essere utilizzati ad una<br />
distanza da qualsiasi parte del<br />
dispositivo che sia inferiore alla<br />
distanza di sicurezza raccomandata.<br />
Distanza di sicurezza raccomandata:<br />
10 V rms<br />
da 10 kHz a 80 MHz<br />
d = 0,35 P<br />
bande ISM a al di fuori delle<br />
10 V rms<br />
da 10 kHz a 80 MHz<br />
nelle bande ISM a) d = 1,2 P<br />
10 V/m<br />
10 V/m<br />
da 800 MHz a<br />
d = 1,2 P<br />
2,5 GHz<br />
per 80 MHz – 800 MHz<br />
d = 2,3<br />
P<br />
per 800 MHz – 2,5 GHz
233 Conformità alla norma IEC 60601-1-2<br />
Verifica di<br />
immunità alle<br />
interferenze<br />
Livello di test a<br />
norma IEC 60601<br />
Livello di<br />
conformità<br />
Linee guida per l'ambiente<br />
elettromagnetico<br />
Con P come potenza nominale<br />
massima del trasmettitore in<br />
Watt [W] in base alle indicazioni<br />
del fabbricante del trasmettitore<br />
e d come distanza di sicurezza<br />
raccomandata in metri<br />
[m] b) .<br />
Italiano<br />
L'intensità del campo di trasmettitori<br />
radio fissi deve risultare,<br />
mediante opportune ispezioni<br />
in loco c) , inferiore al<br />
livello di conformità in tutte le<br />
frequenze d) .<br />
Nelle vicinanze di apparecchi<br />
con questo simbolo è possibile<br />
che si verifichino delle interferenze.<br />
NOTA: è possibile che queste linee guida non valgano in tutti i casi. La diffusione delle<br />
onde elettromagnetiche è influenzata dall'assorbimento e dalla riflessione di palazzi,<br />
oggetti e persone.<br />
a) Le bande ISM (per applicazioni industriali, scientifiche e medicali) tra 150 kHz e<br />
80 MHz sono 6,765 MHz – 6,795 MHz; 13,553 MHz – 13,567 MHz; 26,957 MHz –<br />
27,283 MHz e 40,66 MHz – 40,70 MHz.<br />
b) Il livello di conformità delle bande di frequenza ISM tra 150 kHz e 80 MHz e nella<br />
gamma di frequenze 80 MHz – 2,5 GHz devono ridurre la probabilità, che i dispositivi<br />
di comunicazione mobili provochino disturbi, quando vengono inavvertitamente<br />
avvicinati alla zona in cui si trova il paziente. In queste gamme di frequenze si consiglia<br />
pertanto una maggiore distanza di sicurezza (fattore 1,2 invece di 0,35).<br />
c) Le intensità del campo di trasmettitori fissi, come ad es. delle stazioni base per telefoni<br />
cellulari, apparecchi cellulari, radio amatoriali, radio e televisione non possono<br />
in teoria essere previste con esattezza. Per la valutazione dell'ambiente elettromagnetico<br />
con trasmettitori HF fissi si dovrebbe prevedere uno studio del luogo. Se<br />
l'intensità del campo misurata sul luogo in cui si impiega il dispositivo supera il suddetto<br />
livello di conformità per l'alta frequenza, è necessario osservare il dispositivo<br />
per verificare che funzioni in modo conforme. Eventualmente si devono prendere<br />
ulteriori provvedimenti, come ad es. un altro orientamento o un altro luogo di installazione<br />
del pacemaker esterno.<br />
d) Nella gamma di frequenze compresa tra 150 kHz e 80 MHz le intensità del campo<br />
non devono essere inferiori a 10 V/m.<br />
Italiano
234 Conformità alla norma IEC 60601-1-2<br />
Distanze di sicurezza raccomandate dagli apparecchi<br />
di telecomunicazione HF portatili e mobili<br />
(IEC 60601-1-2: tabella 5)<br />
Il dispositivo è previsto per il funzionamento in un<br />
ambiente elettromagnetico, in cui le grandezze perturbatrici<br />
sono controllate. L'utilizzatore del dispositivo<br />
può contribuire ad evitare interferenze elettromagnetiche<br />
attenendosi alla distanza di sicurezza –<br />
dipendente dalla potenza in uscita dell'apparecchio di<br />
comunicazione, come indicato in basso – dagli apparecchi<br />
di telecomunicazioni HF mobili (trasmettitori).<br />
Potenza<br />
nominale del<br />
trasmettitore<br />
P [W]<br />
Distanza di sicurezza d [m] in base alla frequenza di trasmissione<br />
Da 150 kHz a<br />
80 MHz al di<br />
fuori delle<br />
bande ISM<br />
Da 150 kHz a<br />
80 MHz nelle<br />
bande ISM<br />
Da 80 MHz a<br />
800 MHz<br />
Da 800 MHz a<br />
2,5 GHz<br />
d = 0,35 P d = 1,2 P d = 1,2 P d = 2,3 P<br />
Italiano<br />
0,01 0,04 0,12 0,12 0,23<br />
0,10 0,11 0,38 0,38 0,73<br />
1,00 0,35 1,20 1,20 2,30<br />
10,00 1,11 3,79 3,79 7,27<br />
100,00 3,50 12,00 12,00 23,00<br />
Per trasmettitori, la cui potenza nominale non è riportata nella tabella in alto, si può<br />
calcolare la distanza di sicurezza utilizzando la formula fornita per la rispettiva frequenza<br />
del trasmettitore. In questo caso P è la potenza nominale del trasmettitore<br />
espressa in Watt [W], d la distanza di sicurezza espressa in metri [m].<br />
NOTA 1: le bande ISM (per applicazioni industriali, scientifiche e medicali) tra<br />
150 kHz e 80 MHz sono 6,765 MHz – 6,795 MHz; 13,553 MHz – 13,567 MHz;<br />
26,957 MHz – 27,283 MHz e 40,66 MHz – 40,70 MHz.<br />
NOTA 2: il livello di conformità delle bande di frequenza ISM tra 150 kHz e 80 MHz e<br />
nella gamma di frequenze 80 MHz – 2,5 GHz devono ridurre la probabilità, che i<br />
dispositivi di comunicazione mobili provochino disturbi, quando vengono inavvertitamente<br />
avvicinati alla zona in cui si trova il paziente. In queste gamme di frequenze si<br />
consiglia pertanto una maggiore distanza di sicurezza (fattore 1,2 invece di 0,35).<br />
NOTA 3: è possibile che queste linee guida non valgano in tutti i casi. La diffusione<br />
delle onde elettromagnetiche è influenzata dall'assorbimento e dalla riflessione di<br />
palazzi, oggetti e persone.
235 Contenuto della confezione e accessori<br />
Nota:<br />
Contenuto della confezione<br />
e accessori<br />
<strong>Reocor</strong> S può essere utilizzato solo con gli accessori<br />
sviluppati e testati per questo pacemaker.<br />
Italiano<br />
Contenuto della confezione<br />
Denominazione articolo Quant. Nota N° d'ordine<br />
<strong>Reocor</strong> S 1 365528<br />
Batteria 1 Duracell Plus, 6LR61 –<br />
Bracciale<br />
– Per il Giappone<br />
1 Corto 391843<br />
– Per tutti gli altri paesi<br />
1 Standard 103704<br />
Adattatore Redel 1 371263<br />
Copertura del quadro comandi 1 378007<br />
Manuale tecnico di istruzione multilingue<br />
1 368703<br />
(DE, EN, ES, FR, IT, PT)<br />
Manuale tecnico ZH 368704<br />
Guida rapida DE 370125<br />
Guida rapida EN 371305<br />
Guida rapida ES 371306<br />
Guida rapida FR 371307<br />
Guida rapida IT 1 371308<br />
Guida rapida PT 372231<br />
Guida rapida ZH 371309<br />
Custodia 1 379384<br />
Italiano<br />
Accessori<br />
Articolo N° d'ordine Descrizione Connessione<br />
PK-82 128564 Cavo paziente con due morsetti a<br />
coccodrillo isolati, risterilizzabile<br />
PK-83 (2,5 m) 128563 Cavo paziente con due connettori<br />
filettati isolati, risterilizzabile<br />
PK-83 (1,5 m) 128562 Cavo paziente con due connettori<br />
filettati isolati, risterilizzabile<br />
PK-83-B (2,5 m) 347485 Cavo paziente con due connettori<br />
filettati isolati da 2,3 mm<br />
PK-83-B (1,5 m) 347606 Cavo paziente con due connettori<br />
filettati isolati da 2,3 mm<br />
Connessione<br />
diretta<br />
Connessione<br />
diretta<br />
Connessione<br />
diretta<br />
Adattatore<br />
Redel<br />
Adattatore<br />
Redel<br />
PK-175 333959 Cavo paziente, con quattro connettori<br />
Adattatore<br />
filettati per il collegamento di elettrocateteri<br />
temporanei, risterilizzabile<br />
Redel
236 Contenuto della confezione e accessori<br />
Articolo N° d'ordine Descrizione Connessione<br />
PK-67-L 123672 Cavo paziente, risterilizzabile, per la<br />
combinazione con adattatori PA-1-B,<br />
PA-2, PA-4<br />
PK-67-S 128085 Cavo paziente, risterilizzabile, per la<br />
combinazione con PK-155 e <br />
Remington modello 301-CG<br />
PK-141 (2,8 m) 353181 Cavo paziente, risterilizzabile con<br />
quattro morsetti a coccodrillo isolati<br />
Bracciale 103704 Bracciale standard<br />
<strong>Reocor</strong> standard<br />
Bracciale<br />
<strong>Reocor</strong> corto<br />
391843<br />
Bracciale con diametro ridotto.<br />
Indicato per braccia sottili.<br />
Adattatore<br />
Redel<br />
Adattatore<br />
Redel<br />
Adattatore<br />
Redel<br />
–<br />
–<br />
Solo per gli <strong>USA</strong><br />
Articolo Produttore Descrizione Connessione<br />
ADAP-2R<br />
(0,24 m)<br />
Remington<br />
Medical Inc.<br />
Adattatore riutilizzabile per cavi modello<br />
S-101-97 e modello FL-601-97<br />
Adattatore<br />
Redel<br />
Adattatore per PK-67-S e PK-67-L<br />
Italiano<br />
Articolo N° d'ordine Descrizione<br />
PA-1-B 123751 Per la connessione con l'adattatore da 2 mm o<br />
l'adattatore MHW (adattatore per elettrocateteri<br />
endocardici), risterilizzabile<br />
PA-1-C 349723 Per la connessione con l'adattatore da 2 mm o<br />
l'adattatore MHW (adattatore per elettrocateteri<br />
endocardici), risterilizzabile<br />
PA-2 123157 Per la connessione al connettore IS-1, risterilizzabile<br />
PA-4 123090 Con morsetti a coccodrillo, risterilizzabile<br />
PK-155<br />
(set di due cavi)<br />
337358 Cavo paziente sterile, a 2 conduttori con morsetti<br />
a coccodrillo, monouso
237 Contenuto della confezione e accessori<br />
Adattatore per PK-67-S e PK-67-L<br />
(solo per gli <strong>USA</strong>)<br />
Articolo Produttore Descrizione<br />
Modello 301-CG<br />
Remington<br />
Medical Inc.<br />
Cavo paziente sterile, a 2 conduttori con morsetti<br />
a coccodrillo, monouso<br />
Italiano<br />
Adattatore per ADAP-2R <br />
(solo per gli <strong>USA</strong>)<br />
Articolo Produttore Descrizione<br />
Modello 301-CG Remington Cavo paziente sterile, a 2 conduttori con morsetti<br />
Medical Inc. a coccodrillo, monouso<br />
Modello S-101-97<br />
(2,5 m)<br />
Modello FL-601-<br />
97 (2,0 m)<br />
Remington<br />
Medical Inc.<br />
Remington<br />
Medical Inc.<br />
Cavo paziente, a 2 conduttori con morsetti a<br />
coccodrillo, monouso<br />
Cavo paziente, a 2 conduttori con connettori<br />
filettati, monouso<br />
Italiano
238 Legenda dell'etichetta<br />
Legenda dell'etichetta<br />
I simboli sull'etichetta hanno il seguente significato:<br />
Simbolo<br />
Significato<br />
<strong>Reocor</strong> S<br />
Adattatore Redel<br />
Numero d'ordine <strong>BIOTRONIK</strong><br />
Numero di serie del dispositivo<br />
Data di fabbricazione del dispositivo<br />
Italiano<br />
D<br />
S<br />
Range di temperatura consentito per l'immagazzinamento<br />
Range di pressione atmosferica consentito per l'immagazzinamento<br />
Range di umidità consentito per l'immagazzinamento<br />
Paziente con elettrocatetere impiantato<br />
Contenuto<br />
Simbolo dello smaltimento<br />
Rispettare le istruzioni per l'uso!<br />
Attenzione: le leggi Federali degli U.S.A. restringono la <br />
vendita o l'ordine di questo prodotto ai soli medici.<br />
Marchio CE
239<br />
<br />
Conteúdo<br />
Descrição geral ....................................................................................241<br />
Descrição do produto ............................................. 241<br />
Indicações ............................................................... 242<br />
Contra-indicações .................................................. 242<br />
Possíveis efeitos colaterais .................................... 243<br />
Precauções para o manuseio .................................243<br />
Sinais visuais e acústicos ....................................... 249<br />
Instruções para a operação ..................................................................250<br />
Observações gerais ................................................ 250<br />
Controles de operação e LEDs ...............................252<br />
Tampa de proteção .................................................253<br />
Conexão de eletrodos ............................................. 254<br />
Colocação em funcionamento ................................ 261<br />
Fixação ................................................................... 262<br />
Troca da bateria ...................................................... 263<br />
Modos de estimulação e parâmetros ...................................................265<br />
Modos de estimulação ........................................... 265<br />
Frequência ..............................................................266<br />
Amplitude e largura de pulso ................................ 266<br />
Sensibilidade .......................................................... 266<br />
Intervalo de interferência ....................................... 266<br />
Burst .......................................................................267<br />
Manuseio, cuidados e manutenção .......................................................268<br />
<strong>Reocor</strong> S ................................................................. 268<br />
Cabos do paciente reutilizáveis ............................. 269<br />
Manutenção, serviço e inspeções ..........................270<br />
Descarte ................................................................. 271<br />
Segurança técnica ................................................................................272<br />
Dados técnicos .....................................................................................273<br />
Conformidade com IEC 60601-1-2 ........................................................276<br />
Escopo de fornecimento e acessórios ..................................................281<br />
Legenda da etiqueta .............................................................................284<br />
Português
Português<br />
240
241 Descrição geral<br />
Descrição geral<br />
Descrição do produto<br />
O <strong>Reocor</strong> S é um marcapasso unicameral externo<br />
operado a bateria para a utilização hospitalar que <br />
é conectado a eletrodos temporários de marcapasso<br />
(inclusive fios cardíacos miocárdicos e cateteres<br />
transvenosos implantáveis). <br />
A conexão ocorre diretamente ou mediante um cabo<br />
do paciente separado via adaptadores, se necessário.<br />
Três modos de estimulação estão à disposição: SSI,<br />
S00, SST, bem como uma função de burst.<br />
Podem ser ajustados o modo de estimulação, <br />
a frequência, a sensibilidade, a amplitude de pulso <br />
e a frequência de burst.<br />
Diodos luminosos (LEDs) indicam a detecção (Sense),<br />
estimulação (Pace) e o estado da bateria (Low battery). <br />
Um sinal acústico alerta quando frequências muito<br />
elevadas ou valores de sensibilidade muito baixos<br />
estão ajustados e no caso de impedância não ideal <br />
do eletrodo.<br />
Um defeito no aparelho (não passou pelo auto-teste<br />
depois de ligar o aparelho) é indicado mediante LEDs<br />
permanentemente acesos e por um sinal acústico<br />
sequenciado. Se o auto-teste depois de ligar o aparelho<br />
não detectou nenhuma falha, os sinais visuais e acústicos<br />
se desligam depois de alguns segundos.<br />
Pertencem às características de segurança <br />
do <strong>Reocor</strong> S:<br />
• Indicação visual de eventos detectados <br />
e estimulados<br />
• Parâmetros de estimulação controlados <br />
por microprocessador<br />
• Supervisão da impedância do eletrodo<br />
• Advertência visual no caso da proximidade <br />
do esgotamento da bateria<br />
Português
242 Descrição geral<br />
• Tampa de proteção transparente deslizante dos<br />
elementos de comando, para evitar a alteração<br />
não intencional dos parâmetros<br />
Eletrodos temporários, fios cardíacos e eletrodos <br />
com conectores de 2 mm podem ser conectados diretamente<br />
ao <strong>Reocor</strong> S. Além disso, há diversos cabos<br />
do paciente e adaptadores à disposição. Este sistema<br />
oferece a conexão segura de eletrodos transvenosos <br />
e eletrodos miocárdicos que podem ser aplicados de<br />
forma unipolar ou bipolar.<br />
Indicações<br />
Português<br />
A estimulação temporária com <strong>Reocor</strong> S é adequada<br />
para as seguintes aplicações com pacientes de qualquer<br />
idade:<br />
• Terapia de arritmias e bloqueio cardíaco<br />
• Bradicardia sinusal sintomática<br />
• Doença do nó sinusal<br />
• Estimulação pré-, intra- e pós-operatória <br />
de pacientes com uma cirurgia cardíaca<br />
• Terminação de taquiarritmias supraventriculares<br />
• Estimulação profilática para a prevenção <br />
de arritmias<br />
• Estimulação de emergência<br />
• Verificação dos limiares de estimulação<br />
Contra-indicações<br />
• O <strong>Reocor</strong> S não pode ser esterilizado e, portanto,<br />
não é adequado para a utilização em ambiente<br />
estéril.<br />
• A estimulação unicameral atrial é contra-indicada<br />
em pacientes com distúrbios da condução AV <br />
pré-existentes.<br />
• A utilização de um marcapasso externo é contraindicada<br />
na presença de um marcapasso implantado<br />
ativo.
243 Descrição geral<br />
Possíveis efeitos colaterais<br />
Pertencem às possíveis complicações relacionadas <br />
à aplicação de estimulação externa temporária, <br />
entre outras, assistolias após finalização abrupta da<br />
estimulação (por exemplo, causada por desconexão<br />
não intencional do cabo do paciente, se o eletrodo se<br />
soltar, ou por ajustes incorretos) ou uma dependência<br />
do marcapasso.<br />
Pertencem às complicações durante a introdução <br />
de eletrodos transvenosos, entre outras: infecção do<br />
corte, punção arterial, atritos pericárdicos, perfuração<br />
cardíaca e arritmia após a inserção do eletrodo.<br />
Precauções para o manuseio<br />
Grupo de<br />
usuários<br />
Princípio de<br />
operação<br />
Utilização<br />
prevista<br />
De acordo com os ajustes de estimulação e com a<br />
doença pré-existente do paciente, a estimulação pode<br />
induzir arritmias. Para garantir a segurança do<br />
paciente, determinados procedimentos devem ser<br />
respeitados e as medidas de precaução listadas a<br />
seguir devem ser tomadas. Outros procedimentos e<br />
medidas de precaução devem ser consultados nas<br />
respectivas publicações médicas.<br />
• O <strong>Reocor</strong> S apenas pode ser utilizado por pessoas<br />
com conhecimentos em cardiologia que foram<br />
instruídas para o manuseio do aparelho. Potenciais<br />
usuários são o pessoal técnico-médico<br />
qualificado de uma clínica e médicos.<br />
• O <strong>Reocor</strong> S interage com o coração humano. <br />
Além disso, há uma interação com a pele e os<br />
vasos sanguíneos do paciente.<br />
• <strong>Reocor</strong> S e os seus cabos e acessórios permitidos<br />
apenas podem ser utilizados de acordo com o<br />
especificado neste manual técnico.<br />
• O <strong>Reocor</strong> S não pode ser conectado a outros <br />
aparelhos eletromedicinais.<br />
• <strong>Reocor</strong> S não pode ser utilizado em áreas<br />
com perigo de explosão.<br />
Proibido alterações • A manutenção, ampliação ou alteração do <br />
aparelho somente podem ser efetuadas pelo<br />
fabricante <strong>BIOTRONIK</strong> ou por uma empresa <br />
explicitamente autorizada pelo fabricante.<br />
Português
244 Descrição geral<br />
Português<br />
Peça de reserva e<br />
acessórios<br />
Aparelhos<br />
à disposição<br />
Comportamento<br />
antes da utilização<br />
Conexão de<br />
eletrodos<br />
• Peças de reserva originais e acessórios autorizados<br />
pela <strong>BIOTRONIK</strong> garantem sua segurança. <br />
A utilização de outros componentes invalidam a<br />
responsabilidade pelas consequências bem como<br />
a garantia e a segurança da integridade.<br />
• No caso da dependência do paciente do marcapasso,<br />
deve ser mantido em prontidão um estimulador<br />
de emergência.<br />
• Devem ser mantidos em prontidão um desfibrilador<br />
externo, oxigênio, equipamento de entubação<br />
e medicamentos de emergência.<br />
• Antes da utilização, o <strong>Reocor</strong> S deve ser submetido<br />
a um exame visual para detectar danos e<br />
contaminações.<br />
• Nunca utilizar um aparelho danificado ou <br />
um aparelho que mostra anomalias. Substitua<br />
cabos de qualquer tipo em caso de danos mesmo<br />
minimamente visíveis.<br />
• Antes da utilização do <strong>Reocor</strong> S, dos cabos de<br />
paciente ou de eletrodos, o usuário deve tocar o<br />
paciente para compensar diferenças de potencial<br />
elétrico.<br />
• Recomenda-se veementemente que o usuário<br />
verifique cada parâmetro ajustado antes de <br />
conectar os eletrodos ao <strong>Reocor</strong> S.<br />
• Apesar do <strong>Reocor</strong> S ser protegido contra gotejamento<br />
de água, todos os conectores e o aparelho<br />
devem ser mantidos limpos e secos.<br />
• O <strong>Reocor</strong> S não pode ser esterilizado.<br />
• As conexões do <strong>Reocor</strong> S e dos eletrodos temporários<br />
de estimulação deve ser protegidas e regularmente<br />
verificadas.<br />
• O cabo do paciente deve ser conectado primeiramente<br />
ao <strong>Reocor</strong> S e depois aos eletrodos.<br />
• Os eletrodos temporários, aos quais o <strong>Reocor</strong> S<br />
está conectado, representam uma via de condução<br />
elétrica de baixa resistência ao miocárdio. Por<br />
isso, aparelhos ligados à rede elétrica utilizados<br />
perto do paciente devem ser aterrados conforme<br />
os regulamentos.
245 Descrição geral<br />
Comportamento<br />
durante a aplicação<br />
Estimulação com<br />
altas frequências<br />
• Ao manusear eletrodos já implantados, os pinos<br />
de contato dos mesmos e superfícies metálicas de<br />
contato não podem ser tocadas nem podem entrar<br />
em contato com superfícies condutoras de eletricidade<br />
ou superfícies úmidas.<br />
• Se um cabo se soltar do <strong>Reocor</strong> S, reconecte <br />
imediatamente e a segurança da conexão deve <br />
ser controlada.<br />
• Ao utilizar eletrodos unipolares, devem ser utilizados<br />
dois eletrodos unipolares para uma estimulação<br />
eficaz.<br />
• Durante a aplicação do <strong>Reocor</strong> S, a tampa de <br />
proteção dos elementos de comando deve estar<br />
completamente fechada para evitar a alteração<br />
não intencional dos parâmetros de funcionamento.<br />
• Operar o <strong>Reocor</strong> S apoiado num suporte horizontal<br />
antiderrapante ou fixado no paciente com a<br />
braçadeira ou suspenso num suporte de infusão<br />
com ajuda da alça de suspensão do lado traseiro<br />
do aparelho.<br />
• O <strong>Reocor</strong> S não pode ser usado diretamente na<br />
pele.<br />
• Durante a utilização do <strong>Reocor</strong> S, a frequência<br />
cardíaca do paciente deve ser monitorada com <br />
um monitor de ECG com função de alarme.<br />
• Em caso de distúrbios ocasionados por interferência<br />
eletromagnética (EMI), o <strong>Reocor</strong> S muda para <br />
o modo S00 quando determinados limites forem<br />
ultrapassados.<br />
• A estimulação do coração com frequências acima<br />
de 180 ppm durante um longo período de tempo<br />
pode causar graves complicações hemodinâmicas.<br />
Uma estimulação com altas frequências deve<br />
ser efetuada somente com supervisão contínua<br />
assegurada.<br />
Português
246 Descrição geral<br />
Português<br />
Comportamento<br />
depois da aplicação<br />
Operação<br />
a bateria<br />
• Após uma desfibrilação ou cauterização, o aparelho<br />
deve ser submetido a um teste de função.<br />
• Se o aparelho for armazenado sem utilização por<br />
um longo período de tempo, a bateria deve ser retirada<br />
para evitar danos devidos a um vazamento.<br />
• Para a limpeza podem ser usados um pano úmido<br />
e sabão suave. Produtos de limpeza fortes ou solventes<br />
orgânicos devem ser evitados, pois podem<br />
agredir a carcaça de plástico.<br />
• Trabalhos de inspeção e manutenção devem ser<br />
efetuados de acordo com a página 268.<br />
• Não utilizar baterias recarregáveis. O tempo de<br />
serviço destas baterias é difícil de se estimar,<br />
desta forma o ponto de ERI 1) pode ser ultrapassado<br />
de forma imprevista o que pode ocasionar<br />
uma falha repentina na estimulação.<br />
Apenas podem ser utilizadas baterias de 9 V com <br />
o código internacional IEC 6LR61. Utilizando a<br />
bateria do tipo MN 1604 Duracell ® Procell ® , é<br />
possível uma estimulação externa de, no mínimo,<br />
600 horas antes que uma troca da bateria seja<br />
necessária.<br />
É possível realizar a troca da bateria com o <strong>Reocor</strong><br />
S em uso. Após a retirada da bateria, o dispositivo<br />
permanece operacional por no mínimo 30 s, a uma<br />
temperatura de ambiente de 20 ± 2 °C.<br />
Porém, por motivos de segurança, durante a troca<br />
da bateria, o paciente pode ser estimulado por<br />
outra fonte.<br />
Eletrocauterização • Sob nenhuma hipótese pode ser efetuada uma<br />
eletrocauterização num raio de menos de 15 cm<br />
ao redor dos eletrodos, pois existe o perigo de<br />
induzir fibrilação ventricular ou de danificar <br />
o marcapasso.<br />
O marcapasso deve ser ajustado para estimulação<br />
assíncrona para evitar sua inibição devido a detecção<br />
de interferências. Durante o tratamento, <br />
1) Mediante o sinal ERI (LED Low battery piscando), o <strong>Reocor</strong> S alerta para a necessidade <br />
de trocar a bateria
247 Descrição geral<br />
o pulso periférico do paciente deve ser controlado<br />
continuamente. Depois do tratamento, o funcionamento<br />
do marcapasso deve ser verificado.<br />
Desfibrilação • Os circuitos do <strong>Reocor</strong> S estão protegidos contra <br />
a energia de choque proveniente de uma desfibrilação.<br />
Mesmo assim, se possível devem ser <br />
tomadas as seguintes medidas de precaução:<br />
— A energia ajustada não deve ser mais alta <br />
do que é necessário para a desfibrilação.<br />
— A distância entre os eletrodos do desfibrilador<br />
e os eletrodos do <strong>Reocor</strong> S deve ser de no<br />
mínimo 10 cm.<br />
— Depois de uma desfibrilação, o <strong>Reocor</strong> S deve<br />
ser desligado e ligado de novo, para o aparelho<br />
poder executar um auto-teste completo.<br />
Proteção contra<br />
interferências<br />
Além disso, depois da desfibrilação devem ser<br />
verificados e monitorados por um período maior <br />
o funcionamento do marcapasso e o limiar de estimulação.<br />
• O <strong>Reocor</strong> S é protegido contra interferências<br />
devido a radiação eletromagnética, descarga<br />
eletrostática e contra interferências conduzidas. <br />
Também a radiação emitida pelo <strong>Reocor</strong> S foi<br />
minimizada. Assim, o aparelho satisfaz as exigências<br />
conforme IEC 60601-1-2. Porém, mesmo<br />
assim é possível que fortes campos eletromagnéticos,<br />
tais como os que podem incidir,<br />
por exemplo, na proximidade imediata de motores<br />
elétricos, transformadores, linhas elétricas e<br />
outros aparelhos elétricos, prejudiquem o funcionamento<br />
do <strong>Reocor</strong> S.<br />
Interferências eletromagnéticas podem causar <br />
as seguintes falhas:<br />
— Reinicialização inesperada (auto-teste <br />
é efetuado).<br />
— Eventos cardíacos são detectados, porém, <br />
não aparecem no monitor do ECG.<br />
— O <strong>Reocor</strong> S mostra comportamento inexplicável.<br />
Português
Português<br />
<br />
248 Descrição geral<br />
Medidas para a restauração do funcionamento<br />
correto do <strong>Reocor</strong> S:<br />
— Verificar a conexão entre o aparelho e os eletrodos<br />
temporários de estimulação e corrigir<br />
se necessário.<br />
— Ajustar corretamente a sensibilidade no<br />
<strong>Reocor</strong> S: muitas vezes a metade do valor da<br />
amplitude média do sinal intrínseco leva a <br />
um ajuste correto da sensibilidade.<br />
— Desligar todos os aparelhos elétricos na proximidade<br />
do <strong>Reocor</strong> S se os mesmos podem<br />
causar interferências eletromagnéticas <br />
e se sua operação não for imprescindível.<br />
— Deslocar a fonte de interferência para um local<br />
onde ela não possa incidir sobre o <strong>Reocor</strong> S.<br />
— Caso seja seguro: desligar o <strong>Reocor</strong> S e ligar<br />
novamente para reiniciar o marcapasso para<br />
uma operação sem interferência.<br />
— Se uma disfunção persistir, entrar em contato<br />
com a <strong>BIOTRONIK</strong>.
249 Descrição geral<br />
Sinais visuais e acústicos<br />
• Durante o auto-teste depois de ligar o <strong>Reocor</strong> S,<br />
todos os LEDs acendem e breves sinais acústicos<br />
soam. Após poucos segundos, o auto-teste<br />
encerra.<br />
• Se o auto-teste não encontrar erros, os LEDs <br />
apagam e os sinais de alerta param.<br />
• Se o auto-teste encontrar um defeito, todos os<br />
LEDs piscam continuamente e os sinais de alerta<br />
soam.<br />
• A necessidade da troca de bateria é indicada pelo<br />
LED Low battery piscando em vermelho.<br />
• O LED verde Sense sinaliza a detecção de uma<br />
onda P ou de uma onda R.<br />
• O LED amarelo Pace sinaliza a liberação de pulsos.<br />
• Durante a operação, os LEDs e os sinais acústicos<br />
fornecem além disso os seguintes avisos de alerta:<br />
Avisos Significado Eliminação do erro<br />
Sinal acústico<br />
por 2 s<br />
Sequência rápida<br />
de sons<br />
Sinal acústico e<br />
LEDs Pace e Sense<br />
piscando<br />
Foi ajustada uma amplitude<br />
de pulso 1 V ou uma<br />
frequência 180 ppm<br />
Impedância fora da faixa<br />
admissível<br />
Verificar se os valores<br />
ajustados são adequados<br />
para o paciente.<br />
Verificar se todos os<br />
conectores estão firmemente<br />
conectados.<br />
Verificar se os eletrodos<br />
estão na posição desejada.<br />
Proteção contra frequências<br />
elevadas foi acionada; enviar à <strong>BIOTRONIK</strong>.<br />
Desligar o aparelho e<br />
não passou pelo auto-teste<br />
LED Low battery<br />
piscando<br />
ERI alcançado<br />
Trocar a bateria. <br />
Ainda restam cerca de<br />
36 horas a) de operação.<br />
a) Utilizando a bateria do tipo MN 1604 Duracell ® , Procell ®<br />
Português
250 Instruções para a operação<br />
Instruções para a operação<br />
Observações gerais<br />
Português<br />
Atenção!<br />
Auto-teste<br />
As conexões do <strong>Reocor</strong> S e dos eletrodos temporários<br />
de estimulação deve ser protegidas e regularmente<br />
verificadas.<br />
Depois de ligar, o <strong>Reocor</strong> S executa um auto-teste<br />
durante alguns segundos. Isso inclui:<br />
• Verificação do código do programa e do microprocessador<br />
• Teste de memória<br />
• Teste de função dos LEDs e dos sinais acústicos<br />
• Verificação da capacidade de estimulação <br />
e sensibilidade<br />
• Verificação da eficácia da proteção contra <br />
frequências elevadas<br />
Se o auto-teste encontrar um defeito, todos os LEDs<br />
piscam continuamente e os sinais acústicos de alerta<br />
soam. Neste caso, o marcapasso deve ser desligado <br />
e enviado à <strong>BIOTRONIK</strong>.<br />
Se o auto-teste não encontrar erros, os LEDs apagam<br />
e os sinais de alerta param e o <strong>Reocor</strong> S começa a<br />
liberar pulsos de estimulação de acordo com os<br />
parâmetros ajustados. Por isso, o eletrodo negativo<br />
(catodo) apenas deve ser conectado depois de garantir<br />
que o modo de estimulação, a frequência de estimulação,<br />
a amplitude de pulso e a sensibilidade estão<br />
ajustados corretamente.<br />
Se o seletor para o modo de estimulação estiver colocado<br />
na posição OFF, evita-se que imediatamente ao<br />
conectar os eletrodos são liberados pulsos de estimulação<br />
ao paciente.
251 Instruções para a operação<br />
Mensagens de<br />
aviso<br />
Durante a operação, as seguintes mensagens de aviso<br />
podem ocorrer:<br />
• A necessidade da troca de bateria é indicada pelo<br />
LED Low battery piscando.<br />
• Se a impedância do eletrodo não estiver dentro <br />
da faixa admissível (p. ex., devido a um eletrodo<br />
quebrado, um contato solto), é emitida uma<br />
sequência rápida de sons, no mínimo 5 segundos<br />
depois de ligar.<br />
• Se a amplitude de pulso é ajustada para valores <br />
1 V, ou a frequência para valores 180 ppm, <br />
soa um sinal acústico por cerca de 2 segundos.<br />
• Com a frequência muito alta (v. página 274 <br />
“Proteção contra frequências elevadas”) e se<br />
falhar no auto-teste, soará um sinal acústico <br />
e os LEDs Pace e Sense piscarão.<br />
Português
Português<br />
<br />
252 Instruções para a operação<br />
Controles de operação e LEDs<br />
Figura 1: Campo de operação <strong>Reocor</strong> S
253 Instruções para a operação<br />
Designação<br />
1 Conexão do paciente<br />
INDIFF.+; DIFF.-<br />
Função<br />
Tabela 1: Descrição dos elementos na Figura 1<br />
Para cabos com conector de 2 mm <br />
ou para adaptadores Redel<br />
(vermelho = positivo; azul = negativo)<br />
2 Compartimento da bateria Para bateria bloco 9 V<br />
3 LED Low battery Alerta para voltagem insuficiente da bateria<br />
4 LED Pace Indicador amarelo para evento de estimulação<br />
5 LED Sense Indicador verde para evento detectado<br />
6 Seletor Ampl. Ajuste da amplitude de pulso<br />
7 Seletor Sens. Ajuste da sensibilidade<br />
8 Start burst Iniciar a função de burst<br />
9 Suporte para cinta Fixação do <strong>Reocor</strong> S no paciente, na cama ou <br />
no suporte de infusão<br />
10 Seletor Burst Rate Ajuste da frequência de burst<br />
11 Select burst Seleção da função de burst<br />
12 Seletor Rate Ajuste da frequência de estimulação<br />
13 Seletor Mode Selecionar o modo de estimulação e desligar<br />
Inscrição em negrito nos elementos de comando<br />
marca valores seguros para a finalidade do aparelho.<br />
Tampa de proteção<br />
A tampa de proteção está travada quando a mesma for<br />
deslizada sobre os dois pontos de limitação e a trava<br />
estiver sobre o trilho (veja Fig. 2).<br />
Certo:<br />
Errado:<br />
Português<br />
Figura 2: Posição correta da tampa de proteção do campo de operação
254 Instruções para a operação<br />
Para destravar a tampa de proteção (veja Fig. 3):<br />
Pressione com uma mão a alavanca de travagem<br />
para cima.<br />
Deslize, simultaneamente, com a outra mão, a<br />
tampa de proteção para baixo.<br />
Figura 3: Destravar a tampa de proteção do campo de operação<br />
Português<br />
Atenção!<br />
Para travar a tampa de proteção:<br />
Deslize a tampa de proteção ao longo do trilho<br />
para cima, até o limite (veja Fig. 2).<br />
Para a limpeza, é possível remover a tampa de <br />
proteção totalmente. Para isso, deslizar a tampa para<br />
baixo até o limite. Em seguida deslizar a tampa de<br />
proteção por cima do limite.<br />
Durante a aplicação do <strong>Reocor</strong> S, a tampa de proteção<br />
deve estar travada para evitar a alteração acidental<br />
dos botões e seletores rotativos e assim, dos <br />
parâmetros do programa.<br />
Conexão de eletrodos<br />
<strong>Reocor</strong> S dispõe de duas tomadas para a conexão<br />
direta de eletrodos com conectores de 2 mm protegidos<br />
contra contato.<br />
Para a conexão de cabos com conectores Redel, <br />
o adaptador Redel deve ser conectado pelo lado correto<br />
e aparafusado (figura 4). O adaptador Redel está<br />
conectado pelo lado correto se é possível parafusá-lo<br />
no <strong>Reocor</strong> S.
255 Instruções para a operação<br />
Informação:<br />
Somente se o adaptador Redel estiver conectado pelo<br />
lado correto sua função está garantida!<br />
Figura 4: Adaptador Redel para <strong>Reocor</strong> S<br />
O <strong>Reocor</strong> S pode ser utilizado com os seguintes cabos<br />
do paciente e adaptadores:<br />
• Cabo do paciente PK-83-B com dois terminais<br />
rosqueáveis para eletrodos temporários no lado<br />
do paciente e conector Redel do lado do <strong>Reocor</strong><br />
(utilizar adaptador Redel).<br />
Português<br />
Figura 5: Cabo do paciente PK-83-B
256 Instruções para a operação<br />
• Cabo do paciente PK-83 com dois terminais<br />
rosqueáveis para eletrodos temporários no lado<br />
do paciente e dois conectores de 2 mm protegidos<br />
contra contato do lado do <strong>Reocor</strong>.<br />
Figura 6: Cabo do paciente PK-83<br />
• Cabo do paciente PK-82 com dois clipes jacaré<br />
para eletrodos temporários no lado do paciente <br />
e dois conectores de 2 mm protegidos contra<br />
contato do lado do <strong>Reocor</strong>.<br />
Figura 7: Cabo do paciente PK-82<br />
Português<br />
• Cabos do paciente PK-67-L e PK-67-S<br />
Os cabos do paciente PK-67-L (2,6 m) e PK-67-S<br />
(0,8 m) apenas divergem no seu comprimento. Eles<br />
possuem no lado do <strong>Reocor</strong> um conector Redel (usar<br />
adaptador Redel) e no lado do paciente um receptor<br />
para os adaptadores conforme figura 13 e para os<br />
cabos de uso único conforme figura 9.<br />
Figura 8: Cabo do paciente PK-67-L e PK-67-S<br />
• Cabos para uso único<br />
Os cabos de uso único PK-155 e Remington 301-CG<br />
(apenas EUA) com clipes jacaré são conectados ao<br />
paciente mediante o cabo PK-67-S.<br />
Figura 9: Cabos de uso único PK-155 e 301-CG (apenas EUA)
257 Instruções para a operação<br />
Apenas para os EUA: Os cabos de uso único S-101-97<br />
e FL-601-97 da Remington Medical Inc. são conectados<br />
pelo cabo de adaptador ADAP-2R ao <strong>Reocor</strong> S <br />
(figura 10).<br />
Terminais rosqueáveis<br />
Figura 10: Apenas EUA: Cabos de uso único Remington e adaptador<br />
O <strong>Reocor</strong> S também pode ser utilizado com cabos do<br />
paciente com quatro conexões para um marcapasso<br />
bicameral. Destes cabos, o <strong>Reocor</strong> S apenas utiliza <br />
o canal ventricular.<br />
São possíveis os seguintes cabos:<br />
• Cabo do paciente PK-141 com quatro clipes jacaré<br />
no lado do paciente e conector Redel do lado do<br />
<strong>Reocor</strong> (utilizar adaptador Redel).<br />
O canal ventricular é marcado pela inscrição Vent<br />
Diff/Indiff nos tubos de proteção contra contato.<br />
Português<br />
Figura 11: Cabo do paciente PK-141
Português<br />
<br />
258 Instruções para a operação<br />
• Cabo do paciente PK-175 com quatro terminais<br />
rosqueáveis no lado do paciente e conector Redel<br />
do lado do <strong>Reocor</strong> (utilizar adaptador Redel). <br />
O canal ventricular é marcado com Ventricle.<br />
Figura 12: Cabo do paciente PK-175<br />
• Adaptadores<br />
A figura 13 mostra adaptadores para a conexão de<br />
eletrodos temporários ao <strong>Reocor</strong> S mediante o cabo<br />
do paciente bicameral PK-67-L/S.<br />
Os eletrodos devem ser ligados à conexão ventricular<br />
do adaptador (marcação V).<br />
Figura 13: Adaptador para os cabos de paciente PK-67-L e PK-67-S<br />
PA-1-B e PA-1-C para a conexão de conectores protegidos<br />
contra contato de 2 mm ou adaptadores MHW<br />
(adaptadores para fios cardíacos)<br />
PA-2 IS-1<br />
PA-4 com clipes jacaré
259 Instruções para a operação<br />
AVISO!<br />
AVISO!<br />
AVISO!<br />
Atenção!<br />
Informação:<br />
Informação:<br />
Informação:<br />
Conexão<br />
Cabos danificados causam perigo para o paciente.<br />
Cabos danificados prejudicam a sua função e causam<br />
perigo para o paciente. Não utilize cabos danificados.<br />
Perigo através da perda de função.<br />
Cabos úmidos podem prejudicar a sua função e <br />
causam perigo para o paciente. Não utilize cabos <br />
úmidos.<br />
Perigo devido à condução de correntes elétricas. <br />
O contato com cabos não utilizados podem conduzir <br />
correntes elétricas ao paciente. Fixe os contatos dos<br />
cabos não utilizados na proximidade do paciente.<br />
Reações alérgicas e inflamações.<br />
Evite o contato de cabos com feridas ou com a <br />
pele do paciente.<br />
Antes da utilização dos cabos, certifique-se da <br />
posição correta da capa de proteção.<br />
Na utilização de cabos ou adaptadores para<br />
aplicações bicamerais, os eletrodos devem ser<br />
conectados ao canal ventricular (identificação<br />
Ventricle ou V).<br />
Não conectar o cabo do paciente ao eletrodo<br />
temporário de estimulação do paciente antes de ter<br />
estabelecido a conexão no <strong>Reocor</strong> S.<br />
Conexão direta<br />
Se o <strong>Reocor</strong> S for operado sem o adaptador Redel,<br />
eletrodos temporários e fios cardíacos podem ser<br />
diretamente conectados às tomadas INDIFF.+ e DIFF.-<br />
mediante os cabos do paciente PK-82 e PK-83.<br />
Cabo do paciente<br />
O cabo do paciente é conectado mediante um adaptador<br />
Redel no <strong>Reocor</strong> S.<br />
Colocar adaptador Redel no <strong>Reocor</strong> S.<br />
Aparafusar o mesmo.<br />
Inserir o conector Redel do cabo do paciente na<br />
tomada Redel do adaptador.<br />
Português
260 Instruções para a operação<br />
Conexão do lado <br />
do paciente<br />
Variantes de conexão<br />
Eletrodos temporários com conectores de 2 mm ou <br />
fio cardíaco com adaptador de 2 mm<br />
Existe a possibilidade de conectar o <strong>Reocor</strong> S diretamente<br />
a um eletrodo temporário com conector de<br />
2 mm protegido contra contato ou a um fio cardíaco<br />
com adaptador de 2 mm, sem outros cabos ou adaptadores.<br />
Todas as demais variantes de conexão podem<br />
ser consultadas na tabela a seguir.<br />
Cabo <strong>BIOTRONIK</strong> Conexão do lado<br />
do aparelho<br />
Conexões recomendadas<br />
Conexão<br />
<strong>Reocor</strong> S<br />
Conexão direta (sem cabo <strong>BIOTRONIK</strong>)<br />
Tomadas 2 mm<br />
2 mm PK-67-S/L com Conector Redel Adaptador Redel<br />
PA-1-C<br />
Terminais rosqueáveis PK-83B com TC Adapt Conector Redel Tomadas 2 mm<br />
Terminais rosqueáveis PK-83 com TC Adapt Conector 2 mm Tomadas 2 mm<br />
Conexões possíveis<br />
2 mm PK-67-S/L com PA-1-B Conector Redel Adaptador Redel<br />
Clipes jacaré PK-141 Conector Redel Adaptador Redel<br />
Clipes jacaré PK-67-S/L com PA-4 Conector Redel Adaptador Redel<br />
Clipes jacaré PK-67-S/L com PA-155 Conector Redel Adaptador Redel<br />
Clipes jacaré PK-82 Conector 2 mm Tomadas 2 mm<br />
Português<br />
Conexão do lado do<br />
paciente<br />
Fio cardíaco com agulha Breakoff ou com<br />
ponta flexível (diâmetro máx. 2,3 mm)<br />
Cabo <strong>BIOTRONIK</strong> Conexão do lado<br />
do aparelho<br />
Conexões recomendadas<br />
Conexão<br />
<strong>Reocor</strong> S<br />
Terminais rosqueáveis PK-83B Conector Redel Adaptador Redel<br />
Terminais rosqueáveis PK-83 Conector 2 mm Tomadas 2 mm<br />
Conexões possíveis<br />
Terminais rosqueáveis PK-175 Conector Redel Adaptador Redel<br />
Clipes jacaré PK-141 Conector Redel Adaptador Redel<br />
Clipes jacaré PK-67-S/L com PA-4 Conector Redel Adaptador Redel<br />
Clipes jacaré PK-67-S/L com PA-155 Conector Redel Adaptador Redel<br />
Clipes jacaré PK-82 Conector 2 mm Tomadas 2 mm
261 Instruções para a operação<br />
Conexão do lado do<br />
paciente<br />
Eletrodo implantado com conector IS-1<br />
Cabo <strong>BIOTRONIK</strong> Conexão do lado<br />
do aparelho<br />
Conexões recomendadas<br />
<strong>Reocor</strong> S<br />
Conexão<br />
Tomada IS-1 PK-67-S/L com PA-2 Conector Redel Adaptador Redel<br />
Conexões possíveis<br />
Clipes jacaré PK-141 Conector Redel Adaptador Redel<br />
Clipes jacaré PK-67-S/L com PA-4 Conector Redel Adaptador Redel<br />
Clipes jacaré PK-67-S/L com PA-155 Conector Redel Adaptador Redel<br />
Clipes jacaré PK-82 Conector 2 mm Tomadas 2 mm<br />
Informação:<br />
Com os cabos bicamerais (PK-141, PK-175, PK-67-S/L),<br />
o <strong>Reocor</strong> S apenas utiliza o canal ventricular!<br />
Polaridade<br />
O <strong>Reocor</strong> S, por via de regra, estimula de forma bipolar,<br />
porém, pode ser utilizado também com eletrodos temporários<br />
de estimulação bipolares ou unipolares.<br />
Ao utilizar eletrodos unipolares, devem ser conectados<br />
2 eletrodos.<br />
Soltar as conexões<br />
Desconectar o cabo do paciente dos eletrodos temporários<br />
de estimulação do paciente ou soltar a conexão<br />
direta.<br />
Soltar o conector Redel<br />
• Puxar o anel de segurança no conector Redel para<br />
trás e puxar o conector Redel para fora da tomada<br />
Redel.<br />
Português<br />
Colocação em funcionamento<br />
A operação do <strong>Reocor</strong> S é idêntica para todos os<br />
modos de operação. Os passos de operação devem<br />
ser executados na seguinte ordem (os números entre<br />
parênteses referem-se à figura 1, na página 252 deste<br />
manual técnico).<br />
• Inserir a bateria<br />
• Deslizar a tampa de proteção para baixo
262 Instruções para a operação<br />
Português<br />
Atenção!<br />
• Preparar o paciente: posicionar os eletrodos,<br />
porém, ainda não conectar ao marcapasso.<br />
• Preparar o <strong>Reocor</strong>:<br />
Ajustar a frequência de estimulação com o seletor<br />
Rate (12).<br />
Ajustar a amplitude de estimulação com o seletor<br />
Ampl. (6).<br />
• Selecionar o modo de estimulação com o seletor<br />
Mode (13). Com isso, ao mesmo tempo se liga<br />
o aparelho.<br />
• Depois que o auto-teste interno encerrou com<br />
êxito, os LEDs no campo de operação piscam<br />
simultaneamente duas vezes.<br />
• Quando o LED Low battery (3) piscar, a bateria<br />
deve ser trocada (para a troca da bateria, <br />
ver página 263).<br />
• Conectar os eletrodos, o LED Pace (4) amarelo<br />
pisca sincronizado com o pulso de estimulação.<br />
• Ajustar a sensibilidade com o seletor Sens. (7) <br />
de forma que o LED Sense verde (5) pisque sincronizado<br />
com cada evento detectado.<br />
• Deve ser considerada uma margem de segurança<br />
suficiente para garantir uma sensibilidade confiável.<br />
• Monitorar o ECG do paciente e adaptar a amplitude<br />
e sensibilidade, caso necessário.<br />
Durante a utilização do <strong>Reocor</strong> S, a frequência cardíaca<br />
do paciente deve ser monitorada com um monitor<br />
de ECG com função de alarme.<br />
Fixação<br />
O <strong>Reocor</strong> S deve ser operado apoiado num suporte<br />
horizontal antiderrapante ou fixado no paciente com <br />
a braçadeira ou suspenso num suporte de infusão<br />
com ajuda da alça de suspensão do lado traseiro do<br />
aparelho.<br />
Para fixar o <strong>Reocor</strong> S num suporte de infusão, girar <br />
a alça de suspensão para fora do lado traseiro do aparelho.<br />
Com isso, a utilização segura é garantida e os<br />
cabos do paciente são aliviados.
263 Instruções para a operação<br />
Troca da bateria<br />
Atenção!<br />
Quando o LED Low battery (3) começar a piscar,<br />
a bateria está quase vazia. Utilizando a bateria do tipo<br />
MN 1604 Duracell ® Procell ® , restam ainda aproximadamente<br />
36 horas de tempo de operação. Mesmo<br />
assim, a bateria deve ser trocada o mais rápido possível.<br />
O <strong>Reocor</strong> S deve ser operado com uma bateria de 9 V,<br />
código internacional IEC 6LR61. Devem ser utilizadas<br />
apenas baterias alcalinas-manganês à prova de vazamento.<br />
Utilizando a bateria do tipo MN 1604 Duracell ®<br />
Procell ® , é possível uma estimulação externa de, no<br />
mínimo, 500 horas em temperatura ambiente (20 ± 2 °C)<br />
antes que uma troca da bateria seja necessária.<br />
Durante uma troca da bateria com o <strong>Reocor</strong> S em funcionamento,<br />
o mesmo continua operacional por cerca<br />
de 30 s, a uma temperatura de ambiente de 20 ± 2 °C.<br />
Porém, por motivos de segurança, durante a troca da<br />
bateria, o paciente pode ser estimulado por outra<br />
fonte.<br />
Não utilizar baterias recarregáveis. O tempo de serviço<br />
destas baterias é difícil de se estimar, desta forma<br />
o ponto de ERI pode ser ultrapassado de forma imprevista<br />
o que pode ocasionar uma falha repentina na<br />
estimulação.<br />
O compartimento da bateria (2) encontra-se ao lado<br />
direito do aparelho e se abre pressionando o fecho<br />
azul para cima e puxando a gaveta para fora do lado<br />
direito. Retirar a bateria cuidadosamente.<br />
É possível que haja um tampão de borracha na nova<br />
bateria, para a proteção dos seus pólos. Remover <br />
o mesmo antes de inserir a nova bateria.<br />
No compartimento da bateria, está marcada a polaridade<br />
sugerida. Porém, ao inserir a nova bateria é<br />
necessário somente observar que os pólos da bateria<br />
apontem para o centro da carcaça. A posição do pólo<br />
positivo e negativo pode ser escolhida livremente.<br />
Português
Português<br />
<br />
264 Instruções para a operação<br />
Inserir a nova bateria com o fundo (figura 14) para<br />
baixo no compartimento da bateria.<br />
Figura 14: Inserir a bateria<br />
Informação:<br />
Fechar a gaveta e empurrar o fecho azul para baixo<br />
até engatar audivelmente.<br />
Se o aparelho for armazenado ou não utilizado por um<br />
longo período de tempo, recomenda-se retirar a bateria<br />
para evitar danos devidos a um vazamento.
265 Modos de estimulação e parâmetros<br />
Modos de estimulação<br />
e parâmetros<br />
Modos de estimulação<br />
Modo S00<br />
Modo SSI<br />
Modo SST<br />
Estimulação<br />
de alta frequência<br />
Três modos de estimulação estão à disposição: S00,<br />
SSI, SST, bem como estimulação de alta frequência<br />
(Burst).<br />
Em caso de distúrbios ocasionados por interferência<br />
eletromagnética (EMI), o <strong>Reocor</strong> S muda para o modo<br />
S00 quando determinados limites forem ultrapassados,<br />
enquanto a interferência durar.<br />
O marcapasso libera pulsos com frequência constante.<br />
Os pulsos são assíncronos, ou seja, não sincronizados<br />
com os batimentos cardíacos intrínsecos.<br />
Este modo de estimulação funciona ao conectar no<br />
ventrículo como V00, ao conectar ao átrio, como A00.<br />
O marcapasso inibe pulsos se potenciais intracardíacos<br />
são detectados. Ele libera pulsos se dentro de um<br />
intervalo correspondente à frequência selecionada<br />
não for detectado nenhum evento.<br />
Este modo de estimulação funciona ao conectar no<br />
ventrículo como VVI, ao conectar ao átrio, como AAI.<br />
Os modos de estimulação deflagrados SST correspondem<br />
aos modos de estimulação SSI, com a diferença<br />
de que ao detectar um evento fora do período<br />
refratário não ocorre inibição do pulso, mas liberação<br />
imediata de pulso na respectiva câmara.<br />
A frequência da função Burst pode ser selecionada<br />
mediante o seletor (10) entre 60 ppm e 1000 ppm. <br />
A ativação desta função ocorre com duas teclas: <br />
primeiramente, a tecla (11) Select burst deve ser <br />
acionada, e depois, dentro de 2 segundos, a tecla (8)<br />
Start burst. A liberação de pulsos ocorre enquanto<br />
esta tecla estiver pressionada.<br />
Português
266 Modos de estimulação e parâmetros<br />
Frequência<br />
AVISO!<br />
A frequência pode ser regulada continuamente de<br />
30 ppm a 250 ppm com o seletor Rate (12). Se um<br />
valor acima de 180 ppm é ajustado, o aparelho emite<br />
um tom de alerta durante 2 segundos.<br />
A estimulação do coração com frequências acima de<br />
180 ppm durante um longo período de tempo pode<br />
causar graves complicações hemodinâmicas. Uma<br />
estimulação com altas frequências deve ser efetuada<br />
somente com supervisão contínua assegurada.<br />
Amplitude e largura de pulso<br />
Ajustar a amplitude do pulso com o seletor Ampl. (6)<br />
na gama de 0,1 V a 17 V. Se um valor abaixo de 1 V <br />
é ajustado, o aparelho emite um tom de alerta durante<br />
2 segundos.<br />
A largura de pulso é de 1 ms.<br />
A estimulação deve ser verificada em intervalos regulares<br />
para garantir que haja uma estimulação eficaz <br />
e que uma margem de segurança suficiente tenha<br />
sido ajustada.<br />
Português<br />
Sensibilidade<br />
A sensibilidade pode ser ajustada com o seletor Sens.<br />
(7) entre 1 mV e 20 mV. A mesma deve ser verificada<br />
em intervalos regulares para garantir que haja uma<br />
detecção correta e que uma margem de segurança<br />
suficiente tenha sido ajustada.<br />
Intervalo de interferência<br />
O intervalo de interferência é iniciado tanto por eventos<br />
estimulados quanto detectados.<br />
O intervalo é reiniciado por ruído detectado durante <br />
a duração do intervalo de 80 ms, o que leva a uma estimulação<br />
assíncrona com a frequência programada<br />
enquanto a interferência persistir.
267 Modos de estimulação e parâmetros<br />
Burst<br />
AVISO!<br />
A frequência de burst atrial Burst rate pode ser selecionada<br />
mediante o seletor (10) entre 60 ppm e<br />
1000 ppm.<br />
A ativação desta função ocorre com duas teclas: <br />
primeiramente, a tecla (11) Select burst deve ser <br />
acionada, e depois, dentro de 2 segundos, a tecla (8)<br />
Start burst. A liberação de pulsos ocorre enquanto<br />
esta tecla estiver pressionada.<br />
A estimulação do coração com frequências acima de<br />
180 ppm durante um longo período de tempo pode<br />
causar graves complicações hemodinâmicas. Uma<br />
estimulação com altas frequências deve ser efetuada<br />
somente com supervisão contínua assegurada.<br />
O modo de estimulação para a estimulação de alta<br />
frequência serve para a terminação de determinadas<br />
taquicardias supraventriculares (TSV) e apenas deve<br />
ser considerado para aplicações atriais. A aplicação<br />
de estímulos assíncronos de alta frequência pode<br />
interromper uma TSV através da despolarização de<br />
partes de um caminho de reentrada. Mesmo se um<br />
foco atrial ectópico for responsável por uma TSV, <br />
a aplicação de estímulos de alta frequência no átrio<br />
pode levar à supressão do foco ectópico.<br />
A respeito da estimulação atrial de alta frequência,<br />
diversos riscos devem ser considerados. Entre eles <br />
a possível estimulação ventricular e taquicardia ventricular<br />
ou fibrilação. Isso pode ser causado por um<br />
mau posicionamento dos eletrodos ou pela presença<br />
de vias de condução anormais que desviam da via de<br />
condução atrioventricular normal, (p.ex., síndrome<br />
Wolff-Parkinson-White).<br />
Outros possíveis problemas depois de uma estimulação<br />
de alta frequência podem ser desconforto do<br />
paciente e assístolia.<br />
Português
268 Manuseio, cuidados e manutenção<br />
Manuseio, cuidados<br />
e manutenção<br />
<strong>Reocor</strong> S<br />
Português<br />
AVISO!<br />
Atenção!<br />
Limpeza<br />
Desinfecção<br />
Informação:<br />
O <strong>Reocor</strong> S é um aparelho de precisão altamente<br />
sofisticado que deve ser tratado com cuidado. Impacto<br />
mecânico, por exemplo, causado por quedas, pode<br />
prejudicar seu funcionamento.<br />
Neste caso, enviar o aparelho à <strong>BIOTRONIK</strong>.<br />
Antes da utilização, o marcapasso deve ser armazenado<br />
no mínimo por 2 horas nas condições de ambiente<br />
especificadas para a operação (v. página 275).<br />
A carcaça, os elementos de comando, as conexões e<br />
os cabos do paciente devem ser inspecionados visualmente<br />
antes de cada aplicação para detectar danos<br />
mecânicos, deformação, peças soltas, rachaduras <br />
e contaminação.<br />
Nunca utilizar um aparelho danificado ou um aparelho<br />
que mostra anomalias, especialmente, se o<br />
mesmo sofreu uma queda ou pode estar danificado<br />
por tensão de alta frequência ou de desfibrilação.<br />
Operar o <strong>Reocor</strong> S apoiado num suporte horizontal<br />
antiderrapante ou fixado no paciente com a braçadeira<br />
ou suspenso num suporte de infusão com ajuda da<br />
alça de suspensão do lado traseiro do aparelho.<br />
O <strong>Reocor</strong> S não pode ser usado diretamente na pele.<br />
Para a limpeza do <strong>Reocor</strong> S podem ser usados um<br />
pano úmido e sabão suave, se necessário. Produtos<br />
de limpeza fortes ou solventes orgânicos, tais como<br />
benzina ou éter, devem ser evitados, pois podem <br />
agredir a carcaça de plástico.<br />
Para a desinfecção, limpar o aparelho com um pano<br />
molhado com solução de desinfecção (p. ex., Aerodesin<br />
2000 ou Lysoform D). Observar a medida de diluição<br />
indicada pelo fabricante ao misturar a solução.<br />
Depois de uma limpeza ou desinfecção, o <strong>Reocor</strong> S<br />
não pode ser utilizado durante uma hora.
269 Manuseio, cuidados e manutenção<br />
Esterilização<br />
Atenção!<br />
O <strong>Reocor</strong> S não pode ser esterilizado. Se o aparelho<br />
precisa ser utilizado num ambiente esterilizado, <br />
o mesmo pode ser embalado numa capa esterilizada.<br />
Recomenda-se a verificação anual do aparelho por<br />
técnicos autorizados pelo fabricante.<br />
Apesar do <strong>Reocor</strong> S ser protegido contra gotejamento<br />
de água, o aparelho deve ser mantido limpo e seco.<br />
Cabos do paciente reutilizáveis<br />
Limpeza<br />
Desinfecção<br />
A embalagem do cabo esterilizado deve ser verificada<br />
para detectar danos antes de abrir, para determinar<br />
se a esterilidade está garantida.<br />
Os cabos do paciente reutilizáveis podem ser limpos <br />
e desinfetados por vários diferentes métodos com<br />
produtos hospitalares de limpeza. Porém, não podem<br />
ser utilizados produtos químicos agressivos tais como<br />
acetona.<br />
Recomenda-se como método de limpeza para os<br />
cabos a utilização de um pano com sabonete de mãos<br />
comum sem álcool ou com o produto de limpeza<br />
Stabimed da empresa Braun. A seguir, os resíduos <br />
do produto de limpeza devem ser removidos dos<br />
cabos com água livre de eletrólitos e depois os cabos<br />
devem ser enxugados com um pano limpo e seco.<br />
Para a desinfecção em um banho de agente de desinfecção,<br />
deve ser utilizado um produto de desinfecção<br />
de instrumentos à base de aldeídos (p.ex., Lysoformin<br />
3000) ou à base de álcool (p. ex., Aerodesin 2000) de<br />
acordo com as indicações do fabricante e em observância<br />
às respectivas diretivas do hospital.<br />
Depois da desinfecção, o cabo deve ser enxaguado<br />
com água livre de eletrólitos para remover os restos<br />
do produto de desinfecção.<br />
Esterilização É possível efetuar uma esterilização a vapor a 121 °C<br />
e 1,1 bar por 20 min.<br />
Português
270 Manuseio, cuidados e manutenção<br />
Manutenção, serviço e inspeções<br />
Português<br />
Verificação antes<br />
da utilização<br />
Inspeção<br />
A única medida de manutenção necessária é a troca<br />
da bateria (v. página 263).<br />
Outros trabalhos de manutenção não são necessários.<br />
Antes de cada utilização deve ser efetuada uma breve<br />
verificação do aparelho. Ela inclui uma verificação<br />
visual e uma simples verificação do funcionamento.<br />
Verificação visual:<br />
• Verificação da carcaça para detectar danificações<br />
mecânicas, deformação, peças soltas, rachaduras,<br />
etc.<br />
• Verificação da área de conexão dos cabos <br />
para detectar danificações mecânicas<br />
• Verificação das inscrições para garantir legibilidade<br />
Verificação do funcionamento:<br />
Deve ser observado o resultado do auto-teste que <br />
é executado automaticamente depois de ligar.<br />
A inspeção deve ser efetuada<br />
• depois da utilização conjunta com aparelhos <br />
cirúrgicos de AF ou desfibriladores,<br />
• no caso de suspeitas de disfunções,<br />
• uma vez por ano.<br />
Esta inspeção deve ser efetuada de acordo com as<br />
indicações do fabricante. As mesmas podem ser solicitadas<br />
. Listam-se nelas todos os passos de verificação<br />
necessários e os aparelhos necessários para a<br />
verificação.
271 Manuseio, cuidados e manutenção<br />
Descarte<br />
Informação:<br />
O <strong>Reocor</strong> S exibe o símbolo de uma lata de lixo riscada<br />
na placa de identificação. Este símbolo indica que para<br />
a recolha e reciclagem, a Diretiva Europeia 2002/96/CE<br />
sobre os Resíduos de Equipamentos Elétricos e <br />
Eletrônicos (REEE) aplica-se a este aparelho.<br />
Aparelhos velhos e acessórios não mais utilizados,<br />
tais como, p. ex., cabos do paciente ou adaptadores<br />
devem ser enviados à <strong>BIOTRONIK</strong>. Assim, é garantido<br />
que a eliminação ocorra de acordo com as versões<br />
nacionais da Diretiva REEE.<br />
Cabos que tiveram contato com sangue devem ser<br />
descartados corretamente como resíduo hospitalar<br />
contaminado em conformidade com as normas<br />
ambientais. Cabos não contaminados devem ser descartados<br />
conforme a Diretiva Europeia 2002/96/EC<br />
sobre os Resíduos de Equipamentos Elétricos e<br />
Eletrônicos (REEE).<br />
Baterias usadas devem ser tratadas como lixo <br />
especial e devem ser eliminadas pelo usuário.<br />
Favor entrar em contato com a <strong>BIOTRONIK</strong> se houver<br />
dúvidas.<br />
Português
272 Segurança técnica<br />
Segurança técnica<br />
Português<br />
AVISO!<br />
O marcapasso externo <strong>Reocor</strong> S satisfaz as normas<br />
internacionais para a segurança de aparelhos eletromedicinais<br />
conforme IEC 60601-1 e IEC 60601-1-2,<br />
bem como a norma internacional IEC 60601-2-31 <br />
para marcapassos externos temporários.<br />
As seguintes características especiais oferecem<br />
segurança ao paciente:<br />
• Não há peças metálicas conforme definição IEC<br />
que possam ser tocadas.<br />
• A construção corresponde às normas para a classe<br />
de aparelhos CF (cardiac floating) e é certificada<br />
para o tratamento direto do coração. O marcapasso<br />
satisfaz as exigências estabelecidas por normas<br />
internacionais para a proteção contra desfibrilação.<br />
• A tampa de proteção fechada protege o marcapasso<br />
contra gotas de água.<br />
Os eletrodos temporários, aos quais o <strong>Reocor</strong> S está<br />
conectado, representam uma via de condução elétrica<br />
de baixa resistência ao miocárdio. Por isso, aparelhos<br />
ligados à rede elétrica utilizados perto do paciente<br />
devem ser aterrados conforme os regulamentos.<br />
O marcapasso não pode ser utilizado em áreas com<br />
perigo de explosão.<br />
Quaisquer outros trabalhos de manutenção ou reparos<br />
apenas devem ser efetuados pela <strong>BIOTRONIK</strong>.
273 Dados técnicos<br />
Dados técnicos<br />
Símbolos<br />
Observar avisos no manual técnico<br />
Marcação da posição da bateria no compartimento<br />
Descarte de acordo com a diretiva REEE<br />
Classificação do componente de aplicação: CF <br />
(cardiac floating), proteção contra desfibrilação<br />
IP31<br />
OFF<br />
Repele a água, classe de proteção IP31<br />
Desliga (no interruptor giratório Mode)<br />
Parâmetros ajustáveis<br />
Modos de estimulação S00, SSI, SST<br />
Frequência básica (30…250 ppm) ± 1 ppm Com uma frequência 180 ppm<br />
soa um sinal de aviso<br />
Amplitude de pulso<br />
0,1…17 V máx <br />
(50 mV, 10 %)<br />
Com uma amplitude de pulso<br />
1 V soa um sinal de aviso<br />
Sensibilidade 1…20 mV ± 15 % Rel. a um pulso de 40 ms sin 2<br />
Frequência de burst (60…1000 ppm) ± 20 ppm<br />
(A)<br />
Português<br />
Parâmetros fixos<br />
Largura de pulso 1 ms ± 5 %<br />
Auto short após Pace 20 ms ± 10 %<br />
Intervalo de interferência<br />
80 ms ± 5 ms<br />
In Channel Blanking 110 ms ± 3 ms<br />
Período refratário<br />
(30…150) ppm<br />
(151…200) ppm<br />
(201…250) ppm<br />
<br />
225 ms ± 5 ms<br />
200 ms ± 5 ms<br />
175 ms ± 5 ms
274 Dados técnicos<br />
Parâmetros fixos<br />
Proteção contra<br />
frequências elevadas<br />
1…180 ppm<br />
<br />
181…250 ppm<br />
Forma do pulso<br />
<br />
<br />
286 ms ± 10 %<br />
<br />
214 ms ± 10 %<br />
Assimétrica, bifásica<br />
<br />
<br />
286 ms = 210 ppm, não válido<br />
para Burst<br />
214 ms = 280 ppm, não válido<br />
para Burst<br />
Monitoração da impedância do eletrodo<br />
Aviso acústico A partir de 2000 15 %, com amplitude de 5 V<br />
Conexão do eletrodo Tomadas de 2 mm com proteção contra contato;<br />
Tomada Redel, 6 pinos, mediante adaptador Redel<br />
Português<br />
Dados elétricos/bateria<br />
Bateria<br />
• Tipo alcalina-manganês: IEC 6LR61/ANSI 1604A<br />
• 9 V a prova de vazamento<br />
• P. ex., MN1604 Duracell® Procell® a)<br />
Polaridade<br />
Proteção contra inversão<br />
da polaridade<br />
Consumo de potência<br />
Tempo de operação<br />
com bateria nova b)<br />
Fim do tempo de<br />
operação (EOS)<br />
Tempo de operação<br />
após sinal de ERI b)<br />
Comportamento<br />
durante a troca da<br />
bateria<br />
Catódica<br />
Nenhuma: polaridade é irrelevante<br />
Tipicamente 1 mA (70 ppm, 5,0 V, 500 )<br />
• 600 h (-10%) a 20 °C (± 2°C)<br />
• Com: 70 ppm, 5 V, Mode VVI, 500 Ohm<br />
• Até: sinal ERI (aviso EOS)<br />
LED Low battery piscando<br />
• 36 horas<br />
• Com: 70 ppm, 5 V, Mode VVI, 500 Ohm<br />
• Com a bateria retirada, o aparelho continua <br />
operacional por no mínimo 30 seg.<br />
• O Mode ajustado é preservado.<br />
a) Marca comercial registrada da Duracell Inc., Bethel, CT 06801<br />
b) Utilizando a bateria do tipo MN 1604 Duracell ® , Procell ®
275 Dados técnicos<br />
Condições ambientais<br />
Variação de temperatura para a operação +10 °C…+40 °C<br />
Variação de temperatura para o armazenamento 0 °C…+50 °C<br />
Umidade relativa<br />
30 %…75%, sem condensação<br />
Pressão atmosférica<br />
700 hPa…1060 hPa<br />
Nível de ruído<br />
50 dB<br />
Dimensões, peso, material<br />
Dimensões <strong>Reocor</strong> S 160 mm x 75 mm x 35 mm ±2 mm (sem adaptador Redel)<br />
Peso <strong>Reocor</strong> S Com bateria, com adaptador Redel: 305 g ± 10 %<br />
Sem bateria, com adaptador Redel: 260 g ± 10 %<br />
Sem bateria, sem adaptador Redel: 225 g ± 10 %<br />
Dimensões adaptador 76 mm x 35,5 mm x 29,4 mm<br />
Redel para <strong>Reocor</strong> S<br />
Peso adaptador Redel 35 g ± 10 %<br />
para <strong>Reocor</strong> S<br />
Material da carcaça Babyblend FR 3000 (PC-ABS)<br />
Classificação<br />
Classificação do componente<br />
de aplicação<br />
Categoria de proteção<br />
Classe de proteção<br />
Resistência à desfibrilação<br />
Modo de operação<br />
CF (cardiac floating), proteção contra desfibrilação<br />
II b<br />
IP31 (repele a água)<br />
5 kV<br />
Operação contínua<br />
Português<br />
Vida útil esperada a) <br />
(conforme <br />
EN 60601-1:2007, 4.4)<br />
12 anos<br />
a) A vida útil esperada é o tempo operacional máximo esperado do aparelho após<br />
comercialização. O tempo operacional máximo esperado do aparelho não é comprovado<br />
por datos de testes.
Português<br />
<br />
276 Conformidade com IEC 60601-1-2<br />
Conformidade com IEC 60601-1-2<br />
Diretivas e declarações do fabricante -<br />
Emissões eletromagnéticas <br />
(IEC 60601-1-2: Tabela 1)<br />
O aparelho é previsto para a operação no ambiente<br />
eletromagnético abaixo descrito. O usuário deve<br />
garantir que o aparelho é utilizado num ambiente<br />
conforme esta descrição.<br />
Teste de emissões<br />
Emissão de AF <br />
conforme CISPR 11<br />
Emissão de AF<br />
conforme CISPR 11<br />
Emissão de <br />
frequências <br />
harmônicas conforme<br />
IEC 61000-3-2<br />
Alterações de <br />
tensão conforme<br />
IEC 61000-3-3<br />
Nível de <br />
conformidade<br />
Grupo 1<br />
Classe B<br />
Não aplicável<br />
Não aplicável<br />
Diretrizes para o ambiente eletromagnético<br />
O aparelho usa energia de alta frequência<br />
exclusivamente para seu próprio funcionamento.<br />
Por isso, a emissão de grandezas <br />
de interferência de alta frequência é muito<br />
reduzida, bem como a probabilidade de <br />
causar interferência com outros aparelhos<br />
eletrônicos operados na proximidade.<br />
O aparelho é adequado para o uso em todas<br />
as instituições que não são do âmbito residencial,<br />
e em edificações que são diretamente<br />
ligadas à rede pública de alimentação<br />
elétrica.
277 Conformidade com IEC 60601-1-2<br />
Diretivas e declarações do fabricante -<br />
Resistência a interferência eletromagnética <br />
(IEC 60601-1-2: Tabela 2)<br />
O aparelho é previsto para a operação no ambiente<br />
eletromagnético abaixo descrito. O usuário do aparelho<br />
deve garantir que o mesmo é utilizado num<br />
ambiente conforme esta descrição.<br />
Verificação da<br />
resistência a <br />
interferências<br />
Descarga de eletricidade<br />
estática<br />
(DES) conforme<br />
IEC 61000-4-2<br />
Nível de teste<br />
conforme<br />
IEC 60601<br />
±6 kV descarga<br />
por contato<br />
±8 kV descarga<br />
pelo ar<br />
Confundidores Não aplicável<br />
elétricos transientes<br />
rápidos/<br />
bursts conforme<br />
IEC 61000-4-4<br />
Sobretensão Não aplicável<br />
(Surges) conforme<br />
IEC 61000-4-5<br />
Quedas de tensão, Não aplicável<br />
interrupções de<br />
curta duração <br />
e oscilações na<br />
tensão de alimentação<br />
conforme<br />
IEC 61000-4-11<br />
Campo magnético<br />
com a frequência<br />
de alimentação<br />
(50/60 Hz) <br />
conforme<br />
IEC 61000-4-8<br />
Nível de <br />
conformidade<br />
Diretrizes para o ambiente <br />
eletromagnético<br />
±6 kV descarga<br />
por con-<br />
ou concreto ou ter revestimento<br />
Pisos deveriam ser de madeira<br />
tato<br />
cerâmico. Se o piso for de material<br />
sintético, a umidade relativa<br />
±15 kV descarga<br />
pelo ar deve ser de no mínimo 30 %.<br />
3 A/m 30 A/m A força do campo magnético<br />
deveria corresponder ao valor<br />
tipicamente encontrado em<br />
ambientes comerciais ou hospitalares.<br />
Português
278 Conformidade com IEC 60601-1-2<br />
Diretivas e declarações do fabricante – <br />
Resistência a interferência eletromagnética <br />
para todos os modelos de marcapassos externos <br />
(IEC 60601-1-2: Tabela 3)<br />
O aparelho é previsto para a operação no ambiente<br />
eletromagnético abaixo descrito. O usuário do aparelho<br />
deve garantir que o mesmo é utilizado num<br />
ambiente conforme esta descrição.<br />
Português<br />
Verificação da<br />
resistência a<br />
interferências<br />
Interferências<br />
induzidas de<br />
AF conforme<br />
IEC 61000-4-6<br />
Interferências<br />
de AF emitidas<br />
conforme<br />
IEC 61000-4-3<br />
Nível de teste Nível de <br />
conforme IEC 60601 conformidade<br />
Diretrizes para o ambiente<br />
eletromagnético<br />
10 V rms<br />
10 kHz a 80 MHz<br />
d = 0,35 P<br />
fora de bandas ISM a<br />
10 V rms<br />
10 kHz a 80 MHz<br />
dentro de bandas<br />
ISM a) d = 1,2 P<br />
10 V/m<br />
800 MHz a 2,5 GHz<br />
10 V/m<br />
Aparelhos de comunicação<br />
por rádio móveis e portáteis<br />
não são utilizados mais próximos<br />
a qualquer parte do aparelho,<br />
inclusos os cabos, do<br />
que a distância de segurança<br />
recomendada.<br />
Distância de segurança <br />
recomendada:<br />
d = 1,2<br />
P<br />
para 80 MHz a <br />
800 MHz<br />
d = 2,3<br />
P<br />
para 800 MHz a <br />
2,5 GHz
279 Conformidade com IEC 60601-1-2<br />
Verificação da<br />
resistência a<br />
interferências<br />
Nível de teste Nível de <br />
conforme IEC 60601 conformidade<br />
Diretrizes para o ambiente<br />
eletromagnético<br />
Nisso, “P” é a potência máxima<br />
do transmissor, em Watt<br />
[W], conforme especificada<br />
pelo fabricante do transmissor,<br />
e “d”, a distância de segurança<br />
recomendada, em<br />
metros [m] b) .<br />
A intensidade do campo dos<br />
transmissores de ondas de<br />
rádio estacionários de acordo<br />
com um estudo no local c) deve<br />
ser menor que o nível de conformidade<br />
d) .<br />
É possível que ocorram interferências<br />
na proximidade de<br />
dispositivos que exibem o<br />
seguinte símbolo gráfico.<br />
OBSERVAÇÃO: Estas diretrizes talvez não sejam válidas em todos os casos. A propagação<br />
de ondas eletromagnéticas é influenciada pela absorção e reflexão por edifícios,<br />
objetos e pessoas.<br />
a) As bandas ISM (para aplicações industriais, científicas e medicinais) entre 150 kHz<br />
e 80 MHz são 6,765 MHz a 6,795 MHz; 13,553 MHz a 13,567 MHz; 26,957 MHz a<br />
27,283 MHz e 40,66 MHz a 40,70 MHz.<br />
b) Os níveis de conformidade nas bandas de frequência ISM entre 150 kHz e 80 MHz<br />
e na banda de frequências de 80 MHz a 2,5 GHz são destinadas a reduzir a probabilidade<br />
de aparelhos móveis de comunicação causarem interferências caso forem<br />
trazidos para dentro da área de pacientes de forma não-intencional. Por isso,<br />
recomenda-se uma distância de segurança maior nestas bandas de frequência<br />
(fator 1,2 ao invés de 0,35).<br />
c) É impossível prever com precisão a intensidade de campos de transmissores estacionários,<br />
como p.ex. bases de telefones sem fio ou carregadores de equipamentos<br />
de radiocomunicação, emissores de radioamador, emissoras de AM e FM e<br />
canais de TV. Para avaliar o ambiente eletromagnético criado por emissores estacionários<br />
de AF deveria ser considerado a elaboração de um estudo do local. Se a<br />
intensidade de campo medido no local de utilização do aparelho ultrapassar o<br />
nível de conformidade de AF acima indicado, será conveniente observar o aparelho<br />
para garantir que funcione de modo previsto. Pode ser necessário adotar medidas<br />
adicionais, como, p.ex., uma alteração do alinhamento ou um outro lugar de instalação<br />
do marcapasso externo.<br />
d) Na gama de frequências de 150 kHz a 80 MHz, a intensidade de campo deveria ser<br />
menor que 10 V/m.<br />
Português
280 Conformidade com IEC 60601-1-2<br />
Potência nominal<br />
do transmissor<br />
P [W]<br />
Distâncias de segurança recomendadas de<br />
aparelhos de comunicação de AF portáteis e móveis<br />
(IEC 60601-1-2: Tabela 5)<br />
O aparelho foi desenhado para ser utilizado em<br />
ambientes eletromagnéticos com interferências de AF<br />
controladas. O usuário do aparelho pode ajudar a evitar<br />
interferências eletromagnéticas, mantendo a distância<br />
de segurança para aparelhos móveis de comunicação<br />
de AF (transmissores), de acordo com a potência<br />
de saída do aparelho de comunicação, conforma<br />
abaixo indicado.<br />
Distância de segurança d [m] conforme frequência de transmissão<br />
150 kHz a<br />
80 MHz fora de<br />
bandas ISM<br />
150 kHz a<br />
80 MHz dentro<br />
de bandas ISM<br />
80 MHz a<br />
800 MHz<br />
800 MHz a<br />
2,5 GHz<br />
d = 0,35 P d = 1,2 P d = 1,2 P d = 2,3 P<br />
Português<br />
0,01 0,04 0,12 0,12 0,23<br />
0,10 0,11 0,38 0,38 0,73<br />
1,00 0,35 1,20 1,20 2,30<br />
10,00 1,11 3,79 3,79 7,27<br />
100,00 3,50 12,00 12,00 23,00<br />
Para transmissores cuja potência nominal não está indicada na tabela acima, <br />
a distância de segurança pode ser calculada com ajuda da fórmula indicada para a<br />
respectiva frequência de transmissão. Nisso “P” representa a potência nominal <br />
de emissão em Watt [W] e “d” a distância de segurança em metros [m].<br />
OBSERVAÇÃO 1: as bandas ISM (para aplicações industriais, científicas e medicinais)<br />
entre 150 kHz e 80 MHz são 6,765 MHz a 6,795 MHz; 13,553 MHz a 13,567 MHz;<br />
26,957 MHz a 27,283 MHz e 40,66 MHz a 40,70 MHz.<br />
OBSERVAÇÃO 2: os níveis de conformidade nas bandas de frequência ISM entre<br />
150 kHz e 80 MHz e na banda de frequências de 80 MHz a 2,5 GHz são destinadas <br />
a reduzir a probabilidade de aparelhos móveis de comunicação causarem interferências<br />
caso forem trazidos para dentro da área de pacientes de forma não-intencional.<br />
Por isso, recomenda-se uma distância de segurança maior nestas bandas de frequência<br />
(fator 1,2 ao invés de 0,35).<br />
OBSERVAÇÃO 3: estas diretrizes talvez não sejam válidas em todos os casos. <br />
A propagação de ondas eletromagnéticas é influenciada pela absorção e reflexão<br />
por edifícios, objetos e pessoas.
281 Escopo de fornecimento e acessórios<br />
Escopo de fornecimento<br />
e acessórios<br />
Informação:<br />
O <strong>Reocor</strong> S apenas pode ser utilizado com acessórios<br />
desenvolvidos e testados para este marcapasso.<br />
Escopo de fornecimento<br />
Denominação do artigo Quantidade<br />
Observação<br />
Nº para pedido<br />
<strong>Reocor</strong> S 1 365528<br />
Bateria 1 Duracell Plus, 6LR61 –<br />
Braçadeira<br />
– Para o Japão<br />
1 Curta 391843<br />
– Para todos os demais países 1 Padrão 103704<br />
Adaptador Redel 1 371263<br />
Proteção do campo <br />
1 378007<br />
de operação<br />
Manual técnico multilingual 1 368703<br />
(DE, EN, ES, FR, IT, PT)<br />
Manual técnico ZH 368704<br />
Guia rápido DE 370125<br />
Guia rápido EN 371305<br />
Guia rápido ES 371306<br />
Guia rápido FR 371307<br />
Guia rápido IT 371308<br />
Guia rápido PT 1 372231<br />
Guia rápido ZH 371309<br />
Estojo 1 379384<br />
Português<br />
Acessórios<br />
Artigo<br />
Nº para<br />
pedido<br />
Descrição<br />
PK-82 128564 Cabo do paciente com dois clipes<br />
jacaré, reesterilizável<br />
PK-83 (2,5 m) 128563 Cabo do paciente com dois terminais<br />
rosqueáveis isolados, reesterilizável<br />
PK-83 (1,5 m) 128562 Cabo do paciente com dois terminais<br />
rosqueáveis isolados, reesterilizável<br />
PK-83-B (2,5 m) 347485 Cabo do paciente com dois terminais<br />
rosqueáveis isolados de 2,3 mm<br />
PK-83-B (1,5 m) 347606 Cabo do paciente com dois terminais<br />
rosqueáveis isolados de 2,3 mm<br />
Conexão<br />
Conexão<br />
direta<br />
Conexão<br />
direta<br />
Conexão<br />
direta<br />
Adaptador<br />
Redel<br />
Adaptador<br />
Redel
282 Escopo de fornecimento e acessórios<br />
Artigo<br />
Nº para Descrição<br />
pedido<br />
PK-175 333959 Cabo do paciente com quatro terminais<br />
rosqueáveis para conectar eletrodos<br />
temporários, reesterilizável<br />
PK-67-L 123672 Cabo do paciente, reesterilizável, para<br />
combinação com adaptadores PA-1-B,<br />
PA-2, PA-4<br />
PK-67-S 128085 Cabo do paciente, reesterilizável, <br />
para combinação com PK-155 e <br />
Remington Model 301-CG<br />
PK-141 (2,8 m) 353181 Cabo do paciente, reesterilizável, <br />
com quatro clipes jacaré com proteção<br />
contra contato<br />
Braçadeira <strong>Reocor</strong><br />
padrão<br />
Braçadeira <strong>Reocor</strong><br />
curta<br />
103704 Braçadeira padrão<br />
391843<br />
Braçadeira com circunferência<br />
reduzida. Apropriada para braços mais<br />
finos.<br />
Conexão<br />
Adaptador<br />
Redel<br />
Adaptador<br />
Redel<br />
Adaptador<br />
Redel<br />
Adaptador<br />
Redel<br />
–<br />
–<br />
Apenas para os EUA<br />
Artigo Fabricante Descrição Conexão<br />
ADAP-2R<br />
(0,24 m)<br />
Remington<br />
Medical Inc.<br />
Adaptador reutilizável para cabo modelo <br />
S-101-97 e modelo FL-601-97<br />
Adaptador<br />
Redel<br />
Adaptador para PK-67 e PK-67-L<br />
Português<br />
Artigo<br />
Nº para<br />
pedido<br />
PA-1-B 123751<br />
PA-1-C 349723<br />
PA-2 123157<br />
PA-4 123090<br />
PK-155<br />
(conj. de dois cabos)<br />
Descrição<br />
Para conexão ao adaptador de 2 mm ou adaptador<br />
MHW (adaptador para fios cardíacos), reesterilizável<br />
Para conexão ao adaptador de 2 mm ou adaptador<br />
MHW (adaptador para fios cardíacos), reesterilizável<br />
Para conexão ao conector IS-1, reesterilizável<br />
Com clipes jacaré, reesterilizável<br />
337358 Cabo do paciente esterilizado, dois fios, com clipes<br />
jacaré para uso único
283 Escopo de fornecimento e acessórios<br />
Artigo Fabricante Descrição<br />
Modelo 301-CG<br />
Adaptador para PK-67-S e PK-67-L <br />
(apenas para EUA)<br />
Remington<br />
Medical Inc.<br />
Cabo do paciente esterilizado, dois fios, <br />
com clipes jacaré para uso único<br />
Artigo Fabricante Descrição<br />
Modelo 301-CG Remington Cabo do paciente esterilizado, dois fios, <br />
Medical Inc. com clipes jacaré para uso único<br />
Modelo S-101-97<br />
(2,5 m)<br />
Modelo FL-601-97<br />
(2,0 m)<br />
Adaptador para ADAP-2R (apenas para EUA)<br />
Remington<br />
Medical Inc.<br />
Remington<br />
Medical Inc.<br />
Cabo do paciente, dois fios, com clipes jacaré <br />
para uso único<br />
Cabo do paciente, dois fios, com terminais <br />
rosqueáveis para uso único<br />
Português
284 Legenda da etiqueta<br />
Legenda da etiqueta<br />
Os símbolos na etiqueta têm o seguinte significado:<br />
Símbolo<br />
Significado<br />
<strong>Reocor</strong> S<br />
Adaptador Redel<br />
Número para pedido <strong>BIOTRONIK</strong><br />
Número de série do aparelho<br />
Data de fabricação do aparelho<br />
D<br />
S<br />
Variação de temperatura de armazenamento permitida<br />
Variação de pressão atmosférica de armazenamento <br />
permitida<br />
Variação de umidade do ar de armazenamento permitida<br />
Paciente com eletrodo implantado<br />
Português<br />
Conteúdo<br />
Símbolo de descarte<br />
Observar o manual técnico!<br />
Atenção: Conforme a lei dos Estados Unidos, a venda deste<br />
produto é restrita para ou autorizado por um médico.<br />
Marca CE
Técnico Responsável:<br />
Eng. Zolmo de Oliveira Jr. - CREA/SP nº: 060 1869029<br />
Eng. Rogério Quiarim Zarza - CREA/SP nº: 060 1812032<br />
Marcapasso Externo <strong>Reocor</strong> S - Reg. ANVISA nº: 80224390178<br />
Fabricante / Distribuidor:<br />
<strong>BIOTRONIK</strong> SE & Co. KG<br />
Woermannkehre, 1<br />
D-12359 Berlim · Alemanha<br />
Tel.: (+49 30) 689 05-600<br />
Fax: (+49 30) 689 2804<br />
sales@biotronik.com<br />
www.biotronik.com<br />
Fornecedor:<br />
<strong>BIOTRONIK</strong> Comercial Médica Ltda.<br />
Rua dos Inocentes, 506<br />
04764-050 São Paulo, SP<br />
Tel.: (+55 11) 5694 7755<br />
Fax: (+55 11) 5694 7770<br />
CNPJ: 50.595.271/0001-05<br />
© <strong>BIOTRONIK</strong> SE & Co. KG<br />
Alle Rechte vorbehalten.<br />
Technische Änderungen vorbehalten.<br />
© <strong>BIOTRONIK</strong> SE & Co. KG<br />
Tous droits réservés.<br />
Sous réserve de modifications techniques.<br />
© <strong>BIOTRONIK</strong> SE & Co. KG<br />
All rights reserved. Specifications are subject<br />
to modification, revision and improvement.<br />
© <strong>BIOTRONIK</strong> SE & Co. KG<br />
Reservados todos los derechos. Reservado el<br />
derecho a efectuar modificaciones técnicas.<br />
© <strong>BIOTRONIK</strong> SE & Co. KG<br />
Tutti i diritti riservati.<br />
Soggetto a modifiche tecniche.<br />
© <strong>BIOTRONIK</strong> SE & Co. KG<br />
Todos os direitos reservados.<br />
Alterações técnicas reservadas.<br />
0123 2009<br />
12-D-19<br />
Revision: G (2012-04-27)<br />
<strong>BIOTRONIK</strong> SE & Co. KG<br />
Woermannkehre 1<br />
12359 Berlin · Germany<br />
Tel +49 (0) 30 68905-0<br />
Fax +49 (0) 30 6852804<br />
sales@biotronik.com<br />
www.biotronik.com