ICRRFTSMRN+I - Ppe-pressure-washer-parts.com
ICRRFTSMRN+I - Ppe-pressure-washer-parts.com
ICRRFTSMRN+I - Ppe-pressure-washer-parts.com

Create successful ePaper yourself
Turn your PDF publications into a flip-book with our unique Google optimized e-Paper software.
5.<br />
,<br />
Provide proper water supply (not 1:oexceed<br />
100°F).<br />
Be sure 1:oread =Safety Rules" and ::Opera1:ion"<br />
sections before using <strong>pressure</strong> <strong>washer</strong>.<br />
If s1:arting unit after s1:orage, see ::S1:orage"section<br />
on page 15.<br />
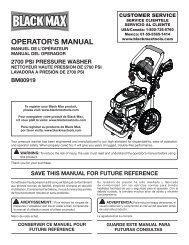
HOW TO USE YOUR<br />
WASHER<br />
PRESSURE<br />
If you have any problems operating your <strong>pressure</strong><br />
<strong>washer</strong>, please call the <strong>pressure</strong> <strong>washer</strong> helpline at<br />
1-800-222-3136.<br />
To Start Your Pressure Washer<br />
To el:art your engine-powered <strong>pressure</strong> <strong>washer</strong> for the<br />
first time, follow these instructions step-by-step. This<br />
s1:arting information also applies whenever you start<br />
the engine after you have let the <strong>pressure</strong> <strong>washer</strong> sit<br />
idle for at leas: a day.<br />
1. Place <strong>pressure</strong> <strong>washer</strong> near an outside water<br />
source capable of supplying water at a flow rate<br />
greater than 3.0 gallons per minute and no less than<br />
20 PSI at <strong>pressure</strong> <strong>washer</strong> end of garden hose.<br />
2,<br />
,<br />
4.<br />
Check that high <strong>pressure</strong> hose is tightlyconnected<br />
1:ospray gun and pump. See "Assembling Your<br />
Pressure Washer" for illus1:ra1:ions.<br />
Make sure unit is in a level position.<br />
Connect garden hose to wa1:erinlet on <strong>pressure</strong><br />
<strong>washer</strong> pump. Turn ON water.<br />
CAUTION<br />
5. Squeeze trigger on gun to purge pump system of<br />
air and impurities.<br />
6. Attach nozzle extension to spray gun. Tighten by<br />
hand.<br />
\\<br />
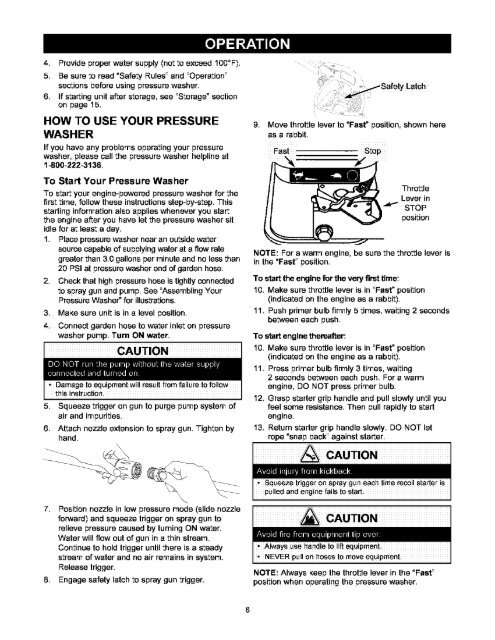
, Move throttle lever to =Fast" position, shown here<br />
as a rabbit.<br />
Fast<br />
Stop<br />
Threttle<br />
Leverin<br />
STOP<br />
position<br />
NOTE: For a warm engine, be sure the throttle lever is<br />
in the =Fast" position.<br />
To start the engine for the very first time:<br />
10. Make sure throttle lever is in ::Fast" position<br />
(indice1:edon the engine as a rabbit).<br />
11. Push primer bulb firmly 5 times, waiting 2 seconds<br />
between each push.<br />
To start engine thereafter:<br />
10. Make sure throttle lever is in ::Fast" position<br />
(indice1:ed on the engine as a rabbit).<br />
11. Press primer bulb firmly 3 times, waiting<br />
2 seconds between each push. For a warm<br />
engine, DO NOT press primer bulb.<br />
12. Grasp s1:arter grip handle and pull slowly until you<br />
feel some resistance. Then pull rapidly to start<br />
engine.<br />
13. Return s1:arter grip handle slowly. DO NOT let<br />
rope =snap back" against starter.<br />
CAUTION<br />
\<br />
7,<br />
Position nozzle in low <strong>pressure</strong> mode (slide nozzle<br />
forward) and squeeze trigger on spray gun to<br />
relieve <strong>pressure</strong> caused by turning ON wa1:er.<br />
Water will flow out of gun in a thin stream.<br />
Continue to hold trigger until there is a s1:eady<br />
stream of water and no air remains in system.<br />
Release trigger.<br />
8. Engage safety latch 1:ospray gun trigger.<br />
CAUTION<br />
NOTE: Always _:eep the throttle lever in the =Fast"<br />
position when operating the <strong>pressure</strong> <strong>washer</strong>.<br />
8