ICRRFTSMRN+I - Ppe-pressure-washer-parts.com
ICRRFTSMRN+I - Ppe-pressure-washer-parts.com
ICRRFTSMRN+I - Ppe-pressure-washer-parts.com

Create successful ePaper yourself
Turn your PDF publications into a flip-book with our unique Google optimized e-Paper software.
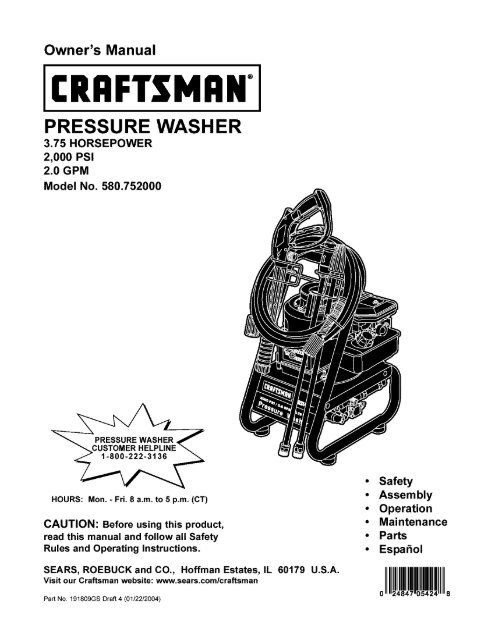
Owner's<br />
Manual<br />
<strong>ICRRFTSMRN+I</strong><br />
PRESSURE<br />
3.75 HORSEPOWER<br />
2,000 PSI<br />
2.0 GPM<br />
Model No. 580.752000<br />
WASHER<br />
HOURS:<br />
Mon. - FrL 8 a.m. to 5 p.m. (CT)<br />
CAUTION: Before using this product,<br />
read this manual and follow all Safety<br />
Rules and Operating Instructions.<br />
SEARS, ROEBUCK and CO., Hoffman Estates, IL 60179 U.S.A.<br />
visit our Craftsman website: www.sears.<strong>com</strong>/craftsman<br />
Part No. 191809GS Draft 4 (01/2212004)<br />
• Safety<br />
• Assembly<br />
• Operation<br />
• Maintenance<br />
• Parts<br />
• Espa_ol<br />
01!!1!1!
WARRANTY .................................... 2<br />
SAFETY RULES ............................... 2-4<br />
ASSEMBLY ................................... 6-7<br />
OPERATION ................................. 8-10<br />
MAINTENANCE .............................. 11-14<br />
SPECIFICATIONS ............................... 11<br />
STORAGE ..................................... 15<br />
TROUBLESHOOTING ............................ 16<br />
REPLACEMENT PARTS ....................... 18-22<br />
EMISSION CONTROL WARRANTY ................. 23<br />
ESPANOL ................................... 24-39<br />
HOW TO ORDER PARTS ................ BACK PAGE<br />
LIMITED WARRANTY ON CRAFTSMAN PRESSURE WASHER<br />
For one year from the date of purchase, when this Craftsman <strong>pressure</strong> <strong>washer</strong> is maintained and operated<br />
according to the instructions in the owner's manual, Sears will repair, free of charge, any defect in material and<br />
workmanship.<br />
if this <strong>washer</strong> is used for <strong>com</strong>mercial purposes, this warranty applies for only 90 days from the date of<br />
purchase, if this <strong>pressure</strong> <strong>washer</strong> is used for rental purposes, this warranty applies for only 30 days after date<br />
of purchase.<br />
This warranty does not cover:<br />
Expendable items such as spark plugs or air filters, which be<strong>com</strong>e worn during normal use.<br />
Repairs necessary because of operator abuse or negligence, including damage resulting from no water<br />
being supplied to pump or failure to maintain the equipment according to the instructions contained in the<br />
owner's manual.<br />
Warranty service is available by returning the <strong>pressure</strong> <strong>washer</strong><br />
the United States.<br />
to the nearest Sears service center or dealer in<br />
This warranty gives you specific legal rights and you may also have other rights, which vary from state to state.<br />
Sears, Roebuck and Co., Dept. 817WA, Hoffman Estates, IL 60179<br />
,_ This Obey isall the safety safetymessages alert symbol. that follow It is used thistosymbol alert you to avoid to potential possible personal injury or injury death. hazards.<br />
_Read<br />
familiar<br />
this<br />
with<br />
manual<br />
your<br />
carefully<br />
<strong>pressure</strong><br />
and<br />
<strong>washer</strong>.<br />
be<strong>com</strong>e<br />
Know its<br />
applications, its limitations, and any hazards<br />
involved.<br />
The safety alert symbol (,_k) is used with a signal<br />
word (DANGER, CAUTION, WARNING), a pictorial<br />
and/or a safety message to alert you to hazards.<br />
DANGER indicates a hazard which, if not avoided, will<br />
result in death or serious injury. WARNING indicates a<br />
hazard which, if not avoided, could result in death or<br />
serious injury. CAUTION indicates a hazard which, if<br />
not avoided, might result in minor or moderate injury.<br />
CAUTION, when used without the alert symbol,<br />
indicates a situation that could result in equipment<br />
damage. Follow safety messages to avoid or reduce<br />
the risk of injury or death.<br />
Hazard Symbols and Meanings<br />
Toxic Fumes Electrical Shock<br />
Slippery Surface Fall Fluid Injection<br />
Fire Explosion Hot Surface<br />
Moving Parts Flying Objects Kickback<br />
2
n the State of California a spark a_rester is required<br />
_y law (section 4442 of the california Public<br />
WARNING<br />
WARNING<br />
The engine exhaust from this product contains<br />
chemicals known to the State of California to cause<br />
cancer, b rth defects, or other reproduct ve harm,<br />
DANGER<br />
• Operate <strong>pressure</strong> <strong>washer</strong> ONLY outdoor&<br />
• Use a respirator or mesk whenever there is a _hance<br />
that vapors may be inhaled;<br />
• Read all instructions pocked with mask so you are certain<br />
mask wil! provide necessary protection against inhaling<br />
harmful vapors;<br />
WHEN ADDING<br />
FUEL<br />
,Turn <strong>pressure</strong> <strong>washer</strong> OFF and !et it ceo! at least<br />
2 minutes before removing gas oap.<br />
, Fill fuel tank eutdoersi<br />
,DO NOT overfill tank. A!!ow space for fuel expansion.<br />
Keep fuel away ftorn spark&open flamesi pilot lightsi<br />
heat; and ether ignitien seur_;<br />
DO NOT light a cigarette or' smoke.<br />
WHEN OPERATING EQUIPMENT<br />
, DO NOT tip engine or equipment at ang!e which _auses<br />
fuel to spill<br />
,DO NO]- Spray flammable liquids<br />
WHEN TRANSPORTING OR REPAIRING EQUIPMENT<br />
, Transpert#epeir with fuel tank EMPTY<br />
Valve OFF.<br />
WHEN STORING FUEL OR EQUIPMENT wrrH FUEL IN<br />
TANK<br />
,Store away frem furnase% stoves; water heaters, clothes<br />
dryers Or other appliances that have pilot light Or other<br />
ignition source because they can ignite fuel Vapors.........<br />
WARNING<br />
WARNING<br />
• Keep spray nozzle between 8 to 24 inches away from<br />
cleaning<br />
• Operate this unit on a stable surfacei<br />
• Cleaning area should have adequate slopes and<br />
drainage to reduce possibility of fails due to slippery<br />
surfacesi<br />
, Be extremely carefu! if you must use <strong>pressure</strong> <strong>washer</strong><br />
from a ladderi S_!ding on any other relatiyely unstable<br />
Iocetiom<br />
, F!rmly grasp spray gun with both hands when using high<br />
Pressure spray to avoid injury if gun kicks b_ck.<br />
WARNING<br />
, DO NOT touch hot surfaces:<br />
• Slay clear of exhaust gases,<br />
NEVER move equipment while operating<br />
• Allow equipment to cool before touching<br />
3
WARNING<br />
CAUTION<br />
WARNING<br />
CAUTION<br />
CAUTION<br />
WARNING<br />
• Always wear eye protection_n using equipment or when<br />
in vicinity of equipment in use,<br />
_<br />
CAUTION<br />
contact Searsi<br />
NEVER operate units with br0ken or missing <strong>parts</strong>; 0r<br />
without protective housing or covers;<br />
• DO NOT by--pass any sefety device on this machine<br />
,Before starUng <strong>pressure</strong> <strong>washer</strong> in cold weatheri check<br />
a!l <strong>parts</strong> of the equ!pment to be sure ice has not formed<br />
there<br />
NEVER move machine by pu!l!ngon high <strong>pressure</strong> hose,<br />
Use handle provided on unit,<br />
• Che0k fuel system for leaks or signs o_ deterioration,<br />
pongy hceei loose or missing<br />
• DO NOT operate <strong>pressure</strong> <strong>washer</strong> above rated <strong>pressure</strong>i<br />
4
KNOW YOUR PRESSURE WASHER<br />
Read the owner's manual and safety rules before operating your <strong>pressure</strong> <strong>washer</strong>,<br />
Compare the illustrations with your <strong>pressure</strong> <strong>washer</strong> to familiarize yourself with the locations of various controls<br />
and adjustments. Save this manual for future reference.<br />
$ ray Gun.............<br />
Adjustable<br />
Nozzle<br />
Accessory<br />
Ex_enSion With<br />
Cleaner<br />
l"hrottle control<br />
el! Fill Cap and Dipstick..........<br />
Detergent Pic_:-Up<br />
I'ube and Filter<br />
Primer Bulb<br />
Fue!Cap<br />
Wa_e r Inlet<br />
High Pressure Outl_<br />
_mp equipped with<br />
Automatic Cool Down system<br />
Accessory Holder, provides convienant storage for High Pmesure Outlet _ c0nn_i0n for high preSsUre<br />
spray gun, _urbo wand and nozzle extension ...................... hosei...................................................<br />
Adjustable Nozzle _ Adjust for high or low <strong>pressure</strong>; N0zzle ]ExtensiOn _ Attach t_ spray gun to use<br />
narrow or faR s_ray,<br />
adjustable nOzzlei<br />
Air Clesner _ Dry type filter element iimits the OilFi!! Cap and Dipstick- Check and f!!l engine with<br />
amount of dir_ and_dLIstthat gets in the engine: el! herei See page 6 foroi I re<strong>com</strong>mendations and<br />
filling instructions<br />
Automatic Cool D0wn System _ cycies water ....... ......<br />
through pump when water reaches !2.5=,!55=F. Warm Primer Bulb_ Prepares a co!d engine for starting. ......<br />
water will discharge from pump onto ground This, Pump ....... _ DoveIops hgh i ware r pr essure ...... ........................<br />
system preven_ internal pump damage_ .....................................................................................<br />
....... Dete r........ gent P iek-Up .................................................... Tube and Filter- Used to slphon _............. ...................... Recoil Starter _ Used f°r' starting the engine manually<br />
detergent .... from .... chem ca berte to the ow <strong>pressure</strong> ..... Spray.... Gun - C0ntrols the applicati0n 0f water Oht0.....<br />
Waterstream.<br />
€!eanmg SUrface w!th tr!gger dev=ca !ncludes Safety<br />
latch.<br />
Extension with Turbo Nozzle _ The turbo nozzle ......................... _ ........................ ......................... . ..................<br />
rotates the high <strong>pressure</strong> strea_ in a rapid circular Thr°tt! e _0ntr01 Lever-_ets engine in smrting<br />
pa_ern for aggr0ssive Cleaning m0do for re_il star_e_an d StoPS running engine •<br />
Fuei Cap -Fill fuel tank Wi_ roguiai uni0ad0d fuel her0. war er !nlet _ c0nnect-i0n for garden hose •<br />
High Pressure Hose (not shown)- connect one end_<br />
the spray gun and Otherendte the high preSSure Outlet.<br />
5
Your<strong>pressure</strong> <strong>washer</strong> requires some assembly and is<br />
ready for use only after it has been properly serviced<br />
with the re<strong>com</strong>mended oil and fuel.<br />
If you have any problems with the assembly of<br />
your <strong>pressure</strong> <strong>washer</strong>, please call the <strong>pressure</strong><br />
<strong>washer</strong> helpline at 1-800-222-3t36.<br />
IMPORTANT: Any attempt to run the engine before it<br />
has been serviced with the re<strong>com</strong>mended oil will result<br />
in an engine failure.<br />
REMOVE PRESSURE WASHER<br />
FROM CARTON<br />
Open carton and slice two corners opposite guide<br />
handle from top to bottom so the panel can be<br />
folded down flat.<br />
Remove fillers, accessories and <strong>parts</strong> bag shipped<br />
with your <strong>pressure</strong> <strong>washer</strong>.<br />
Remove the <strong>pressure</strong> <strong>washer</strong> out the open end of<br />
the carton.<br />
Check carton for additional<br />
CARTON<br />
CONTENTS<br />
loose <strong>parts</strong>.<br />
Check all contents, If any <strong>parts</strong> are missing or damaged,<br />
cell the <strong>pressure</strong> <strong>washer</strong> helpline at t-800-222-3136,<br />
The main unit<br />
High <strong>pressure</strong> hose<br />
Spray gun<br />
Nozzle extension with adjustable nozzle<br />
Turbo wand<br />
Accessory holder<br />
Engine oil<br />
Parts bag (which includes<br />
Owner's manual<br />
Registration<br />
card<br />
items listed below)<br />
Be<strong>com</strong>e familiar with each piece before assembling<br />
the <strong>pressure</strong> <strong>washer</strong>. Compare contents against the<br />
view on page 5. If any <strong>parts</strong> are missing or damaged,<br />
call the <strong>pressure</strong> <strong>washer</strong> helpline at 1-800-222_3136.<br />
ASSEMBLING YOUR PRESSURE<br />
WASHER<br />
Your Craftsman <strong>pressure</strong> <strong>washer</strong> was mostly<br />
assembled at the factory, However, you will need to<br />
perform these tasks before you can operate your<br />
<strong>pressure</strong> <strong>washer</strong>:<br />
1. Add oil to engine crankcase.<br />
2. Add fuel to fuel tank.<br />
3. Connect high <strong>pressure</strong> hose to spray gun and<br />
pump.<br />
4. Connect water supply to pump.<br />
2. Place nozzle extension, turbowand and spray gun<br />
into holder.<br />
Add Engine Oil<br />
IMPORTANT: Any attempt to crank or start the engine<br />
before it has been properly serviced with the<br />
re<strong>com</strong>mended oil may result in an engine failure,<br />
NOTE: When adding oil to the engine crankcase, use<br />
only high quality detergent oil rated with API service<br />
classification SF, SG, SH, SJ or higher rated SAE 30<br />
weight, DO NOT use special additives,<br />
1. Choose a viscosity according to the following table.<br />
STARTING<br />
TE_ FERATURE RANGE AINTICI PATE E) BEFORE NEXT OIL CHANGE<br />
* The use of multi-viscesiN oils (5W-30, 10W-30, etc.)<br />
in temperatures above 40=F (4=C) will result in higher<br />
than normal oil consumption. When using a multiviscosity<br />
oil, check oil more frequently.<br />
** If using SAE 30 oil in temperatures below 40=F<br />
(_=C), it will result in hard starting and possible<br />
engine bore damage due to inadequate lubrication.<br />
2. Place <strong>pressure</strong> <strong>washer</strong> on a level surface.<br />
3. Clean area around oil fill.<br />
4. Remove oil fill cap and dipstick.<br />
5. Wipe dipstick clean, insert it into oil fill hole and<br />
tighten securely, remove dipsticK. Add<br />
re<strong>com</strong>mended oil up to "Fall" mark on dipstick.<br />
Attach Accessory Holder<br />
1, Place accessory holderonto top of handle,<br />
6
6. Pour slowly. Wipe dipstick clean each time oil<br />
level is checKed. DO NOT overfill.<br />
7. Install oil fill plug and dipstick, tighten securely.<br />
NOTE: ChecK oil often during engine breaK-in.<br />
Add<br />
Fuel<br />
,_ WARNINGt NEVER fill fuel NEVER tanK when fill fuel engine tank indoors. is running or<br />
hot. DO NOT smoKe when filling fuel tank.<br />
,_ WARNINGt full. Provide space NEVER for fill fuel fuel expansion. tank <strong>com</strong>pletely Wipe<br />
away any fuel spillage from engine and<br />
equipment before starting.<br />
1. Use clean unleaded automotive fuel and store in<br />
approved, clean, covered containers. Use clean fill<br />
funnels. NEVER use ::stale"fuel left over from last<br />
season or fuel stored for long periods.<br />
2. Clean area around fuel fill cap, remove cap.<br />
3. Slowly add fuel to fuel tank. Use a funnel to<br />
prevent spillage. Fill tank to about 1.5" below the<br />
top of the filler necK.<br />
_,_<br />
Fuel<br />
, Before connecting garden hose to wa1:erinlet,<br />
inspect inlet screen. Clean screen if it con1:ains<br />
debris or have it replaced if damaged. Refer to<br />
section =O-Ring Maintenance" if inlet screen is<br />
damaged. DO NOT run <strong>pressure</strong> <strong>washer</strong> if inlet<br />
screen is damaged. NEVER siphon inlet water.<br />
Inspect inlet<br />
screen. DO<br />
NOT use if<br />
damaged;<br />
clean if dirty.<br />
4. Run wa1:erthrough garden hose for 30 seconds to<br />
flush out any debris.<br />
5. Connect garden hose (net 1:oexceed 50 feet in<br />
length) to water inlet. Tighten by hand.<br />
CAUTION<br />
4. Install fuel cap and wipe up any spilled fuel.<br />
IMPORTANT: It is imporl:ant 1:oprevent gum deposits<br />
from forming in essential fuel system <strong>parts</strong>, such as the<br />
carburetor, fuel filter, fuel hose or tank during s1:orage.<br />
Also, experience indica1:esthat alcohol-blended fuels<br />
(called gasohol, ethanol or methanol) can attract<br />
moisture, which leads to separation and formation of<br />
acids during storage. Acidic gas can damage the fuel<br />
sys1:em of an engine while in storage.<br />
To avoid engine problems, the fuel sys1:em should be<br />
emptied before storage of 30 days or longer. See<br />
=Storage" on page 15. NEVER use engine or<br />
carbure1:or cleaner products in the fuel 1:anKor<br />
permanent damage may occur.<br />
Connect Hose and Water Supply to Pump<br />
IMPORTANT: To avoid pump damage, you must<br />
assemble the nozzle extension to the spray gun and<br />
attach all hoses before you start the engine.<br />
1. Uncoil high <strong>pressure</strong> hose and attach one end of<br />
hose to base of spray gun. Tighten by hand.<br />
2. Attach other end of high <strong>pressure</strong> hose to high<br />
<strong>pressure</strong> outlet on pump. Tighten by hand.<br />
6. Turn ON water and squeeze trigger on gun to<br />
purge pump system of air and impurities.<br />
_aringadequate<br />
WARNING<br />
eye protection.<br />
CHECKLIST BEFORE STARTING<br />
ENGINE<br />
Review the unit 1:oensure you have performed all of<br />
the following:<br />
1. Check that oil has been added to proper level in<br />
engine crankcase.<br />
2. Add proper fuel 1:ofuel tanK.<br />
3. Check for properly tightened hose connections<br />
(high <strong>pressure</strong> and water supply) and there are no<br />
kinks, cuts, or damage to high <strong>pressure</strong> hose.<br />
7
5.<br />
,<br />
Provide proper water supply (not 1:oexceed<br />
100°F).<br />
Be sure 1:oread =Safety Rules" and ::Opera1:ion"<br />
sections before using <strong>pressure</strong> <strong>washer</strong>.<br />
If s1:arting unit after s1:orage, see ::S1:orage"section<br />
on page 15.<br />
HOW TO USE YOUR<br />
WASHER<br />
PRESSURE<br />
If you have any problems operating your <strong>pressure</strong><br />
<strong>washer</strong>, please call the <strong>pressure</strong> <strong>washer</strong> helpline at<br />
1-800-222-3136.<br />
To Start Your Pressure Washer<br />
To el:art your engine-powered <strong>pressure</strong> <strong>washer</strong> for the<br />
first time, follow these instructions step-by-step. This<br />
s1:arting information also applies whenever you start<br />
the engine after you have let the <strong>pressure</strong> <strong>washer</strong> sit<br />
idle for at leas: a day.<br />
1. Place <strong>pressure</strong> <strong>washer</strong> near an outside water<br />
source capable of supplying water at a flow rate<br />
greater than 3.0 gallons per minute and no less than<br />
20 PSI at <strong>pressure</strong> <strong>washer</strong> end of garden hose.<br />
2,<br />
,<br />
4.<br />
Check that high <strong>pressure</strong> hose is tightlyconnected<br />
1:ospray gun and pump. See "Assembling Your<br />
Pressure Washer" for illus1:ra1:ions.<br />
Make sure unit is in a level position.<br />
Connect garden hose to wa1:erinlet on <strong>pressure</strong><br />
<strong>washer</strong> pump. Turn ON water.<br />
CAUTION<br />
5. Squeeze trigger on gun to purge pump system of<br />
air and impurities.<br />
6. Attach nozzle extension to spray gun. Tighten by<br />
hand.<br />
\\<br />
, Move throttle lever to =Fast" position, shown here<br />
as a rabbit.<br />
Fast<br />
Stop<br />
Threttle<br />
Leverin<br />
STOP<br />
position<br />
NOTE: For a warm engine, be sure the throttle lever is<br />
in the =Fast" position.<br />
To start the engine for the very first time:<br />
10. Make sure throttle lever is in ::Fast" position<br />
(indice1:edon the engine as a rabbit).<br />
11. Push primer bulb firmly 5 times, waiting 2 seconds<br />
between each push.<br />
To start engine thereafter:<br />
10. Make sure throttle lever is in ::Fast" position<br />
(indice1:ed on the engine as a rabbit).<br />
11. Press primer bulb firmly 3 times, waiting<br />
2 seconds between each push. For a warm<br />
engine, DO NOT press primer bulb.<br />
12. Grasp s1:arter grip handle and pull slowly until you<br />
feel some resistance. Then pull rapidly to start<br />
engine.<br />
13. Return s1:arter grip handle slowly. DO NOT let<br />
rope =snap back" against starter.<br />
CAUTION<br />
\<br />
7,<br />
Position nozzle in low <strong>pressure</strong> mode (slide nozzle<br />
forward) and squeeze trigger on spray gun to<br />
relieve <strong>pressure</strong> caused by turning ON wa1:er.<br />
Water will flow out of gun in a thin stream.<br />
Continue to hold trigger until there is a s1:eady<br />
stream of water and no air remains in system.<br />
Release trigger.<br />
8. Engage safety latch 1:ospray gun trigger.<br />
CAUTION<br />
NOTE: Always _:eep the throttle lever in the =Fast"<br />
position when operating the <strong>pressure</strong> <strong>washer</strong>.<br />
8
How to Stop Your Pressure Washer<br />
1. Move throttle lover to "Stop" position.<br />
2. Squeeze trigger on spray gun to relieve<br />
<strong>pressure</strong> in hose,<br />
NOTE: A small amount of water will squirt out when<br />
you release the <strong>pressure</strong>.<br />
3. Rotating nozzle adjusts spray pattern from a<br />
narrow pattern to a fan pattern.<br />
How To Use the Adjustable Nozzle<br />
You now should Know how to START your <strong>pressure</strong><br />
<strong>washer</strong> and how to STOP it. The information in this<br />
section will tell you how to adjust the spray pattern<br />
and apply detergent or other cleaning chemicals.<br />
CAUTION<br />
• NEVER adjustspraypattern when spraying.<br />
• NEVERput handsin front of nozzle toadjustsprayp_tern<br />
On the end of your spray gun is a nozzle handle that<br />
can adjust the spray <strong>pressure</strong> and the spray pa_ern.<br />
1. Point nozzle toward ground, disengage safety<br />
latch, and press trigger to l:est pa_ern.<br />
Twist no>71e counter- Twist nozzle ¢!o¢_ise for<br />
clockwise for fan Pattern narrow spray pattern,<br />
4. For most effective cleaning, Keep spray nozzle<br />
between 8 to 24 inches away from cleaning<br />
surface.<br />
5. If you get spray nozzle too close, especially using<br />
high <strong>pressure</strong> mode, you may damage the surface<br />
being cleaned.<br />
6. DO NOT get closer than 6 inches when cleaning<br />
tires.<br />
Using the Turbo Nozzle<br />
The turbo nozzle rotates the high <strong>pressure</strong> stream in a<br />
rapid circular pattern. The high <strong>pressure</strong> spray is most<br />
effective when the tip of the nozzle extension is held<br />
between 8 to 24 inches from the surface being cleaned.<br />
CAUTION<br />
2. Sliding nozzle forward and bacK adjusts spray<br />
<strong>pressure</strong>.<br />
hiddenarea.<br />
To attach the turbo nozzle to the spray gun:<br />
1, Engage safety latch to spray gun trigger,<br />
2. Remove the nozzle extension from the spray gun,<br />
if attached.<br />
3. Attach the turbo nozzle extension to spray gun.<br />
_. Disengage safety latch to spray gun trigger.<br />
5. Always start the turbo nozzle at a disl:anca,<br />
Siide nozziebackward Slide nozzle f0P,_vatdfor I_ gradually getting closer to the surface until you get<br />
high <strong>pressure</strong>m0dei p_essuremode and<br />
detergent app!i_tion.<br />
the cleaning force you want.<br />
NOTE: Detergent cannot be applied with turbo nozzle.<br />
9
Applying Detergent with Adjustable Nozzle<br />
IMPORTANT: Use chemicals designed specifically for<br />
<strong>pressure</strong> <strong>washer</strong>s. Household detergents could<br />
damage the pump.<br />
CAUTION<br />
To apply detergent, follow these steps:<br />
1. Review use of adjustable nozzle.<br />
2. Prepare detergent solution as required by job.<br />
3. Place filter end of detergent siphoning tube into<br />
detergent container.<br />
CAUTION<br />
Pressure Washer Rinsing<br />
For Rinsing:<br />
1. Slide nozzle backward to high <strong>pressure</strong>, press<br />
trigger and wait for detergent to clear.<br />
NOTE: You can also stop detergent flow by removing<br />
detergent siphoning tube from container.<br />
2. Keep spray gun a safe distance from area you<br />
plan to spray.<br />
WARNING<br />
,Keep Sp!ayn_le b_een 8 t024 inches away from<br />
€leaningtrace<br />
, Operate this unit on a stablesurface:<br />
Imlm_mM_llgJm _'{'dil"_[ttlim m<br />
/ lIE IIEaiI/<br />
_r_ Ira<br />
, Be extremely carefulis youmust use the <strong>pressure</strong><br />
<strong>washer</strong> from a !adderi scaffo!djng or any other relatively<br />
', When inserting the fi!ter into a detergent solution bottle, .... Unstableiocatien........................................................<br />
route the tube s0 as t0 keep it fr0m inadvertently ............ ......<br />
c0nta_ing _e hot raUffler.<br />
Firrn!y graS#SpraygunWithb°th hands when us!nghigh<br />
<strong>pressure</strong> spray to ayoid injury if gun kicks back.<br />
4. Slide adjustable nozzle forward to low <strong>pressure</strong> 3. Apply a high <strong>pressure</strong> spray to a small area, then<br />
mode. Detergent cannot be applied with nozzle in<br />
check surface for damage. If no damage is found,<br />
high <strong>pressure</strong> position.<br />
it is okay to continue cleaning.<br />
5. MaKe sure garden hose is connected to water<br />
Start at top of area to be rinsed, working down<br />
inlet. Check that high <strong>pressure</strong> hose is connected<br />
with same overlapping strokes as you used for<br />
to spray gun and pump. Start engine.<br />
washing and applying detergent.<br />
6. Apply detergent to a dry surface, starting from<br />
bottom and working up.<br />
7. Allow detergent to =soak in" for 3-5 minutes before<br />
rinsing. Reapply as needed to prevent surface<br />
from drying.<br />
8. For washing, start at lower portion of area to be<br />
washed and work upward, using long, even,<br />
overlapping strokes.<br />
IMPORTANT: You must flush the chemical injection<br />
system after each use by placing the filter into a clean<br />
bucket of water and running the <strong>pressure</strong> <strong>washer</strong> in<br />
low <strong>pressure</strong> for 1-2 minutes.<br />
Automatic Cool Down System<br />
(Thermal Relief)<br />
If you run the engine on your <strong>pressure</strong> <strong>washer</strong> for<br />
3-5 minutes without pressing the trigger on the spray<br />
gun, circulating water in the pump can reach<br />
temperatures above 125=F. The system engages to<br />
cool the pump by discharging the warm water onto<br />
the ground.<br />
10
OWNER'S RESPONSIBILITIES<br />
Follow the hourly or calendar intervals, whichever occurs first.<br />
More frequent service is required when operating in adverse conditions noted below.<br />
MAINTENANCE SCHEDULE I<br />
FILLIN DATESASYOUCOMPLETE HOURI-YOPERATING i sERvicE DATES<br />
REGULAR SERVICE INTERVAL<br />
Before EV_ 25 EVe_50 Every 100<br />
Usel ¥_y I YearlyI Yearly<br />
PRESSURE WASHER<br />
I I<br />
Pur_epumpofairandContaminants<br />
Change purepQii mmmm_mmmmmm x _ i ]<br />
ENGINE I X I I<br />
ChgPk 0il !e_e!<br />
Charge engine _il<br />
Servi_ sparkplug<br />
If unit !St0 remain id!e for<br />
I ongerthan 30days. (<br />
Cleonif clogged. Replace if perforatedortorn.<br />
= Changeoilafterthefirst (5) operating hoursandevery50 hoursor yearly thereafter.<br />
Change sooner when operating under dirty or dusty conditions.<br />
Replacemoreoftenunderdirty or dusty conditions.<br />
PRODUCT<br />
SPECIFICATIONS<br />
Pressure Washer Specifications<br />
Pressure .......................<br />
FlowRate ......................<br />
Chemical Mix....................<br />
2,000 PSI<br />
2.0 GPM<br />
Use as directed<br />
Water Supply Temperature ......... Not to exceed 100°F<br />
Shipping Weight .................<br />
Engine<br />
Specifications<br />
RatedHorsepower.................<br />
Spark PlugType:<br />
Resistor ....................<br />
Set Gap To: ...................<br />
48 Ibs,<br />
3.75 HP<br />
ChampionRJ-19LM<br />
0,030 inches(0.76turn)<br />
Fuel Capacity....................<br />
1.0 Quarts<br />
Oil<br />
Above 40+:F .................. SAE 30<br />
0+F- 40+F .................... SAE5W-30 or 10W-30<br />
GENERAL<br />
RECOMMENDATIONS<br />
The <strong>pressure</strong> <strong>washer</strong> warranty does not cover items<br />
that have been subjected to operator abuse or<br />
negligence. To receive full value from the warranty,<br />
the operator must maintain <strong>pressure</strong> <strong>washer</strong> as<br />
instructed in this manual including proper storage as<br />
detailed in =Storage" on page 15.<br />
Some adjustments will need to be made periodically to<br />
properly maintain your <strong>pressure</strong> <strong>washer</strong>.<br />
11<br />
All service and adjustments should be made at least<br />
once each season. Follow the requirements in the<br />
=Maintenance Schedule" chart above.<br />
NOTE: Once a year you should clean or replace the<br />
spark: plug and replace the air filter. A new spark plug<br />
and clean air filter assure proper fuel-air mixture and<br />
help your engine run better and last longer.<br />
If equipped with inflatable tires, _eep the air <strong>pressure</strong><br />
at the value marked on the tire or within 15 and 40 psi.<br />
BEFORE EACH USE<br />
1. Check engine oil level.<br />
2. Check water inlet screen for damage.<br />
3. Cheek in-line filter for debris.<br />
4. Cheek high <strong>pressure</strong> hose for leaks.<br />
5. Cheek chemical filters for damage.<br />
8. Cheek gun and nozzle extension assembly for<br />
leaks.<br />
7. Purge pump of air and contaminants.<br />
PRESSURE WASHER<br />
MAINTENANCE<br />
Check and Clean Inlet Screen<br />
Examine garden hose inlet screen. Clean if it is<br />
clogged or replace if it is torn.
Check High Pressure Hose<br />
High <strong>pressure</strong> hoses can develop leaks from wear,<br />
kinking, or abuse. Inspect hose before each use.<br />
Check for cuts, leaks, abrasions, bulging of cover, or<br />
damage or movement of couplings. If any of these<br />
conditions exist, replace hose immediately.<br />
WARNING<br />
<strong>pressure</strong> rating 0f Unit,<br />
Check Gun and Nozzle Extension<br />
Examine hose connection to gun and make sure it is<br />
secure. Test trigger by pressing it and making sure it<br />
springs back inl:o place when you release it. Engage<br />
safety lal:ch and test trigger. You should not be able to<br />
press trigger. Replace gun immediately if it fails any of<br />
these tests.<br />
Check In-Line Filter<br />
Refer to the illustration and service the in-line filter if it<br />
be<strong>com</strong>es clogged, as follows:<br />
To remove contaminants from the pump, follow these<br />
steps:<br />
1. Set up <strong>pressure</strong> <strong>washer</strong> as described in<br />
::Assembling Your Pressure Washer" section, and<br />
connect water supply.<br />
2. Remove nozzle extension from gun.<br />
3. Start engine according 1:oinstructions in =How To<br />
Use Your Pressure Washer" section.<br />
4. Pull trigger on gun and hold.<br />
5. When water supply is s1:eadyand cons1:ant, engage<br />
safety la1:chand refes1:ennozzle extension.<br />
Nozzle<br />
Maintenance<br />
A pulsing sensation felt while squeezing the spray gun<br />
trigger may be caused by excessive pump <strong>pressure</strong>.<br />
The principal cause of excessive pump <strong>pressure</strong> is a<br />
nozzle clogged or restricted with foreign materials,<br />
such as dirt, e1:c.To correct the problem, immedia1:ely<br />
clean the nozzle following these ins1:ructions:<br />
1. Shut off engine and turn off water supply.<br />
2. Remove nozzle from end of nozzle extension.<br />
Separa1:e nozzle extension from spray gun. Twist<br />
nozzle clockwise to stream position. Using a 2ram<br />
(5/64) allen wrench, remove orifice from end of<br />
nozzle extension.<br />
N0zzle extension = 3. Remove in-line filter from other end of nozzle<br />
O-ring<br />
extension.<br />
1. De1:achnozzle extension from gun and remove 4. Use a small paper clip to free any foreign material<br />
o-ring and screen from nozzle extension. Flush<br />
screen, gun, and nozzle extension with clean water<br />
clogging or restricting orifice.<br />
to clear debris.<br />
2. Place in-line fil1:erscreen into threaded end of<br />
nozzle extension. Direction does not matter. Push<br />
screen in with eraser end of pencil until it rests fiat<br />
at bottom of opening. Take care not to bend<br />
screen.<br />
Insertwireint00rificoandtumback<br />
3. Place o-ring into recess. Push o-ring snugly against and forth t0 Clear 0bstructi0ni<br />
in-line filter screen.<br />
4. Assemble nozzle extension to spray gun, as<br />
described earlier in manual.<br />
Purge Pump of Air and Contaminants<br />
To remove air from the pump, follow these steps:<br />
1. Set up <strong>pressure</strong> <strong>washer</strong> as described in<br />
::Assembling Your Pressure Washer" section and<br />
connect water supply.<br />
2. Pull trigger on gun and hold until a steady stream<br />
of water appears.<br />
5. Using a garden hose, remove additional debris by<br />
back flushing wa1:erthrough nozzle extension. Back<br />
flush belween 30 to 60 seconds. Turn adjustable<br />
nozzle extension to stream spray and move nozzle<br />
from low to high while flushing.<br />
12
6. Reinstall orifice and in-line filter inl:o nozzle<br />
extension. DO NOT overtighl:en orifice with allen<br />
wrench.<br />
7. Reconnect nozzle extension 1:ospray gun.<br />
8. Reconnect wa1:ersupply, turn on wa1:er,and s1:art<br />
engine.<br />
9. Test <strong>pressure</strong> <strong>washer</strong> by operating nozzle in high<br />
and low positions.<br />
O-Ring<br />
Maintenance<br />
Purchase an O-Ring Repair Kit, i1:emnumber 7175116,<br />
a1:your local Sears or by calling 1-800-366-PART or<br />
online at www.ssers.<strong>com</strong>. It is not included with the<br />
<strong>pressure</strong> <strong>washer</strong>. This kit includes replacement o-rings,<br />
rubber <strong>washer</strong> and water inlet filter. Refer to the<br />
ins1:ructionshee1:provided in the kit to service your units<br />
o-rings.<br />
Pump<br />
Maintenance<br />
Changing Pump Oil<br />
Change oil every 50 hours or once yearly, whichever<br />
occurs first.<br />
NOTE: You must purchase a premeasurad bottle of<br />
pump oil, i1:emnumber 19C586GS, by calling<br />
1-800-366-PART or online at www.sears.cem.<br />
Change pump oil as follows:<br />
1. Drain engine oil and fuel from <strong>pressure</strong> <strong>washer</strong>.<br />
2. Use a 8ram allen wrench to remove black pump<br />
oil cap between high <strong>pressure</strong> outle1:and garden<br />
hose inle1:.<br />
\<br />
Oil Cap<br />
3. Tilt <strong>pressure</strong> <strong>washer</strong> to drain oil in1:oan approved<br />
con1:ainer until it drips slowly from pump.<br />
4. Tilt <strong>pressure</strong> <strong>washer</strong> in opposite direction and<br />
empty premeasured pump oil bottle into same<br />
opening (a small funnel may be helpful).<br />
5. Ins1:allblack pump oil cap and tighten firmly.<br />
6. Set <strong>pressure</strong> <strong>washer</strong> in upright position. Add fuel<br />
and engine oil.<br />
ENGINE<br />
Checking Oil Level<br />
MAINTENANCE<br />
Oil level should be checked prior to each use or at leas1:<br />
every 8 hours of operation. Keep oil level main1:ained.<br />
Changing<br />
Oil<br />
Change engine oil after the firs1:5 hours and every<br />
50 hours thereafter. If you are using your <strong>pressure</strong><br />
<strong>washer</strong> under extremely dirty or dusty conditions, or in<br />
extremely hot weather, change oil more often.<br />
CAUTION<br />
KEEP OUT OF REACH OF CHILDREN.<br />
DON'T POLLUTE. CONSERVE<br />
_ )COLLECTION<br />
RESOURCES. CENTERS. RETURN USED OIL TO<br />
Change oil while engine is still warm from running,<br />
as follows:<br />
1. Drain fuel tank by running <strong>pressure</strong> <strong>washer</strong> until<br />
fuel tank is empty.<br />
2. Disconnect spark plug wire and Keep it away from<br />
spark plug.<br />
3. Clean area around oil fill, remove oil fill<br />
cap/dipsticK. Wipe dipstick clean.<br />
4. Tip your <strong>pressure</strong> <strong>washer</strong> to drain oil from oil fill<br />
into a sui1:ablecontainer making sure you tip your<br />
unit away from sparK plug and air cleaner. When<br />
crankcase is empty, re1:urn<strong>pressure</strong> <strong>washer</strong> to<br />
upright position.<br />
5. Wipe dipstick clean, insert it in1:ooil fill hole and<br />
tigh1:en securely, remove dipsticK. Add<br />
re<strong>com</strong>mended oil up to "Full" mark on dipstick.<br />
Pour slowly. Wipe dipstick clean each time oil<br />
level is checked. DO NOT overfill.<br />
6. Install oil fill plug and dipsticK, tighten securely.<br />
7. Wipe up any remaining oil.<br />
8. Reconnect spark plug wire to spark plug.<br />
13
Service<br />
Air Cleaner<br />
Your engine will not run properly and may be<br />
damaged if you run it with a dirty air cleaner.<br />
Service the air cleaner once every 25 hours of<br />
operation or once each year, whichever <strong>com</strong>es first.<br />
Service more often if operating under dirty or dusty<br />
conditions. Replacements are available at your local<br />
Sears service center.<br />
1. Clean area around spark plug.<br />
2. Remove and inspect spark plug.<br />
3. Replace spark plug with re<strong>com</strong>mended plug if<br />
electrodes are worn or if insulator is cracked or<br />
chipped.<br />
4. Check electrode gap with wire feeler gauge and<br />
set gap at 0.030 inches (0.76ram), if necessary.<br />
To service the air cleaner, follow these steps:<br />
1. Remove screw.<br />
5. Install spark plug, tighten securely.<br />
NOTE: You can purchase<br />
1-800-366-PART.<br />
2. Carefully remove air cleaner assembly to prevent<br />
debris from falling into carburetor. AFTER EACH USE<br />
3. "]'a_e air cleaner assembly apart and clean all<br />
<strong>parts</strong>. Wash foam air cleaner in liquid de;ergent<br />
and water. Squeeze dry in a clean cloth.<br />
4. SATURATE foam air cleaner in engine oil and<br />
squeeze in a clean cloth to remove excess oil.<br />
5. Reins;all clean or new foam air cleaner in body.<br />
6. Install air cleaner securely on carburetor with<br />
screw.<br />
NOTE: You can purchase now air cleaner elements by<br />
calling 1-800_366-PART.<br />
Service Spark Plug<br />
Service the spark plug every 100 hours of operation or<br />
yearly, whichever occurs first.<br />
WARNING<br />
a new spark plug by calling<br />
Water should not remain in the unit for long periods of<br />
time. Sediments or minerals can deposit on pump<br />
<strong>parts</strong> and _freeze" pump action. Follow these<br />
procedures after every use:<br />
1. Flush detergent siphoning tube by placing filter<br />
into a pail of clean wa;er while running <strong>pressure</strong><br />
<strong>washer</strong> in low <strong>pressure</strong> mode (adjustable nozzle in<br />
forward position). Flush for one to two minu;es.<br />
2. Shut off engine and let it cool, then remove all<br />
hoses.<br />
3. Disconnect spark plug wire from spark plug.<br />
Empty pump of all liquids by pulling recoil handle<br />
about 6 times. This should remove most of the<br />
liquid in pump.<br />
If storing for more than 30 days see "Long Term<br />
Storage" on page 15.<br />
14
GENERAL<br />
Inspect high <strong>pressure</strong> hose for damage. Cuts in<br />
hose or fraying could result in leaks and loss of<br />
<strong>pressure</strong>. Should any damage be found, replace<br />
hose. DO NOT attempt to repair a damaged hose.<br />
Replace hose with genuine Craftsman part.<br />
Drain water from hose, gun, and nozzle extension<br />
and properly coil it on attached wiraform.<br />
Reconnect spark plug wire to spark plug.<br />
Sl:ora unit in a clean, dry area.<br />
,_ WARNINGI NEVER store the engine with fuel<br />
in the gas l:anK indoors or in enclosed, poorly<br />
ventilated areas where fumes may reach an<br />
open flame, a sparK, or pilot light.<br />
WINTER<br />
STORAGE<br />
CAUTION<br />
, Freeze damage is not covered under warranty<br />
To protect the unit from freezing temperatures:<br />
1. Flush detergent siphoning tube by placing filter<br />
into a pail of clean wal:er while running <strong>pressure</strong><br />
<strong>washer</strong> in low <strong>pressure</strong> mode (adjustable nozzle in<br />
forward position). Flush for one to two minul:es.<br />
2. Empty pump of all pumped liquids by pulling recoil<br />
handle about 6 times. This should remove most<br />
liquid in pump.<br />
3. Use pump saver, available at Sears retail item<br />
number 7174403, 1:otreat pump. This prevents<br />
freeze damage and lubricates pis1:onsand seals.<br />
4. If pump saver is not available, connect a 3-foot<br />
section of garden hose 1:owa1:erinlet adapter.<br />
Pour RV-antifreeze (antifreeze without alcohol)<br />
into hose. Pull recoil handle twice. Disconnect<br />
3-foot hose.<br />
LONG TERM STORAGE<br />
If you do not plan to use the <strong>pressure</strong> <strong>washer</strong> for more<br />
than 30 days, you must prepare the engine and pump<br />
for long 1:erms1:orage.<br />
It is imporl:ant 1:oprevent gum deposits from forming in<br />
essential fuel system <strong>parts</strong> such as the carburetor, fuel<br />
filter, fuel hose or 1:anKduring storage. Also,<br />
experience indice1:es that alcohol-blended fuels (called<br />
gasohol, ethanol or methanol) can attract moisture,<br />
which leads to separation and formation of acids<br />
during storage. Acidic gas can damage the fuel<br />
system of an engine while in s1:orage.<br />
Protect Fuel System<br />
Draining Fuel Tank:<br />
,_ WARNINGI Drain fuel, using a funnel, into<br />
approved con1:ainer outdoors, away from open<br />
flame. Be sure engine is cool. DO NOT smoke.<br />
Remove all fuel from cerbure1:or and fuel 1:anK1:o<br />
prevent gum deposits from forming on these <strong>parts</strong><br />
and causing possible malfunction of engine.<br />
Run engine until fuel tank is empty and engine<br />
s1:opsdue 1:olack of fuel.<br />
Change Oil<br />
While engine is s1:illwarm, drain oil from crankcase.<br />
Refill with re<strong>com</strong>mended grade. See "Changing Oil"<br />
on page 13.<br />
Oil Cylinder Bore<br />
Remove spark plug. Squirt about 1 ounce of clean<br />
engine oil into the cylinder. Cover spark plug hole<br />
with rag. Pull recoil handle slowly to distribute oil.<br />
Avoid spray from spark plug hole.<br />
Ins1:allspark plug. DO NOT connect spark plug wire.<br />
Protect<br />
Pump<br />
To protect the pump use Sears pump saver to prevent<br />
freeze damage and lubricate pistons and seals.<br />
NOTE: Sears pump saver, item number 717,_03, is<br />
available as an optionalaccessory. It is not included with<br />
the <strong>pressure</strong> <strong>washer</strong>.<br />
CAUTION<br />
,Failure to de so wi!l permanentlydamageyour pump<br />
and render you_unit ineperablei<br />
_ Freeze damage !Sn_ c0veredunderwarran_ •<br />
To use the pump saver:<br />
CAUTION<br />
1. Attach hose on pump saver can 1:opump inlet.<br />
2. Push in can top to dispense pump saver.<br />
3. When pump saver fluid begins to exit pump outlet,<br />
the pump is protected.<br />
4. Remove pump saver from pump inlet.<br />
OTHER<br />
DO NOT store fuel from one season to another.<br />
If possible, s1:oreyour unit indoors and cover it to<br />
give pro1:ection from dust and dirt. BE SURE TO<br />
EMPTY THE FUEL TANK.<br />
IMPORTANT: NEVER cover your <strong>pressure</strong> <strong>washer</strong><br />
while engine and exhaust area are warm.<br />
15
CaLISQ<br />
Co--Jot1<br />
!i NOzzle in !ow <strong>pressure</strong> mode. !. Pu!! nezz!e backward for high<br />
2. Water inlet is block:ed: ................ 2. cleariniet.<br />
3i Inadequate wal:er sUpp!y. 3. Provide adequate water flowi<br />
_-. Inlet h0se is _:inked or leaking. 4. Straighten inlet hose; patch<br />
Pump has following problems:<br />
failure to produce pressumi 5i C Ogged n et hOSestra neri CheCk:and € ean n e_hOSe<br />
erratic pressUrei chatteringi ioss strainer.<br />
of <strong>pressure</strong>;!ow water v0!ume; 6. water Supply is over i00_F. 16. ProVide cooler water Supply<br />
High <strong>pressure</strong> hose is blocked Clear blOck:sin Outlethosei<br />
orleahcsi<br />
i<br />
8. Gunieaks.<br />
9i Nozzle is obs_uctedi g. Clean nozzlei<br />
!0; PUmp is fau!ty. ! O. ContaPt Sears se_ico facility<br />
li Detergent Siphoning tube is not 1. Insert detergent siphoning l:ube<br />
.submerged<br />
into del:ergent.<br />
2. Chemical filter is clogged. 2. Clean or replace filter/detergent<br />
Detergent fai!s t0 mix with Sprayi Siphoning tU_e•<br />
3i Di_ in-line f!!ter. 3. see i'check in--L!ne Fi!ter"<br />
_. Nozzle is in high <strong>pressure</strong> 4. Push nozz!e forward for !ow<br />
leak,<br />
Engine speed is t0o s!ow Move thrott!e _ntr01 to FAST<br />
,,_,_e _r_, gooo a_ =o_oao If engine Still t'b0gs down'i,<br />
•...,_--.._,.._=_ '_ J jcontactsears se_ico facility<br />
li<br />
Dirty air cleaneri<br />
2i outeffueli 2. Fillfuell:an_i<br />
3. Sta!e fuel ................................... 3. Drain gas l:ank:;fi!! with fresh .......<br />
fuel.<br />
spark plug wire not connected 4. Connect wire _ spark plug.<br />
_0 sparkplug. I<br />
and runs rough,<br />
5<br />
,<br />
Bad spark piUg '5. Repiacasparkpiug<br />
6i water in fueli 6. Drain gas l:ank:;fill With fresh<br />
fuel<br />
7i Excassively rich fuel mixture. 7. Contact Sears service facilityi<br />
8i Infa_e valve stuck open or .8. Contact Sears service facilityi<br />
closed.<br />
I<br />
gi Engine has los1:<strong>com</strong>pressioni g. Contact Sears service facility:<br />
Engine shuts down during Out 0f fuel. Fill fuei _ank.<br />
operationi<br />
J<br />
Engine lacks power. Di_ air fi!teri Rep!a_ air fi!teri<br />
16
CRAFTSMAN 2,000 PSI Pressure Washer 580.752000<br />
Main Unit -- Exploded View and Parts List<br />
Item Part # Description<br />
1 190906GS BASE<br />
2 192162GS WIREFORM<br />
3 190249GS HOSE<br />
4 193482GS GUN<br />
5 194344DGS ASSY, Wand, Hi-Lo<br />
6 B1236DGS ORIFICE<br />
7 192525GS KIT, Pump/Engine Mntng Hrdwre<br />
Item Part # Description<br />
8 194298GS RELIEF, Thermal<br />
9 B1237DGS ORIFICE<br />
10 194343BGS ASSY, Wand, Turbo<br />
11 23139GS KEY<br />
12 194216GS ASSY, Pump (see page 19)<br />
900 NSP ENGINE<br />
Items Not Illustrated ..............................................................................................................................................<br />
Part# Description<br />
191809GS MANUALi Owner!s<br />
192530GS KIT; Decals<br />
AB3061BGS OILi Bottle<br />
Optiona! Access0ries NOt II!ustrated<br />
7"175187GS Garden Hose QUick Connect<br />
!"175!9_G$ Acc_sS0_ QUiCk conne_<br />
Rotating Brush Kit<br />
7175115G$<br />
7175116GS O Ring Repair Kit<br />
7174_01GS 25' ExtenSion HOSe<br />
7"174403G$<br />
PUmP saver<br />
7t74300GS House Wash Concentral:e (maKes 4 gallons)<br />
7t74301GS Deck Wash Concentral:e (maKes 2 gallons)<br />
7174302GS Vehicle/Boat Wash Concentrate (makes 4 gail0ns)<br />
7174303GS Degreaser concentrate (makes _ gallons)<br />
7174307GS Mold/Mildew concentrate (makes 2 gallons)<br />
18
CRAFTSMAN 2,000 PSI Pressure Washer 580.752000<br />
Pump -- Exploded View and Parts List<br />
_E,L >_, .....................................<br />
Item Part # Description Item Part #<br />
19 190571GS CAP, Oil A NSP<br />
28 190827GS MANIFOLD B 190832GS<br />
29 190575GS O-RING C 19063_-GS<br />
30 190576GS SCREW E 190591GS<br />
34 190577GS CONNECTION, Chemical Inlet F 190592GS<br />
45 190578GS PIN G 190593GS<br />
46 190629GS VALVE, Seat Plate, Plastic H 190628GS<br />
47 190630GS VALVE, Seat, Plastic J 189971GS<br />
62 190581GS CAP K 190636GS<br />
68 190582GS BALL, SS<br />
69 19058,_-GS O-RING<br />
76 194298GS THERMO RELIEF<br />
Description<br />
ASSY, CASE, PISTON<br />
KIT, WATER INLET, ALUM<br />
KIT, OUTLET, ALUM<br />
KIT,CHECK VALVES<br />
KIT, INLET CHECK<br />
KIT, CHEMICAL INJECTION<br />
KIT, UNLOADER STEM<br />
KIT, CHEMICAL HOSE<br />
KIT, SEAL SET<br />
NOTE: Item letters B - K are service _:itsand include<br />
all <strong>parts</strong> shown within the box..<br />
19
ENGINE, 3.75 HP, Briggs and Stratton, 10D902 - Exploded View<br />
306 523<br />
iiiiiii51i_iiiii<br />
iiii842_iiii<br />
718_<br />
200<br />
1095 VALVE GASKET SET<br />
22,<br />
iiiiiiiiiiiiiii i<br />
_<br />
iiiiiiiiii_iiiii_iiiii,iiiiiiiiiiiiii iiiiiiiiiiiiiiiiiiiiiiiiiii ¸¸......_iiiiiiiiiiiiiiiiiiiiiiiiiiiiiiiii<br />
,59__<br />
11210__1 i 456_<br />
2O
ENGINE, 3.75 HP, Briggs and Stratton, 10D902 - Exploded View<br />
iiiiiiiiiiiiiiiiiiiiiiiiiiiiiiiiiiiiiiiiiiiiiiiiii3"i iiiiiiiiiiiiiiisz9 iiiiiiiiiiiiiiiiiiiiiiiiiiiiiiiiiiii<br />
163<br />
121_<br />
393<br />
356<br />
106<br />
!24_<br />
356A<br />
9<br />
............. i3_iiiiiii<br />
21
ENGINE, 3.75 HP, Briggs and Stratton, 10D902 - Parts List<br />
Item Part# DeecripUon Item Part#<br />
1 399164 CylinderAssembly 200 691912<br />
2 399269 Kit-Bushing/Seal (Magneto Side) 201 690347<br />
3 299819 Seal-Oil (Magneto Side) 209 691862<br />
4 698691 Sump-Engine 211 691859<br />
5 690386 Head-Cylinder 222 691445<br />
7 692288 Gasket-Cylinder Head 300 394569<br />
8 495785 BreatherAssembly 304 692536<br />
9 695890 Gasket-Breather 305 692198<br />
10 691666 Screw(BreatherAssembly) 306 690400<br />
11 691245 Tube-Breather 307 690345<br />
12 692218 Gasket-Crankcase (,015", Standard) 332 690662<br />
270895 Gasket-Crankcase (.005") 333 496914<br />
270896 Gasket-Crankcase (.009") 334 691061<br />
13 691697 Screw (Cylinder Head) 337 802592<br />
15 691680 Plug-Oil Drain 356 692390<br />
16 692989 Crankshaft 356A 398808<br />
19 293709 Kit-Bushing/Side (PTO Side) 358 298989<br />
20 391483 Seal-Oil (PTO Side) 365 692200<br />
22 691662 Screw (Engine Sump) 390 691839<br />
23 690843 Flywheel 393 691837<br />
24 222698 Key-Flywheel 394 495770<br />
25 498668 Piston Assembly (Standard) 426 691107<br />
498669 Piston Assembly (,010" Oversize) 455 691236<br />
498670 Piston Assembly (,020" Oversize) 456 692299<br />
498671 Piston Assembly (,030" Oversize) 469 694420<br />
26 498680 Ring Set (Standard) 523 691913<br />
498681 Ring Set (,010" Oversize) 529 692189<br />
498682 Ring Set (,020" Oversize) 534 691417<br />
498683 Ring Set (,030" Oversize) 535 698369<br />
27 691588 Lack-Piston Pin 536 698472<br />
28 298909 Pin-Piston (Standard) 592 690800<br />
298908 Pin-Piston (,005" Undersize) 597 691696<br />
29 496792 Rod-Connecting 608 499706<br />
32 691664 Screw (Connecting Rod) 612 496046<br />
33 296676 Valve-Exhaust 617 270344<br />
34 296677 Valve-Intake 621 692310<br />
35 690520 Spring-Valve (Intake) 633 691321<br />
36 690520 Spring-Valve (Exhaust) 635 66538<br />
37 691209 Guard-Flywheel 668 692889<br />
40 692194 Retainer-Valve 670 691633<br />
43 698690 Slinger-Governor/Oil 689 691855<br />
45 691762 Tappet-Valve 718 690959<br />
46 691998 Camshaft 718A 499047<br />
50 693446 Manifold-Intake 741 691805<br />
51 270345 Gasket-Intake 832 691443<br />
54 691111 Screw (Intake Manifold) 836 691443<br />
55 692144 Housing-Rewind Starter 842 691876<br />
58 692259 Rope-Starter 851 493880<br />
60 691915 Grip-Starter Rope 869 691701<br />
65 690837 Screw (Rewind Starter) 870 691702<br />
73 691235 Screen-Rotating 871 231348<br />
90 498811 Carburetor 63709<br />
97 691931 Shaft-Throttle 913 494409<br />
106 691901 Seat-Inlet 957 497929<br />
130 691190 Valve-Throttle 976 694394<br />
163 271139 Gasket-AirCleaner 1095 498526<br />
180 494406 Tank-Fuel 1210 499901<br />
190 691697 Screw (Fuel Tank) 1211 499901<br />
190A 692198 Screw(FuelTank) 1218 695866<br />
Description<br />
Blade-Governor<br />
Link-Air Vane<br />
Spring-Governor<br />
Spring-Governed<br />
Bracket-Control<br />
Muffler<br />
Idle<br />
Housing-Blower<br />
Screw (Blower Housing)<br />
Shield-Cylinder<br />
Screw (Cylinder Shield)<br />
Nut (Flywheel)<br />
Armatu re-Mag neto<br />
Screw (Magneto Armature)<br />
Plug-Spark<br />
Wire-Stop<br />
Wire-Stop<br />
Gasket Set-Engine<br />
Screw (Carburetor)<br />
Spring-Choke Diaphragm<br />
Screen-Carburetor<br />
Gasket-Carburetor Pump<br />
Screw (Governor Blade)<br />
Cup-Flywheel<br />
Plate-Pawl Friction<br />
Ring-Rotating<br />
Dipstick<br />
Grommet<br />
Trim<br />
Screw (Air Cleaner)<br />
Filter-Air Cleaner Foam<br />
Cleaner-Air<br />
Nut (Rewind Starter)<br />
Screw (Pawl Friction Plate)<br />
Starter-Rewind<br />
Tube-Pick Up<br />
SeaI-O Ring (Intake<br />
Switch-Stop<br />
SeaI-ChoketThrotUe<br />
Boot-Spark Plug<br />
Spacer<br />
Spacer-Fuel Tank<br />
Spring-Friction<br />
Pin-Locating<br />
Pin-Locating<br />
Gear-Timing<br />
Guard-Muffler<br />
Manifold)<br />
Shaft<br />
Screw (Muffler Guard)<br />
SeaI-O Ring (Dipstick)<br />
Terminal-Spark Plug<br />
Seat-Valve (Intake)<br />
Seat-Valve (Exhaust)<br />
Bushing-Guide (Exhaust)<br />
Bushing-Guide (Intake)<br />
Seat-Check Valve<br />
Cap-Fuel Tank<br />
Primer-Carburetor<br />
Gasket Set-Valve<br />
Pulley/Spring Assembly (Pulley)<br />
Pulley/Spring Assembly (Spring)<br />
SeaI-O Ring (Carburetor)<br />
22
Sears, Roebuck and Co., U.S.A. (Sears), the California Air Resources Board (CARB) and<br />
the United States Environmental Protection Agency (U.S.EPA)<br />
Emission Control System Warranty Statement<br />
(Owner's Defect Warranty Rights and Obligations)<br />
EMISSION CONTROL WARRANTY COVERAGE IS a, Fuel Metedng System<br />
APPLICABLE TO CERTIFIED ENGINES PURCHASED IN<br />
Cold start enrichment system<br />
CALIFORNIA IN 1995 AND THEREAFTER WHICH ARE<br />
Carburetor and internal <strong>parts</strong><br />
USED IN CALIFORNIA, AND TO CERTIFIED MODEL<br />
YEAR 1997"AND LATER ENGINES WHICH ARE<br />
Fuel Pump<br />
PURCHASED AND USED ELSEWHERE IN THE UNITED<br />
b. Air Induction System<br />
STATES (AND AFTER JANUARY 1, 2001 IN CANADA).<br />
Air cleaner<br />
Intake manifold<br />
California and U.S. EPA Emission Control Warranty<br />
Statement Your Warranty Rights and Obligations<br />
c. Ignition System<br />
The California Air Resources Board (CARB), U.S.EPA and<br />
Spark plug(s)<br />
Sears are pleased to explain the Emission Control System<br />
Magneto ignition system<br />
Warranty on your r'nedel year 2000 and later small off-roed d. Catalyst System<br />
engine (SORE). In California, new small off-reed engines<br />
Catalytic converter<br />
must be designed, built and equipped to meet the State's<br />
Exhaust manifold<br />
stringent anti-smog standards. Elsewhere in the United<br />
States, new non*mad, spark-ignition engines certified for<br />
model year 1997" and later, must meet similar standards set<br />
forth by the U.S.EPA. Sears must warrant the emission<br />
control system on your engine for the pedods of time listed<br />
below, provided there has been no abuse, neglect, or<br />
improper maintenance of your small off-mad engine.<br />
Your emission control system may include <strong>parts</strong> such as the<br />
carburetor or fuel-injection system, the ignition system, and<br />
catalytic converter. Also included may be hoses, belts,<br />
connectors and other emission related assemblies.<br />
Where a warrantable condition exists, Sears will repair your<br />
small off-road engine at no cost to you including diagnosis,<br />
<strong>parts</strong> and labor.<br />
Sears Emission Control Defects Warranty Coverage<br />
The 1995 and later small off-road engines are warranted for<br />
two years. If any emission-related part on your engine is<br />
defective, the part will be repaired or replaced by Sears.<br />
Owner's Warranty Responsibilities<br />
As the small off-road engine owner, you are responsible for<br />
the performance of the required maintenance listed in this<br />
owner's manual. Sears re<strong>com</strong>mends that you retain all your<br />
receipts covering maintenance on your small off-mad<br />
engine, but Sears cannot deny warranty solely for the lack of<br />
receipts or for your failure to ensure the perfon'nance of all<br />
scheduled maintenance.<br />
As the small off-road engine owner, you should however be<br />
aware that Sears may deny you warranty coverage if your<br />
small off-road engine or a part has failed due to abuse,<br />
neglect, improper maintenance or unapproved modifications.<br />
You are responsible for presenting your small off-road<br />
engine to an approved Sears Service Center as soon as a<br />
problem exists. The warranty repairs should be <strong>com</strong>pleted in<br />
a reasonable amount of time, not to exceed 30 days.<br />
If you have any questions regarding your warranty rights and<br />
responsibilities, you should contact a Sears Service<br />
Representative at 1-800-459-4553.<br />
Sears Emission Control Defects Warranty Provisions<br />
The following are specific provisions relative to your<br />
Emission Control Defects Warranty Coverage.<br />
1, Warranted Parts<br />
Coverage under this warranty extends only to the <strong>parts</strong><br />
listed below (the emission central systems <strong>parts</strong>) to the<br />
extent these <strong>parts</strong> were present on the engine purchased.<br />
Air injection system or pulse valve<br />
e. Miscellaneous Items Used in Above Systems<br />
Vacuum, temperature, position, time sensitive valves<br />
and switches<br />
Connectors and assemblies<br />
2, Length of Coverage<br />
Sears warrants to the initial owner and each subsequent<br />
owner that the Warranted Parts shall be free from<br />
defects in materials and workmanship which caused the<br />
failure of the Warranted Parts for a period of two years<br />
from the date the engine is delivered to a retail<br />
purchaser.<br />
3, No Charge<br />
Repair or replacement of any Warranted Part will be<br />
performed at no charge to the owner, including<br />
diagnostic labor which leads to the deten'nination that a<br />
Warranted Part is defective, if the diagnostic work is<br />
performed at an approved Sears Service Center.<br />
4, Claims and Coverage Exclusions<br />
Warranty claims shall be filed in accordance with the<br />
provisions of the Sears Warranty Policy. Warranty<br />
coverage shall be excluded for failures of Warranted<br />
Parts which are not original Sears <strong>parts</strong> or because of<br />
abuse, neglect or improper maintenance as set forth in<br />
the Sears Engine Warranty Policy. Sears is not liable to<br />
cover failures of Warranted Parts caused by the use of<br />
add-on, non-original, or modified <strong>parts</strong>.<br />
5, Maintenance<br />
Any Warranted Part which is not scheduled for<br />
replacement as required maintenance or which is<br />
scheduled only for regular inspection to the effect of<br />
"repair or replace as necessary" shall be warranted as to<br />
defects for the warranty period. Any Warranted Part<br />
which is scheduled for replacement as required<br />
maintenance shall be warranted as to defects only for<br />
the period of time up to the first scheduled replacement<br />
for that part. Any replacement part that is equivalent in<br />
performance and durability may be used in the<br />
performance of any maintenance or repairs. The owner<br />
is responsible for the performance of all required<br />
maintenance, as defined in this owner's manual.<br />
6, Consequential Coverage<br />
Coverage hereunder shall extend to the failure of any<br />
engine <strong>com</strong>ponents caused by the failure of any<br />
Warranty Part still under warranty.<br />
Inthe USA_nd Canadai a 24-hourhotline, "i-800_469_4663ihas amenu of pre_recerdedmessages OfferingyOUproduct<br />
maintenance information<br />
23
GARANTIA .................................... 24<br />
INSTRUCCIONES DE SEGURIDAD .............. 24-26<br />
MONTAJE .................................. 28-29<br />
OPERACION ................................ 30-32<br />
MANTENIMIENTO ............................ 33-36<br />
ESPECIFICACIONES ............................ 33<br />
ALMACENAMIENTO ............................. 37<br />
REPARACION DE DAI_IOS ........................ 38<br />
GARANTIA DEL CONTROL DE EMISIONES ......... 39<br />
COMO ORDENAR PARTES ...... PAGINA POSTERIOR<br />
GARANTIA LIMITADA DE LA MAQUINA LAVADORA DE PRESION CRAFTSMAN<br />
Durante un aria a partir de la fecha de <strong>com</strong>pra, Sears reparar_, sin cargo alguno, cualquier defecto en matedal y mano de<br />
obra, siempre y cuando esta m_quina lavadora de alta presi6n Craftsman haya sido mantenida y puesta en funcionamiento<br />
de acuerdo a lea instrucciones suministradas en el manual del propietado.<br />
Si esta m_quina lavadorg es usada pare fines <strong>com</strong>ereiales, la garantia se aplicar_ tan solo por 90 dies a partir de la fecha<br />
de <strong>com</strong>pra. Siesta mdquina lavadora de alta presi6n es usada pare alquiler, la garantia se aplicard tan solo por 30 dies<br />
despu6s de la fecha de <strong>com</strong>pra.<br />
Esta garantia<br />
no cubre:<br />
Elementos perecederos <strong>com</strong>o bujias O filtros de aire, los cuales se desgastan con el usa normal.<br />
Reparaciones necesarias debido al abuso o negligencia del operador, incluyendo danos ocasionados par la ausencia de<br />
suministro de ague ala bomba o par no mantener el equipo de acuerdo a lea instrucciones contenidas en el manual del<br />
propietario.<br />
El servicio de garantia se hace efectivo devolviendo la m_quina lavadora de alta presi6n al centro de servicio o distribuidor<br />
Sears mas cercano en los Estados Unidos.<br />
Esta garantia le proporciona derechos legales especificos; usted tambi6n puede tener otros derechos, los cuales varian de<br />
estado a estado.<br />
Sears, Roebuck and Co., Dept. 817 WA, Hoffman Estates, IL 60179<br />
_lk ste es el simbolo de alerta de seguridad, Es usado para indicarle situacione$ con paligros potenciales de<br />
lesion pare el personal. Siga lag instrucciones de todos los mensajes de seguridad que aparscen despues de<br />
este simbolo pars evitar posibles lesiones o muerte.<br />
[_Lea este manual minuciosamente y conozca a<br />
rondo las partes y el funcionamiento de su<br />
m_quina lavadors a presi6n, Conozca sus<br />
aplicaciones, sus limitacione$ y los peligros<br />
involucrados,<br />
El simbolo de alerta de seguddad (_k) es usado con una<br />
palabra (PELIGRO, ADVERTENCIA, PRECAUCI(_N), un<br />
mensaje por escrito o una ilustracibn, pare alertarlo acerca<br />
de cualquier situaci0n de peligro que pueda existir.<br />
PELIGRO indica un riesgo el cual, si no se evita, ceusa_ la<br />
muerte o una herida grave. ADVERTENCIA<br />
indica un riesgo<br />
el cual, si no se evita, puede causer la muerte o una hedda<br />
grave. PRECAUCION indica un riesgo, el cual, si no se<br />
evita, puede causer heridas menores o moderadas.<br />
PREOAIJCI6N, cuando se usa sin el simbolo de alerta,<br />
indica una situaci0n que podria resultar en el della del<br />
equipo. Siga los mensajes de seguridad pare evitar o reducir<br />
los desgos de heridas e inclusive<br />
la muerte.<br />
Simbolos de Peligro y Significados<br />
Gases T0xicos<br />
DescargaElectrica<br />
Superficies Resbalosas Caer Inyecci6nLiquida<br />
Fue£o Explosion Superficie Caliente<br />
Partes en Movimiento Objetos Voladores Contragolpe<br />
24
-_-nel estado de California es obligatorio, seg0n la lay, el use<br />
_e apagachispas (Secci6n 4442 del C6digo de Recursos<br />
=0blicos de California), Otros estados pueden tener leyes<br />
_imilares, Las leyes federales se aplican en tierras<br />
'ederales, Si equipa el silensiador con un apagashispas,<br />
_ste debe_ ser mantenido en buenas condiciones de<br />
I<br />
:rabajo, Usted puede ordenar el apagachispas a tray,s de<br />
_u distribuidor de servicio autorizado Sears,<br />
ADVERTENClA<br />
El escape del motor de este producto conSene<br />
elementes quimicos reconocido$ en el Estado de<br />
California per producir c_ncer, defecto$ de nacimiento<br />
u arras dafies de t po reproducUvo.<br />
PELIGRO<br />
, Oper'e e] lavadora de presibn SOLAMENTE al sire libr_<br />
, Utilic_ un respirador o mascara siemp_'equa exists la<br />
posib!lidad de inhalar vapores.<br />
' Lea fades las instrucciones de la m_scara paraasegurarse de<br />
qua le brindar,_ la protecoi6n nec_safia contrala inhalacibn de<br />
vapores natives.<br />
ADVERTENCIA<br />
CUAN D0 AI_ADA CoMBUsTI BI-E<br />
, Apague el generador (posici6n OFF) y dejelo enffiar sl menos<br />
pot2 minutGe antes de rem0ver la taps de la gas01ina.<br />
NO iler_ demaslada el tanquei Permits al men0s espaci0 pars<br />
, Mantenga Is gasolina alejada de ahispas, llamas abiertasi<br />
pil_toSi aalor y otraS fU_ de ignition<br />
, NO encienda un cigarfill0 0 fume.<br />
CUANDO OPERE EL. EQUIPO<br />
' NO incli_ el mot0r 0 el equips, de tal manera qua la gasalina<br />
se puede derramar.<br />
NO retie liquides inftamables.<br />
CUANDO TRANSPORTE 0 REPARE EL EQUIPO<br />
, Transp0rte 0 repare el _Uip0 c_n _1 tanqu_ de <strong>com</strong>bustib!e<br />
VaCIOi _ COn la v_Ivula pa_ apagar el COmbustible, apagada<br />
(posici0n OFF)<br />
CUANDO ALMACENE O GUARDE EL EQUIPO CON<br />
COMBUS'I'IBLE EN EL "I'ANQUE<br />
, AIm_e alejado de cald_s, estufaSi calentaderes de agua,<br />
secadaras de raps U 0ires aparatas elactrodom_-s'dcoS qua<br />
pasean pi!ot_s U _ras _en_ d_ igni¢ibn, ponque el!as p_den<br />
engender 10s Vapo_ de la gasolina<br />
ADVERTENCIA<br />
de Io contrario podrfan _cw'rir d_argas el6ctrJcas fatales.<br />
roaiada cu_ndo el sistema este presurizada:<br />
ADVERTENCIA<br />
'El ar'ea de limpieza deber_ tenet ina!!na_ianes y drenajes<br />
adecoadaa pars d isrninui_ la pasibilided de coidas debido<br />
superficies resbalosas.<br />
Oper'e y almacone<br />
esta unidad sabr_ una superficie estable<br />
, Sujete !a pistols de la hidrolavadara "firmemerfie- con ambas<br />
manes ,;uanda uti!ice e! t'ociado a a!ta presi_n D_ esl:a manem<br />
evitar_ lesiones praducidas par _1 posilale galpe de la pistols<br />
haaia atr_s.<br />
' NO toque ias superFiaie.scalierfies.<br />
• Mantengase alejada de !as gases de escape.<br />
, NUNCA mueva el equipo mientras este en "_unrJanamiento.<br />
, Permits qua el_uipo se enfrie antes de rosario.<br />
25
PRECAUCION<br />
'NO asegur_ la pistola de rociado en la posicibn (open =<br />
, NUNCA Utilir_ una p_st01a de rociad0 q0e no _:enga un segUro<br />
Para gatill0 0 P_ci0n Para gstill0 e n su !ugar Y e n buenas<br />
_ondiciones.<br />
PRECAUCION<br />
PRECAUCION<br />
, $i 0Sl:ed tiene _lguna preg0n_a _ce_a de ITS5nalidach_s do us0<br />
d_ I gen_rad0 r, Pr'_0nte!_ a SO c0ncos!0nario O ¢_ntac_ a<br />
, NUNCA de_r_n set 0p_mdas las Unidades _n part_ _s o<br />
o cuando est6 corca de donde se _t_ usando el equip0<br />
PRECAUCION<br />
,NO<br />
eluda nirrg0n disp0sitivo de seg0ridad de esta m_q0ina.<br />
A ntis de p0ner en ma_cha la mAquina lavadora a p_!_n en<br />
#lima frio. _vise todas !as part_ de! equip0 y aseg0_'P_sed8<br />
qU_ n0 se haya formado hiel0 sobre elias.<br />
, NUNCA mueva la m_q0ina halande la manguera de al_a<br />
presi0n. U_i!!co !a rnanija que viene _n la unidad.<br />
, Revise que el sistema de <strong>com</strong>bustible no present_ fugas o<br />
signos d_ d_i0roi _rno mangue_s de..sgastadas 0 po_sasi<br />
26
CONOZCA SU MAQUINA LAVADORA DE PRESION<br />
Lea el manual dal propiatario y lae reglae de eaguridad antes de poner an marcha eu m_quina lavadora a preeibn,<br />
Compare las ilustraciones con su mdquina lavadora a presibn para familiarizarse con las ubiceciones de los diferentes<br />
controles y ajustes. Guarde este manual para referencias futuras,<br />
Pislola de Rociado<br />
Boquilla Ajustab!e<br />
Poseedo<br />
r Ace..eso ria<br />
ExtensiOn para<br />
Filtro de Aite<br />
Palance de Control dR I_<br />
Vtllvula de Regu!acibn<br />
Arrancad0r de Retr0ceso<br />
Extension<br />
papa B0quillas<br />
Tapa<br />
del Depbsito<br />
Filtro y Tubo para<br />
Reco!e¢_iOnde Detergente<br />
Bombilla mc_ls<br />
Principal<br />
pa de la<br />
Gasolina<br />
Entrada de Agua<br />
I'oma deAl_<br />
PresiOn<br />
Elomba equ!pped with<br />
Autom_ice se Enfria Sistema<br />
Arrancador de Retroceso - Usado para el arranque del motor.<br />
Autom_tico ea Enfria Sietema - Los ciclos regan por<br />
bomba cuando agua alcenza 125'_-155'_F. Entibiar agua<br />
deacargar_ de la bomba en el eualo, Eete eietema<br />
previane el daffo intemo de bomba.<br />
Bomba - Desarrolla alta presibn de agua,<br />
Bombilla m_e Principal -- Usada para arranque de<br />
motores frios,<br />
Boquilla Ajuetable -Ajusta la presibn a alta o baja presi6n;<br />
rociado a chorm o en abanice,<br />
Entrada de Agua - ConexiOn para la manguera de jardin.<br />
Exlenei6n para Etoquillea - Conectada a la pistola de<br />
rociado para un uso m_s conveniente.<br />
Exlenei6n para Etoquillea Turbo - La boquilla del turbo<br />
gira la corriente alta de la presiOn en un modelo circular<br />
r_pido para limpiar agresivo.<br />
Filtro de Aire - El elemento de filtro tipo sece limita la<br />
centidad de suciedad y polvo qua se introduce en el motor,<br />
Filtro y Tubo para Recolecci6n de Datergente - Usado<br />
para succionar detergente de la botella de quimices a la<br />
cerriente de agua de baja presi6n,<br />
Manguara de Alta PresiOn (no moetrado) - Conecte un<br />
extremo a la pistola de rociado y el _ro extremo a la toma<br />
de alta presibn.<br />
Palanca de Control de la V_lvula de Regulaci6n - Coloce<br />
el motor en modo de arranque para el arrancedor de<br />
retroceso y detiene el motor en funcionamiento,<br />
Pietola de Rociado - Controla la apliceci6n de agua sobre<br />
la superficie de limpieza con el gatillo, Incluye cerrojo de<br />
seguridad,<br />
Poeeador Acceaoria - Proporeiona cenvienant<br />
almacenamiento para el pistola de rociado, el extension<br />
para boquillas turbo y extensi6n para boquillas.<br />
Tapa de la Geaolina - Liana el tanque del <strong>com</strong>bustible con<br />
gasolina regular sin centenido de plomo en este punto,<br />
Tapa dal Depbeito dal Aceite - Llene el motor con aceite<br />
aqui. Vea la p_gina 28 para las recemendaciones del aceite<br />
y las instrucciones de Ilenado.<br />
Toma de Alta PreaiOn - Conexibn para la manguera de<br />
alta presi6n,<br />
27
Su m_quina lavadora a presi6n requiere de oierto ensamble<br />
y estar_ lista para ser usada 0nicamente despu_s de haber<br />
depesitado el <strong>com</strong>bustible y el acoite re<strong>com</strong>endado.<br />
Si tiene problemas con el ensamble de su m_quina<br />
lavadora a presi6n, Ilame a la linea de ayuda de la<br />
m_quina lavadora a presi6n al 1-800-222-3136.<br />
IMPORTANTE: Cualquier intento de hacor funoionar el<br />
moLor sin haber depesitado el aceite re<strong>com</strong>endado resultar_<br />
en falla del mismo.<br />
RETIRE LA MAQUINA LAVADORA A<br />
PRESlON DE LA CAJA<br />
Abra la caja y code dos esquinas opuestas a la manija<br />
guia de la parle superior a la inferior de tal forma que el<br />
panel pueda set doblado hacia abajo.<br />
Retire el material de relleno y la caja de repuestos<br />
enviada con la mt=quina lavadora a presi6n.<br />
Retire la m&quina lavadora<br />
a presi6n de la caja.<br />
Revise la caja para vet si existen partes sueltas adicionales.<br />
CONTENIDO<br />
DE LA CAJA<br />
Revise el contenido de la caja. Si alguna de las partes NO<br />
est_ presente o est_ dafiada, Ilame a la Iinea de ayuda de<br />
la m_quina lavadora a presiOn al 1-800-222-3136.<br />
La unidad prinoipal<br />
La manguera de alta presibn<br />
l=istola de rociado<br />
Extensidn para boquillas con boquilla ajustable a<br />
Alta/Baja presidn<br />
Boquilla turbo<br />
FIoseedor<br />
aocesorJo<br />
Aceite para motor<br />
Caja de parLes (incluye los elementes descdtes a<br />
continuacibn)<br />
Manual del operador<br />
Tarjeta de la matricula<br />
Familiaricose con cada parte antes de ensamblar la<br />
m_quina lavadora a presiOn. Compare el contenido con la<br />
ilustracibn de la p_gina 27. Si alguna de la partes NO est_<br />
presente o se encuentra dafiada, Ilame a la Iinea de ayuda<br />
de la m_quina lavadora a presibn al 1-800-222-3136.<br />
MONTAJE DE LA MAQUINA<br />
LAVADORA A PRESION<br />
La gran mayoda de su m_quina lavadora a presiOn Craftsman<br />
ha sido ensamblada en la fdbrica. Sin embargo, usted deberd<br />
Ilevar a cape los siguientes presedimientes antes de poner en<br />
funcionamiento su m_quina lavadora a presibn:<br />
1. Deposite acoite en la caja del cigiJeffal del motor.<br />
2. Deposite <strong>com</strong>bustible en el tanque.<br />
3. Conecte la manguera de alta presibn a la pistola de<br />
rociado y a la bomba.<br />
4. Conecte el suministro de agua a la bomba.<br />
Fijar el Poseedor Accesorio<br />
1. Coloque al peseedor acoesorio en la cima del manubrio.<br />
2. Coloque al extension para boquillas, boquilla turbo y<br />
pistola de rociado en el peseedor accesorio.<br />
Agregue Aceite de Motor<br />
IMPOR'I'ANTE: Cualquier intento de hacor girar o arrancar<br />
el motor antes de que se haya depesitado el acoite<br />
re<strong>com</strong>endado puede resultar en falla del motor.<br />
NO'[A: Cuando agregue aceito al <strong>com</strong>partimiento del motor,<br />
utilise 0nicamento aoeite detergento de alta calidad, designado<br />
con la clesilicaoibn API de servicio SF, SG, SH, SJ o superior,<br />
clesificado con el peso SAE 30. NO use aditives espeoiales.<br />
1. Selecoione una viscosidad de acuerdo a la tabla siguiente.<br />
},<br />
El uso de acoites multigrado (5W-30, 10W-30, etc.) en<br />
temperaLures mayores a los 40'_F (4_C) esesionar_ un<br />
consume de aceite mayor al normal. Cuando utilice un<br />
acoite multigrado, revise con mayor frecuencia el nivel de<br />
acoite del motor.<br />
** Si utiliza aceite SAE 30 en temperaturas inferiores a los<br />
40_F (4'_C), ocasionard que el arranque sea m_s dificil e<br />
incluso que se desbiele el motor debido a su inadecuada<br />
lubricacibn intern&<br />
2. Coloque la mdquina lavadora a presibn en una<br />
superficie nivelada.<br />
3. Limpie area alrededor del Ilenado de aceite.<br />
4. Retire tap6n del of Qdo de Ilenado y la varilla de rTedici6n.<br />
5. Limpie la varilla de medici6n, insertela en el odficio de<br />
Ilenado y aprietela firmemente; retire la varilla de<br />
medici6n. Depesite el acoite re<strong>com</strong>endado hesta la<br />
marca "Full" ("Lleno") de la varilla de medici6n.<br />
DE_OSITAR {_ LLENO<br />
iiiiiiiiiiiiiiiiiiiiiiiiiiii<br />
_iiiiiiiiiiiiiiiiiiiiiiiiiiiiiiiiiiiiiiiiiiiiiiiiiiii<br />
........................... .........................<br />
28
6, Deposite el aceite lentamente. Limpie la vadlla de<br />
medici6n cada vez que revise el nivel del aceite. NO<br />
Ilene excesivamente,<br />
7, Instale el tap6n del orificio de Ilenado de aceite y la<br />
varilla de medicibn y aprietela firmemente.<br />
NOTA: Revise el aceite frecuentemente durante el<br />
despegue del motor.<br />
Agregue Gasolina<br />
A<br />
IADVERTENCIA! NUNCA Ilene el tanque de<br />
<strong>com</strong>bustible en recintes cerrades. NUNCA Ilene el<br />
tanque de <strong>com</strong>bustible cuando el motor est_<br />
funcionando o est_ caliente. NO fume cuando est_<br />
Ilenando el tanque de <strong>com</strong>bustible.<br />
,_ tanque IADVERTENCIA! de <strong>com</strong>bustible, NUNCA Deje Ilene espacio pot para <strong>com</strong>pleto la el<br />
expansibn del <strong>com</strong>bustible, Limpie cualquier derrame<br />
de <strong>com</strong>bustible del motor y del equipo antes de darle<br />
arranque a la unidad,<br />
1, Use <strong>com</strong>bustible limpio y almac_nelo en recipientes<br />
cubiertes, limpies y aprebades. Utilice embudes limpies,<br />
NUNCA utilice gesolina "vieja" dejada de la estaci6n<br />
anterior o gesolina almacenada por periodes de tiempo<br />
prolongades.<br />
2, Limpie el drea alrededor de la tapa de Ilenado del<br />
<strong>com</strong>bustible, retire la tapa.<br />
3, Agregue lentamente gasolina regular"SIN PLOMO" al<br />
tanque de <strong>com</strong>bustible, Use un embudo para evitar que<br />
se derrame, Llene el tanque lentamente hesta<br />
aproximadamente 1.5" pot debajo de la parle la cima<br />
del cuello del tubo de Ilenado.<br />
1, Desenrrelle la manguera de alta presibn y conecte un<br />
extremo de la manguera a la base de la pistola de<br />
rociado, Apriete con la mano,<br />
2. Conecte el if(re extremo de manguera de atia presi6n a<br />
salida de alta presi6n de bomba, Apriete con la mano,<br />
3, Antes de que conecte la manguera de jardin a la<br />
entrada de agua, inspecoione el colador de la entrada.<br />
Limpie el colador si tiene residues o solicite su<br />
remplazo si est_ datiado. Refi(_rase a la secoi6n<br />
=Mantenimiento de los Anilles 'O'" si la colador de la<br />
entrada se dafiado, NO haga funcionar la m_quina<br />
lavadora a preeibn ei el colador de la entrada eet_<br />
dahado, NUNCA agua de cala de siphon,<br />
Inspecoione la<br />
rejilla de entrada,<br />
- NO la use si est_<br />
datiada, limpiela si<br />
_e encuentra sucia,<br />
4, Haga cower el agua a tray,s de la manguera de su<br />
jardin pot 30 segundes para limpiar cualquier es<strong>com</strong>bro<br />
que se encuentre en ella.<br />
5, Conecte la manguera de jardin (no exceder 50 pies en<br />
la Iongitud) a la entrada del agua. Apriete con la mano.<br />
PRECAUCIbN<br />
4, Instale la tapa del tanque de <strong>com</strong>bustible y limpie la<br />
gesolina que se haya derramado,<br />
IMPORTANTE: Es importante evitar la formacibn de depbsites<br />
de goma en les partes esenciales del sistema de <strong>com</strong>bustible<br />
<strong>com</strong>o en el carburador, filtre del <strong>com</strong>bustible, manguera del<br />
<strong>com</strong>bustible o tanque, durante su almacenamiento, Los<br />
<strong>com</strong>bustibles mezclades con alcohol (llamades gesohol, etanol<br />
o metanol) pueden atraer la humedad, la cual produce la<br />
separaci6n y formacibn de _cides durante el almacenamiento.<br />
La gesolina _cida puede dafiar el sistema de <strong>com</strong>bustible de<br />
un motor durante su almacenamiento.<br />
Para evitar problemes en el motor, deber_ vaciar el sistema de<br />
<strong>com</strong>bustible antes de periodes de almacenamiento de 30 dies<br />
o m_s. Yes "Almacenamiento" en la p_gina 37, NUNCA use<br />
productes para limpiar motores o cerburadores en el tanque<br />
del <strong>com</strong>bustible; si Io hace esurrir_n daties permanentes.<br />
Conecte la Manguera y el Surninistro de<br />
Agua a la Bornba<br />
IMPORTANTE: Usted deberb armar la extension para<br />
boquilles y conectar todas les mangueres antes de darle<br />
arranque al motor. La bomba resutiar_ dafiada si arranca el<br />
motor sin tenet todes les mangueres conectades y el<br />
suministre agua abierto,<br />
esta<br />
precauc!6ni no ser_ Cub!ertopot !a garan_fa.<br />
6, ABRA el suministre del agua (abra la v_lvula de<br />
suministre <strong>com</strong>pletamente),<br />
Lista de Revision Previa al Arranque del<br />
Motor<br />
Revise la unidad para aseguraree<br />
siguientes procedimientes:<br />
que ha Ilevado a cabo los<br />
1, Revise que haya sido depesitado aceite y est_ al nivel<br />
correcto en la caja del cig0efial del motor.<br />
29
2, Deposite la gasolina adecuada en tanque del <strong>com</strong>bustible.<br />
3. Revise que todas las conexiones de las mangueras<br />
(alta presi6n y suministro de agua) est6n apretadas<br />
correctamente y que no existan dobleces, cortes o daf_o<br />
de la manguera de alta presi6n, 8.<br />
4. Proporcione el suministro de agua adecuado (que no<br />
exceda los 100°F),<br />
5. Asegt_rese de leer las secciones "Reglas de Seguridad" y<br />
"Operacidn" antes de usar la m_quina lavadora a presidn.<br />
6. Siva a encender la unidad deepu6s de haber estado<br />
almacenada, consulte la secci6n "Almacenamiento" en<br />
la p_gina 37. 9.<br />
COMO USAR SU MAQUINA<br />
LAVADORA A PRESION<br />
Si tiene problemas operando su m&quina lavadora a<br />
presidn, por favor Ilame a la linea de ayuda para m_quinas<br />
lavadoras a presi6n al 1-800-222-3136<br />
Cbmo Darle Arranque a su M_quina<br />
Lavadora a Presibn<br />
Para darle arranque a su maquina lavadora a presi6n<br />
movida a motor por primera vez, siga estas instrucciones<br />
paso a paso. Esta informaci6n acerca del arranque inicial<br />
tambi6n se aplica cuando vaya a darle arranque al motor<br />
despu6s de haber dejado de la m_quina lavadora a presidn<br />
fuera de uso por al menos un dia.<br />
1. Coloque la m_quina lavadora a presi6n en un _rea cercana<br />
a una suministro de agua exterior capaz de abastecer agua<br />
a un volumen mayor de 3.0 galones por minL_oen no<br />
menos que 20 PSI en el fin de arandela de presi6n de la<br />
manga del jardin.<br />
2. Revise que la manguera de alta presi6n se encuentre<br />
conectada firmemente a la pistola de rociado y a la<br />
bomba. Vea "Armado de Su M_quina Lavadora a Presidn".<br />
3. Asegt_rese que la unidad est6 nivelada.<br />
4. Conecte la manguera de jardin a la entrada del agua.<br />
Aprietela con la mano. Abra el suministro de agua,<br />
5.<br />
6.<br />
PRECAUCION<br />
• El daSo a la lavadora a presi6n, resultado de la desatenci6n a<br />
esta precauci6n, no sera cubierto pot la garantia.<br />
Presione el disparador en la pistola para purgar de aire<br />
e impurezas el sistema de bombeo.<br />
Acople la boquilla de extensi6n<br />
Apri6tela manualmente.<br />
\<br />
a la pistola aspersora.<br />
pistola mediante un ligero flujo. Continee sosteniendo el<br />
disparador hasta que haya un flujo estable de agua y<br />
no quede reeiduo alguno de aire en el sistema. Suelte<br />
entonces el disparador.<br />
Fije el pestillo de seguridad al disparador de la pistola<br />
aspersora.<br />
Cerrojo de<br />
Seguridad<br />
Mueva el control de la v_lvula de admisidn a la posicidn<br />
"R&pido" ("Fast"), que se distingue con la figura de un<br />
conejo.<br />
R_pido<br />
Parado<br />
V_Ivula<br />
de<br />
Admisi6n en<br />
la posici6n<br />
"Parado"<br />
NOTA: En el caso de que el motor est6 caliente, asegt_rese<br />
de que la control de la v_lvula de admisi6n se encuentre en<br />
]a posici6n "Rbpido" ("Fast").<br />
Para <strong>com</strong>enzar<br />
el motor para el tiempo muy primer:<br />
10. Asegerese de que la control de la v_lvula de admisi6n<br />
se encuentre en la posici6n "Rbpido" ("Fast"), que se<br />
distingue con la figura de un conejo,<br />
11. Empuje bombifla m&s principal firmemente vez de 5,<br />
esperando 2 segundos entre cada empuj6n, Revise las<br />
instrucciones especificas del <strong>com</strong>ienzo de motor en el<br />
manual de duefios de motor.<br />
Para <strong>com</strong>enzar<br />
motor despu_s:<br />
10. Asegt_rese de que la control de la v_lvula de admisiOn<br />
se encuentre en la posiciOn "Rbpido" ("Fast"), que se<br />
distingue con la figura de un conejo.<br />
11. Empuje bombilla mas principal firmemente vez de 3,<br />
esperando 2 segundos entre cada empuj6n. En el caso<br />
de que el motor est6 caliente, NO apriete la bombilla<br />
mas principal.<br />
12. Jale la cuerda de arranque lentamente con su mano<br />
derecha hasta que sienta alguna resistencia, entonces<br />
jale con energia.<br />
13. Regrese la cuerda de arranque lentamente. No permita que<br />
la cuerda regrese bruscamente y golpee el arrancador.<br />
PRECAUCI6N<br />
7.<br />
Coloque la boquilla en el modo de baja presi6n (deslice<br />
la boquilla hacia adelante) y presione el disparador en<br />
la pistola aspersora para liberar la presi6n provocada<br />
por haber abierto (ON) el agua. El agua Ilenar_ la<br />
\<br />
\<br />
• Apriete el gatillo de la pistola rociadora cada vez que tire del<br />
arrancador de retroceso y que el motor no arranque.<br />
30
iiiPREiCAUCilONiiiiiiiiiiiiiiiiiiiiiiiii<br />
NOTA: Siempre mantenga la control de v_lvula de admisibn<br />
en el "R_pido" ('Fast") posicione cu_ndo operar la arandela<br />
de la presibn.<br />
CSmo Detener su M__quina Lavadora a<br />
PresiSn<br />
1, Mueva v_lvula de admisibn a posicibn "Step" ("Parade").<br />
2, Apriete el gaUllo do la pistola do rociado para<br />
eliminar la presi6n do la manguera,<br />
NOTA: Observar_ una pequefla cantidad de agua cuando<br />
elir'nine la presi6n,<br />
MUeVa la b0quilla hacia atr,_s Mueva la b0quilla hacia<br />
para 0btener 81 mad0 de alia adelante papa 0btener _1modo<br />
presi6n<br />
de baja presi0n y para la<br />
ap!isaci#nde! detergente.<br />
3, El patn_n de rociado se ajusta de un patron angosto a<br />
un patrbn en abanico girando la boquilla,<br />
CSmo Usar la Boquilla Ajustable<br />
Usted ya debe saber came darle ARRANQUE a su r'n_quina<br />
lavadora a presi6n y cor'no DE'I'ENERLA. La inforrnaci6n de<br />
esta secci6n le dim cor'noajustar el patrbn de rociado y<br />
<strong>com</strong>a aplicar detergente u arras quimicos de lir'npieza,<br />
iiiiiPRECAUCilON<br />
, NUNCA ajUste 81 pal:r6n de rosiad0 _an_ _ ro_iand0.<br />
, NUNCA _10qu_ las marTas _rt _nte de la b0quilla pafa ajustar<br />
el pa.tr6n de rociado:<br />
En el extremo de su pistola de rociado existe una manija que<br />
se puede mover hacia adelante y hacia at_s para ajustar el<br />
patrbn de rociado para qua sea de alta o baja presibn,<br />
1, Apunte la boquilla hacia el suelo, desenganche el<br />
cerrojo de seguridad y apdete el gatillo para probar el<br />
patr6n de rociado,<br />
%<br />
Gire la boqui!la en sentid# Gire ]a boqui!la en sentido de<br />
contrado alas manecillas del las m_neciilas del reloj para un<br />
reloj para un patr6n de roe!ado patr6n de roe!ado a chorro<br />
en abanico.<br />
4, Para una limpieza m_s efectiva, mantenga la boquilla<br />
de rociado de 8 a 24 pulgadas de la superficie de<br />
limpieza,<br />
6,<br />
Si coloca la boquilla de rociado demasiado cerca podria<br />
daflar la superficie, especialmente cuando este usando<br />
el modo de alta presi6n,<br />
NO coloque la boquilla a menos de 6 pulgadas cuando<br />
est6 limpiando Ilantas,<br />
CSmo Usar la Boquilla a Chorro<br />
La boquilla a chorro hace girar la cordente de alta presibn<br />
en un patn_n circular _pido. El rociado de alta presi6n es<br />
r'n_s elective cuando la punta de la vara se encuentra entre<br />
8 y 24 pulgadas de la superficie qua se est_ lir'npiando,<br />
PRECAUCION<br />
2, Usted tambien puede ajustar el patrbn de rociado<br />
girando la boquilla para qua est6 concentrado en un<br />
patr6n de chorro o un patrbn expandido en abanico,<br />
, Aseg_rese de qua la superfi¢ieno resulte da_adadebidoale<br />
aH:apresi6n. Para elloi haga una prueba en une`zone.oculta.<br />
Para ¢onectar el boquilla a ¢horro a la piatola do<br />
rociado:<br />
1, Coloque el pasador de seguridad al gatillo de la pistola<br />
rociadora.<br />
2, Quite extensi6n de la lanza del pistola de rociado.<br />
31
3,<br />
4,<br />
Conecte el extension de la boquilla a chorro a la pistola<br />
de rociado. Apriete con la mano.<br />
\<br />
Desembarazo el pasador de seguridad al gatillo de la<br />
pistola rooiadora,<br />
Siempre <strong>com</strong>ience a usar la boquilla a chorro a cierta<br />
distancia y vaya acorcandose a la superficie<br />
gradualmente basra que obtenga la fuerza de limpieza<br />
que desee.<br />
NO'FA: Usted no puede aplicar detergente con la boquilla a<br />
ohorro,<br />
Aplicaci6n del Detergente Usando la<br />
Boquilla Ajustable<br />
IMPORTANTE: Utilico quimicos disefiados especificamente<br />
para mdquinas lavadoras a presibn, Los detergentes<br />
caseros poddan dafiar la bomba.<br />
PRECAUCION<br />
\<br />
8, Para lavar, <strong>com</strong>ienco en la porte inferior del area que<br />
est_ lavando y dirijase hacia arriba, utilizando<br />
movimientos largos, parejos y superpuestos.<br />
IMPORTANTE: Usted deber_ lavar el sistema de inyeooi6n<br />
de quimicos despu_s de coda uso colocando el filtro en un<br />
balde de agua limpia y haciendo funcionar la maquina<br />
lavadora a presi6n de 1 a 2 minutos en el modo de baja<br />
presi0n,<br />
Enjuage de la Mbquina Lavadora a<br />
Presion<br />
Para Enjuage:<br />
"1, Mueva la boquilla hacia at_s para obtener el modo de<br />
alto presi6n, oprima el gatillo y espere que deje de salir<br />
detergente.<br />
NO'FA: Tambi_n puede detener la cireulaci6n del detergente<br />
retirando el tubo de sucoi6n del recipiente,<br />
2, Mantenga la pistola de rociado a una distancia segura<br />
del area que planea rooiar,<br />
ADVERTENCIA<br />
Para aplicar el detergente, siga los aiguientes paso,s:<br />
1, Revise el uso de la boquilla ajustable.<br />
2, Prepare la solucibn detergente seg_in Io indic,ado para<br />
el trabajo de limpieza.<br />
3, Coloque el extremo con el filtro del tubo para sucoibn<br />
de detergente en el recipiente del detergente.<br />
PRECAUCION<br />
4, Mueva la boquilla ajustable haoia adelante para obtener<br />
el modo de baja presi0n. El detergente NO puede set<br />
aplicado si tiene la boquilla en la posicibn de alto<br />
presi6n,<br />
5, Aseg0rese que la manguera de jardin est_ conectada a<br />
la entrada del agua, Revise que la manguera de alto<br />
presi6n est_ conectada a la pistola de rociado y a la<br />
bomba. Dele arranque al motor,<br />
6, Aplique el detergente sobre la superficie seca,<br />
<strong>com</strong>enzando en la porte inferior y dirigi_ndose hacia<br />
arriba,<br />
3,<br />
4,<br />
, Mantenga la boqui!la de rociado de 8 a 24 pu!gadas de la<br />
superfk;ie de limpreza:<br />
, Oper_ y almacer_ esta unidad sobr_ una superficie _stabI_<br />
Sea extremadam_ cuidadoso si usa ]a maquinalavadora<br />
presi0n desde una escalera, andamio o c_Jalquiersuperficie<br />
i_lativamente inestable.<br />
Aplique un rociado de alto presibn en un area pequer3a,<br />
despu_s revise si la superficie presenta dafios, $i no<br />
encuentra dafios, puede continuar con el trabajo de<br />
limpieza.<br />
Comienco en la par|e superior del _rea que va a<br />
enjuagar, dirigiendose haoia abajo con los mismos<br />
movimientos superpuestos que utiliz6 para el lavado y<br />
la aplicacibn del detergente.<br />
Sistema de Enfriamiento Autom&tico<br />
(Alivio T6rmico)<br />
El agua que ciroula dentro de la bomba puede alcanzar<br />
tempera_uras entre los "125_-"155'_Fsi hace funcionar el<br />
motor de su maquina lavadora a presiOn de 3 a 5 minutos<br />
sin oprimir el gatillo de la pistola de rooiado. El sistema de<br />
enfriamiento autom_tico se activa a esta temperatura y<br />
enfria la bomba descargando agua caliente en el piao,<br />
evitando a$i el dafio interno de la bomba,<br />
7, Permita que el detergente "penetre" de 3 a 5 minutos<br />
antes de enjuagar. Vuelva a aplicarlo cuando sea<br />
necosario para evitar que la supeffioie se seque.<br />
32
RESPONSABILIDADES<br />
DEL PROPIETARIO<br />
Siga el programa de mantenimiento segLin el n0mero de horas o seg0n el oslendario, Io que suceda primero.<br />
Se requiere de servioio con mayor frecuenoia cuando opere la unidad en las condioiones adversas descritas a continuaoi6n.<br />
CALENDARIO DE MANTENIMIENTO iNTERvAL.ODE I<br />
ANOTE LAS FECHAS CONFORME<br />
,- _ , ,-.._ r OPEFLACI6N POR FECHAS DESERVICIO<br />
SERViCiO NORMAL HORA<br />
1"AREA DE MANTENiMIEN/0 A_de<br />
Cads[ 25<br />
Horas 0<br />
C_da 50 i001<br />
HOms0<br />
C_tda US0 alAt_ al Afro alAfio<br />
LAVADORA A PRESION ,<br />
Revise/lirnpieel filtrode la entrada de x _<br />
Revise la rclan£uerade _lta pr_lOn<br />
Revise a rnangU_rade<br />
ReV S0 a p_s_oa aSpers0ray Wdf)que<br />
que no hayafugas en el ensarnblaje<br />
Purgue I_bornba de airs y de<br />
, X<br />
X<br />
I...............<br />
Gont_lnants_ ............................... __<br />
iiiiiiiiiiiiiiiiliiiiiiiiiiiiiiliiiiiiiiiiiiiiliiiiiiiiiiiiiii<br />
Prep_r_ la bomba para almaoanadaa Vea _Alrn_namie_o+ en<br />
menoSde 32_F I I_ patina 37. I I I I<br />
C_mbiar el aGsited_l<br />
Servici0 al filtr_ de airs<br />
$er_ici°a labuiia........................... __ ................ I.............. I.............. I...............<br />
_rviCi0 a! SiSternade la<br />
P_par a!m_cen_m!ent0 S!la _nidad permane¢_ S!n<br />
_USO _or 111_[a _e<br />
Limpiar si est_ obstruido. Remplazar siesta perforado o roto.<br />
= Cambiar el aceite despues de las pdmeras (5) horas y despues cada 50 horas.<br />
Hater el oarnbio de aceite con mayor frecuencia cuando trabaje en condicianes de muoha suoiedad o polvo.<br />
=' Rernplazar m_s a menudo bajo condioionP_ de suoiedad o polvo.<br />
ESPECIFICACIONES DEL PRODUCTO<br />
Especificaciones de la M_quina Lavadora a Pre$i6n<br />
Presi6n .................. 2,000 PSI<br />
Velocidad de flujo .......... 2.0 GPM<br />
Mezcla de quimicos ........ Use segQn iostrucciones<br />
Temperatura del suministro<br />
de agua ................. Que no exceda los 100'_F<br />
Peso que Embarea ......... 48 Ibs.<br />
Especificaciones<br />
del Motor<br />
Caballos de fuerza ......... 3.75 HP<br />
Bujia<br />
Tipo: ................<br />
Champion RJ-19LM o similar<br />
Calibre la separaci6n a: 0.030 pulgadas (0.76 ram)<br />
Capacidad de gasolina ..... 1.0 Cuartos<br />
Aceite<br />
Per encima de 40_F ..... SAE 30<br />
0_F - 40°F ............. SAE 5W-30 o 10W-30<br />
RECOMENDACIONES<br />
GENERALES<br />
La garantia de la m_quina lavadora a presi6n NO cubre los<br />
elementos que ban side sujetos a abuse o negligencia por<br />
parte del operador. Para hacer v_lida la cobertura total de la<br />
garantia, el operador deber_ mantener la lavadora de<br />
presi6n tal y <strong>com</strong>o se indios en el manual, incluyendo su<br />
adecuado almacenamiento, <strong>com</strong>e se describe en la secci6n<br />
"Almaosnamiento" en la p_gina 37.<br />
33<br />
Algunos ajustes tendr_n que hacerse peri6dicamente para<br />
mantener adecuadamente su m_quina lavadora a presi6n.<br />
Todos los servicios y ajustes deber_n hacerse per Io menos<br />
una vez en osda estacibn. Siga las instrucciones de la tabla<br />
+Programa de Mantenimiento" descdta antedormente.<br />
NOTA: Una vez al atio, usted deber_ limpiar o remplazar la<br />
bujia y el filtro de aire. Una bujia nueva y un filtro de aire<br />
limpio garantizan una mezcla de <strong>com</strong>bustible-aire adecuada<br />
y le ayuda a su motor a funcionar meier y a tener una vida<br />
0til m_s prolongada.<br />
Si equip6 con Ilantas que se pode hinchar, mantenga la<br />
presi6n aerea en el valor mareado en la Ilanta o dentro de<br />
15 y 40 psi.<br />
ANTES DE CADA usa<br />
1. Revise el nivel de aceite del moLor.<br />
2. Revise si existen dafios en el colador de la entrada de<br />
agua.<br />
3. Revise si existen dafios en el filtro en line&<br />
4. Revise si existen fugas en la manguera de alta presibn.<br />
5. Revise si existen dafios en los flltros de quimioss.<br />
6. Revise si existen fugas en el conjunto de la extension<br />
para boquillas y pistol&<br />
7. Elimine el aire y los contaminantes de la bomba.
MANTENIMIENTO DE LA MAQUINA<br />
LAVADORA A PRESION<br />
Revise y Limpie el Colador de Entrada<br />
Examine el colador de entrada de la r'nanguera de jardin.<br />
Limpielo si est_ tapado o remplacelo si est_ reto.<br />
Revise la Manguera de Alta Presi6n<br />
Les r'nangueras de alta presi6n pueden desarrollar fuges<br />
debido al desgeste, doblecos o abuso. Revise la r'nanguera<br />
antes de cada uso. Revise si existen cortes, fuges,<br />
abrasiones, levantamiento de la cubierta, dar3o o movimiento<br />
de los acoplamientes. Si existe cualquiera de estes<br />
condiciones, remplaco la manguera inmediatamente.<br />
ADVERTENCIA<br />
Revise la Pistola y la Extensi6n para<br />
Boquillas<br />
Examine la conexi6n de la manguera a la pistola y<br />
coreiorese de que est0 en buen estado. Pruebe el gatillo<br />
opdmi0ndolo y esegur_ndese de que se devuelve a su sitio<br />
ouando Io suelte. Coloque el corrojo de seguridad y pruebe<br />
el gatillo. Usted no debe set capaz de oprimir el gaUllo.<br />
Remplaco la pistola inmediatamente si falla oualquiera de<br />
estes pruebes.<br />
Revise el Filtro en Linea<br />
Consulte la ilustraoi6n y suministre servioio al filtro en linea<br />
si se tapa siguiendo estes pesos:<br />
_<br />
ExtensiOn<br />
Boquillas<br />
Filtro en linea<br />
Anillo !O!<br />
1. Retire la pistola y la extension para boquilles de la<br />
manguera de alta presiOn. Retire la extensi6n para<br />
boquillas de la pistola y retire el anillo 'o' y el colador de<br />
la extension para boquilles. Lave el colador, pistola y<br />
extension para boquilles con agua limpia para eliminar<br />
toda olase de residues.<br />
2. Coloque el colador del filtro en lines en el extremo con<br />
rosca de la extension para boquilles. Su direcoi6n NO<br />
importa. Coloque el colador ejereiendo presiOn con el<br />
borrador de un I&piz hesta que se esiente pot <strong>com</strong>pleto<br />
en el rondo de la abertura. Tonga cuidado de NO doblar<br />
el colador.<br />
4. Conecte la extensi6n para boquilles a la pistola de<br />
rociado de la manera desorita anteriorr'nente en este<br />
manual.<br />
Elimine el Aire y los Contaminantes de la<br />
Bomba<br />
Para reUrar el aire de la bomba, siga<br />
pesos:<br />
los aiguiente$<br />
I, Instale la m_quina lavadora a presi6n cor'no est_<br />
descdto en la secoiOn de "Montaje De La Maquina<br />
Lavadora A Presion" y conecte el suministre de agua.<br />
2. Hale el gatillo de la pistola y mant0ngalo apretado hesta<br />
que obtenga una corriente de agua constante.<br />
Para retirar los contaminantes<br />
siguientes pasos:<br />
de la bomba, siga los<br />
1, Instale la m_quina lavadora a presi6n <strong>com</strong>o estd<br />
descdto en la secoiOn de "Montaje De La Maquina<br />
Lavadora A Presion" y conecte el suministre de agua.<br />
2.<br />
3.<br />
4.<br />
5.<br />
Retire la extension para boquilles de la pistola.<br />
Ponga en mareha el motor de acuerdo a lea<br />
instrucoiones de la secoi6n "C6mo Usar Su M_quina<br />
Lavadora A Presi6n".<br />
Hale el gatillo de la pistola y mant0ngalo<br />
apretado.<br />
Cuando el suministro de agua sea uniforme y<br />
constante, enganche el cerrojo de seguridad y vuelva a<br />
ajustar la extensi6n para boquilles.<br />
Mantenimiento<br />
de la Boquilla<br />
Si siente una sensaci6n pulsante al r'nomento de apretar el<br />
gaUllo de la pistola rooiadora, puede que sea causada por la<br />
presiOn excesiva en la bomba. La causa principal de la<br />
presiOn excesiva en la bomba es cuando la boquilla se<br />
encuentra atescada o tapada con matedales extrafies, tales<br />
<strong>com</strong>o tierra, etc. Para corregir el problema, limpie<br />
inmediatamente la boquilla les instrucoiones siguientes:<br />
1. Apagueelmotoryapagueelsuministrodeagua.<br />
2. Remueva la boquilla del extremo de la extensi6n de la<br />
boquilla. Separe la extension de la boquilla, de la pistola<br />
rociadora. Gire la boquilla en direcoi6n de las agujes del<br />
reloj, a la pesioi6n "stream" (chorre). Usando un Allen de<br />
2mm (5/64) provista, remueva la boquilla del extremo de<br />
la extension de la boquilla.<br />
3, Quite el en el filtro de la Iinea del otto fin de la extension<br />
de boquilla,<br />
4, Use u n pequefio sujeta papeles para liberar cualquier<br />
material extrafio que estO tapando la boquilla,<br />
3. Coloque el anillo 'o' en la ranura respectiva. Empuje el<br />
anillo 'o' hesta que quede ajustado contra el colador del<br />
filtro en Iinea. Introduzca el alambre dentro de la boquilla y girelo hacia los<br />
!ados; h_ia adelante y atr_s hesta despejar !a 0bstru_Oni<br />
34
5. Usandc una manguera de jardin, remueva cualquier<br />
desechc adicicnal, pcniendo agua en la extensi6n de la<br />
bcquilla. Haga _',stode 30 a 60 segundos. Gire la<br />
extensi6n de la boquilla ajustable a "stream spray"<br />
(chorrc rociador) y mueva la boquilla de "low" (bajc) a<br />
"high" (alto), mientras drene el agua.<br />
3. Incline la limpiadora a presi6n hacia un lado para que<br />
vaciar <strong>com</strong>pletamente la bomba de aceite, y vierta este<br />
en un recipiente homologado.<br />
4. Incline la limpiadora a presi6n hacia el lado contrario y<br />
Ilene la bomba con el aceite re<strong>com</strong>endado a tray,s del<br />
mismo orificio (puede utilizar para clio un embudo<br />
pequefio).<br />
5. Instale el tap6n negro de aceite de la bombay apri_telo<br />
firmemente.<br />
6. Instaledenuevolabc
6, Instale el tap6n del orifioio de Ilenado y la vadlla de<br />
medioi6n, apriete firmemente.<br />
7, Limpie los residuos de aceite,<br />
8, Conecte de nuevo alambre de bujia al bujia.<br />
Proporcione Servicio a la Bujia<br />
Proporoione servioio a la bujia coda 100 horas de operaoi6n<br />
o una vez al afro, Io que suceda primero,<br />
Servicio del Depurador de Aire<br />
Su motor no funcionarb adecuadamente y puede do,area si<br />
usted Io hace funcionar con un depurador de aire sucio.<br />
Suministre earvido al depurador de aire una vez Osda25 horas<br />
de operaoibn o una vez por afro, Io que suceda pdmero,<br />
Suministre earvido m_s frecuen_men_ sila unidad fundona<br />
bajo condicionea de mucha suciedad o polvo. Los repuestos se<br />
encuenf_an disponiblea en su cenb"o de servicio local Sears,<br />
Para dar setvicio al depurador de aire, siga los pasos 1,<br />
qoe se detallan a con_noaci6n:<br />
1, Afloje el tornillo, 2,<br />
3,<br />
4,<br />
Limpie el _rea alrededor<br />
Retire y revise la bujia,<br />
de la bujia,<br />
Cambie la bujia si los electrodos eat_n desgastados, o<br />
si el aislador eat_ roto o partido. Para su remplazo,<br />
utilice una bujia Champion RJ-19LM.<br />
Revise la eaparacibn del electrodo con un calibrador de<br />
alambre y ajuste la separaoi6n a 0,030 pulgadas<br />
(0,76 mm) si ea necosado.<br />
2, Quite detenidamente aire la asamblea m_s limpia para<br />
prevenir ea<strong>com</strong>bros de cear en el carburador,<br />
3, Tome aire la aeamblea m_s limpia aparte y limpie todo<br />
deapide. Lave limpiador de aire de eapuma en el<br />
detergente y el agua Iiquidea, El eatrujbn eaca en una<br />
tela limpia,<br />
4, SATURE limpiador de aire de eapuma en el aceite de<br />
motor y estruj6n en una tela limpia para quitar el excoso<br />
acoite.<br />
5, Vuelva a instalar limpie o limpiador nuevo de aire de<br />
eapuma en el ouerpo.<br />
6, Instale limpiador de aire eaguramente en carburador<br />
con el tomillo.<br />
NOTA: Usted puede <strong>com</strong>prar los elementea del depurador<br />
de aire nuevos Ilamando al 1-800-366-PART.<br />
5, Instale la bujia y aprietela firmemente,<br />
NOTA: Usted puede <strong>com</strong>prar los bujia nuevos Ilamando al<br />
1-800-366-PART.<br />
DESPUES DE CADA USO<br />
NO deber_ haber agua en la unidad por largos periodos de<br />
tiempo, Los eadimentos de minerales ea pueden depositor<br />
en partes de la bomba y "congelar" su funcionamiento, Lleve<br />
a cabo estea procodimientos deapu_s de coda uso:<br />
1, Lave el tubo de sucoibn de detergente colocando el<br />
filtro en un balde de agua limpia al mismo tiempo que<br />
haco funcionar la m_quina lavadora a presi6n en el<br />
modo de baja presibn (boquilla ajustable en posioibn<br />
delantera). Lave pot un minuto o dos minutea,<br />
2, Apague el motor y d_jelo enfriar, deapu_s retire todas<br />
los mangueras.<br />
3, Deaconecte el alambre de la bujia.<br />
4, Saque todea los Iiquidos de la bomba halando la manija<br />
de retroceao apreaimadamente 6 vecos, Esto deber_<br />
evacuar la mayoria del Iiquido de la bomba,<br />
5. Si planea almaosnar la unidad pot m_s de 30 dias, yea la<br />
eacoi6n "Almaosnamiento Prolongado" en la p_gina 37,<br />
36
GENERAL<br />
Revise la manguera de alta presi6n para ver si presenta<br />
dafios. Los cortes en la manguera o el desgaste de la<br />
misma pueden ocasionar fugas y p_rdida de presi6n. Si<br />
encuentra alg0n dafio, remplaos la manguera. NO intente<br />
reparar una manguera dafiada. Remplaco la manguera<br />
con la parte Craftsman genuina.<br />
Drene el agua de la manguera, boquilla de extensibn y la<br />
pistola aspersora. Fnrollela adecuadamente en el soporte<br />
incluido.<br />
Vuelva a conectar el alambre<br />
Almacene<br />
a la bujia.<br />
la unidad en una t=rea limpia y seca.<br />
_i <strong>com</strong>bustible ADVERTENCIA! en el tanque NUNCA en almacene recintos cerrados el motorocon<br />
en<br />
areas encerradas con poca ventilaci6n donde los<br />
vapores puedan entrar en contacto con llamas<br />
abiertas, chispas o luces de pilcto.<br />
ALMACENAMIENTO<br />
INVIERNO<br />
congelarniento.<br />
PRECAUCION<br />
PARA<br />
Para proteger la unidad de las temperaturas de<br />
congelamiento:<br />
Lave el tube de sucoibn de detergente colocando el filtro<br />
en un balde de agua limpia al mismo tiempo que haco<br />
toncionar la m&quina lavadora a presi6n en el mode de<br />
baja presi6n (boquilla ajustable en posici6n delantera).<br />
Lave per un minute o dos minutes.<br />
Saque redes los Iiquidos de la bomba halando la manija<br />
de retrocese aproximadamente 6 veoss. Fsto deber_<br />
evacuar la mayoda del liquido de la bomba.<br />
Utilice un protector de bomba, disponible en Sears con el<br />
n0mero de cat&logo 7174403, para cuidar la bomba.<br />
Aqu_,l protege a la unidad contra el congelamiento y<br />
lubrica tanto los pistones <strong>com</strong>e los empaques.<br />
Si el protector de bomba no est& disponible, conecte un<br />
tramo de 3 pies de manguera de jardin a la entrada de<br />
agua. Vierta anticongelante RV (anticongelante sin<br />
alcohol) en la manguera. Jale la manija de arranque dos<br />
veces. Desconecte despu_s la manguera de 3 pies.<br />
ALMACENAMIENTO<br />
PROLONGADO<br />
Si usted NO planea usar la mdquina lavadora a presibn per<br />
m_s de 30 dias, deberd preparar el motor para un<br />
almacenamiento prolongado.<br />
Es importanto evitar la formacibn de depbsitos de goma en las<br />
partos esenciales del sistema del <strong>com</strong>bustible tales <strong>com</strong>e<br />
carburador,filf_o del <strong>com</strong>bustible, manguera o tanque del<br />
<strong>com</strong>bustibledurante el almaosnamiento.Tambi_n, la expedencia<br />
indies que los <strong>com</strong>bosf_bles con mezdas de alcohol (llamados<br />
gosohol, etanol o metanol) pueden af_aer la hurT_lad, Io que<br />
Ileva a la separacibn y formad0n de de;_los durante el<br />
almaosnamiento. La gaselina _¢;_lapuede dafiar el sistema del<br />
<strong>com</strong>bustiblede un motor duranto el almaoenamlento.<br />
Proteja el Sistema de Combustible<br />
Drenaje<br />
del "l'anque de Combustible:<br />
,_ despejada, ]ADVERTENCIA! lejos de llamas Drene el abiertas, <strong>com</strong>bustible en un en recipiente un area<br />
adecuado y utilizando un embudo. Aseg_irese que el<br />
motor est_ frio. NO Fume.<br />
Retire toda la gaselina del carburador y del tanque del<br />
<strong>com</strong>bustible para evitar la formacibn de dep0sitos de<br />
goma en estas partes, Io que puede causar un real<br />
toncionamiento del motor.<br />
Haga funcionar el motor hasta que el tanque quede vacio<br />
y el motor se detenga.<br />
Cambio<br />
de Aceite<br />
Con el motor todavia caliento, drene el aceito de la caja del<br />
cig0efial. Vuelva a Ilenarlo con el grade de aceite<br />
re<strong>com</strong>endado. Yea "Cambio de Aceite" en la p_gina 35.<br />
Aceite el Di&metro Interior del Cilindro<br />
Retire la bujia. Rocie aproximadamente 1 onza de aosite<br />
limpio para motor denb"odel cilindre. Cubra el orificiode la<br />
bujia con un b"apo.Hale la manija de reb_,coso lentamente<br />
para distnbuir el aosite. Fvite el rociado del orificiode la bujia.<br />
Instale la bujia. NO conecte el alambre<br />
Protecci6n<br />
de la Bomba<br />
de la bujia.<br />
A protege al salvador de bomba de use de bomba Sears a<br />
previene congelar el dafio y lubdca _mbolos y sellos.<br />
NO'FA: El protector de la bomba, mimero de item Sears<br />
n0mero 7174403, ost_n disponible s01o<strong>com</strong>e un acceserio<br />
opcional. NO es incluido con la arandela de la presi0n.<br />
AI ueo el salvador de bomba:<br />
PRECAUCION<br />
PRECAUCION<br />
* Siempr_ pmteccibnde ojo de use cuando se usa PumpSaver.<br />
Conecte manga en el salvador de bomba puede a la<br />
cala de la bor'aba.<br />
El empuj0n en puede la cima a distribuye bomba salvador.<br />
Cu_ndo Iiquido de salvador de bomba <strong>com</strong>ienza a la<br />
salida de la bomba de la salida, la bomba es protegida.<br />
Quite bomba salvador de la cala de bomba.<br />
OTROS<br />
NO almacene gasolina de una estaci0n a ctra.<br />
Si es posible, almacene su unidad en un recinto corrado<br />
y c_brala para protegeda del polvo y la suciedad.<br />
ASFGURFSF DE VACIAR EL TANQUF DFL<br />
COMBUSTIBLE.<br />
IMPOR'I'AN'I'E: NUNCA cubra su m_quina lavadora a<br />
presibn cuando el motor y el area del escape est_n calientos.<br />
37
Problema Causa So!uci6n<br />
"lLaboquillaest_enelmododebaja 1. Mueva la b0qUilla hacia _FbS para<br />
presibni<br />
el r'a0do de alta presibni<br />
2i Laentradadeaguaestb 2. I_ir'apielaentradai<br />
b!oqueada<br />
I<br />
3; Suministro de agua inadecuado, 3. Propor¢ione flujo de agua<br />
4; La manguera de entrada est'_ .4. Estire la manguera de entrada,<br />
L.a b0mba presenta !os siguien_$ d0blada o prese_ fugas co!oqueunparcheen!a{uga.<br />
pl_blemas: rio _,adoi de la m_ngUeia de 15. ReViSe_ 'im_i_ e{ co{adOi d_ l_<br />
traque_o; p_rdida de presi6n, bajo sbminiSiiO de _gUa est_ s;_ihist_ de<br />
volumen de agua.<br />
en0=r'aade !os !00F<br />
o<br />
rods fr!a.<br />
;<br />
7_ La manguera de a!ta presibn est_ 7. Retire las obstmcciones de!a<br />
manguera de salida.<br />
8 La pist01a presenta fugas. 8. Remplace!apisto!a.<br />
9 La boquilla est_ obstruida, 9. I-ir'apie !a b0quil!a,<br />
10, Bomba defectuosa. 10_ Pbngase en contacto con el centro<br />
de Servici0 Searsi<br />
"1 El |ubo de s_ccibn de detergente l. Coloqueeltubodesuccibnde<br />
no est_ Sur'aergido, detergente en el detergente,<br />
2i El filtro de quimicos est_ tapado. 2. I_ir'apie 0 rer'apla_ el filtr0/tub0 de<br />
3 SU_ioenelfilt_deiaiine_. 3. Ve_'!ChequeEneiFiitr0deia<br />
4; La boquilla es_ en el r'aodode alta 4. Mueva la boquilla hacia adelar_e<br />
presibni<br />
paFa el modo de baja presi6ni<br />
L.aVelocidad del mot0r es demasiado M_eva el controlde la V_Ivula de<br />
!egu!acibn a la p0s!cibn FAST<br />
" i " I" (RAPIDO)i Si el moto_ continua<br />
fun_ionando ma!; pbngase en cor_acto<br />
con el centro de servicio Sears:<br />
1 Depurador de aire SUci0i 1. I_ir'apie 0 rer'apla_ el depurador de<br />
air'e;<br />
2_ Sin gasolina, 2. Lleneeltanquede<strong>com</strong>bustib!e.<br />
3; Gaso!ina vieja, 3. Drene el tanque de gasolina; !!_ne!o<br />
con <strong>com</strong>bustible fresco;<br />
4; El alambre de la bujia no est'_ 4. Cone_te el alambre a la bujia:<br />
I _eCtad0a labuj!a I<br />
El motor no arranCa; o ar'ranca y 5 Buj!ama! a, 5. Remplace !a bujia<br />
funciona mali 6 AgSa en ia gasoiina 16. Drene ei tanqde de gaS01ina; iieneio<br />
I<br />
con Cor'abUstiblefrescoi<br />
7i Mezcla de cor'abUstibledemasiado 7. Pbngase en contacto con el centro<br />
ri_.<br />
de servjoio Sears;<br />
8; Vblyula de entrada trabada en la 8. Pbngase en ¢ontacto con el centro<br />
posit!on abierta o cerrada,<br />
de servicio Sears<br />
9_Elmotorhaperdido<strong>com</strong>presibm 9. pbngase en ¢ontacto con el centre<br />
de Servici0 Searsi<br />
El motor se apaga durante la Sin gasoI!na, Llene e! tanque de <strong>com</strong>bustib!e.<br />
0peraci_ni<br />
El motor no tiene fuem, Filt_o de aire sucio: Remplaceelfiltrodeaire,<br />
38
Sears, Roebuck and Co., U,S.A. (Sears), California Air Resources Board (Consajo da Racursoa sobra al Aire da<br />
California, CARB, per sus siglaa an ingl*_e) y United States Environmental Protection Agency (Agancia da Protacci6n<br />
Ambiantal da EE,UU,, EPA, per sus siglas en ingl*_e),<br />
Declaracibn da garantia dal sistama de control de amisionoa<br />
(darechos y obligacionoa dal propiatario pare la garantia contra defectos)<br />
LA COBERTURA DE LA GARANT[A DE CONTROL DE EMISIONES SE<br />
APLICA A LOS MOTORE$ CERTIFICADOS ADQUIRIDO$ EN<br />
CALIFORNIA EN _995 Y POSTERIORMENTE, QUE SE UTILICEN EN<br />
CALIFORNIA, Y A MOTORES CERTIFICADOS MODELO _997 Y<br />
POSTERIORES QUE SEAN ADQUIRIDOS Y UTILIZADOS EN OTRA<br />
REGION DE ESTADOS UNIDOS (_"A FARTIR DEL 1" DE ENERO DE<br />
200"1, EN CANADA).<br />
Dsetarsci6n de garsntia eobrs el control de emieionea de la EPA de<br />
EE.UU. y California.<br />
El Califomia.&Jr Reaour_es Board (CARD), 18EPA de EEUU y Sears se<br />
<strong>com</strong>plaean ea expliear le Garsntia pars el sistema de contrel de emisionea<br />
_:_rs motorss boqueilea pare exteriorss (SORE) m#aeles e_o 2000 y<br />
_toriorss En California, lea nuevca motorss #aQuebos pare exteriorss se<br />
de#an dise_iar,coeat_Jir y edui#ar #ars cumplir con Ise es_rictas normea<br />
del eatado centre el src_)g En otras regionea de Estados Unidca, los<br />
nuevca motorss pars interiorea de ignioiOn par chispa eartifeadca #are<br />
m(_lelca a_o 1997 y postedores deben _mplir con earmea sirnilerss<br />
eatableeidse per le EPA de EEUU. Sears debe 9arsn_zar el sisteme de<br />
con_)l de emisionea de se motor pare los per'#aea indicadea a<br />
conlJncaoiOn,siemprs y cuendo no se heya adueado, deseuidede o dedo<br />
mentonimiento incor_cto el me{or boqueile pera exteriorss<br />
Su sis_ema de control de emisieaea bo_ra incluir #artse <strong>com</strong>e el<br />
carsursdor e el sisterna de inysecibn de <strong>com</strong>busUble, el sis_ema de 2<br />
i_lnicibn y el eanveriJder catal_ea. Tambi_n se pueden incluir manguerss,<br />
correse, conecterss y otrea <strong>com</strong>ponentos relseionadea con Ise emisienea<br />
Cuando exist8 une ¢ondicibn due puade ear cubierta per la gerant"8,<br />
Seers re#ars_ el motor boque_ie pars extederos sin costa algune,<br />
incluyendo el dia_lnbstico, lea #artas de repueato y la mane de ebra.<br />
Col_rturs de la gerantia de Sears contra dsfactos en el control de 3<br />
emieionee<br />
LOS motorea boque_ea pare exteriorss mo_elea 1995 y posteriorss tienen<br />
una gersnti8 de Pea e_ea Si elguna #ar_e de su motor releoienada con<br />
Ise emisienes ea_ defecfueaa, Sears la repersr_i e sustituir&<br />
Reaponeabilidades dal propiatario para le garsnt{a<br />
Come prodietario del motor peQueilo par8 extedorea, cated as<br />
rsspensebla de realizer las ectJvide_es de mantonimiento rer4uaridas<br />
qua se indican an este manuel del propietario. Sears re<strong>com</strong>ianda due<br />
conserve _dea los recibos due oubrsn el mantanimiento de su motor<br />
boque_e pars extedorss, pore Sears no pueda negar le garentia<br />
selamente par la falt8 de recibca ni per su imposibilidad de garentizer la<br />
rsalizseibn de redes lee ac_ividadse de mentenimianto progrsmedas.<br />
Come propietario del motor pequaPlo par8 ex[ariorss, cated siemprs<br />
debo toner an cuent8 qua Sears pod_ neger la cober_urs de le _arsntie<br />
si su motor paduePlo pare ax_eriorss e una per_e del misme preaenta<br />
fallas dedido a abuse, deseuide, man_enimiento incorrscto o<br />
modiflcacienea<br />
no aprs#adse<br />
Usted as reaboneable de preaentar su meter peque_o pare extedores e<br />
un Centrs de servioio Sears aprs#ado tan prseto <strong>com</strong>e se prseente el<br />
prsdleme LaS repersciones bsje _tarsntta dabo_n ¢oncluirse an un<br />
peri#ao razonebla, due no exeadar_ de 90 dise<br />
$i tieea elguea pre_lunta con respecte e sca dero_;heay<br />
rssponeabilidadea pare la ger_ntf& ptm_lasean contacto con un<br />
rspreaentanta de servicio Sears el "1-4500-469-4863<br />
Diepeaicionea de le garsnt[a de Sears centre defectos an el control<br />
de emisionea<br />
Las siguientea sen disposioionseespe_;ificas releoionadse con le<br />
eaborturs de la _tarsntta eantrs defectos an el control de emisionea<br />
1. Parlea garsntizadea<br />
La cobertura be_oeat8 _larsntie incluye selementa aquellea per_ea<br />
qua se enumersn a eantinuseiOn (lea parsee del sisteme de control<br />
de emisionea) an le medida due dichse pertes heyea eatado<br />
presentes an el meter adquiddo.<br />
e Sistarna de mediciOn de earndustidle<br />
b<br />
Sistarna de enriqeaoimiento<br />
Cerbu raper y per_ea internee<br />
Bom#a de <strong>com</strong>bustible.<br />
Sistarna de inducoiOn de airs<br />
Filtro de airs<br />
Colector de entrsda.<br />
c. Sistema de ignioi_n<br />
Bujiea<br />
Sistama de ignition par magneto<br />
Sistarna catalizador.<br />
Ceavertidor cat_litico.<br />
pare arrandue en fr_e.<br />
Colector de eacape<br />
Sistarna de iny_citm de airs o vSIvul8 par irnpulsea<br />
e Distintes elementea utilizadea ea los sistarnseentedorss<br />
V_lvulse e interruptorss de vaco, tamperaturs, posioi_ny de<br />
detecoiOn de tiempo<br />
Conectores y ceajunt_<br />
Vigencia de la cobarturs<br />
Sears garsntize el propietsrie iniciel y a eade propieta_o<br />
subsiguiente due Ise per_ea garantizedse eataran libres de defsetca<br />
ea material y an mane de edra, qua ecasioean fallea de Ise pertes<br />
_larsntizedea dursnta un parode de dos e_os a pertir de le feoha<br />
ea qua el motor sea entrogedo el <strong>com</strong>prsdor minod_.<br />
NO hab_<br />
¢arSea<br />
La rs#arsoi_)n o reempleze de cualquier parte gersntizede se<br />
rsalizar_ sin cargo elgcao pars el prspief,_do, incluyendo la meae de<br />
obrs de diagn_s_ea qua derive an la determinaoi_n de qua uea parte<br />
_larsn_zade ea_ defeotuo_4a, si la labor de di_gn_ico se realize en<br />
un Centre da servicie Seer8 aprs#ado.<br />
4 Reclemea y exclueionea de cobet_urs<br />
LOS reclames vinoulsdea con le gersntia se prssents_n conforme a<br />
Ise disbosioienea de le P_liza de garsnt"_ de Sears. La cobor_ura de<br />
la gersnt"_ se excluira pars aquellea fallse de _r_es gersn_zadea<br />
qua no eaan dsr_es eri_linalea de Seers o debido a aduse, dseouide<br />
o mentanimien_ inearrecto, se_lOn ea es_sblaea en le P_lize de<br />
_larsntta de moterss de Seers Sears no se rs$poneabla per le<br />
eabor_urs da fsIIse de dsr_es garsnfJzsdas eeasienadas per el use<br />
da #artos adicionelse, no originelse o mboif_cadse<br />
5 Mentanir_ienlo<br />
Cualquier perle gersntizada ouyo reemplazo no eat_ bo)_lrsmado<br />
<strong>com</strong>e mantanimiente requed_o o qua sate progrsmeda Onicamenle<br />
pare ieapesei*)n freceante con el fin de "ropersr e reemplazer<br />
conforme sea ne_eaedo", estate gersntizada en ceanto e defectca<br />
per el periodo de la _tarsnte Cualquier porte _tarsntizadacuyo<br />
reemplazo eat@pregrsmedo <strong>com</strong>a rnentanimiente reqeaddo tandra<br />
8olamenta una gersntfa eantr8 defec_ea _nicameate bet el betided<br />
hseta el pdmer reamplazo prs_lrsma_o pera eaa parte. Se pbor_<br />
utilizer oualquier perle de ropueate due tenge un rendimiento y<br />
dursbilided equivelentea, al realizer oualquier ac_ividad de<br />
mantenimieato o repersei_)n. El propietsrio as respeaeable de<br />
realizer t#ao el mantenirniente requeddo, segbo ea define ea eate<br />
manual del prspietario.<br />
Cobarturs<br />
consiguiante<br />
La coberturs be_e le prssente ea ampliar_ e la _lle de oualquier<br />
<strong>com</strong>poeante del meter prsvocada par un desperfeoto en eualduier<br />
#arte garsntizede qua sige gozando de 18coborturs de le garsntia.<br />
En EE.UU y Cened_ contamea con uca Ifnee de emergencia Ise 24 horse (1-800-489-4683), due ofroea un men_ de meneajea prs_lrs#ados ean<br />
informecibn sobro mentenimiento de productea<br />
39
Your Home<br />
For repair - in your home - of all major brand appliances,<br />
lawn and garden equipment, or heating and cooling systems,<br />
no matter who made it, no matter who sold it!<br />
For the replacement <strong>parts</strong>, accessories and<br />
owner's manuals that you need to do-it-yourself.<br />
For Sears professional installation of home appliances<br />
and items like garage door openers and water heaters.<br />
1-800-4-MY-HOME ® Anytime, day or night<br />
(1-800-469-4663) (U.S.A. and Canada)<br />
www.sears.<strong>com</strong><br />
www.sears.ca<br />
Our<br />
Home<br />
For repair of carry-in products like vacuums, lawn equipment,<br />
and electronics, call or go on-line for the nearest<br />
Sears Parts and Repair Center.<br />
1-800-488-1222 Anytime,dayornight(U.S.A.only)<br />
www.seara.<strong>com</strong><br />
To purchase a protection agreement on a product serviced by Sears:<br />
1-800-827-6655 (u.sA) 1-800-361-6665 (Canada)<br />
Para pedirserviciode reparacibn<br />
a domicilio,y para ordenarpiezas:<br />
I_U.HOG.,SJ_SM<br />
(l-e_-784-r_27)<br />
Au Canada pourserviceen fmngais:<br />
1-800.LE-FOYER Mc<br />
(1-80o-533-6937)<br />
www.sears.ca<br />
#E/AR#<br />
® Registered Trademark/TM Trademark I SMService Mark of Sears, Roebuck andCo.<br />
® Mama Registrada l _ iarca de Fdbrica/sM iarca de Servicio de Sears, Roebuck andCo.<br />
MCMarque de <strong>com</strong>merce/MO Marque d_poe6e de Sears i Roebuck and Coi