
Create successful ePaper yourself
Turn your PDF publications into a flip-book with our unique Google optimized e-Paper software.
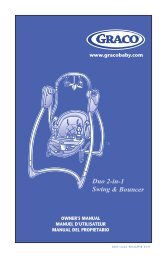
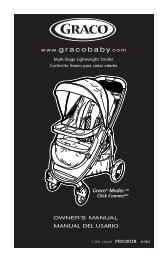
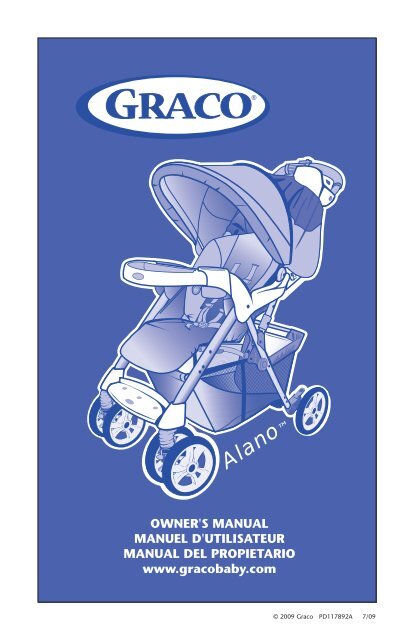
Alano<br />
OWNER'S MANUAL<br />
MANUEL D'UTILISATEUR<br />
MANUAL DEL PROPIETARIO<br />
www.gracobaby.com<br />
© 2009 <strong>Graco</strong> PD117892A 7/09
Failure to follow these warnings and the<br />
assembly instructions could result in serious injury or death.<br />
<br />
<br />
<br />
child<br />
unattended. Always keep<br />
child in view while in stroller.<br />
from<br />
falling or sliding out. Always use<br />
seat belt. After fastening buckles,<br />
adjust belts to get a snug fit<br />
around your child.<br />
<br />
Use care when folding and<br />
unfolding the stroller. Be certain<br />
the stroller is fully erected and<br />
latched before allowing your<br />
child near the stroller.<br />
<br />
or escalators. You may<br />
suddenly lose control of the<br />
stroller or your child may fall out.<br />
Also, use extra care when going<br />
up or down a step or curb.<br />
only<br />
at walking speed. Product not<br />
intended for use while jogging,<br />
skating, etc.<br />
with a<br />
child weighing more than 50 lbs<br />
(22.7 kg) or taller than 45 in.<br />
(114.3 cm) will cause excessive<br />
wear and stress on the stroller.<br />
Use the stroller with only one<br />
child at a time.<br />
do not<br />
place more than 3 lbs (1.4 kg)<br />
on the parent’s tray.<br />
never put<br />
hot liquids in the parent’s tray.<br />
<br />
, never<br />
place purses, shopping bags,<br />
parcels or accessory items (other<br />
than approved <strong>Graco</strong> stroller<br />
bags) on the handle. Never place<br />
anything on the canopy.<br />
<br />
, do not<br />
place more than 10 lbs (4.5 kg)<br />
in the storage basket and more<br />
than 2 lbs (0.9 kg) in the<br />
canopy pockets (on certain<br />
models).<br />
use storage basket as a<br />
child carrier.<br />
your child<br />
to stand on the basket. It may<br />
collapse and cause injury.<br />
child in the<br />
stroller with head toward<br />
front of stroller.<br />
<br />
to be used as a toy.<br />
<br />
should it become<br />
damaged or broken.<br />
2
DO NOT place items with a<br />
string around your child’s<br />
neck, suspend strings from<br />
this product, or attach strings<br />
to toys.<br />
® <br />
<br />
®<br />
® ®<br />
® ®<br />
® <br />
with<br />
this travel system.<br />
(Not intended for use with<br />
AUTOBABY (Europe only) and<br />
ASSURA infant car seats.)<br />
Improper use of this stroller with<br />
other manufacturers’ car seats<br />
may result in serious<br />
injury or death.<br />
provided<br />
with your <strong>Graco</strong> car seat before<br />
using it with your stroller.<br />
your child<br />
with the car seat harness when<br />
using the car seat in the stroller.<br />
If your child is already in the<br />
car seat, check that the child is<br />
secured with the harness.<br />
3
Manquer de suivre ces avertissements et les instructions<br />
d'assemblage peut entraîner de sérieuses blessures ou un décès.<br />
<br />
<br />
<br />
<br />
<br />
votre<br />
enfant sans surveillance. Ayez<br />
toujours l’enfant en vue.<br />
<br />
blessures. Utilisez toujours la<br />
ceinture de sécurité. Après<br />
avoir attaché les boucles,<br />
ajustez les ceintures pour<br />
obtenir un ajustement<br />
confortable autour de<br />
votre enfant.<br />
<br />
Plier ou déplier la<br />
poussette avec soin. Soyez<br />
assuré(e) que la poussette est<br />
bien droite et que les loquets<br />
sont bien enclenchés avant<br />
de laisser votre enfant près<br />
de la poussette.<br />
<br />
<br />
ou les escaliers<br />
roulants. L’enfant pourrait<br />
tomber ou vous pourriez<br />
perdre le contrôle de la<br />
poussette. Aussi, soyez très<br />
prudent lorsque vous montez<br />
et descendez une marche ou<br />
le bord du trottoir.<br />
<br />
pour la marche<br />
seulement. Ce produit n’est<br />
pas conçu pour usage pendant<br />
la course à pied, pour patiner,<br />
etc.<br />
<br />
avec un enfant pesant plus de<br />
50 livres (22,7 kg) ou mesure<br />
plus de 45 po (114,3 cm)<br />
occasionnera une usure et<br />
une tension excessive à la<br />
poussette. Utilisez la poussette<br />
avec seulement un enfant à<br />
la fois.<br />
<br />
<br />
NE PAS<br />
charger le plateau à plus de<br />
3 livres (1,4 kg).<br />
<br />
ne jamais mettre<br />
de liquides brûlants dans le<br />
plateau pour parents.<br />
<br />
<br />
, ne jamais<br />
placer de sacs à main ou de<br />
magasinage, de colis ou d’<br />
accessoires (autres que les sacs<br />
à poussette <strong>Graco</strong> approuvés)<br />
sur la poignée ou le baldaquin.<br />
Ne jamais placer quoi que ce<br />
soit sur le baldaquin.<br />
4
ne placez jamais plus de 10<br />
livres (4,5 kg) dans le panier et<br />
2 livres (0,9 kg) dans les<br />
pochettes de baldaquin<br />
(sur certainmodèles).<br />
utiliser le panier<br />
comme porte-bébé.<br />
votre<br />
enfant debout sur le panier.<br />
Il pourrait s’écrouler et<br />
causer des blessures.<br />
l’enfant<br />
dans la poussette avec la tête<br />
vers l’avant de la poussette.<br />
<br />
comme un jouet.<br />
<br />
si elle devient<br />
endommagée ou brisée.<br />
<br />
NE JAMAIS accrocher des<br />
objets avec ficelles autour du<br />
cou de votre enfant, suspendre<br />
des ficelles au-dessus de ce<br />
produit, ou attacher des jouets<br />
à des ficelles.<br />
<br />
® <br />
<br />
<br />
<br />
® ® 32<br />
® ® 35<br />
® <br />
® avec ce système<br />
de voyage. (Non conçu pour<br />
utiliser avec les dispositifs de<br />
retenue pour nourrisson<br />
AUTOBABY (Europe seulement)<br />
et ASSURA.) Ne pas se<br />
conformer à toutes les mises en<br />
garde et instructions de<br />
montage peut causer des<br />
blessures corporelles sérieuses<br />
ou même la mort.<br />
d'utilisateur<br />
fourni avec votre porte-bébé<br />
<strong>Graco</strong> avant de l'utiliser avec<br />
cette poussette.<br />
<br />
votre enfant avec le harnais<br />
du porte-bébé lorsqu'il est<br />
utilisé avec la poussette. Si<br />
votre enfant est déjà dans le<br />
porte-bébé, s'assurer qu'il est<br />
attaché avec le harnais.<br />
5
a su niño<br />
desatendido. Siempre<br />
tenga su niño a la vista.<br />
<br />
seria debido a una calda o<br />
resbalamiento del asiento.<br />
Use siempre el cinturón de<br />
seguridad. Luego de ajustar las<br />
hebillas, ajuste las correas para<br />
que queden ajustadas alrededor<br />
de su niño.<br />
<br />
Use cuidado cuando<br />
abre y cierra el cochecito.<br />
Asegúrese de que el cochecito<br />
esté totalmente montado y<br />
estable antes de que su niño<br />
esté se acerque al cochecito.<br />
<br />
o las<br />
escaleras mecánicas. Usted<br />
puede perder súbitamente el<br />
control del cochecito, o su niño<br />
podrá caerse. Asimismo, tenga<br />
cuidado especial cuando suba<br />
o baje un escalón o la calzada.<br />
<br />
solamente a velocidad<br />
de caminar. El producto no está<br />
destinado para usarlo mientras<br />
está corriendo, patinando, etc.<br />
para<br />
un niño que pese más de<br />
50 libras (22,7 kg) o más alto<br />
que 45 pulgadas (114,3 cm)<br />
causará desgaste y tensión<br />
excesiva en el cochecito.<br />
Empléelo solamente con<br />
un niño a la vez.<br />
<br />
no ponga<br />
mas de 3 libras (1,4 kg) sobre<br />
la bandeja.<br />
nunca<br />
ponga liquidos calientes sobre<br />
la bandeja para padres.<br />
<br />
<br />
nunca ponga<br />
carteras, bolsas, paquetes o<br />
accesorios (que no sean las<br />
bolsas para cochecito<br />
aprobadas por <strong>Graco</strong>) en la<br />
manija. No ponga nunca nada<br />
sobre la capota.<br />
su niño se<br />
pare en la canasta. Puede<br />
desmoronarse y causar daño.<br />
6
no coloque más de 10 libras<br />
(4,5 kg) en la canasta o 2 libras<br />
(0,9 kg) en los bolsillos de<br />
capota (en ciertos modelos).<br />
use dicha canasta para<br />
transportar el niño.<br />
el niño en<br />
el cochecito con la cabeza en la<br />
delantera parte del cochecito.<br />
<br />
sea usado<br />
como juguete.<br />
<br />
si éste se daña o<br />
se quiebra.<br />
<br />
NO coloque artículos con<br />
cuerdas alrededor del cuello del<br />
niño, o suspenda cuerdas del<br />
producto, o coloque cordones<br />
en los juguetes.<br />
<br />
® <br />
<br />
<br />
<br />
® ®<br />
® <br />
® <br />
® <br />
® en este sistema de<br />
viaje. (No debe usarse con<br />
AUTOBABY (Europa<br />
solamente) y asientos de<br />
automóvil para bebé<br />
ASSURA.) El uso inadecuado<br />
de este cochecito con<br />
asientos para automóvil de<br />
otros fabricantes podría<br />
resultar en lesiones serias<br />
o la muerte.<br />
incluido<br />
con su transportador<br />
<strong>Graco</strong> antes de usarlo con<br />
su cochecito.<br />
a<br />
su niño con el arnés del<br />
transportador cuando usa el<br />
transportador en el cochecito.<br />
Si su niño ya está en el<br />
transportador, verifique que<br />
esté asegurado con el arnés.<br />
7
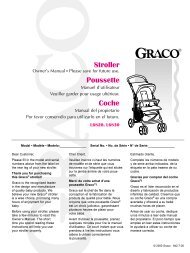
that you<br />
have all the parts for<br />
this model <br />
assembling your<br />
product. If<br />
any parts are<br />
missing, call<br />
Customer Service.<br />
<br />
<br />
que vous avez<br />
toutes les pièces pour ce<br />
modéle <br />
d'assembler votre<br />
produit. S'il vous manque<br />
des pièces,<br />
communiquez avec notre<br />
service à la clientèle.<br />
que tiene<br />
todas las piezas de este<br />
modelo de<br />
armar su producto. Si<br />
falta alguna pieza,<br />
llame al Departamento<br />
de Servicio al Cliente.<br />
<br />
Hammer<br />
<br />
Marteau<br />
<br />
<br />
Martillo<br />
<br />
2X<br />
2X<br />
2X<br />
2X<br />
2X<br />
8
1<br />
<br />
<br />
<br />
2<br />
SNAP!<br />
ENCLENCHEZ!<br />
¡CHASQUIDO!<br />
that stroller is completely<br />
open (by trying to fold it)<br />
before continuing.<br />
que la poussette<br />
est completement dépliée<br />
(en essayant de la plier)<br />
avant de continuer.<br />
que el cochecito esté<br />
completamente abierto (intente<br />
doblarlo) antes de continuar.<br />
9
3<br />
SNAP!<br />
ENCLENCHEZ!<br />
¡CHASQUIDO!<br />
4<br />
SNAP!<br />
ENCLENCHEZ!<br />
¡CHASQUIDO!<br />
5<br />
SNAP!<br />
ENCLENCHEZ!<br />
¡CHASQUIDO!<br />
10
2X<br />
6<br />
SNAP!<br />
ENCLENCHEZ!<br />
¡CHASQUIDO!<br />
Turn stroller over.<br />
Pull sleeve back to reveal metal<br />
button.<br />
Retournez la poussette.<br />
Retirez l'enveloppe pour révéler le<br />
bouton métallique.<br />
Vuelque el cochecito.<br />
Retire el manguito para ver el<br />
botón metálico.<br />
that wheels are securely<br />
attached by pulling on wheel<br />
assemblies.<br />
que les roues<br />
sont attachées solidement en tirant<br />
sur les assemblages de roue.<br />
que las ruedas estén<br />
bien contactadas, tirando de los<br />
montajes de las ruedas.<br />
11
Choking Hazard:<br />
Remove and<br />
immediately<br />
discard plastic<br />
end caps on the<br />
rear axle.<br />
<br />
Danger d'étranglement:<br />
enlevez et jetez<br />
immédiatement les<br />
embouts de plastique<br />
sur l'essieu arrière.<br />
de<br />
peligro de estrangulación:<br />
Saque y deseche<br />
inmediatamente las<br />
tapas de plástico de los<br />
extremos de las clavijas<br />
del eje trasero.<br />
7<br />
SNAP!<br />
ENCLENCHEZ!<br />
¡CHASQUIDO!<br />
Brake levers point toward<br />
rear of stroller. that<br />
rear axle is securely attached<br />
by pulling on brake assembly.<br />
Leviers des freins vers<br />
l’arrière de la poussette.<br />
que l'essieu<br />
arrière est attaché solidement<br />
en tirant sur l'assemblage<br />
du frein.<br />
Las palancas del freno deben<br />
apuntar hacia la parte trasera<br />
del cochecito. que<br />
el eje trasero esté bien<br />
conectado tirando del<br />
equipo de frenos.<br />
12
attaching wheel: Be sure to place stroller on top of a<br />
piece of card board or some other protective cover to prevent any<br />
damage to floor.<br />
de fixer la roue: Assurez-vous de placer la poussette sur un<br />
morceau de carton ou un autre revêtement de protection pour<br />
prévenir tout dégât au plancher.<br />
de instalar la rueda: Asegúrese de poner el cochecito<br />
sobre un pedazo de cartón o algún otro material de protección<br />
para prevenir dañar el piso.<br />
2X<br />
2X<br />
2X<br />
8<br />
Firmly attach hub adapter<br />
onto wheel.<br />
Attachez fermerment l'adapteur<br />
du moyeu sur la roue.<br />
Conecte el adaptador del cubo<br />
firmemente a la rueda.<br />
13
9<br />
Lay stroller on its side. Place<br />
wheel on rear axle, and set the<br />
cap in place. Tap cap onto axle<br />
with hammer.<br />
that wheel is secure by<br />
pulling on it.<br />
Cap<br />
Capuchon<br />
Tapacubos<br />
2X<br />
On certain models<br />
Sur certains modèles<br />
En ciertos modelos<br />
Placez la poussette sur la côté.<br />
Replacez la roue sur l'essieu<br />
arrière, et fixez le capuchon en<br />
place. Abaissez le capuchon sur<br />
l'essieu avec un marteau.<br />
que cette roue est<br />
solide en la tirant.<br />
Ponga el cochecito de costado.<br />
Coloque la rueda en el eje<br />
trasero y fije el tapacubos en su<br />
lugar. Coloque el tapacubos en<br />
el eje golpeando suavemente<br />
con un martillo.<br />
que la rueda esté<br />
segura tirando de ella.<br />
10<br />
SNAP!<br />
ENCLENCHEZ!<br />
¡CHASQUIDO!<br />
14
11<br />
Open canopy.<br />
Ouvrez le baldaquin.<br />
Abra la capota.<br />
12<br />
SNAP!<br />
ENCLENCHEZ!<br />
¡CHASQUIDO!<br />
15
Always secure your<br />
child with the seat<br />
belt. The tray is not<br />
a restraint device.<br />
lift the<br />
stroller by the<br />
child’s tray. Use care<br />
when snapping the<br />
tray on the stroller<br />
with a child in the<br />
stroller.<br />
<br />
Toujours attacher votre<br />
enfant avec la ceinture<br />
de sécurité. Ce plateau<br />
n'est pas un système de<br />
retenue. lever<br />
la poussette par le<br />
plateau pour enfant.<br />
Prenez garde lorsque<br />
vous enclenchez le<br />
plateau à la poussette<br />
avec un enfant dans<br />
la poussette.<br />
<br />
Siempre sujete a su<br />
niño con el cinturón<br />
de seguridad. La<br />
bandeja no es un<br />
dispositivo de<br />
seguridad. <br />
levante el cochecito<br />
por la bandeja del<br />
niño. Lleve cuidado<br />
al conectar la bandeja<br />
al cochecito cuando<br />
el niño esté dentro<br />
del mismo.<br />
13<br />
SNAP!<br />
ENCLENCHEZ!<br />
¡CHASQUIDO!<br />
Push button.<br />
Appuyez sur le bouton.<br />
Oprima el botón.<br />
16
14<br />
SNAP!<br />
ENCLENCHEZ!<br />
¡CHASQUIDO!<br />
15 To open tray, pull tab as shown.<br />
Pour ouvrir le plateau, tirer la<br />
languette tel qu'illustré.<br />
Para abrir la bandeja, tire de la<br />
lengüeta como se indica.<br />
17
16 17<br />
<br />
<br />
To lower<br />
Pour abaisser<br />
Para bajar<br />
To raise<br />
Pour remonter<br />
Para levantar<br />
SNAP!<br />
ENCLENCHEZ!<br />
¡CHASQUIDO!<br />
<br />
<br />
Always apply both<br />
brakes. <br />
that brakes are<br />
on by trying to<br />
push stroller.<br />
<br />
Toujours utiliser les deux<br />
freins. que les<br />
freins fonctionnent en<br />
essayant de pousser<br />
la poussette.<br />
<br />
Siempre use ambos<br />
frenos. <br />
los frenos tratando de<br />
empujar el cochecito.<br />
18 19<br />
18
20<br />
21<br />
Front swivel wheels lock for use on<br />
uneven surfaces such as grass,<br />
stones or gravel.<br />
Les roues pivotantes avant se<br />
barrent pour un usage sur les<br />
surfaces irrégulières tel que le<br />
gazon, les cailloux ou le gravier.<br />
Las ruedas giratorias delanteras se<br />
traban para el uso en superficies<br />
desparejas tales como césped,<br />
piedras o grava.<br />
19
have one of the<br />
following seat<br />
<br />
<br />
aura une des<br />
ceintures de<br />
<br />
<br />
uno de los siguientes<br />
cinturones de<br />
<br />
22 23<br />
<br />
24<br />
<br />
20
25<br />
26<br />
27<br />
To adjust harness.<br />
To change shoulder harness<br />
slots see page 23.<br />
Pour ajuster le harnais.<br />
Pour changer des fentes de<br />
harnais d'épaule voir la page 23.<br />
Para ajustar el arnés.<br />
Para cambiar ranuras del arnés<br />
del hombro vea la página 23.<br />
21
28<br />
To convert to 3-pt buckle.<br />
Pour convertir en boucle à<br />
3-points.<br />
Para convertirlo en un hebilla<br />
de 3 puntos.<br />
29<br />
30<br />
31<br />
22
Shoulder harness anchor— larger child<br />
Harnais d 'ancrage à l 'épaule pour grand enfant<br />
Anclaje del arnés del hombro - niño grande<br />
Shoulder harness anchor— smaller child<br />
Harnais d 'ancrage à l 'épaule pour petit enfant<br />
Anclaje del arnés del hombro - niño pequeño<br />
Slide adjuster<br />
Glissez le régleur<br />
Ajustador deslizable<br />
32<br />
Use either shoulder harness anchor in<br />
the slots that are closest to child’s<br />
shoulder height.<br />
Use slide adjuster for further adjustment.<br />
Utilisez l'un ou l'autre des harnais<br />
d'ancrage à l'épaule dans les fentes<br />
qui sont les plus proches de la hauteur<br />
de l'épaule de l'enfant.<br />
Utilisez le régleur pour plus d'ajustement.<br />
Use uno de los anclajes del arnés del<br />
hombro en las ranuras que estén más<br />
cerca a la altura del hombro del niño.<br />
Use el ajustador deslizable para lograr<br />
ajustes adicionales.<br />
23
When making<br />
adjustments to<br />
the stroller seat,<br />
make sure child’s<br />
head, arms, and<br />
legs are clear of<br />
moving seat parts<br />
and stroller frame.<br />
33<br />
<br />
Lorsque vous faites des<br />
ajustements au siège<br />
de la poussette,<br />
s'assurer que la tête de<br />
l'enfant, les bras, et les<br />
jambes soient dégagés<br />
des pièces du siège en<br />
mouvement et de<br />
l'armature de la<br />
poussette.<br />
<br />
Cuando realiza ajustes<br />
al asiento del<br />
cochecito, asegúrese<br />
que la cabeza, brazos y<br />
piernas del niño están<br />
lejos de las piezas del<br />
asiento que se mueven<br />
y del armazón del<br />
cochecito.<br />
Recline strap<br />
Courroie d'inclinaison<br />
Correa de reclinación<br />
Recline tab<br />
Languette d'inclinaison<br />
Lengüeta de reclinación<br />
34<br />
35<br />
pull recline strap up.<br />
tirer sur la<br />
courroie d'inclinaison.<br />
tire la correa<br />
de reclinación hacia arriba.<br />
pull recline tab<br />
down.<br />
abaisser la<br />
languette d'inclinaison.<br />
tire la<br />
lengüeta de reclinación hacia<br />
abajo.<br />
24
36<br />
<br />
<br />
<br />
37<br />
25
® <br />
<br />
®<br />
<br />
®<br />
For models that do not come with an infant car seat one may be<br />
purchased separately.<br />
Use only a <strong>Graco</strong> ® SnugRide ® , <strong>Graco</strong> ®<br />
SnugRide ® 32, <strong>Graco</strong> ® SnugRide ® 35 or Infant SafeSeat car<br />
seat with this travel system. (Not intended for use with AUTOBABY<br />
(Europe only) and ASSURA infant car seats.) If unsure of the model or<br />
for more information please call <strong>Graco</strong>’s<br />
customer service number: 1-800-345-4109. Improper use of this<br />
stroller with other manufacturers’ car seats may result in serious injury<br />
or death. Read the manual provided with your <strong>Graco</strong> car seat before<br />
using it with your stroller.<br />
Always secure your child with the car seat harness when using the<br />
car seat in the stroller. If your child is already in the car seat, <br />
that the child is secured with the harness.<br />
Pour les modèles qui n'ont pas un porte-bébé, vous pouvez en<br />
acheter un séparément.<br />
Utilisez uniquement un dispositif de retenue<br />
pour enfant SnugRide ® , SnugRide ® 32 de <strong>Graco</strong> ® , SnugRide ® 35 de<br />
<strong>Graco</strong> ® ou SafeSeat de <strong>Graco</strong> ® avec ce système de voyage. (Non<br />
conçu pour utiliser avec les dispositifs de retenue pour nourrisson<br />
AUTOBABY (Europe seulement) et ASSURA.) En cas de doute au sujet<br />
du modèle ou pour obtenir plus de renseignements, veuillez<br />
communiquer avec le service à la clientèle de <strong>Graco</strong> au<br />
1-800-345-4109. Tout mauvais usage de cette poussette avec un<br />
siège d'auto d'une autre marque peut occasionner des blessures<br />
sérieuses ou mortelles. Lire le manuel d'utilisation fourni avec le<br />
porte-bébé <strong>Graco</strong> avant de l'utiliser avec cette poussette.<br />
<br />
vous l'utilisez avec la poussette. Si votre enfant est déjà dans le<br />
porte-bébé, <br />
harnais.<br />
26
En los modelos que no incluyen un asiento para automóvil, se puede<br />
comprar uno por separado.<br />
Use solamente los asientos infantiles para<br />
automóviles SnugRide ® , SnugRide ® 32 de <strong>Graco</strong> ® , SnugRide ® 35 de<br />
<strong>Graco</strong> ® o SafeSeat de <strong>Graco</strong> ® en este sistema de viaje. (No debe<br />
usarse con AUTOBABY (Europa solamente) y asientos de automóvil<br />
para bebé ASSURA.) Si no está seguro del modelo o para obtener más<br />
información, por favor llame al número de servicio al cliente de<br />
<strong>Graco</strong>: 1-800-345-4109. El uso inadecuado de este cochecito con<br />
asientos para automóvil de otros fabricantes podría resultar en<br />
lesiones serias o la muerte. Lea el manual incluido con su<br />
transportador <strong>Graco</strong> antes de usarlo con su cochecito.<br />
<br />
usa el transportador en el cochecito. Si su niño ya está en el<br />
transportador, verifique que esté asegurado con el arnés.<br />
38<br />
<br />
lowest position. Fold the canopy.<br />
<br />
SNAP!<br />
ENCLENCHEZ!<br />
¡CHASQUIDO!<br />
<br />
position la plus basse. Pliez le<br />
baldaquin.<br />
<br />
pour enfant au plateau pour<br />
enfant.<br />
<br />
hacia atrás hasta la posición más<br />
baja. Pliegue la capota.<br />
<br />
en la bandeja del niño.<br />
Attachment latch<br />
Loquet de sûreté<br />
de l’attachement<br />
Traba de seguridad<br />
27
39<br />
<br />
shown. <br />
<br />
<br />
the car seat handle.<br />
<br />
qu’il soit en-dessous des loquets de sûreté sur le guidon de la<br />
poussette comme illustré. <br />
de sûreté. <br />
<br />
<br />
<br />
attaché solidement en tirant sur le guidon du dispositif<br />
de retenue pour enfant.<br />
<br />
esté por debajo de las trabas de la manija del cochecito como<br />
se muestra. <br />
<br />
<br />
<br />
<br />
28
40<br />
unlock latches<br />
above car seat, squeeze release<br />
handle at back of car seat, and lift car<br />
seat out of the stroller. When car seat<br />
is not in use, latches should be in<br />
unlocked position, away from baby.<br />
<br />
déverrouillez<br />
les loquets de sûreté au dessus du<br />
dispositif de retenue pour enfant,<br />
pressez la poignée de dégagement à<br />
l'arrière du dispositif de retenue pour<br />
enfant, et enlevez le dispositif de<br />
retenue pour enfant de la poussette.<br />
Quand le dispositif de retenue pour<br />
enfant n'est pas utilisé, les loquets<br />
de sûreté doivent être déverrouillés,<br />
loin de bébé.<br />
<br />
abra los cierres arriba<br />
del asiento para automóvil; apriete la<br />
manivela de soltar en la parte trasera<br />
del asiento para automóvil, y levante<br />
el asiento para automóvil del<br />
cochecito. Cuando el asiento para<br />
automóvil no esté en uso, los cierres<br />
deben estar en la posición abierta,<br />
fuera del alcance del bebé.<br />
29
(if so equipped) may be machine washed<br />
in cold water on delicate cycle and drip-dried. NO BLEACH.<br />
use only household soap and warm<br />
water. NO BLEACH or detergent.<br />
for loose screws,<br />
worn parts, torn material or stitching. Replace or repair the parts as<br />
needed. Use only <strong>Graco</strong> replacement parts.<br />
could cause fading or<br />
warping of parts.<br />
open canopy and allow to dry<br />
thoroughly before storing.<br />
use a light oil (e.g., WD-40, 3-in-1,<br />
or sewing machine oil). It is important to get the oil into<br />
the axle and wheel assembly as illustrated.<br />
<br />
completely clean your stroller afterward to remove sand and salt from<br />
mechanisms and wheel assemblies.<br />
<br />
(si applicable) est lavable à la<br />
machine à l’eau froide et au cycle délicat. Étendre pour sécher. PAS<br />
D’EAU DE JAVEL.<br />
utilisez<br />
un savon de ménage et de l’eau tiède. PAS D’EAU DE JAVEL ou<br />
détergent.<br />
pour des vis<br />
desserrées, pièces usagées, tissu ou couture déchiré. Remplacez ou<br />
réparez ces pièces si nécessaire. Utilisez seulement les pièces de<br />
remplacement <strong>Graco</strong>.<br />
peut provoquer une<br />
décoloration prématurée du tissu et du plastique.<br />
ouvrez le baldaquin et laissez<br />
sécher complètement avant l’entreposage.<br />
utilisez une huile légère<br />
(i.e. WD-40, 3 dans 1, ou bien une huile pour machine à<br />
coudre). Il est important de déposer l’huile dans l’essieu<br />
de la roue.<br />
<br />
prenez soin de bien la nettoyer après l’usage afin d’enlever le sable<br />
et le sel du mécanisme et des roues.<br />
30
(si así está equipado) puede lavarse a<br />
máquina en agua fria en el ciclo delicado y secarse al aire. NO USE<br />
CLORO.<br />
usar solamente<br />
jabón de uso doméstico y agua tibia. NO USE CLORO o detergente.<br />
para<br />
determinar si hay tornillos flojos, piezas gastadas, material o costuras<br />
rotas. Cambie o repare las piezas según sea necesario. Use solamente<br />
repuestos marca <strong>Graco</strong>.<br />
o el calor podría causar que<br />
se destiña o se tuerzan algunas piezas.<br />
abra la capota y déjelo secar<br />
completamente antes de guardarlo.<br />
use un aceite liviano<br />
(por ej., WD-40, 3-en-1, o aceite para máquinas de coser).<br />
Es importante hacer penetrar el aceite en el eje y equipo<br />
de la rueda como se ilustra.<br />
limpie el<br />
cochecito completamente después para sacar la arena y la sal<br />
de los mecanismos y equipos de las ruedas.<br />
31
In<br />
<br />
accessories or for warranty<br />
<br />
please contact us at<br />
the following:<br />
<br />
accesorios o para obtener<br />
<br />
por favor<br />
comuníquese con nosotros en:<br />
www.gracobaby.com<br />
<br />
<br />
<br />
contact Elfe at:<br />
<br />
<br />
communiquez avec Elfe au:<br />
<br />
(Montréal : 514-344-3533 / Fax: 514-344-9296).<br />
or/ou<br />
www.elfe.net<br />
<br />
<br />
<br />
To register your <strong>Graco</strong> product from within the U.S.A. visit us<br />
online at www.gracobaby.com/productregistration. We currently<br />
do not accept product registrations from those living outside<br />
the United States of America.<br />
Pour inscrire votre produit <strong>Graco</strong> aux États-Unis, visitez notre site<br />
Internet www.gracobaby.com/productregistration. Pour le moment<br />
nous n’acceptons pas d’inscriptions de produits des<br />
résidents hors des États-Unis.<br />
Para registrar su producto <strong>Graco</strong> desde dentro de los EE.UU., visítenos<br />
en línea en www.gracobaby.com/productregistration. Actualmente no<br />
aceptamos registros de los productos de quienes viven fuera de los<br />
Estados Unidos de América.<br />
32
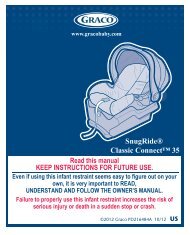
Infant<br />
Restraint/<br />
Carrier<br />
Owner’s Manual<br />
READ THIS MANUAL<br />
KEEP INSTRUCTIONS<br />
FOR FUTURE USE.<br />
Do not install or use<br />
this infant restraint until you<br />
read and understand the<br />
instructions in this manual.<br />
FAILURE TO PROPERLY<br />
USE THIS INFANT<br />
RESTRAINT INCREASES<br />
THERISKOFSERIOUS<br />
INJURY OR DEATH<br />
IN A SUDDEN STOP<br />
OR CRASH.<br />
© 2007 <strong>Graco</strong> ISPC090BB 2/07 US
1.0 Warning to Parents and Other Users . . . . . . . . . . . . . . . . . .4-5<br />
2.0 Registration Information . . . . . . . . . . . . . . . . . . . . . . . . . . . .6-7<br />
2.1 Register Your Infant Restraint . . . . . . . . . . . . . . . . . . . . . . .6<br />
2.2 RecallInformation ................................6<br />
2.3 IfYouNeedHelp .................................7<br />
3.0 Features and Components . . . . . . . . . . . . . . . . . . . . . . . . .8-14<br />
3.1 Removing and Attaching Base . . . . . . . . . . . . . . . . . . . . . .10<br />
3.2 Adjusting Handle ................................10<br />
3.3 AttachingCanopy................................11<br />
3.4 Head Support (on certain models) ...................12<br />
3.5 Seat Pad Assembly (certains models) ................13<br />
3.6 Cold Weather Boot (certain models) .................14<br />
3.7 Harness Covers (certain models) ...................14<br />
4.0 Important Information ............................15-19<br />
4.1 Warnings for Use as Infant Restraint .................15<br />
4.2 Warning for Use With a Stroller .....................17<br />
4.3 Additional Warnings for Use as Carrier ...............18<br />
4.4 Height and Weight Limits . . . .......................19<br />
2
5.0 Infant Restraint Location . . . . . . . . . . . . . . . . . . . . . . . . . .20-25<br />
5.1 VehicleSeatRequirements ........................20<br />
5.2 Vehicle Seat Belt Requirements . . . . . . . . . . . . . . . . . . . .21<br />
5.2.1 UNSAFE Vehicle Belt Systems . . . . . . . . . . . . . . . . .22<br />
5.2.2SAFEVehicleBeltSystems ...................23<br />
5.3 LATCH Locations . . . . . . . . . . . . . . . . . . . . . . . . . . . . . . . .25<br />
6.0 Using Infant Restraint .................................26-36<br />
6.1 Positioning Harness Straps ........................26<br />
6.2 Securing Child in Infant Restraint ...................28<br />
6.3 Installing the Infant Restraint/Base Using Vehicle Belt . . .30<br />
6.4 Using LATCH toInstallBase.......................33<br />
6.5 Reclining Infant Restraint/Base .....................34<br />
7.0 Additional Information ............................37-38<br />
7.1 Airplane Use ...................................37<br />
7.2 Storing LATCH ..................................37<br />
7.3 Cleaning and Maintenance ........................38<br />
Replacement Parts .....................................40<br />
3
1.0 Warnings to Parents and<br />
Other Users<br />
No infant restraint can guarantee protection from injury in every<br />
situation. However, proper use of this infant restraint reduces the<br />
risk of serious injury or death to your child.<br />
Failure to properly use this infant restraint increases the risk of<br />
serious injury or death in a sharp turn, sudden stop or crash.<br />
Your child’s safety depends on you installing and using this<br />
infant restraint correctly.<br />
Even if using this infant restraint seems easy to figure out on your<br />
own, it is very important to READ THE OWNER’S MANUAL.<br />
The manual is located in the back pocket of the infant restraint.<br />
You must also read your vehicle owner’s manual.<br />
Your child’s safety depends on:<br />
1. Choosing a suitable location in your vehicle. Some seating<br />
positions, such as those equipped with air bags, may not be<br />
safe locations for this infant restraint.<br />
2. Inserting the harness straps in the proper slots for your child.<br />
3. Properly securing your child in the infant restraint.<br />
4
4. Placing infant restraint/base in a rear-facing position.<br />
5. Properly routing the vehicle seat belt or LATCH.<br />
6. Properly reclining the infant restraint.<br />
7. Properly securing the infant restraint in the vehicle using a<br />
seat belt designed to restrain an infant restraint or by using<br />
LATCH. Many seat belts are NOT safe to use with infant<br />
restraints, even though they can easily be threaded through<br />
the infant restraint!<br />
5
2.0 Registration Information<br />
Model Number:<br />
Manufactured in:<br />
Purchase Date:<br />
2.1 Register Your Infant Restraint<br />
Please fill in the above information. The model number and the<br />
manufactured in (date) can be found on a label underneath your<br />
infant restraint. Fill out the prepaid registration postcard attached to<br />
the seat cover and mail it today.<br />
Child restraints could be recalled for safety reasons. You must<br />
register this restraint to be reached in a recall. Send your name,<br />
address and model/serial numbers to:<br />
<strong>Graco</strong> Children’s Products Inc.<br />
150 Oaklands Blvd.<br />
Exton, PA 19341<br />
or call 1-800-345-4109<br />
or www.gracobaby.com<br />
2.2 Recall Information<br />
• Call the U.S. Government’s Vehicle Safety Hotline<br />
at 1-888-327-4236 (TTY: 1-800-424-9153) or go to<br />
http://www.NHTSA.gov<br />
• <strong>Graco</strong>: 1-800-345-4109 or www.gracobaby.com<br />
6
2.3 If You Need Help<br />
In the U.S.A. or Canada, please contact our Customer Service<br />
Department with any questions you may have concerning parts, use,<br />
or maintenance. When you contact us, please have your product’s<br />
model and serial numbers ready so that we may help you<br />
efficiently. These numbers can be found on a sticker on the<br />
underside of your infant restraint.<br />
USA: 1-800-345-4109 or www.gracobaby.com<br />
Canada: 1-800-667-8184 Montreal: 514-344-3533<br />
7
3.0 Features and Components<br />
Harness<br />
slots<br />
FRONT VIEW<br />
Handle<br />
Harness<br />
buckle<br />
Harness<br />
clip<br />
Handle<br />
adjustment<br />
button<br />
Vehicle<br />
belt<br />
hook<br />
Harness<br />
buckle tongues<br />
Adjustment Belt<br />
Vehicle belt/LATCH path<br />
LATCH<br />
Storage<br />
Bars<br />
LATCH Connector<br />
Adjustable Foot<br />
Base<br />
8
REAR VIEW<br />
Harness<br />
tightener<br />
Canopy<br />
Release handle<br />
Level<br />
indicator*<br />
Harness slot<br />
Owner’s manual<br />
pocket<br />
Attachment<br />
latch<br />
*Level<br />
Indicator<br />
**Locking<br />
Clip<br />
9<br />
Locking clip**<br />
The level indicator is attached to the side of<br />
the infant restraint, and indicates whether or<br />
not the infant restraint is properly reclined.<br />
The locking clip is stored on the bottom of<br />
the infant restraint. You will need to use it<br />
with certain types of vehicle seat belts.
3.1 Removing and Attaching Base<br />
To remove infant restraint, squeeze handle at<br />
back of seat and lift infant restraint from base<br />
as shown ➊.<br />
To put infant restraint in base, push infant<br />
restraint down until it clicks into base. Pull up<br />
on infant restraint to be sure it is latched<br />
firmly into base.<br />
3.2 Adjusting Handle<br />
1. Press handle adjustment buttons on<br />
both sides of handle ➋.<br />
2. Rotate handle until it clicks into any<br />
of the 5 positions:<br />
Position A: MUST be used<br />
when carrying by handle,<br />
Position B,C,D: are convenience<br />
positions,<br />
Position E: is the sitting position,<br />
NEVER use positions B or C<br />
in the vehicle.<br />
BOTH handle adjustment<br />
buttons must pop out to lock<br />
handle in place ➌.<br />
3. Push and pull on the handle<br />
to be sure it is locked firmly<br />
in position.<br />
Carrying<br />
A<br />
B<br />
➊<br />
➋<br />
➌<br />
C<br />
D<br />
E Sitting<br />
10
3.3 Attaching Canopy<br />
1. Infant restraint comes with four<br />
(two on certain models) identical<br />
canopy support parts.<br />
Thread one canopy support<br />
completely through one sewn<br />
tunnel ➍.<br />
2. Slide straight end of a second<br />
support into the straight end of<br />
the first support ➎.<br />
3. On models with four canopy supports,<br />
repeat steps one and two for the other<br />
canopy tunnel. The canopy should appear<br />
as shown ➏.<br />
OR<br />
➍<br />
➎<br />
➏<br />
4. Attach canopy in the areas between the<br />
infant restraint and the handle base ➐.<br />
To remove the canopy, reverse the steps.<br />
11<br />
➐
3.4 Head Support (on certain models)<br />
Some infants may need extra support<br />
to keep their head and body in a<br />
comfortable position. Unsnap the sides<br />
and resnap them with the harness<br />
straps threaded through the slots in<br />
the cushion ➊.<br />
➊<br />
If your model does not include<br />
a head support, you may want<br />
to use a rolled towel or a<br />
blanket for support ➋.<br />
MAKE SURE THAT NOTHING<br />
INTERFERES WITH THE<br />
HARNESS OR THE BLANKET.<br />
It must still be flat and snug<br />
against your child’s shoulders.<br />
➋<br />
12
3.5 Seat Pad Assembly<br />
(on certain models)<br />
Step 1.<br />
Wrap bottom edge of seat pad<br />
around the foot end of seat as<br />
shown.<br />
➊<br />
Step 2.<br />
Wrap the top edge of the seat pad<br />
around the head end of the seat<br />
as shown.<br />
Step 3.<br />
On side of seat, wrap elastic strap<br />
around the handle as shown.<br />
Skip Steps 3 and 4 if your model<br />
does not include straps.<br />
Step 4.<br />
Fasten strap to hook that is<br />
attached to the seat pad. Repeat<br />
steps for the elastic strap and<br />
hook on the other side of the seat<br />
pad.<br />
13<br />
➋<br />
➌<br />
➍
3.6 Cold Weather Boot<br />
(on certain models)<br />
Some models come with a cold weather<br />
boot. To use, wrap elastic around bottom<br />
of seat and place both elastic loops around<br />
vehicle belt hooks as shown ➑.<br />
➑<br />
3.7 Harness Covers (on certain models)<br />
To prevent ejection in sudden stop or crash:<br />
• Always make sure shoulder straps are threaded through slots and<br />
properly positioned on shoulders.<br />
• Make sure that harness covers do not interfere with placement of<br />
the chest clip at armpit level.<br />
14
4.0 Important Information<br />
4.1 Warnings for Use as Infant Restraint<br />
• DO NOT INSTALL OR USE THIS INFANT RESTRAINT<br />
AND BASE UNTIL YOU READ AND UNDERSTAND THE<br />
INSTRUCTIONS IN THIS MANUAL AND IN YOUR VEHICLE<br />
OWNER’S MANUAL. DO NOT let others install or use the<br />
infant restraint unless they understand how to use it.<br />
• FAILURE TO PROPERLY USE THIS INFANT RESTRAINT<br />
AND BASE INCREASES THE RISK OF SERIOUS INJURY<br />
OR DEATH IN A SUDDEN STOP OR CRASH. Your child can<br />
be injured in a vehicle even if you are not in a crash. Sudden<br />
braking and sharp turns can injure your child if the infant<br />
restraint is not properly installed or if your child is not properly<br />
secured in the infant restraint.<br />
• PLACE THIS INFANT RESTRAINT IN A REAR-FACING<br />
POSITION when using it in the vehicle.<br />
• DO NOT PLACE THIS INFANT RESTRAINT IN A VEHICLE<br />
SEATING LOCATION THAT HAS A FRONT<br />
AIR BAG. If the air bag inflates, it can hit the<br />
infant restraint with great force and cause<br />
serious injury or death to your child. Check<br />
vehicle owner’s manual for information about<br />
side air bags and infant restraint installation.<br />
15
• SOME SPECIAL NEEDS CHILDREN, such as pre-term babies<br />
or those who have tested positive for positional apnea, may be<br />
at increased risk of suffering breathing or other difficulties in an<br />
infant restraint. If your child has special needs, we recommend<br />
that you have your physician or hospital staff evaluate your child<br />
and recommend the proper infant restraint or car bed before<br />
using this product.<br />
• According to accident statistics, CHILDREN ARE SAFER WHEN<br />
PROPERLY RESTRAINED IN REAR VEHICLE SEATING<br />
POSITIONS, RATHER THAN FRONT SEATING POSITIONS.<br />
For a vehicle with a front passenger air bag, refer to your vehicle<br />
owner’s manual as well as these instructions for infant restraint<br />
installation.<br />
• NEVER LEAVE YOUR CHILD UNATTENDED.<br />
• NEVER LEAVE AN INFANT RESTRAINT AND BASE<br />
UNSECURED IN YOUR VEHICLE. An unsecured infant<br />
restraint or base can be thrown around and may injure occupants<br />
in a sharp turn, sudden stop or crash. Remove it or make sure<br />
that it is securely belted in the vehicle. If not using LATCH, make<br />
sure unsecured LATCH connectors are properly stored on base.<br />
• REPLACE THE INFANT RESTRAINT AND BASE AFTER AN<br />
ACCIDENT OF ANY KIND. An accident can cause damage to<br />
the infant restraint that you cannot see.<br />
• STOP USING INFANT RESTRAINT AND BASE AND THROW IT<br />
AWAY after the date molded into the back of the infant restraint.<br />
• DO NOT MODIFY YOUR INFANT RESTRAINT AND BASE or<br />
use any accessories or parts supplied by other manufacturers.<br />
16
• NEVER USE INFANT RESTRAINT AND BASE IF IT HAS<br />
DAMAGED OR MISSING PARTS. DO NOT use a cut, frayed<br />
or damaged infant restraint harness or vehicle seat belt or<br />
LATCH belt.<br />
• THE INFANT RESTRAINT CAN BECOME VERY HOT IF LEFT IN<br />
THE SUN. Always touch the surface of any metal or plastic parts<br />
before putting your child in the infant restraint.<br />
• THIS INFANT RESTRAINT CONFORMS to all applicable<br />
Federal Motor Vehicle Safety Standards and is certified for<br />
use in motor vehicles and aircraft.<br />
• NEVER GIVE THIS INFANT RESTRAINT AND BASE to<br />
someone else without also giving them this manual.<br />
• NEVER USE A SECOND-HAND INFANT RESTRAINT AND BASE<br />
or an infant restraint whose history you do not know.<br />
4.2 Warning for Use With a Stroller<br />
• USE ONLY WITH STROLLERS THAT ARE PART OF THE<br />
GRACO TRAVEL SYSTEM. Refer to stroller instruction sheet<br />
for details about how to attach the infant restraint to your stroller.<br />
If you do not have an instruction sheet, please call toll-free,<br />
1-800-345-4109 to obtain one, or visit our website,<br />
www.gracobaby.com.<br />
• Improper use of <strong>Graco</strong>’s infant car seat with other manufacturer’s<br />
strollers may result in serious injury or death.<br />
17
4.3 Additional Warnings<br />
for Use as Carrier<br />
• FALL HAZARD: Child’s movements can slide carrier.<br />
NEVER place carrier near edges of countertops, tables or other<br />
high surfaces. Always stay within arms reach whenever carrier is<br />
not on floor/ground.<br />
BE SURE handle locks into position before lifting carrier.<br />
NEVER place carrier in the top of a shopping cart.<br />
• SUFFOCATION HAZARD: Infant carrier can roll over on soft<br />
surfaces and suffocate child. Never place carrier on beds, sofas<br />
or other soft surfaces.<br />
• STRANGULATION HAZARD: Child can strangle in loose restraint<br />
straps. Always use harness, never leave child in carrier when<br />
straps are loose or undone.<br />
KEEP STRINGS AND CORDS AWAY FROM CHILD. Strings and<br />
cords can cause strangulation.<br />
DO NOT place carrier near a window where cords from blinds or<br />
drapes can strangle a child.<br />
DO NOT hang strings on or over the carrier.<br />
DO NOT place items with a string around a child’s neck, such<br />
as hood strings, pacifier cords, etc.<br />
DO NOT attach strings to toys.<br />
18
4.4 Height and Weight Limits<br />
FAILURE TO USE INFANT RESTRAINT IN A MANNER<br />
APPROPRIATE FOR YOUR CHILD’S SIZE MAY INCREASE<br />
THE RISK OF SERIOUS INJURY OR DEATH.<br />
Your child MUST meet all requirements:<br />
• WEIGHT: 5-22 lbs. (2.3-10 kg)<br />
• HEIGHT: 29 inches (73 cm) or less<br />
19
5.0 Infant Restraint Location<br />
5.1 Vehicle Seat Requirements<br />
IMPROPER PLACEMENT OF THE INFANT RESTRAINT<br />
INCREASES THE RISK OF SERIOUS INJURY OR DEATH.<br />
Some seating positions in your vehicle may not be safe for this infant<br />
restraint. Some vehicles do not have any seating positions that can<br />
be used safely with the infant restraint. If you are not sure where to<br />
place the infant restraint in your vehicle, consult your vehicle owner’s<br />
manual or call <strong>Graco</strong> at 1-800-345-4109.<br />
• Whenever possible, secure the infant<br />
restraint in the center position of the<br />
seat directly behind the front seats ➊.<br />
An adult should ride in the rear seat to<br />
watch the child. If the driver is the only<br />
adult present, a child may need to ride in the front seat. BUT<br />
ONLY if there is no passenger-side air bag and all of the other<br />
vehicle seat and seat belt requirements listed are met.<br />
• NEVER place this infant restraint in a<br />
vehicle seating location that has a<br />
front air bag ➋. See“4.1 Warnings for<br />
Use as Infant Restraint”, p.15.<br />
➊<br />
➋<br />
20
• The VEHICLE seat must face forward.<br />
• DO NOT use infant restraint on vehicle seats with seat backs<br />
that will not lock in an upright position. DO NOT use seats that<br />
can fold down without having to release a lock or latch of some<br />
kind. These seats can fly forward and strike the child in a sudden<br />
stop or crash.<br />
5.2 Vehicle Seat Belt Requirements<br />
MANY SEAT BELT SYSTEMS ARE NOT SAFE TO USE WITH<br />
THE INFANT RESTRAINT. THE VEHICLE SEAT BELT MUST BE<br />
DESIGNED TO HOLD THE INFANT RESTRAINT TIGHTLY AT<br />
ALL TIMES.<br />
Pay careful attention to these systems; some of the seat belts that<br />
are not safe to use look very much like seat belts that are safe to<br />
use. If you are unsure, consult your vehicle owner’s manual or call<br />
<strong>Graco</strong> at 1-800-345-4109.<br />
21
5.2.1 UNSAFE Vehicle Belt Systems<br />
DO NOT use any of the following systems to secure the infant restraint.<br />
LATCH can be used IN PLACE OF the vehicle belt system. Please<br />
refer to vehicle owners manual for LATCH locations.<br />
• Lap Belts with Emergency Locking Retractor (ELR)<br />
This lap belt stays loose and can move until it locks<br />
in a crash or sudden stop.<br />
• Combination Lap/Shoulder Belt with Retractor<br />
Each strap has a retractor at one end and is<br />
attached to the latch plate at the other end.<br />
• Passive Restraint - Lap Belt with Motorized<br />
Shoulder Belt<br />
• Passive Restraint - Lap or<br />
Shoulder Belt Mounted on Door<br />
DO NOT use vehicle belts that are<br />
attached to the door in any way or<br />
that move along a track to<br />
automatically surround the<br />
passenger when the door is closed.<br />
• Lap Belts Forward of Seat Crease<br />
22
5.2.2 SAFE Vehicle Belt Systems<br />
THE FOLLOWING BELT SYSTEMS CAN BE USED WITH YOUR<br />
INFANT RESTRAINT, IF the seat location meets all other<br />
requirements of these instructions and those in your vehicle owner's<br />
manual. LATCH can be used in place of the vehicle belt system.<br />
Please refer to vehicle owners manual for LATCH locations.<br />
• Lap Belts - Manually Adjusted<br />
When buckled, the belt is<br />
tightened manually by pulling<br />
on the excess belt while pushing<br />
down hard on the infant restraint.<br />
• Lap Belts with Automatic<br />
Locking Retractor (ALR)<br />
The automatic locking retractor<br />
will not permit the lap belt to<br />
lengthen once it is buckled. Tighten<br />
the belt by feeding the belt back<br />
into the retractor while pushing<br />
down hard on the infant restraint.<br />
• Combination Lap/Shoulder Belt<br />
with Locking Latch Plate<br />
Once it is buckled, this type of<br />
belt has a latchplate that will not<br />
allow the lap portion of the belt to<br />
loosen. Belt is tightened by pulling<br />
hard on the shoulder portion of the<br />
vehicle belt while pushing down<br />
hard on the infant restraint.<br />
23
• Combination Lap/Shoulder<br />
Belt with Sliding Latch Plate<br />
This belt has a latchplate that<br />
slides freely along the belt.<br />
This belt MUST be converted to prevent<br />
movement of the lap portion of the belt. You<br />
must use the locking clip provided with the<br />
infant restraint, unless your vehicle's seat belt<br />
can be converted in another way as described in<br />
your vehicle owner's manual.<br />
To Install Locking Clip:<br />
1. Tighten the buckled belt by pushing down<br />
hard on the infant restraint and pulling<br />
hard on the shoulder belt.<br />
2. While pushing down on infant restraint,<br />
pinch the two straps together behind the<br />
buckle tongue. Unbuckle the belt<br />
without allowing it to slip.<br />
3. Connect lap and shoulder belts<br />
with locking clip as shown ➊<br />
and ➋.<br />
4. Rebuckle belt. Check that lap belt<br />
does not move by pulling and<br />
pushing hard on infant restraint.<br />
If belt loosens or lengthens,<br />
repeat procedure.<br />
24<br />
Locking clip<br />
Locking clip goes here,<br />
1<br />
/2 inch from the buckle<br />
½<br />
inch<br />
➊<br />
➋
5.3 LATCH Locations<br />
Newer vehicles may have one or more seating positions with LATCH<br />
anchorage systems. If vehicle is equipped with LATCH, the vehicle<br />
lower anchor points may be visible at the vehicle seat crease. If not<br />
visible, they may be marked with the symbol .<br />
See your vehicle owner’s manual for exact locations, anchor<br />
identification, and requirements for use with an infant restraint.<br />
Typical seat in a passenger vehicle.<br />
Other vehicle types may have<br />
different LATCH locations or<br />
different markings.<br />
Vehicle Lower<br />
Anchor Points<br />
Vehicle<br />
Seat Crease<br />
LATCH is defined as anchorages 280mm (11.02 inches) on center.<br />
As a manufacturer, we do not recommend using the LATCH system<br />
in the center position if it exceeds this length.<br />
25
6.0 Using Infant Restraint<br />
6.1 Positioning Harness Straps<br />
FAILURE TO PROPERLY ADJUST THE HARNESS STRAPS<br />
FOR YOUR CHILD INCREASES THE RISK OF SERIOUS<br />
INJURY OR DEATH IN THE EVENT OF A SHARP TURN,<br />
SUDDEN STOP OR CRASH. The harness straps must be properly<br />
adjusted to fit your child according to the following instructions.<br />
1. Remove infant restraint from base and rotate handle down to<br />
sitting position. See “3.1 Removing and Attaching Base” and<br />
“3.2 Adjusting Handle”, p.10.<br />
2. Place child in infant restraint as shown ➊. ➊<br />
3. Determine which pair of harness slots are even<br />
with or just below your child’s shoulders ➋.<br />
DO NOT use upper harness slots if they<br />
are above your child’s shoulders. They ➋<br />
will not hold a small child securely in a<br />
sudden stop or crash.<br />
4. If the harness straps must be adjusted:<br />
remove child from infant restraint and move<br />
harness straps to other harness slots.<br />
Use harness slots<br />
even with or just below<br />
child’s shoulders<br />
26
5. From back, remove harness straps from<br />
harness tighteners. From front pull strap<br />
from slot ➌.<br />
➌<br />
6. Reinsert strap in the appropriate slot ➍.<br />
Harness tighteners<br />
➍<br />
7. Thread straps through tighteners exactly<br />
as shown ➎.<br />
➎<br />
8. SAFETY CHECK:<br />
a) CHECK that straps are not twisted;<br />
b) CHECK that straps are secure:<br />
pull on harness straps from front.<br />
27
6.2 Securing Child in Infant Restraint<br />
Failure to properly secure your child in the infant restraint/carrier<br />
increases the risk of serious injury or death from suffocation or falls,<br />
or in the event of a sudden stop or crash. Even when used only as<br />
a carrier, make sure the harness straps are properly secured.<br />
1. Move infant restraint handle to sitting position (see page 10).<br />
2. Open harness clip by squeezing both sides and<br />
unbuckle as shown ➊.<br />
➊<br />
3. Place your child in the infant<br />
restraint as shown in ➋, not<br />
➌. Pull the harness straps<br />
down over your child.<br />
➋<br />
➌<br />
4. Insert the two buckle tongues into the harness buckle on the<br />
crotch strap. Make sure that you hear each tongue click into<br />
the buckle.<br />
DO NOT use the infant restraint if the harness does not latch<br />
in place. Call <strong>Graco</strong> at 1-800-345-4109.<br />
28
5. From the back, pull strap through<br />
harness tightener to tighten the straps<br />
as shown ➍. The remaining straps<br />
should be about equal in length.<br />
CHECK that both straps are flat<br />
and tight on child’s shoulders.<br />
To loosen the straps, hold the harness<br />
tightener up and pull the strap from the<br />
front of the seat ➎.<br />
➍<br />
➎<br />
6. Snap harness clip pieces together ➏.<br />
Position harness clip in middle of chest,<br />
level with armpits and away from the<br />
neck ➐.<br />
7. SAFETY CHECK:<br />
a) CHECK that harness straps are not<br />
twisted.<br />
b) CHECK that the harness is snug.<br />
A snug strap should not allow any slack.<br />
It lies in a relatively straight line without<br />
sagging. It does not press on the child’s<br />
flesh or push the child’s body into an<br />
unnatural position ➐.<br />
➏<br />
➐<br />
29
6.3 Installing the Infant Restraint/Base<br />
Using Vehicle Belt<br />
You must carefully follow the instructions provided by your vehicle<br />
manufacturer, in addition to the information in this manual. Before<br />
proceeding, be sure you have read and understood section 5,<br />
“Infant Restraint Location” on p. 20-25.<br />
Make sure vehicle is on level ground so that<br />
the level indicator, which is attached to the<br />
infant restraint, can be used to properly<br />
recline the infant restraint ➊.<br />
If a front passenger seat is used, slide the<br />
vehicle seat rearward as far as possible<br />
from the dashboard. If a rear seat is used,<br />
make sure the seat in front of it is moved<br />
forward enough and is upright enough to<br />
allow room for the infant restraint.<br />
1. Remove infant restraint from base,<br />
regardless of whether or not you plan on using the base.<br />
2. Place the base ➋ or infant restraint without base ➌ in a<br />
rear-facing position in a forward-facing vehicle seat.<br />
➋<br />
➌<br />
➊<br />
30
3. Thread the seat belt:<br />
Base with seat belt<br />
Belt MUST go<br />
under tongue<br />
Infant restraint with seat belt<br />
4. Buckle the seat belt. Make sure the buckle tongue goes into the<br />
correct buckle ➍. The seat belt should not be twisted or turned.<br />
➍<br />
31
5. Tighten the vehicle seat belt. Refer to your vehicle owners<br />
manual and the instructions in “5.2.2 SAFE Vehicle Belt<br />
Systems”, p.23-24, on tightening your vehicle belt.<br />
To create a very tight installation, push down hard with your knee<br />
or free hand in the middle of infant restraint ➊ or base and pull<br />
and tighten the vehicle belt.<br />
➊<br />
6. Push the infant restraint down into the base and make sure that<br />
you hear a “click” ➋. Pull up on the infant restraint to be sure<br />
it is latched securely into the base.<br />
If the infant restraint does not securely<br />
latch into the base, the infant restraint<br />
provides NO protection for your child.<br />
DO NOT use the infant restraint/base<br />
if the infant restraint does not securely<br />
latch into the base.<br />
➋<br />
32
6.4 Using LATCH to install Base<br />
1. For ease of installation, extend LATCH<br />
to its maximum length.<br />
2. Position base in vehicle seat as<br />
shown.<br />
3. Thread LATCH through base belt<br />
path normally used for vehicle seat<br />
belt. Make sure that LATCH is UNDER<br />
tongue on base ➌.<br />
Belt must lay flat and not be twisted.<br />
4. Hook Connectors to vehicle lower<br />
anchors. Pull firmly on Connectors to<br />
be sure they are attached ➍.<br />
5. Tighten LATCH by pushing down<br />
hard on base and pulling the<br />
adjustment belt ➎.<br />
6. NEVER put two LATCH connectors on<br />
one vehicle LATCH anchor unless<br />
specifically allowed by the vehicle<br />
manufacturer ➏.<br />
Tongue<br />
➌<br />
➍<br />
➎<br />
➏<br />
7. Test infant restraint for secure<br />
installation as described in infant<br />
restraint “Final Safety Check” p.36.<br />
8. Check that the LATCH stays tight and does not slip from the<br />
tightened position. If it does not stay tight, try another<br />
seating position or contact Customer Service.<br />
33
6.5 Reclining Infant Restraint/Base<br />
For your child’s safety, it is important that your infant restraint/base<br />
be properly reclined. Attached to the side of your infant restraint is a<br />
level indicator to help properly recline the infant restraint/base on the<br />
vehicle seat.<br />
Failure to properly recline the infant restraint on the vehicle seat<br />
increases the risk of serious injury or death.<br />
If the infant restraint is too upright, a child’s<br />
head may drop forward and cause breathing<br />
problems.<br />
If the infant restraint is too reclined, a crash<br />
could put too much force on a child’s neck<br />
and shoulders.<br />
The infant restraint must be properly reclined<br />
according to the following instructions.<br />
Check the level indicator. You must look straight on at the indicator.<br />
—If the indicator shows ONLY blue, the infant restraint is<br />
properly leveled.<br />
—If any orange is showing in the level indicator adjust the recline.<br />
34
When using the base:<br />
To lower the foot; pull down on the bottom of<br />
the foot to the desired setting to adjust the<br />
recline ➊.<br />
To raise the foot; set the base on a flat<br />
surface, push in on the fingers on the base<br />
and push down on the base to adjust the<br />
recline ➋.<br />
If there is still orange in the level indicator<br />
when the foot is completely extended then<br />
place a rolled towel under the foot until<br />
ONLY blue shows ➌.<br />
➊<br />
➋<br />
➌<br />
When using only the infant restraint, if there<br />
is still orange in the level indicator when the<br />
infant restraint is resting on the vehicle seat<br />
then place a rolled towel under the infant<br />
restraint until ONLY blue shows ➍.<br />
Readjust the vehicle seat belt as necessary<br />
to secure the infant restraint firmly in the<br />
vehicle seat.<br />
➍<br />
35
Final Safety Check: Every time<br />
you drive with your child,<br />
PUSH DOWN on the top of the infant restraint<br />
slowly but firmly to make sure the vehicle belt<br />
does not lengthen at all and that the vehicle<br />
belt or LATCH is fastened very tightly around the<br />
infant restraint/base ➊.<br />
Holding the infant restraint near the vehicle belt<br />
path, TWIST AND PULL the seat forward and to<br />
both sides to make sure the vehicle belt or<br />
LATCH does not lengthen or loosen and the<br />
infant restraint does not easily move ➋.<br />
➊<br />
➋<br />
36
7.0 Additional Information<br />
7.1 Airplane Use<br />
Installinanairplanethesamewayasinan<br />
automobile. Notify the airline ahead of time<br />
that you intend to bring the seat on board.<br />
Use only in forward-facing aircraft seat.<br />
Follow the flight attendant’s instructions about infant restraint<br />
placement. Do not use this infant restraint if the airplane seat belt<br />
does not hold the infant restraint tightly.<br />
7.2 Storing LATCH<br />
1. For ease of storing, extend<br />
LATCH to its maximum length.<br />
2. Locate the storage bars on<br />
bottom of infant restraint<br />
base ➌.<br />
Storage bars<br />
➌<br />
3. Fasten end of LATCH (without<br />
adjustment belt) onto storage bar.<br />
4. Repeat step 3 for LATCH with<br />
adjustment belt. After fastening onto<br />
storage bar, pull on adjustment belt to<br />
make sure LATCH is securely<br />
fastened.<br />
5. LATCH storage should look like this<br />
when complete ➍.<br />
37<br />
➍<br />
Underside of base
7.3 Cleaning and Maintenance<br />
! TO REMOVE AND WASH INFANT RESTRAINT PAD, follow<br />
instructions in “6.1 Positioning Harness Straps”, p. 26-27.<br />
Carefully remove the seat pad. Machine wash on delicate cycle and<br />
drip-dry. DO NOT USE BLEACH.<br />
Reverse steps to reinstall seat pad. Check that harness system is not<br />
twisted, and pull on harness system to be sure harness is securely<br />
reinstalled.<br />
! INFANT RESTRAINT METAL AND PLASTIC PARTS may be<br />
cleaned by wiping with a mild soap and water solution. DO NOT USE<br />
BLEACH. Use of bleach may weaken plastic parts.<br />
! HARNESS STRAPS may be spot cleaned or replaced. DO NOT<br />
IMMERSE THE HARNESS STRAPS IN WATER. Doing so may weaken<br />
the harness straps.<br />
! BUCKLE may be cleaned with a damp cloth.<br />
! DO NOT LUBRICATE the buckle.<br />
! DO NOT USE INFANT RESTRAINT without seat pad.<br />
! CONTINUOUS USE OF INFANT RESTRAINT MAY CAUSE<br />
DAMAGE TO VEHICLE SEAT. Use an infant restraint mat, towel<br />
or thin blanket to protect upholstery.<br />
38
Notes<br />
39
Replacement Parts<br />
To purchase parts or accessories in the United States for your<br />
<strong>Graco</strong> product, please contact us at the following:<br />
www.gracobaby.com<br />
or<br />
1-800-345-4109<br />
40
Asiento de<br />
seguridad infantil<br />
/portabebés<br />
Manual del propietario<br />
LEA ESTE MANUAL<br />
GUARDE ESTAS<br />
INSTRUCCIONES PARA<br />
USO FUTURO.<br />
No instale ni use este<br />
sistema de seguridad para<br />
niños hasta que haya leído<br />
y entendido las instrucciones<br />
en este manual.<br />
NO USAR DEBIDAMENTE<br />
ESTE SISTEMA DE<br />
SEGURIDAD PARA NIÑOS<br />
AUMENTA EL RIESGO DE<br />
SUFRIR LESIONES SERIAS<br />
O FATALES EN UN<br />
ACCIDENTE O AL<br />
DETENERSE DE REPENTE.<br />
© 2007 <strong>Graco</strong> ISPC090BB 2/07 US
1.0 Advertencias a padres y otros usuarios . . . . . . . . . . . . . . .4-5<br />
2.0 Información sobre el registro . . . . . . . . . . . . . . . . . . . . . . . .6-7<br />
2.1 Registro de su sistema de seguridad para niños . . . . . . . .6<br />
2.2 Información sobre el retiro de productos del mercado . . . .7<br />
2.3 Sinecesitaayuda.................................7<br />
3.0 Funciones y componentes . . . . . . . . . . . . . . . . . . . . . . . . .8-14<br />
3.1 Sacar y conectar la base . . . . . . . . . . . . . . . . . . . . . . . . . .10<br />
3.2 Ajustedelamanija ..............................10<br />
3.3 Colocación de la capota ...........................11<br />
3.4 Apoyacabezas(enciertosmodelos) .................12<br />
3.5 Armado de la almohadilla del asiento (ciertos modelos) . .13<br />
3.6Botaparetiempo(ciertosmodelos) ..................14<br />
3.7 Cubiertas del arnés ...............................14<br />
4.0 Información importante . ..........................15-19<br />
4.1 Advertencias para el uso como sistema de seguridad para<br />
niños ..........................................15<br />
4.2 Advertenciasparaelusoconuncochecito............17<br />
4.3 Advertencias adicionales para el uso como transportador .18<br />
4.4 Limitaciones de peso y estatura ....................19<br />
2
5.0 Ubicación del sistema de seguridad para niños . . . . . .20-25<br />
5.1 Requisitos del asiento del vehículo . . . . . . . . . . . . . . . . . .20<br />
5.2 Requisitos del cinturón de seguridad del vehículo . . . . . .21<br />
5.2.1 Sistemas PELIGROSOS de cinturones para vehículos 22<br />
5.2.2 Sistemas SEGUROS de cinturones para vehículos .23<br />
5.3 Ubicación del LATCH ............................25<br />
6.0 Usar el asiento de seguridad infantil . . ..................26-36<br />
6.1 Colocación de las correas del arnés .................26<br />
6.2 Sujetarelniñoalsistemadeseguridadparaniños......28<br />
6.3 Instalación del sistema de seguridad para niños/base<br />
conelcinturondelvehículo ........................30<br />
6.4 Uso del LATCH parainstalarlabase ................33<br />
6.5 Inclinación del sistema de seguridad para niños/base . . .34<br />
7.0 Información adicional ............................37-38<br />
7.1 Uso en aviones .................................37<br />
7.2 Almacenamiento del LATCH .......................37<br />
7.3 Limpieza y mantenimiento .........................38<br />
Piezasderepuesto .....................................40<br />
3
1.0 Advertencias a padres<br />
y otros usuarios<br />
Ningún asiento de seguridad infantil puede garantizar la<br />
protección contra lesiones en todas las situaciones. Sin embargo,<br />
el uso correcto de este asiento de seguridad infantil reduce el riesgo<br />
de que su niño sufra lesiones serias o la muerte.<br />
El uso incorrecto de este sistema de seguridad infantil aumenta el<br />
riesgo de graves lesiones o la muerte durante un giro brusco, una<br />
parada repentina o un accidente. La seguridad de su niño depende<br />
de la correcta instalación y uso de este sistema de seguridad infantil.<br />
Incluso si el uso de este sistema de seguridad infantil le parece muy<br />
fácil, es muy importante que LEA EL MANUAL DEL PROPIETARIO.<br />
El manual se encuentra en el bolsillo trasero del sistema de<br />
seguridad infantil. También debe leer el manual del propietario<br />
de su vehículo.<br />
La seguridad de su niño depende de:<br />
1. Elegir una ubicación adecuada en su vehículo. Algunos<br />
asientos, tales como los equipados con bolsas de aire, pueden<br />
resultar ubicaciones inseguras para este sistema de<br />
seguridad infantil.<br />
2. Insertar los cinturones en las ranuras apropiadas para su niño.<br />
4
3. Sujetar a su niño de manera adecuada en el sistema de<br />
seguridad infantil.<br />
4. Colocar el sistema de seguridad infantil/base en una posición<br />
orientada hacia atrás.<br />
5. Colocar el cinturón de seguridad del vehículo o LATCH de<br />
manera correcta.<br />
6. Reclinar de manera correcta el sistema de seguridad infantil.<br />
7. Sujetar el sistema de seguridad infantil de manera correcta<br />
en el vehículo usando un cinturón de seguridad diseñado para<br />
sujetar un sistema de seguridad infantil o usando LATCH. Muchos<br />
cinturones de seguridad NO son seguros para su uso con sistemas<br />
de seguridad infantil, a pesar de que se colocan fácilmente en<br />
el mismo.<br />
5
2.0 Información sobre el registro<br />
Número de modelo:<br />
Fabricado en:<br />
Fecha de compra:<br />
2.1 Registro de su sistema de seguridad<br />
para niños<br />
Por favor, complete la información que se solicita más arriba. Los<br />
números de modelo y de serie pueden encontrarse en una etiqueta<br />
ubicada debajo del sistema de seguridad para niños. Llene la tarjeta<br />
postal de registro prepagada que se encuentra en la funda del<br />
asiento y envíela hoy mismo.<br />
Los dispositivos de seguridad para niños podrán ser retirados del<br />
mercado por problemas de seguridad. Debe registrar este sistema<br />
para que lo podamos contactar en dicho caso. Envíe su nombre y<br />
apellido, dirección y números de serie y de modelo a:<br />
<strong>Graco</strong> Children’s Products Inc.<br />
150 Oaklands Blvd.<br />
Exton, PA 19341<br />
o llame al 1-800-345-4109<br />
o www.gracobaby.com<br />
6
2.2 Información sobre el retiro de<br />
productos del mercado<br />
• Llame a la línea telefónica sobre seguridad en automóviles del<br />
gobierno de EE.UU. al 1-888-327-4236 (TTY:1-800-424-9153) o<br />
http://www.NHTSA.gov<br />
• <strong>Graco</strong>: 1-800-345-4109 o www.gracobaby.com<br />
2.3 Si necesita ayuda<br />
En los EE.UU. o Canadá, por favor, comuníquese con el<br />
Departamento de Servicio al Cliente con cualquier pregunta que<br />
pudiera tener sobre piezas, uso o mantenimiento. Cuando se ponga<br />
en contacto con nosotros, por favor tenga listo los números de<br />
modelo y de serie de su producto para que lo podamos ayudar más<br />
eficientemente. Estos números pueden encontrarse en una etiqueta<br />
ubicada en la parte inferior del sistema de seguridad para niños.<br />
EE.UU.: 1-800-345-4109 o www.gracobaby.com<br />
Canadá: 1-800-667-8184 Montreal: 514-344-3533<br />
7
3.0 Funciones y componentes<br />
Ranura para<br />
el arnés<br />
VISTA DELANTERA<br />
Manija<br />
Traba del<br />
arnés<br />
Hebilla<br />
del arnés<br />
Botón de<br />
ajuste de<br />
la manija<br />
Gancho del<br />
cinturón del<br />
vehículo<br />
Lengüetas de la<br />
hebilla del arnés<br />
Cinturón de ajuste<br />
Cinturón del vehículo/recorrido<br />
del LATCH<br />
Barras de<br />
almacenamiento<br />
del LATCH<br />
Gancho del LATCH<br />
Apoyapiés ajustable<br />
Base<br />
8
VISTA TRASERA<br />
Tensionador<br />
del arnés<br />
Capota<br />
Manija de<br />
liberación<br />
Indicador<br />
del nivel*<br />
Ranura para<br />
el arnés<br />
Bolsillo del<br />
manual del<br />
propietario<br />
Traba de<br />
conexión<br />
Traba de seguridad**<br />
*Indicador<br />
del nivel<br />
**Traba de<br />
seguridad<br />
El indicador de nivel se conecta al costado del<br />
sistema de seguridad para niños e indica si el<br />
sistema de seguridad para niños está<br />
debidamente inclinado.<br />
La traba de seguridad se guarda en el fondo del<br />
sistema de seguridad para niños. Necesitará<br />
usarlo con ciertos tipos de cinturones de<br />
seguridad de automóviles.<br />
9
3.1 Sacar y conectar la base<br />
Para sacar el sistema de seguridad para niños,<br />
apriete la manija de liberación en la parte trasera<br />
del asiento y levante el sistema de seguridad<br />
para niños de la base como se indica ➊.<br />
Para poner el sistema de seguridad para niños<br />
en la base, empuje el sistema de seguridad para<br />
niños hacia abajo hasta que se trabe en la base.<br />
Tire hacia arriba del sistema de seguridad para niños<br />
para asegurarse que esté trabado firmemente en la base.<br />
3.2 Ajuste de la manija<br />
1. Oprima los botones de ajuste de la manija<br />
en ambos costados de la manija ➋.<br />
2. Gire la manija hasta que se trabe en<br />
una de las 5 posiciones:<br />
Posición A: DEBE usarse cuando se<br />
transporta de la manija,<br />
Posiciones B,C,D: son posiciones de<br />
mayor comodidad,<br />
Posición E: es la posición de asiento,<br />
NUNCA usarse en las posiciones<br />
B o C en el automóvil.<br />
AMBOS botones de ajuste de<br />
la manija deben saltar para trabar<br />
la manija en su lugar ➌.<br />
3. Empuje y tire de la manija para<br />
asegurarse que está trabada<br />
firmemente en su lugar.<br />
Transporte<br />
A<br />
B<br />
➊<br />
➋<br />
➌<br />
D<br />
C<br />
E Sentarse<br />
10
3.3 Colocación de la capota<br />
1. El sistema de seguridad para niños<br />
viene con cuatro (dos en ciertos<br />
modelos) piezas idénticas de<br />
soporte de la capota. Pase un<br />
soporte de la capota completamente<br />
a través del túnel cosido ➍.<br />
2. Deslice el extremo recto del<br />
segundo soporte en el extremo<br />
recto del primer soporte ➎.<br />
3. En modelos con cuatro apoyos de<br />
la capota, repita los pasos uno y dos<br />
para el otro túnel de la capota. La<br />
capota deberá tener este aspecto ➏.<br />
O<br />
➍<br />
➎<br />
➏<br />
4. Sujete la capota en los lugares entre el<br />
sistema de seguridad para niños y la<br />
base de la manija ➐.<br />
➐<br />
Para quitar la capota, siga los pasos<br />
al revés.<br />
11
3.4 Apoyacabezas (en ciertos modelos)<br />
Algunos bebés necesitan apoyo<br />
adicional para mantener la cabeza<br />
y el cuerpo en una posición cómoda.<br />
Destrabe los costados y vuelva a<br />
trabarlos con las correas del arnés<br />
pasadas a través de las ranuras en<br />
el cojín ➊.<br />
Si su modelo no incluye un<br />
apoyacabezas, puede usar una<br />
toalla enrollada o una manta<br />
como apoyo ➋.<br />
ASEGÚRESE QUE NADA<br />
INTERFIERA CON EL ARNÉS<br />
O LA MANTA. El arnés debe<br />
quedar plano y ajustarse sobre<br />
los hombros del niño.<br />
➊<br />
➋<br />
12
3.5 Armado de la almohadilla del asiento<br />
(ciertos modelos)<br />
Paso 1.<br />
Envuelva el borde inferior de la<br />
almohadilla del asiento alrededor del<br />
extremo del asiento donde van los<br />
pies como se indica.<br />
Paso 2.<br />
Envuelva el borde superior de la<br />
almohadilla del asiento alrededor del<br />
extremo del asiento donde va la<br />
cabeza como se indica.<br />
Paso 3.<br />
En el costado del asiento, envuelva<br />
la correa elástica alrededor de la<br />
manija como se indica. Ignore los<br />
pasos3y4sisumodelo no tiene<br />
correas elásticas.<br />
➊<br />
➋<br />
➌<br />
Paso 4.<br />
Sujete la correa al gancho que se<br />
encuentra en la almohadilla del<br />
asiento. Repita los pasos para la<br />
correa elástica y el gancho en el<br />
otro costado de la almohadilla del<br />
asiento.<br />
➍<br />
13
3.6 Bota para tiempo frío<br />
(en ciertos modelos)<br />
Algunos modelos vienen con una bota para<br />
tiempo frío. Para usarla, ponga elástico<br />
alrededor del fondo del asiento y coloque<br />
elástico alrededor de los ganchos<br />
del cinturón del vehículo como se indica ➑.<br />
➑<br />
3.7 Cubiertas de arnes (ciertos modelos)<br />
Para prevenir la eyección en un accidente o parada repentina:<br />
• Asegúrese siempre que las correas del hombro pasan por las<br />
ranuras y están debidamente instaladas en los hombros.<br />
• Asegúrese de que las cubiertas del arnés no interfieran con la<br />
colocación del pasador del pecho a la altura de las axilas.<br />
14
4.0 Información importante<br />
4.1 Advertencias para uso como sistema<br />
de seguridad para niños<br />
• NO INSTALE O USE ESTE SISTEMA DE SEGURIDAD PARA<br />
NIÑOS Y BASE HASTA QUE HAYA LEÍDO Y ENTIENDA LAS<br />
INSTRUCCIONES EN ESTE MANUAL Y EN EL MANUAL DEL<br />
PROPIETARIO DE SU VEHÍCULO. NO deje que otros instalen o<br />
usen el sistema de seguridad para niños a menos que entiendan<br />
cómo usarlo.<br />
• NO USAR DEBIDAMENTE ESTE SISTEMA DE SEGURIDAD<br />
PARA NIÑOS Y BASE AUMENTA EL RIESGO DE LESIONES<br />
SERIAS O FATALES EN UN ACCIDENTE O AL DETENERSE DE<br />
REPENTE. Su niño puede sufrir una lesión en un vehículo aunque<br />
no sufra un accidente. Una frenada repentina o una curva cerrada<br />
puede lesionar a su niño si el sistema de seguridad para niños no<br />
está debidamente instalado o si el niño no está debidamente<br />
sujetado en el sistema de seguridad para niños.<br />
• ESTE SISTEMA DE SEGURIDAD PARA NIÑOS DEBE ESTAR<br />
ORIENTADO HACIA ATRÁS cuando se lo usa en el vehículo.<br />
• NO PONGA ESTE SISTEMA DE SEGURIDAD PARA NIÑOS EN UN<br />
ASIENTO DEL VEHÍCULO QUE TENGA INSTALADO UNA BOLSA<br />
DE AIRE DELANTERA. Si la bolsa de aire se infla,<br />
puede golpear al niño y al sistema de<br />
seguridad para niños con mucha fuerza y causar<br />
lesiones serias o la muerte de su niño.Consulte el<br />
manual del dueño del vehículo para obtener<br />
información sobre las bolsas de aire laterales y la<br />
instalación del sistema de seguridad para niños.<br />
15
• ALGUNOS NIÑOS CON NECESIDADES ESPECIALES, tales<br />
como bebés que nacen antes de tiempo o quienes sufren de apnea<br />
de posición, podrían sufrir más riesgo de sufrir problemas<br />
respiratorios u otras dificultades en un sistema de seguridad para<br />
niños. Si su niño tiene necesidades especiales, recomendamos<br />
que su médico o personal del hospital evalúe a su niño y<br />
recomiende el sistema de seguridad para niños adecuado para su<br />
bebé o cama para el automóvil antes de usar este producto.<br />
• Según las estadísticas de accidentes, LOS NIÑOS ESTÁN MÁS<br />
SEGUROS CUANDO ESTÁN DEBIDAMENTE SUJETADOS EN<br />
LOS ASIENTOS TRASEROS DEL VEHÍCULO EN LUGAR DE<br />
LOS ASIENTOS DELANTEROS. En el caso de un vehículo con<br />
una bolsa de aire para el pasajero delantero, consulte el manual<br />
del propietario de su vehículo así como estas instrucciones para la<br />
instalación del sistema de seguridad para niños.<br />
• NUNCA DEJE A SU NIÑO SOLO.<br />
• NUNCA DEJE UN SISTEMA DE SEGURIDAD PARA NIÑOS Y LA<br />
BASE SIN SUJETAR EN SU VEHÍCULO. Un asiento o base sin<br />
sujetar puede ser arrojado y podría lesionar a los ocupantes en<br />
una curva cerrada, parada repentina o accidente. Sáquelo o<br />
asegúrese de que esté debidamente sujetado en el vehículo. Si no<br />
usa el LATCH, asegúrese que los conectores del LATCH que no<br />
estén enganchados estén debidamente almacenados en la base.<br />
• CAMBIE EL SISTEMA DE SEGURIDAD PARA NIÑOS Y LA<br />
BASE DESPUÉS DE UN ACCIDENTE DE CUALQUIER TIPO.<br />
Un accidente puede causar daño invisible al sistema de seguridad<br />
para niños.<br />
• DEJE DE USAR EL SISTEMA DE SEGURIDAD PARA NIÑOS Y<br />
LA BASE Y TÍRELO después de la fecha indicada en el respaldo<br />
del sistema de seguridad para niños.<br />
16
• NO MODIFIQUE SU SISTEMA DE SEGURIDAD PARA NIÑOS Y<br />
BASE o ni use cualquier accesorio o piezas suministradas por<br />
otros fabricantes.<br />
• NUNCA USE EL SISTEMA DE SEGURIDAD PARA NIÑOS Y LA<br />
BASE SI HAN RESULTADO DAÑADOS O FALTAN PIEZAS.<br />
NO use un arnés de sistema de seguridad para niños o cinturón<br />
del asiento del vehículo o cinturón del LATCH roto, deshilachado o<br />
dañado.<br />
• EL SISTEMA DE SEGURIDAD PARA NIÑOS PUEDE ALCANZAR<br />
ALTAS TEMPERATURAS SI QUEDA EN EL SOL. Toque siempre<br />
la superficie de cualquier pieza de metal o de plástico antes de<br />
poner a su niño en el sistema de seguridad para niños.<br />
• ESTE SISTEMA DE SEGURIDAD PARA NIÑOS CUMPLE<br />
con todas las Normas Federales de Seguridad para Vehículos<br />
Automotor y ha sido certificado para el uso en vehículos automotor<br />
y aeronaves.<br />
• NUNCA ENTREGUE ESTE SISTEMA DE SEGURIDAD PARA<br />
NIÑOS Y BASE a otra persona sin entregarles este manual.<br />
• NUNCA USE UN SISTEMA DE SEGURIDAD PARA NIÑOS Y<br />
BASE USADOS o un sistema de seguridad para niños si no<br />
conoce su historia.<br />
4.2 Advertencias para el uso con un<br />
cochecito<br />
• USAR SOLAMENTE CON COCHECITOS QUE SON PARTE DEL<br />
SISTEMA DE VIAJES GRACO. Consulte la hoja de instrucciones<br />
del cochecito para obtener más información sobre la conexión del<br />
sistema de seguridad para niños a su cochecito. Si no tiene una<br />
hoja de instrucciones, por favor llame gratis al 1-800-345-4109<br />
para obtener una, o visite nuestro sitio Web, www.gracobaby.com.<br />
• El uso inadecuado de asientos para automóvil <strong>Graco</strong> con este<br />
cochecito de otros fabricantes podría resultar en lesiones serias<br />
o la muerte.<br />
17
4.3 Advertencias adicionales para el<br />
uso como transportador<br />
• PELIGRO DE CAÍDA: Los movimientos del niño pueden mover el<br />
transportador.<br />
NUNCA ponga el transportador cerca de los bordes de mesadas,<br />
mesas u otras superficies altas. Manténgase siempre cerca<br />
cuando el transportador no esté en el piso/tierra.<br />
Antes de levantar el transportador, ASEGÚRESE que las manijas<br />
estén trabajadas en posición.<br />
No ponga NUNCA el transportador encima de un carrito de<br />
compras.<br />
• PELIGRO DE ASFIXIA: En superficies blandas, el transportador<br />
para bebé puede darse la vuelta y asfixiar al niño. Nunca ponga el<br />
transportador sobre una cama, sofá u otra superficie blanda.<br />
• PELIGRO DE ESTRANGULACIÓN: El niño puede estrangularse<br />
con las correas de seguridad sueltas. Use siempre el arnés, no<br />
deje nunca al niño en el transportador cuando las correas estén<br />
sueltas o sin atar.<br />
GUARDE LOS CORDONES Y CUERDAS FUERA DEL<br />
ALCANCE DEL NIÑO. Los cordones y cuerdas pueden causar<br />
la estrangulación.<br />
NO coloque el transportador cerca de una ventana donde los<br />
cordones de las cortinas o persianas puedan estrangular al niño.<br />
NO cuelgue cordones sobre o encima del transportador.<br />
NO coloque artículos con un cordón alrededor del cuello del<br />
niño, tales como cordones de capucha, cordón del chupete, etc.<br />
NO ponga cordones a los juguetes.<br />
18
4.4 Limitaciones de peso y estatura<br />
NO USAR EL SISTEMA DE SEGURIDAD PARA NIÑOS DE<br />
MANERA APROPIADA DE ACUERDO AL TAMAÑO DE SU NIÑO<br />
PODRÍA AUMENTAR EL RIESGO DE QUE SUFRA LESIONES<br />
SERIAS O FATALES.<br />
Su niño DEBE cumplir con todos los requisitos:<br />
• PESO: 5-22 libras (2.3-10 Kg)<br />
• ESTATURA: 29 pulgadas (73 cm) o menos<br />
19
5.0 Ubicación del sistema de seguridad<br />
para niños<br />
5.1 Requisitos del asiento del vehículo<br />
LA COLOCACIÓN INADECUADA DEL SISTEMA DE SEGURIDAD<br />
PARA NIÑOS AUMENTA EL RIESGO DE SUFRIR LESIONES SERIAS<br />
OFATALES.Algunas posiciones de asiento en su vehículo podrían no<br />
ser seguras para este sistema de seguridad para niños. Algunos<br />
vehículos no tienen posiciones de asiento que puedan usarse sin peligro<br />
con el sistema de seguridad para niños. Si no está seguro sobre dónde<br />
colocar el sistema de seguridad para niños en su vehículo, consulte el<br />
manual del propietario del vehículo o llame a <strong>Graco</strong> al 1-800-345-4109.<br />
• Cuando sea posible, sujete el sistema<br />
de seguridad para niños en la posición<br />
de asiento central directamente detrás<br />
de los asientos delanteros ➊.<br />
Una persona adulta debería viajar en el<br />
asiento trasero para poder observar al<br />
niño. Si el conductor es la única persona adulta presente, el niño<br />
podría necesitar viajar en el asiento delantero. PERO SOLAMENTE<br />
si no se ha instalado una bolsa de aire en el asiento del pasajero y<br />
se han cumplido con todos los otros requisitos listados con respecto<br />
al cinturón de seguridad y el asiento del vehículo.<br />
• NUNCA PONGA ESTE SISTEMA DE<br />
SEGURIDAD PARA NIÑOS EN UN ASIENTO<br />
DEL VEHÍCULO QUE TENGA INSTALADO<br />
UNA BOLSA DE AIRE DELANTERA ➋. Vea<br />
"4.1 Advertencias para uso como sistema de<br />
seguridad para niños", página 15.<br />
20<br />
➊<br />
➋
• El asiento del VEHÍCULO debe estar orientado hacia adelante.<br />
• NO USE el sistema de seguridad para niños en asientos del<br />
vehículo con respaldos que no traben en la posición vertical.<br />
NO use asientos que se puedan plegar sin tener que liberar una<br />
traba o dispositivo de algún tipo. Estos asientos pueden<br />
desplazarse hacia adelante y golpear al niño en un accidente o<br />
parada repentina.<br />
5.2 Requisitos del cinturón de seguridad<br />
del vehículo<br />
MUCHOS CINTURONES DE SEGURIDAD NO SE PUEDEN USAR<br />
CON CONFIANZA CON ESTE SISTEMA DE SEGURIDAD PARA<br />
NIÑOS. EL CINTURÓN DE SEGURIDAD DEL VEHÍCULO DEBE<br />
HABER SIDO DISEÑADO PARA RETENER AL SISTEMA DE<br />
SEGURIDAD PARA NIÑOS DE MODO AJUSTADO EN TODO<br />
MOMENTO.<br />
Preste mucha atención a estos sistemas ya que muchos de los<br />
sistemas de cinturones de seguridad que no son seguros se<br />
parecen mucho a los que no presentan peligro. Si no está seguro,<br />
consulte el manual del propietario del vehículo o llame a <strong>Graco</strong> al<br />
1-800-345-4109.<br />
21
5.2.1 Sistemas PELIGROSOS de cinturones<br />
para vehículos<br />
NO USE ninguno de los siguientes sistemas para asegurar el sistema<br />
de seguridad para niños.<br />
El LATCH se puede usar EN LUGAR DE el sistema de cinturone<br />
para vehículo. Por favor, consulte el manual del propietario del<br />
vehículo para obtener las ubicaciones donde debe instalarse<br />
el LATCH.<br />
• Cinturón de seguridad abdominal<br />
con retractor de traba de emergencia<br />
(Emergency Locking Retractor, ELR)<br />
Este cinturón de seguridad abdominal se mantiene<br />
flojo y puede moverse hasta que se trabe en un<br />
accidente o parada repentina.<br />
• Combinación de cinturón abdominal y para el<br />
hombro con retractor<br />
Cada correa tiene un retractor en una punta y está<br />
conectada a la placa de seguridad en la otra punta.<br />
• Cinturón pasivo - Cinturón abdominal con cinturón<br />
para el hombro motorizado<br />
• Cinturón pasivo - Cinturón para el<br />
hombro o abdomen montado en la<br />
puerta<br />
NO use los cinturones del vehículo<br />
que estén enganchados a la puerta<br />
de manera alguna o que se muevan<br />
a través de un carril para rodear<br />
automáticamente al pasajero<br />
cuando se cierra la puerta.<br />
• Cinturón de seguridad abdominal que están<br />
más adelante del pliegue del asiento<br />
22
5.2.2 Sistemas SEGUROS de cinturones<br />
de vehículos<br />
LOS SIGUIENTES CINTURONES DE SEGURIDAD PUEDEN USARSE<br />
CON SU SISTEMA DE SEGURIDAD PARA NIÑOS, SI el asiento<br />
cumple con todos los otros requisitos de estas instrucciones y los que se<br />
incluyen en el manual del propietario de su vehículo. Se puede usar el<br />
LATCH en lugar de el sistema de seguridad del vehículo. Por favor,<br />
consulte el manual del propietario se el LATCH.<br />
• Cinturón de seguridad abdominal -<br />
ajustado manualmente<br />
Cuando está trabado, se tensiona<br />
manualmente el cinturón tirando del exceso de la correa mientras se<br />
empuja con fuerza hacia abajo sobre el sistema de seguridad para<br />
niños.<br />
• Cinturón de seguridad abdominal con<br />
retractor de seguridad automático (ALR)<br />
El retractor de seguridad automático no<br />
permitirá que el cinturón de seguridad<br />
abdominal se extienda una vez que está sujetado en la hebilla. Ajuste<br />
el cinturón pasando el cinturón por el retractor mientras empuja con<br />
fuerza el sistema de seguridad para niños hacia abajo.<br />
• Combinación cinturón para el hombro/abdomen y con placa de<br />
seguridad con traba- Una vez que está<br />
trabado en la hebilla, este tipo de cinturón<br />
tiene una placa de seguridad que no permitirá<br />
que la parte del cinturón que está en el<br />
abdomen se afloje. El cinturón se ajusta tirando con fuerza de la parte<br />
del hombro del cinturón del vehículo mientras empuja con fuerza el<br />
sistema de seguridad para niños hacia abajo.<br />
23
• Combinación cinturón para el<br />
hombro/abdomen y placa de<br />
seguridad con traba móvil<br />
Este cinturón tiene una placa de<br />
seguridad que se mueve libremente<br />
a lo largo del cinturón.<br />
Este cinturón DEBE convertirse para prevenir el<br />
movimiento de la parte de la falda del cinturón.<br />
Debe usar la traba de seguridad provista con el<br />
sistema de seguridad para niños, a menos que el<br />
cinturón de seguridad del asiento de su vehículo<br />
pueda convertirse de otra manera como se<br />
describe en el manual del propietario del vehículo.<br />
Para instalar la traba de seguridad:<br />
1. Ajuste el cinturón empujando con fuerza el<br />
sistema de seguridad para niños hacia<br />
abajo y tirando con fuerza el cinturón para<br />
el hombro.<br />
2. Mientras empuja el asiento hacia abajo,<br />
apriete las dos correas juntas detrás<br />
de la lengüeta de la hebilla. Destrabe<br />
el cinturón sin permitir que se mueva.<br />
3. Conecte los cinturones abdominal<br />
y para el hombro con la traba de<br />
seguridad como se indica ➊ y ➋.<br />
4. Vuelva a poner el cinturón en la<br />
hebilla. Verifique que el cinturón<br />
abdominal no se mueve tirando y<br />
empujando el sistema de seguridad<br />
para niños. Si el cinturón se afloja<br />
o se alarga, repita el procedimiento.<br />
Traba de seguridad<br />
1/2<br />
pulgada<br />
➊<br />
➋<br />
La traba de seguridad va aquí,<br />
a media pulgada de la hebilla<br />
24
5.3 Ubicación del LATCH<br />
Los vehículos nuevos pueden tener uno o varios asientos equipados<br />
con sistemas de anclaje LATCH . Si el vehículo viene equipado con<br />
LATCH, se pueden ver los puntos de anclaje inferiores en el pliegue<br />
del asiento del vehículo. Si no están visibles, pueden estar marcados<br />
con el símbolo que sigue .<br />
Vea el manual del propietario de su vehículo para informarse<br />
sobre las ubicaciones exactas, la identificación de los anclajes y<br />
los requisitos de uso con el sistema de seguridad para niños.<br />
Un asiento típico de un vehículo de pasajeros. Otros<br />
tipos de vehículos disponen de otras ubicaciones del<br />
sistema LATCH o otros marcados.<br />
Puntos de anclaje<br />
inferior del vehículo<br />
Pliegue del asiento<br />
del vehículo<br />
LATCH se define como anclajes de hasta 280 mm (11,02 pulgadas)<br />
en el centro. Como fabricante, no recomendamos el uso del sistema<br />
LATCH en la posición central si sobrepase esta longitud.<br />
25
6.0 Usar el asiento de seguridad<br />
infantil<br />
6.1 Colocación de las correas del arnés<br />
NO AJUSTAR DEBIDAMENTE LAS CORREAS DEL ARNÉS DEL<br />
NIÑO AUMENTA EL RIESGO DE LESIONES SERIAS O FATALES<br />
EN CASO DE UNA CURVA CERRADA, ACCIDENTE O PARADA<br />
REPENTINA. Las correas del arnés deben estar debidamente<br />
ajustadas para que puedan mantener a su niño de a cuerdo a las<br />
siguientes instrucciones.<br />
1. Saque el sistema de seguridad para niños de la base y gire la<br />
manija hacia abajo en la posición de asiento. Vea la sección "3.1<br />
Sacar y conectar la base" y 3.2 "Ajuste de la manija" en la página 10.<br />
2. Coloca el niño en el asiento de seguridad infantil<br />
como se indica ➊.<br />
3. Determine qué par de ranuras del arnés están<br />
parejas o apenas por debajo de los hombros del<br />
niño ➋.<br />
NO use las ranuras del arnés superior si<br />
están por encima de los hombros de su<br />
niño. No podrán sujetar a un niño pequeño<br />
con seguridad en caso de un accidente o<br />
parada repentina.<br />
4. Si se deben ajustar las correas del arnés:<br />
saque al niño del sistema de seguridad y<br />
mueva las correas del arnés a otra<br />
ranura del arnés.<br />
26<br />
➊<br />
➋<br />
Use las ranuras del arnés a la<br />
altura o apenas por debajo de<br />
los hombros del niño.
5. Por detrás, saque las correas del arnés de<br />
los tensionadores del arnés. Por adelante,<br />
saquelacorreadelaranura➌.<br />
➌<br />
6. Vuelva a insertar la correa en<br />
la ranura apropiada ➍.<br />
Tensionadores del arnés<br />
➍<br />
7. Pase las correas por los tensionadores<br />
exactamente como se indica ➎.<br />
➎<br />
8. VERIFICACIÓN DE SEGURIDAD:<br />
a) VERIFIQUE que las correas no estén dobladas;<br />
b) VERIFIQUE que las correas estén bien sujetas: tire de las<br />
correas del arnés por adelante.<br />
27
6.2 Sujetar el niño en el sistema de seguridad<br />
para niños<br />
No ajustar debidamente a su niño en el sistema de seguridad para<br />
niños/transportador aumenta el riesgo de lesiones serias o fatales<br />
en una curva cerrada, parada repentina o accidente. Inclusive<br />
cuando lo usa solamente como transportador, asegúrese que las<br />
correas del arnés estén debidamente ajustadas.<br />
1. Mueva la manija del sistema de seguridad para niños a la<br />
posición de asiento (vea la página 10).<br />
2. Abra la traba del arnés apretando ambos costados<br />
y destrabando la hebilla como se indica ➊.<br />
➊<br />
3. Coloque su niño en el sistema<br />
de seguridad para niños<br />
como se indica en ➋, NO ➌.<br />
Pase las correas del arnés<br />
sobre su niño.<br />
➋<br />
➌<br />
4. Inserte las dos lengüetas de la hebilla<br />
en la hebilla del arnés en la correa de la entrepierna.<br />
Asegúrese que escucha cada clic de la lengüeta en la<br />
hebilla. NO use el sistema de seguridad para niños si el<br />
arnés no se traba en su lugar. Llame a <strong>Graco</strong> al 1-800-345-4109.<br />
28
5. Por detrás, pase la correa a través del<br />
tensionador del arnés para tensionar<br />
las correas como se indica. Las<br />
correas restantes deberían tener la<br />
misma longitud ➍. ASEGÚRESE<br />
que ambas correas estén planas y<br />
ajustadas sobre los hombros del niño.<br />
Para aflojar las correas, levante el<br />
tensionador del arnés y pase la correa<br />
desde el frente del asiento ➎.<br />
➍<br />
➎<br />
6. Trabe la hebilla del arnés ➏. Coloque la<br />
traba del arnés en el medio del pecho, a<br />
nivel con la axila y lejos del cuello ➐.<br />
➏<br />
7. VERIFICACIÓN DE SEGURIDAD:<br />
a) VERIFIQUE que las correas del<br />
arnés no estén dobladas.<br />
b) VERIFIQUE que el arnés esté<br />
ajustado. Una correa bien ajustada no<br />
deberá tener nada de huelgo. Se<br />
mantiene en una línea relativamente<br />
derecha sin combarse. No aprieta la piel<br />
del niño ni pone al cuerpo del niño en<br />
una posición poco natural ➐.<br />
➐<br />
29
6.3 Instalación del sistema de seguridad<br />
para niños/base con el cinturón del vehículo<br />
Debe seguir detenidamente las instrucciones provistas por el<br />
fabricante de su vehículo, además de la información de este manual.<br />
Antes de seguir, asegúrese que ha leído y entendido la sección 5,<br />
"Ubicación del sistema de seguridad para niños" en las páginas<br />
20 a 25.<br />
Asegúrese que el vehículo está nivelado de<br />
➊<br />
modo que el indicador de nivel, conectado al<br />
sistema de seguridad para niños, pueda<br />
usarse para reclinar adecuadamente el<br />
sistema de seguridad para niños ➊.<br />
Se va a usar el asiento delantero del<br />
pasajero, mueva el asiento del vehículo<br />
para atrás todo lo posible. Si usa un<br />
asiento trasero, asegúrese que el<br />
asiento de adelante está lo más adelante<br />
posible y en posición vertical para que<br />
haya suficiente espacio para el sistema de seguridad para niños.<br />
1. Saque el sistema de seguridad para niños de la base,<br />
independientemente de si usted planea usar la base o no.<br />
2. Coloque la base ➋ o sistema de seguridad para niños sin la base<br />
➌ orientado hacia atrás en un asiento orientado hacia adelante.<br />
➋<br />
➌<br />
30
3. Pase el cinturón de seguridad:<br />
Base con cinturón<br />
de seguridad<br />
El cinturón DEBE pasar<br />
debajo de la lengüeta.<br />
Sistema de seguridad para niños con cinturón de seguridad<br />
4. Trabe el cinturón del asiento. Asegúrese que la lengüeta de la<br />
hebilla pase por la hebilla correcta ➍. El cinturón del vehículo no<br />
deberá estar doblado ni dar vuelta.<br />
➍<br />
31
. Ajuste el cinturón de seguridad del vehículo. Consulte el manual<br />
del propietario del vehículo y las instrucciones en la sección<br />
"5.2.2. Sistemas SEGUROS de cinturones de seguridad para<br />
vehículo”, página 23 y 24 sobre cómo ajustar el cinturón del<br />
vehículo.<br />
Para crear una instalación bien ajustada, apriete hacia abajo con<br />
fuerza con su rodilla o mano en el medio del sistema de<br />
seguridad para niños ➊ o base y tire y apriete el cinturón de<br />
seguridad del vehículo.<br />
➊<br />
6.<br />
Empuje el sistema de seguridad hacia abajo en la base y<br />
asegúrese de que escucha un "clic" ➋.<br />
Tire hacia arriba del<br />
sistema de seguridad para asegurarse que<br />
esté trabado apretadamente en la base.<br />
Si el sistema de seguridad no se traba<br />
apretadamente en la base, el sistema de<br />
seguridad NO proporciona ninguna<br />
protección a su niño.<br />
NO use la base/sistema de seguridad si el<br />
sistema de seguridad para niños no está<br />
debidamente trabado en la base.<br />
32<br />
➋
6.4 Uso del LATCH para instalar la base<br />
1. Para facilitar la instalación, extienda el<br />
Lengüeta<br />
LATCH hasta el máximo.<br />
2. Ponga la base en el asiento del<br />
vehículo como se indica.<br />
3. Pase el LATCH por el recorrido del<br />
cinturón en la base que normalmente se usa<br />
para el cinturón del asiento del vehículo.<br />
Asegúrese que el LATCH esté DEBAJO de<br />
la lengüeta de la base ➌.<br />
El cinturón debe mantenerse en posición<br />
plana sin torcerse.<br />
4. Enganche los conectores a los sujetadores<br />
inferiores. Tire firmemente de los conectores<br />
para asegurarse que estén enganchados ➍.<br />
5. Ajuste el LATCH empujando con fuerza<br />
hacia abajo sobre la base y tirando el<br />
cinturón de ajuste ➎.<br />
6. NUNCA ponga dos conectores LATCH en<br />
un vehículo con sujetador LATCH a menos que<br />
el fabricante lo haya permitido específicamente ➏.<br />
7. Pruebe el sistema de seguridad para niños para<br />
determinar si la instalación está segura como se<br />
describe en la sección "Verificación final de<br />
seguridad" del sistema de seguridad para niños en<br />
la página 36.<br />
8. Verifique que el LATCH se mantiene apretado y no se suelta de la<br />
posición apretada. De no mantenerse apretado, colóquelo en otro<br />
asiento o póngase en contacto con el Servicio al Cliente.<br />
33<br />
➌<br />
➍<br />
➎<br />
➏
6.5 Inclinación del sistema de seguridad<br />
para niños/base<br />
Es importante que su sistema de seguridad para niños/base esté<br />
debidamente reclinado para mayor seguridad del niño. En el costado de<br />
su sistema de seguridad para niños hay un indicador del nivel para<br />
ayudar a reclinar debidamente el sistema de seguridad para niños/base<br />
en el asiento del vehículo.<br />
No reclinar debidamente el sistema de seguridad para niños en el<br />
asiento del vehículo aumenta el riesgo de sufrir<br />
lesiones serias o fatales.<br />
Si el sistema de seguridad para niños está<br />
demasiado vertical, la cabeza del niño podría<br />
caer hacia adelante y causar problemas a la<br />
respiración.<br />
Si el sistema de seguridad para niños está<br />
demasiado reclinado, un accidente podría<br />
ejercer demasiada fuerza en el cuello y<br />
hombros del niño.<br />
El sistema de seguridad para niños debe estar<br />
debidamente reclinado según las siguientes instrucciones.<br />
Verifique el indicador del nivel. Debe mirar de frente al indicador.<br />
—Si en el indicador aparece SOLAMENTE la zona de color azul,<br />
el sistema de seguridad está debidamente nivelado.<br />
—Si en el indicador de nivel aparece la zona de color naranja, debe<br />
ajustar la inclinación.<br />
34
Cuando usa la base:<br />
Para bajar el pie; tire hacia abajo del fondo del<br />
pie hasta alcanzar el valor deseado para<br />
ajustar la inclinación ➊.<br />
Para levantar el pie; ponga la base en una<br />
superficie plana, empuje hacia adentro los<br />
dedos de la base y empuje hacia abajo la base<br />
para ajustar la inclinación ➋.<br />
Si todavía aparece la zona de color naranja en el<br />
indicador de nivel cuando el pie está<br />
completamente extendido, entonces coloque<br />
una toalla enrollada debajo del pie<br />
SOLAMENTE hasta que aparezca la<br />
zona de color azul ➌.<br />
Cuando usa solamente el sistema de seguridad<br />
para niños, si todavía aparece la zona de color<br />
naranja en el indicador de nivel cuando el sistema<br />
de seguridad para niños está instalado en el<br />
asiento del vehículo, coloque una toalla enrollada<br />
debajo del sistema de seguridad para niños hasta<br />
que SOLAMENTE se vea la zona de color azul ➍.<br />
➊<br />
➋<br />
➌<br />
➍<br />
Vuelva a ajustar el cinturón de seguridad del<br />
vehículo lo necesario para sujetar firmemente el<br />
sistema de seguridad para niños al asiento del vehículo.<br />
35
Verificación final de seguridad: Cada<br />
vez que sale en el automóvil con su<br />
niño,<br />
EMPUJE HACIA ABAJO lenta pero firmemente la<br />
parte de arriba del sistema de seguridad para<br />
niños para asegurarse que el cinturón del<br />
vehículo o LATCH esté asegurado apretadamente<br />
alrededor de la base/sistema de seguridad<br />
para niños ➊.<br />
GIRE Y TIRE el asiento hacia adelante agarrando<br />
el sistema de seguridad cerca del recorrido del<br />
cinturón del vehículo y en ambos costados para<br />
asegurarse que el cinturón del vehículo o LATCH<br />
no se alargue ni se afloje y que no se pueda<br />
mover el sistema de seguridad con facilidad ➋.<br />
➊<br />
➋<br />
36
7.0 Información adicional<br />
7.1 Uso en aviones<br />
Instálelo en un avión de la misma manera que en<br />
un automóvil. Notifique a la compañía aérea por<br />
adelantado que va a usar el asiento abordo.<br />
Úselo solamente en un asiento del aeronave orientado hacia delante.<br />
Siga las instrucciones del personal de vuelo sobre la colocación del<br />
asiento de seguridad infantil. No use este asiento de seguridad<br />
infantil si el cinturón de seguridad del avión no sujeta el asiento de<br />
seguridad infantil firmemente.<br />
7.2 Almacenamiento del LATCH<br />
1. Para facilitar el almacenamiento,<br />
extienda el LATCH hasta el máximo.<br />
2. Ubique las barras de almacenamiento Barras de almacenamiento<br />
en el fondo de la base del sistema de<br />
seguridad ➌.<br />
➌<br />
3. Ajuste el extremo del LATCH<br />
(sin el cinturón de ajuste) sobre la<br />
barra de almacenamiento.<br />
4. Repita el Paso 3 del LATCH con el cinturón<br />
de ajuste. Después de ajustarlo sobre la barra ➍<br />
de almacenamiento, tire el cinturón de ajuste<br />
para asegurarse que el LATCH esté<br />
debidamente ajustado.<br />
5. El almacenamiento del LATCH debería tener<br />
este aspecto cuando esté terminado ➍.<br />
37<br />
Parte inferior de la base
7.3 Limpieza y mantenimiento<br />
! PARA SACAR Y LAVAR LA ALMOHADILLA DE SEGURIDAD<br />
DEL NIÑO, siga las instrucciones en la sección "6.1 Colocación de<br />
las correas del arnés", páginas 26 y 27.<br />
Saque cuidadosamente la almohadilla del asiento. Se lavan a<br />
máquina por separado en el ciclo delicado y se seca al aire. NO USE<br />
CLORO.<br />
Invierta los pasos para volver a instalar la almohadilla del asiento.<br />
Verifique que el sistema del arnés no esté doblado, y tire del<br />
sistema del arnés para asegurarse que esté debidamente instalado.<br />
! LAS PIEZAS DE METAL Y DE PLÁSTICO DEL SISTEMA DE<br />
SEGURIDAD PARA NIÑOS pueden limpiarse con una solución de<br />
jabón suave y agua. NO USE CLORO. El uso de cloro puede<br />
debilitar las piezas de plástico.<br />
! LAS CORREAS DEL ARNÉS pueden limpiarse a mano o cambiarse.<br />
NO SUMERJA LAS CORREAS DEL ARNÉS EN AGUA. Hacerlo podría<br />
aflojar las correas del arnés<br />
! La HEBILLA puede limpiarse con un trapo húmedo.<br />
! NO LUBRIQUE la hebilla.<br />
! NO USE EL SISTEMA DE SEGURIDAD PARA NIÑOS sin la<br />
almohadilla para el asiento.<br />
! USO CONTINUO DEL SISTEMA DE SEGURIDAD PARA NIÑOS<br />
PODRÍA CAUSAR DAÑO AL ASIENTO DEL VEHÍCULO. Use una<br />
estera para el sistema de seguridad para niños, toalla o frazada fina<br />
para proteger el tapizado.<br />
38
Notas<br />
39
Piezas de repuesto<br />
Para comprar repuestos o accesorios en los Estados Unidos para<br />
su producto <strong>Graco</strong>, por favor comuníquese con nosotros en:<br />
www.gracobaby.com<br />
o<br />
1-800-345-4109<br />
40