Instruction Manual Manual de Instrucciones - PlayStation
Instruction Manual Manual de Instrucciones - PlayStation
Instruction Manual Manual de Instrucciones - PlayStation

Create successful ePaper yourself
Turn your PDF publications into a flip-book with our unique Google optimized e-Paper software.
<strong>Instruction</strong> <strong>Manual</strong><br />
<strong>Manual</strong> <strong>de</strong> <strong>Instrucciones</strong><br />
Before using this product, carefully read all product documentation and retain it for future reference.<br />
Antes <strong>de</strong> utilizar este producto, lea <strong>de</strong>tenidamente toda la documentación <strong>de</strong>l producto y consérvela para consultarla en el futuro.<br />
CECH-2001A<br />
CECH-2001B<br />
4-156-992-61(1)
WARNING<br />
To avoid electrical shock, do not open the cabinet. Refer<br />
servicing to qualified personnel only.<br />
Caution<br />
Use of controls or adjustments or performance of<br />
procedures other than those specified herein may result in<br />
hazardous radiation exposure.<br />
The use of optical instruments with this product will<br />
increase eye hazard.<br />
This appliance is classified as a CLASS 1 LASER product un<strong>de</strong>r IEC60825-<br />
1+A2:2001.<br />
This equipment complies with FCC/IC radiation exposure limits set forth for<br />
uncontrolled equipment and meets the FCC radio frequency (RF) Exposure<br />
Gui<strong>de</strong>lines in Supplement C to OET65 and RSS-102 of the IC radio frequency (RF)<br />
Exposure rules. This equipment should be installed and operated with at least 20<br />
cm (8 in) and more between the radiator and person’s body (excluding<br />
extremities: hands, wrists, feet and legs).<br />
This transmitter must not be co-located or operated in conjunction with any other<br />
antenna or transmitter.<br />
The wireless controller complies with FCC/IC radiation exposure limits set forth for<br />
uncontrolled equipment and meets the FCC radio frequency (RF) Exposure<br />
Gui<strong>de</strong>lines in Supplement C to OET65 and RSS-102 of the IC radio frequency (RF)<br />
Exposure rules. This equipment has very low levels of RF energy that are <strong>de</strong>emed<br />
to comply without testing of specific absorption ratio (SAR).<br />
NOTE:<br />
This equipment has been tested and found to comply with the limits for a Class B<br />
digital <strong>de</strong>vice, pursuant to Part 15 of the FCC rules. These limits are <strong>de</strong>signed to<br />
provi<strong>de</strong> reasonable protection against harmful interference in a resi<strong>de</strong>ntial<br />
installation. This equipment generates, uses, and can radiate radio frequency<br />
energy and, if not installed and used in accordance with the instructions, may<br />
cause harmful interference to radio communications. However, there is no<br />
guarantee that interference will not occur in a particular installation. If this<br />
equipment does cause harmful interference to radio or television reception, which<br />
can be <strong>de</strong>termined by turning the equipment off and on, the user is encouraged<br />
to try to correct the interference by one or more of the following measures:<br />
− Reorient or relocate the receiving antenna.<br />
− Increase the separation between the equipment and receiver.<br />
− Connect the equipment into an outlet on a circuit different from that to which the<br />
receiver is connected.<br />
− Consult the <strong>de</strong>aler or an experienced radio/TV technician for help.<br />
You are cautioned that any changes or modifications not expressly approved by<br />
the party responsible for compliance could void the user’s authority to operate the<br />
equipment.
If you have questions about this product, contact SCEA Consumer Services<br />
( back cover) or write to:<br />
Sony Computer Entertainment America<br />
Consumer Services/Technical Support<br />
PO Box 5888, San Mateo, CA 94402-0888 U.S.A.<br />
Declaration of Conformity<br />
Tra<strong>de</strong> Name :<br />
SONY<br />
Mo<strong>de</strong>l No. :<br />
CECH-2001A, CECH-2001B and CECHZC2U<br />
Responsible Party : Sony Electronics Inc.<br />
Address :<br />
16530 Via Esprillo<br />
San Diego, CA 92127 U.S.A.<br />
Telephone No. : 858-942-2230<br />
This <strong>de</strong>vice complies with Part 15 of the FCC Rules and RSS-Gen of IC<br />
Rules. Operation is subject to the following two conditions: (1) this <strong>de</strong>vice<br />
may not cause harmful interference, and (2) this <strong>de</strong>vice must accept any<br />
interference received, including interference that may cause un<strong>de</strong>sired<br />
operation of this <strong>de</strong>vice.<br />
Photosensitivity/Epilepsy/Seizures<br />
A very small percentage of individuals may experience epileptic seizures or<br />
blackouts when exposed to certain light patterns or flashing lights. Exposure to<br />
certain patterns or backgrounds on a television screen or when playing vi<strong>de</strong>o<br />
games may trigger epileptic seizures or blackouts in these individuals. These<br />
conditions may trigger previously un<strong>de</strong>tected epileptic symptoms or seizures in<br />
persons who have no history of prior seizures or epilepsy. If you, or anyone in your<br />
family, has an epileptic condition or has had seizures of any kind, consult your<br />
physician before playing.<br />
IMMEDIATELY DISCONTINUE use and consult your physician before resuming<br />
gameplay if you or your child experience any of the following health problems or<br />
symptoms:<br />
dizziness,<br />
altered vision,<br />
eye or muscle twitches,<br />
loss of awareness,<br />
disorientation,<br />
seizures, or<br />
any involuntary movement or convulsion.<br />
RESUME GAMEPLAY ONLY ON APPROVAL OF YOUR PHYSICIAN.<br />
US<br />
WARNING<br />
About the lithium coin memory back-up battery<br />
The lithium coin memory back-up battery insi<strong>de</strong> this product contains Perchlorate.<br />
The following statement is required by the State of California, USA:<br />
Perchlorate Material - special handling may apply, See<br />
http://www.dtsc.ca.gov/hazardouswaste/perchlorate<br />
Use and handling of vi<strong>de</strong>o games to reduce the likelihood of a<br />
seizure<br />
Use in a well-lit area and keep as far away as possible from the television<br />
screen.<br />
Avoid large screen televisions. Use the smallest television screen available.<br />
Avoid prolonged use of the PS3 system. Take a 15-minute break during each<br />
hour of play.<br />
Avoid playing when you are tired or need sleep.
WARNING<br />
Radio waves<br />
Radio waves may affect electronic equipment or medical <strong>de</strong>vices (for example,<br />
pacemakers), which may cause malfunctions and possible injuries.<br />
If you use a pacemaker or other medical <strong>de</strong>vice, consult your physician or the<br />
manufacturer of your medical <strong>de</strong>vice before using the wireless networking<br />
feature (Bluetooth® and wireless LAN).<br />
Do not use the wireless networking feature in the following locations:<br />
– Areas where wireless network use is prohibited, such as in hospitals. Abi<strong>de</strong><br />
by medical institution regulations when using the system on their premises.<br />
– Areas near fire alarms, automatic doors and other types of automated<br />
equipment.<br />
Notice about U.S. Export Administration Regulations<br />
This product contains software that is subject to certain restrictions un<strong>de</strong>r the U.S.<br />
Export Administration Regulations, and may not be exported or re-exported to<br />
U.S. embargoed <strong>de</strong>stinations. In addition this product may not be exported or<br />
re-exported to persons and entities prohibited by the U.S. Export Administration<br />
Regulations.<br />
<strong>PlayStation</strong>® and <strong>PlayStation</strong>®2 format software<br />
This mo<strong>de</strong>l of the <strong>PlayStation</strong>®3 system is <strong>de</strong>signed to play <strong>PlayStation</strong>®3 format<br />
software and has limited backward compatibility. This system is not compatible<br />
with and will not play <strong>PlayStation</strong>®2 format software. Some <strong>PlayStation</strong>® format<br />
software may play on this system. For more information, visit<br />
www.us.playstation.com.<br />
System software<br />
The system software inclu<strong>de</strong>d within this product is subject to a limited license<br />
from Sony Computer Entertainment Inc. Refer to http://www.scei.co.jp/ps3-eula for<br />
further <strong>de</strong>tails.<br />
About national export control<br />
This product may fall within the scope of national export control legislation. You<br />
must comply fully with the requirements of such legislation and of all other<br />
applicable laws of any jurisdiction in relation to this product.
Table of contents<br />
WARNING......................................................................................... 2<br />
Precautions........................................................................................ 6<br />
Online information about the PS3 system.................................... 10<br />
XMB (XrossMediaBar) menu....................................................... 11<br />
Part names................................................................................ 12<br />
Getting started.......................................................................... 13<br />
Connection methods......................................................................13<br />
Performing initial setup of the system software..............................15<br />
Vi<strong>de</strong>o output on the PS3 system................................................16<br />
Connecting digital audio <strong>de</strong>vices....................................................20<br />
Turning the PS3 system on and off....................................... 21<br />
Using the wireless controller..................................................... 22<br />
Playing content.......................................................................... 24<br />
Blu-ray Disc (BD)/DVD/CD.............................................................24<br />
Playing content on USB <strong>de</strong>vices....................................................25<br />
File formats that can be played or viewed......................................25<br />
Playing games........................................................................... 26<br />
Game compatibility.........................................................................26<br />
Playing games................................................................................26<br />
Controller settings..........................................................................27<br />
Saved data for <strong>PlayStation</strong>®3 format software................................27<br />
Saved data for <strong>PlayStation</strong>® format software..................................27<br />
Adjusting network settings........................................................ 28<br />
Adjusting network settings (wired)..................................................29<br />
Adjusting network settings (wireless).............................................29<br />
Adjusting custom settings...............................................................31<br />
Connecting to the Internet......................................................... 32<br />
Using the Internet browser.............................................................32<br />
Viewing the user’s gui<strong>de</strong>.................................................................32<br />
Creating a <strong>PlayStation</strong>®Network account.......................................32<br />
PS3 system updates.............................................................. 33<br />
Using the on-screen keyboard.................................................. 34<br />
Parental control......................................................................... 35<br />
Replacing the hard disk............................................................. 36<br />
Backing up data..............................................................................36<br />
Removing the hard disk..................................................................37<br />
Replacing the hard disk..................................................................39<br />
Reinstalling the system software....................................................40<br />
Restoring data that has been backed up........................................40<br />
Restoring the PS3 system..................................................... 42<br />
Before disposing of or transferring the PS3 system....................42<br />
Before requesting service......................................................... 43<br />
Specifications.................................................................................. 48<br />
LIMITED HARDWARE WARRANTY AND LIABILITY...................... 53<br />
Copyright and tra<strong>de</strong>marks............................................................... 55<br />
US<br />
Table of contents
Precautions<br />
Before using this product, carefully read all the precautions.<br />
Safety<br />
This product has been <strong>de</strong>signed with the highest concern for safety. However, any<br />
electrical <strong>de</strong>vice, if used improperly, has the potential for causing fire, electrical<br />
shock or personal injury. To help ensure acci<strong>de</strong>nt-free operation, follow these<br />
gui<strong>de</strong>lines:<br />
Observe all warnings, precautions and instructions.<br />
Regularly inspect the AC power cord for damage.<br />
Stop use, unplug the AC power cord from the electrical outlet and disconnect<br />
any other cables immediately if the <strong>de</strong>vice functions in an abnormal manner,<br />
produces unusual sounds or smells or becomes too hot to touch.<br />
For more information on product safety and support, visit our website ( back<br />
cover).<br />
Use and handling<br />
Use in a well-lit area and keep as far away as possible from the television<br />
screen.<br />
Avoid prolonged use of the PS3 system and wireless controller.<br />
Stop using the system immediately if you begin to feel tired or if you experience<br />
discomfort or pain in your hands or arms while operating the wireless controller.<br />
If the condition persists, consult a doctor.<br />
If you experience any of the following health problems, discontinue use of the<br />
system immediately. If symptoms persist, consult with your physician.<br />
− Dizziness, nausea, fatigue or symptoms similar to motion sickness<br />
− Discomfort or pain in a part of the body, such as eyes, ears, hands or arms<br />
Keep the system and accessories, including cable ties and fasteners, out of the<br />
reach of small children.<br />
Do not connect cables other than a USB cable while the system is turned on<br />
(power indicator is lit solid green).<br />
Any TV or component connected to the system must be functioning properly<br />
and free of <strong>de</strong>fects. If a TV or component connected to the system is faulty or<br />
<strong>de</strong>fective, it may cause damage to the TV or component, or to the system itself.<br />
As with all electrical products, connection to faulty or <strong>de</strong>fective components, or<br />
the failure to connect to a properly wired outlet, may cause sparking and pose<br />
a fire hazard.<br />
Do not touch the system or connected cables or accessories during an<br />
electrical storm.<br />
Do not use the system or accessories near water.<br />
Do not allow liquid, small particles or other foreign objects to get into the<br />
system or accessories.<br />
Do not touch the connectors of the system or accessories.<br />
Do not expose the system or accessories to dust, smoke or steam. Also, do not<br />
place the system in an area subject to excessive dust or cigarette smoke. Dust<br />
build-up or cigarette smoke residue on the internal components (such as the<br />
lens) may cause the system to malfunction.<br />
Do not expose the system or accessories to high temperatures, high humidity<br />
or direct sunlight.<br />
Do not place the system or accessories on surfaces that are unstable, tilted or<br />
subject to vibration.<br />
Do not set the system other than in the vertical or horizontal position. When<br />
setting the system in the vertical position, use the vertical stand (sold<br />
separately) for this mo<strong>de</strong>l of the system. Also, do not change the position of the<br />
system while it is turned on.<br />
Be careful when carrying the system. If you do not have a good grip, the<br />
system may drop causing potential damage or injury.<br />
Do not move or change the position of the system with a disc inserted. The<br />
vibration may result in scratching of the disc or the system.<br />
Do not turn off the system while data is being saved on or loa<strong>de</strong>d from the hard<br />
disk.<br />
Do not stand on or put objects on the system, and do not stack the system with<br />
other <strong>de</strong>vices.
Do not place the system and connected accessories on the floor or in a place<br />
where they may cause someone to trip or stumble.<br />
Do not allow bodily contact with the system or air from the system vents for an<br />
exten<strong>de</strong>d period of time while in use. Exten<strong>de</strong>d contact un<strong>de</strong>r these conditions<br />
may cause low-temperature burns.<br />
When connecting the system to a plasma or projection* TV, do not leave a still<br />
image on the TV screen for an exten<strong>de</strong>d period of time, as this may leave a<br />
faint image permanently on the screen.<br />
* Except LCD screen types<br />
Parents are encouraged to monitor children in online activities to ensure safe<br />
and responsible Internet usage.<br />
Notes on safety when using the DUALSHOCK®3<br />
Wireless Controller*<br />
Stop using the system immediately if you begin to feel tired or if you experience<br />
discomfort or pain in your hands or arms while operating the DUALSHOCK®3<br />
Wireless Controller. If the condition persists, consult a doctor.<br />
The vibration function of the DUALSHOCK®3 Wireless Controller can aggravate<br />
injuries. Do not use the vibration function if you have any ailment or injury to the<br />
bones, joints or muscles of your hands or arms. If you have an ailment or an<br />
injury, do not play software titles that contain the vibration function using the<br />
DUALSHOCK®3 Wireless Controller unless you have set the vibration function<br />
to [Off].<br />
Avoid prolonged use of the DUALSHOCK®3 Wireless Controller. Take a break at<br />
about 30-minute intervals.<br />
Note that some software titles set the vibration function to [On] by <strong>de</strong>fault. To<br />
disable the vibration function, press the PS button of the controller, and then<br />
select [Controller Settings] [Vibration Function] [Off]<br />
When using the motion sensor function of the wireless controller, be cautious of<br />
the following points. If the controller hits a person or object, this may cause<br />
acci<strong>de</strong>ntal injury or damage.<br />
– Before using, check that there is plenty of space around you.<br />
– When using the controller, grip it firmly to make sure it cannot slip out of your<br />
hand.<br />
– If using a controller that is connected to the PS3 system with a USB cable,<br />
make sure there is enough space for the cable so that the cable will not hit a<br />
person or object. Also, take care to avoid pulling the cable out of the PS3<br />
system while using the controller.<br />
* These notes also apply to other controllers.<br />
Vents<br />
Do not block any vents. To maintain good ventilation, follow the gui<strong>de</strong>lines below:<br />
Place the system at least 10 cm (4 in) away from a wall surface.<br />
Do not place on a carpet or rug with long fibers.<br />
Do not place in a narrow or cramped space.<br />
Do not cover with cloth.<br />
Do not allow dust to build up on the vents.<br />
AC power cord use<br />
Any TV or component connected to the system must be functioning properly<br />
and free of <strong>de</strong>fects. If a TV or component is faulty or <strong>de</strong>fective, it may cause<br />
damage to the TV or component, or to the system itself. As with all electrical<br />
products, connection to faulty or <strong>de</strong>fective components, or the failure to<br />
connect to a properly wired outlet, may cause sparking and pose a fire hazard.<br />
Do not plug the AC power cord for the system into an electrical outlet until you<br />
have ma<strong>de</strong> all other connections. Make sure the TV or other component is<br />
unplugged from the electrical outlet prior to connecting it to the system.<br />
To help ensure safe operation, regularly inspect the AC power cord. If<br />
damaged, stop use immediately and contact SCEA Consumer Services<br />
( back cover).<br />
Do not use a power cord other than the supplied AC power cord. Do not modify<br />
the cord.<br />
US<br />
Precautions
Precautions<br />
<br />
Do not touch the plug of the AC power cord with wet hands.<br />
Protect the AC power cord from being walked on or pinched particularly at<br />
plugs, expansion receptacles and the point where the cord exits from the<br />
system.<br />
Do not place heavy items on the cord.<br />
Do not place the AC power cord near heating equipment and do not expose<br />
the cord to heat.<br />
Unplug the AC power cord from the electrical outlet before cleaning or moving<br />
the system, or when you do not intend to use the system for an exten<strong>de</strong>d period<br />
of time. When disconnecting, grasp the power cord by the plug and pull<br />
straight out of the electrical outlet. Never pull by the cord and do not pull out at<br />
an angle.<br />
Do not connect the AC power cord to a voltage transformer or inverter.<br />
Connecting the AC power cord to a voltage transformer for overseas travel or<br />
an inverter for use in an automobile may cause heat to build up in the system<br />
and may cause burns or a malfunction.<br />
Never disassemble or modify the system or accessories<br />
Use the PS3 system and accessories according to the instructions in the<br />
product documentation. No authorization for the analysis or modification of the<br />
system or accessories, or the analysis and use of its circuit configurations, is<br />
provi<strong>de</strong>d. Unauthorized modification of the system or accessories will void your<br />
warranty. There are no user serviceable components insi<strong>de</strong> the PS3 system (the<br />
supplied hard disk may be removed but not disassembled or modified).<br />
Additionally, there is a risk of exposure to laser radiation as well as to electrical<br />
shock.<br />
Network<br />
A broadband connection is required to access the Internet. Note that dial-up<br />
connectivity is not supported.<br />
User is responsible for Internet service fees. For <strong>de</strong>tails, refer to the information<br />
provi<strong>de</strong>d in your service contract or contact your Internet service provi<strong>de</strong>r.<br />
Do not use a cord for a standard resi<strong>de</strong>ntial telephone line or cables of types<br />
other than those mentioned here. Using the wrong type of cord or cable can<br />
cause more electrical current than necessary to flow through the LAN<br />
connector, which may lead to heat build-up, fire or malfunction.<br />
Wireless networking feature<br />
The 2.4 GHz range of radio waves used by the wireless networking feature of<br />
this product is a range shared by various <strong>de</strong>vices. This product has been<br />
<strong>de</strong>signed to minimize the effect of other <strong>de</strong>vices using the same range.<br />
However, in some cases interference from other <strong>de</strong>vices may reduce the<br />
connection speed, shorten the signal range or cause the connection to be<br />
terminated unexpectedly.<br />
When using the PS3 system’s scan function to select a wireless LAN access<br />
point, access points that are not inten<strong>de</strong>d for public use may be displayed.<br />
Only connect to an access point that you are authorized to use.<br />
Moisture con<strong>de</strong>nsation<br />
If the system or disc is brought directly from a cold location to a warm one,<br />
moisture may con<strong>de</strong>nse on the lens insi<strong>de</strong> the system or on the disc. Should this<br />
occur, the system may not operate properly. In this case, remove the disc and<br />
turn off and unplug the system. Do not put the disc back in until the moisture<br />
evaporates (this may take several hours). If the system still does not operate<br />
properly, contact SCEA Consumer Services ( back cover) for assistance.<br />
Cleaning<br />
For safety reasons, before cleaning the system or connected accessories,<br />
disconnect the AC power cord from the electrical outlet.
Exterior surfaces (plastic cover of system and wireless<br />
controller)<br />
Follow the instructions below to help prevent the product exterior from<br />
<strong>de</strong>teriorating or becoming discolored.<br />
Wipe with a soft, dry cloth.<br />
Do not place any rubber or vinyl materials on the product exterior for an<br />
exten<strong>de</strong>d period of time.<br />
Do not use solvents or other chemicals. Do not wipe with a chemically-treated<br />
cleaning cloth.<br />
Vents<br />
When dust accumulates in the system vents, remove the dust with a low-powered<br />
vacuum cleaner.<br />
Storage<br />
Do not expose discs to high temperatures, high humidity or direct sunlight.<br />
When discs will not be used for an exten<strong>de</strong>d period of time, store them in their<br />
cases. Stacking uncased discs or storing them at an angle can cause them to<br />
warp.<br />
Cleaning method<br />
Clean discs with a soft cloth, lightly wiping from the center<br />
outwards.<br />
Do not use solvents, record cleaners, anti-static spray or other<br />
chemicals as these can damage the discs.<br />
US<br />
Precautions<br />
Discs<br />
Note on compatibility<br />
Some media may have region or territorial restrictions and may not work with your<br />
system. See media packaging for <strong>de</strong>tails.<br />
Handling<br />
Do not touch the disc surface when handling a disc; hold it by the edges.<br />
Do not stick paper or tape onto discs and do not write on discs.<br />
Fingerprints, dust, dirt or scratches on the disc can distort the picture or reduce<br />
sound quality. Always handle carefully and check that discs are clean before<br />
use.
Online information about the PS3 system<br />
This manual explains hardware features and provi<strong>de</strong>s basic information about how to<br />
set up and operate the PS3 system, including warnings and precautions for the safe<br />
and proper use of the system. For up-to-date information regarding the PS3 system,<br />
you can also access the following information available on the Internet.<br />
Online user’s gui<strong>de</strong> http://manuals.playstation.net/document/<br />
This gui<strong>de</strong> contains <strong>de</strong>tailed information about using the PS3 system software.<br />
System software updates http://www.us.playstation.com/ps3<br />
This site provi<strong>de</strong>s the latest information about system software updates.<br />
<strong>PlayStation</strong>®3 official site http://www.us.playstation.com/ps3<br />
The official site for <strong>PlayStation</strong>®3 products provi<strong>de</strong>s the latest information about software titles and<br />
hardware accessories.<br />
Support http://www.us.playstation.com/support<br />
The official site for <strong>PlayStation</strong>® product support provi<strong>de</strong>s the latest questions and answers about<br />
your product.<br />
Friends<br />
Chatting and exchanging messages<br />
<strong>PlayStation</strong>®Network<br />
Using <strong>PlayStation</strong>®Network services<br />
Network<br />
Connecting to the Internet<br />
Game<br />
Playing games<br />
Vi<strong>de</strong>o<br />
10<br />
Check that you have all of the following items. If any items are missing, contact<br />
SCEA Consumer Services ( back cover).<br />
<strong>PlayStation</strong>®3 system<br />
DUALSHOCK®3 Wireless Controller<br />
AC Power Cord<br />
AV Cable<br />
USB Cable<br />
Printed materials<br />
Information about system functionality published in this document may vary from the information<br />
for your PS3 system, <strong>de</strong>pending on the system software version in use.<br />
Playing vi<strong>de</strong>o<br />
Music<br />
Playing music<br />
Photo<br />
Displaying images<br />
Settings<br />
Adjusting PS3 system settings<br />
Users<br />
Selecting users to log in to the PS3<br />
system
Category<br />
XMB (XrossMediaBar) menu<br />
The PS3 system inclu<strong>de</strong>s a user interface called XMB <br />
(XrossMediaBar).<br />
1<br />
Select a category using the<br />
or button.<br />
2<br />
Select an item using the<br />
or button.<br />
Item<br />
3<br />
Press the button to confirm the<br />
selected item.<br />
Directional buttons:<br />
Used to select on-screen categories/items<br />
PS button:<br />
Displays the XMB menu<br />
Turns the system on/off<br />
button: Displays the options menu/control panel<br />
Selecting an icon and pressing the<br />
button will display the options menu.<br />
Pressing the button during content<br />
playback will display the control panel.<br />
button:<br />
Confirms the selected item<br />
button:<br />
Cancels an operation<br />
Icons<br />
Options menu<br />
Control panel<br />
11
Part names<br />
System front / rear<br />
DUALSHOCK®3 Wireless Controller<br />
Port indicators<br />
USB connector<br />
Disc slot<br />
L2 button<br />
L1 button<br />
R2 button<br />
R1 button<br />
WLAN access indicator<br />
HDD access indicator<br />
Power button<br />
Eject button<br />
Directional buttons<br />
button<br />
button<br />
button<br />
button<br />
USB connectors<br />
LAN connector<br />
HDMI OUT connector<br />
Left stick/L3 button*<br />
SELECT button<br />
Right stick/<br />
R3 button*<br />
START button<br />
PS button<br />
* The L3 and R3 buttons function when the sticks are pressed.<br />
12<br />
Caution<br />
Vent<br />
AC IN connector<br />
AV MULTI OUT connector<br />
DIGITAL OUT (OPTICAL)<br />
connector<br />
Do not use the system in a closed cabinet or other locations where heat may<br />
build up. Doing so may cause the system to overheat and may lead to fire,<br />
injury or malfunction.<br />
If the system’s internal temperature becomes elevated, the power indicator<br />
will flash alternately in red and green. In this case, turn off the system<br />
( page 21) and leave it unused for a while. After the system cools down,<br />
move it to a location with good ventilation, and then resume use.<br />
Notices<br />
Do not place the system in an area subject to excessive dust or cigarette<br />
smoke. Dust build-up or cigarette smoke residue on the internal<br />
components (such as the lens) may cause the system to malfunction.<br />
Do not move or change the position of the system while the power indicator<br />
is lit solid green or flashing green. The vibration that occurs as a result of<br />
moving the system may cause data loss or corruption, or damage to the<br />
system.<br />
Some <strong>PlayStation</strong>® and <strong>PlayStation</strong>®2 peripherals such as the analog<br />
controller (DUALSHOCK®) and analog controller (DUALSHOCK®2) are not<br />
compatible with the PS3 system. For <strong>de</strong>tails, visit<br />
http://www.us.playstation.com.<br />
Hint<br />
When placing the system in a vertical position, use of the vertical stand (sold<br />
separately) is required for stability.
Getting started<br />
Connection methods<br />
US<br />
<br />
HDMI OUT<br />
connector<br />
AV MULTI OUT<br />
connector<br />
Connect your system to a TV<br />
You can use any of the following methods to connect your system to a TV.<br />
Vi<strong>de</strong>o output in SD (Standard Definition) resolution<br />
AV MULTI OUT<br />
connector<br />
AV Cable<br />
VIDEO L-AUDIO-R<br />
TV<br />
Getting started<br />
Vi<strong>de</strong>o output in HD (High Definition) resolution - component vi<strong>de</strong>o<br />
Caution<br />
Any TV or component connected to the system<br />
must be functioning properly and free of <strong>de</strong>fects. If<br />
a TV or component connected to the system is<br />
faulty or <strong>de</strong>fective, it may cause damage to the TV<br />
or component, or to the system itself. As with all<br />
electrical products, connection to faulty or<br />
<strong>de</strong>fective components, or the failure to connect to a<br />
properly wired outlet, may cause sparking and<br />
pose a fire hazard.<br />
AV MULTI OUT<br />
connector<br />
Component AV Cable<br />
(sold separately)<br />
Vi<strong>de</strong>o output in HD (High Definition) resolution - HDMI<br />
COMPONENT VIDEO IN AUDIO IN<br />
Y PB/CB PR/CR L R<br />
TV<br />
If vi<strong>de</strong>o is not displayed on the screen<br />
If you change the type of cable used to connect the<br />
system to a TV, vi<strong>de</strong>o may not appear on the screen. If<br />
vi<strong>de</strong>o does not appear, turn off the system and then<br />
turn it on again by pressing the power button for at<br />
least five seconds (until the system beeps twice). The<br />
vi<strong>de</strong>o output setting will be reset and vi<strong>de</strong>o will be<br />
output at standard <strong>de</strong>finition (SD) resolution.<br />
Hints<br />
HDMI OUT<br />
connector<br />
HDMI Cable (sold separately)<br />
For <strong>de</strong>tails about vi<strong>de</strong>o output cable types and supported vi<strong>de</strong>o mo<strong>de</strong>s, see "Vi<strong>de</strong>o output on the<br />
PS3 system" ( page 16) and "Vi<strong>de</strong>o output cable types" ( page 17).<br />
You can connect audio <strong>de</strong>vices that support digital audio playback, such as an AV receiver for home<br />
entertainment use. For <strong>de</strong>tails, see "Connecting digital audio <strong>de</strong>vices" ( page 20).<br />
TV<br />
13
Getting started<br />
Connect an Ethernet cable (sold separately)<br />
Use an Ethernet cable to connect the system to the Internet.<br />
LAN connector<br />
<br />
AC IN connector<br />
<br />
Hint<br />
You can use a wireless network connection to connect to the Internet without using an Ethernet cable.<br />
For <strong>de</strong>tails, see "Adjusting network settings" ( page 28).<br />
Caution<br />
Do not connect a standard telephone line or other types of cords or cables that are not compatible<br />
with the system directly to the LAN connector on the system, as this may cause heat build-up, fire<br />
or malfunction.<br />
Connect the AC power cord<br />
After plugging the AC power cord into the electrical outlet, the power indicator on the<br />
PS3 system will light up in solid red ( page 21).<br />
Caution<br />
Do not plug the AC power cord for the system into an electrical outlet until you have ma<strong>de</strong> all other<br />
connections. Make sure the TV or other component is unplugged from the electrical outlet prior to<br />
connecting it to the system.<br />
14
Performing initial setup of the system software<br />
After turning on the system, perform initial setup.<br />
5 Perform initial setup.<br />
US<br />
1 Turn on the TV, and then switch the vi<strong>de</strong>o input of the TV to<br />
match the input connector used by the PS3 system.<br />
2 Press the power button.<br />
The power indicator turns green and the picture is displayed on the TV<br />
screen.<br />
Getting started<br />
Power indicator<br />
Power button<br />
3 Connect the wireless controller to the system using a USB<br />
cable.<br />
4 Press the PS button on the controller.<br />
The system will recognize the controller. After it has recognized the controller,<br />
the initial setup screen will be displayed.<br />
Follow the on-screen instructions to enter settings for system language, time<br />
zone, date and time, and user name.<br />
The screen for setting up the Internet connection will be displayed. When<br />
connecting using an Ethernet cable, basic settings will be selected<br />
automatically if you follow the on-screen instructions. When connecting over<br />
a wireless LAN, follow the instructions in "Adjusting network settings<br />
(wireless)" ( page 29) to set up the connection.<br />
After the settings have been completed, the XMB menu ( page 11) will<br />
be displayed on the TV screen.<br />
Hints<br />
When using an HDMI cable to connect the system to the TV, a screen for<br />
changing the vi<strong>de</strong>o output resolution will be displayed during initial setup. If you<br />
select [Yes] on the screen and then press the button, the optimal output<br />
resolution will be selected automatically.<br />
For <strong>de</strong>tails on entering text, see "Using the on-screen keyboard" ( page 34).<br />
Settings entered during initial setup can be changed un<strong>de</strong>r (Settings) or<br />
(Users). For <strong>de</strong>tails, refer to the online user’s gui<strong>de</strong><br />
(http://manuals.playstation.net/document/).<br />
15
Getting started<br />
Vi<strong>de</strong>o output on the PS3 system<br />
The PS3 system can output two types of resolution: HD and SD. Refer to the instruction manual for the TV in use to check which vi<strong>de</strong>o mo<strong>de</strong> is<br />
supported.<br />
HD (High Definition)<br />
SD (Standard Definition)<br />
Vi<strong>de</strong>o mo<strong>de</strong> * 1 1080p 1080i 720p 480p 480i * 2<br />
Aspect ratio 16:9 16:9 16:9<br />
* 1 This number indicates the number of scan lines. Note that "i" stands for "interlace" and "p" stands for "progressive". Using progressive results in high-quality vi<strong>de</strong>o with<br />
minimal flickering.<br />
* 2 The vi<strong>de</strong>o output setting on the system will display as [Standard (NTSC)].<br />
16:9<br />
4:3<br />
16:9<br />
4:3<br />
Screens showing the difference in resolution<br />
HD screen<br />
SD screen<br />
16
Vi<strong>de</strong>o output cable types<br />
The resolution displayed on the TV varies <strong>de</strong>pending on the input connectors on the TV and the type of cable in use. Select a cable to match the TV<br />
in use.<br />
HDMI Cable*²<br />
(sold separately)<br />
Cable type Input connector on the TV Supported vi<strong>de</strong>o mo<strong>de</strong>s*¹<br />
HDMI IN connector<br />
<br />
<br />
1080p / 1080i / 720p / 480p<br />
US<br />
Getting started<br />
Component AV Cable<br />
(sold separately)<br />
Component VIDEO IN<br />
connector<br />
<br />
COMPONENT VIDEO IN AUDIO IN<br />
Y PB/CB PR/CR L R<br />
1080p / 1080i / 720p / 480p / 480i* 3<br />
S VIDEO Cable<br />
(sold separately)<br />
S VIDEO IN connector<br />
<br />
S VIDEO<br />
L-AUDIO-R<br />
480i* 3<br />
AV Cable<br />
(supplied)<br />
VIDEO IN connector<br />
(composite)<br />
<br />
VIDEO<br />
L-AUDIO-R<br />
480i* 3<br />
* 1 Depending on the type of TV or content to be played, some vi<strong>de</strong>o mo<strong>de</strong>s may not be supported.<br />
If a <strong>de</strong>vice that is not compatible with the HDCP (High-bandwidth Digital Content Protection) standard is connected to the system using an HDMI cable, vi<strong>de</strong>o and/or<br />
audio cannot be output from the system.<br />
Copyright-protected Blu-ray vi<strong>de</strong>o discs can only be output at 1080p using an HDMI cable connected to a <strong>de</strong>vice that is compatible with the HDCP (Highband-width<br />
Digital Content Protection) standard.<br />
* 2 Connect the system to the TV using an HDMI cable (sold separately). An HDMI cable can output both vi<strong>de</strong>o and audio and enables you to enjoy digital-quality<br />
vi<strong>de</strong>o and audio.<br />
* 3 The vi<strong>de</strong>o output setting on the system will display as [Standard (NTSC)].<br />
17
Getting started<br />
Adjusting vi<strong>de</strong>o output settings<br />
Depending on the type of cables and the connectors used, you may<br />
need to adjust the PS3 system's vi<strong>de</strong>o output settings to display<br />
vi<strong>de</strong>o at HD resolutions ( page 16) on a TV.<br />
If vi<strong>de</strong>o is not displayed<br />
Switch the vi<strong>de</strong>o input of the TV to match the input connector used to<br />
connect to the system.<br />
Turn off the system, and then turn it on again by pressing the power button<br />
for at least five seconds (until the system beeps twice). The vi<strong>de</strong>o output<br />
setting will be reset and vi<strong>de</strong>o will be output at standard <strong>de</strong>finition (SD)<br />
resolution.<br />
3 Confirm the screen, and then press the button.<br />
If you changed the connector in step 2, a screen for confirming the change<br />
will be displayed.<br />
4 Confirm the settings, select [Yes], and then press the button.<br />
If you changed the connector in step 2, a screen for confirming the settings<br />
will be displayed.<br />
1 Select (Settings) (Display Settings) [Vi<strong>de</strong>o Output<br />
Settings], and then press the button.<br />
2 Select the input connector ( page 17) in use on the TV, and<br />
then press the button.<br />
5 Select the resolutions supported by the TV, and then press the<br />
button.<br />
The resolution displayed on the TV varies <strong>de</strong>pending on the input connector<br />
and the type of cable used ( page 17). The highest resolution you<br />
selected will be used for vi<strong>de</strong>o output.<br />
Depending on the connector selected in step 2, this screen may not be<br />
displayed.<br />
18<br />
If you select [HDMI], you will have the option to choose [Automatic] or<br />
[Custom] on the next screen. In most cases, select [Automatic], and vi<strong>de</strong>o<br />
output settings will be completed automatically.<br />
If you select [AV MULTI / SCART], you must choose the type of output signal<br />
on the next screen. In most cases, select [Y Pb/Cb Pr/Cr].
6 Confirm the settings, select [Yes], and then press the button.<br />
Depending on the connector selected in step 2 and the resolutions selected<br />
in step 5, this screen may not be displayed.<br />
9 Adjust audio output settings.<br />
Continue on to adjust audio output settings. Adjust settings to match the TV<br />
or audio <strong>de</strong>vice in use.<br />
US<br />
Getting started<br />
7 Select the type of TV, and then press the button.<br />
If you selected [Standard (NTSC)] or [480p] in step 5, a screen for selecting<br />
the TV screen size will be displayed. Adjust the setting to match the TV in use.<br />
If you selected [720p] or a higher resolution in step 5, the TV type will<br />
automatically be set to 16:9 and the screen for selecting the TV screen size<br />
will not be displayed.<br />
8 Confirm the settings, and then press the button.<br />
The vi<strong>de</strong>o output settings will be saved on the system.<br />
If you select [HDMI], you will have the option to choose [Automatic] or<br />
[<strong>Manual</strong>] on the next screen. In most cases, select [Automatic].<br />
If using a cable other than an HDMI cable to output audio from the TV, select<br />
[Audio Input Connector / SCART / AV MULTI]. If using an optical digital cable<br />
to output audio, select [Digital Out (Optical)] and choose the output format<br />
on the next screen.<br />
10 Confirm the settings, and then press the button.<br />
The audio output settings will be saved on the system.<br />
Hint<br />
You can adjust audio output settings un<strong>de</strong>r (Settings) (Sound Settings)<br />
[Audio Output Settings].<br />
19
Getting started<br />
Connecting digital audio <strong>de</strong>vices<br />
You can connect audio <strong>de</strong>vices that support digital audio playback,<br />
such as an AV receiver for home entertainment use.<br />
Examples when connecting an audio <strong>de</strong>vice<br />
An HDMI cable or optical digital cable can be used to connect an<br />
audio <strong>de</strong>vice to the PS3 system.<br />
Audio output on the PS3 system<br />
The supported channels may vary <strong>de</strong>pending on the output connector<br />
to be used.<br />
HDMI cable<br />
Optical digital cable<br />
PS3 system output connectors<br />
Channels that can be used for output<br />
2 Ch. 5.1 Ch. 7.1 Ch.<br />
AV MULTI OUT connector <br />
DIGITAL OUT (OPTICAL) connector <br />
HDMI OUT connector <br />
Hints<br />
When connecting a digital audio <strong>de</strong>vice to the system, go to (Settings)<br />
(Sound Settings) [Audio Output Settings], and then adjust the settings as<br />
necessary for the audio <strong>de</strong>vice.<br />
Normally, audio cannot be output simultaneously from multiple output<br />
connectors. For example, if your PS3 system is connected to a TV via an<br />
HDMI cable and to an audio <strong>de</strong>vice via an optical digital cable and [Digital Out<br />
(Optical)] is set un<strong>de</strong>r [Audio Output Settings], audio will no longer be output<br />
from the TV and will only be output from the audio <strong>de</strong>vice.<br />
The system can output both audio and vi<strong>de</strong>o through an HDMI cable. If both<br />
the TV and the audio <strong>de</strong>vice have HDMI connectors, you can output the TV<br />
picture to the TV through a connected audio <strong>de</strong>vice.<br />
If a <strong>de</strong>vice is connected to the PS3 system via an HDMI cable, do not turn off<br />
the <strong>de</strong>vice while the system is turned on (power indicator is lit solid green), as<br />
doing so may cause sound distortion or produce abnormal sounds.<br />
HDMI cable<br />
(sold separately)<br />
Digital audio<br />
<strong>de</strong>vice<br />
HDMI cable<br />
(sold separately)<br />
Optical digital<br />
cable for audio<br />
(sold separately)<br />
Digital audio<br />
<strong>de</strong>vice<br />
Vi<strong>de</strong>o output cable for the<br />
TV in use ( page 17)<br />
TV<br />
TV<br />
20
Turning the PS3 system on and off<br />
Turning on the system<br />
1 Press the power button.<br />
The power indicator lights up in solid green to indicate that the system is<br />
turned on.<br />
Power indicator:<br />
solid green<br />
Power button<br />
2 Press the PS button on the controller.<br />
After the controller number is assigned, you can use the controller to operate<br />
the system.<br />
PS button<br />
Turning off the system<br />
1 Press the power button.<br />
The power indicator lights up in solid red.<br />
Notice<br />
Power indicator:<br />
solid red<br />
Power button<br />
When the power indicator is lit solid green or flashing green, be sure to abi<strong>de</strong><br />
by the notices below. If you do not, data loss or corruption, or damage to the<br />
system may occur.<br />
Do not unplug the AC power cord from the electrical outlet.<br />
Do not move or change the position of the system.<br />
US<br />
Turning the PS3 system on and off<br />
Power indicator status<br />
You can check the power indicator on the PS3 system to see the<br />
current status of the system.<br />
Solid green<br />
Flashing green<br />
Solid red<br />
System on<br />
System turning off<br />
System off (in standby mo<strong>de</strong>)<br />
Hints<br />
Before using a wireless controller, you must first pair it with the system<br />
( page 22).<br />
You can also turn the PS3 system on and off using the PS button on the<br />
wireless controller. If you use the PS button to turn on the system, the controller<br />
number will be assigned at the same time. To turn off the system, press the PS<br />
button for more than one second, and then follow the on-screen instructions.<br />
You can also turn off the PS3 system from the XMB menu. Select<br />
(Users) (Turn Off System).<br />
If you will not be using the system for a long period of time, check that the<br />
power indicator is lit solid red, and then unplug the AC power cord from the<br />
electrical outlet.<br />
21
Using the wireless controller<br />
Preparing for use<br />
To use a wireless controller, you must first register or "pair" the controller<br />
with the PS3 system and assign a number to the controller.<br />
Step 2: Assign a controller number<br />
Each time you turn on the system, a number must be assigned to the<br />
controller.<br />
Step 1: Pair the system and the controller.<br />
When using for the first time<br />
When using with a different PS3 system<br />
<br />
Step 2: Assign a controller number.<br />
Every time the system is turned on<br />
Press the PS button.<br />
All of the port indicators flash.<br />
1 2 3 4<br />
<br />
When the controller has been assigned a<br />
number, the port indicators for the assigned<br />
number turn solid red.<br />
1 2 3 4<br />
Step 1: Pair the system and the controller<br />
When using the controller for the first time or when using with a different<br />
PS3 system, you must first pair the <strong>de</strong>vices. If you turn on the system<br />
and connect the controller using a USB cable, the pairing will be<br />
completed automatically.<br />
You can connect up to 7 controllers at one time. The controller number<br />
is shown by the number above the port indicators. For numbers 5-7,<br />
add the numbers of the lit indicators.<br />
Example: Controller number 5 has been assigned.<br />
1<br />
2 3 4<br />
1<br />
USB cable (supplied)<br />
Check that the system is turned on<br />
(power indicator is lit solid green).<br />
Hints<br />
Pairing and assigning controller numbers can only be done when the system is<br />
turned on (power indicator is lit solid green).<br />
When a paired controller is used with another PS3 system, the pairing with<br />
the original system is cleared. Pair the controller with the system again if the<br />
controller has been used with another system.<br />
If the controller or the system is turned off, the port indicators on the controller<br />
will turn off and the assigned number will be cleared.<br />
22
Using the controller wirelessly<br />
If you disconnect the USB cable, you can use the controller wirelessly.<br />
To use it wirelessly, the controller’s battery must be charged.<br />
Hints<br />
The USB cable can be connected or disconnected while the controller and the<br />
system are turned on.<br />
If the controller does not function, press the PS button, and then reassign the<br />
controller number.<br />
Charging the controller<br />
With the system turned on (power indicator is lit solid green), connect<br />
the controller to the system using a USB cable. The port indicators of<br />
the controller flash slowly and charging begins. When charging has<br />
completed, the port indicators stop flashing.<br />
Hints<br />
The controller can be used while charging.<br />
Charge in an environment where the temperature range is between<br />
10°C - 30°C (50°F - 86°F). Charging may not be as effective when performed in<br />
other environments.<br />
The controller cannot be charged when the system is off (in standby mo<strong>de</strong>).<br />
The battery has a limited life span. Battery charge duration will gradually<br />
<strong>de</strong>crease with repeated usage and age.<br />
Battery life also varies <strong>de</strong>pending on the storage method, usage state,<br />
environment and other factors.<br />
Battery charge level<br />
If you press and hold down the PS button for more than one second,<br />
you can check the battery charge level on the screen.<br />
The battery has plenty of charge.<br />
The battery has started losing its charge.<br />
Charge Level<br />
The battery charge level is low.<br />
The battery has no charge. The port indicators on the controller flash<br />
rapidly. Charge the controller.<br />
Hint<br />
Depending on the environment or the conditions of use, the remaining charge<br />
level may not display correctly and the battery duration may vary.<br />
US<br />
Using the wireless controller<br />
23
Playing content<br />
Blu-ray Disc (BD)/DVD/CD<br />
1 Insert the disc.<br />
The eject indicator turns solid blue to indicate that the disc<br />
is inserted.<br />
2 An icon is displayed in the XMB menu, and playback of the<br />
disc begins.<br />
If the disc does not automatically start, select the icon for the disc from the<br />
XMB menu, and then press the button.<br />
Insert the disc with the<br />
label si<strong>de</strong> facing up.<br />
Notices<br />
Discs that are not compatible with the system cannot be<br />
played.<br />
To play commercially available BD vi<strong>de</strong>o software, in<br />
some cases the encryption key* may need to be<br />
renewed. The encryption key can be renewed when the<br />
system software is updated ( page 33).<br />
* AACS (Advanced Access Control System) key<br />
Ejecting a disc<br />
Stop playback, and then press the eject button.<br />
Eject indicator<br />
Eject button<br />
24
Playing content on USB <strong>de</strong>vices<br />
You can connect external <strong>de</strong>vices, such as <strong>de</strong>vices that are compatible<br />
with USB Mass Storage Class, using a USB cable. Devices can be<br />
connected while the system is turned on. Refer also to the instructions<br />
supplied with the <strong>de</strong>vice.<br />
1 Connect the USB <strong>de</strong>vice.<br />
An icon is displayed on the screen.<br />
Notices<br />
Do not remove USB <strong>de</strong>vices or turn off the system while data is being<br />
saved, loa<strong>de</strong>d or <strong>de</strong>leted. Doing so may cause data loss or corruption.<br />
When using a USB flash drive with a write-protect switch, do not operate<br />
the switch when the <strong>de</strong>vice is connected to the system. Doing so may<br />
cause data loss or corruption.<br />
File formats that can be played or viewed<br />
File formats that can be played or viewed on this system inclu<strong>de</strong><br />
ATRAC, MP3, AAC, JPEG and MPEG-4. For the latest information,<br />
refer to the online user’s gui<strong>de</strong><br />
(http://manuals.playstation.net/document/).<br />
US<br />
Playing content<br />
External <strong>de</strong>vice such as a digital camera<br />
2 Select the icon, and then press the button.<br />
A list of playable content is displayed.<br />
Hints<br />
Only files that are playable or viewable on the PS3 system are displayed in<br />
the column for the compatible category (Example: Image data is displayed<br />
un<strong>de</strong>r (Photo)).<br />
Depending on the storage media, only a subset of the fol<strong>de</strong>rs on the media<br />
may be displayed. If you select [Display All] from the options menu<br />
( page 11), all fol<strong>de</strong>rs saved on the media will be displayed.<br />
Notice<br />
For information on backing up files saved on the hard disk, see "Backing up<br />
data" ( page 36).<br />
25
Playing games<br />
Game compatibility<br />
Starting a game<br />
When you insert the disc, the game starts automatically.<br />
<strong>PlayStation</strong>®3 format software<br />
<strong>PlayStation</strong>® format software<br />
<strong>PlayStation</strong>®2 format software<br />
Can be played on this system *<br />
Cannot be played on this system<br />
* Operation of all <strong>PlayStation</strong>® format software titles is not guaranteed. Visit<br />
http://www.us.playstation.com for the latest information on software that can be<br />
played on this system.<br />
Playing games<br />
This mo<strong>de</strong>l of the <strong>PlayStation</strong>®3 system is <strong>de</strong>signed to play<br />
<strong>PlayStation</strong>®3 format software and has limited backward compatibility.<br />
This system is not compatible with and will not play <strong>PlayStation</strong>®2<br />
format software. Some <strong>PlayStation</strong>® format software may play on this<br />
system. For more information, visit www.us.playstation.com.<br />
Insert the disc with the label si<strong>de</strong> facing up.<br />
Quitting a game<br />
During gameplay, press the PS button on the wireless controller. Then<br />
select (Game) (Quit Game) to quit the game.<br />
Hint<br />
Depending on the type of software, such as <strong>PlayStation</strong>® format software,<br />
(Quit Game) may not be displayed when the PS button is pressed. In this<br />
case, select [Quit Game] from the screen that is displayed.<br />
26
Controller settings<br />
You can change controller settings by selecting<br />
(Accessory Settings).<br />
Reassign<br />
Controllers<br />
Controller<br />
Vibration Function<br />
(Settings)<br />
If a controller port or number is specified by the software,<br />
you can use this setting to assign the appropriate controller<br />
port or number.*<br />
You can set the vibration function to on or off. It is set to [On]<br />
by <strong>de</strong>fault.<br />
* You cannot assign controller port 2-D using this system.<br />
Creating internal memory cards<br />
1 Select (Game) (Memory Card Utility (PS/PS2)), and<br />
then press the button.<br />
2 Select (Create New Internal Memory Card), and then press<br />
the button.<br />
3 Select [Internal Memory Card (PS)], and then press the button.<br />
Follow the on-screen instructions to complete the operation.<br />
US<br />
Playing games<br />
Hint<br />
You can change settings for the controller during gameplay by pressing the<br />
PS button. Select (Settings) (Accessory Settings) in the XMB screen,<br />
or select [Controller Settings] from the screen that is displayed.<br />
Saved data for <strong>PlayStation</strong>®3 format software<br />
Saved data for <strong>PlayStation</strong>®3 format software is saved on the system’s<br />
hard disk. The data is displayed un<strong>de</strong>r (Game) (Saved Data<br />
Utility).<br />
Saved data for <strong>PlayStation</strong>® format software<br />
To save data from <strong>PlayStation</strong>® format software, you must create internal<br />
memory cards on the hard disk and assign the cards to slots.<br />
Notice<br />
This system does not support playback of <strong>PlayStation</strong>®2 format software. Even<br />
if you create an internal memory card for <strong>PlayStation</strong>®2 format software, you<br />
will not be able to use it to play games.<br />
Assigning slots<br />
1 Select (Game) (Memory Card Utility (PS/PS2)), and<br />
then press the button.<br />
2 Select the internal memory card that you want to use, and then<br />
press the button.<br />
Select [Assign Slots], and then assign [Slot 1] or [Slot 2].<br />
Hints<br />
Depending on the software, slots may be preassigned. For <strong>de</strong>tails, refer to the<br />
instructions supplied with the software.<br />
You can assign slots during gameplay. Press the PS button on the wireless<br />
controller, and then select [Assign Slots] from the screen that is displayed.<br />
27
Adjusting network settings<br />
Example of a network configuration (wired)<br />
A wired network configuration requires items , and .<br />
Example of a network configuration (wireless)<br />
A wireless network configuration requires items and .<br />
Network gateway <strong>de</strong>vice<br />
such as a DSL mo<strong>de</strong>m* 1 * 2 Router* 3<br />
Network gateway <strong>de</strong>vice<br />
such as a DSL mo<strong>de</strong>m* 1 * 2<br />
Wireless router<br />
(access point) * 3 * 4<br />
To the Internet line<br />
To the Internet line<br />
Ethernet cable<br />
PC<br />
PC<br />
* 1 The connection method may vary <strong>de</strong>pending on the environment in use. For example, you may be able to connect Ethernet cables directly into the wall outlet in<br />
housing complex units that have preinstalled LAN ports. If you are using such a network environment, you do not need a network gateway <strong>de</strong>vice.<br />
* 2 Dial-up connectivity is not supported.<br />
* 3 A router is a <strong>de</strong>vice that enables multiple <strong>de</strong>vices to be connected to one Internet line. A router may be necessary if a PS3 system and other <strong>de</strong>vices such as a PC<br />
will be connected to the Internet at the same time using one Internet connection. A router is not necessary if the DSL or cable mo<strong>de</strong>m or other network <strong>de</strong>vice has<br />
built-in router functionality.<br />
* 4 A wireless router is a <strong>de</strong>vice that adds access point functionality to a router. A wireless network configuration requires settings information for the access point (SSID,<br />
WEP key, WPA key) ( page 30).<br />
28
Adjusting network settings (wired)<br />
1 Connect an Ethernet cable (sold separately) to the system.<br />
2 Select (Settings) (Network Settings) [Internet<br />
Connection Settings], and then press the button.<br />
A message stating that the Internet connection will be terminated is<br />
displayed.<br />
Adjusting network settings (wireless)<br />
1 Check that an Ethernet cable is not connected to the system.<br />
2 Select (Settings) (Network Settings) [Internet<br />
Connection Settings], and then press the button.<br />
A message stating that the Internet connection will be terminated is<br />
displayed.<br />
US<br />
Adjusting network settings<br />
3 Select [Yes], and then press the button.<br />
4 Select [Easy], and then press the button.<br />
Basic settings are adjusted automatically, and a list of the settings is<br />
displayed. If the list is not displayed, you must adjust custom settings. Refer<br />
to the instructions supplied by your Internet service provi<strong>de</strong>r to adjust the<br />
custom settings ( page 31).<br />
3 Select [Yes], and then press the button.<br />
4 Select [Easy], and then press the button.<br />
Basic settings are adjusted automatically.<br />
5 Select [Wireless], and then press the button.<br />
5 Perform the Internet connection test.<br />
If the connection is successful, you will be able to connect to the Internet.<br />
29
Adjusting network settings<br />
6 Adjust wireless LAN settings.<br />
Select the access point that you want to use. You can usually select [Scan]<br />
and choose an access point within range of your system.<br />
Scan<br />
Enter <strong>Manual</strong>ly<br />
Automatic*<br />
System scans for a nearby access point. Select the<br />
access point that you want to use.<br />
Specify the access point by entering its SSID manually.<br />
Use the automatic setting feature of the access point.<br />
You can follow the on-screen instructions to complete<br />
the required settings automatically.<br />
AOSS<br />
Buffalo, Inc.<br />
Hints<br />
SSID and WEP/WPA keys are types of security information that are required<br />
when connecting to an access point. If you do not have this information,<br />
contact the person who set up or maintains the access point.<br />
Depending on the access point you use, you may need the MAC address for<br />
the PS3 system when connecting to the Internet. You can find the MAC<br />
address for the PS3 system by going to (Settings) (System<br />
Settings) [System Information].<br />
When connecting to the Internet wirelessly, signal interference may occur<br />
<strong>de</strong>pending on the usage condition of the wireless network <strong>de</strong>vices. If the<br />
Internet data transfer speed is <strong>de</strong>creased or the wireless controller does not<br />
function properly, try using a wired Internet connection.<br />
* For information on access points that support automatic setup (AOSS),<br />
contact the access point manufacturers.<br />
7 Adjust the security settings for the wireless network.<br />
Enter the encryption key for the access point. If you selected [Automatic] in<br />
step 6, this screen will not be displayed.<br />
None<br />
WEP<br />
WPA-PSK/<br />
WPA2-PSK<br />
Encryption key is not set.<br />
Enter the encryption key. The encryption key field will<br />
display an asterisk (*) for each character you enter.<br />
8 Check the settings.<br />
A list of the settings is displayed. If the list is not displayed, you must adjust<br />
custom settings. Refer to the instructions supplied by your Internet service<br />
provi<strong>de</strong>r to adjust the custom settings ( page 31).<br />
9 Perform the Internet connection test.<br />
If the connection is successful, you will be able to connect to the Internet.<br />
30
Adjusting custom settings<br />
In certain network environments, some settings may not be adjusted<br />
automatically by selecting [Easy]. Refer to the information below and<br />
also follow the on-screen instructions to adjust custom settings.<br />
Ethernet operation mo<strong>de</strong><br />
Specify the Ethernet data transfer rate and operation method. You can<br />
usually select [Auto-Detect].<br />
IP Address Setting<br />
Specify the method for obtaining an IP address when connecting to the<br />
Internet. The method varies <strong>de</strong>pending on the Internet service provi<strong>de</strong>r<br />
you use.<br />
MTU<br />
Specify the MTU value used when transmitting data. You can usually<br />
select [Automatic].<br />
Proxy Server<br />
Specify the proxy server to be used. You can usually select [Do Not Use].<br />
UPnP<br />
Enable or disable UPnP (Universal Plug and Play). You can usually<br />
select [Enable].<br />
Hint<br />
If [UPnP] is set to [Disable], online communication may be restricted when using<br />
the voice / vi<strong>de</strong>o chat feature or communication features in games.<br />
US<br />
Adjusting network settings<br />
Automatic<br />
<strong>Manual</strong><br />
PPPoE<br />
Use the IP address allocated by the DHCP server.<br />
Enter the IP address manually.<br />
Connect to the Internet using PPPoE. Enter the user name<br />
and password supplied by your Internet service provi<strong>de</strong>r.<br />
DHCP host name<br />
Specify the DHCP server host name. You can usually select [Do Not Set].<br />
DNS Setting<br />
Specify the DNS server. The method varies <strong>de</strong>pending on the Internet<br />
service provi<strong>de</strong>r you use.<br />
Automatic<br />
<strong>Manual</strong><br />
System acquires the DNS server address automatically.<br />
Enter the DNS server address manually. Enter the IP<br />
addresses of the primary and secondary DNS servers that<br />
are supplied by your Internet service provi<strong>de</strong>r.<br />
31
Connecting to the Internet<br />
If network settings are already completed, the PS3 system will<br />
automatically connect to the Internet when the system is turned on. The<br />
connection will remain active as long as the system is on.<br />
Using the Internet browser<br />
1 Select (Network) (Internet Browser), and then press<br />
the button.<br />
The Internet browser opens. A busy icon is displayed while the page is<br />
loading.<br />
Busy icon<br />
Viewing the user’s gui<strong>de</strong><br />
You can use the Internet browser to view the online user’s gui<strong>de</strong> for the<br />
PS3 system. Select (Network) (Online <strong>Instruction</strong> <strong>Manual</strong>s),<br />
and then press the button.<br />
Online user’s gui<strong>de</strong> http://manuals.playstation.net/document/<br />
This gui<strong>de</strong> contains <strong>de</strong>tailed information about using the PS3 system<br />
software.<br />
Creating a <strong>PlayStation</strong>®Network account<br />
By creating a <strong>PlayStation</strong>®Network account, you can enjoy<br />
communicating with your Friends or download games or vi<strong>de</strong>os from<br />
(<strong>PlayStation</strong>®Store). Select (<strong>PlayStation</strong>®Network) (Sign Up<br />
for <strong>PlayStation</strong>®Network), and then press the button. The screen for<br />
creating an account will be displayed.<br />
Basic operations of the Internet browser<br />
32<br />
Directional buttons<br />
Right stick<br />
L1 button<br />
START button<br />
button<br />
Move the pointer to a link.<br />
Scroll in the <strong>de</strong>sired direction.<br />
Go back to the previous page.<br />
Enter an address.<br />
Switch between displaying and not displaying<br />
the menu.<br />
Hints<br />
An Internet connection is required to create an account.<br />
<strong>PlayStation</strong>®Network service content may vary <strong>de</strong>pending on the region.<br />
You can also create a <strong>PlayStation</strong>®Network account at<br />
http://www.us.playstation.com.
PS3 system updates<br />
By updating the PS3 system software, you can add features and/or<br />
security patches. Frequently update your system to use the latest<br />
version of the system software.<br />
Update methods<br />
You can perform an update in any of the ways <strong>de</strong>scribed below.<br />
US<br />
System software updates http://www.us.playstation.com/ps3<br />
This site provi<strong>de</strong>s the latest information about system software updates.<br />
Use the update data to overwrite<br />
the existing system software.<br />
Notices<br />
The system software is updated.<br />
During an update, do not turn off the system or remove media. If an update<br />
is cancelled before completion, the system software may become<br />
damaged, and the system may require servicing or exchange.<br />
During an update, the power button on the system and PS button of the<br />
controller are inactive.<br />
Depending on the content, you may not be able to play without first<br />
updating the system software.<br />
After you have updated the system software, you cannot go back to an<br />
earlier version.<br />
Network update<br />
You can update by downloading the update data from the Internet. The<br />
latest update is automatically downloa<strong>de</strong>d.<br />
Select (Settings) (System Update) [Update via Internet].<br />
Update using storage media<br />
You can update using the update data saved on a USB flash drive or<br />
other media.<br />
Select (Settings) (System Update) [Update via Storage<br />
Media].<br />
Update using disc media<br />
Update data may also be contained in some game discs and other<br />
types of disc media. When you play a disc that contains update data, a<br />
screen will be displayed to gui<strong>de</strong> you through the update process.<br />
Hint<br />
If you cannot perform an update in any of the ways <strong>de</strong>scribed above, contact<br />
SCEA Consumer Services ( back cover).<br />
PS3 system updates<br />
Checking the system software version<br />
You can check system version information by selecting (Settings)<br />
(System Settings) [System Information]. The current version is<br />
displayed in the [System Software] field.<br />
33
Using the on-screen keyboard<br />
Cursor<br />
Text entry field<br />
Displays predictive options<br />
Hints<br />
For <strong>de</strong>tails about using the on-screen keyboard, refer to the online user’s gui<strong>de</strong><br />
(http://manuals.playstation.net/document/).<br />
You can also enter text using a USB keyboard or Bluetooth®-compatible<br />
keyboard (both sold separately). With the on-screen keyboard displayed, press<br />
any key on the connected keyboard to start entering text.<br />
List of keys<br />
Keys that are displayed vary <strong>de</strong>pending on the input mo<strong>de</strong> and other<br />
conditions.<br />
Keys<br />
Explanation<br />
Operation keys<br />
Displays when<br />
predictive mo<strong>de</strong> is on<br />
Input mo<strong>de</strong><br />
display<br />
Inserts a line break<br />
Moves the cursor<br />
Entering text<br />
The following steps explain how to enter text, using the word "fun" as an<br />
example.<br />
1 Select [f] on the keyboard, and then press the button.<br />
Repeat this step for the characters [u] and [n].<br />
2 Select [Enter], and then press the button.<br />
The characters you entered are confirmed.<br />
3 Select [Enter], and then press the button again.<br />
The text is entered and the keyboard closes.<br />
Deletes the character to the left of the cursor<br />
Inserts a space<br />
Switches the input mo<strong>de</strong><br />
Confirms characters that have been typed and<br />
then closes the keyboard<br />
Switches to the mini-size keyboard<br />
/ Inserts a symbol or emoticon<br />
/ Switches the type of characters to be entered<br />
Pastes text that has been copied from the<br />
Internet browser<br />
34
Parental control<br />
The PS3 system inclu<strong>de</strong>s a parental control feature. You can use this<br />
feature to set a password and limit the playback of content restricted by<br />
a parental control level (games, vi<strong>de</strong>os and other content) for children.<br />
For more information on parental control settings, visit<br />
http://www.us.playstation.com.<br />
Changing the security settings<br />
You can set a parental control level for games or Blu-ray Discs or other<br />
content un<strong>de</strong>r (Settings) (Security Settings).<br />
A password is required to change parental control settings. You can set<br />
a password un<strong>de</strong>r (Security Settings) [Change Password].<br />
The password is set to "0000" in the <strong>de</strong>fault settings.<br />
Parental control levels for games<br />
You can set the parental control level for games un<strong>de</strong>r (Security<br />
Settings) [Parental Control]. Select from [Off] or one of 11 levels.<br />
Off<br />
11-1<br />
Play any content regardless of parental control level.<br />
Set the parental control level based on the number. Note that the lower<br />
the number, the tighter the restriction.<br />
The combination of the parental control levels of both the PS3 system<br />
and the content <strong>de</strong>termine whether the content can be played.<br />
Example: If the parental control level of the system is set to [7], content<br />
with a level from [1] to [7] can be played on the system.<br />
You can see the parental control level of a game or vi<strong>de</strong>o that you<br />
downloa<strong>de</strong>d from (<strong>PlayStation</strong>®Store). Select the game or vi<strong>de</strong>o, and<br />
then press the button. From the options menu, select [Information] to<br />
display a screen with the parental control level.<br />
Game rating marks<br />
Most game packaging displays a symbol to indicate the age group that<br />
is appropriate to play the game. The symbols correspond to the<br />
parental control levels set on the games as shown below.<br />
Age group<br />
Game parental<br />
control level<br />
2 3 4 5 9 10<br />
Based on information at time of publication. For more information, visit<br />
http://www.us.playstation.com/support. For the latest information about the ESRB<br />
rating system, visit http://www.esrb.org.<br />
Other security settings<br />
You can set parental control limitations on content other than games<br />
un<strong>de</strong>r (Security Settings), as <strong>de</strong>scribed below.<br />
BD Parental Control<br />
DVD parental control<br />
Internet Browser<br />
Start Control<br />
When playing a BD with parental control settings, restrict<br />
playback based on the age you have set. The lower the<br />
setting, the tighter the restriction.<br />
When playing a DVD with parental control settings, restrict<br />
playback based on the level you have set.<br />
Select from [Off] or one of eight levels.<br />
The lower the number, the tighter the restriction.<br />
Restrict the ability to start the Internet Browser with a<br />
password.<br />
Hint<br />
For information about parental control settings for <strong>PlayStation</strong>®Network content<br />
and services, visit http://www.us.playstation.com/support.<br />
US<br />
Parental control<br />
35
Replacing the hard disk<br />
You can replace the hard disk that is installed in the PS3 system.<br />
Caution<br />
Remove the hard disk in a location out of the reach of small children to help<br />
prevent acci<strong>de</strong>ntal swallowing of small parts such as screws.<br />
The insi<strong>de</strong> of the system is hot directly after use. Allow time for the system to<br />
cool down before starting to remove the hard disk.<br />
Be careful not to injure yourself when removing or handling the screw cover<br />
or the hard disk.<br />
Be sure to reattach the screw cover and the HDD bay cover before turning<br />
the PS3 system on. If these covers are not attached, heat may build up<br />
insi<strong>de</strong> the system.<br />
To attach or remove screws, use an appropriate crosshead screwdriver. If<br />
the size does not match, the groove on the screw’s head may be damaged.<br />
Notices<br />
All hard disks, including a PS3 system’s hard disk, must be reformatted<br />
before use in a PS3 system.<br />
It is recommen<strong>de</strong>d that you regularly back up data on the hard disk. If for<br />
any reason software or data loss or corruption occurs, it may not be<br />
possible to restore or repair the software or data. Sony Computer<br />
Entertainment Inc. and its subsidiaries and affiliates will not be liable for<br />
damage or injury related to software or data loss or corruption.<br />
You can back up data stored on the hard disk to a USB mass storage<br />
<strong>de</strong>vice and restore data that has been backed up. For <strong>de</strong>tails, see "Backing<br />
up data" ( page 36).<br />
Improper removal or installation of a hard disk may cause damage to your<br />
PS3 system or loss of data, and may void your PS3 system’s hardware<br />
warranty. SCEA shall not be liable for any resulting damages, including any<br />
damages to your hard disk. User assumes all risks and liabilities associated<br />
with using a replacement hard disk, including any incompatibility or<br />
interoperability problems with the PS3 system. Services will not be<br />
provi<strong>de</strong>d on any non-PS3 system hard disks.<br />
To help protect your personal information, be sure to clear passwords for all<br />
<strong>PlayStation</strong>®Network accounts before submitting the PS3 system for<br />
service. To clear a password, select (<strong>PlayStation</strong>®Network) (Sign<br />
In), and then from the screen that is displayed, clear the [Save Password]<br />
checkbox. Note that if [Sign In Automatically (Auto Sign-In)] is set, the icon<br />
for (Sign In) will no longer be displayed. In that case, you must first clear<br />
the auto sign-in option. To clear the auto sign-in option, select<br />
(<strong>PlayStation</strong>®Network) (Account Management), press the<br />
button, and then select [Auto Sign-In Off] from the options menu. After the<br />
auto sign-in option is turned off, proceed with the password clearing<br />
process.<br />
Backing up data<br />
You can back up data that is saved on the hard disk using either of the<br />
following methods.<br />
36
Notice<br />
It is recommen<strong>de</strong>d that you regularly back up data on the hard disk. If for any<br />
reason software or data loss or corruption occurs or the hard disk must be<br />
initialized during authorized service, it may not be possible to restore or repair<br />
the software or data. Sony Computer Entertainment Inc. and its subsidiaries<br />
and affiliates will not be held liable for damage or injury related to software or<br />
data loss or corruption.<br />
Backing up data in a single operation<br />
You can back up data that is saved on the hard disk to a USB mass<br />
storage <strong>de</strong>vice in a single operation. Select (Settings)<br />
(System Settings) [Backup Utility], and then follow the on-screen<br />
instructions to perform this operation. You may not be able to back up<br />
some content, including some types of copyright-protected data.<br />
Hint<br />
You may not be able to use the backup utility to restore some data. For important<br />
data that cannot be backed up, it is recommen<strong>de</strong>d that you selectively copy or<br />
move the data to a USB storage <strong>de</strong>vice before you use the backup utility feature.<br />
For <strong>de</strong>tails on the backup utility feature, refer to the online user’s gui<strong>de</strong><br />
(http://manuals.playstation.net/document/).<br />
Backing up selected data<br />
The following file types saved on the system’s hard disk can be copied<br />
or moved to a USB <strong>de</strong>vice. Select the file, press the button, and then<br />
select [Copy] or [Move] from the options menu. For some types of<br />
vi<strong>de</strong>o files, you may need to select [Back Up] instead.<br />
File type<br />
Saved data from games; vi<strong>de</strong>o, music<br />
or photo files<br />
Back up <strong>de</strong>stination<br />
USB mass storage <strong>de</strong>vice<br />
(USB flash drive, etc.)<br />
Hints<br />
Some data cannot be copied, moved or backed up.<br />
By using a card rea<strong>de</strong>r/writer (USB connector type, sold separately), you can<br />
back up files saved on the hard disk to storage media such as a Memory<br />
Stick or an SD Memory Card.<br />
Removing the hard disk<br />
Caution<br />
For safety reasons, be sure to turn off and unplug the system before<br />
attempting to remove the hard disk.<br />
The system may not be stable when placed upsi<strong>de</strong> down. Be careful not to<br />
injure yourself when removing the screw.<br />
1 Press the power button to turn off the system.<br />
The power indicator turns solid red and the system enters standby mo<strong>de</strong>.<br />
2 Unplug the AC power cord, and then disconnect the other<br />
cables from the system.<br />
For safety reasons, remove the plug for the power cord from the electrical<br />
outlet, and then <strong>de</strong>tach the other cables.<br />
US<br />
Replacing the hard disk<br />
37
Replacing the hard disk<br />
3 Place the system upsi<strong>de</strong> down on a soft, dry cloth, and then<br />
open the screw cover.<br />
Use the notch located above the screw cover to slightly pull up the cover.<br />
Then rotate the cover as shown in the diagram. If the cover is hard to pull up,<br />
insert a tool such as a flathead screwdriver in the notch and gently pull the<br />
cover up.<br />
5 Remove the hard disk.<br />
Pull the handle upwards, and then pull out the hard disk from the system.<br />
<br />
<br />
Notices<br />
Screw cover<br />
4 Remove the screw that fastens the hard disk in place, and then<br />
remove the HDD bay cover.<br />
Remove the blue screw with an appropriate crosshead screwdriver.<br />
Sli<strong>de</strong> the HDD bay cover to the left, and then remove the cover.<br />
<br />
<br />
The hard disk is a sensitive piece of equipment and should be handled with<br />
care at all times. To help prevent software or data loss or corruption, or<br />
damage to the hard disk, carefully follow the precautions listed below:<br />
Do not drop the system or hard disk, or subject either <strong>de</strong>vice to physical<br />
shock or vibration.<br />
Do not allow liquid or small particles to get into the system or hard disk.<br />
Do not touch the connectors or insert foreign objects into the connectors.<br />
Do not place the system or hard disk close to magnetic fields such as those<br />
produced by magnets or loudspeakers. Also, do not place <strong>de</strong>vices that<br />
may be sensitive to magnetic forces (such as a wrist watch or a credit card)<br />
near the hard disk.<br />
Do not put heavy objects on the hard disk.<br />
When handling the hard disk, hold it only by the edges or metal frame.<br />
The hard disk is sensitive to static electricity. Ensure that proper handling<br />
methods are used when installing the hard disk.<br />
Store in a cool, dry location.<br />
38<br />
HDD bay cover
Replacing the hard disk<br />
Caution<br />
For safety reasons, be sure to turn off and unplug the system before attempting<br />
to replace the hard disk.<br />
When replacing the hard disk, follow the procedure below to remove<br />
the metal frame.<br />
1 Using a crosshead screwdriver, remove the screws (4 places).<br />
3 Remove the hard disk from the metal frame.<br />
<br />
<br />
4 Place the replacement hard disk on the metal frame for the<br />
PS3 system’s hard disk, and then attach using the screws<br />
(4 places).<br />
Do not overtighten the screws.<br />
US<br />
Replacing the hard disk<br />
5 Install the hard disk in the system.<br />
Refer to the instructions in "Removing the hard disk" ( page 37) and follow<br />
the steps in reverse or<strong>de</strong>r when installing. Be sure to fully insert the hard disk<br />
in the HDD bay.<br />
2 Hold the hard disk by the edges, and then turn it over.<br />
6 Reinstall the system software.<br />
After the hard disk has been replaced, the system software must be<br />
reinstalled ( page 40).<br />
Replacement hard disks<br />
You can use hard disks of the following types with the PS3 system.<br />
Grasp firmly by the opening on<br />
either si<strong>de</strong> to prevent slipping.<br />
Size 2.5 inch (internal type) * 1<br />
Interface format Serial ATA * 2<br />
* 1 Proper operation is not guaranteed for all mo<strong>de</strong>ls.<br />
* 2 Parallel ATA is not supported.<br />
39
Replacing the hard disk<br />
Reinstalling the system software<br />
If the system software does not start when the system is turned on<br />
(such as when the hard disk has been replaced), a screen such as the<br />
one shown below is displayed. In this case, you must reinstall the<br />
system software using downloa<strong>de</strong>d update data.<br />
If you have a game disc or other disc that contains update data, you may be<br />
able to use that disc to reinstall the system software. If you insert the disc in the<br />
PS3 system and follow the on-screen instructions, you can verify whether the<br />
update data can be used.<br />
For additional information on the installation of the system software, refer to the<br />
section "Update using a PC" at our website: http://www.us.playstation.com/ps3.<br />
The system software inclu<strong>de</strong>d within this product is subject to a limited license<br />
from Sony Computer Entertainment Inc. Refer to http://www.scei.co.jp/ps3-eula<br />
for further <strong>de</strong>tails.<br />
Installing the system software<br />
Turn on the PS3 system, and then insert the storage media containing<br />
the update data. Follow the on-screen instructions to reinstall the<br />
system software.<br />
Notices<br />
Downloading system software update data<br />
Using a PC with Internet access, download the system software update<br />
data from the website shown below. Follow the instructions available on<br />
the website to copy the update data from the PC to storage media.<br />
http://www.us.playstation.com/PS3<br />
Hints<br />
Use the latest version of the update data available on the website. You cannot<br />
reinstall the system software using a version that is earlier than the system<br />
software version that had previously been used. If the appropriate update data<br />
for your system is not available at the website, contact SCEA Consumer<br />
Services ( back cover).<br />
Do not turn off the system or remove the storage media during the<br />
installation. If the installation is cancelled before completion, the system<br />
software may become damaged, and the system may require servicing or<br />
exchange.<br />
During the installation, the power button on the system and the PS button<br />
on the wireless controller are not active.<br />
Restoring data that has been backed up<br />
You can restore data that you backed up using either of the following<br />
methods.<br />
40
Restoring data in a single operation<br />
You can restore data that you backed up in a single operation by<br />
selecting (Settings) (System Settings) [Backup Utility].<br />
Connect the USB mass storage <strong>de</strong>vice that contains the backup data,<br />
and then follow the on-screen instructions to perform this operation.<br />
Hints<br />
You may not be able to use the backup utility to restore some data.<br />
For <strong>de</strong>tails on the backup utility feature, refer to the online user’s gui<strong>de</strong><br />
(http://manuals.playstation.net/document/).<br />
Restoring selected data<br />
You can manually restore files using the options menu for the file.<br />
Connect the USB mass storage <strong>de</strong>vice that contains the file, select the<br />
file that you want to restore, and then press the button. Select [Copy]<br />
or [Move] from the options menu.<br />
US<br />
Replacing the hard disk<br />
Hint<br />
You may not be able to copy or move files that contain copyright-protected data.<br />
41
Restoring the PS3 system<br />
Notices<br />
If you restore the <strong>de</strong>fault settings or restore the PS3 system, changes to<br />
the settings cannot be undone. Data loss or corruption is the responsibility<br />
of the user.<br />
Do not turn off the PS3 system during this operation. If the operation is<br />
cancelled before completion, the system software may become damaged,<br />
and the system may require servicing or exchange.<br />
During this operation, the power button on the system and the PS button on<br />
the wireless controller are not active.<br />
You cannot use this feature to go back to an earlier version of the system<br />
software.<br />
Restoring <strong>de</strong>fault settings<br />
You can restore from the current settings un<strong>de</strong>r (Settings) to the<br />
<strong>de</strong>fault settings by selecting (Settings) (System Settings)<br />
[Restore Default Settings].<br />
After you complete the operation and restart the system, the initial<br />
setup screen will be displayed. Follow the on-screen instructions to<br />
perform initial setup of the system software ( page 15).<br />
Deleting data on the hard disk drive<br />
You can <strong>de</strong>lete all data on the system’s hard disk and restore from the<br />
current settings un<strong>de</strong>r (Settings) to the <strong>de</strong>fault settings by selecting<br />
(Settings) (System Settings) [Restore PS3 System].<br />
You can shorten the time required to perform this operation by selecting<br />
[Quick Format] from the list of hard disk format options. It is<br />
recommen<strong>de</strong>d that you select [Full Format] when formatting a hard disk<br />
that contains important or sensitive data.<br />
After you complete the operation and restart the system, the initial<br />
setup screen will be displayed. Follow the on-screen instructions to<br />
perform initial setup of the system software ( page 15).<br />
Before disposing of or transferring the PS3 system<br />
Before disposing of the system, it is recommen<strong>de</strong>d that personal<br />
information and other data of similar nature be <strong>de</strong>leted. To <strong>de</strong>lete data,<br />
go to (Settings) (System Settings) [Restore PS3 System].<br />
It is recommen<strong>de</strong>d that you select [Full Format] when the screen for<br />
selecting a hard disk format method is displayed during system<br />
restoration. Although formatting time can be reduced by using [Quick<br />
Format], it might be possible to restore erased data in some cases if a<br />
special tool is used.<br />
42
Before requesting service<br />
Go through this section if you experience difficulty in operating the<br />
PS3 system. Should any problem persist, contact Consumer Services<br />
( back cover) for assistance.<br />
Power<br />
The system does not turn on.<br />
Check that the AC power cord is securely inserted in the system<br />
and the electrical outlet.<br />
Picture<br />
There is no picture on the TV screen.<br />
Check that the cable is securely inserted. Try disconnecting the<br />
cable from the PS3 system or TV and then reconnecting it.<br />
There may be a problem with the AV cable in use. Try using another<br />
cable that is compatible with the PS3 system.<br />
Adjust the vi<strong>de</strong>o input on the TV to match the input connector that is<br />
being used to connect to the PS3 system.<br />
If the vi<strong>de</strong>o output settings on the system do not match those of the<br />
cable or TV in use, there may be no picture. If the screen goes<br />
blank, turn off the system. Then, with only the system and the TV<br />
connected, press the system’s power button for more than 5<br />
seconds to turn the system back on. The vi<strong>de</strong>o output settings will<br />
automatically be reset to the standard <strong>de</strong>finition (SD) resolution.<br />
The picture is distorted.<br />
Check that the cable is securely inserted. Try disconnecting the<br />
cable from the PS3 system or TV and then reconnecting it.<br />
The Blu-ray Disc (BD) or DVD cannot be played, or the picture is<br />
distorted.<br />
When outputting DVD content or <strong>PlayStation</strong>®3 format software in<br />
standard <strong>de</strong>finition (SD) resolution, only discs recor<strong>de</strong>d in the NTSC<br />
standard can be played.<br />
If the system is connected to a VCR, copy protection encoding on<br />
some BDs and DVDs may cause image distortion, or may cause the<br />
image to become lighter or darker. In such cases, connect the<br />
system to the TV directly. You may also see a similar occurrence if<br />
using a combination TV/VCR unit.<br />
If the BD or DVD does not match the region co<strong>de</strong> set in the system,<br />
it cannot be played. For <strong>de</strong>tails, see "Region co<strong>de</strong>s" ( page 50).<br />
Some DVDs are preset with parental control restrictions. Enter the<br />
password that was set in (Security Settings) to temporarily<br />
increase the parental control level.<br />
If you record vi<strong>de</strong>o content on DVD-R, DVD-RW, DVD+R or<br />
DVD+RW media using a <strong>de</strong>vice such as a DVD recor<strong>de</strong>r, you must<br />
finalize the media before playing it on the PS3 system. Finalize the<br />
media using the recording <strong>de</strong>vice.<br />
Some BDs are preset with parental control restrictions. Enter the<br />
password that was set in (Security Settings) to change the<br />
parental control level.<br />
The BD may be disc-locked. Enter the password that was set when<br />
the disc was created.<br />
See also the notices un<strong>de</strong>r "Playable discs" ( page 49).<br />
Certain BDs cannot be played.<br />
To play commercially available BD vi<strong>de</strong>o software, the encryption<br />
key for AACS (Advanced Access Control System) may need to be<br />
renewed. To renew the key, you must update the system software.<br />
US<br />
Before requesting service<br />
43
Before requesting service<br />
The size of the vi<strong>de</strong>o image and the TV screen do not match.<br />
The settings of the connected TV and the vi<strong>de</strong>o output settings of<br />
the system may not match. Check the following items:<br />
Check that the system’s settings un<strong>de</strong>r (Settings)<br />
(Display Settings) [Vi<strong>de</strong>o Output Settings] are correct.<br />
Check that the settings of the connected TV are correct. For<br />
<strong>de</strong>tails, refer to the instructions supplied with your TV.<br />
With some vi<strong>de</strong>o content, the screen size cannot be changed.<br />
The screen color does not seem right.<br />
If set to the <strong>de</strong>fault setting, the background color changes as the<br />
time, day and month changes.<br />
Audio<br />
There is no sound.<br />
Check that the muting function on the TV or speakers is turned off.<br />
Also check that the volume is at the appropriate level.<br />
If an audio <strong>de</strong>vice is connected, check the settings of the <strong>de</strong>vice.<br />
For <strong>de</strong>tails, refer to the instructions supplied with the audio <strong>de</strong>vice.<br />
There may be a problem with the AV cable. Try using another cable<br />
that is compatible with the PS3 system.<br />
Some software do not support digital audio output.<br />
If the system’s audio output settings do not match the AV cable or<br />
<strong>de</strong>vice in use, the system may not produce sound. Check that the<br />
system’s settings un<strong>de</strong>r (Settings) (Sound Settings)<br />
[Audio Output Settings] are correct.<br />
Some content that support Dolby Digital, DTS, and other formats<br />
may not produce audio from all channels.<br />
Music files do not play.<br />
Playback methods may be limited for some music files that are<br />
distributed via the Internet. In such cases, it may not be possible to<br />
play the content on the PS3 system.<br />
Network<br />
A connection to the network cannot be established.<br />
If using a wired connection, check that the Ethernet cable is<br />
securely connected.<br />
Check that the network settings are correct. Refer to the instructions<br />
supplied by your Internet service provi<strong>de</strong>r or in the software manual<br />
to make the correct network settings.<br />
The message [An error occurred during communication with the<br />
server. This is a DNS error. (80710102)] is displayed during the<br />
Internet connection test.<br />
If you connect the system to a mo<strong>de</strong>m that does not have a router<br />
feature (bridge mo<strong>de</strong>m), you may need to set PPPoE settings.<br />
Select (Settings) (Network Settings) [Internet<br />
Connection Settings] [Custom] to start configuring the Internet<br />
connection. Continue adjusting settings until you see the IP address<br />
setting screen. Select [PPPoE], and then enter the user name and<br />
password provi<strong>de</strong>d by your Internet service provi<strong>de</strong>r.<br />
If you connect your system to a router, complete initial settings on<br />
the router first. After completing the settings on the router, try to<br />
adjust the network settings again by selecting (Settings)<br />
(Network Settings) [Internet Connection Settings] [Easy] again.<br />
For <strong>de</strong>tails about the router settings, refer to the instructions<br />
supplied with your router.<br />
44
The message [The attempt to obtain an IP address timed out.] is<br />
displayed during the Internet connection test.<br />
If you disconnected the Ethernet cable that is used to connect to a<br />
<strong>de</strong>vice such as a PC, and then reconnected it to the system, you<br />
must restart both your system and the mo<strong>de</strong>m. After restarting both<br />
<strong>de</strong>vices, update your network settings by selecting (Settings)<br />
(Network Settings) [Internet Connection Settings] [Easy].<br />
For <strong>de</strong>tails about restarting your mo<strong>de</strong>m, refer to the instructions<br />
supplied with your mo<strong>de</strong>m.<br />
If you are using a wireless connection, the WEP key may be wrong.<br />
Check that you have the correct WEP key, and then enter it again.<br />
The message [The PPPoE user name or password is not correct.] is<br />
displayed during the Internet connection test.<br />
Enter the correct user name and password for PPPoE. If you do not<br />
know the user name and password, contact your Internet service<br />
provi<strong>de</strong>r.<br />
The Web page does not display properly.<br />
Certain content, such as content that requires specialized software,<br />
may not display properly on some Web pages.<br />
Disc Media and USB Devices<br />
The system does not recognize the disc.<br />
Remove the disc and reinsert it.<br />
If the disc has a label, insert it with the label si<strong>de</strong> up.<br />
Check whether the disc is scratched or dirty. If dirty, wipe it gently<br />
with a soft cloth.<br />
See also the notices un<strong>de</strong>r "Playable discs" ( page 49).<br />
The disc cannot be removed.<br />
Press the eject button for 10 seconds or longer to force the disc to<br />
eject. After removing and before reinserting a disc into the system,<br />
turn off the system, and then turn on the system again to resume<br />
use.<br />
The system does not recognize the USB <strong>de</strong>vice, or the USB <strong>de</strong>vice<br />
does not operate properly.<br />
Check that the <strong>de</strong>vice is inserted correctly.<br />
The connected <strong>de</strong>vice may not be usable with the system.<br />
Try using a different USB connector on the PS3 system. The<br />
<strong>de</strong>vice may not be recognized <strong>de</strong>pending on the combination of<br />
USB connectors in use.<br />
In some cases, the system may not recognize the <strong>de</strong>vice if an<br />
external USB hub is used and more than the allotted number of<br />
<strong>de</strong>vices are connected. Try removing unused <strong>de</strong>vices.<br />
When connecting a USB <strong>de</strong>vice, the message [An unknown USB<br />
<strong>de</strong>vice has been connected.] is displayed.<br />
The connected <strong>de</strong>vice may not be compatible with the system or<br />
software application.<br />
The <strong>de</strong>vice may be compatible with specific software only. Use<br />
software that is compatible with the <strong>de</strong>vice.<br />
There may be too many USB hubs connected. Try removing a USB<br />
hub.<br />
US<br />
Before requesting service<br />
45
Before requesting service<br />
Wireless controller<br />
The wireless controller does not function.<br />
When using the wireless controller, you must pair it with the system<br />
and assign a controller number. With the system turned on (power<br />
indicator is lit solid green), connect the system and the controller<br />
using the USB cable, and then press the PS button on the controller.<br />
The controller number may have been cleared. Press the PS button<br />
on the controller to reassign the number.<br />
With some software, you may need to use a specified controller<br />
number. Refer to the manual for the software in use.<br />
Check the charge level of the wireless controller battery. When the<br />
controller is used in wireless mo<strong>de</strong>, it will not function if the battery<br />
does not have any charge left. Charge the battery by connecting<br />
the controller to the system with the USB cable.<br />
If you cannot use the controller even after checking the items<br />
above, try resetting the wireless controller by pushing the reset<br />
button on the controller rear with a thin-tipped object such as a pen.<br />
Reset button<br />
The wireless controller operates in an abnormal manner.<br />
Try resetting the wireless controller by pushing the reset button on<br />
the controller rear with a thin-tipped object such as a pen.<br />
Try selecting (Settings) (Accessory Settings) [Controller<br />
Vibration Function], and then setting [Vibration Function] to [On].<br />
The software may not support the vibration function. Refer to the<br />
instruction manual for the software. For software downloa<strong>de</strong>d from<br />
(<strong>PlayStation</strong>®Store), refer to the compatibility notice information<br />
inclu<strong>de</strong>d in the software’s online <strong>de</strong>scription.<br />
The response to button operations is slow.<br />
The response speed may be slow on an LCD display or PC display.<br />
This is not a malfunction.<br />
The battery does not charge or does not fully recharge.<br />
The battery can only be charged when the system is turned on.<br />
(The power indicator on the system front is lit solid green.)<br />
See "Wireless controller battery" ( page 51).<br />
The battery charge does not last long.<br />
The battery may be wearing out. Battery charge duration will<br />
gradually <strong>de</strong>crease with repeated usage and age. See "Wireless<br />
controller battery" ( page 51).<br />
Even when the wireless controller is not being used, it loses its<br />
charge over time.<br />
The controller’s battery slowly loses its charge even when the<br />
controller is not in use. It is recommen<strong>de</strong>d that you charge the<br />
controller frequently.<br />
The wireless controller does not vibrate.<br />
Check that you are using a DUALSHOCK®3 Wireless Controller.<br />
The SIXAXIS Wireless Controller does not vibrate.<br />
46
Other issues<br />
The system makes noise.<br />
When using the system in a location where heat can build up, such<br />
as in an enclosed AV cabinet, on carpet or a cushion, or near a wall<br />
(within 10cm of the wall), the internal fan will rotate rapidly to reduce<br />
the system’s temperature and this may generate increased noise.<br />
Move the system to a location with good ventilation.<br />
Depending on how a disc is being used, such as when copying an<br />
audio CD to the hard disk or starting software from a disc, disc<br />
noise may be lou<strong>de</strong>r than normal.<br />
Furthermore, some software may cause more disc noise than<br />
others.<br />
You forgot your password for security settings.<br />
If you restore the system using (Settings) (System Settings)<br />
[Restore Default Settings], your password will return to "0000".<br />
However, note that all settings other than the password will also be<br />
reset. Once these settings are reset, they cannot be recovered.<br />
The system is warm.<br />
When the system is being used or is turned on, it may become<br />
warm. This is not a malfunction.<br />
The screen freezes during gameplay.<br />
Check whether the disc is scratched or dirty. If dirty, wipe it gently<br />
with a soft cloth.<br />
If you have game data for <strong>PlayStation</strong>®3 format software installed,<br />
try <strong>de</strong>leting the game data and reinstalling the software. Select<br />
(Game) (Game Data Utility), press the button, and<br />
then <strong>de</strong>lete the game data from the options menu. Next, reinstall the<br />
<strong>PlayStation</strong>®3 format software. Be careful not to <strong>de</strong>lete the saved<br />
data for the game.<br />
The screen is frozen. The system does not operate.<br />
Disconnect all accessories such as USB <strong>de</strong>vices from the system,<br />
and then restart the system. Pressing the power button for 15<br />
seconds or longer will force the system to turn off (enter standby<br />
mo<strong>de</strong>). After the system turns off, turn it on again.<br />
The power indicator is flashing red and green alternately.<br />
The interior of the system may have become too warm. This is<br />
typically due to the operating environment. Check whether the<br />
system is being used in a warm location. Ensure that vents are not<br />
blocked and that a<strong>de</strong>quate airflow exists around the system.<br />
Continuing to use the system in the above condition will cause it to<br />
stop functioning. Turn the system off and leave it unused until it<br />
cools down. After the system cools down, turn it on again.<br />
The power indicator is flashing red and the system does not<br />
operate.<br />
The temperature insi<strong>de</strong> the system may be too high. Check whether<br />
the system is being used in a hot location or whether the vents are<br />
blocked. Press the power button to stop the flashing, and then leave<br />
the system turned off until it cools down. After it cools down, turn on<br />
the system again.<br />
The system does not recognize content.<br />
The content may be of a format that is not supported by the system.<br />
Content of types not supported by the system will not be<br />
recognized. For information on supported formats, refer to the<br />
online user’s gui<strong>de</strong> (http://manuals.playstation.net/document/).<br />
US<br />
Before requesting service<br />
47
Specifications<br />
Design and specifications are subject to change without notice. Information about<br />
system functionality and images published in this document may vary from those<br />
for your PS3 system, <strong>de</strong>pending on the system software version in use.<br />
<strong>PlayStation</strong>®3 system<br />
CPU<br />
GPU<br />
Audio output<br />
Memory<br />
Hard disk<br />
Inputs/<br />
outputs* 3<br />
Networking<br />
Controller<br />
AV output<br />
BD/DVD/<br />
CD drive<br />
(read only)<br />
Cell Broadband Engine<br />
RSX<br />
LPCM 7.1ch, Dolby Digital,<br />
Dolby Digital Plus, Dolby TrueHD, DTS,<br />
DTS-HD, AAC<br />
256 MB XDR Main RAM,<br />
256 MB GDDR3 VRAM<br />
120 GB*<br />
2.5" Serial ATA<br />
1 * 2 (CECH-2001A)<br />
250 GB* 1 * 2 (CECH-2001B)<br />
Hi-Speed USB<br />
2<br />
(USB 2.0)<br />
Ethernet (10BASE-T, 100BASE-TX,<br />
1000BASE-T) × 1<br />
IEEE 802.11 b/g<br />
Bluetooth® 2.0 (EDR)<br />
Wireless Controller (Bluetooth®)<br />
Resolution<br />
1080p, 1080i, 720p, 480p, 480i<br />
HDMI OUT connector* 4 1<br />
AV MULTI OUT connector 1<br />
Digital out (optical) connector 1<br />
Maximum read rate<br />
BD × 2 (BD-ROM)<br />
DVD × 8 (DVD-ROM)<br />
CD × 24 (CD-ROM)<br />
Laser<br />
Power<br />
Power consumption<br />
External dimensions<br />
(excluding maximum projecting part)<br />
Mass<br />
Operating temperature<br />
Type: Semiconductor, continuous<br />
BD Wavelength: 400 - 410 nm<br />
Power: Max. 17.5 mW<br />
DVD Wavelength: 655 - 664 nm<br />
Power: Max. 2.6 mW<br />
CD Wavelength: 770 - 800 nm<br />
Power: Max. 4.0 mW<br />
120 V AC, 60 Hz<br />
Approx. 250 W<br />
Approx. 290 × 65 × 290 mm<br />
(11.5 × 2.6 ×11.5 in)<br />
(width × height × length)<br />
Approx. 3.2 kg (7.1 lb)<br />
5°C - 35°C (41°F - 95°F)<br />
* 1 Hard disk capacity calculated using base 10 mathematics (1GB =<br />
1,000,000,000 bytes). The system software for this PS3 system calculates<br />
capacity using binary mathematics (1GB = 1,073,741,824 bytes) and<br />
subsequently displays lower capacity and free space. The difference in<br />
displayed values does not indicate a difference in the actual number of bytes.<br />
* 2 A portion of the hard disk capacity is reserved for use in connection with system<br />
administration, maintenance, and additional options. This may occur upon<br />
installation of system software or other software. As a result, the availability of<br />
hard disk capacity may vary <strong>de</strong>pending on the system, system software version,<br />
or available options, and is not otherwise available for your use.<br />
* 3 Functionality of all connected <strong>de</strong>vices is not guaranteed.<br />
* 4 "Deep Color", "x.v.Color (xvYCC)" and "HD lossless audio format" <strong>de</strong>fined by<br />
HDMI ver.1.3a are supported.<br />
DUALSHOCK®3 Wireless Controller<br />
48<br />
Battery type<br />
Voltage<br />
Battery capacity<br />
Mass<br />
Built-in rechargeable Lithium-Ion battery<br />
DC 3.7 V<br />
610 mAh<br />
Approx. 180 g (6.4 oz)
Supplied AV cable and USB cable<br />
AV cable Company: SONY<br />
Part No.: 1-834-231-11<br />
USB cable Company: SONY<br />
BRAVIA Sync<br />
Part No.: 1-833-625-12<br />
"BRAVIA Sync" is a Sony product feature that allows you to use the remote<br />
controls of BRAVIA televisions (Sony Corporation products) to operate various<br />
<strong>de</strong>vices that are connected to each other through HDMI cables. BRAVIA Sync<br />
uses the control signals that are transferred through the HDMI connections.<br />
To enable the BRAVIA Sync feature, go to (Settings) (System Settings)<br />
[Control for HDMI], and set the option to [On]. For <strong>de</strong>tails, refer to the online<br />
user’s gui<strong>de</strong> (http://manuals.playstation.net/document/) and the instructions<br />
supplied with the BRAVIA products in use.<br />
Hint<br />
This feature can only be used on <strong>de</strong>vices that support the BRAVIA Sync feature.<br />
Compatibility with all <strong>de</strong>vices that comply with the HDMI CEC specification is not<br />
guaranteed.<br />
Playable discs<br />
For additional information on compatible media types, visit our website at<br />
http://www.us.playstation.com.<br />
<strong>PlayStation</strong>®3 format BD-ROM<br />
BD-ROM<br />
Blu-ray Disc (BD)<br />
BD-R<br />
BD-RE* 1<br />
DVD-ROM<br />
DVD+R/RW<br />
DVD<br />
DVD-R/RW<br />
AVCHD<br />
DSD Disc<br />
<strong>PlayStation</strong>® format CD-ROM* 2<br />
CD<br />
CD-DA (audio CD)* 3<br />
CD-R/RW<br />
* 1 Playback of BD-RE ver. 1.0 discs is not supported.<br />
* 2 This mo<strong>de</strong>l of the <strong>PlayStation</strong>®3 system is <strong>de</strong>signed to play <strong>PlayStation</strong>®3 format<br />
software and has limited backward compatibility. This system is not compatible<br />
with and will not play <strong>PlayStation</strong>®2 format software. Some <strong>PlayStation</strong>® format<br />
software may play on this system. For more information, visit<br />
www.us.playstation.com.<br />
* 3 Playback of Super Audio CDs is not supported.<br />
US<br />
Specifications<br />
49
Specifications<br />
50<br />
Region co<strong>de</strong>s<br />
Depending on the disc, a region co<strong>de</strong> that is based on the geographic region<br />
where the disc is distributed may be assigned. This system can play discs<br />
marked with the following region co<strong>de</strong>s.<br />
Disc<br />
Blu-ray Disc (BD)<br />
DVD<br />
<strong>PlayStation</strong>®3 format BD-ROM<br />
<strong>PlayStation</strong>® format CD-ROM<br />
DVD and <strong>PlayStation</strong>®3 format software<br />
Region co<strong>de</strong><br />
When outputting DVD content or <strong>PlayStation</strong>®3 format software in SD resolution,<br />
only discs recor<strong>de</strong>d in the NTSC standard can be played.<br />
When playing <strong>PlayStation</strong>®3 format software in HD resolution, a TV that supports<br />
vi<strong>de</strong>o playback at 59.94 Hz is required.<br />
DVD-R/DVD-RW/DVD+R/DVD+RW discs<br />
Discs that have not been finalized cannot be played.<br />
Notices<br />
Use only circular-shaped discs with the system. Do not use irregularly-shaped<br />
discs (for example, heart- or star-shaped discs). Using irregularly-shaped<br />
discs may cause a malfunction.<br />
Do not use damaged, re-shaped or repaired discs. Use of such discs may<br />
cause a malfunction.<br />
ALL<br />
When using an 8 cm disc, insert the disc in the system without an adaptor.<br />
The audio CD playback feature of this system is <strong>de</strong>signed to conform to the<br />
Compact Disc (CD) standard. Recently, some record companies have started<br />
marketing music discs enco<strong>de</strong>d with copyright protection technologies. Some<br />
of these music discs do not conform to the CD standard and may not be<br />
playable on this system.<br />
A DualDisc is a dual-si<strong>de</strong>d disc that combines a DVD si<strong>de</strong> and an audio si<strong>de</strong>.<br />
Note that the audio si<strong>de</strong> is not guaranteed to play because this type of disc<br />
does not conform to the specifications required for an audio Compact Disc<br />
(CD).<br />
If a <strong>de</strong>vice that is not compatible with the HDCP (High-bandwidth Digital<br />
Content Protection) standard is connected to the system using an HDMI cable,<br />
vi<strong>de</strong>o or audio cannot be output from the system.<br />
Copyright-protected Blu-ray vi<strong>de</strong>o discs can only be output at 1080p using an<br />
HDMI cable connected to a <strong>de</strong>vice that is compatible with the HDCP (Highbandwidth<br />
Digital Content Protection) standard.<br />
When you use the AV MULTI OUT connector of the system to connect to a TV,<br />
the resolution used to output copyright-protected vi<strong>de</strong>o from a BD or from vi<strong>de</strong>o<br />
files may be limited or the vi<strong>de</strong>o may not be output.<br />
When playing discs with content that was copied fraudulently, abnormal sounds<br />
may be produced or the content may not play correctly.<br />
To enjoy continuous playback of copyright-protected BDs, the encryption key<br />
for AACS (Advanced Access Control System) may need to be renewed. To<br />
renew the key, you must update the system software.<br />
Some discs may not be playable due to scratches, dust, the quality of<br />
recording, or the characteristics of the recording <strong>de</strong>vice.<br />
In rare instances, CDs, DVDs, BDs and other media may not operate properly<br />
when played on the PS3 system. This is primarily due to variations in the<br />
manufacturing process or encoding of the software.
Wireless controller battery<br />
Caution<br />
If you come into contact with material from a leaking battery, take the<br />
following actions:<br />
– If the material gets into the eyes, do not rub. Immediately flush the eyes<br />
with clean water and seek medical attention.<br />
– If the material comes into contact with the skin or clothes, immediately<br />
rinse the affected area with clean water. Consult your physician if<br />
inflammation or soreness <strong>de</strong>velops.<br />
Do not allow the battery to come into contact with fire or subject it to extreme<br />
temperatures such as in direct sunlight, in a vehicle exposed to the sun or<br />
near a heat source.<br />
Removing the battery<br />
Caution<br />
Remove the battery in a location out of the reach of small children to help<br />
prevent acci<strong>de</strong>ntal swallowing of small parts such as the screws.<br />
Be careful not to hurt your nails or fingers when removing the controller<br />
casing.<br />
For safety reasons, attach tape or a seal on the metal part of the battery<br />
before disposing.<br />
Notice<br />
Other than when disposing of the wireless controller, never remove the screws<br />
and never remove the battery from the wireless controller.<br />
US<br />
Specifications<br />
Wireless controller battery life<br />
The battery has a limited lifespan. Battery duration will gradually <strong>de</strong>crease with<br />
repeated usage and age.<br />
Battery life also varies <strong>de</strong>pending on the storage method, usage state,<br />
environment and other factors.<br />
Storage<br />
When the wireless controller is not used for an exten<strong>de</strong>d period of time, it is<br />
recommen<strong>de</strong>d that you fully charge it at least once a year in or<strong>de</strong>r to maintain<br />
battery functionality.<br />
1 Disconnect the USB cable from the wireless controller.<br />
2 Using a crosshead screwdriver, remove the screws (5 places).<br />
When disposing of the wireless controller<br />
The lithium-ion battery of the wireless controller is recyclable. When<br />
disposing of the wireless controller, remove the battery and follow local<br />
regulations regarding disposing of batteries.<br />
51
Specifications<br />
3 Remove the casing.<br />
Push in the direction of the arrow.<br />
Pull the casing apart.<br />
4 After disconnecting the connector, remove the battery.<br />
Connector<br />
Battery<br />
Recycling Lithium-Ion Batteries<br />
Lithium-Ion batteries are recyclable.<br />
You can help preserve our environment by returning your used<br />
rechargeable batteries to the collection and recycling location<br />
nearest you.<br />
For more information regarding recycling of rechargeable batteries,<br />
call toll free 1-800-822-8837, or visit http://www.rbrc.org/<br />
52<br />
Caution<br />
Do not handle damaged or leaking Lithium-Ion batteries.
LIMITED HARDWARE WARRANTY AND LIABILITY<br />
Sony Computer Entertainment America ("SCEA") warrants to the original<br />
purchaser that the PS3 hardware shall be free from material <strong>de</strong>fects in material<br />
and workmanship for a period of one (1) year from the original date of purchase<br />
(the "Warranty Period"). If the product is <strong>de</strong>termined to be materially <strong>de</strong>fective<br />
during the Warranty Period, your sole remedy and SCEA’s sole and exclusive<br />
liability shall be limited to the repair or replacement of this product with a factory<br />
recertified product at SCEA’s option. For purpose of this Limited Hardware<br />
Warranty and Liability, "factory recertified" means a product that has been<br />
returned to its original specifications. You must visit<br />
http://www.us.playstation.com/support or call 1-800-345-7669 to receive a return<br />
authorization and shipping instructions.<br />
THIS WARRANTY SHALL NOT APPLY IF THIS PRODUCT (A) IS USED WITH<br />
PRODUCTS THAT ARE NOT COMPATIBLE WITH THIS PRODUCT; (B) IS USED<br />
FOR COMMERCIAL PURPOSES (INCLUDING RENTAL); (C) IS MODIFIED, OR<br />
TAMPERED WITH; (D) IS DAMAGED BY ACTS OF GOD, MISUSE, ABUSE,<br />
NEGLIGENCE, ACCIDENT, WEAR AND TEAR, UNREASONABLE USE, OR BY<br />
OTHER CAUSES UNRELATED TO DEFECTIVE MATERIALS OR<br />
WORKMANSHIP; (E) HAS HAD THE SERIAL NUMBER ALTERED, DEFACED<br />
OR REMOVED; OR (F) HAS HAD THE WARRANTY SEAL ON THE PS3<br />
SYSTEM ALTERED, DEFACED, OR REMOVED. THIS WARRANTY DOES NOT<br />
COVER CONSUMABLES (SUCH AS BATTERIES) OR PRODUCTS SOLD "AS<br />
IS" OR WITH ALL FAULTS. THIS WARRANTY SHALL ALSO BE VOIDABLE BY<br />
SCEA IF (1) SCEA REASONABLY BELIEVES THAT THE PS3 SYSTEM HAS<br />
BEEN USED IN A MANNER THAT WOULD VIOLATE THE TERMS AND<br />
CONDITIONS OF A SEPARATE END USER LICENSE AGREEMENT FOR<br />
SYSTEM SOFTWARE; OR (2) THE PRODUCT IS USED WITH PRODUCTS NOT<br />
SOLD OR LICENSED BY SCEA (INCLUDING, BUT NOT LIMITED TO, NON-<br />
LICENSED GAME ENHANCEMENT DEVICES, CONTROLLERS, ADAPTORS<br />
AND POWER SUPPLY DEVICES). YOU ASSUME ALL RISKS AND LIABILITIES<br />
ASSOCIATED WITH USE OF THIRD PARTY PRODUCTS. A VALID PROOF OF<br />
PURCHASE IN THE FORM OF A BILL OF SALE OR RECEIPT FROM AN<br />
AUTHORIZED RETAILER WITH THE DATE OF THE ORIGINAL PURCHASE<br />
MUST BE PRESENTED TO OBTAIN WARRANTY SERVICE.<br />
THIS WARRANTY IS PROVIDED TO YOU IN LIEU OF ALL OTHER EXPRESS<br />
OR IMPLIED WARRANTIES INCLUDING WARRANTIES OF<br />
MERCHANTABILITY AND FITNESS FOR A PARTICULAR PURPOSE FOR THE<br />
PS3 HARDWARE, WHICH ARE DISCLAIMED HEREUNDER. HOWEVER, IF<br />
SUCH WARRANTIES ARE REQUIRED AS A MATTER OF LAW, THEN THEY<br />
ARE LIMITED IN DURATION TO THE WARRANTY PERIOD.<br />
YOUR SOLE AND EXCLUSIVE RECOURSE IN THE EVENT OF ANY<br />
DISSATISFACTION WITH OR DAMAGE ARISING FROM THE USE OF THE<br />
PS3 HARDWARE AND SCEA’S MAXIMUM LIABILITY SHALL BE LIMITED<br />
TO REPAIR OR REPLACEMENT OF THE PS3 SYSTEM.<br />
EXCEPT AS EXPRESSLY STATED ABOVE, SCEA EXCLUDES ALL LIABILITY<br />
FOR ANY LOSS OF DATA, LOSS OF PROFIT, OR ANY OTHER LOSS OR<br />
DAMAGE SUFFERED BY YOU OR ANY THIRD PARTY, WHETHER SUCH<br />
DAMAGES ARE DIRECT, INDIRECT, CONSEQUENTIAL, SPECIAL, OR<br />
INCIDENTAL AND HOWEVER ARISING UNDER ANY THEORY OF LAW, AS A<br />
RESULT OF USING YOUR PS3 HARDWARE. SOME STATES OR PROVINCES<br />
DO NOT ALLOW LIMITATION ON HOW LONG AN IMPLIED WARRANTY<br />
LASTS AND SOME STATES DO NOT ALLOW THE EXCLUSION OR<br />
LIMITATIONS OF CONSEQUENTIAL OR INCIDENTAL DAMAGES, SO THE<br />
LIMITATIONS OR EXCLUSIONS MAY NOT APPLY TO YOU.<br />
This warranty gives you specific legal rights, and you may also have other rights<br />
which vary from state to state or province to province. This warranty is valid only<br />
in the United States and Canada.<br />
The warranty offered by Sony Computer Entertainment America on your PS3<br />
hardware is the same whether or not you register your product.<br />
This warranty does not apply to any system software that is pre-installed in<br />
the PS3 hardware, or is subsequently provi<strong>de</strong>d via update or upgra<strong>de</strong><br />
releases. Such system software is licensed to you un<strong>de</strong>r the terms and<br />
conditions of a separate end user license agreement at<br />
http://www.scei.co.jp/ps3-eula/ and such software is provi<strong>de</strong>d pursuant to its<br />
own warranty.<br />
US<br />
LIMITED HARDWARE WARRANTY AND LIABILITY<br />
53
LIMITED HARDWARE WARRANTY AND LIABILITY<br />
Service policy<br />
You un<strong>de</strong>rstand and acknowledge that any time SCEA services your PS3<br />
system (either within the Warranty Period or un<strong>de</strong>r a separate service<br />
arrangement), it may become necessary for SCEA to provi<strong>de</strong> certain services to<br />
your PS3 system to ensure it is functioning properly in accordance with SCEA<br />
gui<strong>de</strong>lines. Such services may inclu<strong>de</strong> the installation of the latest software or<br />
firmware updates, or service or replacement of the PS3 system’s hard disk or<br />
the PS3 system with a new or factory recertified product. You acknowledge and<br />
agree that some services may change your current settings, cause a removal of<br />
cosmetic stickers or system skins, cause a loss of data or content, or cause some<br />
loss of functionality. You should back up your hard disk regularly to prevent loss of<br />
data, although some content cannot be backed up and must be reinstalled by the<br />
user. You should also remove any peripherals, non-PS3 system components,<br />
and any content that you consi<strong>de</strong>r proprietary, private, or confi<strong>de</strong>ntial before you<br />
send in your PS3 system for service. SCEA shall not be liable for damages<br />
resulting from your failure to comply with the foregoing, or any instructions<br />
provi<strong>de</strong>d to you by SCEA. SCEA reserves the right to refuse service or void the<br />
warranty of any PS3 system that has been modified or tampered with.<br />
Except as otherwise stated in the Limited Hardware Warranty and Liability<br />
above, you agree that (i) the services are provi<strong>de</strong>d "AS IS" without any<br />
express or implied warranties; and (ii) SCEA shall not be liable for any direct<br />
and indirect, consequential, or special damages, including any damages that<br />
may arise from loss of data or functionality. The foregoing limitation shall<br />
apply to the extent permitted by applicable law.<br />
54
Copyright and tra<strong>de</strong>marks<br />
" ", "<strong>PlayStation</strong>" and "DUALSHOCK" are registered tra<strong>de</strong>marks of Sony<br />
Computer Entertainment Inc. " ", "SIXAXIS" and " " are tra<strong>de</strong>marks of the<br />
same company.<br />
"XMB" and "xross media bar" are tra<strong>de</strong>marks of Sony Corporation and Sony<br />
Computer Entertainment Inc.<br />
"SONY" and " " are registered tra<strong>de</strong>marks of Sony Corporation. "Memory Stick",<br />
"Memory Stick Duo", " ", "ATRAC", "BRAVIA" logo, "BRAVIA" and the "x.v.Color"<br />
name and logo are tra<strong>de</strong>marks or registered tra<strong>de</strong>marks of Sony Corporation.<br />
" " and AOSS are the tra<strong>de</strong>marks of BUFFALO INC.<br />
"AVCHD" and "AVCHD" logo are tra<strong>de</strong>marks of Panasonic Corporation and Sony<br />
Corporation.<br />
Contains Macromedia® Flash® Player technology by Adobe<br />
Copyright © 1995-2008 Adobe Systems Incorporated. All rights reserved. Flash,<br />
Macromedia, and Macromedia Flash are either tra<strong>de</strong>marks or registered<br />
tra<strong>de</strong>marks of Adobe Systems Incorporated in the United States and/or other<br />
countries.<br />
© 2006 All Media Gui<strong>de</strong>, LLC<br />
Content and technology provi<strong>de</strong>d by All Media Gui<strong>de</strong>®.<br />
US<br />
Copyright and tra<strong>de</strong>marks<br />
"Blu-ray Disc" and<br />
are tra<strong>de</strong>marks.<br />
Copyright © 2004-2006 Cambridge Silicon Radio Ltd.<br />
The Bluetooth® word mark and logos are owned by the Bluetooth SIG, Inc. and<br />
any use of such marks by Sony Computer Entertainment Inc. is un<strong>de</strong>r license.<br />
Other tra<strong>de</strong>marks and tra<strong>de</strong> names are those of their respective owners.<br />
55
Copyright and tra<strong>de</strong>marks<br />
DivX, DivX Certified, and associated logos are tra<strong>de</strong>marks of DivX, Inc. and are<br />
used un<strong>de</strong>r license.<br />
Manufactured un<strong>de</strong>r license from Dolby Laboratories. Dolby and the double-D<br />
symbol are tra<strong>de</strong>marks of Dolby Laboratories.<br />
U.S. and foreign patents licensed from Dolby Laboratories.<br />
DLNA and DLNA CERTIFIED are tra<strong>de</strong>marks and/or service marks of Digital<br />
Living Network Alliance.<br />
The DVD logo is a tra<strong>de</strong>mark.<br />
Manufactured un<strong>de</strong>r license un<strong>de</strong>r U.S. Patent #’s: 5,451,942; 5,956,674;<br />
5,974,380; 5,978,762; 6,226,616; 6,487,535 & other U.S. and worldwi<strong>de</strong> patents<br />
issued & pending.<br />
DTS is a registered tra<strong>de</strong>mark and the DTS logos, Symbol, DTS-HD and DTS-HD<br />
Master Audio are tra<strong>de</strong>marks of DTS, Inc.<br />
© 1996-2008 DTS, Inc. All Rights Reserved.<br />
All of the Japanese fonts and some parts of the Latin fonts in this machine use<br />
characters provi<strong>de</strong>d by Fontworks Japan, Inc.<br />
HDMI, the HDMI logo and High-Definition Multimedia Interface are tra<strong>de</strong>marks or<br />
registered tra<strong>de</strong>marks of HDMI Licensing, LLC.<br />
ATOK is a registered tra<strong>de</strong>mark of JUSTSYSTEM CORP. in Japan and other<br />
countries.<br />
56
This product incorporates copyright protection technology that is protected by<br />
U.S. patents and other intellectual property rights. Use of this copyright protection<br />
technology must be authorized by Macrovision, and is inten<strong>de</strong>d for home and<br />
other limited viewing uses only unless otherwise authorized by Macrovision.<br />
Reverse engineering or disassembly is prohibited.<br />
Anti-Grain Geometry - Version 2.0<br />
Copyright © 2002-2004 Maxim Shemanarev (McSeem)<br />
Permission to copy, use, modify, sell and distribute this software is granted<br />
provi<strong>de</strong>d this copyright notice appears in all copies.<br />
This software is provi<strong>de</strong>d "as is" without express or implied warranty, and with no<br />
claim as to its suitability for any purpose.<br />
This product inclu<strong>de</strong>s RSA BSAFE® Cryptographic software from RSA Security<br />
Inc.<br />
RSA, BSAFE are either registered tra<strong>de</strong>marks or tra<strong>de</strong>marks of RSA Security Inc.<br />
in the United States and/or other countries.<br />
RSA Security Inc. All rights reserved.<br />
Java and all Java based tra<strong>de</strong>marks and logos are tra<strong>de</strong>marks or registered<br />
tra<strong>de</strong>marks of Sun Microsystems, Inc. in the U.S. and other countries.<br />
@(#)fdlibm.h 1.5 95/01/18<br />
Copyright © 1993 by Sun Microsystems, Inc. All rights reserved<br />
Developed at SunSoft, a Sun Microsystems, Inc. business.<br />
Permission to use, copy, modify, and distribute this software is freely granted,<br />
provi<strong>de</strong>d that this notice is preserved.<br />
MPEG Layer-3 audio coding technology and patents licensed from Fraunhofer IIS<br />
and Thomson.<br />
US<br />
Copyright and tra<strong>de</strong>marks<br />
Mp3Surround audio coding technology and patents licensed from Fraunhofer IIS,<br />
Thomson, and Agere.<br />
This product adopts S3TC texture compression technology un<strong>de</strong>r license from S3<br />
Graphics, Co., Ltd.<br />
The USB-IF Logos are tra<strong>de</strong>marks of Universal Serial Bus Implementers Forum,<br />
Inc.<br />
57
Copyright and tra<strong>de</strong>marks<br />
eZiText® and Zi® are registered tra<strong>de</strong>marks of Zi Corporation.<br />
Portions of this software are copyright © 1996-2008 The FreeType Project<br />
(www.freetype.org). All rights reserved.<br />
This software is based in part on the work of the In<strong>de</strong>pen<strong>de</strong>nt JPEG Group.<br />
Visit http://www.scei.co.jp/ps3-license/in<strong>de</strong>x.html for other licensees and<br />
tra<strong>de</strong>marks.<br />
All other tra<strong>de</strong>marks are the property of their respective owners.<br />
58
ADVERTENCIA<br />
Para evitar <strong>de</strong>scargas eléctricas, no abra la unidad. Confie<br />
solamente sus reparaciones a personal cualificado.<br />
Precaución<br />
El empleo <strong>de</strong> controles, ajustes o procedimientos distintos<br />
<strong>de</strong> los aquí recogidos pue<strong>de</strong> dar lugar a una exposición a<br />
radiaciones peligrosas.<br />
El uso <strong>de</strong> instrumentos ópticos con este producto aumenta<br />
el riesgo <strong>de</strong> daños oculares.<br />
Este dispositivo está clasificado como producto LÁSER DE CLASE 1 según la<br />
norma IEC60825-1+A2:2001.<br />
Este equipo cumple con los límites <strong>de</strong> exposición <strong>de</strong> radiación FCC/IC<br />
establecidos para equipos no controlados y cumple con los Lineamientos <strong>de</strong><br />
Exposición <strong>de</strong> frecuencia <strong>de</strong> radio (FR) <strong>de</strong> FCC en el Suplemento C a OET 65 y<br />
RSS-102 <strong>de</strong> las normas <strong>de</strong> Exposición <strong>de</strong> frecuencia <strong>de</strong> radio (FR) <strong>de</strong> la IC. Este<br />
equipo no <strong>de</strong>be instalarse ni operarse con por lo menos 20 cm (8 pulgadas) y<br />
más entre el radiador y el cuerpo <strong>de</strong> la persona (excluyendo extremida<strong>de</strong>s:<br />
manos, muñecas, pies y piernas). Este transmisor no <strong>de</strong>be ser colocado o puesto<br />
en funcionamiento junto con ninguna antena o transmisor.<br />
El mando inalámbrico cumple con los límites <strong>de</strong> exposición <strong>de</strong> radiación FCC/IC<br />
establecidos para equipos no controlados y cumple con los Lineamientos <strong>de</strong><br />
Exposición <strong>de</strong> frecuencia <strong>de</strong> radio (FR) <strong>de</strong> FCC en el Suplemento C a OET 65 y<br />
RSS-102 <strong>de</strong> las normas <strong>de</strong> Exposición <strong>de</strong> frecuencia <strong>de</strong> radio (FR) <strong>de</strong> la IC. Se<br />
consi<strong>de</strong>ra que este equipo cumple con dos niveles <strong>de</strong> energía <strong>de</strong> RF sin realizar<br />
pruebas <strong>de</strong> índice específico <strong>de</strong> absorción.<br />
NOTA:<br />
Este equipo ha sido sometido a pruebas y se ha <strong>de</strong>terminado que cumple con<br />
los límites requeridos por los aparatos digitales <strong>de</strong> clase B, en cumplimiento con<br />
la Sección 15 <strong>de</strong> las regulaciones <strong>de</strong> la FCC (Comisión Fe<strong>de</strong>ral <strong>de</strong><br />
Comunicaciones). Estas especificaciones han sido diseñadas para proporcionar<br />
una protección razonable contra interferencias perjudiciales en una instalación<br />
resi<strong>de</strong>ncial. Este equipo genera, utiliza y pue<strong>de</strong> emitir energía <strong>de</strong> radiofrecuencia<br />
y, <strong>de</strong> no ser instalado y utilizado <strong>de</strong> acuerdo con las instrucciones, podría<br />
ocasionar interferencias perjudiciales en las comunicaciones <strong>de</strong> radio. No<br />
obstante, no se garantiza que no ocurra ninguna interferencia en una instalación<br />
particular. Si el presente equipo causa interferencia en la recepción <strong>de</strong> radio o <strong>de</strong><br />
televisión, la cual pue<strong>de</strong> <strong>de</strong>terminarse al apagar y encen<strong>de</strong>r el equipo, se<br />
recomienda que el usuario intente corregir la interferencia mediante una o más<br />
<strong>de</strong> las medidas siguientes:<br />
− Cambie la orientación o ubicación <strong>de</strong> la antena <strong>de</strong> recepción.<br />
− Aumente la separación entre el equipo y el receptor.<br />
− Conecte el equipo en un tomacorriente <strong>de</strong> circuito distinto al que está<br />
conectado el receptor.<br />
− Consulte con su distribuidor o con un técnico especializado en radio/television<br />
para solicitar asistencia.<br />
Tenga precaución <strong>de</strong> que cualquier cambio o modificación no expresamente<br />
aprobada por la parte responsable <strong>de</strong>l cumplimiento podría anular la autoridad<br />
<strong>de</strong>l usuario <strong>de</strong> operar el equipo.<br />
60
Si tiene alguna pregunta relacionada a este producto, póngase en contacto<br />
con el servicio <strong>de</strong> atención al cliente SCEA ( contraportada) ó escriba a:<br />
Sony Computer Entertainment America<br />
Consumer Services/Technical Support<br />
PO Box 5888, San Mateo, CA 94402-0888 U.S.A.<br />
Declaración <strong>de</strong> Conformidad<br />
Nombre comercial: SONY<br />
Número <strong>de</strong> mo<strong>de</strong>lo: CECH-2001A, CECH-2001B y CECHZC2U<br />
Responsabilidad: Sony Electronics Inc.<br />
Domicilio:<br />
16530 Via Esprillo<br />
San Diego, CA 92127 U.S.A.<br />
Número <strong>de</strong> teléfono: 858-942-2230<br />
Este dispositivo cumple con Parte 15 <strong>de</strong> las Normas FCC y RSS-Gen <strong>de</strong> las<br />
Normas IC. El funcionamiento se encuentra sujeto a las dos condiciones<br />
siguientes: (1) este dispositivo no podrá ocasionar interferencia perjudicial y<br />
(2) este dispositivo <strong>de</strong>be aceptar cualquier tipo <strong>de</strong> interferencia recibida,<br />
incluyendo interferencias que puedan afectar al funcionamiento <strong>de</strong>l<br />
dispositivo.<br />
Acerca <strong>de</strong> la batería <strong>de</strong> litio tipo moneda para respaldo <strong>de</strong><br />
memoria<br />
La batería <strong>de</strong> litio tipo moneda para respaldo <strong>de</strong> memoria en el interior <strong>de</strong> este<br />
producto contiene perclorato.<br />
La siguiente <strong>de</strong>claración es requerimiento <strong>de</strong>l Estado <strong>de</strong> California, EE.UU.:<br />
Material <strong>de</strong> Perclorato - pue<strong>de</strong> requerir un manejo especial, vea:<br />
http://www.dtsc.ca.gov/hazardouswaste/perchlorate *<br />
* Sitio Web disponible únicamente en inglés.<br />
Fotosensibilidad/epilepsia/convulsiones<br />
Existe la posibilidad <strong>de</strong> que un pequeño porcentaje <strong>de</strong> personas sufra ataques<br />
epilépticos o pérdidas pasajeras <strong>de</strong>l conocimiento al exponerse a ciertos<br />
patrones luminosos o luces intermitentes. Estas personas podrían sufrir un ataque<br />
epiléptico o pérdidas pasajeras <strong>de</strong>l conocimiento al exponerse a ciertos patrones<br />
o fondos en la pantalla <strong>de</strong>l televisor o al jugar a vi<strong>de</strong>ojuegos. Estas condiciones<br />
podrían provocar síntomas <strong>de</strong> epilepsia no <strong>de</strong>tectada previamente o<br />
convulsiones incluso en personas sin un historial <strong>de</strong> ataques o epilepsia o<br />
convulsiones. Si usted, o cualquier miembro <strong>de</strong> su familia, sufre <strong>de</strong> epilepsia o<br />
experimenta convulsiones <strong>de</strong> cualquier tipo, consulte a su médico antes <strong>de</strong><br />
utilizar un vi<strong>de</strong>ojuego.<br />
DEJE DE UTILIZAR EL SISTEMA INMEDIATAMENTE y consulte a su médico<br />
antes <strong>de</strong> volver a utilizar un vi<strong>de</strong>ojuego si usted o su hijo experimentan cualquiera<br />
<strong>de</strong> los siguientes problemas <strong>de</strong> salud o muestran síntomas:<br />
mareos,<br />
problemas en la vista,<br />
contracciones oculares o musculares,<br />
pérdida <strong>de</strong> conocimiento,<br />
<strong>de</strong>sorientación,<br />
convulsiones, o<br />
cualquier movimiento involuntario o convulsiones.<br />
NO VUELVA A UTILIZAR UN VIDEOJUEGO HASTA QUE ASÍ SE LO INDIQUE<br />
SU MÉDICO.<br />
Cómo usar y manipular los vi<strong>de</strong>ojuegos para reducir la<br />
posibilidad <strong>de</strong> un ataque<br />
Utilice el sistema en una zona bien iluminada y manténgase lo más alejado<br />
posible <strong>de</strong>l televisor.<br />
Evite los televisores <strong>de</strong> gran tamaño. Utilice un televisor <strong>de</strong>l menor tamaño<br />
posible.<br />
ES<br />
ADVERTENCIA<br />
61
ADVERTENCIA<br />
Evite el uso prolongado <strong>de</strong>l sistema PS3. Tómese un <strong>de</strong>scanso <strong>de</strong> 15<br />
minutos durante cada hora <strong>de</strong> juego.<br />
Evite jugar si está cansado o tiene sueño.<br />
Ondas radiofónicas<br />
Las ondas radiofónicas podrían afectar a los equipos electrónicos o los equipos<br />
médicos (por ejemplo los marcapasos), y ocasionar fallos <strong>de</strong> funcionamiento o<br />
daños personales.<br />
Si utiliza un marcapasos o cualquier otro dispositivo médico, consulte a su<br />
médico o al fabricante <strong>de</strong>l dispositivo antes <strong>de</strong> usar la función <strong>de</strong> red<br />
inalámbrica (Bluetooth® y LAN inalámbrica).<br />
No utilice la función <strong>de</strong> red inalámbrica en los siguientes lugares:<br />
– Zonas en las que esté prohibido el uso <strong>de</strong> re<strong>de</strong>s inalámbricas como, por<br />
ejemplo, en hospitales. Respete las normativas <strong>de</strong> los centros médicos<br />
cuando utilice el sistema en sus instalaciones.<br />
– Cerca <strong>de</strong> alarmas <strong>de</strong> incendios, puertas automáticas y otros dispositivos<br />
automatizados.<br />
Acerca <strong>de</strong>l control <strong>de</strong> exportación nacional<br />
Este producto pue<strong>de</strong> estar <strong>de</strong>ntro <strong>de</strong>l ámbito <strong>de</strong> la legislación nacional en<br />
materia <strong>de</strong> control <strong>de</strong> exportación. Usted <strong>de</strong>be cumplir completamente con los<br />
requerimientos <strong>de</strong> dicha legislación y <strong>de</strong> todas las otras leyes <strong>de</strong> cualquier otra<br />
jurisdicción que se apliquen en relación a este producto.<br />
Acerca <strong>de</strong> la regulación <strong>de</strong> la Administración <strong>de</strong><br />
Exportaciones <strong>de</strong> los EE. UU.<br />
Este producto contiene software que está sujeto a ciertas restricciones según la<br />
regulación <strong>de</strong> la Administración <strong>de</strong> Exportaciones <strong>de</strong> los EE. UU. y pue<strong>de</strong> no ser<br />
exportable o re-exportable a los <strong>de</strong>stinos bajo embargo estadouni<strong>de</strong>nse.<br />
A<strong>de</strong>más, este producto no pue<strong>de</strong> ser exportado o re-exportado a las personas o<br />
entida<strong>de</strong>s prohibidas según la regulación <strong>de</strong> la Administración <strong>de</strong> Exportaciones<br />
<strong>de</strong> los EE. UU.<br />
Software <strong>de</strong> formato <strong>PlayStation</strong>® y <strong>PlayStation</strong>®2<br />
Este mo<strong>de</strong>lo <strong>de</strong>l sistema <strong>PlayStation</strong>®3 está diseñado para reproducir software <strong>de</strong><br />
formato <strong>PlayStation</strong>®3 y tiene compatibilidad retroactiva limitada. Este sistema no<br />
es compatible y no reproducirá software <strong>de</strong> formato <strong>PlayStation</strong>®2. Es posible<br />
reproducir ciertos títulos <strong>de</strong> software <strong>de</strong> formato <strong>PlayStation</strong>® en este sistema.<br />
Para más información, visite www.us.playstation.com.<br />
Software <strong>de</strong>l sistema<br />
El software <strong>de</strong>l sistema que se incorpora con este producto está sujeto a una<br />
licencia limitada <strong>de</strong> Sony Computer Entertainment Inc. Consulte<br />
http://www.scei.co.jp/ps3-eula para obtener más información.<br />
62
Índice<br />
ADVERTENCIA............................................................................... 60<br />
Precauciones................................................................................... 64<br />
Información online sobre el sistema PS3..................................... 68<br />
Menú XMB (XrossMediaBar)....................................................... 69<br />
Nombres <strong>de</strong> los componentes.................................................. 70<br />
Procedimientos iniciales............................................................ 71<br />
Métodos <strong>de</strong> conexión.....................................................................71<br />
Configuración inicial <strong>de</strong>l software <strong>de</strong>l sistema................................73<br />
Salida <strong>de</strong> ví<strong>de</strong>o <strong>de</strong>l sistema PS3................................................74<br />
Conexión <strong>de</strong> los dispositivos <strong>de</strong> sonido digital...............................78<br />
Encendido y apagado <strong>de</strong>l sistema PS3................................. 79<br />
Uso <strong>de</strong>l mando inalámbrico...................................................... 80<br />
Reproducción <strong>de</strong>l contenido...................................................... 82<br />
Blu-ray Disc (BD)/DVD/CD.............................................................82<br />
Reproducir contenido en dispositivos USB....................................83<br />
Formatos <strong>de</strong> archivo que se pue<strong>de</strong>n reproducir o visualizar..........83<br />
Jugar......................................................................................... 84<br />
Juegos compatibles........................................................................84<br />
Juegos............................................................................................84<br />
Ajustes <strong>de</strong> mando...........................................................................85<br />
Datos guardados para el software <strong>de</strong> formato <strong>PlayStation</strong>®3.........85<br />
Datos guardados para el software <strong>de</strong> formato <strong>PlayStation</strong>® ...........85<br />
Configuración <strong>de</strong> los ajustes <strong>de</strong> red.......................................... 86<br />
Configuración <strong>de</strong> los ajustes <strong>de</strong> red (con cable)............................87<br />
Configuración <strong>de</strong> los ajustes <strong>de</strong> red (inalámbrica).........................87<br />
Ajuste <strong>de</strong> la configuración personalizada.......................................89<br />
Conexión a Internet................................................................... 90<br />
Utilización <strong>de</strong>l navegador <strong>de</strong> Internet.............................................90<br />
Visualización <strong>de</strong> la guía <strong>de</strong>l usuario...............................................90<br />
Crear una cuenta <strong>PlayStation</strong>®Network..........................................90<br />
Actualizaciones <strong>de</strong>l sistema PS3........................................... 91<br />
Utilización <strong>de</strong>l teclado en pantalla............................................. 92<br />
Control paterno......................................................................... 93<br />
Cambio <strong>de</strong>l disco duro.............................................................. 94<br />
Copias <strong>de</strong> seguridad <strong>de</strong> los datos..................................................95<br />
Extracción <strong>de</strong>l disco duro...............................................................96<br />
Sustitución <strong>de</strong>l disco duro..............................................................97<br />
Reinstalación <strong>de</strong>l software <strong>de</strong>l sistema..........................................99<br />
Restauración <strong>de</strong> datos <strong>de</strong> los que se ha realizado una copia <strong>de</strong><br />
seguridad......................................................................................100<br />
Restauración <strong>de</strong>l sistema PS3............................................ 101<br />
Antes <strong>de</strong> <strong>de</strong>shacerse <strong>de</strong>l sistema PS3 o <strong>de</strong> transferirlo...........101<br />
Antes <strong>de</strong> solicitar asistencia técnica....................................... 102<br />
Especificaciones............................................................................ 108<br />
GARANTÍA DEL HARDWARE Y RESPONSABILIDAD .<br />
LIMITADAS.................................................................................... 113<br />
Derechos <strong>de</strong> autor y marcas comerciales..................................... 115<br />
ES<br />
Índice<br />
63
Precauciones<br />
64<br />
Lea <strong>de</strong>tenidamente todas las precauciones antes <strong>de</strong> utilizar este producto.<br />
Seguridad<br />
Este producto ha sido diseñado prestando la máxima atención a las medidas <strong>de</strong><br />
seguridad. Sin embargo, cualquier dispositivo eléctrico, si se utiliza <strong>de</strong> forma<br />
ina<strong>de</strong>cuada, pue<strong>de</strong> causar un incendio, <strong>de</strong>scargas eléctricas o lesiones<br />
personales. Para tratar <strong>de</strong> evitar cualquier acci<strong>de</strong>nte durante el funcionamiento,<br />
siga estas indicaciones:<br />
Siga todas las advertencias, precauciones e instrucciones.<br />
Inspeccione regularmente el cable <strong>de</strong> alimentación AC para comprobar que no<br />
esté dañado.<br />
Si la unidad comienza a funcionar <strong>de</strong> manera anormal, emite sonidos u olores<br />
no habituales o se calienta <strong>de</strong>masiado, <strong>de</strong>je <strong>de</strong> utilizarla, <strong>de</strong>senchufe el cable<br />
<strong>de</strong> alimentación AC <strong>de</strong> la toma <strong>de</strong> corriente eléctrica y <strong>de</strong>sconecte el resto <strong>de</strong><br />
cables inmediatamente.<br />
Para obtener más información acerca <strong>de</strong> la seguridad <strong>de</strong>l producto y soporte,<br />
visite nuestro sitio Web ( contraportada).<br />
Utilización y manejo<br />
Utilice en un lugar bien iluminado y mantenga lo más alejado posible <strong>de</strong> la<br />
pantalla <strong>de</strong>l televisor.<br />
Evite el uso prolongado <strong>de</strong>l sistema PS3 y el mando inalámbrico.<br />
Deje <strong>de</strong> utilizar el sistema inmediatamente si comienza a sentirse cansado o<br />
experimenta una sensación <strong>de</strong> malestar o dolor en las manos o en los brazos<br />
mientras utiliza el mando inalámbrico. Si el malestar persiste, consulte a su<br />
médico.<br />
Si sufre alguno <strong>de</strong> los siguientes problemas <strong>de</strong> salud, <strong>de</strong>je <strong>de</strong> utilizar el sistema<br />
inmediatamente. En caso <strong>de</strong> que los síntomas persistan, póngase en contacto<br />
con un médico.<br />
– Vértigo, náuseas, fatiga o síntomas similares al mareo<br />
– Molestias o dolor en <strong>de</strong>terminadas partes <strong>de</strong>l cuerpo, como en los ojos,<br />
oídos, manos o brazos<br />
Mantenga el sistema y los accesorios, inluyendo tiras y bridas para cables,<br />
fuera <strong>de</strong>l alcance <strong>de</strong> los niños pequeños.<br />
No conecte cables diferentes al cable USB mientras el sistema esté encendido<br />
(el indicador <strong>de</strong> encendido se encuentra en ver<strong>de</strong> intenso).<br />
Cualquier TV u otro dispositivo conectados al sistema <strong>de</strong>ben funcionar<br />
correctamente y estar libres <strong>de</strong> <strong>de</strong>fectos. Si un TV u otro dispositivo conectado al<br />
sistema tienen fallas o <strong>de</strong>fectos, pue<strong>de</strong>n causar daños al TV u otro dispositivo, o<br />
al sistema en si. Como con todos los productos eléctricos, la conexión a<br />
componentes con fallas o <strong>de</strong>fectos, o el uso <strong>de</strong> un enchufe con un cableado no<br />
a<strong>de</strong>cuado pue<strong>de</strong> causar chispas y suponer un peligro <strong>de</strong> incendio.<br />
No toque el sistema, ni los cables o los accesorios conectados durante una<br />
tormenta eléctrica.<br />
No utilice el sistema ni los accesorios cerca <strong>de</strong>l agua.<br />
No permita que se introduzcan líquidos, partículas pequeñas y <strong>de</strong>más objetos<br />
extrañas en el sistema ni en los accesorios.<br />
No toque los conectores <strong>de</strong>l sistema ni los accesorios.<br />
No exponga el sistema ni los accesorios al polvo, al humo o al vapor. Asimismo,<br />
no coloque el sistema en un área don<strong>de</strong> haya exceso <strong>de</strong> polvo o humo <strong>de</strong><br />
cigarrillos. La acumulación <strong>de</strong> suciedad o residuos <strong>de</strong> humo <strong>de</strong> cigarrillos en<br />
los componentes internos (como la lente) pue<strong>de</strong> ocasionar fallos en el sistema.<br />
No exponga el sistema ni los accesorios a altas temperaturas, a humedad<br />
elevada ni a la luz solar directa.<br />
No coloque el sistema ni los accesorios sobre superficies inestables, inclinadas<br />
o sometidas a vibraciones.<br />
No coloque el sistema en otra posición que no sea la horizontal o vertical. Al<br />
colocar el sistema en la posición vertical, utilice la base vertical (se ven<strong>de</strong> por<br />
separado) para este mo<strong>de</strong>lo <strong>de</strong>l sistema. A<strong>de</strong>más, no cambie la posición <strong>de</strong>l<br />
sistema cuando esté encendido.<br />
Tenga cuidado al transportar el sistema. Si no lo sujeta firmemente, el sistema<br />
podría caerse y provocar daños o lesiones.<br />
No mueva ni cambie la posición <strong>de</strong>l sistema con un disco insertado. Las<br />
vibraciones podrían provocar que se raye el disco o daños en el sistema.<br />
No apague el sistema mientras se estén grabando o cargando datos <strong>de</strong>l disco<br />
duro.
No coloque objetos ni se ponga <strong>de</strong> pie sobre el sistema, y no lo apile con otros<br />
dispositivos.<br />
No coloque el sistema ni los accesorios conectados en el suelo ni en lugares<br />
en los que pueda provocar que las personas tropiecen al pasar.<br />
No permita que el cuerpo entre en contacto con el sistema ni obstruya el paso<br />
<strong>de</strong>l aire a través <strong>de</strong> las rejillas <strong>de</strong> ventilación <strong>de</strong> éste durante períodos <strong>de</strong><br />
tiempo prolongados mientras lo utilice. El contacto prolongado con el sistema<br />
en estas condiciones podría provocar quemaduras por bajas temperaturas.<br />
Cuando conecte el sistema a un televisor <strong>de</strong> plasma o a un proyección*, no<br />
<strong>de</strong>je una imagen fija en la pantalla <strong>de</strong>l televisor durante un largo período <strong>de</strong><br />
tiempo, ya que ésta pue<strong>de</strong> <strong>de</strong>jar una imagen débil <strong>de</strong> forma permanente en la<br />
pantalla.<br />
* Salvo los tipos <strong>de</strong> pantalla LCD<br />
Se recomienda a los padres que presten atención a los niños que utilizan<br />
activida<strong>de</strong>s online para garantizar un uso seguro y responsable <strong>de</strong> Internet.<br />
Notas sobre seguridad al utilizar el mando inalámbrico<br />
DUALSHOCK®3*<br />
Si empieza a sentirse cansado o siente dolor en sus manos o brazos cuando<br />
está utilizando el mando inalámbrico DUALSHOCK®3 entonces <strong>de</strong>je <strong>de</strong> usarlo<br />
inmediatamente. Consulte a su médico si persisten estas condiciones.<br />
La función <strong>de</strong> vibración <strong>de</strong>l mando inalámbrico DUALSHOCK®3 pue<strong>de</strong><br />
empeorar lesiones previas. Si tiene alguna dolencia o lesión <strong>de</strong> huesos o<br />
músculos en sus manos o brazos, no utilice la función <strong>de</strong> vibración. Si tiene<br />
una lesión no juegue a los títulos <strong>de</strong> software que contiene la función <strong>de</strong><br />
vibración que utiliza el mando inalámbrico DUALSHOCK®3 a menos que haya<br />
ajustado la función <strong>de</strong> vibración en [No].<br />
Evite el uso prolongado <strong>de</strong>l mando inalámbrico DUALSHOCK®3. Tómese un<br />
<strong>de</strong>scanso cada 30 minutos.<br />
Tenga en cuenta que ciertos títulos <strong>de</strong> software establecen la función <strong>de</strong><br />
vibración en [Sí] <strong>de</strong> forma pre<strong>de</strong>terminada. Para <strong>de</strong>sactivar la función <strong>de</strong><br />
vibración, pulse el botón PS <strong>de</strong>l mando inalámbrico y, a continuación,<br />
seleccione [Ajustes <strong>de</strong> mando] [Función <strong>de</strong> vibración] [No].<br />
Cuando utilice la función <strong>de</strong> sensor <strong>de</strong> movimiento <strong>de</strong>l mando inalámbrico,<br />
tenga en cuenta los siguientes puntos. Si el mando golpea a una persona u<br />
objeto, es posible que se produzca un acci<strong>de</strong>nte, lesiones o daños materiales.<br />
– Antes <strong>de</strong> utilizarlo, compruebe que cuenta con espacio suficiente alre<strong>de</strong>dor<br />
<strong>de</strong> usted.<br />
– Cuando utilice el mando, sujételo con firmeza para asegurarse que no se<br />
resbalará <strong>de</strong> sus manos.<br />
– Si utiliza un mando conectado al sistema PS3 mediante un cable USB,<br />
asegúrese que cuenta con espacio suficiente alre<strong>de</strong>dor <strong>de</strong> usted para que el<br />
cable no golpeé a ninguna persona u objeto. Asimismo, tenga cuidado <strong>de</strong> no<br />
tirar <strong>de</strong>l cable conectado al sistema PS3 al utilizar el mando.<br />
* Estas notas también se aplican a otros mandos.<br />
Rejillas <strong>de</strong> ventilación<br />
No bloquee las rejillas <strong>de</strong> ventilación. Para mantener una buena ventilación, siga<br />
las instrucciones que se facilitan a continuación:<br />
Coloque el sistema a una distancia mínima <strong>de</strong> 10 cm (4 pulgadas) <strong>de</strong> la<br />
superficie <strong>de</strong> una pared.<br />
No coloque el sistema sobre moqueta ni sobre alfombras <strong>de</strong> fibras largas.<br />
No coloque el sistema en lugares estrechos ni reducidos.<br />
No cubra el sistema con telas.<br />
No permita que se acumule suciedad en las rejillas <strong>de</strong> ventilación.<br />
Utilización <strong>de</strong>l cable <strong>de</strong> alimentación AC<br />
Cualquier TV u otro dispositivo conectados al sistema <strong>de</strong>ben funcionar<br />
correctamente y estar libres <strong>de</strong> <strong>de</strong>fectos. Si un TV u otro dispositivo conectado<br />
al sistema tienen fallas o <strong>de</strong>fectos, pue<strong>de</strong>n causar daños al TV u otro<br />
dispositivo, o al sistema en si. Como con todos los productos eléctricos, la<br />
conexión a componentes con fallas o <strong>de</strong>fectos, o el uso <strong>de</strong> un enchufe con un<br />
cableado no a<strong>de</strong>cuado pue<strong>de</strong> causar chispas y suponer un peligro <strong>de</strong><br />
incendio.<br />
ES<br />
Precauciones<br />
65
Precauciones<br />
66<br />
No enchufe el cable <strong>de</strong> alimentación AC <strong>de</strong>l sistema a una toma <strong>de</strong> corriente<br />
eléctrica hasta que haya realizado todas las conexiones. Asegúrese <strong>de</strong> que el<br />
TV u otro dispositivo estén <strong>de</strong>sconectados <strong>de</strong> la toma <strong>de</strong> corriente eléctrica<br />
antes <strong>de</strong> enchufar el sistema.<br />
Para garantizar un funcionamiento seguro, revise regularmente el cable <strong>de</strong><br />
alimentación AC. En caso <strong>de</strong> que esté dañado, <strong>de</strong>je <strong>de</strong> utilizarlo<br />
inmediatamente y póngase en contacto con el servicio <strong>de</strong> atención al cliente<br />
SCEA ( contraportada).<br />
No utilice un cable <strong>de</strong> alimentación distinto <strong>de</strong>l cable <strong>de</strong> alimentación AC<br />
suministrado. No realice modificaciones en el cable.<br />
No toque el enchufe <strong>de</strong>l cable <strong>de</strong> alimentación AC con las manos mojadas.<br />
Evite pisar el cable <strong>de</strong> alimentación AC o que éste que<strong>de</strong> atrapado,<br />
especialmente en las clavijas, los receptáculos <strong>de</strong> expansión y en el punto en<br />
el que el cable sale <strong>de</strong>l sistema.<br />
No coloque objetos pesados sobre el cable.<br />
No coloque el cable <strong>de</strong> alimentación AC cerca <strong>de</strong> equipos <strong>de</strong> calefacción ni lo<br />
exponga al calor.<br />
Desenchufe el cable <strong>de</strong> alimentación AC <strong>de</strong> la toma <strong>de</strong> corriente eléctrica<br />
antes <strong>de</strong> limpiar o mover el sistema, o cuando no vaya a utilizarlo durante un<br />
período <strong>de</strong> tiempo prolongado. A la hora <strong>de</strong> <strong>de</strong>sconectar el cable <strong>de</strong><br />
alimentación, sujételo por el enchufe y tire hacia fuera en línea recta para<br />
extraerlo <strong>de</strong> la toma <strong>de</strong> corriente eléctrica. No tire nunca <strong>de</strong>l cable ni saque el<br />
enchufe tirando en cualquier ángulo.<br />
No conecte el cable <strong>de</strong> alimentación AC a un transformador o a un inversor <strong>de</strong><br />
tensión. Conectar el cable <strong>de</strong> alimentación AC a un transformador <strong>de</strong> tensión<br />
para viajar al extranjero o a un inversor para usar en un automóvil pue<strong>de</strong><br />
provocar la acumulación <strong>de</strong> calor en el sistema y generar quemaduras o un<br />
fallo <strong>de</strong> funcionamiento.<br />
Nunca <strong>de</strong>smonte ni modifique el sistema ni los<br />
accesorios<br />
Utilice el sistema PS3 y los accesorios <strong>de</strong> acuerdo con las instrucciones<br />
incluidas en la documentación <strong>de</strong>l producto. No está permitido el análisis o la<br />
modificación <strong>de</strong>l sistema o los accesorios, ni el análisis y el uso <strong>de</strong> la<br />
configuración <strong>de</strong> los circuitos. La modificación no autorizada <strong>de</strong>l sistema o los<br />
accesorios anulará la garantía. El sistema PS3 no contiene ningún componente<br />
que pueda reparar el usuario (el disco duro incluido pue<strong>de</strong> extraerse, pero no<br />
<strong>de</strong>sensamblarse ni modificarse). A<strong>de</strong>más, el usuario corre el riesgo <strong>de</strong> verse<br />
expuesto a radiación láser y a <strong>de</strong>scargas eléctricas.<br />
Re<strong>de</strong>s<br />
Para po<strong>de</strong>r conectarse a Internet, es necesario disponer <strong>de</strong> una conexión <strong>de</strong><br />
banda ancha. Nótese que una conexión a través <strong>de</strong> mó<strong>de</strong>m no es posible.<br />
Los usuarios son los responsables <strong>de</strong>l pago <strong>de</strong> los servicios <strong>de</strong> Internet. Para<br />
obtener más información, consulte la información suministrada en el contrato<br />
correspondiente o póngase en contacto con su proveedor <strong>de</strong> servicios <strong>de</strong><br />
Internet.<br />
No use un cable para la línea telefónica resi<strong>de</strong>ncial estándar ni cables <strong>de</strong> tipos<br />
diferentes a los mencionados en este documento. El uso <strong>de</strong>l tipo <strong>de</strong> cable<br />
incorrecto pue<strong>de</strong> generar un flujo <strong>de</strong> corriente eléctrica más alto que el<br />
necesario a través <strong>de</strong>l conector LAN, lo que pue<strong>de</strong> provocar la acumulación <strong>de</strong><br />
calor, un incendio o un fallo <strong>de</strong> funcionamiento.<br />
Función <strong>de</strong> red inalámbrica<br />
La gama <strong>de</strong> frecuencia <strong>de</strong> 2,4 GHz <strong>de</strong> ondas <strong>de</strong> radio que utiliza la función <strong>de</strong><br />
red inalámbrica <strong>de</strong> este producto es una gama <strong>de</strong> frecuencia que comparten<br />
diversos dispositivos. Este producto se ha diseñado para minimizar el efecto<br />
<strong>de</strong> otros dispositivos que utilizan la misma gama <strong>de</strong> frecuencia. No obstante,<br />
en algunos casos, las interferencias proce<strong>de</strong>ntes <strong>de</strong> otros dispositivos pue<strong>de</strong>n<br />
reducir la velocidad <strong>de</strong> conexión, el alcance <strong>de</strong> la señal, o bien provocar que la<br />
conexión se interrumpa inesperadamente.
Cuando utilice la función para escanear <strong>de</strong>l sistema PS3 a fin <strong>de</strong> seleccionar<br />
un punto <strong>de</strong> acceso a la red LAN inalámbrica, es posible que se muestren los<br />
puntos <strong>de</strong> acceso no <strong>de</strong>stinados a uso público. Conecte el sistema únicamente<br />
a un punto <strong>de</strong> acceso que esté autorizado a utilizar.<br />
Con<strong>de</strong>nsación <strong>de</strong> humedad<br />
Si se traslada el sistema o el disco directamente <strong>de</strong> un lugar frío a uno cálido,<br />
pue<strong>de</strong> con<strong>de</strong>nsarse humedad en la lente situada en el interior <strong>de</strong>l sistema o en el<br />
disco. Si ocurre esto, es posible que el sistema no funcione correctamente. En<br />
este caso, extraiga el disco, y apague y <strong>de</strong>senchufe el sistema. No vuelva a<br />
introducir el disco hasta que se haya evaporado la humedad (podrían transcurrir<br />
varias horas). En caso <strong>de</strong> que el sistema siga sin funcionar correctamente,<br />
póngase en contacto con el servicio <strong>de</strong> atención al cliente SCEA<br />
( contraportada) para obtener ayuda.<br />
Limpieza<br />
Por razones <strong>de</strong> seguridad, antes <strong>de</strong> limpiar el sistema o los accesorios<br />
conectados, <strong>de</strong>sconecte el cable <strong>de</strong> alimentación AC <strong>de</strong> la toma <strong>de</strong> corriente<br />
eléctrica.<br />
Superficies externas (cubierta <strong>de</strong> plástico <strong>de</strong>l sistema y <strong>de</strong>l<br />
mando inalámbrico)<br />
Siga las instrucciones facilitadas a continuación para contribuir a evitar que el<br />
exterior <strong>de</strong>l producto se <strong>de</strong>teriore o se <strong>de</strong>colore.<br />
Límpiela con un paño suave y seco.<br />
No coloque ningún tipo <strong>de</strong> material <strong>de</strong> goma o vinilo en el exterior <strong>de</strong>l producto<br />
durante un período <strong>de</strong> tiempo prolongado.<br />
No utilice disolventes ni otras sustancias químicas. No limpie con paños <strong>de</strong><br />
limpieza tratados químicamente.<br />
Rejillas <strong>de</strong> ventilación<br />
Cuando se acumule polvo en las rejillas <strong>de</strong> ventilación <strong>de</strong>l sistema, elimínelo con<br />
una aspiradora <strong>de</strong> baja potencia.<br />
Discos<br />
Acerca <strong>de</strong> la compatibilidad<br />
Algunos soportes pue<strong>de</strong>n presentar restricciones <strong>de</strong> área o territoriales, y<br />
posiblemente no funcionen con este sistema. Consulte el embalaje <strong>de</strong> los<br />
soportes para obtener información <strong>de</strong>tallada.<br />
Manejo<br />
No toque la superficie <strong>de</strong>l disco cuando lo manipule; sujételo por los bor<strong>de</strong>s.<br />
No adhiera papel ni cinta sobre los discos, ni escriba en ellos.<br />
La presencia <strong>de</strong> huellas dactilares, polvo, suciedad o rasguños en el disco<br />
pue<strong>de</strong> distorsionar la imagen o reducir la calidad <strong>de</strong>l sonido. Maneje siempre<br />
los discos con cuidado y asegúrese <strong>de</strong> que estén limpios antes <strong>de</strong> utilizarlos.<br />
Almacenamiento<br />
No exponga los discos a altas temperaturas, a humedad elevada ni a la luz<br />
solar directa.<br />
Cuando no vaya a utilizar los discos durante un período <strong>de</strong> tiempo prolongado,<br />
guár<strong>de</strong>los en sus cajas. Apilar los discos sin cajas o almacenarlos en una<br />
posición que forme un ángulo pue<strong>de</strong> provocar su <strong>de</strong>formación.<br />
Método <strong>de</strong> limpieza<br />
Limpie los discos con un paño suave, frotando con suavidad<br />
<strong>de</strong>s<strong>de</strong> el centro hacia fuera.<br />
No utilice disolventes, limpiadores <strong>de</strong> discos, aerosoles<br />
antiestáticos u otras sustancias químicas, ya que pue<strong>de</strong>n<br />
producirse daños en los discos.<br />
ES<br />
Precauciones<br />
67
68<br />
Información online sobre el sistema PS3<br />
En este manual se explican las características <strong>de</strong>l hardware y se proporciona<br />
información básica sobre la configuración y el funcionamiento <strong>de</strong>l sistema PS3, y se<br />
incluyen advertencias y precauciones para utilizarlo <strong>de</strong> manera segura y a<strong>de</strong>cuada.<br />
Para obtener información actualizada en relación al sistema PS3, también pue<strong>de</strong><br />
acce<strong>de</strong>r a la siguiente información disponible en Internet.<br />
<strong>Manual</strong> <strong>de</strong>l usuario online http://manuals.playstation.net/document/<br />
Este manual contiene información <strong>de</strong>tallada acerca <strong>de</strong> el uso <strong>de</strong>l software <strong>de</strong>l sistema PS3.<br />
Actualizaciones <strong>de</strong>l software <strong>de</strong>l sistema http://www.us.playstation.com/ps3<br />
Este sitio proporciona la información más reciente acerca <strong>de</strong> las actualizaciones <strong>de</strong>l software <strong>de</strong>l<br />
sistema.<br />
Sitio oficial <strong>de</strong> <strong>PlayStation</strong>®3 http://www.us.playstation.com/ps3<br />
El sitio oficial para los productos <strong>de</strong> <strong>PlayStation</strong>®3 proporciona la información más reciente acerca<br />
<strong>de</strong> los títulos <strong>de</strong> software y accesorios <strong>de</strong> hardware.<br />
Soporte http://www.us.playstation.com/support<br />
El sitio oficial para soporte <strong>de</strong> productos <strong>PlayStation</strong>® proporciona las preguntas y respuestas más<br />
recientes acerca <strong>de</strong> su producto.<br />
Compruebe que dispone <strong>de</strong> los siguientes elementos. Si falta algún elemento,<br />
póngase en contacto con el servicio <strong>de</strong> atención al cliente SCEA<br />
( contraportada).<br />
Sistema <strong>PlayStation</strong>®3<br />
Mando inalámbrico DUALSHOCK®3<br />
Cable <strong>de</strong> alimentación AC<br />
Cable AV<br />
Cable USB<br />
Materiales impresos<br />
La información publicada en este documento sobre la funcionalidad <strong>de</strong>l sistema pue<strong>de</strong> variar <strong>de</strong><br />
lo que aparece en su sistema PS3, en función <strong>de</strong> la versión <strong>de</strong> software <strong>de</strong>l sistema en uso.<br />
Amigos<br />
Conversación e intercambio <strong>de</strong><br />
mensajes<br />
<strong>PlayStation</strong>®Network<br />
Utilización <strong>de</strong> servicios<br />
<strong>PlayStation</strong>®Network<br />
Red<br />
Conexión a Internet<br />
Juego<br />
Jugar<br />
Ví<strong>de</strong>o<br />
Reproducción <strong>de</strong> ví<strong>de</strong>os<br />
Música<br />
Reproducción <strong>de</strong> música<br />
Foto<br />
Visualización <strong>de</strong> imágenes<br />
Ajustes<br />
Configuración <strong>de</strong> los ajustes <strong>de</strong>l<br />
sistema PS3<br />
Usuarios<br />
Selección <strong>de</strong> los usuarios que podrán<br />
iniciar sesión en el sistema PS3
Menú XMB (XrossMediaBar)<br />
El sistema PS3 incluye una interfaz <strong>de</strong> usuario llamada XMB <br />
(XrossMediaBar).<br />
Categoría<br />
1<br />
Seleccione una categoría<br />
mediante el botón o .<br />
Elemento<br />
2<br />
3<br />
Seleccione un elemento con el<br />
botón o .<br />
Pulse el botón para confirmar<br />
el elemento seleccionado.<br />
Botones <strong>de</strong> dirección:<br />
se utilizan para seleccionar categorías/<br />
elementos en pantalla.<br />
Botón PS:<br />
muestra el menú XMB <br />
encien<strong>de</strong>/apaga el sistema.<br />
Botón<br />
: muestra las opciones <strong>de</strong>l menú/panel <strong>de</strong> control<br />
Si selecciona un icono y pulsa el botón<br />
, aparecerá el menú <strong>de</strong> opciones.<br />
Si pulsa el botón durante la<br />
reproducción <strong>de</strong>l contenido, aparecerá<br />
el panel <strong>de</strong> control.<br />
Botón :<br />
confirma el elemento seleccionado.<br />
Botón :<br />
cancela una operación.<br />
Iconos<br />
Menú <strong>de</strong> opciones<br />
Panel <strong>de</strong> control<br />
69
Nombres <strong>de</strong> los componentes<br />
Parte frontal/posterior <strong>de</strong>l sistema<br />
Mando inalámbrico DUALSHOCK®3<br />
Indicadores <strong>de</strong> puerto<br />
Conector USB<br />
Ranura para disco<br />
Botón <strong>de</strong> encendido<br />
Botón extraer<br />
Indicador <strong>de</strong> acceso WLAN<br />
Indicador <strong>de</strong> acceso disco duro<br />
Conectores USB<br />
Botón L2<br />
Botón L1<br />
Botones <strong>de</strong> dirección<br />
Botón R2<br />
Botón R1<br />
Botón<br />
Botón<br />
Botón<br />
Botón<br />
Conector LAN<br />
Conector HDMI OUT<br />
Joystick izquierdo/<br />
botón L3*<br />
Botón SELECT<br />
(selección)<br />
Joystick <strong>de</strong>recho/<br />
botón R3*<br />
Botón START (inicio)<br />
Botón PS<br />
70<br />
Precaución<br />
Rejilla <strong>de</strong> ventilación<br />
Conector AC IN<br />
Conector AV MULTI OUT<br />
Conector DIGITAL OUT (OPTICAL)<br />
No use el sistema en un armario cerrado ni en otras ubicaciones en las que<br />
pueda acumularse calor. Si lo hace el sistema pue<strong>de</strong> sobrecalentarse y<br />
provocar incendios, lesiones o averías.<br />
Si la temperatura interna <strong>de</strong>l sistema aumenta <strong>de</strong>masiado, el indicador <strong>de</strong><br />
encendido parpa<strong>de</strong>ará <strong>de</strong> forma alternativa en rojo y ver<strong>de</strong>. En ese caso,<br />
apague el sistema ( página 79) y no lo utilice durante un tiempo. Cuando<br />
el sistema se enfríe, traslá<strong>de</strong>lo a una ubicación bien ventilada y luego<br />
reanu<strong>de</strong> su uso.<br />
* Los botones L3 y R3 funcionan cuando se pulsan los joysticks.<br />
Avisos<br />
No coloque el sistema en un área don<strong>de</strong> haya exceso <strong>de</strong> polvo o humo <strong>de</strong><br />
cigarrillos. La acumulación <strong>de</strong> suciedad o residuos <strong>de</strong> humo <strong>de</strong> cigarrillos<br />
en los componentes internos (como los lectores ópticos) pue<strong>de</strong> ocasionar<br />
fallos en el sistema.<br />
No mueva ni cambie <strong>de</strong> posición el sistema mientras el indicador <strong>de</strong><br />
encendido esté iluminado en ver<strong>de</strong> intenso o ver<strong>de</strong> intermitente. La<br />
vibración resultante <strong>de</strong> mover el sistema pue<strong>de</strong> producir daños o pérdida<br />
<strong>de</strong> datos o dañar el sistema.<br />
Algunos periféricos <strong>de</strong> <strong>PlayStation</strong>® y <strong>PlayStation</strong>®2, como el control<br />
analógico (DUALSHOCK®) y el control analógico (DUALSHOCK®2) no son<br />
compatibles con el sistema PS3. Para obtener más <strong>de</strong>talles, visite la<br />
página Web http://www.us.playstation.com.<br />
Nota<br />
Al colocar el sistema en la posición vertical, es necesario utilizar el soporte<br />
vertical (se ven<strong>de</strong> por separado) para mayor estabilidad.
Procedimientos iniciales<br />
Métodos <strong>de</strong> conexión<br />
<br />
Precaución<br />
Conector<br />
HDMI OUT<br />
Conector<br />
AV MULTI OUT<br />
Cualquier TV u otro dispositivo conectados al<br />
sistema <strong>de</strong>ben funcionar correctamente y estar<br />
libres <strong>de</strong> <strong>de</strong>fectos. Si un TV u otro dispositivo<br />
conectado al sistema tienen fallas o <strong>de</strong>fectos,<br />
pue<strong>de</strong>n causar daños al TV u otro dispositivo, o al<br />
sistema en si. Como con todos los productos<br />
eléctricos, la conexión a componentes con fallas o<br />
<strong>de</strong>fectos, o el uso <strong>de</strong> un enchufe con un cableado<br />
no a<strong>de</strong>cuado pue<strong>de</strong> causar chispas y suponer un<br />
peligro <strong>de</strong> incendio.<br />
Si no se muestra ví<strong>de</strong>o en la pantalla<br />
Si cambia el tipo <strong>de</strong> cable utilizado para conectar el<br />
sistema a un televisor, es posible que no se muestre la<br />
señal <strong>de</strong> ví<strong>de</strong>o en la pantalla. Si no aparece la señal<br />
<strong>de</strong> ví<strong>de</strong>o, apague el sistema y vuelva a encen<strong>de</strong>rlo<br />
pulsando el botón <strong>de</strong> encendido durante al menos<br />
cinco segundos (hasta que el sistema emita dos<br />
pitidos). Los ajustes <strong>de</strong> salida <strong>de</strong> ví<strong>de</strong>o se<br />
restablecerán y el ví<strong>de</strong>o se emitirá con resolución <strong>de</strong><br />
<strong>de</strong>finición estándar (SD).<br />
Conecte el sistema a un televisor<br />
Pue<strong>de</strong> utilizar cualquiera <strong>de</strong> los siguientes métodos para conectar el sistema a un televisor.<br />
Salida <strong>de</strong> ví<strong>de</strong>o con resolución SD (<strong>de</strong>finición estándar)<br />
Conector<br />
AV MULTI OUT<br />
Cable AV<br />
Salida <strong>de</strong> ví<strong>de</strong>o con resolución HD (alta <strong>de</strong>finición) - ví<strong>de</strong>o componente<br />
Conector<br />
AV MULTI OUT<br />
Salida <strong>de</strong> ví<strong>de</strong>o con resolución HD (alta <strong>de</strong>finición) - HDMI<br />
Conector<br />
HDMI OUT<br />
Cable AV por Componentes<br />
(se ven<strong>de</strong> por separado)<br />
Cable HDMI<br />
(se ven<strong>de</strong> por separado)<br />
VIDEO L-AUDIO-R<br />
COMPONENT VIDEO IN AUDIO IN<br />
Y PB/CB PR/CR L R<br />
Televisor<br />
Televisor<br />
Televisor<br />
Notas<br />
Para obtener más información acerca <strong>de</strong> los tipos <strong>de</strong> cables <strong>de</strong> salida <strong>de</strong> ví<strong>de</strong>o y los modos <strong>de</strong> ví<strong>de</strong>o<br />
compatibles, consulte "Salida <strong>de</strong> ví<strong>de</strong>o <strong>de</strong>l sistema PS3" ( página 74) y "Tipos <strong>de</strong> cable <strong>de</strong> salida<br />
<strong>de</strong> ví<strong>de</strong>o" ( página 75).<br />
Es posible conectar dispositivos <strong>de</strong> audio que admitan la reproducción <strong>de</strong> audio digital como, por<br />
ejemplo, un receptor <strong>de</strong> AV para fines <strong>de</strong> entretenimiento doméstico. Si <strong>de</strong>sea obtener más<br />
información, consulte "Conexión <strong>de</strong> los dispositivos <strong>de</strong> sonido digital" ( página 78).<br />
ES<br />
Procedimientos iniciales<br />
71
Procedimientos iniciales<br />
Conecte un cable Ethernet (se ven<strong>de</strong> por separado)<br />
Utilice un cable Ethernet para conectar el sistema a Internet.<br />
Conector LAN<br />
<br />
Conector AC IN<br />
<br />
Nota<br />
Es posible utilizar una conexión <strong>de</strong> red inalámbrica para realizar la conexión a Internet sin utilizar un<br />
cable Ethernet. Si <strong>de</strong>sea obtener más información, consulte "Configuración <strong>de</strong> los ajustes <strong>de</strong> red"<br />
( página 86).<br />
Precaución<br />
No conecte una línea <strong>de</strong> teléfono estándar ni cables <strong>de</strong> otro tipo que no sean compatibles con el<br />
sistema directamente al conector LAN, ya que podría ocasionar sobrecalentamiento, un incendio<br />
o un fallo en el funcionamiento <strong>de</strong>l sistema.<br />
Conecte el cable <strong>de</strong> alimentación AC<br />
Tras enchufar el cable <strong>de</strong> alimentación AC a la red eléctrica, el indicador <strong>de</strong> encendido<br />
<strong>de</strong>l sistema PS3 se iluminará en rojo intenso ( página 79).<br />
Precaución<br />
No enchufe el cable <strong>de</strong> alimentación AC <strong>de</strong>l sistema en una toma <strong>de</strong> corriente eléctrica hasta<br />
haber realizado todas las conexiones. Asegúrese <strong>de</strong> que el TV u otros dispositivos estén<br />
<strong>de</strong>sconectados <strong>de</strong> la toma <strong>de</strong> corriente eléctrica antes <strong>de</strong> enchufar el sistema.<br />
72
Configuración inicial <strong>de</strong>l software <strong>de</strong>l sistema<br />
Después <strong>de</strong> encen<strong>de</strong>r el sistema, efectúe la configuración inicial.<br />
1 Encienda el televisor y, a continuación, cambie la entrada <strong>de</strong><br />
ví<strong>de</strong>o <strong>de</strong>l televisor para ajustarla al conector <strong>de</strong> entrada que<br />
utiliza el sistema PS3.<br />
2 Pulse el botón <strong>de</strong> encendido.<br />
El indicador <strong>de</strong> encendido se ilumina en ver<strong>de</strong> y la imagen se muestra en la<br />
pantalla <strong>de</strong>l televisor.<br />
Indicador <strong>de</strong><br />
encendido<br />
Botón <strong>de</strong> encendido<br />
3 Conecte el mando inalámbrico al sistema mediante un cable<br />
USB.<br />
4 Pulse el botón PS <strong>de</strong>l mando.<br />
El sistema reconocerá el mando. Una vez reconocido el mando, aparecerá la<br />
pantalla <strong>de</strong> configuración inicial.<br />
5 Realice la Configuración inicial.<br />
Siga las instrucciones en pantalla para introducir la configuración <strong>de</strong>l idioma<br />
<strong>de</strong>l sistema, zona horaria, fecha y hora, y nombre <strong>de</strong> usuario.<br />
Tras completar la configuración inicial, aparecerá la pantalla para configurar<br />
la conexión a Internet. Si sigue las instrucciones en pantalla, cuando realice<br />
la conexión mediante un cable Ethernet, se seleccionarán automáticamente<br />
los ajustes básicos. Cuando realice la conexión mediante una red LAN<br />
inalámbrica, siga las instrucciones que encontrará en "Configuración <strong>de</strong> los<br />
ajustes <strong>de</strong> red (inalámbrica)" ( página 87) para configurar la conexión.<br />
Una vez finalizada la configuración, aparecerá el menú XMB <br />
( página 69) en la pantalla <strong>de</strong>l televisor.<br />
Notas<br />
Al utilizar un cable HDMI para conectar el sistema a un televisor, la pantalla<br />
para cambiar la resolución <strong>de</strong> salida <strong>de</strong> ví<strong>de</strong>o se mostrará durante la<br />
configuración inicial. Si selecciona [Sí] en la pantalla y, a continuación, pulsa el<br />
botón , la resolución óptima <strong>de</strong> salida <strong>de</strong> ví<strong>de</strong>o se seleccionará<br />
automáticamente.<br />
Para obtener información acerca <strong>de</strong> cómo introducir texto, consulte "Utilización<br />
<strong>de</strong>l teclado en pantalla" ( página 92).<br />
Los parámetros introducidos durante la configuración inicial se pue<strong>de</strong>n<br />
cambiar en (Ajustes) o (Usuarios). Para obtener más información,<br />
consulte la guía online <strong>de</strong>l usuario (http://manuals.playstation.net/document/).<br />
ES<br />
Procedimientos iniciales<br />
73
Procedimientos iniciales<br />
Salida <strong>de</strong> ví<strong>de</strong>o <strong>de</strong>l sistema PS3<br />
El sistema PS3 pue<strong>de</strong> mostrar dos tipos <strong>de</strong> resoluciones: HD y SD. Consulte el manual <strong>de</strong> instrucciones <strong>de</strong>l televisor que está utilizando para<br />
comprobar el modo <strong>de</strong> ví<strong>de</strong>o compatible.<br />
HD (Alta <strong>de</strong>finición)<br />
SD (Definición estándar)<br />
Modo <strong>de</strong> ví<strong>de</strong>o * 1 1080p 1080i 720p 480p 480i * 2<br />
Formato 16:9 16:9 16:9<br />
* 1 Este número indica el número <strong>de</strong> líneas <strong>de</strong> exploración. Tenga en cuenta que "i" significa "entrelazado" y "p" significa "progresivo". El uso <strong>de</strong>l modo progresivo da<br />
como resultado ví<strong>de</strong>o <strong>de</strong> alta calidad con parpa<strong>de</strong>o mínimo.<br />
* 2 Los ajustes <strong>de</strong> salida <strong>de</strong> ví<strong>de</strong>o <strong>de</strong>l sistema se mostrarán como [Estándar (NTSC)].<br />
16:9<br />
4:3<br />
16:9<br />
4:3<br />
Pantallas que muestran la diferencia en la resolución<br />
Pantalla HD<br />
Pantalla SD<br />
74
Tipos <strong>de</strong> cable <strong>de</strong> salida <strong>de</strong> ví<strong>de</strong>o<br />
La resolución que se muestra en el televisor varía en función <strong>de</strong> los conectores <strong>de</strong> entrada <strong>de</strong>l televisor y el tipo <strong>de</strong> cable que se esté utilizando.<br />
Seleccione un cable que corresponda con el televisor que utiliza.<br />
Cable HDMI* 2<br />
(se ven<strong>de</strong> por separado)<br />
Cable AV por Componentes<br />
(se ven<strong>de</strong> por separado)<br />
Tipo <strong>de</strong> cable Conector <strong>de</strong> entrada <strong>de</strong>l televisor Modos <strong>de</strong> ví<strong>de</strong>o compatible*¹<br />
Conector HDMI IN<br />
Conector VIDEO IN <strong>de</strong><br />
entrada <strong>de</strong> ví<strong>de</strong>o por<br />
componentes<br />
<br />
<br />
COMPONENT VIDEO IN AUDIO IN<br />
Y PB/CB PR/CR L R<br />
<br />
1080p / 1080i / 720p / 480p<br />
1080p / 1080i / 720p / 480p / 480i* 3<br />
ES<br />
Procedimientos iniciales<br />
Cable S VIDEO<br />
(se ven<strong>de</strong> por separado)<br />
Conector S VIDEO IN<br />
<br />
S VIDEO<br />
L-AUDIO-R<br />
480i* 3<br />
Cable AV<br />
(suministrado)<br />
Conector VIDEO IN<br />
(compuesto)<br />
<br />
VIDEO<br />
L-AUDIO-R<br />
480i* 3<br />
* 1 Es posible que algunos modos <strong>de</strong> ví<strong>de</strong>o no se reconozcan según el tipo <strong>de</strong> televisor o el contenido reproducido.<br />
Si se conecta un dispositivo no compatible con el estándar HDCP (High-bandwidth Digital Content Protection, Protección <strong>de</strong> contenido digital <strong>de</strong> alto ancho <strong>de</strong><br />
banda) al sistema mediante un cable HDMI, no se podrá emitir ví<strong>de</strong>o ni audio.<br />
Discos <strong>de</strong> vi<strong>de</strong>o Blu-ray protegidos por <strong>de</strong>rechos <strong>de</strong> autor solo pue<strong>de</strong>n enviar señal a 1080p utilizando un cable HDMI conectado a un dispositivo que sea<br />
compatible con la norma <strong>de</strong> Protección <strong>de</strong> Contenido Digital <strong>de</strong> banda ancha).<br />
* 2 Conecte el sistema al televisor mediante un cable HDMI (se ven<strong>de</strong> por separado). Un cable HDMI permite emitir ví<strong>de</strong>o y audio, así como disfrutar <strong>de</strong> ví<strong>de</strong>o y audio <strong>de</strong><br />
calidad digital.<br />
* 3 Los ajustes <strong>de</strong> salida <strong>de</strong> ví<strong>de</strong>o <strong>de</strong>l sistema se mostrarán como [Estándar (NTSC)].<br />
75
Procedimientos iniciales<br />
Configuración <strong>de</strong> los ajustes <strong>de</strong> salida <strong>de</strong> ví<strong>de</strong>o<br />
En función <strong>de</strong>l tipo <strong>de</strong> cables y conectores utilizados, es posible que<br />
sea necesario configurar los ajustes <strong>de</strong> salida <strong>de</strong> ví<strong>de</strong>o <strong>de</strong>l sistema<br />
PS3 para emitir ví<strong>de</strong>o en alta resolución ( página 74) en un<br />
televisor.<br />
Si el ví<strong>de</strong>o no se muestra<br />
Cambie la entrada <strong>de</strong> ví<strong>de</strong>o <strong>de</strong>l televisor para coincidir con la entrada <strong>de</strong>l<br />
conector utilizado para conectar el sistema.<br />
Apague el sistema y vuelva a encen<strong>de</strong>rlo pulsando el botón <strong>de</strong> encendido<br />
durante al menos cinco segundos (hasta que el sistema emita dos pitidos).<br />
Los ajustes <strong>de</strong> salida <strong>de</strong> ví<strong>de</strong>o se restablecerán y el ví<strong>de</strong>o se emitirá con<br />
resolución <strong>de</strong> <strong>de</strong>finición estándar (SD).<br />
3 Confirme la pantalla y, a continuación, pulse el botón .<br />
Si ha cambiado el conector en el paso 2, aparecerá una pantalla para<br />
confirmar el cambio.<br />
4 Confirme los ajustes, seleccione [Sí] y, a continuación, pulse el<br />
botón .<br />
Si ha cambiado el conector en el paso 2, aparecerá una pantalla para<br />
confirmar el cambio.<br />
1 Seleccione (Ajustes) (Ajustes <strong>de</strong> pantalla) [Ajustes<br />
<strong>de</strong> salida <strong>de</strong> ví<strong>de</strong>o] y, a continuación, pulse el botón .<br />
2 Seleccione el conector <strong>de</strong> entrada ( página 75) en uso en el<br />
televisor y, a continuación, pulse el botón .<br />
5 Seleccione las resoluciones compatibles con el televisor y, a<br />
continuación, pulse el botón .<br />
La resolución mostrada en el televisor varía en función <strong>de</strong>l conector <strong>de</strong><br />
entrada y <strong>de</strong>l tipo <strong>de</strong> cable utilizado ( página 75). La resolución más alta<br />
será seleccionada para la emisión <strong>de</strong> ví<strong>de</strong>o.<br />
En función <strong>de</strong>l conector seleccionado en el paso 2, es posible que no<br />
aparezca esta pantalla.<br />
76<br />
Si selecciona [HDMI], tendrá la opción <strong>de</strong> escoger [Automático] o<br />
[Personalizados] en la siguiente pantalla. En la mayoría <strong>de</strong> los casos,<br />
seleccione [Automático], y los ajustes <strong>de</strong> salida <strong>de</strong> ví<strong>de</strong>o se completarán<br />
automáticamente.<br />
Si selecciona [AV MULTI / SCART], <strong>de</strong>be escoger el tipo <strong>de</strong> señal <strong>de</strong> salida en<br />
la siguiente pantalla. En la mayoría <strong>de</strong> los casos, seleccione [Y Pb/Cb Pr/Cr].
6 Confirme los ajustes, seleccione [Sí] y, a continuación, pulse el<br />
botón .<br />
En función <strong>de</strong>l conector seleccionado en el paso 2 y las resoluciones<br />
seleccionadas en el paso 5, es posible que no aparezca esta pantalla.<br />
7 Seleccione el tipo <strong>de</strong> televisor y, a continuación, pulse el botón .<br />
Si selecciona [Estándar (NTSC)] o [480p] en el paso 5, aparecerá una<br />
pantalla para seleccionar el tamaño <strong>de</strong>l televisor.<br />
Si selecciona [720p] o una resolución mayor en el paso 5, el tipo <strong>de</strong> televisor<br />
se ajustará automáticamente en 16:9 y no aparecerá la pantalla para<br />
seleccionar el tamaño <strong>de</strong>l televisor.<br />
8 Confirme los ajustes y, a continuación, pulse el botón .<br />
Los ajustes <strong>de</strong> salida <strong>de</strong> ví<strong>de</strong>o se guardarán en el sistema.<br />
9 Configurar los ajustes <strong>de</strong> salida <strong>de</strong> audio.<br />
Continúe para configurar los ajustes <strong>de</strong> salida <strong>de</strong> audio. Configure los<br />
ajustes para que se adapten al televisor o dispositivo <strong>de</strong> audio en uso.<br />
Si selecciona [HDMI], tendrá la opción <strong>de</strong> escoger [Automático] o [<strong>Manual</strong>]<br />
en la siguiente pantalla. En la mayoría <strong>de</strong> los casos, seleccione [Automático].<br />
Si utiliza un cable distinto a un cable HDMI para emitir audio <strong>de</strong>l televisor,<br />
seleccione [Conector <strong>de</strong> entrada <strong>de</strong> audio / SCART / AV MULTI]. Si utiliza un<br />
cable digital óptico para emitir audio, seleccione [Salida digital (Óptica)] y<br />
seleccione un formato <strong>de</strong> salida en la siguiente pantalla.<br />
10 Confirme los ajustes y, a continuación, pulse el botón .<br />
Los ajustes <strong>de</strong> salida <strong>de</strong> audio se guardarán en el sistema.<br />
Nota<br />
Pue<strong>de</strong> configurar los ajustes <strong>de</strong> salida <strong>de</strong> audio en (Ajustes) (Ajustes<br />
<strong>de</strong> sonido) [Ajustes <strong>de</strong> salida <strong>de</strong> audio].<br />
ES<br />
Procedimientos iniciales<br />
77
Procedimientos iniciales<br />
Conexión <strong>de</strong> los dispositivos <strong>de</strong> sonido digital<br />
Es posible conectar dispositivos <strong>de</strong> audio que admitan la reproducción<br />
<strong>de</strong> audio digital, como un receptor <strong>de</strong> AV para fines <strong>de</strong> entretenimiento<br />
doméstico.<br />
Salida <strong>de</strong> audio <strong>de</strong>l sistema PS3<br />
Los canales admitidos pue<strong>de</strong>n variar en función <strong>de</strong>l conector <strong>de</strong> salida<br />
que se vaya a utilizar.<br />
Conectores <strong>de</strong> salida <strong>de</strong>l sistema<br />
PS3<br />
Canales que se pue<strong>de</strong>n utilizar para la<br />
salida<br />
2 canales 5.1 canales 7.1 canales<br />
Conector AV MULTI OUT <br />
Conector DIGITAL OUT (OPTICAL) <br />
Conector HDMI OUT <br />
Ejemplos <strong>de</strong> conexión <strong>de</strong> dispositivos <strong>de</strong> audio<br />
Pue<strong>de</strong> utilizar un cable HDMI o un cable digital óptico para la conexión<br />
<strong>de</strong> dispositivos <strong>de</strong> audio al sistema PS3.<br />
Cable HDMI<br />
Cable HDMI<br />
(se ven<strong>de</strong> por<br />
separado)<br />
Cable digital óptico<br />
Cable digital<br />
óptico para audio<br />
(se ven<strong>de</strong> por<br />
separado).<br />
78<br />
Notas<br />
Cuando conecte un dispositivo <strong>de</strong> audio digital al sistema, vaya a (Ajustes)<br />
(Ajustes <strong>de</strong> sonido) [Ajustes <strong>de</strong> salida <strong>de</strong> audio] y configure los<br />
ajustes que sean necesarios para el dispositivo <strong>de</strong> audio.<br />
Normalmente no se pue<strong>de</strong> reproducir sonido simultáneamente <strong>de</strong>s<strong>de</strong> varios<br />
conectores <strong>de</strong> salida. Por ejemplo, si su sistema PS3 está conectado a un<br />
televisor mediante un cable HDMI y a un dispositivo <strong>de</strong> audio mediante un<br />
cable digital óptico, y si [Salida digital (Óptica)] está configurada en [Ajustes<br />
<strong>de</strong> salida <strong>de</strong> audio], el sonido no se reproducirá por el televisor, sino sólo por el<br />
dispositivo <strong>de</strong> audio.<br />
El sistema pue<strong>de</strong> emitir tanto audio como ví<strong>de</strong>o mediante un cable HDMI. Si<br />
tanto el televisor como el dispositivo <strong>de</strong> audio disponen <strong>de</strong> conectores HDMI,<br />
podrá emitir la imagen <strong>de</strong>l televisor al televisor a través <strong>de</strong> un dispositivo <strong>de</strong><br />
audio conectado.<br />
Si se conecta un dispositivo al sistema PS3 mediante un cable HDMI, no<br />
apague el dispositivo mientras el sistema esté encendido (indicador <strong>de</strong><br />
encendido iluminado en ver<strong>de</strong> intenso), ya que esto podría causar distorsiones<br />
<strong>de</strong> sonido o producir sonidos anormales.<br />
Televisor<br />
Dispositivo <strong>de</strong><br />
audio digital<br />
Cable HDMI<br />
(se ven<strong>de</strong> por<br />
separado)<br />
Dispositivo <strong>de</strong><br />
audio digital<br />
Cable <strong>de</strong> salida <strong>de</strong> ví<strong>de</strong>o<br />
para el televisor utilizado<br />
( página 75).<br />
Televisor
Encendido y apagado <strong>de</strong>l sistema PS3<br />
Encendido <strong>de</strong>l sistema<br />
1 Pulse el botón <strong>de</strong> encendido.<br />
El indicador <strong>de</strong> encendido se iluminará en ver<strong>de</strong> intenso para indicar que el<br />
sistema está encendido.<br />
Indicador <strong>de</strong> encendido:<br />
ver<strong>de</strong> intenso<br />
Botón <strong>de</strong> encendido<br />
2 Pulse el botón PS <strong>de</strong>l mando.<br />
Una vez asignado el número <strong>de</strong> mando, pue<strong>de</strong> usarlo para controlar el<br />
sistema.<br />
Estado <strong>de</strong>l indicador <strong>de</strong> encendido<br />
Botón PS<br />
El indicador <strong>de</strong> encendido <strong>de</strong>l sistema PS3 para ver el estado actual<br />
<strong>de</strong>l sistema PS3.<br />
Ver<strong>de</strong> intenso<br />
Ver<strong>de</strong> intermitente<br />
Rojo intenso<br />
Sistema encendido.<br />
El sistema se está apagando.<br />
Sistema apagado (en modo <strong>de</strong> espera).<br />
Apagado <strong>de</strong>l sistema<br />
1 Pulse el botón <strong>de</strong> encendido.<br />
El indicador <strong>de</strong> encendido se ilumina en rojo intenso.<br />
Aviso<br />
Indicador <strong>de</strong><br />
encendido: rojo intenso<br />
Botón <strong>de</strong> encendido<br />
Cuando el indicador <strong>de</strong> encendido esté iluminado en ver<strong>de</strong> intenso o ver<strong>de</strong><br />
parpa<strong>de</strong>ante, asegúrese <strong>de</strong> cumplir con las siguientes advertencias. De no<br />
hacerlo, se podrían producir daños o pérdida <strong>de</strong> datos o se podría dañar el<br />
sistema.<br />
No <strong>de</strong>senchufe el cable <strong>de</strong> alimentación AC <strong>de</strong> la red eléctrica.<br />
No mueva o cambie <strong>de</strong> posición el sistema.<br />
Notas<br />
Antes <strong>de</strong> utilizar un mando inalámbrico, primero <strong>de</strong>be emparejarlo con el<br />
sistema ( página 80).<br />
También pue<strong>de</strong> encen<strong>de</strong>r y apagar el sistema PS3 mediante el botón PS <strong>de</strong>l<br />
mando inalámbrico. Si utiliza el botón PS para encen<strong>de</strong>r el sistema, se asignará<br />
el número <strong>de</strong> mando al mismo tiempo. Para apagar el sistema, pulse el botón<br />
PS durante más <strong>de</strong> un segundo y, a continuación, siga las instrucciones en<br />
pantalla.<br />
También pue<strong>de</strong> apagar el sistema PS3 <strong>de</strong>s<strong>de</strong> el menú XMB . Seleccione<br />
(Usuarios) (Apagar sistema).<br />
Si no va a utilizar el sistema durante un largo período <strong>de</strong> tiempo, confirme que<br />
el indicador <strong>de</strong> encendido esté iluminado en rojo intenso y, a continuación,<br />
<strong>de</strong>sconecte el cable <strong>de</strong> alimentación AC <strong>de</strong> la toma <strong>de</strong> corriente eléctrica.<br />
ES<br />
Encendido y apagado <strong>de</strong>l sistema PS3<br />
79
Uso <strong>de</strong>l mando inalámbrico<br />
Preparación para su utilización<br />
Para utilizar un mando inalámbrico, primero <strong>de</strong>be registrar o<br />
"emparejar" el mando con el sistema PS3 y asignarle un número.<br />
Paso 1: empareje el sistema y el mando.<br />
Cuando se utiliza por primera vez.<br />
Cuando se utiliza con un sistema PS3 diferente.<br />
<br />
Paso 2: asigne un número <strong>de</strong> mando.<br />
Cada vez que el sistema se encien<strong>de</strong>.<br />
Paso 1: empareje el sistema y el mando<br />
Cuando utilice el mando por primera vez o con un sistema PS3<br />
diferente, primero <strong>de</strong>berá emparejar los dispositivos. Si encien<strong>de</strong> el<br />
sistema y conecta el mando mediante un cable USB, el<br />
emparejamiento finalizará.<br />
Paso 2: asigne un número <strong>de</strong> mando<br />
Cada vez que encienda el sistema, <strong>de</strong>berá asignar un número al<br />
mando.<br />
Pulse el botón PS.<br />
Todos los indicadores <strong>de</strong> puerto parpa<strong>de</strong>an.<br />
1 2 3 4<br />
<br />
Cuando se haya asignado un número al<br />
mando, los indicadores <strong>de</strong> puerto <strong>de</strong>l número<br />
asignado cambiarán a rojo intenso.<br />
1 2 3 4<br />
Es posible conectar hasta 7 mandos al mismo tiempo. El número <strong>de</strong>l<br />
mando es el que se encuentra en la parte superior <strong>de</strong> los indicadores<br />
<strong>de</strong>l puerto. Para los números <strong>de</strong>l 5 al 7, añada los números <strong>de</strong> los<br />
indicadores encendidos.<br />
Ejemplo: se ha asignado el mando número 5.<br />
1<br />
2 3 4<br />
1<br />
80<br />
Cable USB (suministrado)<br />
Verifique que el sistema esté encendido<br />
(que el indicador <strong>de</strong> encendido esté<br />
iluminado en ver<strong>de</strong> intenso).<br />
Notas<br />
El emparejamiento y la asignación <strong>de</strong> números <strong>de</strong>l mando se pue<strong>de</strong>n realizar<br />
sólo cuando el sistema está encendido (indicador <strong>de</strong> encendido iluminado en<br />
ver<strong>de</strong> intenso).<br />
Cuando se utiliza un mando emparejado con otro sistema PS3, se elimina el<br />
emparejamiento con el sistema original. Empareje el mando con el sistema<br />
nuevamente si el mando se ha utilizado con otro sistema.<br />
Si se apaga el mando o el sistema, los indicadores <strong>de</strong> puerto situados en el<br />
mando se apagarán y se borrará el número asignado.
Utilización <strong>de</strong>l mando <strong>de</strong> manera inalámbrica<br />
Si <strong>de</strong>sconecta el cable USB, podrá utilizar el mando <strong>de</strong> forma<br />
inalámbrica. Para ello, la batería <strong>de</strong>l mando <strong>de</strong>be estar cargada.<br />
Notas<br />
El cable USB se pue<strong>de</strong> conectar o <strong>de</strong>sconectar con el mando y el sistema<br />
encendidos.<br />
Si el mando no funciona, pulse el botón PS y, a continuación, vuelva a asignar<br />
el número <strong>de</strong>l mando.<br />
Carga <strong>de</strong>l mando<br />
Con el sistema encendido (indicador <strong>de</strong> encendido iluminado en ver<strong>de</strong><br />
intenso), conecte el mando al sistema mediante un cable USB. Los<br />
indicadores <strong>de</strong>l puerto <strong>de</strong>l mando parpa<strong>de</strong>an lentamente y comienza la<br />
carga. Cuando la carga se ha completado, los indicadores <strong>de</strong>l puerto<br />
<strong>de</strong>jan <strong>de</strong> parpa<strong>de</strong>ar.<br />
Notas<br />
El mando se pue<strong>de</strong> utilizar durante la carga.<br />
Realice la carga en un lugar don<strong>de</strong> la temperatura ambiente oscile entre 10 °C<br />
y 30 °C. Es posible que la carga no sea tan efectiva si se realiza en otros<br />
entornos.<br />
El mando no se pue<strong>de</strong> cargar cuando el sistema está apagado (en modo <strong>de</strong><br />
espera).<br />
La batería tiene una vida útil limitada. La duración <strong>de</strong> la carga <strong>de</strong> la batería<br />
disminuirá gradualmente con el uso y el paso <strong>de</strong>l tiempo.<br />
La vida útil <strong>de</strong> la batería también varía en función <strong>de</strong>l método <strong>de</strong><br />
almacenamiento, el estado <strong>de</strong> uso, el entorno y otros factores.<br />
Nivel <strong>de</strong> carga <strong>de</strong> la batería<br />
Si mantiene pulsado el botón PS durante más <strong>de</strong> un segundo, podrá<br />
comprobar el nivel <strong>de</strong> carga <strong>de</strong> la batería en la pantalla.<br />
La batería tiene mucha carga.<br />
La batería ha empezado a per<strong>de</strong>r su carga.<br />
Nivel <strong>de</strong> carga<br />
El nivel <strong>de</strong> carga <strong>de</strong> la batería es bajo.<br />
La batería no tiene carga. Los indicadores <strong>de</strong>l puerto <strong>de</strong>l mando<br />
parpa<strong>de</strong>an rápidamente. Cargue el mando.<br />
Nota<br />
En función <strong>de</strong>l entorno o <strong>de</strong> las condiciones <strong>de</strong> uso, es posible que el nivel <strong>de</strong><br />
carga restante no se muestre correctamente y que la duración <strong>de</strong> la batería varíe.<br />
ES<br />
Uso <strong>de</strong>l mando inalámbrico<br />
81
Reproducción <strong>de</strong>l contenido<br />
Blu-ray Disc (BD)/DVD/CD<br />
1 Inserte el disco.<br />
El indicador <strong>de</strong> extracción se ilumina en azul intenso para<br />
indicar que el disco está insertado.<br />
2 Aparece un icono en el menú XMB y se inicia la reproducción<br />
<strong>de</strong>l disco.<br />
Si el disco no se inicia automáticamente, seleccione el icono<br />
correspondiente al disco en el menú XMB y, a continuación, pulse el botón<br />
.<br />
Introduzca el disco con la etiqueta<br />
orientada hacia arriba.<br />
Avisos<br />
Los discos no compatibles con el sistema no podrán<br />
reproducirse.<br />
Para reproducir software comercial <strong>de</strong> ví<strong>de</strong>o en BD, en<br />
ciertos casos es necesario renovar la clave <strong>de</strong><br />
encriptación*. La clave pue<strong>de</strong> renovarse al actualizar el<br />
software <strong>de</strong>l sistema ( página 91).<br />
* Clave AACS (Sistema <strong>de</strong> Control <strong>de</strong> Acceso Avanzado)<br />
Expulsión <strong>de</strong> un disco<br />
Detenga la reproducción y, a continuación, pulse<br />
el botón extraer.<br />
Indicador<br />
extraer<br />
Botón extraer<br />
82
Reproducir contenido en dispositivos USB<br />
Pue<strong>de</strong> conectar dispositivos externos, como, por ejemplo, dispositivos<br />
compatibles con los <strong>de</strong> almacenamiento masivo USB, mediante un<br />
cable USB. Es posible conectar dispositivos con el sistema encendido.<br />
Consulte también las instrucciones suministradas con el dispositivo.<br />
1 Conecte el dispositivo USB.<br />
Aparece un icono en la pantalla.<br />
Dispositivo externo como, por ejemplo, una cámara digital.<br />
2 Seleccione el icono y, a continuación, pulse el botón .<br />
Aparecerá una lista <strong>de</strong>l contenido que se pue<strong>de</strong> reproducir.<br />
Avisos<br />
No extraiga dispositivos USB ni apague el sistema mientras se guardan,<br />
cargan o eliminan datos. Si lo hace, pue<strong>de</strong> que los datos se pierdan o<br />
resulten dañados.<br />
Si utiliza un dispositivo <strong>de</strong> memoria USB con interruptor <strong>de</strong> protección<br />
contra escritura, no accione el interruptor cuando el dispositivo esté<br />
conectado al sistema. Si lo hace, pue<strong>de</strong> que los datos se pierdan o<br />
resulten dañados.<br />
Formatos <strong>de</strong> archivo que se pue<strong>de</strong>n reproducir o<br />
visualizar<br />
Entre los formatos <strong>de</strong> archivo que se pue<strong>de</strong>n reproducir o visualizar en<br />
este sistema, se incluyen ATRAC, MP3, AAC, JPEG y MPEG-4. Para<br />
obtener información actualizada, consulte la guía online <strong>de</strong>l usuario<br />
(http://manuals.playstation.net/document/).<br />
Notas<br />
Sólo los archivos que se pue<strong>de</strong>n reproducir o visualizar en el sistema PS3<br />
aparecen en la columna <strong>de</strong> la categoría compatible (ejemplo: los datos <strong>de</strong><br />
imagen aparecen en la categoría (Foto).<br />
En función <strong>de</strong>l soporte <strong>de</strong> almacenamiento, sólo se pue<strong>de</strong> mostrar un<br />
subconjunto <strong>de</strong> las carpetas que contiene el soporte. Si selecciona [Mostrar<br />
todo] en el menú <strong>de</strong> opciones ( página 69), se mostrarán todas las carpetas<br />
guardadas en el soporte.<br />
ES<br />
Reproducción <strong>de</strong>l contenido<br />
Aviso<br />
Para más información acerca <strong>de</strong> como realizar copias <strong>de</strong> seguridad <strong>de</strong><br />
archivos guardados en el disco duro, consulte "Copias <strong>de</strong> seguridad <strong>de</strong> los<br />
datos" ( página 95).<br />
83
Jugar<br />
Juegos compatibles<br />
Iniciar un juego<br />
Al insertar el disco, el juego se inicia <strong>de</strong> forma automática.<br />
Software <strong>de</strong> formato <strong>PlayStation</strong>®3<br />
Software <strong>de</strong> formato <strong>PlayStation</strong>®<br />
Software <strong>de</strong> formato <strong>PlayStation</strong>®2<br />
Compatible con este sistema.*<br />
Incompatible con este sistema.<br />
* No se garantiza el funcionamiento <strong>de</strong> todos los títulos <strong>de</strong> software <strong>de</strong> formato<br />
<strong>PlayStation</strong>®. Visite http://www.us.playstation.com para obtener la información<br />
más actualizada sobre el software compatible con este sistema.<br />
Juegos<br />
Este mo<strong>de</strong>lo <strong>de</strong>l sistema <strong>PlayStation</strong>®3 está diseñado para reproducir<br />
software <strong>de</strong> formato <strong>PlayStation</strong>®3 y tiene compatibilidad retroactiva<br />
limitada. Este sistema no es compatible y no reproducirá software <strong>de</strong><br />
formato <strong>PlayStation</strong>®2. Es posible reproducir ciertos títulos <strong>de</strong> software<br />
<strong>de</strong> formato <strong>PlayStation</strong>® en este sistema. Para más información, visite<br />
www.us.playstation.com.<br />
Introduzca el disco con la etiqueta<br />
orientada hacia arriba.<br />
Salir <strong>de</strong> un juego<br />
Mientras juega, pulse el botón PS <strong>de</strong>l mando inalámbrico. A continuación,<br />
seleccione (Juego) (Salir <strong>de</strong>l juego) para salir <strong>de</strong>l juego.<br />
Nota<br />
Según el tipo <strong>de</strong> software, como por ejemplo, el software <strong>de</strong> formato <strong>PlayStation</strong>®,<br />
es posible que (Salir <strong>de</strong>l juego) no se muestre al pulsar el botón PS. En ese<br />
caso, seleccione [Salir <strong>de</strong>l juego] en la pantalla que se muestra.<br />
84
Ajustes <strong>de</strong> mando<br />
Es posible cambiar los ajustes <strong>de</strong>l mando seleccionando<br />
(Ajustes <strong>de</strong> accesorios).<br />
Vuelva a asignar los<br />
mandos<br />
Función <strong>de</strong> vibración<br />
<strong>de</strong>l mando<br />
(Ajustes)<br />
Si el software especifica el puerto <strong>de</strong> mando o el número,<br />
es posible utilizar este ajuste para asignar el puerto <strong>de</strong><br />
mando o el número apropiado.*<br />
La función <strong>de</strong> vibración pue<strong>de</strong> ajustarse en Sí/No. Está<br />
ajustada en [Sí] <strong>de</strong> forma pre<strong>de</strong>terminada.<br />
* Utilizando este sistema el puerto <strong>de</strong> mando 2-D no pue<strong>de</strong> ser asignado.<br />
Nota<br />
Pue<strong>de</strong> cambiar los ajustes <strong>de</strong>l mando durante la partida pulsando el botón PS.<br />
Seleccione (Ajustes) (Ajustes <strong>de</strong> accesorios) en la pantalla XMB o<br />
seleccione [Ajustes <strong>de</strong> mando] en la pantalla que se muestra.<br />
Datos guardados para el software <strong>de</strong> formato<br />
<strong>PlayStation</strong>®3<br />
Los datos guardados para el software <strong>de</strong> formato <strong>PlayStation</strong>®3 se<br />
guardan en el disco duro <strong>de</strong>l sistema. Los datos se muestran en<br />
(Juego) (Herramienta <strong>de</strong> datos guardados).<br />
Datos guardados para el software <strong>de</strong> formato<br />
<strong>PlayStation</strong>®<br />
Para guardar datos <strong>de</strong> software <strong>de</strong> formato <strong>PlayStation</strong>®, <strong>de</strong>be crear<br />
Memory Card internas en el disco duro y asignarlas a las ranuras.<br />
Aviso<br />
Este sistema no reproduce software <strong>de</strong> formato <strong>PlayStation</strong>®2. Aunque cree<br />
una Memory Card interna para software con formato <strong>de</strong> <strong>PlayStation</strong>®2, no<br />
podrá utilizarla para jugar.<br />
Creación <strong>de</strong> Memory Card internas<br />
1 Seleccione (Juego) (Herramienta <strong>de</strong> Memory Card<br />
(PS/PS2)) y, a continuación, pulse el botón .<br />
2 Seleccione (Crear nueva Memory Card interna) y, a<br />
continuación, pulse el botón .<br />
3 Seleccione [Memory Card (PS) interna] y a continuación pulse<br />
el botón .<br />
Siga las instrucciones en pantalla para completar la operación.<br />
Asignación <strong>de</strong> ranuras<br />
1 Seleccione (Juego) (Herramienta <strong>de</strong> Memory Card<br />
(PS/PS2)) y, a continuación, pulse el botón .<br />
2 Seleccione la Memory Card interna que <strong>de</strong>sea utilizar y, a<br />
continuación, pulse el botón .<br />
Seleccione [Asignar ranuras] y, a continuación, asigne [Ranura 1] o [Ranura 2].<br />
Notas<br />
En función <strong>de</strong>l software, es posible que las ranuras estén asignadas<br />
previamente. Para obtener más información, consulte las instrucciones<br />
suministradas con el software.<br />
Pue<strong>de</strong> asignar ranuras durante un juego. Pulse el botón PS <strong>de</strong>l mando inalámbrico<br />
y, a continuación, seleccione [Asignar ranuras] en la pantalla que aparece.<br />
ES<br />
Jugar<br />
85
Configuración <strong>de</strong> los ajustes <strong>de</strong> red<br />
Ejemplo <strong>de</strong> la configuración <strong>de</strong> una red (con cable)<br />
La configuración <strong>de</strong> una red por cable requiere los elementos , y<br />
.<br />
Ejemplo <strong>de</strong> la configuración <strong>de</strong> una red (inalámbrica)<br />
La configuración <strong>de</strong> una red inalámbrica requiere los elementos y<br />
.<br />
Dispositivo <strong>de</strong> pasarela <strong>de</strong> red como,<br />
por ejemplo, un mó<strong>de</strong>m DSL.* 1 * 2 Router* 3<br />
Dispositivo <strong>de</strong> pasarela <strong>de</strong> red como,<br />
por ejemplo, un mó<strong>de</strong>m DSL.* 1 * 2<br />
Router inalámbrico<br />
(punto <strong>de</strong> acceso) * 3 * 4<br />
A la línea <strong>de</strong> Internet<br />
A la línea <strong>de</strong> Internet<br />
Cable Ethernet<br />
Or<strong>de</strong>nador<br />
Or<strong>de</strong>nador<br />
* 1 Es posible que el método <strong>de</strong> conexión varíe en función <strong>de</strong>l entorno que se utilice. Por ejemplo, es posible conectar cables Ethernet directamente en la toma <strong>de</strong><br />
corriente en unida<strong>de</strong>s <strong>de</strong> almacenamiento complejas que posean puertos LAN preinstalados. Si está utilizando dicho entorno <strong>de</strong> red, no es necesario un dispositivo<br />
<strong>de</strong> pasarela <strong>de</strong> red.<br />
* 2 No es compatible la conexión a Internet mediante marcado telefónico (dial-up).<br />
* 3 Un router es un dispositivo que permite la conexión <strong>de</strong> varios dispositivos a una línea <strong>de</strong> Internet. Pue<strong>de</strong> ser necesario disponer <strong>de</strong> un router si <strong>de</strong>sea conectar un<br />
sistema PS3 y otro dispositivo como, por ejemplo, un PC a Internet al mismo tiempo utilizando la misma conexión a Internet. Un router no es necesario si el mó<strong>de</strong>m<br />
DSL, mó<strong>de</strong>m <strong>de</strong> cable u otro dispositivo <strong>de</strong> red cuenta con funcionalidad <strong>de</strong> router.<br />
* 4 Un router inalámbrico es un dispositivo que aña<strong>de</strong> la funcionalidad <strong>de</strong> un punto <strong>de</strong> acceso a un router. Para una configuración <strong>de</strong> red inalámbrica es necesario<br />
disponer con la información <strong>de</strong> ajustes para el punto <strong>de</strong> acceso (SSID, clave WEB, clave WPA) ( página 88).<br />
86
Configuración <strong>de</strong> los ajustes <strong>de</strong> red (con cable)<br />
1 Conecte un cable Ethernet (se ven<strong>de</strong> por separado) al sistema.<br />
2 Seleccione (Ajustes) (Ajustes <strong>de</strong> red) [Ajustes <strong>de</strong><br />
conexión a Internet] y, a continuación, pulse el botón .<br />
Se muestra un mensaje que indica que la conexión a Internet finalizará.<br />
3 Seleccione [Sí] y, a continuación, pulse el botón .<br />
4 Seleccione [Fáciles] y, a continuación, pulse el botón .<br />
Los ajustes básicos se ajustan automáticamente y se visualiza una lista <strong>de</strong><br />
ajustes. Si no se visualiza la lista, <strong>de</strong>be ajustar los ajustes personalizados.<br />
Consulte las instrucciones suministradas por su proveedor <strong>de</strong> servicios <strong>de</strong><br />
Internet para ajustar los ajustes personalizados ( página 89).<br />
5 Realice la prueba <strong>de</strong> conexión a Internet.<br />
Si la conexión se realiza correctamente, podrá conectarse a Internet.<br />
Configuración <strong>de</strong> los ajustes <strong>de</strong> red (inalámbrica)<br />
1 Asegúrese <strong>de</strong> que el cable Ethernet no se encuentra conectado<br />
al sistema.<br />
2 Seleccione (Ajustes) (Ajustes <strong>de</strong> red) [Ajustes <strong>de</strong><br />
conexión a Internet] y, a continuación, pulse el botón .<br />
Se muestra un mensaje que indica que la conexión a Internet finalizará.<br />
3 Seleccione [Sí] y, a continuación, pulse el botón .<br />
4 Seleccione [Fáciles] y, a continuación, pulse el botón .<br />
Los ajustes básicos se establecen automáticamente.<br />
5 Seleccione [Inalámbrico] y, a continuación, pulse el botón .<br />
ES<br />
Configuración <strong>de</strong> los ajustes <strong>de</strong> red<br />
87
Configuración <strong>de</strong> los ajustes <strong>de</strong> red<br />
6 Ajuste la configuración <strong>de</strong> la LAN inalámbrica.<br />
Seleccione el punto <strong>de</strong> acceso que <strong>de</strong>see utilizar. Normalmente pue<strong>de</strong><br />
seleccionar [Escanear] y elegir un punto <strong>de</strong> acceso que se encuentre <strong>de</strong>ntro<br />
<strong>de</strong> los límites <strong>de</strong> su sistema.<br />
Escanear<br />
Introducir<br />
manualmente<br />
Automático*<br />
El sistema busca un punto <strong>de</strong> acceso cercano.<br />
Seleccione el punto <strong>de</strong> acceso que <strong>de</strong>see utilizar.<br />
Introduzca el SSID <strong>de</strong>l punto <strong>de</strong> acceso manualmente<br />
para especificarlo.<br />
Utilice la función <strong>de</strong> ajuste automático <strong>de</strong>l punto <strong>de</strong><br />
acceso.<br />
Pue<strong>de</strong> seguir las instrucciones en pantalla para<br />
completar automáticamente los ajustes necesarios.<br />
AOSS<br />
Buffalo, Inc.<br />
* Para obtener información acerca <strong>de</strong> puntos <strong>de</strong> acceso compatibles con la<br />
configuración automática (AOSS), póngase en contacto con los<br />
fabricantes <strong>de</strong>l punto <strong>de</strong> acceso.<br />
9 Realice la prueba <strong>de</strong> conexión a Internet.<br />
Notas<br />
Si la conexión se realiza correctamente, podrá conectarse a Internet.<br />
SSID y las claves WEP/WPA son tipos <strong>de</strong> información <strong>de</strong> seguridad necesaria<br />
para la conexión a un punto <strong>de</strong> acceso. Si no posee esta información, póngase<br />
en contacto con la persona que se encarga <strong>de</strong> la configuración o<br />
mantenimiento <strong>de</strong>l punto <strong>de</strong> acceso.<br />
En función <strong>de</strong>l punto <strong>de</strong> acceso que utilice, es posible que necesite la<br />
dirección MAC para el sistema PS3 cuando se conecte a Internet. Podrá<br />
encontrar la dirección MAC para el sistema PS3 si va a (Ajustes)<br />
(Ajustes <strong>de</strong>l sistema) [Información <strong>de</strong>l sistema].<br />
Al conectarse a Internet <strong>de</strong> manera inalámbrica, es posible que se produzcan<br />
interferencias en la señal en función <strong>de</strong> las condiciones <strong>de</strong> uso <strong>de</strong> los<br />
dispositivos <strong>de</strong> la red inalámbrica. Si la velocidad <strong>de</strong> transferencia <strong>de</strong> datos <strong>de</strong><br />
Internet disminuye o el controlador inalámbrico no funciona correctamente,<br />
pruebe a utilizar una conexión a Internet por cable.<br />
7 Modifica los ajustes <strong>de</strong> seguridad para la red inalámbrica.<br />
Introduzca la clave <strong>de</strong> encriptación <strong>de</strong>l punto <strong>de</strong> acceso. Si seleccionó<br />
[Automático] en el paso 6, no se visualizará esta pantalla.<br />
Ninguna<br />
WEP<br />
WPA-PSK/<br />
WPA2-PSK<br />
La clave <strong>de</strong> encriptación no está ajustada.<br />
Introduzca la clave <strong>de</strong> encriptación. El campo <strong>de</strong> la<br />
clave <strong>de</strong> encriptación mostrará un asterisco (*) por cada<br />
carácter que introduzca.<br />
88<br />
8 Compruebe los ajustes.<br />
Aparece una lista <strong>de</strong> ajustes. Si no se visualiza la lista, <strong>de</strong>be ajustar los<br />
ajustes personalizados. Consulte las instrucciones suministradas por su<br />
proveedor <strong>de</strong> servicios <strong>de</strong> Internet para ajustar los ajustes personalizados<br />
( página 89).
Ajuste <strong>de</strong> la configuración personalizada<br />
En algunos entornos <strong>de</strong> red, es posible que algunos datos <strong>de</strong><br />
configuración no se ajusten automáticamente si selecciona [Fáciles].<br />
Consulte la información que encontrará a continuación y siga asimismo<br />
las instrucciones en pantalla para ajustar la configuración<br />
personalizada.<br />
Modo <strong>de</strong> funcionamiento Ethernet<br />
Permite especificar la velocidad <strong>de</strong> transferencia <strong>de</strong> datos <strong>de</strong> Ethernet<br />
y el modo <strong>de</strong> funcionamiento. Por lo general, seleccione [Detección<br />
automática].<br />
Ajuste <strong>de</strong> dirección IP<br />
Permite especificar el método <strong>de</strong> obtención <strong>de</strong> una dirección IP al<br />
conectarse a Internet. El método varía en función <strong>de</strong>l proveedor <strong>de</strong><br />
servicios <strong>de</strong> Internet.<br />
Automático<br />
<strong>Manual</strong><br />
PPPoE<br />
Nombre <strong>de</strong>l host DHCP<br />
Permite utilizar la dirección IP asignada por el servidor<br />
DHCP.<br />
Permite introducir la dirección IP manualmente.<br />
Permite conectarse a Internet mediante PPPoE.<br />
Introduzca el nombre <strong>de</strong> usuario y la contraseña facilitada<br />
por su proveedor <strong>de</strong> servicios <strong>de</strong> Internet.<br />
Especifique el nombre <strong>de</strong> host <strong>de</strong>l servidor DHCP. Por lo general,<br />
seleccione [No establecer].<br />
Ajuste <strong>de</strong> DNS<br />
Permite especificar el servidor DNS. El método varía en función <strong>de</strong>l<br />
proveedor <strong>de</strong> servicios <strong>de</strong> Internet.<br />
Automático<br />
<strong>Manual</strong><br />
MTU<br />
El sistema obtiene la dirección <strong>de</strong>l servidor DNS<br />
automáticamente.<br />
Permite introducir la dirección <strong>de</strong>l servidor DNS<br />
manualmente. Permite introducir las direcciones IP <strong>de</strong>l<br />
servidor DNS primario y secundario facilitados por su<br />
proveedor <strong>de</strong> servicios <strong>de</strong> Internet.<br />
Permite especificar el valor correspondiente a MTU utilizado durante la<br />
transmisión <strong>de</strong> datos. Por lo general, seleccione [Automático].<br />
Servidor proxy<br />
Permite especificar el servidor proxy que <strong>de</strong>sea utilizar. Por lo general,<br />
seleccione [No usar].<br />
UPnP<br />
Permite activar o <strong>de</strong>sactivar UPnP (Universal Plug and Play). Por lo<br />
general, seleccione [Activar].<br />
Nota<br />
Si [UPnP] está ajustado en [Desactivar], es posible que la comunicación online<br />
esté restringida cuando utilice la función <strong>de</strong> chat <strong>de</strong> voz o ví<strong>de</strong>o o las funciones<br />
<strong>de</strong> comunicación en los juegos.<br />
ES<br />
Configuración <strong>de</strong> los ajustes <strong>de</strong> red<br />
89
Conexión a Internet<br />
Si los ajustes <strong>de</strong> la red ya están completados, el sistema PS3 se<br />
conectará automáticamente a Internet cuando se encienda el sistema.<br />
La conexión permanecerá activa siempre que el sistema esté<br />
encendido.<br />
Utilización <strong>de</strong>l navegador <strong>de</strong> Internet<br />
1 Seleccione (Red) (Navegador <strong>de</strong> Internet) y, a<br />
continuación, pulse el botón .<br />
Se abre el navegador <strong>de</strong> Internet. Aparece un icono <strong>de</strong> ocupado mientras se<br />
carga la página.<br />
Icono Ocupado<br />
Visualización <strong>de</strong> la guía <strong>de</strong>l usuario<br />
Pue<strong>de</strong> utilizar el navegador <strong>de</strong> Internet para ver la guía online <strong>de</strong>l<br />
usuario <strong>de</strong>l sistema PS3. Seleccione (Red) (<strong>Manual</strong>es <strong>de</strong><br />
instrucciones online) y, a continuación, pulse el botón .<br />
<strong>Manual</strong> <strong>de</strong>l usuario online http://manuals.playstation.net/document/<br />
Este manual contiene información <strong>de</strong>tallada acerca <strong>de</strong> el uso <strong>de</strong>l software <strong>de</strong>l<br />
sistema PS3.<br />
Crear una cuenta <strong>PlayStation</strong>®Network<br />
Al crear una cuenta <strong>PlayStation</strong>®Network, podrá disfrutar<br />
comunicándose con sus amigos o <strong>de</strong>scargar juegos o ví<strong>de</strong>os <strong>de</strong>s<strong>de</strong><br />
(<strong>PlayStation</strong>®Store). Seleccione (<strong>PlayStation</strong>®Network)<br />
(Inscribirse en <strong>PlayStation</strong>®Network) y, a continuación, pulse el<br />
botón . Se mostrará la pantalla para crear una cuenta.<br />
Operaciones básicas <strong>de</strong>l navegador <strong>de</strong> Internet<br />
90<br />
Botones <strong>de</strong> dirección<br />
Joystick <strong>de</strong>recho<br />
Botón L1<br />
Botón START<br />
Botón<br />
Mueven el cursor a un vínculo.<br />
Permiten <strong>de</strong>splazarse en la dirección que <strong>de</strong>see.<br />
Permite volver a la página anterior.<br />
Introduce una dirección.<br />
Permite alternar entre las opciones <strong>de</strong> mostrar u<br />
ocultar el menú.<br />
Notas<br />
Para crear una cuenta es necesaria una conexión a Internet.<br />
El contenido <strong>de</strong>l servicio <strong>de</strong> <strong>PlayStation</strong>®Network pue<strong>de</strong> variar en función <strong>de</strong> la<br />
región.<br />
También pue<strong>de</strong> crear una cuenta <strong>PlayStation</strong>®Network en<br />
http://www.us.playstation.com.
Actualizaciones <strong>de</strong>l sistema PS3<br />
Mediante la actualización <strong>de</strong>l software <strong>de</strong>l sistema PS3, pue<strong>de</strong> añadir<br />
funciones o revisiones <strong>de</strong> seguridad. Actualice su sistema periódicamente<br />
para utilizar la versión más reciente <strong>de</strong>l software <strong>de</strong>l sistema.<br />
Actualizaciones <strong>de</strong>l software <strong>de</strong>l sistema<br />
http://www.us.playstation.com/ps3<br />
Este sitio proporciona la información más reciente acerca <strong>de</strong> las<br />
actualizaciones <strong>de</strong>l software <strong>de</strong>l sistema.<br />
Utilice los datos <strong>de</strong> actualización<br />
para sobrescribir el software<br />
existente <strong>de</strong>l sistema.<br />
Avisos<br />
El software <strong>de</strong>l sistema está<br />
actualizado.<br />
Durante una actualización, no <strong>de</strong>sactive el sistema ni extraiga el soporte. Si<br />
se cancela una actualización antes <strong>de</strong> completarse, el software <strong>de</strong>l sistema<br />
pue<strong>de</strong> resultar dañado y pue<strong>de</strong> que se precise asistencia técnica o<br />
reemplazar el sistema.<br />
Durante una actualización, el botón <strong>de</strong> encendido <strong>de</strong>l sistema y el botón PS<br />
situado en el mando están inactivos.<br />
En función <strong>de</strong>l contenido, es posible que no pueda jugar sin primero<br />
actualizar el software <strong>de</strong>l sistema.<br />
Después <strong>de</strong> actualizar el software <strong>de</strong>l sistema, no es posible volver a una<br />
versión anterior.<br />
Comprobación <strong>de</strong> la versión <strong>de</strong>l software <strong>de</strong>l sistema<br />
Pue<strong>de</strong> comprobar la información <strong>de</strong> la versión <strong>de</strong>l software <strong>de</strong>l sistema<br />
mediante la selección <strong>de</strong> (Ajustes) (Ajustes <strong>de</strong>l sistema)<br />
[Información <strong>de</strong>l sistema]. La versión actual se muestra en el campo<br />
[Software <strong>de</strong>l sistema].<br />
Métodos <strong>de</strong> actualización<br />
Pue<strong>de</strong> llevar a cabo una actualización <strong>de</strong> cualquiera <strong>de</strong> las formas<br />
<strong>de</strong>scritas a continuación.<br />
Actualización a través <strong>de</strong> la red<br />
Pue<strong>de</strong> realizar la actualización mediante la <strong>de</strong>scarga <strong>de</strong> los datos <strong>de</strong><br />
actualización <strong>de</strong> Internet. Las actualizaciones más recientes se<br />
<strong>de</strong>scargan automáticamente.<br />
Seleccione (Ajustes) (Actualización <strong>de</strong>l sistema) [Actualizar<br />
mediante Internet].<br />
Actualización mediante soporte <strong>de</strong> almacenamiento<br />
Pue<strong>de</strong> realizar una actualización mediante los datos <strong>de</strong> actualización<br />
guardados en un dispositivo <strong>de</strong> almacenamiento masivo USB u otros<br />
tipos <strong>de</strong> soportes.<br />
Seleccione (Ajustes) (Actualización <strong>de</strong>l sistema) [Actualizar<br />
mediante un soporte <strong>de</strong> almacenamiento].<br />
Actualización mediante soportes <strong>de</strong> disco<br />
Los datos <strong>de</strong> actualización pue<strong>de</strong>n estar incluidos en los discos <strong>de</strong><br />
algunos juegos y otro tipo <strong>de</strong> soportes en disco. Cuando reproduzca<br />
un disco que contenga datos <strong>de</strong> actualización, aparecerá una pantalla<br />
para guiarle durante el proceso.<br />
Nota<br />
Si no pue<strong>de</strong> realizar una actualización en ninguna <strong>de</strong> las formas <strong>de</strong>scritas<br />
anteriormente, póngase en contacto con servicio <strong>de</strong> atención al cliente SCEA<br />
( contraportada).<br />
ES<br />
Actualizaciones <strong>de</strong>l sistema PS3<br />
91
Utilización <strong>de</strong>l teclado en pantalla<br />
Cursor<br />
Campo <strong>de</strong> introducción <strong>de</strong> texto<br />
Muestra las opciones intuitivas<br />
Notas<br />
Si <strong>de</strong>sea obtener más información acerca <strong>de</strong>l uso <strong>de</strong>l teclado en pantalla,<br />
consulte la guía online <strong>de</strong>l usuario (http://manuals.playstation.net/document/).<br />
También pue<strong>de</strong> introducir texto mediante un teclado USB o un teclado<br />
compatible con Bluetooth® (ambos se ven<strong>de</strong>n por separado). Pulse cualquier<br />
tecla <strong>de</strong>l teclado conectado para comenzar a introducir el texto cuando el<br />
teclado en pantalla se muestre.<br />
Lista <strong>de</strong> teclas<br />
Las teclas que se muestran varían en función <strong>de</strong>l modo <strong>de</strong> entrada y<br />
otras condiciones.<br />
Teclas<br />
Explicación<br />
Teclas <strong>de</strong> operación<br />
Muestra cuando el modo<br />
intuitivo está activado<br />
Visualización <strong>de</strong>l<br />
modo <strong>de</strong> entrada<br />
Inserta un salto <strong>de</strong> línea.<br />
Mueve el cursor.<br />
Introducción <strong>de</strong> texto<br />
En los pasos siguientes se <strong>de</strong>scribe cómo introducir texto mediante la<br />
palabra "fun" como ejemplo.<br />
1 Seleccione [f] en el teclado y, a continuación, pulse el botón .<br />
Repita este paso para los caracteres [u] y [n].<br />
2 Seleccione [Aceptar] y, a continuación, pulse el botón .<br />
Se confirman los caracteres que ha introducido.<br />
3 Seleccione [Aceptar] y, a continuación, pulse el botón<br />
<strong>de</strong> nuevo.<br />
Se introduce el texto y se cierra el teclado.<br />
Elimina el carácter situado a la izquierda <strong>de</strong>l<br />
cursor.<br />
Inserta un espacio.<br />
Cambia el modo <strong>de</strong> entrada.<br />
Confirma los caracteres que se han escrito y, a<br />
continuación, cierra el teclado.<br />
Cambia el teclado al tamaño pequeño.<br />
/ Inserta un símbolo o un emoticono.<br />
/<br />
Cambia el tipo <strong>de</strong> caracteres que se van a<br />
introducir.<br />
Pega el texto que se ha copiado <strong>de</strong>l navegador<br />
<strong>de</strong> Internet.<br />
92
Control paterno<br />
El sistema PS3 incluye una función <strong>de</strong> control paterno. Es posible<br />
utilizar esta función para establecer una contraseña y limitar la<br />
reproducción a los niños <strong>de</strong> contenido restringido mediante un nivel <strong>de</strong><br />
control paterno (juegos, ví<strong>de</strong>os y otros contenidos). Para obtener más<br />
información acerca <strong>de</strong> los ajustes <strong>de</strong> control paterno, visite nuestro sitio<br />
Web ( contraportada).<br />
Cambio <strong>de</strong> los ajustes <strong>de</strong> seguridad<br />
Es posible ajustar el nivel <strong>de</strong> control paterno para juegos, discos<br />
Blu-ray u otros contenidos en (Ajustes) (Ajustes <strong>de</strong><br />
seguridad).<br />
Para cambiar el ajuste <strong>de</strong> control paterno es necesario introducir una<br />
contraseña. Es posible establecer una contraseña en (Ajustes <strong>de</strong><br />
seguridad) [Cambiar contraseña].<br />
La contraseña viene ajustada en "0000" <strong>de</strong> manera pre<strong>de</strong>terminada.<br />
Nivel <strong>de</strong> control paterno para juegos<br />
Pue<strong>de</strong> ajustar el nivel <strong>de</strong> control paterno para juegos en (Ajustes <strong>de</strong><br />
seguridad) [Control paterno]. Seleccione [No] o uno <strong>de</strong> los 11 niveles.<br />
No<br />
11-1<br />
Permite reproducir cualquier contenido sin tener en cuenta el nivel <strong>de</strong><br />
control paterno.<br />
Ajuste el nivel <strong>de</strong> control paterno según el número. Tenga en cuenta<br />
que cuanto menor sea el número, mayor será la restricción.<br />
La combinación <strong>de</strong> los niveles <strong>de</strong> control paterno <strong>de</strong>l sistema PS3 y<br />
<strong>de</strong>l contenido <strong>de</strong>termina los contenidos que se pue<strong>de</strong>n reproducir.<br />
Ejemplo: si el nivel <strong>de</strong> control paterno <strong>de</strong>l sistema está ajustado en [7],<br />
es posible visualizar en el sistema el contenido con un nivel <strong>de</strong>l [1] al [7].<br />
Pue<strong>de</strong> ver el nivel <strong>de</strong> control paterno <strong>de</strong> un juego o ví<strong>de</strong>o <strong>de</strong>scargado<br />
<strong>de</strong>s<strong>de</strong> (<strong>PlayStation</strong>®Store). Seleccione el juego o ví<strong>de</strong>o y, a<br />
continuación, pulse el botón . Des<strong>de</strong> el menú <strong>de</strong> opciones,<br />
seleccione [Información] para mostrar una pantalla con el nivel <strong>de</strong><br />
control paterno.<br />
Juego<br />
En la mayoría <strong>de</strong> embalajes <strong>de</strong> juegos aparece un símbolo que indica<br />
el grupo <strong>de</strong> eda<strong>de</strong>s para el que es a<strong>de</strong>cuado. Los símbolos<br />
correspon<strong>de</strong>n al nivel <strong>de</strong> control paterno <strong>de</strong> los juegos como se indica.<br />
Edad<br />
Nivel <strong>de</strong> control paterno<br />
<strong>de</strong> juegos<br />
2 3 4 5 9 10<br />
A partir <strong>de</strong> la fecha <strong>de</strong> publicación. Para mayor información, visite<br />
http://www.us.playstation.com/support. Para obtener la información más reciente sobre<br />
el sistema <strong>de</strong> clasificaciones ESRB, visite http://www.esrb.org.<br />
Otros ajustes <strong>de</strong> seguridad<br />
A continuación se <strong>de</strong>scribe como es posible ajustar el control paterno<br />
en contenido distinto <strong>de</strong> juegos en (Ajustes <strong>de</strong> seguridad).<br />
Control paterno <strong>de</strong><br />
BD<br />
Control paterno <strong>de</strong><br />
DVD<br />
Control <strong>de</strong> inicio <strong>de</strong>l<br />
navegador <strong>de</strong><br />
Internet<br />
Al reproducir un BD con ajustes <strong>de</strong> control paterno, es<br />
posible restringir la reproducción según la edad ajustada.<br />
En número menor, mayor restricción.<br />
Al reproducir un DVD con ajustes <strong>de</strong> control paterno, es<br />
posible restringir la reproducción según el nivel que se ha<br />
ajustado.<br />
Seleccione [No] o uno <strong>de</strong> los ocho niveles.<br />
Cuanto menor sea el número, mayor será la restricción.<br />
Es posible restringir la capacidad <strong>de</strong> iniciar el navegador<br />
<strong>de</strong> Internet con una contraseña.<br />
Nota<br />
Para más información acerca <strong>de</strong> los ajustes <strong>de</strong> control paterno para contenido y<br />
servicios en <strong>PlayStation</strong>®Network, visite http://www.us.playstation.com/support.<br />
ES<br />
Control paterno<br />
93
Cambio <strong>de</strong>l disco duro<br />
Pue<strong>de</strong> cambiar el disco duro que se encuentra instalado en el sistema<br />
PS3.<br />
Precaución<br />
Extraiga el disco duro en una ubicación fuera <strong>de</strong>l alcance <strong>de</strong> niños<br />
pequeños para intentar evitar la ingesta acci<strong>de</strong>ntal <strong>de</strong> piezas pequeñas<br />
como los tornillos.<br />
La parte inferior <strong>de</strong>l sistema está caliente justo <strong>de</strong>spués <strong>de</strong> su uso. Deje<br />
que transcurra un tiempo para que el sistema se enfríe antes <strong>de</strong> iniciar la<br />
extracción <strong>de</strong>l disco duro.<br />
Tenga cuidado <strong>de</strong> no lesionarse al extraer o manipular la tapa <strong>de</strong>l tornillo o<br />
el disco duro.<br />
Asegúrese <strong>de</strong> volver a instalar la tapa <strong>de</strong>l tornillo y la tapa <strong>de</strong> la bahía <strong>de</strong>l<br />
disco duro antes <strong>de</strong> encen<strong>de</strong>r el sistema PS3. Si no se instalan estas<br />
tapas, pue<strong>de</strong> producirse una acumulación <strong>de</strong> calor <strong>de</strong>ntro <strong>de</strong>l sistema.<br />
Para colocar o retirar tornillos, utilice un <strong>de</strong>stornillador <strong>de</strong> estrella <strong>de</strong> tamaño<br />
a<strong>de</strong>cuado. Si el tamaño no coinci<strong>de</strong>, podría dañar la ranura <strong>de</strong> la cabeza<br />
<strong>de</strong>l tornillo.<br />
Avisos<br />
Todos los discos duros, inclusive un disco duro <strong>de</strong> sistema PS3, <strong>de</strong>ben<br />
volver a formatearse antes <strong>de</strong> su uso en un sistema PS3.<br />
Es recomendable que realice regularmente copias <strong>de</strong> seguridad <strong>de</strong> los<br />
datos <strong>de</strong>l disco duro. Si, por cualquier motivo, el software o los datos se<br />
pier<strong>de</strong>n o resultan dañados, tal vez sea imposible restaurar o reparar los<br />
mismos. Sony Computer Entertainment Inc. y sus compañías subsidiarias y<br />
filiales no serán consi<strong>de</strong>radas responsables <strong>de</strong> los daños o lesiones que<br />
pudieran ocasionar la pérdida o el daño <strong>de</strong>l software o los datos.<br />
Pue<strong>de</strong> realizar una copia <strong>de</strong> seguridad <strong>de</strong> datos guardados en el disco<br />
duro en un dispositivo <strong>de</strong> almacenamiento masivo USB y restaurar datos<br />
<strong>de</strong> los cuales ha hecho una copia <strong>de</strong> seguridad. Para más <strong>de</strong>talles, vea<br />
"Copias <strong>de</strong> seguridad <strong>de</strong> los datos" ( página 95).<br />
Una extracción o instalación ina<strong>de</strong>cuadas <strong>de</strong> un disco duro pue<strong>de</strong>n dañar<br />
su sistema PS3 y producir pérdida <strong>de</strong> datos, y también pue<strong>de</strong>n anular su<br />
garantía <strong>de</strong>l hardware <strong>de</strong>l sistema PS3. SCEA no será consi<strong>de</strong>rada<br />
responsable <strong>de</strong> ningún daño resultante, incluido cualquier daño que sufra<br />
su disco duro. El usuario asume todos los riesgos y responsabilida<strong>de</strong>s<br />
asociados con el uso <strong>de</strong> un disco duro <strong>de</strong> repuesto, incluido cualquier<br />
problema <strong>de</strong> incompatibilidad o interoperabilidad con el sistema PS3. No<br />
se brindará ningún servicio a los discos duros que no sean <strong>de</strong>l sistema<br />
PS3.<br />
Para ayudar a proteger su información personal, asegúrese <strong>de</strong> borrar las<br />
contraseñas <strong>de</strong> todas las cuentas <strong>PlayStation</strong>®Network antes <strong>de</strong> entregar el<br />
sistema PS3 para su reparación. Para borrar una contraseña, seleccione<br />
(<strong>PlayStation</strong>®Network) (Iniciar sesión), y <strong>de</strong> la pantalla que<br />
aparece a continuación elimine la opción <strong>de</strong> [Guardar contraseña]. Tenga<br />
en cuenta que si ha ajustado [Inicio <strong>de</strong> sesión automático (inicio <strong>de</strong> sesión<br />
automático)], no se mostrará el icono <strong>de</strong> (Iniciar sesión). En ese caso,<br />
primero <strong>de</strong>berá eliminar la opción <strong>de</strong> inicio <strong>de</strong> sesión automático. Para<br />
eliminar la opción <strong>de</strong> inicio <strong>de</strong> sesión automático, seleccione<br />
(<strong>PlayStation</strong>®Network) (Administración <strong>de</strong> cuentas), pulse el<br />
botón , y seleccione [Inicio <strong>de</strong> sesión automático <strong>de</strong>sactivado] <strong>de</strong>l menú<br />
<strong>de</strong> opciones. Después <strong>de</strong> <strong>de</strong>sactivar la opción <strong>de</strong> inicio <strong>de</strong> sesión,<br />
continué con la operación <strong>de</strong> eliminación <strong>de</strong> contraseña.<br />
94
Copias <strong>de</strong> seguridad <strong>de</strong> los datos<br />
Pue<strong>de</strong> realizar una copia <strong>de</strong> seguridad <strong>de</strong> los datos guardados en el<br />
disco duro mediante uno <strong>de</strong> los métodos <strong>de</strong>scritos a continuación.<br />
Aviso<br />
Es recomendable que realice regularmente copias <strong>de</strong> seguridad <strong>de</strong> los datos<br />
<strong>de</strong>l disco duro. Si por cualquier motivo se produce una pérdida o daño <strong>de</strong>l<br />
software o <strong>de</strong> los datos o el disco duro <strong>de</strong>be ser inicializado durante un servicio,<br />
pue<strong>de</strong> no ser posible recuperarlos o repararlos. Sony Computer Entertainment<br />
Inc. y sus sucursales y filiales no se responsabilizan <strong>de</strong> los daños o lesiones<br />
relacionadas con la pérdida o la corrupción <strong>de</strong> los datos o <strong>de</strong>l software.<br />
Hacer una copia <strong>de</strong> seguridad <strong>de</strong> datos con una sola<br />
operación<br />
Pue<strong>de</strong> hacer una copia <strong>de</strong> seguridad <strong>de</strong> los datos que están guardados<br />
en el disco duro en un dispositivo <strong>de</strong> almacenamiento masivo USB con<br />
una sola operación. Seleccione (Ajustes) (Ajustes <strong>de</strong>l sistema)<br />
[Herramienta <strong>de</strong> copia <strong>de</strong> seguridad] y, a continuación, siga las<br />
instrucciones en pantalla para llevar a cabo esta operación. Es posible<br />
que no pueda realizar copias <strong>de</strong> seguridad <strong>de</strong> ciertos datos, incluyendo<br />
ciertos datos con protección <strong>de</strong> <strong>de</strong>rechos <strong>de</strong> autor.<br />
Nota<br />
Es posible que no pueda utilizar la herramienta <strong>de</strong> copia <strong>de</strong> seguridad para<br />
restaurar ciertos datos. Para datos importantes a los que no pue<strong>de</strong>n realizarse<br />
copias <strong>de</strong> seguridad, se recomienda copiar o transferir los datos manualmente a<br />
un dispositivo <strong>de</strong> almacenamiento USB antes <strong>de</strong> utilizar la herramienta <strong>de</strong> copia<br />
<strong>de</strong> seguridad. Para más información acerca <strong>de</strong> la herramienta <strong>de</strong> copia <strong>de</strong><br />
seguridad, consulte la guía <strong>de</strong>l usuario online<br />
(http://manuals.playstation.net/document/).<br />
Copiar o mover datos selectivamente<br />
Es posible copiar o mover los siguientes tipos <strong>de</strong> archivos guardados<br />
en el disco duro <strong>de</strong>l sistema a un dispositivo <strong>de</strong> almacenamiento<br />
masivo USB. Seleccione el archivo, pulse el botón y, a continuación,<br />
seleccione [Copiar] o [Mover] en el menú <strong>de</strong> opciones. Para ciertos<br />
tipos <strong>de</strong> archivos <strong>de</strong> ví<strong>de</strong>o, es posible que tenga que seleccionar<br />
[Crear copia <strong>de</strong> seguridad].<br />
Tipo <strong>de</strong> archivo<br />
Datos guardados <strong>de</strong> juegos; archivos<br />
<strong>de</strong> ví<strong>de</strong>o, música o fotografías<br />
Destino <strong>de</strong> la copia <strong>de</strong> seguridad<br />
Dispositivo <strong>de</strong> almacenamiento<br />
(unidad USB Flash, etc.).<br />
Notas<br />
Ciertos tipos <strong>de</strong> datos no se pue<strong>de</strong>n copiar, mover o crear copias <strong>de</strong><br />
seguridad.<br />
Al utilizar un lector/grabador <strong>de</strong> tarjeta <strong>de</strong> memoria (con tipo <strong>de</strong> conexión USB,<br />
que se ven<strong>de</strong> por separado), pue<strong>de</strong> realizar copias <strong>de</strong> seguridad <strong>de</strong> datos<br />
guardados en el disco duro a un soporte <strong>de</strong> almacenamiento como, por<br />
ejemplo, un Memory Stick o una SD Memory Card.<br />
ES<br />
Cambio <strong>de</strong>l disco duro<br />
95
Cambio <strong>de</strong>l disco duro<br />
Extracción <strong>de</strong>l disco duro<br />
Precaución<br />
Por motivos <strong>de</strong> seguridad, asegúrese <strong>de</strong> apagar y <strong>de</strong>senchufar el sistema<br />
antes <strong>de</strong> intentar extraer el disco duro.<br />
Es posible que el sistema no se encuentre en una posición estable cuando<br />
esté colocado boca abajo. Procure no lesionarse cuando extraiga el tornillo.<br />
3 Coloque el sistema boca abajo sobre un paño suave y seco y, a<br />
continuación, abra la tapa <strong>de</strong>l tornillo.<br />
Utilice la muesca situada sobre la tapa <strong>de</strong>l tornillo para levantar ligeramente<br />
la tapa. A continuación, gire la tapa tal como se muestra en la ilustración. Si<br />
le resulta difícil levantar la tapa, inserte una herramienta como, por ejemplo,<br />
un <strong>de</strong>stornillador <strong>de</strong> cabeza plana en la ranura y levántela con suavidad.<br />
<br />
<br />
1 Pulse el botón <strong>de</strong> encendido para apagar el sistema.<br />
El indicador <strong>de</strong> encendido cambiará a rojo fijo y el sistema entrará en el<br />
modo <strong>de</strong> espera.<br />
2 Desenchufe el cable <strong>de</strong> alimentación AC y luego <strong>de</strong>sconecte<br />
los <strong>de</strong>más cables <strong>de</strong>l sistema.<br />
Por motivos <strong>de</strong> seguridad, retire el enchufe <strong>de</strong>l cable <strong>de</strong> alimentación <strong>de</strong> la<br />
toma <strong>de</strong> corriente eléctrica y luego <strong>de</strong>sconecte los <strong>de</strong>más cables.<br />
Tapa <strong>de</strong>l tornillo<br />
96
4 Extraiga el tornillo que fija el disco duro y, a continuación, retire<br />
la tapa <strong>de</strong> la bahía <strong>de</strong>l disco duro.<br />
Retire el tornillo azul con un <strong>de</strong>stornillador <strong>de</strong> estrella apropiado.<br />
Deslice la tapa <strong>de</strong> la bahía <strong>de</strong>l disco duro hacia la izquierda y, a<br />
continuación, extráigala.<br />
<br />
<br />
Tapa <strong>de</strong> la bahía <strong>de</strong>l disco<br />
duro<br />
5 Extraiga el disco duro.<br />
Tire <strong>de</strong>l asa hacia arriba y, a continuación, extraiga el disco duro <strong>de</strong>l sistema.<br />
Avisos<br />
El disco duro es una parte sensible <strong>de</strong>l equipo, y <strong>de</strong>be manipularse con<br />
cuidado en todo momento. Para ayudar a evitar que el software o los datos<br />
se pierdan o resulten dañados, o que se dañe el disco duro, siga<br />
atentamente las precauciones que aparecen a continuación:<br />
No <strong>de</strong>je caer el sistema ni el disco duro, ni los someta a vibraciones o<br />
golpes violentos.<br />
No permita que penetren líquidos ni partículas pequeñas en el sistema ni<br />
en el disco duro.<br />
No toque los conectores ni inserte objetos extraños en ellos.<br />
No coloque el sistema ni el disco duro cerca <strong>de</strong> campos magnéticos como<br />
los producidos por imanes o altavoces. No coloque cerca <strong>de</strong>l disco duro<br />
ningún dispositivo que pueda ser sensible a fuerzas magnéticas (como un<br />
reloj <strong>de</strong> pulsera o una tarjeta magnética).<br />
No coloque objetos pesados sobre el disco duro.<br />
Al manipular el disco duro, sosténgalo por los bor<strong>de</strong>s o por el armazón<br />
metálico.<br />
El disco duro es sensible a la electricidad estática. Asegúrese <strong>de</strong> usar los<br />
métodos <strong>de</strong> manipulación a<strong>de</strong>cuados al instalar el disco duro.<br />
Guár<strong>de</strong>lo en una ubicación fresca y seca.<br />
ES<br />
Cambio <strong>de</strong>l disco duro<br />
Sustitución <strong>de</strong>l disco duro<br />
Precaución<br />
Por motivos <strong>de</strong> seguridad, asegúrese <strong>de</strong> apagar y <strong>de</strong>senchufar el sistema<br />
antes <strong>de</strong> intentar reemplazar el disco duro.<br />
Al volver a colocar el disco duro, siga el procedimiento que aparece a<br />
continuación para extraer el bastidor metálico.<br />
97
Cambio <strong>de</strong>l disco duro<br />
1 Utilice un <strong>de</strong>stornillador <strong>de</strong> estrella para extraer los tornillos<br />
(4 anclajes).<br />
4 Coloque el disco duro <strong>de</strong> repuesto en el armazón metálico <strong>de</strong>l<br />
disco duro <strong>de</strong>l sistema PS3 y luego fíjelo utilizando los<br />
tornillos (4 anclajes).<br />
No apriete los tornillos en exceso.<br />
5 Instale el disco duro en el sistema.<br />
Consulte las instrucciones <strong>de</strong> la sección "Extracción <strong>de</strong>l disco duro"<br />
( página 96) y siga los pasos <strong>de</strong>l procedimiento <strong>de</strong> instalación en or<strong>de</strong>n<br />
inverso. Asegúrese <strong>de</strong> insertar completamente el disco duro en la bahía <strong>de</strong>l<br />
disco duro.<br />
2 Sujete el disco duro por los bor<strong>de</strong>s y, a continuación, déle la<br />
vuelta.<br />
6 Reinstale el software <strong>de</strong>l sistema.<br />
Después <strong>de</strong> sustituir el disco duro, <strong>de</strong>be reinstalar el software <strong>de</strong>l sistema<br />
( página 99).<br />
Discos duros <strong>de</strong> repuesto<br />
Pue<strong>de</strong> usar discos duros <strong>de</strong> los siguientes tipos con el sistema PS3.<br />
Tamaño 2,5 pulgadas (tipo interno)* 1<br />
Sujételo firmemente por la<br />
abertura <strong>de</strong> uno <strong>de</strong> los lados<br />
para evitar que le resbale.<br />
Formato <strong>de</strong> interfaz Serial ATA* 2<br />
* 1 No se garantiza un funcionamiento correcto.<br />
* 2 ATA paralelo no compatible.<br />
3 Extraiga el disco duro <strong>de</strong>l armazón metálico.<br />
<br />
<br />
98
Reinstalación <strong>de</strong>l software <strong>de</strong>l sistema<br />
Si el software <strong>de</strong>l sistema no se inicia al encen<strong>de</strong>r el sistema (como,<br />
por ejemplo, cuando ha cambiado el disco duro), aparecerá una<br />
pantalla en el sistema como la que se muestra abajo. En tal caso, <strong>de</strong>be<br />
reinstalar el software <strong>de</strong>l sistema usando los datos <strong>de</strong> actualización<br />
<strong>de</strong>scargados.<br />
Notas<br />
Utilice la versión más reciente <strong>de</strong> los datos <strong>de</strong> actualización que se encuentre<br />
disponible en el sitio web. No pue<strong>de</strong> reinstalar el software <strong>de</strong>l sistema mediante<br />
una versión anterior a la versión <strong>de</strong>l software <strong>de</strong>l sistema utilizado<br />
anteriormente. Si los datos <strong>de</strong> actualización a<strong>de</strong>cuados no están disponibles<br />
en el sitio Web, póngase en contacto con el servicio <strong>de</strong> atención al cliente<br />
SCEA ( contraportada).<br />
Si dispone <strong>de</strong> un disco <strong>de</strong> juego u otro disco que contenga datos <strong>de</strong><br />
actualización, es posible que pue<strong>de</strong> utilizar el disco para reinstalar el software<br />
<strong>de</strong>l sistema. Si inserta el disco en el sistema PS3 y sigue las instrucciones en<br />
pantalla, pue<strong>de</strong> comprobar si es posible utilizar los datos <strong>de</strong> actualización.<br />
Para obtener <strong>de</strong>talles sobre la instalación <strong>de</strong>l software <strong>de</strong>l sistema, consulte la<br />
sección "Actualización <strong>de</strong>l uso <strong>de</strong> una PC" en nuestro sitio Web:<br />
http://www.us.playstation.com/ps3.<br />
El software <strong>de</strong>l sistema que se incorpora con este producto está sujeto a una<br />
licencia limitada <strong>de</strong> Sony Computer Entertainment Inc. Consulte<br />
http://www.scei.co.jp/ps3-eula para obtener más información.<br />
ES<br />
Cambio <strong>de</strong>l disco duro<br />
Descarga <strong>de</strong> los datos <strong>de</strong> actualización <strong>de</strong>l software<br />
<strong>de</strong>l sistema<br />
Utilizando un PC con acceso a Internet, <strong>de</strong>scargue los datos <strong>de</strong><br />
actualización <strong>de</strong>l software <strong>de</strong>l sistema <strong>de</strong>s<strong>de</strong> el siguiente sitio web.<br />
Siga las instrucciones disponibles en el sitio web para copiar los datos<br />
<strong>de</strong> actualización <strong>de</strong>l PC al soporte <strong>de</strong> almacenamiento.<br />
http://www.us.playstation.com/PS3<br />
Instalación <strong>de</strong>l software <strong>de</strong>l sistema<br />
Encienda el sistema PS3 y, a continuación, inserte el soporte <strong>de</strong><br />
almacenamiento que contiene los datos <strong>de</strong> actualización. Siga las<br />
instrucciones que aparecen en pantalla para reinstalar el software <strong>de</strong>l<br />
sistema.<br />
Avisos<br />
No apague el sistema o extraiga el dispositivo <strong>de</strong> almacenamiento durante<br />
la instalación. Si la instalación se cancela antes <strong>de</strong> completarse, el software<br />
<strong>de</strong>l sistema pue<strong>de</strong> quedar dañado, y el sistema pue<strong>de</strong> requerir servicio <strong>de</strong><br />
asistencia técnica o ser reemplazado.<br />
Durante la instalación, el botón <strong>de</strong> encendido <strong>de</strong>l sistema y el botón PS <strong>de</strong>l<br />
mando inalámbrico no están activos.<br />
99
Cambio <strong>de</strong>l disco duro<br />
Restauración <strong>de</strong> datos <strong>de</strong> los que se ha realizado una<br />
copia <strong>de</strong> seguridad<br />
Pue<strong>de</strong> restaurar los datos <strong>de</strong> los que se ha realizado copia <strong>de</strong><br />
seguridad mediante uno <strong>de</strong> los siguientes métodos.<br />
Restaurar datos con una sola operación<br />
Pue<strong>de</strong> restaurar datos <strong>de</strong> los que haya hecho una copia <strong>de</strong> seguridad<br />
con una sola operación, seleccione (Ajustes) (Ajustes <strong>de</strong>l<br />
sistema) [Herramienta <strong>de</strong> copia <strong>de</strong> seguridad]. Conecte el<br />
dispositivo <strong>de</strong> almacenamiento masivo USB que contiene los datos <strong>de</strong><br />
los que se ha realizado una copia <strong>de</strong> seguridad y, a continuación, siga<br />
las instrucciones en pantalla para realizar esta operación.<br />
Notas<br />
Es posible que no pueda utilizar la herramienta <strong>de</strong> copia <strong>de</strong> seguridad para<br />
restaurar ciertos datos.<br />
Para obtener más información acerca <strong>de</strong> la herramienta <strong>de</strong> copia <strong>de</strong><br />
seguridad, consulte la guía online <strong>de</strong>l usuario<br />
(http://manuals.playstation.net/document/).<br />
Restauración <strong>de</strong> datos seleccionados<br />
Pue<strong>de</strong> restaurar archivos manualmente mediante el menú <strong>de</strong> opciones<br />
<strong>de</strong>l archivo. Conecte el dispositivo <strong>de</strong> almacenamiento masivo USB<br />
que contiene el archivo, seleccione el archivo que <strong>de</strong>sea restaurar y, a<br />
continuación, pulse el botón . Seleccione [Copiar] o [Mover] en el<br />
menú <strong>de</strong> opciones.<br />
100<br />
Nota<br />
Es posible que no pueda copiar o mover archivos que contengan datos<br />
protegidos por <strong>de</strong>rechos <strong>de</strong> autor.
Restauración <strong>de</strong>l sistema PS3<br />
Avisos<br />
Si restaura los ajustes pre<strong>de</strong>terminados o restaura el sistema PS3, no<br />
podrá <strong>de</strong>shacer los cambios realizados. En caso <strong>de</strong> producirse daños en<br />
los datos o la pérdida <strong>de</strong> estos, será responsabilidad exclusiva <strong>de</strong>l usuario.<br />
No apague el sistema PS3 durante esta operación. Si se cancela la<br />
operación antes <strong>de</strong> completarse, es posible que el software <strong>de</strong>l sistema se<br />
dañe y que éste necesite ser reparado o sustituido.<br />
Durante esta operación, el botón <strong>de</strong> encendido <strong>de</strong> la parte frontal <strong>de</strong>l<br />
sistema y el botón PS <strong>de</strong>l mando inalámbrico están inactivos.<br />
Esta función no permite utilizar una versión anterior <strong>de</strong>l software <strong>de</strong>l<br />
sistema.<br />
Restauración <strong>de</strong> los ajustes pre<strong>de</strong>terminados<br />
Para restablecer los ajustes actuales <strong>de</strong> (Ajustes) a sus ajustes<br />
pre<strong>de</strong>terminados, seleccione (Ajustes) (Ajustes <strong>de</strong>l sistema)<br />
[Restablecer ajustes pre<strong>de</strong>terminados].<br />
Una vez completada la operación y <strong>de</strong>spués <strong>de</strong> reiniciar el sistema,<br />
aparecerá la pantalla <strong>de</strong> configuración inicial. Siga las instrucciones en<br />
pantalla para efectuar la configuración inicial <strong>de</strong>l software <strong>de</strong>l sistema<br />
( página 73).<br />
Eliminación <strong>de</strong> datos <strong>de</strong> la unidad <strong>de</strong> disco duro<br />
Para borrar todos los datos <strong>de</strong>l disco duro <strong>de</strong>l sistema y restablecer los<br />
ajustes actuales <strong>de</strong> (Ajustes) a sus ajustes pre<strong>de</strong>terminados,<br />
seleccione (Ajustes) (Ajustes <strong>de</strong>l sistema) [Restablecer<br />
sistema PS3].<br />
Para reducir el tiempo necesario para realizar esta operación,<br />
seleccione [Formato rápido] en la lista <strong>de</strong> opciones <strong>de</strong> formateo <strong>de</strong>l<br />
disco duro. Es recomendable que seleccione [Formato completo]<br />
cuando formatee un disco duro que contenga datos importantes o<br />
confi<strong>de</strong>nciales.<br />
Una vez completada la operación y <strong>de</strong>spués <strong>de</strong> reiniciar el sistema,<br />
aparecerá la pantalla <strong>de</strong> configuración inicial. Siga las instrucciones en<br />
pantalla para efectuar la configuración inicial <strong>de</strong>l software <strong>de</strong>l sistema<br />
( página 73).<br />
Antes <strong>de</strong> <strong>de</strong>shacerse <strong>de</strong>l sistema PS3 o <strong>de</strong><br />
transferirlo<br />
Antes <strong>de</strong> <strong>de</strong>shacerse o transferir el sistema, se recomienda que la<br />
información personal u otros datos similares se eliminen. Para eliminar<br />
datos, vaya a (Ajustes) (Ajustes <strong>de</strong>l sistema) [Restablecer<br />
sistema PS3].<br />
Es recomendable que seleccione [Formato completo] cuando<br />
aparezca la pantalla <strong>de</strong> selección <strong>de</strong>l método <strong>de</strong> formateo <strong>de</strong>l disco<br />
duro durante la restauración <strong>de</strong>l sistema. Aunque es posible reducir el<br />
tiempo <strong>de</strong>l formateo mediante la función [Formato rápido], es posible<br />
que pueda restaurar los datos eliminados en <strong>de</strong>terminados casos si<br />
utiliza una herramienta especial.<br />
ES<br />
Restauración <strong>de</strong>l sistema PS3<br />
101
Antes <strong>de</strong> solicitar asistencia técnica<br />
Consulte esta sección si tiene problemas a la hora <strong>de</strong> utilizar el sistema<br />
PS3. Si algún problema no se soluciona póngase en contacto con el<br />
servicio <strong>de</strong> atención al cliente SCEA ( contraportada) para obtener<br />
ayuda.<br />
Alimentación<br />
El sistema no se encien<strong>de</strong>.<br />
Compruebe que el cable <strong>de</strong> alimentación AC está conectado<br />
firmemente en el sistema y en la toma <strong>de</strong> corriente eléctrica.<br />
Imagen<br />
No aparece ninguna imagen en la pantalla <strong>de</strong>l televisor.<br />
Compruebe que el cable se ha conectado firmemente. Intente<br />
<strong>de</strong>sconectar el cable <strong>de</strong>l sistema PS3 o <strong>de</strong>l televisor y volver a<br />
conectarlo.<br />
Es posible que exista un problema con el cable AV que está<br />
utilizando. Intente usar otro cable que sea compatible con el<br />
sistema PS3.<br />
Configure los ajustes <strong>de</strong> entrada <strong>de</strong> ví<strong>de</strong>o en el televisor para<br />
coincidir con el conector <strong>de</strong> entrada utilizado para conectarlo al<br />
sistema PS3.<br />
Si los ajustes <strong>de</strong> salida <strong>de</strong> ví<strong>de</strong>o <strong>de</strong>l sistema no coinci<strong>de</strong>n con los<br />
<strong>de</strong>l cable o los <strong>de</strong>l televisor que se están utilizando, es posible que<br />
no se visualice la imagen. Si la pantalla se queda en blanco,<br />
apague el sistema. A continuación, solo con el sistema y el televisor<br />
conectados, pulse el botón <strong>de</strong> encendido <strong>de</strong>l sistema durante más<br />
<strong>de</strong> 5 segundos para volver a encen<strong>de</strong>r el sistema. Los ajustes <strong>de</strong><br />
salida <strong>de</strong> ví<strong>de</strong>o se restablecerán automáticamente a la resolución<br />
<strong>de</strong> <strong>de</strong>finición estándar (SD).<br />
La imagen aparece distorsionada.<br />
Compruebe que el cable esté conectado firmemente. Intente<br />
<strong>de</strong>sconectar el cable <strong>de</strong>l sistema PS3 o <strong>de</strong>l televisor y vuelva a<br />
conectarlo.<br />
El disco Blu-ray Disc (BD) o DVD no pue<strong>de</strong> reproducirse, o bien la<br />
imagen aparece distorsionada.<br />
Al visualizar el contenido <strong>de</strong> DVD o el software <strong>de</strong> formato<br />
<strong>PlayStation</strong>®3 con resolución <strong>de</strong> <strong>de</strong>finición estándar (SD), solo se<br />
podrán reproducir los discos grabados en el estándar NTSC.<br />
Si se conecta el sistema a una vi<strong>de</strong>ograbadora, la codificación <strong>de</strong><br />
la protección contra copia <strong>de</strong> algunos BD y DVD pue<strong>de</strong> provocar la<br />
distorsión <strong>de</strong> las imágenes o que éstas se vuelvan más claras u<br />
oscuras. En tales casos, conecte el sistema directamente al<br />
televisor. Es posible que también observe un efecto similar si utiliza<br />
una unidad combinada <strong>de</strong> televisor y vi<strong>de</strong>ograbadora.<br />
Si el código <strong>de</strong> región <strong>de</strong>l BD o <strong>de</strong>l DVD no coinci<strong>de</strong> con el<br />
ajustado en el sistema, éste no podrá reproducirse. Para obtener<br />
más información, consulte "Códigos <strong>de</strong> región" ( página 110).<br />
Algunos DVD presentan restricciones <strong>de</strong> control paterno<br />
pre<strong>de</strong>terminadas. Introduzca la contraseña <strong>de</strong>finida en (Ajustes<br />
<strong>de</strong> seguridad) para aumentar temporalmente el nivel <strong>de</strong> control<br />
paterno.<br />
Si graba contenido <strong>de</strong> ví<strong>de</strong>o en soportes DVD-R, DVD-RW, DVD+R<br />
o DVD+RW mediante un dispositivo como una grabadora <strong>de</strong> DVD,<br />
<strong>de</strong>be finalizar el soporte antes <strong>de</strong> reproducirlo en el sistema PS3.<br />
Finalice el soporte mediante el dispositivo <strong>de</strong> grabación.<br />
Algunos BD presentan restricciones <strong>de</strong> control paterno<br />
pre<strong>de</strong>terminadas. Introduzca la contraseña establecida en<br />
(Ajustes <strong>de</strong> seguridad) para cambiar el nivel <strong>de</strong> control paterno.<br />
Es posible que el BD esté bloqueado. Introduzca la contraseña<br />
establecida al crear el disco.<br />
102
Consulte también los avisos <strong>de</strong>l apartado "Discos que pue<strong>de</strong>n<br />
reproducirse" ( página 109).<br />
Algunos BD no se pue<strong>de</strong>n reproducir.<br />
Para reproducir software <strong>de</strong> ví<strong>de</strong>o en BD disponible en el mercado,<br />
en ciertos casos es necesario renovar la clave <strong>de</strong> encriptación para<br />
AACS (Sistema <strong>de</strong> Control <strong>de</strong> Acceso Avanzado). La clave <strong>de</strong><br />
encriptación pue<strong>de</strong> renovarse al actualizar el software <strong>de</strong>l sistema.<br />
El tamaño <strong>de</strong> la imagen <strong>de</strong>l ví<strong>de</strong>o y la pantalla <strong>de</strong>l televisor no<br />
coinci<strong>de</strong>n.<br />
Es posible que los ajustes <strong>de</strong>l televisor conectado y los ajustes <strong>de</strong><br />
salida <strong>de</strong> ví<strong>de</strong>o <strong>de</strong>l sistema no coincidan. Compruebe lo siguiente:<br />
Compruebe que los ajustes <strong>de</strong>l sistema en (Ajustes)<br />
(Ajustes <strong>de</strong> pantalla) [Ajustes <strong>de</strong> salida <strong>de</strong> ví<strong>de</strong>o] sean los<br />
correctos.<br />
Compruebe que la configuración <strong>de</strong>l televisor es correcta. Para<br />
obtener más información, consulte las instrucciones suministradas<br />
con el televisor.<br />
El tamaño <strong>de</strong> la pantalla no pue<strong>de</strong> modificarse con <strong>de</strong>terminados<br />
contenidos <strong>de</strong> ví<strong>de</strong>o.<br />
El color <strong>de</strong> la pantalla no parece estar bien.<br />
Si se configura con los ajustes pre<strong>de</strong>terminados, el color <strong>de</strong> fondo<br />
cambiará cuando cambien la hora, el día y el mes.<br />
Audio<br />
No hay sonido.<br />
Compruebe que la función <strong>de</strong> silenciamiento <strong>de</strong>l televisor o <strong>de</strong> los<br />
altavoces esté <strong>de</strong>sactivada. Asimismo, compruebe que el volumen<br />
esté ajustado en un nivel a<strong>de</strong>cuado.<br />
Si se conecta un dispositivo <strong>de</strong> audio, compruebe la configuración<br />
<strong>de</strong>l mismo. Para obtener más información, consulte las<br />
instrucciones suministradas con el dispositivo <strong>de</strong> audio.<br />
Es posible que exista un problema con el cable AV que está<br />
utilizando. Intente usar otro cable que sea compatible con el<br />
sistema PS3.<br />
Algunas aplicaciones <strong>de</strong> software no admiten la salida <strong>de</strong> audio<br />
digital.<br />
Si los ajustes <strong>de</strong> salida <strong>de</strong> audio <strong>de</strong>l sistema no se ajustan al cable<br />
AV o al dispositivo, es posible que el sistema no emita sonido.<br />
Compruebe que los ajustes <strong>de</strong>l sistema en (Ajustes)<br />
(Ajustes <strong>de</strong> sonido) [Ajustes <strong>de</strong> salida <strong>de</strong> audio] sean los<br />
correctos.<br />
Es posible que <strong>de</strong>terminados contenidos que admiten los formatos<br />
Dolby Digital, DTS y otros, no reproduzcan audio <strong>de</strong>s<strong>de</strong> todos los<br />
canales.<br />
Los archivos <strong>de</strong> música no se reproducen.<br />
Es posible que los métodos <strong>de</strong> reproducción estén limitados para<br />
algunos archivos <strong>de</strong> música que se distribuyen a través <strong>de</strong> Internet.<br />
En estos casos, es posible que el contenido no pueda reproducirse<br />
en el sistema PS3.<br />
Red<br />
No se pue<strong>de</strong> establecer la conexión a la red.<br />
Si está utilizando una conexión alámbrica, compruebe que el cable<br />
Ethernet esté correctamente conectado.<br />
Compruebe que la configuración <strong>de</strong> la red sea correcta. Consulte el<br />
manual <strong>de</strong> instrucciones suministrado por el proveedor <strong>de</strong> servicios<br />
<strong>de</strong> Internet o el manual <strong>de</strong> instrucciones <strong>de</strong>l software para realizar<br />
la configuración <strong>de</strong> red correcta.<br />
ES<br />
Antes <strong>de</strong> solicitar asistencia técnica<br />
103
Antes <strong>de</strong> solicitar asistencia técnica<br />
Se muestra el mensaje [Se ha producido un error durante la<br />
comunicación con el servidor. Se ha producido un error <strong>de</strong> DNS.<br />
(80710102)] durante la prueba <strong>de</strong> conexión a Internet.<br />
Si conecta el sistema a un mó<strong>de</strong>m que no posea la función <strong>de</strong><br />
router (mó<strong>de</strong>m puente), es posible que necesite configurar los<br />
ajustes PPPoE. Seleccione (Ajustes) (Ajustes <strong>de</strong> red)<br />
[Ajustes <strong>de</strong> conexión a Internet] [Personalizados] para comenzar<br />
a configurar la conexión a Internet. Siga configurando los ajustes<br />
hasta que aparezca la pantalla <strong>de</strong> ajuste <strong>de</strong> la dirección IP.<br />
Seleccione [PPPoE] y, a continuación, introduzca el nombre <strong>de</strong><br />
usuario y la contraseña que le ha proporcionado su proveedor <strong>de</strong><br />
servicios <strong>de</strong> Internet.<br />
Si conecta el sistema a un router, ajuste primero la configuración<br />
inicial en el router. Una vez haya completado los ajustes <strong>de</strong>l router,<br />
seleccione (Ajustes) (Ajustes <strong>de</strong> red) [Ajustes <strong>de</strong><br />
conexión a Internet] [Fáciles] para intentar realizar los ajustes <strong>de</strong><br />
red <strong>de</strong> nuevo. Si <strong>de</strong>sea obtener más información acerca <strong>de</strong> la<br />
configuración <strong>de</strong>l router, consulte las instrucciones suministradas<br />
con este.<br />
Se muestra el mensaje [Se ha agotado el tiempo <strong>de</strong>l intento <strong>de</strong><br />
obtener una dirección IP.] durante la prueba <strong>de</strong> conexión a Internet.<br />
Si <strong>de</strong>sconecta el cable Ethernet que se utiliza para establecer la<br />
conexión con un dispositivo, como un PC, y lo vuelve a conectar al<br />
sistema, <strong>de</strong>be reiniciar tanto el sistema como el mó<strong>de</strong>m. Después<br />
<strong>de</strong> reiniciar ambos dispositivos, seleccione (Ajustes)<br />
(Ajustes <strong>de</strong> red) [Ajustes <strong>de</strong> conexión a Internet] [Fáciles]<br />
para actualizar los ajustes <strong>de</strong> red. Si <strong>de</strong>sea obtener más<br />
información acerca <strong>de</strong>l reinicio <strong>de</strong>l mó<strong>de</strong>m, consulte las<br />
instrucciones suministradas con este.<br />
Si está utilizando una conexión inalámbrica, es posible que la clave<br />
WEP sea incorrecta. Compruebe que dispone <strong>de</strong> la clave WEP<br />
correcta y vuelva a introducirla.<br />
Se muestra el mensaje [El nombre <strong>de</strong> usuario o la contraseña <strong>de</strong><br />
PPPoE no son correctos.] durante la prueba <strong>de</strong> conexión a Internet.<br />
Introduzca el nombre <strong>de</strong> usuario y la contraseña <strong>de</strong> PPPoE<br />
correctos. Si no conoce el nombre <strong>de</strong> usuario y la contraseña,<br />
póngase en contacto con su proveedor <strong>de</strong> servicios <strong>de</strong> Internet.<br />
La página web no se visualiza correctamente.<br />
Pue<strong>de</strong> que en algunas páginas web cierto contenido, como<br />
contenido que requiere un software específico, no se reproduzca<br />
correctamente.<br />
Discos y dispositivos USB<br />
El sistema no reconoce el disco.<br />
Extráigalo y vuelva a insertarlo.<br />
Si el disco tiene una etiqueta, insértelo con ésta orientada hacia<br />
arriba.<br />
Compruebe si el disco está rayado o sucio. Si está sucio, límpielo<br />
cuidadosamente con un paño suave.<br />
Consulte también los avisos <strong>de</strong>l apartado "Discos que pue<strong>de</strong>n<br />
reproducirse" ( página 109).<br />
El disco no pue<strong>de</strong> extraerse.<br />
Pulse el botón extraer durante 10 segundos o más para expulsar el<br />
disco. Después <strong>de</strong> sacar un disco y antes <strong>de</strong> reinsertarlo en el<br />
sistema, apague el sistema y luego enciéndalo nuevamente para<br />
volver a usarlo.<br />
El sistema no reconoce el dispositivo USB o el dispositivo USB no<br />
funciona correctamente.<br />
Compruebe que el dispositivo se ha insertado correctamente.<br />
104
Es posible que el dispositivo conectado no se pueda utilizar con el<br />
sistema.<br />
Intente utilizar un conector USB distinto en el sistema PS3. Es<br />
posible que el dispositivo no sea reconocido en función <strong>de</strong> la<br />
combinación <strong>de</strong> conectores USB.<br />
En algunos casos, es posible que el sistema no reconozca el<br />
dispositivo si se utiliza un concentrador USB externo o se conectan<br />
más dispositivos <strong>de</strong> los asignados. Intente <strong>de</strong>sconectar los<br />
dispositivos que no se utilicen.<br />
Al conectar un dispositivo USB aparece el mensaje [Se ha<br />
<strong>de</strong>tectado la conexión <strong>de</strong> un dispositivo USB <strong>de</strong>sconocido.]<br />
Es posible que el dispositivo conectado no sea compatible con el<br />
sistema o la aplicación <strong>de</strong> software.<br />
Es posible que el dispositivo sólo sea compatible con software<br />
específico. Utilice software compatible con el dispositivo.<br />
Pue<strong>de</strong> que haya <strong>de</strong>masiados concentradores USB conectados.<br />
Intente extraer un concentrador USB.<br />
Mando inalámbrico<br />
El mando inalámbrico no funciona.<br />
Al utilizar el mando inalámbrico, <strong>de</strong>be emparejarlo con el sistema y<br />
asignarle un número <strong>de</strong> mando. Con el sistema encendido (el<br />
indicador <strong>de</strong> encendido se encuentra en ver<strong>de</strong> intenso), conecte el<br />
sistema y el mando con el cable USB y, a continuación, pulse el<br />
botón PS en el mando.<br />
Es posible que el número <strong>de</strong>l mando se haya eliminado. Pulse el<br />
botón PS en el mando para reasignar el número.<br />
Con algunos tipos <strong>de</strong> software, es posible que necesite utilizar un<br />
número <strong>de</strong> mando especificado. Consulte el manual <strong>de</strong>l software<br />
que utilice.<br />
Compruebe el nivel <strong>de</strong> carga <strong>de</strong> la batería <strong>de</strong>l mando inalámbrico.<br />
Si se utiliza el mando en modo inalámbrico, no funcionará si la<br />
batería está <strong>de</strong>scargada. Conecte el mando al sistema mediante el<br />
cable USB para cargar la batería.<br />
Si no pue<strong>de</strong> utilizar el mando incluso <strong>de</strong>spués <strong>de</strong> comprobar los<br />
elementos mencionados anteriormente, pulse el botón <strong>de</strong> reinicio<br />
situado en la parte posterior <strong>de</strong>l mando con un objeto puntiagudo<br />
como, por ejemplo, un bolígrafo para intentar reiniciar el mando<br />
inalámbrico.<br />
Botón <strong>de</strong><br />
reinicio<br />
El mando inalámbrico funciona <strong>de</strong> manera anormal.<br />
Pulse el botón <strong>de</strong> reinicio situado en la parte posterior <strong>de</strong>l mando<br />
con un objeto puntiagudo como, por ejemplo, un bolígrafo para<br />
intentar reiniciar el mando inalámbrico.<br />
El mando inalámbrico no vibra<br />
Compruebe que está utilizando un mando inalámbrico<br />
DUALSHOCK®3. El mando inalámbrico SIXAXIS no vibra.<br />
Intente seleccionar (Ajustes) (Ajustes <strong>de</strong> accesorios)<br />
[Función <strong>de</strong> vibración <strong>de</strong>l mando] y, a continuación, intente<br />
ajustar [Función <strong>de</strong> vibración] en [Sí].<br />
El software pue<strong>de</strong> no ser compatible con la función <strong>de</strong> vibración.<br />
Consulte el manual <strong>de</strong>l software. Para el software <strong>de</strong>scargado<br />
<strong>de</strong>s<strong>de</strong> (<strong>PlayStation</strong>®Store), consulte la información <strong>de</strong> aviso <strong>de</strong><br />
compatibilidad que se incluye en la <strong>de</strong>scripción <strong>de</strong>l software online.<br />
ES<br />
Antes <strong>de</strong> solicitar asistencia técnica<br />
105
106<br />
Antes <strong>de</strong> solicitar asistencia técnica<br />
La respuesta a la operación <strong>de</strong> los botones es lenta.<br />
La velocidad <strong>de</strong> respuesta pue<strong>de</strong> ser lenta en una pantalla LCD o<br />
en la pantalla <strong>de</strong> un or<strong>de</strong>nador. No se trata <strong>de</strong> un fallo <strong>de</strong><br />
funcionamiento.<br />
La batería no se carga o no se recarga completamente.<br />
La batería solo se pue<strong>de</strong> cargar cuando el sistema está encendido<br />
(indicador <strong>de</strong> alimentación iluminado en ver<strong>de</strong> intenso).<br />
Consulte "Batería <strong>de</strong>l mando inalámbrico" ( página 111).<br />
La carga <strong>de</strong> la batería dura poco.<br />
Es posible que la batería esté <strong>de</strong>sgastada. La duración <strong>de</strong> la<br />
batería disminuirá gradualmente con el uso y el paso <strong>de</strong>l tiempo.<br />
Consulte "Batería <strong>de</strong>l mando inalámbrico" ( página 111).<br />
La carga <strong>de</strong> la batería <strong>de</strong>l mando inalámbrico se agota con el<br />
tiempo aunque éste no se utilice.<br />
La carga <strong>de</strong> la batería <strong>de</strong>l mando se agota lentamente incluso si<br />
éste no se utiliza. Es recomendable que cargue la batería <strong>de</strong>l<br />
mando con frecuencia.<br />
Otros problemas<br />
El sistema emite ruidos.<br />
Cuando utilice el sistema en una ubicación en la que pueda<br />
generarse calor, como en un armario cerrado <strong>de</strong>stinado a equipos<br />
<strong>de</strong> audio y ví<strong>de</strong>o, sobre una alfombra o un cojín, o cerca <strong>de</strong> una<br />
pared (a una distancia máxima <strong>de</strong> 10 cm <strong>de</strong> la pared), el ventilador<br />
interno girará a gran velocidad para reducir la temperatura <strong>de</strong>l<br />
sistema, por lo que podría generarse más ruido. Trasla<strong>de</strong> el sistema<br />
a una ubicación con buena ventilación.<br />
En función <strong>de</strong> la utilización <strong>de</strong> un disco como, por ejemplo, la copia<br />
<strong>de</strong> un CD <strong>de</strong> audio al disco duro o el inicio <strong>de</strong> software <strong>de</strong>s<strong>de</strong> un<br />
disco, es posible que el ruido <strong>de</strong>l disco sea más alto <strong>de</strong> lo normal.<br />
A<strong>de</strong>más, es posible que algunos tipos <strong>de</strong> software generen más<br />
ruido en los discos que otros.<br />
Ha olvidado su contraseña <strong>de</strong> ajustes <strong>de</strong> seguridad.<br />
Si restaura el sistema mediante (Ajustes) (Ajustes <strong>de</strong>l<br />
sistema) [Restablecer ajustes pre<strong>de</strong>terminados], la contraseña<br />
volverá a ser "0000". Sin embargo, tenga en cuenta que los ajustes<br />
distintos <strong>de</strong> los correspondientes a la contraseña también se<br />
restablecerán. Una vez restablecidos los ajustes, no podrán<br />
recuperarse.<br />
El sistema se calienta.<br />
El sistema pue<strong>de</strong> calentarse al utilizarlo o permanecer encendido.<br />
No se trata <strong>de</strong> un fallo <strong>de</strong> funcionamiento.<br />
La pantalla se congela durante el juego.<br />
Compruebe que el disco no esté rayado o sucio. Si está sucio,<br />
límpielo con cuidado con un paño suave.<br />
Si tiene datos <strong>de</strong> juego para software <strong>de</strong> formato <strong>PlayStation</strong>®3<br />
instalado, intente eliminar los datos <strong>de</strong> juego y volver a instalar el<br />
software. Seleccione (Juego) (Herramienta <strong>de</strong> datos <strong>de</strong><br />
juego), pulse el botón y elimine los datos <strong>de</strong> juego mediante el<br />
menú <strong>de</strong> opciones. A continuación, vuelva a instalar el software <strong>de</strong><br />
formato <strong>PlayStation</strong>®3. Tenga cuidado <strong>de</strong> no eliminar los datos<br />
guardados <strong>de</strong>l juego.<br />
La pantalla se ha bloqueado. El sistema no funciona.<br />
Desconecte todos los accesorios como dispositivos USB <strong>de</strong>l<br />
sistema y, a continuación, reinicie el sistema. Si pulsa el botón <strong>de</strong><br />
encendido durante 15 segundos o más, el sistema se apagará<br />
(pasa a modo <strong>de</strong> espera). Tras apagarlo, vuelva a encen<strong>de</strong>r el<br />
sistema.
El indicador <strong>de</strong> encendido parpa<strong>de</strong>a en rojo y ver<strong>de</strong><br />
alternativamente.<br />
Es posible que la temperatura <strong>de</strong>l interior <strong>de</strong>l sistema se haya<br />
calentado <strong>de</strong>masiado. Comúnmente esto se <strong>de</strong>be al entorno <strong>de</strong><br />
operación. Compruebe si el sistema se está usando en una<br />
ubicación caliente. Asegúrese <strong>de</strong> que las rejillas <strong>de</strong> ventilación no<br />
estén bloqueadas y que el flujo <strong>de</strong> aire alre<strong>de</strong>dor <strong>de</strong>l sistema sea el<br />
a<strong>de</strong>cuado. Si el sistema sigue usándose en las condiciones<br />
anteriores <strong>de</strong>jará <strong>de</strong> funcionar. Apague el sistema y no lo use hasta<br />
que se enfríe. Cuando el sistema se haya enfriado, vuelva a<br />
encen<strong>de</strong>rlo.<br />
El indicador <strong>de</strong> encendido parpa<strong>de</strong>a en rojo y el sistema no<br />
funciona.<br />
Es posible que la temperatura <strong>de</strong>l interior <strong>de</strong>l sistema sea<br />
<strong>de</strong>masiado elevada. Compruebe si el sistema se está usando en<br />
una ubicación con temperaturas elevadas o si las rejillas <strong>de</strong><br />
ventilación están bloqueadas. Pulse el botón <strong>de</strong> encendido para<br />
<strong>de</strong>tener el parpa<strong>de</strong>o y no utilice el sistema hasta que se enfríe.<br />
Cuando se haya enfriado, vuelva a encen<strong>de</strong>rlo.<br />
ES<br />
Antes <strong>de</strong> solicitar asistencia técnica<br />
El sistema no reconoce el contenido.<br />
Es posible que el formato <strong>de</strong>l contenido no sea compatible con el<br />
sistema. El sistema no reconoce los tipos <strong>de</strong> contenido no<br />
compatibles. Para obtener información acerca <strong>de</strong> los formatos<br />
compatibles, consulte la guía online <strong>de</strong>l usuario<br />
(http://manuals.playstation.net/document/).<br />
107
Especificaciones<br />
El diseño y las especificaciones están sujetos a modificaciones sin previo aviso.<br />
La información sobre la funcionalidad <strong>de</strong>l sistema y las imágenes publicadas en<br />
este documento pue<strong>de</strong>n variar <strong>de</strong> lo que aparece en su sistema PS3, en<br />
función <strong>de</strong> la versión <strong>de</strong>l software <strong>de</strong>l sistema que utilice.<br />
Sistema <strong>PlayStation</strong>®3<br />
CPU<br />
GPU<br />
Salida <strong>de</strong> audio<br />
Memoria<br />
Disco duro<br />
Entradas/<br />
salidas* 3<br />
Re<strong>de</strong>s<br />
Mando<br />
Salida <strong>de</strong> AV<br />
Unidad <strong>de</strong> BD/<br />
DVD/CD<br />
(sólo lectura)<br />
Cell Broadband Engine<br />
RSX<br />
LPCM 7.1ch, Dolby Digital,<br />
Dolby Digital Plus, Dolby TrueHD,<br />
DTS, DTS-HD, AAC<br />
RAM principal XDR <strong>de</strong> 256 MB,<br />
256 MB GDDR3 VRAM<br />
120 GB*<br />
2,5" Serial ATA<br />
1 * 2 (CECH-2001A)<br />
250 GB* 1 * 2 (CECH-2001B)<br />
USB <strong>de</strong> alta velocidad<br />
2<br />
(USB 2.0)<br />
Ethernet (10BASE-T, 100BASE-TX,<br />
1000BASE-T) × 1<br />
IEEE 802.11 b/g<br />
Bluetooth® 2.0 (EDR)<br />
Mando inalámbrico (Bluetooth®)<br />
Resolución<br />
1080p, 1080i, 720p, 480p, 480i<br />
Conector HDMI OUT* 4 1<br />
Conector AV MULTI<br />
1<br />
OUT<br />
Conector DIGITAL OUT<br />
1<br />
(OPTICAL)<br />
Velocidad <strong>de</strong> lectura<br />
máxima<br />
BD × 2 (BD-ROM)<br />
DVD × 8 (DVD-ROM)<br />
CD × 24 (CD-ROM)<br />
Láser<br />
Alimentación<br />
Consumo <strong>de</strong> energía<br />
Dimensiones externas<br />
(sin incluir la pieza más saliente)<br />
Peso<br />
Temperatura <strong>de</strong> funcionamiento<br />
Tipo: Semiconductor, continuo<br />
BD Longitud <strong>de</strong> onda 400 - 410 nm<br />
Alimentación Máx. 17,5 mW<br />
DVD Longitud <strong>de</strong> onda 655 - 664 nm<br />
Alimentación Máx. 2,6 mW<br />
CD Longitud <strong>de</strong> onda 770 - 800 nm<br />
Alimentación Máx. 4,0 mW<br />
120 V AC, 60 Hz<br />
Aprox. 250 W<br />
Aprox. 290 × 65 × 290 mm<br />
(11,5 × 2,6 × 11,5 pulgadas)<br />
(anchura × altura × longitud)<br />
Aprox. 3,2 kg (7,1 lb)<br />
Entre 5 ºC y 35 ºC (41°F - 95°F)<br />
* 1 Capacidad <strong>de</strong>l disco duro calculada mediante matemáticas <strong>de</strong> base 10 (1GB<br />
= 1.000.000.000 bytes). El software <strong>de</strong>l sistema <strong>de</strong> este sistema PS3 calcula<br />
la capacidad mediante matemáticas binarias (1GB = 1.073.741.824 bytes) lo<br />
que dará como resultado una capacidad y espacio libre inferiores. La<br />
diferencia entre los valores mostrados no supone ninguna diferencia en el<br />
número real <strong>de</strong> bytes.<br />
* 2 Una parte <strong>de</strong> la capacidad <strong>de</strong>l disco duro está reservada para la<br />
administración, mantenimiento u opciones adicionales <strong>de</strong>l sistema. Esto puedo<br />
ocurrir al instalar software <strong>de</strong>l sistema u otro software. Como resultado, la<br />
disponibilidad <strong>de</strong> capacidad <strong>de</strong>l disco duro pue<strong>de</strong> variar <strong>de</strong>pendiendo <strong>de</strong>l<br />
sistema, versión <strong>de</strong>l software <strong>de</strong>l sistema u opciones disponibles, y no se<br />
encuentra disponible para su utilización.<br />
* 3 No está garantizado el funcionamiento <strong>de</strong> todos los dispositivos conectados.<br />
* 4 Los ajustes "Deep Color", "x.v.Color (xvYCC)" y "formato <strong>de</strong> audio HD sin<br />
pérdidas" <strong>de</strong>finidos por HDMI versión 1.3a son compatibles.<br />
108
Mando inalámbrico DUALSHOCK®3<br />
Tipo <strong>de</strong> batería<br />
Tensión<br />
Capacidad <strong>de</strong> la batería<br />
Peso<br />
Cable AV y cable USB suministrados<br />
Cable AV Fabricante: SONY<br />
Batería integrada recargable <strong>de</strong> iones <strong>de</strong> litio<br />
Número <strong>de</strong> pieza: 1-834-231-11<br />
Cable USB Fabricante: SONY<br />
BRAVIA Sync<br />
Número <strong>de</strong> pieza: 1-833-625-12<br />
3,7 V <strong>de</strong> cc<br />
610 mAh<br />
Aprox. 180 g (6,4 oz.)<br />
"BRAVIA Sync" es una función <strong>de</strong> producto Sony que permite utilizar los<br />
mandos a distancia <strong>de</strong> las televisiones BRAVIA (productos Sony Corporation)<br />
con varios aparatos conectados entre ellos, a través <strong>de</strong> cables HDMI. BRAVIA<br />
Sync utiliza las señales <strong>de</strong> control transferidas a través <strong>de</strong> las conexiones HDMI.<br />
Si quiere activar la función BRAVIA Sync, vaya a (Ajustes) (Ajustes<br />
<strong>de</strong>l sistema) [Control por HDMI], y seleccione [Sí]. Si quiere obtener más<br />
información consulte la guía online <strong>de</strong>l usuario<br />
(http://manuals.playstation.net/document/) y las instrucciones proporcionadas<br />
con los productos BRAVIA.<br />
Nota<br />
Esta función solo se pue<strong>de</strong> utilizar en aparatos compatibles con BRAVIA Sync.<br />
No se garantiza la compatibilidad con todos los aparatos que cumplan con las<br />
especificaciones <strong>de</strong> HDMI CEC.<br />
Discos que pue<strong>de</strong>n reproducirse<br />
Para obtener información adicional acerca <strong>de</strong> los tipos <strong>de</strong> soporte compatibles,<br />
visite nuestra página Web en http://www.us.playstation.com.<br />
BD-ROM con formato <strong>PlayStation</strong>®3<br />
BD-ROM<br />
Blu-ray Disc (BD)<br />
BD-R<br />
BD-RE* 1<br />
DVD-ROM<br />
DVD+R/RW<br />
DVD<br />
DVD-R/RW<br />
AVCHD<br />
Disco DSD<br />
CD-ROM con formato <strong>PlayStation</strong>®* 2<br />
CD<br />
CD-DA (CD <strong>de</strong> audio)* 3<br />
CD-R/RW<br />
* 1 No se admite la reproducción <strong>de</strong> discos BD-RE versión 1.0.<br />
* 2 Este mo<strong>de</strong>lo <strong>de</strong>l sistema <strong>PlayStation</strong>®3 está diseñado para reproducir software<br />
<strong>de</strong> formato <strong>PlayStation</strong>®3 y tiene compatibilidad retroactiva limitada. Este<br />
sistema no es compatible y no reproducirá software <strong>de</strong> formato <strong>PlayStation</strong>®2.<br />
Es posible reproducir ciertos títulos <strong>de</strong> software <strong>de</strong> formato <strong>PlayStation</strong>® en este<br />
sistema. Para más información, visite www.us.playstation.com.<br />
* 3 La reproducción <strong>de</strong> discos Super Audio CD no es compatible.<br />
ES<br />
Especificaciones<br />
109
Especificaciones<br />
110<br />
Códigos <strong>de</strong> región<br />
En función <strong>de</strong>l disco, es posible que tenga asignado un código <strong>de</strong> región que<br />
está basado en la región geográfica en la que se distribuye el disco. Este sistema<br />
pue<strong>de</strong> reproducir discos marcados con los siguientes códigos <strong>de</strong> región.<br />
Disco<br />
Blu-ray Disc (BD)<br />
DVD<br />
BD-ROM con formato <strong>PlayStation</strong>®3<br />
CD-ROM con formato <strong>PlayStation</strong>®<br />
DVD y software <strong>de</strong> formato <strong>PlayStation</strong>®3<br />
Código <strong>de</strong> región<br />
Al reproducir el contenido <strong>de</strong> DVD o el software <strong>de</strong> formato <strong>PlayStation</strong>®3 con<br />
resolución SD, sólo se podrán reproducir los discos grabados en el estándar<br />
NTSC.<br />
Cuando se reproduce software para formato <strong>PlayStation</strong>®3 con resolución HD,<br />
es necesario un televisor que admita la reproducción <strong>de</strong> vi<strong>de</strong>o a 59,94 Hz.<br />
Discos DVD-R/DVD-RW/DVD+R/DVD+RW<br />
ALL<br />
No se podrán reproducir los discos que no se hayan finalizado.<br />
Avisos<br />
Utilice únicamente discos circulares con el sistema. No utilice discos con<br />
formas irregulares (por ejemplo, discos con formas <strong>de</strong> corazón o estrella). El<br />
uso <strong>de</strong> discos con formas irregulares pue<strong>de</strong> provocar un fallo <strong>de</strong><br />
funcionamiento.<br />
No utilice discos dañados, a los que se les haya cambiado la forma ni<br />
reparados. El uso <strong>de</strong> este tipo <strong>de</strong> discos pue<strong>de</strong> provocar un fallo <strong>de</strong><br />
funcionamiento.<br />
Si utiliza un disco <strong>de</strong> 8 cm, insértelo en el sistema sin un adaptador.<br />
La función <strong>de</strong> reproducción <strong>de</strong> CD <strong>de</strong> audio <strong>de</strong> este sistema está diseñada<br />
para cumplir con el estándar para discos compactos (CD). Recientemente,<br />
algunas compañías discográficas comenzaron a comercializar discos <strong>de</strong><br />
música codificados con tecnologías <strong>de</strong> protección <strong>de</strong> <strong>de</strong>rechos <strong>de</strong> autor.<br />
Algunos <strong>de</strong> estos discos <strong>de</strong> música no cumplen con el estándar CD y<br />
posiblemente no puedan reproducirse en este sistema.<br />
Un DualDisc es un disco <strong>de</strong> dos caras que combina una cara con formato DVD<br />
y otra con formato <strong>de</strong> audio. Tenga en cuenta que no se garantiza que la cara<br />
<strong>de</strong> audio pueda reproducirse, dado que este tipo <strong>de</strong> discos no cumple con las<br />
especificaciones exigidas para un disco compacto (CD) <strong>de</strong> audio.<br />
Si se conecta un dispositivo no compatible con el estándar HDCP (Highbandwidth<br />
Digital Content Protection, Protección <strong>de</strong> contenido digital <strong>de</strong> banda<br />
ancha) al sistema mediante un cable HDMI, no se podrá emitir ví<strong>de</strong>o ni audio.<br />
Discos <strong>de</strong> vi<strong>de</strong>o Blu-ray protegidos por <strong>de</strong>rechos <strong>de</strong> autor solo pue<strong>de</strong>n enviar<br />
señal a 1080p utilizando un cable HDMI conectado a un dispositivo que sea<br />
compatible con la norma <strong>de</strong> Protección <strong>de</strong> Contenido Digital <strong>de</strong> banda ancha).<br />
Cuando utilice el conector <strong>de</strong>l sistema AV MULTI OUT para conectarse a un TV,<br />
es posible que las resoluciones para emitir los ví<strong>de</strong>os protegidos por <strong>de</strong>rechos<br />
<strong>de</strong> autor provenientes <strong>de</strong>l BD o <strong>de</strong> ficheros <strong>de</strong> ví<strong>de</strong>o sean limitadas o que no<br />
sean emitidas.<br />
Al reproducir discos con contenido copiado <strong>de</strong> manera fraudulenta, es posible<br />
que se produzcan sonidos anormales o que el contenido no se reproduzca<br />
correctamente.<br />
Para disfrutar la reproducción continua <strong>de</strong> discos BD protegidos por <strong>de</strong>rechos<br />
<strong>de</strong> autor, en algunos casos es necesario renovar la clave <strong>de</strong> encriptación<br />
AACS (Advanced Access Control System). Para renovar la clave, <strong>de</strong>be realizar<br />
una actualización <strong>de</strong>l software <strong>de</strong>l sistema.<br />
Algunos discos posiblemente no puedan reproducirse a causa <strong>de</strong> arañazos,<br />
polvo, la calidad <strong>de</strong> la grabación o las características <strong>de</strong>l dispositivo <strong>de</strong><br />
grabación.
En raras ocasiones, es posible que los discos CD, DVD, BD y otros soportes no<br />
funcionen a<strong>de</strong>cuadamente cuando se reproducen en el sistema PS3. Esto se<br />
<strong>de</strong>be principalmente a las variaciones <strong>de</strong>l proceso <strong>de</strong> fabricación o a la<br />
codificación <strong>de</strong>l mismo.<br />
Batería <strong>de</strong>l mando inalámbrico<br />
Precaución<br />
Si el material proce<strong>de</strong>nte <strong>de</strong> la fuga <strong>de</strong> una batería entra en contacto con su<br />
piel, lleve a cabo las acciones siguientes:<br />
– Si el material le entra en los ojos, no se los frote. Enjuáguese<br />
inmediatamente los ojos con agua limpia y solicite asistencia médica.<br />
– Si el material entra en contacto con la piel o la ropa, aclare<br />
inmediatamente la zona afectada con agua limpia. Póngase en contacto<br />
con su médico si sufre una inflamación o dolores.<br />
No permita que la batería entre en contacto con el fuego ni la exponga a<br />
temperaturas extremas como bajo la luz solar directa, en vehículos<br />
expuestos al sol o cerca <strong>de</strong> fuentes <strong>de</strong> calor.<br />
Vida útil <strong>de</strong> la batería <strong>de</strong>l mando inalámbrico<br />
La batería tiene una vida útil limitada. La duración <strong>de</strong> la batería disminuirá<br />
gradualmente con el uso y el paso <strong>de</strong>l tiempo.<br />
La vida útil <strong>de</strong> la batería también varía en función <strong>de</strong>l método <strong>de</strong><br />
almacenamiento, el estado <strong>de</strong> uso, el ambiente y otros factores.<br />
Almacenamiento<br />
Cuando no utilice el mando inalámbrico durante un período <strong>de</strong> tiempo<br />
prolongado, es recomendable que lo cargue por completo al menos una vez al<br />
año para mantener la funcionalidad <strong>de</strong> la batería.<br />
Cuando se <strong>de</strong>shaga <strong>de</strong>l mando inalámbrico<br />
La batería <strong>de</strong> iones <strong>de</strong> litio <strong>de</strong>l mando inalámbrico es reciclable.<br />
Cuando se <strong>de</strong>shaga <strong>de</strong>l mando inalámbrico, extraiga la pila y siga las<br />
normativas locales relativas al <strong>de</strong>secho <strong>de</strong> las pilas.<br />
Extracción <strong>de</strong> la batería<br />
Precaución<br />
Extraiga la batería en un lugar fuera <strong>de</strong>l alcance <strong>de</strong> los niños para evitar la<br />
ingestión acci<strong>de</strong>ntal <strong>de</strong> piezas pequeñas como, por ejemplo, los tornillos.<br />
Al extraer la cubierta <strong>de</strong>l mando, tenga cuidado <strong>de</strong> no dañarse las uñas o<br />
los <strong>de</strong>dos.<br />
Por razones <strong>de</strong> seguridad, adhiera un trozo <strong>de</strong> cinta adhesiva o precinto a<br />
la parte metálica <strong>de</strong> la pila antes <strong>de</strong> <strong>de</strong>secharla.<br />
Aviso<br />
Salvo cuando se disponga a <strong>de</strong>shacerse <strong>de</strong>l mando inalámbrico, nunca<br />
extraiga los tornillos ni la batería <strong>de</strong>l mismo.<br />
1 Desconecte el cable USB <strong>de</strong>l mando inalámbrico.<br />
2 Utilice un <strong>de</strong>stornillador <strong>de</strong> estrella para extraer los tornillos (5<br />
lugares).<br />
ES<br />
Especificaciones<br />
111
Especificaciones<br />
3 Extraiga la cubierta inferior.<br />
Presione en la dirección <strong>de</strong> la flecha.<br />
Retire la cubierta inferior.<br />
RECICLADO DE BATERÍAS DE IONES DE LITIO<br />
Las baterías <strong>de</strong> iones <strong>de</strong> litio son reciclables.<br />
Usted podrá ayudar a conservar el medio ambiente <strong>de</strong>volviendo<br />
las baterías usadas al punto <strong>de</strong> reciclaje mas cercano.<br />
Para más información sobre el reciclado <strong>de</strong> baterías, llame al<br />
número gratuito 1-800-822-8837, o visite http://www.rbrc.org/<br />
Precaución<br />
No utilice baterías <strong>de</strong> iones <strong>de</strong> litio dañadas o con fugas.<br />
4 Tras <strong>de</strong>sconectar el conector, extraiga la batería.<br />
Conector<br />
Batería<br />
112
GARANTÍA DEL HARDWARE Y RESPONSABILIDAD LIMITADAS<br />
Sony Computer Entertainment America (SCEA) garantiza al comprador original<br />
que cada uno <strong>de</strong> los productos que constituyen este sistema PS3 estará exento<br />
<strong>de</strong> <strong>de</strong>fectos en el material y la mano <strong>de</strong> obra durante un período <strong>de</strong> un (1) año a<br />
partir <strong>de</strong> la fecha <strong>de</strong> compra (el "Período <strong>de</strong> garantía"). Si se <strong>de</strong>termina que uno o<br />
más <strong>de</strong> los productos i<strong>de</strong>ntificados anteriormente son <strong>de</strong>fectuosos durante el<br />
Período <strong>de</strong> garantía, la responsabilidad <strong>de</strong> SCEA estará limitada a la reparación o<br />
sustitución <strong>de</strong> dicho producto por un producto recertificado por el fabricante, a<br />
elección <strong>de</strong> SCEA. En el marco <strong>de</strong> esta Garantía limitada, "recertificado por el<br />
fabricante" se refiere a un producto cuyas especificaciones se han restablecido a<br />
las originales. Debe visitar http://www.us.playstation.com/support o llamar al<br />
1-800-345-7669 para recibir una autorización <strong>de</strong> retorno e instrucciones <strong>de</strong> envío.<br />
ESTA GARANTÍA NO SE APLICARÁ SI ESTE PRODUCTO: (A) SE UTILIZA<br />
CON PRODUCTOS QUE NO SEAN COMPATIBLES CON ESTE PRODUCTO;<br />
(B) SE UTILIZA PARA FINES COMERCIALES (INCLUIDO EL ALQUILER); (C)<br />
O SE MODIFICA O MANIPULA; (D) RESULTA DAÑADO POR MOTIVOS DE<br />
FUERZA MAYOR, MAL USO, ABUSO, NEGLIGENCIA, ACCIDENTE,<br />
DESGASTE Y ROTURA, USO NO RAZONABLE U OTRAS CAUSAS NO<br />
RELACIONADAS CON MATERIALES O MANO DE OBRA DEFECTUOSOS; (E)<br />
TIENE EL NÚMERO DE SERIE ALTERADO, DEFORMADO O BORRADO; O (F)<br />
TIENE EL SELLO DE GARANTÍA DEL SISTEMA PS3 MODIFICADO,<br />
DEFORMADO O BORRADO. ESTA GARANTÍA NO CUBRE PRODUCTOS<br />
VENDIDOS "TAL CUAL" O CON TODOS LOS DEFECTOS, NI CONSUMIBLES<br />
(POR EJEMPLO, BATERÍAS). ASIMISMO, ESTA GARANTÍA TAMBIÉN PODRÁ<br />
SER ANULADA POR SCEA SI (1) SCEA CONSIDERA, DE FORMA<br />
RAZONABLE, QUE EL SISTEMA PS3 SE HA UTILIZADO DE ALGÚN MODO<br />
QUE VIOLA LOS TÉRMINOS Y CONDICIONES DE UN CONTRATO DE<br />
LICENCIA PARA EL USUARIO FINAL SEPARADO PARA EL SISTEMA DE<br />
SOFTWARE: SE UTILIZA CON UN PRODUCTO QUE NO SEA VENDIDO O NO<br />
TENGA EL PERMISO DE SCEA (INCLUIDOS, SIN LIMITACIÓN, DISPOSITIVOS<br />
SIN LICENCIA QUE SIRVAN PARA MEJORAR LOS JUEGOS, MANDOS,<br />
ADAPTADORES Y DISPOSITIVOS DE SUMINISTRO DE ENERGÍA). USTED<br />
ASUME TODOS LOS RIESGOS Y RESPONSABILIDADES ASOCIADOS CON<br />
EL USO DE PRODUCTOS DE TERCEROS. PARA BENEFICIARSE DE LA<br />
GARANTÍA, DEBERÁ PRESENTAR UNA PRUEBA DE COMPRA EN FORMA<br />
DE RECIBO DE COMPRA O FACTURA DE UN DISTRIBUIDOR AUTORIZADO,<br />
Y QUE INCLUYA LA FECHA DE COMPRA ORIGINAL.<br />
ESTA GARANTÍA SE ENTREGA EN LUGAR DE CUALQUIER OTRA<br />
GARANTÍA, EXPRESA O IMPLÍCITA, INCLUIDAS LAS GARANTÍAS DE<br />
COMERCIABILIDAD E IDONEIDAD PARA UN FIN DETERMINADO DEL<br />
HARDWARE PS3, TODAS LAS CUALES SE RECHAZAN POR EL<br />
PRESENTE DOCUMENTO. SIN EMBARGO, SI DICHAS GARANTÍAS SON<br />
NECESARIAS DE ACUERDO CON LA LEY, ÉSTAS ESTARÁN LIMITADAS EN<br />
DURACIÓN AL PERÍODO DE GARANTÍA.<br />
SU ÚNICO RECURSO EN EL CASO DE DISCONFORMIDAD O DAÑO<br />
PRODUCTO DEL USO DEL HARDWARE PS3, ASÍ COMO LA MÁXIMA<br />
RESPONSABILIDAD DE SCEA, SE LIMITARÁ A LA REPARACIÓN O LA<br />
SUSTITUCIÓN DEL SISTEMA PS3.<br />
EXCEPTO EN EL MODO EXPRESADO ANTERIORMENTE, EN NINGÚN CASO<br />
SCEA SERÁ RESPONSABLE DE PÉRDIDA DE DATOS, PÉRDIDA DE<br />
BENEFICIOS, O CUALQUIER OTRA PÉRDIDA O DAÑO SUFRIDOS POR<br />
USTED O POR TERCEROS, TANTO SI DICHOS DAÑOS SON DIRECTOS,<br />
INDIRECTOS, DERIVADOS, ESPECIALES O INCIDENTALES, POR<br />
CUALQUIER MOTIVO, DE ACUERDO CON CUALQUIER TEORÍA JURÍDICA,<br />
RELACIONADO CON SU USO DEL HARDWARE PS3. ALGUNOS ESTADOS<br />
O PROVINCIAS NO PERMITEN LA LIMITACIÓN DEL PERÍODO DE DURACIÓN<br />
DE UNA GARANTÍA IMPLÍCITA Y ALGUNOS ESTADOS NO PERMITEN LA<br />
EXCLUSIÓN O LIMITACIONES DE DAÑOS INCIDENTALES O DERIVADOS,<br />
POR LO QUE ES POSIBLE QUE DICHAS LIMITACIONES O DICHA<br />
EXCLUSIÓN NO SE APLIQUEN A DETERMINADOS USUARIOS.<br />
Esta garantía le otorga <strong>de</strong>rechos legales específicos, aunque también pue<strong>de</strong><br />
contar con otros <strong>de</strong>rechos que varíen entre estados o provincias. Esta garantía es<br />
válida únicamente en los Estados Unidos y Canadá.<br />
La garantía ofrecida por Sony Computer Entertainment America para el sistema<br />
PS3 es la misma in<strong>de</strong>pendientemente <strong>de</strong> que registre el producto o no.<br />
ES<br />
GARANTÍA DEL HARDWARE Y RESPONSABILIDAD LIMITADAS<br />
113
GARANTÍA DEL HARDWARE Y RESPONSABILIDAD LIMITADAS<br />
Esta garantía no se aplica a ningún software <strong>de</strong>l sistema que esté<br />
preinstalado en el hardware PS3, o que se suministre posteriormente<br />
mediante actualizaciones o nuevas versiones <strong>de</strong>l software. La licencia <strong>de</strong><br />
dicho software <strong>de</strong>l sistema se le otorga <strong>de</strong> acuerdo con los términos y<br />
condiciones <strong>de</strong> un contrato <strong>de</strong> licencia para el usuario final que se encuentra<br />
en http://www.scei.co.jp/ps3-eula/, y dicho software se suministra con su<br />
propia garantía.<br />
Excepto que la Garantía <strong>de</strong>l hardware y responsabilidad limitadas anteriores<br />
indiquen algo distinto, acepta que (i) los servicios brindados se<br />
proporcionan "TAL CUAL", sin ninguna garantía expresa o implícita; y (ii)<br />
SCEA no será responsable <strong>de</strong> ningún daño directo e indirecto, inci<strong>de</strong>ntal o<br />
especial, lo que incluye cualquier daño que pueda <strong>de</strong>berse a pérdida <strong>de</strong><br />
datos o funciones. La anterior limitación se aplicará en la máxima medida<br />
permitida por la ley aplicable.<br />
Política <strong>de</strong> asistencia técnica<br />
Usted compren<strong>de</strong> y acepta que en cualquier momento que SCEA le brinda<br />
asistencia técnica para su sistema PS3 (tanto <strong>de</strong>ntro <strong>de</strong>l Período <strong>de</strong> garantía<br />
como <strong>de</strong> acuerdo con un contrato <strong>de</strong> servicios distinto), es posible que SCEA<br />
<strong>de</strong>ba proporcionar ciertos servicios o reparaciones a su sistema PS3 para<br />
garantizar su correcto funcionamiento <strong>de</strong> acuerdo con las directrices <strong>de</strong> SCEA.<br />
Dichos servicios pue<strong>de</strong>n incluir la instalación <strong>de</strong> la actualización más reciente <strong>de</strong>l<br />
software o el firmware, o la reparación o sustitución <strong>de</strong>l disco duro <strong>de</strong>l sistema<br />
PS3 o <strong>de</strong>l sistema PS3 por un producto nuevo o recertificado <strong>de</strong> fábrica.<br />
Usted reconoce y acepta que algunos servicios pue<strong>de</strong>n cambiar sus ajustes<br />
actuales, provocar que se pierdan pegatinas <strong>de</strong>corativas o máscaras <strong>de</strong>l<br />
sistema, originar una pérdida <strong>de</strong> datos o <strong>de</strong> contenido, o resultar en la pérdida<br />
<strong>de</strong> algunas funciones. Es necesario que realice copias <strong>de</strong> seguridad <strong>de</strong> su disco<br />
duro regularmente para evitar la pérdida <strong>de</strong> sus datos, aunque no es posible<br />
realizar copias <strong>de</strong> seguridad <strong>de</strong> ciertos contenidos, por lo que <strong>de</strong>berá volver a<br />
instalarlos. Asimismo, <strong>de</strong>berá extraer cualquier periférico, componentes que no<br />
sean <strong>de</strong>l sistema PS3 y todo aquel contenido que consi<strong>de</strong>re <strong>de</strong> <strong>de</strong>rechos<br />
reservados, privado o confi<strong>de</strong>ncial, antes <strong>de</strong> enviar su sistema PS3 para una<br />
reparación. SCEA no será consi<strong>de</strong>rada responsable <strong>de</strong> aquellos daños producto<br />
<strong>de</strong> su incumplimiento <strong>de</strong> lo anterior o <strong>de</strong> cualquier instrucción que le facilite<br />
SCEA. SCEA se reserva el <strong>de</strong>recho a no realizar el servicio técnico o anular la<br />
garantía <strong>de</strong> cualquier sistema PS3 que haya sido modificado o manipulado.<br />
114
Derechos <strong>de</strong> autor y marcas comerciales<br />
" ", "<strong>PlayStation</strong>" y "DUALSHOCK" son marcas comerciales registradas <strong>de</strong> Sony<br />
Computer Entertainment Inc. Asimismo, " ", "SIXAXIS" y " " son marcas<br />
comerciales <strong>de</strong> dicha compañía.<br />
"XMB" y "xross media bar" son marcas comerciales <strong>de</strong> Sony Corporation y <strong>de</strong><br />
Sony Computer Entertainment Inc.<br />
"SONY" y " " son marcas comerciales registradas <strong>de</strong> Sony Corporation. "Memory<br />
Stick", "Memory Stick Duo", " ", "ATRAC", "BRAVIA" logo, "BRAVIA" y el nombre<br />
"x.v.Color" y su logotipo son marcas comerciales o marcas comerciales<br />
registradas <strong>de</strong> Sony Corporation.<br />
" " and AOSS are the tra<strong>de</strong>marks of BUFFALO INC.<br />
"AVCHD" and "AVCHD" logo are tra<strong>de</strong>marks of Panasonic Corporation and Sony<br />
Corporation.<br />
Contains Macromedia® Flash® Player technology by Adobe<br />
Copyright © 1995-2008 Adobe Systems Incorporated. All rights reserved. Flash,<br />
Macromedia, and Macromedia Flash are either tra<strong>de</strong>marks or registered<br />
tra<strong>de</strong>marks of Adobe Systems Incorporated in the United States and/or other<br />
countries.<br />
"Blu-ray Disc" and<br />
© 2006 All Media Gui<strong>de</strong>, LLC<br />
Content and technology provi<strong>de</strong>d by All Media Gui<strong>de</strong>®.<br />
are tra<strong>de</strong>marks.<br />
ES<br />
Derechos <strong>de</strong> autor y marcas comerciales<br />
Copyright © 2004-2006 Cambridge Silicon Radio Ltd.<br />
The Bluetooth® word mark and logos are owned by the Bluetooth SIG, Inc. and<br />
any use of such marks by Sony Computer Entertainment Inc. is un<strong>de</strong>r license.<br />
Other tra<strong>de</strong>marks and tra<strong>de</strong> names are those of their respective owners.<br />
115
Derechos <strong>de</strong> autor y marcas comerciales<br />
DivX, DivX Certified y los logotipos correspondientes son marcas comerciales <strong>de</strong><br />
DivX, Inc. usados bajo licencia.<br />
Manufactured un<strong>de</strong>r licence from Dolby Laboratories. Dolby and the double-D<br />
symbol are tra<strong>de</strong>marks of Dolby Laboratories.<br />
U.S. and foreign patents licensed from Dolby Laboratories.<br />
DLNA and DLNA CERTIFIED are tra<strong>de</strong>marks and/or service marks of Digital<br />
Living Network Alliance.<br />
The DVD logo is a tra<strong>de</strong>mark.<br />
Manufactured un<strong>de</strong>r license un<strong>de</strong>r U.S. Patent #'s: 5,451,942; 5,956,674;<br />
5,974,380; 5,978,762; 6,226,616; 6,487,535 & other U.S. and worldwi<strong>de</strong> patents<br />
issued & pending.<br />
DTS is a registered tra<strong>de</strong>mark and the DTS logos, Symbol, DTS-HD and DTS-HD<br />
Master Audio are tra<strong>de</strong>marks of DTS, Inc.<br />
© 1996-2008 DTS, Inc. All Rights Reserved.<br />
All of the Japanese fonts and some parts of the Latin fonts in this machine use<br />
characters provi<strong>de</strong>d by Fontworks Japan, Inc.<br />
HDMI, the HDMI logo and High-Definition Multimedia Interface are tra<strong>de</strong>marks or<br />
registered tra<strong>de</strong>marks of HDMI Licensing, LLC.<br />
ATOK is a registered tra<strong>de</strong>mark of JUSTSYSTEM CORP. in Japan and other<br />
countries.<br />
116
This product incorporates copyright protection technology that is protected by<br />
U.S. patents and other intellectual property rights. Use of this copyright protection<br />
technology must be authorized by Macrovision, and is inten<strong>de</strong>d for home and<br />
other limited viewing uses only unless otherwise authorized by Macrovision.<br />
Reverse engineering or disassembly is prohibited.<br />
Anti-Grain Geometry - Version 2.0<br />
Copyright © 2002-2004 Maxim Shemanarev (McSeem)<br />
Permission to copy, use, modify, sell and distribute this software is granted<br />
provi<strong>de</strong>d this copyright notice appears in all copies.<br />
This software is provi<strong>de</strong>d "as is" without express or implied warranty, and with no<br />
claim as to its suitability for any purpose.<br />
This product inclu<strong>de</strong>s RSA BSAFE® Cryptographic software from RSA Security<br />
Inc.<br />
RSA, BSAFE are either registered tra<strong>de</strong>marks or tra<strong>de</strong>marks of RSA Security Inc.<br />
in the United States and/or other countries.<br />
RSA Security Inc. All rights reserved.<br />
Java and all Java based tra<strong>de</strong>marks and logos are tra<strong>de</strong>marks or registered<br />
tra<strong>de</strong>marks of Sun Microsystems, Inc. in the U.S. and other countries.<br />
@(#)fdlibm.h 1.5 95/01/18<br />
Copyright © 1993 by Sun Microsystems, Inc. All rights reserved<br />
Developed at SunSoft, a Sun Microsystems, Inc. business.<br />
Permission to use, copy, modify, and distribute this software is freely granted,<br />
provi<strong>de</strong>d that this notice is preserved.<br />
MPEG Layer-3 audio coding technology and patents licenced from Fraunhofer IIS<br />
and Thomson.<br />
Mp3Surround audio coding technology and patents licensed from Fraunhofer IIS,<br />
Thomson, and Agere.<br />
ES<br />
Derechos <strong>de</strong> autor y marcas comerciales<br />
This product adopts S3TC texture compression technology un<strong>de</strong>r licence from S3<br />
Graphics, Co., Ltd.<br />
The USB-IF Logos are tra<strong>de</strong>marks of Universal Serial Bus Implementers Forum,<br />
Inc.<br />
117
Derechos <strong>de</strong> autor y marcas comerciales<br />
eZiText® and Zi® are registered tra<strong>de</strong>marks of Zi Corporation.<br />
Portions of this software are copyright © 1996-2008 The FreeType Project<br />
(www.freetype.org). All rights reserved.<br />
This software is based in part on the work of the In<strong>de</strong>pen<strong>de</strong>nt JPEG Group.<br />
Visite el sitio web http://www.scei.co.jp/ps3-license/in<strong>de</strong>x.html para obtener<br />
información acerca <strong>de</strong> otros titulares <strong>de</strong> licencia y marcas comerciales.<br />
Todas las <strong>de</strong>más marcas comerciales pertenecen a sus respectivos propietarios.<br />
118
Online user's gui<strong>de</strong><br />
http://manuals.playstation.net/document/<br />
This gui<strong>de</strong> contains <strong>de</strong>tailed information about using the PS3 system software.<br />
System software updates<br />
http://www.us.playstation.com/ps3<br />
This site provi<strong>de</strong>s the latest information about system software updates.<br />
<strong>PlayStation</strong>®3 official site<br />
http://www.us.playstation.com/ps3<br />
The official site for <strong>PlayStation</strong>®3 products provi<strong>de</strong>s the latest information about<br />
software titles and hardware accessories.<br />
Support<br />
http://www.us.playstation.com/support<br />
The official site for <strong>PlayStation</strong>® product support provi<strong>de</strong>s the latest questions and<br />
answers about your product.<br />
<strong>Manual</strong> <strong>de</strong>l usuario online<br />
http://manuals.playstation.net/document/<br />
Este manual contiene información <strong>de</strong>tallada acerca <strong>de</strong> el uso <strong>de</strong>l software <strong>de</strong>l<br />
sistema PS3.<br />
Actualizaciones <strong>de</strong>l software <strong>de</strong>l sistema<br />
http://www.us.playstation.com/ps3<br />
Este sitio proporciona la información más reciente acerca <strong>de</strong> las actualizaciones<br />
<strong>de</strong>l software <strong>de</strong>l sistema.<br />
Sitio oficial <strong>de</strong> <strong>PlayStation</strong>®3<br />
http://www.us.playstation.com/ps3<br />
El sitio oficial para los productos <strong>de</strong> <strong>PlayStation</strong>®3 proporciona la información más<br />
reciente acerca <strong>de</strong> los títulos <strong>de</strong> software y accesorios <strong>de</strong> hardware.<br />
Soporte<br />
http://www.us.playstation.com/support<br />
El sitio oficial para soporte <strong>de</strong> productos <strong>PlayStation</strong>® proporciona las preguntas y<br />
respuestas más recientes acerca <strong>de</strong> su producto.<br />
© 2009 Sony Computer Entertainment Inc. All rights reserved. Printed in China
![사용ìƒÂì˜ 주ì˜/고장ì´ë¼고ìƒÂê°Âë 때 [0.7MB] - PlayStation](https://img.yumpu.com/48197031/1/190x135/aaaaasacaaaaaa-aaa-1-4-aaa-aaa-aazaaaaaaa-1-4-aaa-aaaaaaaaa-aaoaoe-07mb-playstation.jpg?quality=85)
![SCPH-30005 R [1.64MB] - PlayStation](https://img.yumpu.com/48010538/1/190x143/scph-30005-r-164mb-playstation.jpg?quality=85)
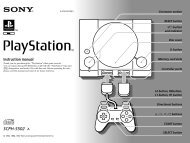
![SCPH-55005 GT/N [2.02 MB] - PlayStation](https://img.yumpu.com/35261967/1/190x143/scph-55005-gt-n-202-mb-playstation.jpg?quality=85)