81500 - Universal Sewing Supply
81500 - Universal Sewing Supply
81500 - Universal Sewing Supply

You also want an ePaper? Increase the reach of your titles
YUMPU automatically turns print PDFs into web optimized ePapers that Google loves.
OPERATING INSTRUCTIONS<br />
THREADING<br />
INSTRUCCIONES DE OPERACION<br />
DIAGRAMA DE ENHEBRADO<br />
CAUTION!<br />
Turn off main power switch before<br />
threading! When using clutch motors<br />
with or without actuation lock wait until<br />
the motor has stopped!<br />
PRECAUCION! Apague el motor principal antes de<br />
enhebrar!. Cuando utilice motor con clutch<br />
debe esperar hasta que el mismo se<br />
detenga totalmente!.<br />
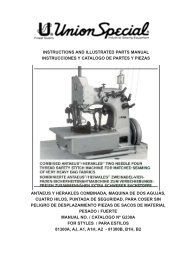
Styles <strong>81500</strong>A, B, B1H, B2, BA, BA1H, BA2 and <strong>81500</strong>E<br />
are threaded as shown in Fig. 5.<br />
Style <strong>81500</strong>C is threaded as shown in Fig. 5 A.<br />
For threading the needle turn handwheel in operating<br />
direction until the needle is in the upmost position.<br />
For looper threading open the hinge plate by lifting locking<br />
bolt knob (A, Figs. 5 and 5 A).<br />
Reclose hinge plate after threading.<br />
OPERATING<br />
1. Switch on main power switch.<br />
2. Without lifting the presser foot, place the fabric to<br />
be sewn as close as possible in front of the needle<br />
and to the right on the edge guide.<br />
Para enhebrar estilos <strong>81500</strong>A, B, B1H, B2, BA, BA1H,<br />
BA2 y <strong>81500</strong>E, por favor vea diagrama en Fig. 5.<br />
Para enhebrar estilo <strong>81500</strong>C, por favor vea diagrama en<br />
Fig. 5 A.<br />
Para enhebrar la aguja gire el volante en sentido de operación<br />
hasta que la aguja se encuentre en su posición<br />
superior. Para enhebrar el looper abra la tapa delantera<br />
levantando el tornillo de manivela (A, Figs.5 y 5A).<br />
Cierre la tapa delantera otra vez.<br />
OPERACION<br />
1. Active el interruptor principal.<br />
2. Ponga las telas lo más cercano posible delante de la aguja<br />
y a la derecha a la guía tope, sin levantar el pie prensatela.<br />
CAUTION!<br />
Remove the foot from the motor treadle,<br />
to avoid inadvertently starting of the<br />
machine, in case it is necessary to lift<br />
presser foot and upper feed dog for<br />
aligning the fabric to be sewn!<br />
PRECAUCION! Quite el pie del pedal del motor para no<br />
arrancar la máquina accidentalmente, si<br />
fuera necesario levante el pie prensatela y<br />
el transporte superior manualmente para<br />
guiar las telas.<br />
3. Depress the motor treadle. The machine sews.<br />
Guide the fabric to be sewn.<br />
3. Pise el pedal de motor hacia adelante. La máquina cose.<br />
Guíe las telas.<br />
CAUTION! Keep a security distance of approx. 100<br />
mm (4 in.) between hand and sewing<br />
needle when guiding the fabric to be<br />
sewn!<br />
4. Release the motor treadle. The machine stops.<br />
Cut the thread chain at the trailing edge of the fabric<br />
and remove the fabric from the machine.<br />
PRECAUCION! Mantenga una distancia de por lo menos<br />
100 mm entre la aguja y la mano mientras<br />
guíe las telas!<br />
4. Suelte el pedal del motor. La máquina se parará. Corte la<br />
cadeneta al final de las telas cosidas y quite los sobrantes<br />
de la superficie de la máquina.<br />
16