Infant Restraint Base Owner's Manual SnugRide® Click ... - Graco
Infant Restraint Base Owner's Manual SnugRide® Click ... - Graco
Infant Restraint Base Owner's Manual SnugRide® Click ... - Graco

You also want an ePaper? Increase the reach of your titles
YUMPU automatically turns print PDFs into web optimized ePapers that Google loves.
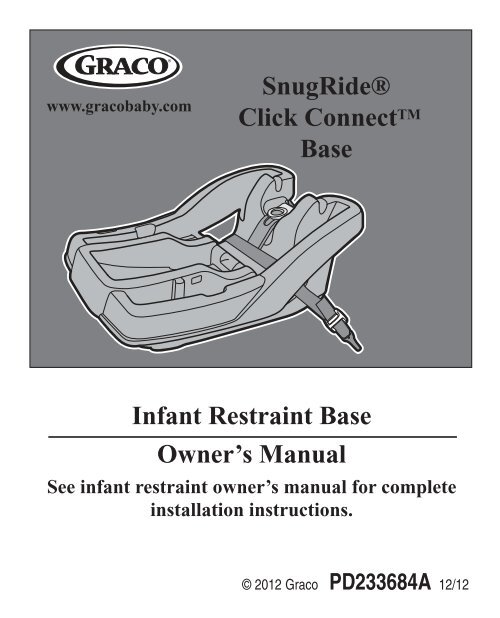
SnugRide®<br />
<strong>Click</strong> Connect TM<br />
<strong>Base</strong><br />
<strong>Infant</strong> <strong>Restraint</strong> <strong>Base</strong><br />
Owner’s <strong>Manual</strong><br />
See infant restraint owner’s manual for complete<br />
installation instructions.<br />
© 2012 <strong>Graco</strong> PD233684A 12/12
DO NOT PLACE THIS INFANT RESTRAINT IN A VEHICLE<br />
SEATING LOCATION THAT HAS A FRONT AIR BAG . If the air bag<br />
inflates, it can hit the infant restraint with great force and cause serious<br />
injury or death to your child. Check vehicle owner’s manual for<br />
information about side air bags and infant restraint installation.<br />
You MUST read and understand both the owner’s manual from the<br />
infant restraint and these instructions before using the infant restraint<br />
and base. Keep this sheet with the instruction booklet in the base for<br />
reference.<br />
This base can only be used with a <strong>Graco</strong> ® SnugRide ® <strong>Click</strong><br />
Connect 35 LX, SnugRide ® <strong>Click</strong> Connect 30 and SnugRide ® <strong>Click</strong><br />
Connect 35.<br />
If you do not have instructions for your infant restraint or if you have<br />
any questions about your product, call <strong>Graco</strong> at 1-800-345-4109.<br />
Your infant restraint base is equipped with <strong>Graco</strong>’s recline adjustment<br />
foot, which helps to properly recline the infant restraint/base on the<br />
vehicle seat. Use it AFTER you have carefully followed all of the steps<br />
in your infant restraint owner’s manual.<br />
Locking clip<br />
(See infant restraint<br />
owner’s manual)<br />
2
Installing the <strong>Base</strong> Using Vehicle Belt<br />
You must carefully follow the instructions provided by your vehicle<br />
manufacturer, in addition to the information in this manual.<br />
If a front passenger seat is used, slide the<br />
vehicle seat rearward as far as possible from<br />
the dashboard. If a rear seat is used, make sure<br />
the seat in front of it is moved forward enough<br />
and is upright enough to allow room for the<br />
infant restraint.<br />
1. Make sure vehicle is on level ground in order<br />
to get the correct recline position .<br />
2. Place the base in a rear-facing position on a<br />
forward-facing vehicle seat.<br />
Lock-off<br />
3. When using the base to install the<br />
infant restraint, the lock-off is ALWAYS<br />
used to secure both belts of the<br />
lap or lap/shoulder belt.<br />
Open the lock-off and route the<br />
vehicle belt through the vehicle belt path and<br />
over the lock-off . Buckle the vehicle belt.<br />
4. Make sure the buckle tongue goes into the<br />
correct buckle . The seat belt should<br />
not be twisted or turned.<br />
Lap Belt<br />
Belts MUST go<br />
under lock-off<br />
Lap/Shoulder<br />
Belt<br />
<br />
<br />
<br />
3
5. To create a secure installation, while<br />
pushing down on the base, pull the free<br />
end of the lap belt or the shoulder portion<br />
of the lap/shoulder belt to tighten .<br />
6. Close lock-off over lap belt AND free end of the<br />
lap/shoulder belt .<br />
NEVER allow any object other than the vehicle<br />
belts to go under or interfere with the lock-off.<br />
If any other part of the vehicle belt interferes<br />
with the lock-off choose another seating location.<br />
MAKE SURE that you push the top of the<br />
lock-off all the way down.<br />
7. Check that belt does not move by pulling<br />
and pushing hard on base with hands near the<br />
vehicle belt path. If belt loosens or lengthens,<br />
repeat procedure. If it does not stay tight, try<br />
another seating position or contact <strong>Graco</strong> at<br />
1-800-345-4109.<br />
8. Push the infant restraint down into the base and<br />
make sure that you hear a “click” . Pull up on<br />
the infant restraint to be sure it is latched<br />
securely into the base.<br />
If the infant restraint does not securely latch<br />
into the base, the infant restraint provides NO<br />
protection for your child. DO NOT use the<br />
infant restraint/base if the infant restraint<br />
does not securely latch into the base.<br />
9. Test infant restraint for secure installation as<br />
described in infant restraint “Final Safety<br />
Check” page 9.<br />
4<br />
<br />
<br />
<br />
CLICK!
Using LATCH to Install <strong>Base</strong><br />
LATCH locations<br />
Newer vehicles may have one or more seating positions with LATCH<br />
anchorage systems. If vehicle is equipped with LATCH, the vehicle lower<br />
anchor points may be visible at the vehicle seat crease. If not visible,<br />
they may be marked with the symbol .<br />
See your vehicle owner’s manual for exact locations, anchor<br />
identification, and requirements for use with an infant restraint.<br />
Typical seat in a passenger vehicle.<br />
Other vehicle types may have<br />
different LATCH locations or<br />
different markings.<br />
Vehicle Lower<br />
Anchor Points<br />
Vehicle<br />
Seat Crease<br />
1. MAKE SURE vehicle is on level ground. Make<br />
sure to check your vehicle owner's manual for<br />
LATCH seating positions.<br />
2. For ease of installation, press button to extend<br />
LATCH to its MAXIMUM LENGTH .<br />
3. Position base in vehicle seat as shown.<br />
4. Make sure LATCH is through vehicle/LATCH<br />
belt path normally used for vehicle seat belt. .<br />
Belt must lie flat and not be twisted.<br />
LATCH belt must not go under lock-off.<br />
<br />
<br />
5
5. Attach connectors to vehicle lower anchors.<br />
Pull firmly on connectors to be sure they<br />
are attached .<br />
6. Tighten LATCH by pushing down hard on<br />
base and pulling the adjustment belt back<br />
through belt path .<br />
7. NEVER put two LATCH connectors on one<br />
vehicle LATCH anchor .<br />
8. Test infant restraint for secure installation as<br />
described in infant restraint “Final Safety<br />
Check” page 9.<br />
9. Check that the LATCH stays tight and does not<br />
slip from the tightened position. If it does not stay<br />
tight, try another seating position or contact<br />
<strong>Graco</strong> at 1-800-345-4109.<br />
10. To remove LATCH, push button while<br />
pulling on the LATCH belt as shown .<br />
CLICK!<br />
<br />
<br />
<br />
<br />
11. Press and hold LATCH release hinge .<br />
12. Push connector in, lift connector up and<br />
pull out (away from anchor point) .<br />
13. Repeat steps 11 and 12 for other connector.<br />
<br />
<br />
6
Reclining <strong>Infant</strong> <strong>Restraint</strong>/<strong>Base</strong><br />
1) Vehicle MUST be level with ground to get<br />
correct recline position.<br />
2) Use level indicator on base. When reading<br />
the level indicator on base, view it directly from<br />
side of the indicator.<br />
Check the level indicator. You must look<br />
straight on at the indicator.<br />
WHEN READING THE LEVEL INDICATOR,<br />
Use corrected age for preemies.<br />
- If the indicator shows light blue<br />
in the window, the restraint is<br />
level for infants 0+ months in age.<br />
- If the indicator shows light blue<br />
and dark blue in the window,<br />
the restraint is level for a child<br />
3+ months in age.<br />
3+ months<br />
(meses)<br />
- If any RED is showing, child<br />
restraint is NOT level. You must<br />
adjust your recline position.<br />
7
Turn the knob counter clockwise to the desired<br />
setting to lower the foot .<br />
<br />
Turn the knob clockwise to raise the foot .<br />
<br />
If there is still red in the level indicator when the<br />
foot is completely extended then raise the foot<br />
and place a rolled towel under the foot until<br />
ONLY blue shows.<br />
<br />
Re-adjust the vehicle seat belt as necessary to<br />
secure the infant restraint firmly in the vehicle seat.<br />
8
Final Safety Check:<br />
Every time you drive with your child,<br />
PUSH DOWN on the top of the infant restraint slowly but 1"<br />
firmly to make sure the vehicle belt does not<br />
lengthen at all and that the vehicle belt or LATCH is<br />
fastened securely around the infant restraint/base.<br />
Holding the infant restraintor base near the vehicle<br />
belt path, TWIST AND PULL the infant restraint<br />
forward and to both sides to make sure the vehicle<br />
belt or LATCH does not lengthen or loosen and the infant restraint does<br />
not easily move. The infant restraint should not move side to side or<br />
forward more than 1 inch (2.5 cm).<br />
1. For ease of storing, extend<br />
LATCH to its maximum<br />
length .<br />
Storing LATCH<br />
<br />
2. LATCH storage should look<br />
like this when complete .<br />
<br />
9
Replacement Parts<br />
Bottom<br />
of <strong>Base</strong><br />
To purchase parts or accessories or for warranty<br />
information in the United States,<br />
please contact us at the following:<br />
www.gracobaby.com<br />
or<br />
1-800-345-4109<br />
10
SnugRide®<br />
<strong>Click</strong> Connect TM<br />
<strong>Base</strong><br />
<strong>Base</strong> del sistema de seguridad para niños<br />
<strong>Manual</strong> del propietario<br />
Vea el manual del propietario del sistema de<br />
seguridad para niños para obtener instrucciones<br />
copletas sobre la instalación.<br />
© 2012 <strong>Graco</strong> PD233684A 12/12
NO PONGA ESTE SISTEMA DE SEGURIDAD PARA BEBÉS EN UN<br />
ASIENTO DEL VEHÍCULO EQUIPADO CON UNA BOLSA DE AIRE<br />
DELANTERA. Si la bolsa de aire se infla, puede golpear al sistema de<br />
seguridad para bebés con mucha fuerza y causar lesiones serias o la<br />
muerte de su niño. Consulte el manual del propietario del vehículo para<br />
obtener información sobre las bolsas de aire laterales y la instalación<br />
del sistema de seguridad para niños.<br />
Antes de usar la base y el sistema de seguridad para niños, DEBE<br />
leer y entender el manual del propietario del sistema de seguridad y<br />
estas instrucciones. Guarde esta hoja con el libro de instrucciones<br />
como referencia en la base.<br />
Esta base se puede usar solamente con un sistema de seguridad<br />
SnugRide ® <strong>Click</strong> Connect 35 LX, SnugRide ® <strong>Click</strong> Connect 30 y<br />
SnugRide ® <strong>Click</strong> Connect 35 de <strong>Graco</strong>.<br />
Si no recibió instrucciones con su sistema de seguridad o si tuviera<br />
alguna pregunta sobre su producto, llame a <strong>Graco</strong> al 1-800-345-4109.<br />
La base de su nuevo sistema de seguridad para niños está equipada<br />
con el pie <strong>Graco</strong> de ajuste inclinable que ayuda a reclinar debidamente<br />
la base/sistema del seguridad sobre el asiento del vehículo. Úselo<br />
DESPUÉS de haber seguido detenidamente todos los pasos en el<br />
manual del propietario de su sistema de seguridad para niños.<br />
Traba de seguridad<br />
(Vea el manual del<br />
propietario del<br />
sistema de seguridad)<br />
122
Instalación de la base usando el<br />
cinturón del vehículo<br />
Debe seguir detenidamente las instrucciones provistas por el fabricante<br />
de su vehículo, además de la información de este manual.<br />
Si va a usar el asiento delantero del pasajero<br />
mueva el asiento del vehículo para atrás todo<br />
lo posible. Si usa un asiento trasero, asegúrese<br />
que el asiento de adelante está lo más adelante<br />
posible y en posición vertical para que haya<br />
suficiente espacio para el sistema de seguridad<br />
para bebés.<br />
1. Asegúrese de que el vehículo esté sobre piso<br />
nivelado para poder obtener la posición correcta<br />
de reclinación .<br />
2. Coloque la base orientada hacia atrás en<br />
un asiento del vehículo orientado hacia<br />
adelante.<br />
3. Cuando usa la base para instalar el<br />
sistema de seguridad para bebés, debe usar SIEMPRE la traba para<br />
asegurar ambos cinturones de la falda o del hombro y la falda. Abra la<br />
traba y pase el cinturón del vehículo a través de<br />
la vía del cinturón del vehículo y sobre la traba<br />
. Trabe el cinturón de vehículo.<br />
4. Trabe el cinturón del asiento. Asegúrese que<br />
la lengua de la hebilla pase por la hebilla<br />
correcta . El cinturón del vehículo no<br />
deberá estar doblado ni dar vuelta.<br />
Cinturón para<br />
la falda<br />
Traba<br />
Cinturón para<br />
la falda y el<br />
hombro<br />
Los cinturones<br />
DEBEN pasar<br />
debajo de la traba<br />
<br />
<br />
<br />
3
5. Para crear una instalación segura, mientras empuja<br />
a la base hacia abajo, tire la punta libre del cinturón<br />
para la falda o la parte del hombro del cinturón para<br />
el hombro/falda para apretarlo .<br />
6. Cierre la traba sobre el cinturón para la falda Y el<br />
extremo libre del cinturón para la falda y el hombro<br />
.<br />
NUNCA permita que ningún objeto que no sean<br />
los cinturones del vehículo pase por debajo o<br />
interfieran con la traba. Si alguna otra parte del<br />
cinturón del vehículo interfiere con la traba, elija<br />
otro lugar en el asiento.<br />
ASEGÚRESE que puede empujar la parte de arriba<br />
de la traba bien hacia abajo.<br />
7. Verifique que el cinturón no se mueve tirando y<br />
empujando con fuerza con las manos sobre la<br />
base cerca de la vía del cinturón del vehículo. Si<br />
el cinturón se afloja o se alarga, repita el procedimiento. De no<br />
mantenerse apretado, colóquelo en otro lugar en el asiento o póngase<br />
en contacto con <strong>Graco</strong> llamando al 1-800-345-4109.<br />
8. Empuje el sistema de seguridad para niños hacia abajo en la base y<br />
asegúrese de que escucha un “clic” . Tire hacia arriba del sistema<br />
de seguridad para niños para asegurarse que esté<br />
trabado apretadamente en la base.<br />
Si el sistema de seguridad para niños no se<br />
traba apretadamente en la base, el sistema de<br />
seguridad para niños NO proporciona ninguna<br />
protección a su niño. NO use la base/sistema de<br />
seguridad si el sistema de seguridad para niños<br />
no está debidamente trabado en la base.<br />
9. Pruebe el sistema de seguridad para niños para<br />
determinar si la instalación está segura como se describe<br />
en la sección “Verificación final de seguridad” en la página 9.<br />
14 4<br />
¡CLIC!
Utilización del LATCH para instalar la base<br />
Ubicación del LATCH<br />
Los vehículos nuevos tienen uno o varios asientos equipados con<br />
sistemas de anclaje LATCH. Si el vehículo viene equipado con el<br />
sistema LATCH, se pueden ver los puntos de anclaje inferiores en<br />
el pliegue del asiento del vehículo. Si no están visibles, pueden estar<br />
marcados con el símbolo .<br />
Vea su manual del dueño del vehículo para informarse sobre las<br />
ubicaciones exactas, la identificación de los anclajes y los<br />
requisitos de uso con un sistema de seguridad para bebés.<br />
Un asiento típico de un vehículo de<br />
pasajeros. Otros tipos de vehículos<br />
pueden tener otras ubicaciones del<br />
sistema LATCH o marcas diferentes.<br />
Pliegue del asiento<br />
del vehículo<br />
1. ASEGÚRESE de que el vehículo esté en un piso nivelado. Asegúrese<br />
de verificar el manual del propietario de su vehículo para obtener<br />
las posiciones de asiento con LATCH.<br />
<br />
2. Para facilitar la instalación, extienda el LATCH<br />
hasta su máxima longitud .<br />
3. Ponga la base en el asiento del vehículo como se indica.<br />
4. Pase el LATCH por el recorrido del cinturón/<br />
LATCH en la base que normalmente se usa para<br />
el cinturón del asiento del vehículo .El<br />
cinturón debe mantenerse en posición plana<br />
sin doblarse.<br />
El LATCH no deben pasar debajo de la traba.<br />
5<br />
Puntos de<br />
anclaje<br />
inferiores del<br />
vehículo
5. Sujete los conectores a los anclajes inferiores<br />
del vehículo.<br />
Tire firmemente de los conectores para<br />
asegurarse de que estén enganchados .<br />
6. Ajuste el LATCH empujando con fuerza hacia<br />
abajo sobre la base y tirando el cinturón de<br />
ajuste a través de la vía del cinturón .<br />
7. NUNCA ponga dos conectores LATCH en un<br />
anclaje LATCH del vehículo .<br />
8. Pruebe el sistema de seguridad para niños para<br />
determinar si la instalación está segura como se<br />
describe en la sección “Verificación final de<br />
seguridad” en la página 9.<br />
9. Verifique que el LATCH se mantiene apretado y no<br />
se suelta de la posición apretada. De no<br />
mantenerse apretado, colóquelo en otro lugar en el<br />
asiento o póngase en contacto con <strong>Graco</strong> llamando<br />
al 1-800-345-4109.<br />
10. Para sacar el LATCH, oprima el botón mientras<br />
tira del cinturón LATCH como se indica .<br />
11. Oprima y sujete la bisagra LATCH .<br />
12. Empuje el conector hacia dentro, levante el<br />
conector y jálelo (en el sentido opuesto al<br />
punto de anclaje) .<br />
13. Repita los pasos 11 y 12 para el otro conector.<br />
¡CLIC!<br />
<br />
<br />
<br />
<br />
<br />
<br />
166
Inclinación del sistema de seguridad para<br />
bebés/base<br />
1) El vehículo DEBE estar nivelado con<br />
el piso para obtener la posición correcta<br />
de reclinación.<br />
2) Use el indicador del nivel en la base.<br />
Cuando lee el indicador del nivel en la<br />
base, véalo directamente desde el costado<br />
del indicador.<br />
Verifique el indicador del nivel. Debe mirar de<br />
frente al indicador.<br />
CUANDO LEE EL INDICADOR DEL NIVEL,<br />
Use la edad corregida para prematuros.<br />
- Si el indicador aparece azul claro en<br />
la ventana, el sistema de seguridad<br />
está nivelado para recién nacidos.<br />
- Si el indicador aparece azul claro y<br />
oscuro en la ventana, el sistema<br />
de seguridad está nivelado para<br />
niños de 3 meses de edad y más.<br />
3+ months<br />
(meses)<br />
- Si aparece el color ROJO el sistema<br />
de seguridad para niños NO está<br />
nivelado. Debe ajustar su posición<br />
de reclinación.<br />
7
Gire la perilla en el sentido contrario a las<br />
agujas del reloj hasta alcanzar el valor deseado<br />
para bajar el pie .<br />
<br />
Gire la perilla en el sentido de las agujas del<br />
reloj para levantar el pie .<br />
<br />
Si todavía aparece la zona de color roja en el<br />
indicador de nivel cuando el pie está<br />
completamente extendido, levante el pie y<br />
coloque una toalla enrollada debajo del pie <br />
SOLAMENTE hasta que aparezca la zona de<br />
color azul.<br />
Vuelva a ajustar el cinturón de seguridad del<br />
vehículo lo necesario para sujetar firmemente el<br />
sistema de seguridad para niños al asiento del vehículo.<br />
<br />
188
Verificación final de seguridad: Cada<br />
ez que sale en automóvil con su niño,<br />
EMPUJE HACIA ABAJO lenta pero firmemente la parte de arriba del<br />
sistema de seguridad para bebés para asegurarse que el cinturón del<br />
vehículo no se alarga y que el cinturón del vehículo<br />
o el LATCH esté sujetado apretadamente alrededor<br />
de la base/sistema de seguridad para bebés.<br />
Agarrando el sistema de seguridad para bebé o<br />
base cerca del recorrido del cinturón del vehículo,<br />
GIRE Y TIRE el asiento hacia adelante y hacia<br />
ambos costados para asegurarse que el cinturón<br />
del vehículo o LATCH no se alargue ni se afloje y que no se pueda<br />
mover el sistema de seguridad para bebés con facilidad. El sistema de<br />
seguridad para bebés no deberá moverse de un lado a otro ni hacia<br />
adelante más de 1 pulgada (2,5 cm).<br />
Almacenamiento del LATCH<br />
1. Para facilitar el<br />
almacenamiento,<br />
extienda el LATCH hasta su<br />
máxima longitud .<br />
1"<br />
<br />
2. El almacenamiento del LATCH<br />
debería tener este aspecto<br />
cuando esté terminado .<br />
<br />
9
Piezas de repuesto<br />
El lado inferior<br />
de la base<br />
Para comprar piezas o accesorios o para obtener información sobre la<br />
garantía en los Estados Unidos,<br />
por favor comuníquese con nosotros en:<br />
www.gracobaby.com<br />
o<br />
1-800-345-4109<br />
20 10