Die Bedienungsanleitung für das Soundmaster UR 2025 finden Sie
Die Bedienungsanleitung für das Soundmaster UR 2025 finden Sie
Die Bedienungsanleitung für das Soundmaster UR 2025 finden Sie

Create successful ePaper yourself
Turn your PDF publications into a flip-book with our unique Google optimized e-Paper software.
Instruction manual / <strong>UR</strong><strong>2025</strong><br />
2.1 Auto-run Mode (Radio OFF)<br />
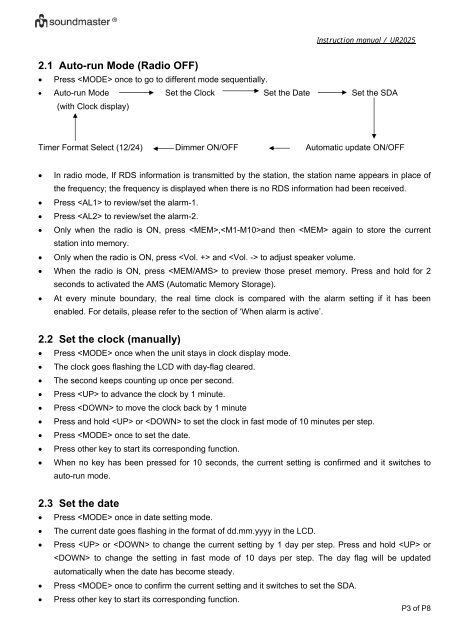
• Press once to go to different mode sequentially.<br />
• Auto-run Mode Set the Clock Set the Date Set the SDA<br />
(with Clock display)<br />
Timer Format Select (12/24) Dimmer ON/OFF Automatic update ON/OFF<br />
• In radio mode, If RDS information is transmitted by the station, the station name appears in place of<br />
the frequency; the frequency is displayed when there is no RDS information had been received.<br />
• Press to review/set the alarm-1.<br />
• Press to review/set the alarm-2.<br />
• Only when the radio is ON, press ,and then again to store the current<br />
station into memory.<br />
• Only when the radio is ON, press and to adjust speaker volume.<br />
• When the radio is ON, press to preview those preset memory. Press and hold for 2<br />
seconds to activated the AMS (Automatic Memory Storage).<br />
• At every minute boundary, the real time clock is compared with the alarm setting if it has been<br />
enabled. For details, please refer to the section of ‘When alarm is active’.<br />
2.2 Set the clock (manually)<br />
• Press once when the unit stays in clock display mode.<br />
• The clock goes flashing the LCD with day-flag cleared.<br />
• The second keeps counting up once per second.<br />
• Press to advance the clock by 1 minute.<br />
• Press to move the clock back by 1 minute<br />
• Press and hold or to set the clock in fast mode of 10 minutes per step.<br />
• Press once to set the date.<br />
• Press other key to start its corresponding function.<br />
• When no key has been pressed for 10 seconds, the current setting is confirmed and it switches to<br />
auto-run mode.<br />
2.3 Set the date<br />
• Press once in date setting mode.<br />
• The current date goes flashing in the format of dd.mm.yyyy in the LCD.<br />
• Press or to change the current setting by 1 day per step. Press and hold or<br />
to change the setting in fast mode of 10 days per step. The day flag will be updated<br />
automatically when the date has become steady.<br />
• Press once to confirm the current setting and it switches to set the SDA.<br />
• Press other key to start its corresponding function.<br />
P3 of P8