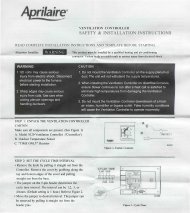
E G O Manual del usuario - Alpine Home Air Products
E G O Manual del usuario - Alpine Home Air Products
E G O Manual del usuario - Alpine Home Air Products

You also want an ePaper? Increase the reach of your titles
YUMPU automatically turns print PDFs into web optimized ePapers that Google loves.
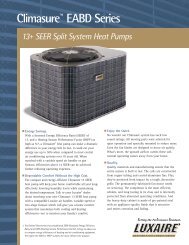
Maple Chase Company<br />
www.maplechase.com<br />
Tech Service: 1-800-445-8299<br />
M-F 7:30 a.m. - 5:30 p.m. CST<br />
MADE IN MEXICO<br />
SETTING OR CHANGING THE SETPOINT TEMPERATURE:<br />
1. Press or button. Display will show SET and the current<br />
temperature setpoint.<br />
2. Press or button to adjust temperature setpoint.<br />
3. After completing the change, the display will return to the current<br />
room temperature after a few seconds.<br />
CHANGING THE TEMPERATURE DIFFERENTIAL,<br />
DEAD BAND, AND RESIDUAL COOL:<br />
The temperature differentials are factory set at 1˚F and 2˚F for<br />
1 ST and 2 ND stages respectively. The dead band for Autochangeover<br />
is set at 3˚F. To change settings:<br />
1. Press the and buttons at the same time and hold for 1<br />
second. Display will indicate: DIFFERENTIAL 1 ST .<br />
2. Press either the or button to adjust the 1st stage differential<br />
between 0.5˚F – 3˚F (0.5˚C - 1.5˚C).<br />
3. Either wait five seconds or press the button. The display<br />
will indicate: DIFFERENTIAL 2 ND .<br />
4. Press either the or button to adjust 2nd stage differential<br />
between 1˚F – 6˚F (1˚C - 3˚C).<br />
5. Either wait five seconds or press the button. The display<br />
will indicate: DEADBAND.<br />
6. Press either the or button to adjust the dead band<br />
between 3˚F – 6˚F (1.5˚C - 3˚C).<br />
7. Either wait five seconds or press the button. The fan<br />
icon and ON will be displayed.<br />
8. Press either the or button to adjust the Residual Cool<br />
fan <strong>del</strong>ay between 0, 30, 60, or 90 seconds.<br />
9. The display will return to the current room temperature after<br />
a few seconds.<br />
120-1523<br />
TM<br />
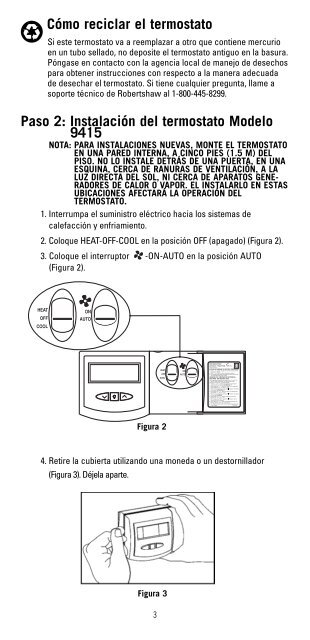
Cómo reciclar el termostato<br />
Si este termostato va a reemplazar a otro que contiene mercurio<br />
en un tubo sellado, no deposite el termostato antiguo en la basura.<br />
Póngase en contacto con la agencia local de manejo de desechos<br />
para obtener instrucciones con respecto a la manera adecuada<br />
de desechar el termostato. Si tiene cualquier pregunta, llame a<br />
soporte técnico de Robertshaw al 1-800-445-8299.<br />
Paso 2: Instalación <strong>del</strong> termostato Mo<strong>del</strong>o<br />
9415<br />
NOTA: PARA INSTALACIONES NUEVAS, MONTE EL TERMOSTATO<br />
EN UNA PARED INTERNA, A CINCO PIES (1.5 M) DEL<br />
PISO. NO LO INSTALE DETRÁS DE UNA PUERTA, EN UNA<br />
ESQUINA, CERCA DE RANURAS DE VENTILACIÓN, A LA<br />
LUZ DIRECTA DEL SOL, NI CERCA DE APARATOS GENE-<br />
RADORES DE CALOR O VAPOR. EL INSTALARLO EN ESTAS<br />
UBICACIONES AFECTARÁ LA OPERACIÓN DEL<br />
TERMOSTATO.<br />
1. Interrumpa el suministro eléctrico hacia los sistemas de<br />
calefacción y enfriamiento.<br />
2. Coloque HEAT-OFF-COOL en la posición OFF (apagado) (Figura 2).<br />
3. Coloque el interruptor -ON-AUTO en la posición AUTO<br />
(Figura 2).<br />
Item<br />
9555<br />
Figura 2<br />
4. Retire la cubierta utilizando una moneda o un destornillador<br />
(Figura 3). Déjela aparte.<br />
Figura 3<br />
3

![Owner's Manual (General) [pdf] - Appliance Factory Parts](https://img.yumpu.com/50830858/1/184x260/owners-manual-general-pdf-appliance-factory-parts.jpg?quality=85)