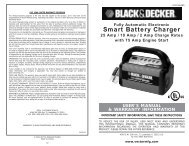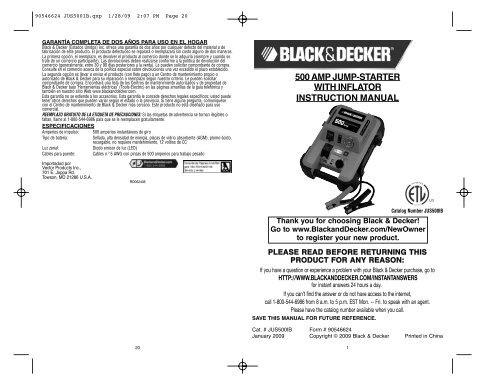
500 AMP JUMP-STARTER WITH INFLATOR INSTRUCTION MANUAL
500 AMP JUMP-STARTER WITH INFLATOR INSTRUCTION MANUAL
500 AMP JUMP-STARTER WITH INFLATOR INSTRUCTION MANUAL

Create successful ePaper yourself
Turn your PDF publications into a flip-book with our unique Google optimized e-Paper software.
90546624 JUS<strong>500</strong>IB.qxp 1/28/09 2:07 PM Page 20<br />
GARANTÍA COMPLETA DE DOS AÑOS PARA USO EN EL HOGAR<br />
Black & Decker (Estados Unidos) Inc. ofrece una garantía de dos años por cualquier defecto del material o de<br />
fabricación de este producto. El producto defectuoso se reparará o reemplazará sin costo alguno de dos maneras.<br />
La primera opción, el reemplazo, es devolver el producto al comercio donde se lo adquirió (siempre y cuando se<br />
trate de un comercio participante). Las devoluciones deben realizarse conforme a la política de devolución del<br />
comercio (generalmente, entre 30 y 90 días posteriores a la venta). Le pueden solicitar comprobante de compra.<br />
Consulte en el comercio acerca de la política especial sobre devoluciones una vez excedido el plazo establecido.<br />
La segunda opción es llevar o enviar el producto (con flete pago) a un Centro de mantenimiento propio o<br />
autorizado de Black & Decker para su reparación o reemplazo según nuestro criterio. Le pueden solicitar<br />
comprobante de compra. Encontrará una lista de los Centros de mantenimiento autorizados y de propiedad de<br />
Black & Decker bajo "Herramientas eléctricas" (Tools-Electric) en las páginas amarillas de la guía telefónica y<br />
también en nuestro sitio Web www.blackanddecker.com.<br />
Esta garantía no se extiende a los accesorios. Esta garantía le concede derechos legales específicos; usted puede<br />
tener otros derechos que pueden variar según el estado o la provincia. Si tiene alguna pregunta, comuníquese<br />
con el Centro de mantenimiento de Black & Decker más cercano. Este producto no está diseñado para uso<br />
comercial.<br />
REEMPLAZO GRATUITO DE LA ETIQUETA DE PRECAUCIONES: Si las etiquetas de advertencia se tornan ilegibles o<br />
faltan, llame al 1-800-544-6986 para que se le reemplacen gratuitamente.<br />
ESPECIFICACIONES<br />
Amperios de impulso: <strong>500</strong> amperios instantáneos de giro<br />
Tipo de batería:<br />
Sellada, alta densidad de energía, placas de vidrio absorbente (AGM), plomo-ácido,<br />
recargable, no requiere mantenimiento, 12 voltios de CC<br />
Luz zonal:<br />
Diodo emisor de luz (LED)<br />
Cables para puente: Cables n.º 5 AWG con pinzas de <strong>500</strong> amperios para trabajo pesado<br />
<strong>500</strong> <strong>AMP</strong> <strong>JUMP</strong>-<strong>STARTER</strong><br />
<strong>WITH</strong> <strong>INFLATOR</strong><br />
<strong>INSTRUCTION</strong> <strong>MANUAL</strong><br />
Importadod por<br />
Vector Products Inc.,<br />
701 E. Joppa Rd.<br />
Towson, MD 21286 U.S.A.<br />
RD062408<br />
SAVE THIS <strong>MANUAL</strong> FOR FUTURE REFERENCE.<br />
Catalog Number JUS<strong>500</strong>IB<br />
Thank you for choosing Black & Decker!<br />
Go to www.BlackandDecker.com/NewOwner<br />
to register your new product.<br />
PLEASE READ BEFORE RETURNING THIS<br />
PRODUCT FOR ANY REASON:<br />
If you have a question or experience a problem with your Black & Decker purchase, go to<br />
HTTP://WWW.BLACKANDDECKER.COM/INSTANTANSWERS<br />
for instant answers 24 hours a day.<br />
If you can’t find the answer or do not have access to the internet,<br />
call 1-800-544-6986 from 8 a.m. to 5 p.m. EST Mon. -- Fri. to speak with an agent.<br />
Please have the catalog number available when you call.<br />
Cat. # JUS<strong>500</strong>IB Form # 90546624<br />
January 2009 Copyright © 2009 Black & Decker Printed in China<br />
20<br />
1
90546624 JUS<strong>500</strong>IB.qxp 1/28/09 2:07 PM Page 2<br />
SAFETY GUIDELINES / DEFINITIONS<br />
DANGER: Indicates an imminently hazardous situation which, if not avoided, will result in death or serious<br />
injury.<br />
WARNING: Indicates a potentially hazardous situation which, if not avoided, could result in death or serious<br />
injury.<br />
CAUTION: Indicates a potentially hazardous situation which, if not avoided, may result in minor or moderate<br />
injury.<br />
CAUTION: Used without the safety alert symbol indicates potentially hazardous situation which, if not avoided, may<br />
result in property damage.<br />
RISK OF UNSAFE OPERATION. When using tools or equipment, basic safety precautions should always be followed<br />
to reduce the risk of personal injury. Improper operation, maintenance or modification of tools or equipment<br />
could result in serious injury and property damage. There are certain applications for which tools and equipment<br />
are designed. Black & Decker strongly recommends that this product NOT be modified and/or used for any<br />
application other than for which it was designed. Read and understand all warnings and operating instructions<br />
before using any tool or equipment.<br />
IMPORTANT SAFETY <strong>INSTRUCTION</strong>S<br />
GENERAL SAFETY WARNINGS AND <strong>INSTRUCTION</strong>S FOR ALL APPLIANCES READ ALL <strong>INSTRUCTION</strong>S<br />
READ ALL <strong>INSTRUCTION</strong>S<br />
WARNING: Read all instructions before operating product. Failure to follow all instructions listed below may<br />
result in electric shock, fire and/or serious injury.<br />
• AVOID DANGEROUS ENVIRONMENTS: Don’t use appliances in damp or wet locations. Don’t use appliances in the rain.<br />
• KEEP CHILDREN AWAY. All visitors should be kept at a distance from work area.<br />
• STORE IDLE APPLIANCES INDOORS. When not in use, appliances should be stored indoors in dry, and high or<br />
locked-up place – out of reach of children.<br />
• DON’T FORCE APPLIANCE. It will do the job better and with less likelihood of a risk of injury at the rate for which it<br />
was designed.<br />
• USE RIGHT APPLIANCE. Do not use the appliance for any job except that for which it is intended.<br />
• DRESS PROPERLY. Do not wear loose clothing or jewelry. They can be caught in moving parts. Rubber gloves<br />
and substantial, non-skid footwear are recommended when working outdoors. Wear protective hair covering to<br />
contain long hair.<br />
• USE SAFETY GLASSES AND OTHER SAFETY EQUIPMENT. Use safety goggles or safety glasses with side shields,<br />
complying with applicable safety standards and, when needed, a face shield. Also use face or dust mask if<br />
operation is dusty. This applies to all persons in the work area. Also use a hard hat, hearing protection, gloves,<br />
safety shoes and dust collection systems when specified or required. Safety glasses or the like are available at<br />
extra cost at your local dealer or Black & Decker Service Center.<br />
• DON’T ABUSE CORD. Never carry appliance by cord or yank it to disconnect from receptacle. Keep cord from heat, oil,<br />
and sharp edges.<br />
• DON’T OVERREACH. Keep proper footing and balance at all times.<br />
• DISCONNECT APPLIANCES. Disconnect the appliance from the power supply when not in use, before servicing,<br />
and when changing accessories such as blades and the like.<br />
• AVOID UNINTENTIONAL STARTING. Don’t carry plugged-in appliance with finger on switch. Be sure switch is off when<br />
plugging in.<br />
• GROUND FAULT CIRCUIT INTERRUPTER (GFCI) protection should be provided on the circuits or outlets to be<br />
used. Receptacles are available having built in GFCI protection and may be used for this measure of safety.<br />
• USE OF ACCESSORIES AND ATTACHMENTS. The use of any accessory or attachment not recommended for use<br />
with this appliance could be hazardous. Note: Refer to the accessory section of this manual for further details.<br />
• STAY ALERT. Watch what you are doing. Use common sense. Do not operate tool when you are tired.<br />
• CHECK DAMAGED PARTS. Before further use of the tool, a guard or other part that is damaged should be carefully<br />
checked to determine that it will operate properly and perform its intended function. Check for alignment of<br />
moving parts, binding of moving parts, breakage of parts, mounting, and any other conditions that may affect its<br />
operation. A guard or other part that is damaged should be properly repaired or replaced by an authorized service<br />
center unless otherwise indicated elsewhere in this instruction manual. Have defective switches replaced by<br />
authorized service center. Do not use tool if switch does not turn it on and off.<br />
• DO NOT OPERATE portable electric tools near flammable liquids or in gaseous or explosive atmospheres. Motors<br />
in these tools normally spark, and the sparks might ignite fumes.<br />
• OUTDOOR USE EXTENSION CORDS. When tool is used outdoors, use only extension cords intended for use outdoors and<br />
so marked.<br />
2<br />
• EXTENSION CORDS. Make sure your extension cord is in good condition. When using an extension cord, be sure to<br />
use one heavy enough to carry the current your product will draw. An undersized cord will cause a drop in line voltage<br />
resulting in loss of power and overheating. The following table shows the correct size to use depending on cord length<br />
and nameplate ampere rating. If in doubt, use the next heavier gage. The smaller the gage number, the heavier the cord.<br />
Minimum Gage for Cord Sets<br />
Volts<br />
Total Length of Cord in Feet<br />
120V 0-25 26-50 51-100 101-150<br />
(0-7.6m) (7.6-15.2m) (15.2-30.4m) (30.4-45.7m)<br />
240V 0-50 51-100 101-200 201-300<br />
(0-15.2m) (15.2-30.4m) (30.4-60.9m) (60.9-91.4m)<br />
Ampere Rating<br />
More Not more American Wire Gage<br />
Than Than<br />
0 - 6 18 16 16 14<br />
6 - 10 18 16 14 12<br />
10 - 12 16 16 14 12<br />
12 - 16 14 12 Not Recommended<br />
WARNING: This product or its power cord contains lead, a chemical known to the State of California to cause<br />
cancer and birth defect or other reproductive harm. Wash hands after handling.<br />
WARNING: BURST HAZARD: Do not use the unit for charging dry-cell batteries that are commonly used with home<br />
appliances. These batteries may burst and cause injury to persons and damage property. Use the unit for<br />
charging/boosting a LEAD-ACID battery only. It is not intended to supply power to a low-voltage electrical system other<br />
than in a starter-motor application.<br />
WARNING: SHOCK HAZARD:<br />
• If an extension cord is used, make sure that:<br />
a) the pins of extension cord are the same number, size and shape as those in the charger,<br />
b) the extension cord is properly wired and in good electrical condition,<br />
c) the wire size is large enough for the AC rating of the charger as indicated in the table on page 1.<br />
• Do not operate unit with damaged cord or plug; or if the unit has received a sharp blow, been dropped, or<br />
otherwise damaged in any way. Do not disassemble the unit; take it to a qualified service technician when<br />
service or repair is required. Incorrect reassembly may result in a risk of electric shock or fire, and will void<br />
warranty.<br />
• Use of an attachment not supplied, recommended or sold by manufacturer specifically for use with this unit may<br />
result in a risk of electrical shock and injury to persons.<br />
• NEVER submerge this unit in water; do not expose it to rain, snow or use when wet.<br />
• To reduce risk of electric shock, disconnect the unit from any power source before attempting maintenance or<br />
cleaning. Turning off controls without disconnecting will not reduce this risk.<br />
WARNING: RISK OF EXPLOSIVE GASES<br />
• Working in the vicinity of a lead acid battery is dangerous. Batteries generate explosive gases during normal<br />
battery operation. For this reason, it is of the utmost importance that each time before using the jump-starter<br />
you read this manual and follow instructions exactly.<br />
• To reduce the risk of battery explosion, follow these instructions and those published by the battery<br />
manufacturer and manufacturer of any equipment you intend to use in the vicinity of the battery. Review<br />
cautionary markings on these products and on the engine.<br />
• This equipment employs parts (switches, relays, etc.) that produce arcs or sparks. Therefore, if used in a garage<br />
or enclosed area, the unit MUST be placed not less than 18 inches above the floor.<br />
• THIS UNIT IS NOT FOR USE BY CHILDREN AND SHOULD ONLY BE OPERATED BY ADULTS.<br />
CAUTION: TO REDUCE THE RISK OF INJURY OR PROPERTY DAMAGE:<br />
• Pull cord by plug rather than cord when disconnecting the 120V AC Charging Adapter from the unit.<br />
• NEVER ATTEMPT TO <strong>JUMP</strong>-START OR CHARGE A FROZEN BATTERY.<br />
• To recharge this unit, use only the supplied AC Charging Adapter.<br />
• Vehicles that have on-board computerized systems may be damaged if vehicle battery is jump-started. Before<br />
jump-starting, read the vehicle’s owner’s manual to confirm that external-starting assistance<br />
is suitable.<br />
• When working with lead acid batteries, always make sure immediate assistance is available in case of accident<br />
or emergency.<br />
• Always have protective eyewear when using this product: contact with battery acid may cause blindness and/or<br />
severe burns. Be aware of first aid procedures in case of accidental contact with battery acid.<br />
• Have plenty of fresh water and soap nearby in case battery acid contacts skin.<br />
• If battery acid contacts skin or clothing, wash immediately with soap and water for at least 10 minutes and get<br />
medical attention immediately.<br />
3
90546624 JUS<strong>500</strong>IB.qxp 1/28/09 2:07 PM Page 4<br />
• Never smoke or allow a spark or flame in vicinity of vehicle battery, engine or power station<br />
• Remove personal metal items such as rings, bracelets, necklaces and watches when working with a lead acid<br />
battery. A lead acid battery can produce a short circuit current high enough to weld a ring, or similar metal<br />
object, to skin, causing a severe burn.<br />
• Do not wear vinyl clothing when jump-starting a vehicle when jump-starting a vehicle, friction can cause<br />
dangerous static-electrical sparks.<br />
• Jump-start procedures should only be performed in a safe, dry, well-ventilated area.<br />
• Always store battery clamps when not in use. Never touch battery clamps together. This can cause dangerous<br />
sparks, power arcing and/or explosion.<br />
• When using this unit close to the vehicle’s battery and engine, stand the unit on a flat, stable surface, and be sure<br />
to keep all clamps, cords, clothing and body parts away from moving vehicle parts.<br />
• Never allow red and black clamps to touch each other or another common metal conductor — this could cause<br />
damage to the unit and/or create a sparking/explosion hazard.<br />
a) For negative-grounded systems, connect the POSITIVE (RED) clamp to the POSITIVE ungrounded battery<br />
post and the NEGATIVE (BLACK) clamp to the vehicle chassis or engine block away from the battery. Do not<br />
connect the clamp to the carburetor, fuel lines or sheet-metal body parts. Connect to a heavy gauge metal part<br />
of the frame or engine block. Refer to the automobile owner’s manual.<br />
b) For positive-grounded systems, connect the NEGATIVE (BLACK) clamp to the NEGATIVE ungrounded<br />
battery post and the POSITIVE (RED) clamp to the vehicle chassis or engine block away from the battery. Do<br />
not connect the clamp to the carburetor, fuel lines or sheet-metal body parts. Connect to a heavy gauge metal<br />
part of the frame or engine block. Refer to the automobile owner’s manual.<br />
• If the connections to the battery’s POSITIVE and NEGATIVE terminals are incorrect, the Reverse Polarity<br />
Indicator will light (red) and the unit will sound a beep. Disconnect clamps and reconnect to battery with correct<br />
polarity.<br />
• Always disconnect the NEGATIVE (BLACK) jumper cable first, followed by the POSITIVE (RED) jumper cable,<br />
except for positive grounded systems.<br />
• Do not expose battery to fire or intense heat since it may explode. Before disposing of the battery, protect<br />
exposed terminals with heavy-duty electrical tape to prevent shorting (shorting can result in injury or fire).<br />
• Place this unit as far away from the battery as cables permit.<br />
• Never allow battery acid to come in contact with this unit.<br />
• Do not operate this unit in a closed area or restrict ventilation in any way.<br />
• FIRST AID – SKIN: If battery acid comes in contact with skin, rinse immediately with water, then wash<br />
thoroughly with soap and water. If redness, pain, or irritation occurs, seek immediate medical attention.<br />
EYES: If battery acid comes in contact with eyes, flush eyes immediately, for a minimum of 15 minutes and seek<br />
immediate medical attention.<br />
• IMPORTANT: This unit is delivered in a partially charged state. Fully charge unit with a household extension cord<br />
(not supplied) for a full 24 hours before using for the first time. You cannot overcharge the unit using the AC<br />
charging method.<br />
• All On/Off switches should be in the OFF position when the unit is charging or not in use. Make sure all switches<br />
are in the OFF position before connection to a power source or load.<br />
• This system is designed to be used only on vehicles with a 12 volt DC battery system. Do not connect to a 6 volt<br />
or 24 volt battery system.<br />
• This system is not designed to be used as a replacement for a vehicular battery. Do not attempt to operate a<br />
vehicle that does not have a battery installed.<br />
• Excessive engine cranking can damage a vehicle’s starter motor. If the engine fails to start after the<br />
recommended number of attempts, discontinue jump-start procedures and look for other problems that may<br />
need to be corrected.<br />
• Do not use this jump-starter on a watercraft. It is not qualified for marine applications.<br />
• Although this unit contains a non-spillable battery, it is recommended that unit be kept upright during storage,<br />
use and recharging. To avoid possible damage that may shorten the unit’s working life, protect it from direct<br />
sunlight, direct heat and/or moisture.<br />
• Read And Understand This Instruction Manual Before Using This Unit.<br />
SAVE THESE <strong>INSTRUCTION</strong>S<br />
This device complies with part 15 of the FCC rules. Operation is subject to the following two conditions: (1) this device<br />
may not cause harmful interference, and (2) this device must accept any interference received, including interference<br />
that may cause undesired operation.<br />
This equipment has been tested and found to comply with the limits for a Class B digital device, pursuant to part 15 of<br />
the FCC Rules. These limits are designed to provide reasonable protection against harmful interference in a residential<br />
installation. This equipment generates, uses and can radiate radio frequency energy and, if not installed and used in<br />
accordance with the instructions, may cause harmful interference to radio communications. However, there is no<br />
guarantee that interference will not occur in a particular installation. If equipment does cause harmful interference to<br />
radio or television reception, which can be determined by turning the equipment off and on, the user is encouraged to<br />
try to correct the interference by one or more of the following measures:<br />
• Reorient or relocate the receiving antenna.<br />
• Increase the separation between equipment and receiver.<br />
• Connect the equipment into an outlet on a circuit different from that to which the receiver is connected.<br />
• Consult the dealer or an experienced radio/TV technician for help.<br />
WARNING: TO REDUCE THE RISK OF INJURY:<br />
Follow these instructions and those published by the battery manufacturer and manufacturer of any equipment<br />
you intend to use with this unit. Review cautionary markings on these products and on engine.<br />
INTRODUCTION<br />
Thank you for choosing the <strong>500</strong> Amp Jump-Starter. This compact jump-starter is unique in the amount of<br />
energy it can supply for its size. The internal battery is a high density sealed, lead-acid battery that stores and<br />
delivers energy comparable to full sized ordinary jump-starters. Please read this guide carefully before use to<br />
ensure optimum performance and avoid damage to the unit or items that you are using it with.<br />
The <strong>500</strong> Amp Jump-Starter is a compact, durable, portable jump-start system for vehicles that have a<br />
standard 12 volt battery system. This self-contained, rechargeable system will start most vehicles without the<br />
need for a host vehicle or 12 volt DC power supply.<br />
FEATURES<br />
• Keyless ON/OFF Power Switch<br />
• Cordless/rechargeable<br />
• Built-in non-spillable, maintenance-free, heavy duty, sealed, lead-acid battery<br />
• Requires no maintenance (other than recharging) for optimum operation<br />
• Heavy duty cables and clamps<br />
• Built-in LED Area Light<br />
• Built-in portable inflator for vehicle tires and recreational inflatables<br />
• Reverse polarity connection warning indicator<br />
• Exclusive cable storage channels keep jumper cables out of the way until needed<br />
• Built-in 120 Volt AC Charger (uses a standard extension cord, not included)<br />
• Easy-to-read LED battery charge status indicators<br />
4<br />
5
90546624 JUS<strong>500</strong>IB.qxp 1/28/09 2:07 PM Page 6<br />
Controls and Indicators<br />
1<br />
10<br />
9<br />
11<br />
TOP OF UNIT<br />
1.<strong>INFLATOR</strong> NOZZLE TIPS AND STORAGE HATCH<br />
2.<strong>INFLATOR</strong> ON/OFF SWITCH<br />
3.PRESSURE GAUGE<br />
4.BUILT-IN LED AREA LIGHT<br />
5.AREA LIGHT POWER SWITCH<br />
6.REVERSE POLARITY INDICATOR<br />
7.<strong>JUMP</strong>-<strong>STARTER</strong> POWER SWITCH<br />
8.LED BATTERY STATUS INDICATORS<br />
9.BATTERY CHARGE LEVEL PUSHBUTTON<br />
8<br />
2 3<br />
6<br />
12<br />
13<br />
10.BUILT-IN 120 VOLT AC CHARGER (UNDER<br />
PROTECTIVE COVER)<br />
SIDES OF UNIT<br />
11.POSITIVE (+) RED CL<strong>AMP</strong><br />
12.NEGATIVE (–) BLACK CL<strong>AMP</strong><br />
BOTTOM OF UNIT<br />
13.<strong>INFLATOR</strong> HOSE AND CONNECTOR (CHUCK)<br />
CHARGING/RECHARGING<br />
This product has a sealed lead acid battery. For maximum battery life, we recommend the Jump-Starter be kept<br />
fully charged at all times. Recharge before first use, immediately after each use, and once a month if not used.<br />
Failure to do this may reduce the battery life dramatically. To check the battery charge status at any time, press<br />
the Battery Charge Level Pushbutton.<br />
Note: This unit is delivered in a partially charged state – you must fully charge it before using it for the first time. Initial AC<br />
charge should be for 24 hours.<br />
7<br />
4<br />
6<br />
5<br />
Charging/Recharging Using the 120 Volt AC Charger and<br />
a Standard Household Extension Cord (not included)<br />
1.Lift the AC adapter cover located on the front of the unit and connect an extension cord to the unit. Plug the<br />
other end of the cord into a standard 120 volt AC wall outlet.<br />
2.Charge until three Red and one Green LED Battery Status Indicators light or flash.<br />
3.Once fully charged, disconnect the extension cord.<br />
Note: The unit cannot be overcharged using the AC method.<br />
<strong>JUMP</strong>-<strong>STARTER</strong><br />
This Jump-Starter is equipped with an ON/OFF Power Switch. Once the connections are properly made, turn the<br />
switch ON to jump-start the vehicle.<br />
1.Turn OFF vehicle ignition and all accessories (radio, A/C, lights, connected cell phone chargers, etc.). Place<br />
vehicle in “park” and set the emergency brake.<br />
2.Make sure the Jump-Starter Power Switch is turned to OFF.<br />
3.Remove jumper clamps from clamp tabs. Connect the red clamp first, then the black clamp.<br />
4.Procedure for jump-starting a NEGATIVE GROUNDED SYSTEM (negative battery terminal is connected to chassis)<br />
(MOST COMMON)<br />
4a.Connect positive (+) red clamp to vehicle battery’s positive terminal.<br />
4b.Connect negative (–) black clamp to chassis or a solid, non-moving, metal vehicle component or body<br />
part. Never clamp directly to negative battery terminal or moving part. Refer to the automobile owner’s<br />
manual.<br />
5.Procedure for jump-starting POSITIVE GROUND SYSTEMS<br />
Note: In the rare event that the vehicle to be started has a Positive Grounded System (positive battery terminal is<br />
connected to chassis), replace steps 4a and 4b above with steps 5a and 5b, then proceed to step 6.<br />
5a.Connect negative (–) black clamp to vehicle battery’s negative terminal.<br />
5b.Connect positive (+) red clamp to vehicle chassis or a solid, non-moving, metal vehicle component or body<br />
part. Never clamp directly to Positive battery terminal or moving part. Refer to the automobile owner’s<br />
manual.<br />
6.When clamps are connected properly, turn the Jump-Starter Power Switch to ON.<br />
7.Turn ON the ignition and crank the engine in 5-6 second bursts until engine starts.<br />
8.Turn the Jump-Starter Power Switch back to the OFF position.<br />
9.Disconnect the negative (–) engine or chassis clamp first, then disconnect the positive (+) battery clamp.<br />
FOLLOW ALL SAFETY <strong>INSTRUCTION</strong>S FOUND IN THIS <strong>MANUAL</strong>.<br />
CAUTIONS: RISK OF PROPERTY DAMAGE<br />
• If the connections to the battery’s positive and negative terminals are incorrect, the Reverse Polarity Indicator<br />
will light (red) and the unit will sound a beep. Disconnect clamps and reconnect to battery with correct polarity.<br />
• If vehicle fails to start, turn OFF the ignition, turn OFF the Jump-Starter Power Switch, disconnect the jump-start<br />
system’s leads and contact a qualified technician to investigate why the engine did not start.<br />
• Recharge this unit fully after each use.<br />
WARNINGS<br />
• Jump-Starter Power Switch should be off prior to jump-starting.<br />
• This power system is to be used ONLY on vehicles with 12 volt DC battery systems.<br />
• Never touch red and black clamps together — this can cause dangerous sparks, power arcing, and/or explosion.<br />
• Vehicles that have on-board computerized systems may be damaged if vehicle battery is jump-started. Before<br />
jump-starting this type of vehicle, read the vehicle manual to confirm that external-starting assistance is advised.<br />
• Excessive engine cranking can damage the vehicle‘s starter motor. If the engine fails to start after the<br />
recommended number of attempts, discontinue jump-start procedure and look for other problems that need to<br />
be corrected.<br />
• After use, turn the Jump-Starter Power Switch OFF.<br />
• Replace worn or defective parts immediately — contact the Customer Service Department toll free<br />
1-800-544-6986.<br />
LED AREA LIGHT<br />
The area light is controlled by the Area Light Power Switch on the front panel of the unit. Make sure the lamp is<br />
turned OFF when the unit is being recharged or stored.<br />
PORTABLE <strong>INFLATOR</strong><br />
The built-in 12 volt DC inflator is the ultimate inflator for all vehicle tires, trailer tires and recreational inflatables.<br />
Three different sized nozzles are supplied. Each nozzle will clip on the end of the standard tire valve connector<br />
located at the free end of the inflator hose. The inflator nozzles are stored inside the storage hatch on the top of<br />
the unit. The inflator hose with tire fitting is stored in a retaining channel on the bottom of the unit. The ON/OFF<br />
7
90546624 JUS<strong>500</strong>IB.qxp 1/28/09 2:07 PM Page 8<br />
Switch is located on the front of the unit. The inflator can operate long enough to fill up to 3 average sized tires<br />
before the battery must be recharged.<br />
The inflator may be used by removing the air hose from the storage hatch and if required, fitting an appropriate<br />
nozzle to the air hose. An ON/OFF switch located on the front of the unit controls the power to the inflator and the<br />
gauge light. Refer to the “Controls and Indicators” section on page 5 for locations of inflator hose and nozzle<br />
storage hatch. Return hose to the storage compartment after use.<br />
WARNING: BURST HAZARD<br />
• The inflator is capable of inflating up to 120 pounds per square inch (psi) pressure. To avoid over-inflation,<br />
carefully follow instructions on articles to be inflated. Never exceed recommended pressures. Bursting articles<br />
can cause serious injury.<br />
• Always check pressure with the pressure gauge.<br />
• Never leave the inflator unattended while in use.<br />
CAUTION: RISK OF PROPERTY DAMAGE<br />
Do not operate inflator continuously for extended periods of time (approximately 10 minutes, depending on<br />
ambient temperatures), as it may overheat. In such event, inflator will automatically shut down. Immediately turn<br />
OFF the Inflator Power Switch. Restart after a cooling down period of approximately 10 minutes.<br />
Inflating Tires or Products With Valve Stems<br />
1.Place connector (chuck) on valve stem.<br />
2.Ensure connector is pushed on to valve stem as far as possible before closing thumb latch.<br />
3.Make sure latch is secure.<br />
4.Turn ON the Inflator Power Switch.<br />
5.Check pressure with the pressure gauge.<br />
6.When desired pressure is reached, open thumb latch and remove connector from valve stem.<br />
7.Turn OFF Inflator Power Switch.<br />
8.Allow unit to cool before storing away.<br />
9.Store inflator hose and tire fitting in storage compartment.<br />
Inflating Other Inflatables Without Valve Stems<br />
Inflation of other items requires use of one of the adapters (nozzles).<br />
1.Select the appropriate nozzle, located on the inside back cover.<br />
2.Insert appropriate adapter (i.e. needle) into connector (chuck) and close thumb latch.<br />
3.Small items such as volleyballs, footballs, etc. inflate very rapidly.<br />
4.Insert adapter (i.e., needle) into item to inflate to appropriate pressure.<br />
5.Turn ON the Inflator Power Switch — inflate to desired pressure or fullness.<br />
6.Remove adapter.<br />
7.Switch the Inflator Power Switch OFF.<br />
8.Recharge the unit before storing away.<br />
CARE AND MAINTENANCE<br />
Battery Replacement<br />
It is recommended that the unit be returned to manufacturer for battery replacement. Contact Customer Service,<br />
toll-free, at 1-800-544-6986.<br />
Battery Disposal<br />
Contains a maintenance-free, sealed, non-spillable, lead acid battery, which must be<br />
disposed of properly. Recycling is required — contact your local authority for<br />
information. Failure to comply with local, state and federal regulations can result in fines<br />
or imprisonment. For more information on recycling this battery, call toll-free<br />
1-800-544-6986.<br />
WARNINGS<br />
Do not dispose of this unit in fire as batteries inside this product may explode or leak.<br />
Do not expose the unit containing a battery to fire or intense heat as it may explode.<br />
Before disposing of the battery, protect exposed terminals with heavy-duty electrical tape to prevent shorting<br />
(shorting can result in injury or fire).<br />
TROUBLESHOOTING<br />
Problem<br />
Unit Fails to Jump-Start<br />
LED Area Light does not come on<br />
Portable Inflator will not inflate<br />
ACCESSORIES<br />
Recommended accessories for use with your tool are available from your local dealer or authorized service center.<br />
If you need assistance regarding accessories, please call: 1-800-544-6986.<br />
WARNING: The use of any accessory not recommended for use with this tool could be hazardous.<br />
SERVICE INFORMATION<br />
All Black & Decker Service Centers are staffed with trained personnel to provide customers with efficient and<br />
reliable power tool service. Whether you need technical advice, repair, or genuine factory replacement parts,<br />
contact the Black & Decker location nearest you. To find your local service location, refer to the yellow page<br />
directory under "Tools—Electric" or call: 1-800-544-6986 or visit www.blackanddecker.com.<br />
FULL TWO-YEAR HOME USE WARRANTY<br />
Black & Decker (U.S.) Inc. warrants this product for two years against any defects in material or workmanship.<br />
The defective product will be replaced or repaired at no charge in either of two ways.<br />
The first, which will result in exchanges only, is to return the product to the retailer from whom it was purchased<br />
(provided that the store is a participating retailer). Returns should be made within the time period of the retailer’s<br />
policy for exchanges (usually 30 to 90 days after the sale). Proof of purchase may be required. Please check with<br />
the retailer for their specific return policy regarding returns that are beyond the time set for exchanges.<br />
The second option is to take or send the product (prepaid) to a Black & Decker owned or authorized Service<br />
Center for repair or replacement at our option. Proof of purchase may be required. Black & Decker owned and<br />
authorized Service Centers are listed under "Tools-Electric" in the yellow pages of the phone directory and on our<br />
website www.blackanddecker.com.<br />
This warranty does not apply to accessories. This warranty gives you specific legal rights and you may have other<br />
rights which vary from state to state or province to province. Should you have any questions, contact the<br />
manager of your nearest Black & Decker Service Center. This product is not intended for commercial use.<br />
FREE WARNING LABEL REPLACEMENT: If your warning labels become illegible or are missing, call 1-800-544-6986<br />
for a free replacement.<br />
SPECIFICATIONS<br />
Boost Ampere:<br />
<strong>500</strong> instantaneous cranking amps<br />
Battery Type:<br />
Sealed, high energy density, AGM, lead-acid, rechargeable,<br />
maintenance-free, 12 volt DC<br />
Area Light:<br />
Light Emitting Diode (LED)<br />
Booster Cables:<br />
#5 AWG cables with <strong>500</strong> Amps heavy duty clamps<br />
Imported by<br />
Vector Products Inc.,<br />
701 E. Joppa Rd.<br />
Towson, MD 21286 U.S.A.<br />
Solution<br />
• Make sure unit’s power switch is in the ON position.<br />
• Check that Jump-Starter has a full charge. Recharge unit if necessary.<br />
• Make sure a proper polarity cable connection has been established.<br />
• Make sure the LED Area Light ON/OFF button is in the ON position<br />
• Check that Jump-Starter has a full charge. Recharge unit if necessary.<br />
• Make sure the Inflator Power Switch is in the ON position.<br />
• Check that Jump-Starter has a full charge. Recharge unit if necessary.<br />
• Make sure connector is pushed to valve stem and thumb latch is<br />
closed when attempting to inflate tires; or nozzle (adapter) is securely<br />
inserted into connector (chuck) on all other inflatables.<br />
RD062408<br />
See ‘Tools-Electric’<br />
– Yellow Pages –<br />
for Service & Sales<br />
8<br />
9
90546624 JUS<strong>500</strong>IB.qxp 1/28/09 2:07 PM Page 10<br />
<strong>MANUAL</strong> DE INSTRUCCIONES DEL<br />
PUENTE AUXILIAR DE ARRANQUE CON<br />
INFLADOR DE <strong>500</strong> <strong>AMP</strong>ERIOS<br />
10 11<br />
Número de catálogo JUS<strong>500</strong>IB<br />
Gracias por elegir Black & Decker!<br />
Visite<br />
www.BlackandDecker.com/NewOwner<br />
para registrar su nuevo producto.<br />
LEA EL <strong>MANUAL</strong> ANTES DE DEVOLVER<br />
ESTE PRODUCTO POR CUALQUIER MOTIVO:<br />
Si tiene una consulta o algún inconveniente con su producto Black & Decker, visite<br />
HTTP://WWW.BLACKANDDECKER.COM/INSTANTANSWERS<br />
para obtener respuestas instantáneas las 24 horas del día.<br />
Si no encuentra la respuesta o no tiene acceso a Internet, llame al 1-800-544-6986 de<br />
lunes a viernes de 8 a.m. a 5 p.m. hora del Este para hablar con un agente.<br />
Cuando llame, tenga a mano el número de catálogo.<br />
CONSERVE ESTE <strong>MANUAL</strong> PARA FUTURAS CONSULTAS.<br />
N.º de catálogo JUS<strong>500</strong>IB Formulario n.º 90546624<br />
Enero 2009 Copyright © 2009 Black & Decker Impreso en China
90546624 JUS<strong>500</strong>IB.qxp 1/28/09 2:07 PM Page 12<br />
NORMAS DE<br />
SEGURIDAD/DEFINICIONES<br />
PELIGRO: Indica una situación de peligro inminente que, si no se evita, provocará la muerte o lesiones graves.<br />
ADVERTENCIA: Indica una situación de peligro potencial que, si no se evita, podría provocar la muerte o<br />
lesiones graves.<br />
PRECAUCIÓN: Indica una situación de peligro potencial que, si no se evita, puede provocar lesiones leves o<br />
moderadas.<br />
PRECAUCIÓN: Utilizado sin el símbolo de alerta de seguridad indica una situación de peligro potencial que, si no<br />
se evita, puede provocar daños en la propiedad.<br />
RIESGO DE OPERACIÓN INSEGURA. Cuando se utilizan herramientas o equipos, siempre se deben respetar las<br />
precauciones de seguridad para reducir el riesgo de lesiones personales. La operación, la modificación o el<br />
mantenimiento incorrectos de herramientas o equipos pueden provocar lesiones graves y daños a la propiedad.<br />
Las herramientas y los equipos están diseñados para determinados usos. Black & Decker recomienda<br />
enfáticamente que NO se modifique este producto y que NO se utilice para ningún otro uso que aquél para el que<br />
fue diseñado. Lea y comprenda todas las instrucciones operativas y las advertencias antes de utilizar cualquier<br />
herramienta o equipo.<br />
INSTRUCCIONES IMPORTANTES<br />
SOBRE SEGURIDAD<br />
INSTRUCCIONES Y ADVERTENCIAS DE SEGURIDAD GENERALES PARA TODOS LOS ARTEFACTOS<br />
LEA TODAS LAS INSTRUCCIONES<br />
ADVERTENCIA: Lea todas las instrucciones antes de hacer funcionar el producto. El incumplimiento de todas<br />
las instrucciones enumeradas a continuación puede provocar una descarga eléctrica, un incendio o lgraves.<br />
• EVITE LAS CONDICIONES AMBIENTALES PELIGROSAS. No utilice artefactos en zonas húmedas o mojadas. No<br />
utilice artefactos bajo la lluvia.<br />
• MANTENGA A LOS NIÑOS ALEJADOS. Los visitantes deben mantenerse a cierta distancia del área de trabajo.<br />
• GUARDE LOS ARTEFACTOS QUE NO UTILICE EN EL INTERIOR. Cuando no los utilice, los artefactos deben<br />
guardarse bajo techo, en un lugar seco, alto o bajo llave, lejos del alcance de los niños.<br />
• NO FUERCE EL APARATO. Funcionará mejor y con menos probabilidades de daños si se opera a la velocidad para<br />
la que fue diseñado.<br />
• UTILICE EL APARATO ADECUADO. Nunca utilice el aparato para otra tarea que no sea aquella para la que fue<br />
creado.<br />
• USE LA VESTIMENTA ADECUADA. No use ropas holgadas o joyas. Pueden atascarse en las piezas en movimiento.<br />
Se recomienda utilizar guantes de goma y calzado antideslizante considerable al trabajar al aire libre. Recójase y<br />
cubra el cabello largo.<br />
• USE ANTEOJOS DE SEGURIDAD Y CUALQUIER OTRO EQUIPO DE SEGURIDAD. Use anteojos protectores o lentes<br />
de seguridad con protección lateral que cumplan con las normas de seguridad aplicables y, de ser necesario, un<br />
protector facial. Utilice también máscaras faciales o para polvo si la operación produce polvillo. Esto se aplica a<br />
todas las personas que se encuentren en el área de trabajo. Utilice también un casco, protección auditiva,<br />
guantes, calzado de seguridad y sistemas de recolección de polvo cuando así se especifique o requiera. Puede<br />
conseguir anteojos de seguridad o similares a un costo adicional en su distribuidor local o Centro de<br />
mantenimiento de Black & Decker más cercano.<br />
• NO TIRE DEL CABLE. Nunca transporte el aparato por el cable ni lo jale para desconectarlo del tomacorriente.<br />
Mantenga el cable alejado del calor, el aceite y los bordes afilados.<br />
• NO SE ESTIRE. Conserve el equilibrio y párese adecuadamente en todo momento.<br />
• DESCONECTE LOS APARATOS. Desconecte el aparato de la fuente de energía cuando no lo utilice, antes de<br />
realizar un mantenimiento y al cambiar accesorios como hojas y elementos semejantes.<br />
• EVITE EL ENCENDIDO POR ACCIDENTE. No transporte el aparato enchufado con el dedo en el interruptor.<br />
Asegúrese de que el interruptor esté apagado cuando lo enchufe.<br />
• LA PROTECCIÓN DEL INTERRUPTOR DE CORTE POR FALLA A TIERRA (GFCI) debe aplicarse a los circuitos o los<br />
tomacorrientes que se utilizarán. Hay tomacorrientes con protección GFCI incorporada que pueden utilizarse<br />
para tomar esta medida de seguridad.<br />
• USO DE SUPLEMENTOS Y ACCESORIOS. El uso de accesorios o dispositivos no recomendados para utilizar con<br />
este aparato puede resultar peligroso. Nota: Consulte la sección "Accesorios" de este manual para obtener<br />
detalles adicionales.<br />
• MANTÉNGASE ALERTA. Fíjese en lo que está haciendo. Use el sentido común. No opere la herramienta si está<br />
cansado.<br />
• VERIFIQUE QUE NO HAYA PIEZAS DAÑADAS. Antes de volver a utilizar la herramienta, se debe controlar cualquier<br />
protección u otra pieza que esté averiada para determinar si funcionará correctamente y realizará la función para<br />
la que fue diseñada. Verifique la alineación y la sujeción de las piezas móviles, la rotura de piezas, el montaje y<br />
cualquier otra condición que pueda afectar su operación. Cualquier protección u otra pieza que esté dañada debe<br />
ser reparada correctamente o reemplazada por un centro de mantenimiento autorizado, a menos que este<br />
manual de instrucciones indique otra cosa. Reemplace los interruptores defectuosos en un centro de<br />
mantenimiento autorizado. No utilice la herramienta si no puede encenderla o apagarla con el interruptor.<br />
• NO OPERE herramientas eléctricas portátiles cerca de líquidos inflamables o en atmósferas gaseosas o<br />
explosivas. Los motores de estas herramientas normalmente chispean, y las chispas pueden encender los<br />
vapores.<br />
• EN ESPACIOS ABIERTOS, USE CABLES PROLONGADORES. Cuando opere la herramienta al aire libre, utilice<br />
solamente cables prolongadores diseñados para su uso al aire libre o marcados como tales.<br />
• CABLES PROLONGADORES. Asegúrese de que el cable prolongador esté en buenas condiciones. Cuando utilice<br />
un cable prolongador, cerciórese de que tenga la capacidad para conducir la corriente que su producto exige. Un<br />
cable de menor capacidad provocará una disminución en el voltaje de la línea, lo cual producirá una pérdida de<br />
potencia y sobrecalentamiento. La siguiente tabla muestra la medida correcta que debe utilizar según la longitud<br />
del cable y la capacidad nominal en amperios indicada en la placa. En caso de duda, utilice el calibre<br />
inmediatamente superior. Cuanto menor es el número de calibre, más grueso es el cable.<br />
Calibre mínimo para los juegos de cables<br />
Voltios<br />
Longitud total del cable en pies<br />
120V 0-25 26-50 51-100 101-150<br />
(0-7,6m) (7,6-15,2m) (15,2-30,4m) (30,4-45,7m)<br />
240V 0-50 51-100 101-200 201-300<br />
(0-15,2m) (15,2-30,4m) (30,4-60,9m) (60,9-91,4m)<br />
Capacidad nominal en amperios<br />
Más No más Medida de conductor estadounidense<br />
que que<br />
0 - 6 18 16 16 14<br />
6 - 10 18 16 14 12<br />
10 - 12 16 16 14 12<br />
12 - 16 14 12 No recomendado<br />
ADVERTENCIA: Este producto o su cable de alimentación contiene plomo, una sustancia química reconocida<br />
por el Estado de California como causante de cáncer, defectos de nacimiento u otros problemas reproductivos.<br />
Lávese las manos después de utilizarlo.<br />
ADVERTENCIA, PELIGRO DE ESTALLIDO: No utilice la unidad para cargar las baterías secas que se usan<br />
normalmente con los aparatos domésticos. Estas baterías pueden estallar y provocar lesiones a las personas y<br />
daños a la propiedad. Use la unidad para carga/ refuerzo solamente de una batería de PLOMO-ÁCIDO. No está<br />
diseñada para proveer energía a un sistema eléctrico de bajo voltaje que no sea para arrancar un motor.<br />
ADVERTENCIA: RIESGO DE DESCARGA ELÉCTRICA:<br />
• Si es necesario utilizar un cable prolongador, asegúrese de que:<br />
a) las patas del cable prolongador sean del mismo número, el mismo tamaño y la misma forma que las del<br />
cargador,<br />
b) el cable prolongador posea los conductores correctos y esté en buenas condiciones eléctricas,<br />
c) la medida del conductor sea suficientemente grande para la capacidad nominal en amperios como lo indicado en<br />
la tabla arriba.<br />
• No opere la unidad con un cable o enchufe dañados, o si ésta ha recibido un golpe fuerte, se cayó o presenta<br />
algún daño. No desarme la unidad; llévela a un técnico de servicio calificado cuando se requiera mantenimiento<br />
o una reparación. Volver a armarla de manera incorrecta podría provocar un riesgo de descarga eléctrica o un<br />
incendio, y anulará la garantía.<br />
• El uso de un dispositivo no suministrado, recomendado o vendido por el fabricante específicamente para el uso<br />
con esta unidad puede provocar riesgo de descarga eléctrica y lesiones a las personas.<br />
• NUNCA sumerja esta unidad en agua; no la exponga a la lluvia, la nieve, ni la use cuando esté mojada.<br />
• Para reducir el riesgo de descarga eléctrica, desconecte la unidad de cualquier fuente de energía antes de<br />
intentar limpiarla o realizarle un mantenimiento. Apagar los controles sin desenchufar la unidad no reducirá este<br />
riesgo.<br />
12<br />
13
90546624 JUS<strong>500</strong>IB.qxp 1/28/09 2:07 PM Page 14<br />
ADVERTENCIA: RIESGO DE GASES EXPLOSIVOS<br />
• Trabajar cerca de una batería de plomo ácido es peligroso. Las baterías generan gases explosivos durante su<br />
funcionamiento normal. Por esta razón, es muy importante que siempre lea este manual antes de utilizar el<br />
puente auxiliar de arranque y que siga las instrucciones con exactitud.<br />
• Para reducir el riesgo de explosión de la batería, siga estas instrucciones y las publicadas por el fabricante de la<br />
batería y el fabricante de cualquier equipo que tenga la intención de utilizar cerca de la batería. Revise las<br />
indicaciones sobre precauciones en estos productos y en el motor.<br />
• Este equipo emplea piezas (interruptores y relés) que producen arcos o chispas. Por lo tanto, si utiliza la unidad<br />
en una cochera o un área cerrada, DEBE colocarla a no menos de 457 mm (18 pulgadas) por encima del piso.<br />
• LOS NIÑOS NO DEBEN UTILIZAR ESTA UNIDAD. SÓLO LOS ADULTOS PUEDEN OPERARLA.<br />
PRECAUCIÓN: PARA REDUCIR EL RIESGO DE LESIONES O DAÑO A LA PROPIEDAD:<br />
• Cuando desconecte el adaptador de carga de CA de 120 V de la unidad, tire el cable por el enchufe y no por el<br />
cable.<br />
• NUNCA INTENTE ARRANCAR MEDIANTE PUENTE NI CARGAR UNA BATERÍA CONGELADA.<br />
• Para recargar esta unidad, utilice solamente el adaptador de carga de CA que se suministra.<br />
• Los vehículos que tienen sistemas computarizados incorporados pueden resultar dañados si la batería del<br />
vehículo se arranca mediante puente. Antes de arrancar mediante puente, lea el manual del cliente del vehículo<br />
para confirmar que la ayuda externa para arrancar es adecuada.<br />
• Cuando trabaje con baterías de plomo-ácido, asegúrese de que siempre haya ayuda inmediata disponible en<br />
caso de accidente o emergencia.<br />
• Utilice siempre protección para los ojos al emplear este producto; el contacto con el ácido de la batería puede<br />
producir ceguera o quemaduras graves. Conozca los procedimientos de primeros auxilios para el caso de<br />
contacto accidental con el ácido de la batería.<br />
• Tenga al alcance mucha agua potable y jabón en el caso de que el ácido de la batería entre en contacto con la<br />
piel.<br />
• Si el ácido de la batería entra en contacto con la piel o la ropa, lave inmediatamente con agua y jabón durante al<br />
menos 10 minutos y busque atención médica de inmediato.<br />
• Nunca fume o permita que haya una chispa o llama cerca de la batería, el motor o la central de energía.<br />
• Quítese los elementos personales metálicos, como anillos, pulseras, collares y relojes cuando trabaja con una<br />
batería de plomo-ácido. Una batería de plomo-ácido puede producir un cortocircuito con bastante corriente<br />
como para soldar un anillo u objeto metálico similar a la piel y provocar una quemadura grave.<br />
• No use ropa de vinilo cuando arranque un vehículo mediante puente; la fricción puede provocar chispas<br />
peligrosas a causa de la electricidad estática.<br />
• Los procedimientos de arranque mediante puente sólo se deben realizar en un área segura, seca y bien<br />
ventilada.<br />
• Almacene siempre las pinzas de la batería cuando no se usa. Nunca toque las pinzas de la batería entre sí. Esto<br />
puede generar chispas peligrosas, arcos eléctricos o explosión.<br />
• Cuando use esta unidad cerca de la batería y el motor del vehículo, coloque la unidad sobre una superficie plana y<br />
estable, y asegúrese de mantener todas las pinzas, los cables, la ropa y las partes del cuerpo alejados de los<br />
elementos móviles del vehículo.<br />
• Nunca deje que las pinzas roja y negra se toquen entre sí o con otro conductor metálico común, esto podría<br />
provocar daños a la unidad o crear un riesgo de chispas/explosión.<br />
a) Para los sistemas con negativo a tierra, conecte la pinza del POSITIVO (ROJA) al borne sin conexión a tierra<br />
de la batería y la pinza del NEGATIVO (NEGRA) al bastidor del vehículo o al bloque del motor, lejos de la<br />
batería. No conecte la pinza al carburador, las cañerías de combustible o a las piezas de chapa de la carrocería.<br />
Conecte a una pieza de metal sólida del bastidor o del bloque del motor. Refiera al manual del dueño del<br />
automóvil.<br />
b) Para los sistemas con positivo a tierra, conecte la pinza del NEGATIVO (NEGRA) al borne sin conexión a tierra<br />
NEGATIVO de la batería y la pinza del POSITIVO (ROJA) al bastidor del vehículo o al bloque del motor, lejos de<br />
la batería. No conecte la pinza al carburador, las cañerías de combustible o a las piezas de chapa de la<br />
carrocería. Conecte a una pieza de metal sólida del bastidor o del bloque del motor. Refiera al manual del dueño<br />
del automóvil.<br />
• Si las conexiones a los terminales POSITIVO y NEGATIVO son incorrectas, el indicador de polaridad invertida se<br />
encenderá (de color rojo) y la unidad emitirá un sonido. Desconecte las pinzas y vuelva a conectarlas a la batería<br />
con la polaridad correcta.<br />
• Siempre desconecte primero el cable del puente del negativo (negro) y luego el cable del puente del positivo<br />
(rojo), excepto para los sistemas con positivo a tierra.<br />
• No exponga la batería al fuego o a un calor intenso, porque puede explotar. Antes de eliminar la batería, proteja<br />
los terminales expuestos con cinta aislante para trabajo pesado para evitar cortocircuitos (un cortocircuito puede<br />
producir lesiones o incendio).<br />
• Coloque esta unidad lo más lejos posible de la batería que los cables permitan.<br />
• Nunca permita que el ácido de la batería entre en contacto con esta unidad.<br />
• No opere esta unidad en un área cerrada ni restrinja la ventilación de alguna forma.<br />
14<br />
• PRIMEROS AUXILIOS – PIEL: Si el ácido de la batería entra en contacto con la piel, enjuáguese inmediatamente<br />
con agua, luego lávese con agua y jabón. Si se presenta enrojecimiento, dolor o irritación, busque asistencia<br />
médica de inmediato.<br />
OJOS: Si el ácido de la batería entra en contacto con los ojos, lávese los ojos inmediatamente durante 15<br />
minutos como mínimo y busque asistencia médica de inmediato.<br />
• IMPORTANTE: Esta unidad se entrega en un estado de carga parcial. Cargue la unidad completamente con el<br />
cable prolongador para uso doméstico (no incluido) durante 24 horas antes de utilizarla por primera vez. No<br />
puede sobrecargar la unidad utilizando el método de carga de CA.<br />
• Todos los interruptores de ENCENDIDO/APAGADO (ON/OFF) deben estar en la posición de apagado (OFF)<br />
cuando se carga la unidad o cuando no está en uso. Asegúrese de que todos los interruptores estén en la<br />
posición de apagado (OFF) antes de realizar la conexión a una fuente de energía o carga.<br />
• Este sistema está diseñado para ser utilizado únicamente en vehículos con sistema de batería de CC de 12<br />
voltios. No lo conecte a un sistema de batería de 6 o 24 voltios.<br />
• Este sistema no está diseñado para ser utilizado en reemplazo de una batería de vehículo. No intente hacer<br />
funcionar un vehículo que no tenga la batería instalada.<br />
• El exceso de revoluciones del motor puede dañar el mecanismo de arranque de un vehículo. Si el motor no<br />
arranca después de la cantidad recomendada de intentos, abandone los procedimientos de arranque mediante<br />
puente y busque otros problemas que deban solucionarse.<br />
• No utilice este puente auxiliar de arranque en una moto de agua. No fue diseñado para prácticas marinas.<br />
• Si bien esta unidad contiene una batería que no derrama, se recomienda que la unidad se conserve parada<br />
durante el almacenamiento, el uso y la recarga. Para evitar daños posibles que puedan acortar la duración de la<br />
unidad, protéjala de la luz solar directa, el calor directo o la humedad.<br />
• Lea y comprenda este manual de instrucciones antes de utilizar esta unidad.<br />
CONSERVE ESTAS INSTRUCCIONES<br />
Este dispositivo cumple con la parte 15 de las normas de la Comisión Federal de Comunicaciones de Estados Unidos<br />
(FCC). La operación está sujeta a las dos condiciones siguientes: (1) este dispositivo no puede causar interferencia<br />
perjudicial y (2) este mecanismo debe aceptar cualquier interferencia recibida, incluida la interferencia que puede<br />
provocar una operación no deseada.<br />
Este equipo ha sido probado y se encontró que cumple con los límites para dispositivo digital Clase B, según la parte<br />
15 de las normas de la FCC. Estos límites están diseñados para brindar protección razonable contra interferencia<br />
perjudicial en una instalación residencial. Este equipo genera, usa y puede irradiar energía en frecuencia de radio y, si<br />
no se instala y se usa de acuerdo con las instrucciones, puede provocar interferencia perjudicial en las comunicaciones<br />
de radio. Sin embargo, no hay garantía de que la interferencia no ocurra en una instalación en particular. Si el equipo<br />
provoca interferencia perjudicial en la recepción de radio o televisión, lo que se puede determinar al apagar y encender<br />
el equipo, el usuario debe tratar de corregir la interferencia mediante una o más de las siguientes medidas:<br />
• Cambiar la orientación o la ubicación de la antena de recepción.<br />
• Aumentar la separación entre el equipo y el receptor.<br />
• Conectar el equipo a un tomacorriente sobre un circuito diferente de aquel al que está conectado el receptor.<br />
• Consultar al vendedor o pedir la ayuda de un técnico en radio y televisión con experiencia.<br />
ADVERTENCIA: PARA REDUCIR EL RIESGO DE LESIONES:<br />
Siga estas instrucciones y las publicadas por el fabricante de la batería y el fabricante de cualquier equipo que<br />
tenga la intención de utilizar con esta unidad. Revise las indicaciones sobre precauciones en estos productos y en<br />
el motor.<br />
INTRODUCCIÓN<br />
Gracias por elegir el puente auxiliar de arranque con inflador. Este puente auxiliar de arranque de tamaño<br />
compacto es único por la cantidad de energía que puede suministrar con relación a su tamaño. La batería interna<br />
es una batería de plomo-ácido sellada de alta densidad que almacena y suministra energía comparable a un<br />
puente auxiliar de arranque común de tamaño normal. Lea esta guía cuidadosamente antes de usar la unidad para<br />
asegurarse el rendimiento óptimo de ésta y evitar daños a la unidad o a los artículos con los cuales la está<br />
usando.<br />
El puente auxiliar de arranque con inflador es un sistema de arranque portátil, durable, de tamaño compacto para<br />
vehículos que tienen un sistema de batería estándar de 12 voltios. Este sistema recargable autónomo arrancará la<br />
mayoría de los vehículos sin necesidad de otro vehículo o el suministro de energía de 12 voltios de CC.<br />
15
90546624 JUS<strong>500</strong>IB.qxp 1/28/09 2:07 PM Page 16<br />
CARACTERÍSTICAS<br />
• Interruptor de encendido/apagado (ON/OFF) de energía sin llave<br />
• Inalámbrico/recargable<br />
• Batería de plomo-ácido incorporada, sellada, para trabajo pesado, que no derrama y no requiere mantenimiento<br />
• No requiere mantenimiento (salvo recargarlo) para un funcionamiento óptimo<br />
• Cables y abrazaderas para trabajo pesado<br />
• Luz zonal del LED incorporada<br />
• Compresor portátil incorporado para neumáticos de vehículos, remolques y artículos inflables para recreación<br />
• Indicador de advertencia de conexión de polaridad inversa<br />
• Canales exclusivos para guardar los cables que mantienen los cables del puente fuera del camino hasta que son<br />
necesarios<br />
• Cargador de CA de 120 voltios incorporado (utiliza un cable prolongador estándar, no incluido)<br />
• Indicadores de carga de la batería fáciles de leer<br />
Controles e indicadores<br />
2 3<br />
TAPA DE LA UNIDAD<br />
1.PORTILLA DE LAS EXTREMIDADES Y DEL<br />
ALMACENAJE DE INYECTOR DEL INFLADOR<br />
2.INTERRUPTOR DE ENCENDIDO DEL INFLADOR<br />
3.MANÓMETRO<br />
4.LUZ ZONAL DE LED INCORPORADA<br />
5.INTERRUPTOR DE ENCENDIDO DE LA LUZ<br />
ZONAL<br />
6.INDICADOR DE POLARIDAD INVERSA<br />
7.INTERRUPTOR DE ENCENDIDO DEL PUENTE<br />
AUXILIAR DE ARRANQUE<br />
8.INDICADORES DE DIODO EMISOR DE LUZ (LED)<br />
DE ESTADO DE LA BATERÍA<br />
9.BOTÓN DEL NIVEL DE CARGA DE LA BATERÍA<br />
10.CARGADOR DE CA DE 120 VOLTIOS<br />
INCORPORADO (BAJO CUBIERTA<br />
PROTECTORA)<br />
LADOS DE LA UNIDAD<br />
11.PINZA ROJA DEL POSITIVO (+)<br />
12.PINZA NEGRA DEL NEGATIVO (–)<br />
PARTE INFERIOR DE LA UNIDAD<br />
13.CONECTOR (MANDRIL) DEL INFLADOR<br />
1<br />
10<br />
9<br />
11<br />
8<br />
16<br />
12<br />
13<br />
7<br />
4<br />
6<br />
5<br />
AL CARGAR/RECARGAR<br />
Este producto tiene una batería de plomo-ácido sellada que se debe mantener completamente cargada. Recargue<br />
antes del primer uso, inmediatamente después de cada uso, y una vez al mes si no se usa. Si esto no se cumple<br />
la duración de la batería se reduce de manera muy importante.<br />
Nota: Esta unidad se entrega parcialmente cargada, usted debe cargarla completamente antes de usarla por primera vez. La<br />
carga inicial de CA debe ser de 24 horas.<br />
Para una duración máxima de la batería, recomendamos que el puente auxiliar de arranque se mantenga<br />
completamente cargado en todo momento. Si se permite que la batería permanezca descargada, se acortará su<br />
duración.<br />
Nota: Recargar la batería luego de cada uso prolongará la vida útil de la batería; las descargas importantes frecuentes entre<br />
recargas o la sobrecarga reducirán la duración de la batería.<br />
Carga/recarga con el cargador de CA de 120 voltios y un cable prolongador estándar para uso<br />
doméstico (no incluido)<br />
1.Levante la cubierta del adaptador de CA ubicado en el frente de la unidad y conecte un cable prolongador a la<br />
unidad. Enchufe el otro extremo del cable al tomacorriente de pared estándar de CA de 120 voltios.<br />
2.Cargue hasta que se enciendan o destellan tres indicadores LED de estado de la batería de color rojo y uno de<br />
color verde.<br />
3.Una vez que esté completamente cargada, desconecte el cable prolongador.<br />
Nota: La unidad no se puede sobrecargar si se utiliza el método de CA.<br />
PUENTE AUXILIAR DE ARRANQUE<br />
El puente auxiliar de arranque está equipado con un interruptor de encendido apagado (ON/OFF). Una vez que las<br />
conexiones están hechas correctamente, encienda el interruptor para arrancar el vehículo mediante puente.<br />
1.Apague la ignición del vehículo y todos los accesorios (radio, aire acondicionado, luces, cargadores de<br />
teléfono celular conectados, etc.). Ubique el vehículo en "estacionar" y coloque el freno de emergencia.<br />
2.Asegúrese de que el interruptor de encendido del puente auxiliar de arranque esté apagado (OFF).<br />
3.Retire las pinzas del puente de sus respectivas lengüetas. Conecte primero la pinza roja, luego la pinza negra.<br />
4.Procedimiento para arrancar mediante puente un SISTEMA CON NEGATIVO A TIERRA (el terminal de la<br />
batería está conectado al bastidor) (LO MÁS COMÚN).<br />
4a.Conecte la pinza roja del positivo (+) al terminal del positivo de la batería del vehículo.<br />
4b.Conecte la pinza negra del negativo (-) al bastidor o a un componente metálico no móvil y sólido, o una<br />
parte de la carrocería. Nunca fije la pinza directamente al terminal del negativo de la batería o a una pieza<br />
móvil. Refiera al manual del dueño del automóvil.<br />
5.Procedimiento para arrancar SISTEMAS CON POSITIVO A TIERRA.<br />
Nota: En el caso poco habitual de que el vehículo que se debe arrancar tenga un sistema de positivo a tierra (el terminal<br />
positivo de la batería está conectado al bastidor), reemplace los pasos 4a y 4b anteriores con los pasos 5a y 5b,<br />
luego continúe con el paso 6.<br />
5a.Conecte la pinza negra del negativo (-) al terminal del negativo de la batería del vehículo.<br />
5b.Conecte la pinza roja del positivo (+) al bastidor del vehículo o a un componente metálico no móvil y<br />
sólido, o una parte de la carrocería. Nunca fije la pinza directamente al terminal del positivo de la batería o a<br />
una pieza móvil. Refiera al manual del dueño del automóvil.<br />
6.Cuando las pinzas estén correctamente conectadas, encienda el interruptor de encendido del puente auxiliar de<br />
arranque.<br />
7.Encienda la ignición y acelere el motor en etapas de 5 a 6 segundos hasta que arranque.<br />
8.Coloque el interruptor de encendido del puente auxiliar de arranque en la posición de apagado (OFF)<br />
nuevamente.<br />
9.Desconecte la pinza del negativo (-) del motor o bastidor primero y luego desconecte la pinza del positivo (+)<br />
de la batería.<br />
17
90546624 JUS<strong>500</strong>IB.qxp 1/28/09 2:07 PM Page 18<br />
LEA Y SIGA TODAS LAS INSTRUCCIONES DE SEGURIDAD DE ESTE <strong>MANUAL</strong>.<br />
PRECAUCIÓN: RIESGO DE DAÑO A LA PROPIEDADE<br />
• Si las conexiones a los terminales POSITIVO y NEGATIVO son incorrectas, el indicador de polaridad invertida se<br />
encenderá (de color rojo) y la unidad emitirá un sonido. Desconecte las pinzas y vuelva a conectarlas a la batería<br />
con la polaridad correcta.<br />
• Si no es posible arrancar el vehículo, apague la ignición, coloque el interruptor de encendido del puente auxiliar<br />
de arranque en la posición de apagado (OFF), desconecte los conductores del puente auxiliar de arranque y<br />
comuníquese con un técnico calificado para investigar por qué no arrancó el motor.<br />
• Vuelva a cargar la unidad completamente después de cada uso.<br />
ADVERTENCIAS<br />
• Antes de comenzar a arrancar mediante puente, debe apagar el interruptor de encendido del puente auxiliar.<br />
• Este sistema está diseñado para utilizarse EXCLUSIVAMENTE en vehículos con sistemas de batería de 12 voltios<br />
de CC.<br />
• Nunca toque entre sí las pinzas roja y negra de la batería: esto puede provocar chispas peligrosas, arco eléctrico<br />
o explosión.<br />
• Los vehículos que tienen sistemas computarizados incorporados pueden resultar dañados si la batería del<br />
vehículo se arranca mediante puente. Antes de arrancar mediante puente este tipo de vehículo, lea el manual del<br />
vehículo para confirmar que se aconseja ayuda externa para arrancar.<br />
• El exceso de revoluciones del motor puede dañar el mecanismo de arranque del vehículo. Si el motor no arranca<br />
después de la cantidad recomendada de intentos, abandone el procedimiento de arranque mediante puente y<br />
busque otros problemas que puedan ser solucionados.<br />
• Después de cada uso, apague el interruptor de encendido del puente auxiliar de arranque.<br />
• Reemplace las piezas gastadas o defectuosas inmediatamente, comuníquese con el Departamento de Servicio al<br />
Cliente, llamando a la línea gratuita 1-800-544-6986.<br />
LUZ ZONAL DEL LED<br />
La luz zonal se controla mediante el interruptor de la luz zonal ubicado en el panel frontal de la unidad. Asegúrese<br />
de que la lámpara esté apagada (OFF) cuando se recarga o se almacena la unidad.<br />
INFLADOR PORTÁTIL<br />
El inflador incorporado de CC de 12 voltios es el inflador de última generación para los neumáticos de todos los<br />
vehículos, remolques y artículos inflables para recreación. Se proveen tres medidas diferentes de picos. Cada pico<br />
se engancha en el extremo del conector de la válvula estándar para neumáticos ubicado en el extremo libre de la<br />
manguera del inflador. Los picos del inflador se almacenan dentro del portilla del almacenaje en la tapa de la<br />
unidad. La manguera del inflador con su accesorio para neumáticos se almacena en un canal ubicado entre los<br />
canales para cables del puente en la parte inferior de la unidad. El interruptor de encendido/apagado (ON/OFF)<br />
está ubicado en el frente de la unidad principal. El inflador puede funcionar lo suficiente para llenar hasta 3<br />
neumáticos de medida promedio antes de tener que recargar la batería.<br />
El inflador se puede utilizar quitando la manguera de aire del receptáculo de almacenamiento, y de ser necesario,<br />
colocando un pico apropiado a la manguera de aire. El interruptor de encendido/apagado (ON/OFF) ubicado en el<br />
frente de la unidad controla la energía del inflador y la luz del medidor. Consulte la página 13 de la sección<br />
"Controles e indicadores" para conocer las ubicaciones de la manguera del inflador y el receptáculo para<br />
almacenar los picos. Vuelva a colocar la manguera en el compartimiento de almacenamiento después del uso.<br />
ADVERTENCIA: PELIGRO DE ESTALLIDO<br />
• El inflador puede inflar hasta 120 libras por pulgada cuadrada (psi) de presión. Para evitar excederse en el<br />
inflado, siga cuidadosamente las instrucciones de los artículos a inflar. Nunca exceda las presiones<br />
recomendadas. Los artículos que estallan pueden provocar lesiones graves.<br />
• Controle siempre la presión con el manómetro (medidor de presión).<br />
• Nunca deje el inflador sin supervisión mientras se está usando.<br />
PRECAUCIÓN: RIESGO DE DAÑOS A LA PROPIEDAD<br />
No opere el inflador en forma continua durante un período prolongado (aproximadamente 10 minutos, según la<br />
temperatura ambiente), ya que se puede sobrecalentar. En este caso, el inflador se apagará automáticamente.<br />
Apague inmediatamente el interruptor de encendido del inflador. Vuelva a encenderlo después de que se haya<br />
enfriado, en aproximadamente 10 minutos.<br />
Cómo inflar neumáticos o productos con vástagos de válvulas<br />
1.Coloque el conector (mandril) en el vástago de la válvula.<br />
2. Asegúrese de que el conector esté metido en el vástago de la válvula tanto como sea posible antes de cerrar<br />
el cerrojo de botón.<br />
3.Asegúrese de que el cerrojo esté firme.<br />
4.ENCIENDA el interruptor de energía del inflador.<br />
5.Controle la presión con el manómetro (medidor de presión).<br />
6. Cuando se alcance la presión deseada, abra el cerrojo de botón y retire el conector del vástago de la válvula.<br />
7.APAGUE el interruptor de energía del inflador.<br />
18<br />
8.Permita que la unidad se enfríe antes de almacenarla.<br />
9.Almacene la manguera del inflador y el accesorio para neumáticos en el compartimiento de almacenamiento.<br />
Cómo inflar otros artículos inflables sin vástago de válvula<br />
El inflado de otros artículos requiere el uso de uno de los adaptadores (picos).<br />
1.Seleccione el pico apropiado, ubicado dentro de la tapa posterior.<br />
2. Inserte el adaptador apropiado (por ejemplo, aguja) en el conector (mandril) y cierre el cerrojo de botón.<br />
3. Los artículos pequeños como las pelotas de voleibol, fútbol, etc. se inflan muy rápidamente.<br />
4.Inserte el adaptador (por ejemplo, aguja) en el artículo para inflar a la presión adecuada.<br />
5.Encienda el interruptor de energía del inflador (ON) e infle a la presión deseada o hasta llenar.<br />
6.Retire el adaptador.<br />
7.Apague el interruptor de energía del inflador (OFF).<br />
8.Recargue la unidad antes de almacenarla.<br />
CUIDADO Y MANTENIMIENTO<br />
Reemplazo de la batería<br />
Se recomienda que la unidad esté vuelta a un negro y a un centro de servicio de Decker. Entre en contacto con el<br />
servicio de cliente, gratis, en 1-800-544-6986 para localizar el centro de servicio cerca a usted.<br />
Eliminación de la batería<br />
Contiene una batería de plomo-ácido sellada, que no derrama y no requiere<br />
mantenimiento, la que debe ser eliminada de la manera correcta. Se requiere reciclado:<br />
comuníquese con su autoridad local para obtener información. El incumplimiento de las<br />
reglamentaciones locales, estatales y federales pueden provocar multas o penas de prisión.<br />
Para obtener más información sobre cómo reciclar esta batería, llame a la línea gratuita<br />
1-800-544-6986.<br />
ADVERTENCIAS<br />
No arroje la unidad al fuego, ya que las baterías internas del producto pueden explotar o tener filtraciones.<br />
No exponga la unidad que contiene la batería al fuego o a un calor intenso, porque puede explotar.<br />
Antes de eliminar la batería, proteja los terminales expuestos con cinta aislante para trabajo pesado para evitar<br />
cortocircuitos (un cortocircuito puede producir lesiones o incendio).<br />
DETECCIÓN DE PROBLEMAS<br />
Problema<br />
Solución<br />
La unidad no puede saltar comienzo<br />
el motor<br />
La luz zonal de diodo (LED) no<br />
enciende<br />
• Asegúrese de que el interruptor de seguridad de la unidad está en la<br />
posición encendido (ON).<br />
• Controle que el puente auxiliar de arranque tenga la carga completa.<br />
Recargue la unidad en caso de necesidad.<br />
• Asegúrese de que se han realizado las conexiones de los cables con la<br />
polaridad correcta.<br />
• Cerciórese de que el botón CON./DESC. de la luz del área del LED esté<br />
en la posición de trabajo.<br />
• Controle que el puente auxiliar de arranque tenga la carga completa.<br />
Recargue la unidad en caso de necesidad.<br />
El inflador portátil no inflará • Cerciórese de que el interruptor del inflador esté en la posición de trabajo.<br />
• Controle que el puente auxiliar de arranque tenga la carga completa.<br />
Recargue la unidad en caso de necesidad.<br />
• Cerciórese de que el conectador esté empujado al vástago de válvula y<br />
cierre del pulgar es cerrado al intentar inflar los neumáticos; o el<br />
inyector (adaptador) se inserta con seguridad en el conectador (tirada)<br />
en el resto de los inflatables.<br />
ACCESORIOS<br />
Los accesorios que se recomiendan para la herramienta están disponibles en su distribuidor local o en el centro<br />
de mantenimiento autorizado. Si necesita asistencia en relación con los accesorios, llame al: 1-800-544-6986.<br />
ADVERTENCIA: El uso de accesorios no recomendados para utilizar con esta herramienta puede resultar<br />
peligroso.<br />
INFORMACIÓN DEL SERVICIO TÉCNICO<br />
Todos los Centros de mantenimiento de Black & Decker cuentan con personal capacitado dispuesto a brindar a<br />
los clientes un servicio eficiente y confiable en la reparación de herramientas eléctricas. Si necesita consejo<br />
técnico, reparaciones o piezas de repuesto originales de fábrica, póngase en contacto con el Centro de Servicio de<br />
Black & Decker más cercano a su domicilio. Para ubicar su centro de mantenimiento local, consulte la sección<br />
"Herramientas eléctricas" (Tools-Electric) de las páginas amarillas, llame al 1-800-544-6986 o visite<br />
www.blackanddecker.com.<br />
19