Smart Battery Charger - Black & Decker ServiceNet
Smart Battery Charger - Black & Decker ServiceNet
Smart Battery Charger - Black & Decker ServiceNet

Create successful ePaper yourself
Turn your PDF publications into a flip-book with our unique Google optimized e-Paper software.
VEC1089ABD_Manual_042805 5/9/05 2:40 PM Page 12<br />
VEC1089ABD<br />
FIVE YEAR LIMITED WARRANTY PROGRAM<br />
This limited warranty program is the only one that applies to this product, and it sets forth all the<br />
responsibilities of Vector Manufacturing, regarding this product. There is no other warranty, other than those<br />
described herein.<br />
This Vector Manufacturing product is warranted, to the original purchaser only, to be free of defects in<br />
materials and workmanship for five years from the date of purchase without additional charge. The<br />
warranty does not extend to subsequent purchasers or users. Manufacturer will not be responsible for any<br />
amount of damage in excess of the retail purchase price of the product under any circumstances. Incidental<br />
and consequential damages are specifically excluded from coverage under this warranty.<br />
This product is not intended for commercial use. This warranty does not apply to accessories or damage to<br />
units from misuse or incorrect installation. Misuse includes wiring or connecting to improper polarity power<br />
sources.<br />
RETURN/REPAIR POLICY: Defective products, other than accessories, may be returned postage prepaid to<br />
manufacturer. Any defective product, other than accessories, that is returned to manufacturer within 30 days<br />
of the date of purchase will be replaced free of charge. If such a product is returned more than 30 days<br />
but less than five years from the purchase date, manufacturer will repair the unit or, at its option, replace it<br />
free of charge.<br />
If the unit is repaired, new or reconditioned replacement parts may be used, at manufacturer’s option. A<br />
unit may be replaced with a new or reconditioned unit of the same or comparable design. The repaired or<br />
replaced unit will then be warranted under the terms of the remainder of the warranty period. The customer<br />
is responsible for the shipping charges on all returned items after 30 days. During the warranty period,<br />
manufacturer will be responsible for the return shipping charges.<br />
LIMITATIONS: This warranty does not cover accessories, bulbs, fuses and batteries, defects resulting from<br />
normal wear and tear (including chips, scratches, abrasions, discoloration or fading due to usage or<br />
exposure to sunlight), accidents, damage during shipping to our service facility, alterations, unauthorized<br />
use or repair, neglect, misuse, abuse, failure to follow instructions for care and maintenance, fire, flood and<br />
Acts of God.<br />
If your problem is not covered by this warranty, call Technical Support at (800) 618-5178 for general<br />
repair information and charges, if applicable. You may also contact us through our website at<br />
www.vectormfg.com.<br />
STATE LAW RIGHTS: This warranty gives you specific legal rights. Some states do not allow limitations on<br />
how long an implied warranty lasts or the exclusion or limitation of incidental or consequential damages,<br />
so the exclusions or limitations stated herein may not apply. This warranty gives the purchaser specific legal<br />
rights; other rights, which vary from state to state, may apply.<br />
TO REQUEST WARRANTY SERVICE FOR THIS PRODUCT: Contact Technical Support by telephone, fax or<br />
mail (see below). We suggest that you keep the original packaging in case you need to ship the unit. When<br />
returning a product, include your name, address, phone number, dated sales receipt (or copy) and a<br />
description of the reason for return and product serial number. After repairing or replacing the unit, we will<br />
make every effort to return it to you within four weeks.<br />
WARRANTY ACTIVATION: Please complete Warranty Activation Card and mail to Vector Manufacturing.<br />
Enter “VEC1089ABD” as Model and “15/10/2 Amp <strong>Smart</strong> <strong>Battery</strong> <strong>Charger</strong>” as Product Type. All Vector<br />
products must be registered within 30 days of purchase to activate this warranty. Mail the completed<br />
registration form, along with a copy of the original sales receipt to:<br />
ATTN.: CUSTOMER SERVICE<br />
4140 SW 30th Ave., Ft. Lauderdale, FL 33312<br />
• TOLL FREE: (800) 618-5178 • FAX: (954) 584-5556 •<br />
WARRANTY IS NON-TRANSFERABLE AND NON-REFUNDABLE.<br />
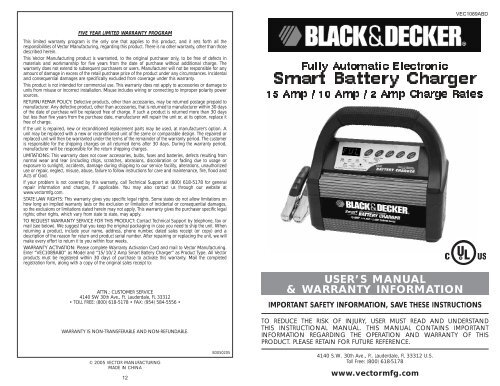
Fully Automatic Electronic<br />
<strong>Smart</strong> <strong>Battery</strong> <strong>Charger</strong><br />
15 Amp / 10 Amp / 2 Amp Charge Rates<br />
USER’S MANUAL<br />
& WARRANTY INFORMATION<br />
IMPORTANT SAFETY INFORMATION, SAVE THESE INSTRUCTIONS<br />
TO REDUCE THE RISK OF INJURY, USER MUST READ AND UNDERSTAND<br />
THIS INSTRUCTIONAL MANUAL. THIS MANUAL CONTAINS IMPORTANT<br />
INFORMATION REGARDING THE OPERATION AND WARRANTY OF THIS<br />
PRODUCT. PLEASE RETAIN FOR FUTURE REFERENCE.<br />
© 2005 VECTOR MANUFACTURING<br />
MADE IN CHINA<br />
12<br />
BD050205<br />
4140 S.W. 30th Ave., Ft. Lauderdale, FL 33312 U.S.<br />
Toll Free: (800) 618-5178<br />
www.vectormfg.com
VEC1089ABD_Manual_042805 5/9/05 2:40 PM Page ii<br />
IMPORTANT SAFETY INSTRUCTIONS<br />
WARNINGS<br />
1. RISK OF EXPLOSIVE GAS MIXTURES — WORKING IN VICINITY OF A LEAD-ACID<br />
BATTERY IS DANGEROUS. BATTERIES GENERATE EXPLOSIVE GASES DURING<br />
NORMAL BATTERY OPERATION. FOR THIS REASON, IT IS OF UTMOST IMPORTANCE<br />
THAT EACH TIME BEFORE USING YOUR CHARGER, YOU READ THIS MANUAL AND<br />
FOLLOW THE INSTRUCTIONS EXACTLY.<br />
2. To reduce risk of battery explosion, follow these instructions and those published by<br />
the battery manufacturer and manufacturer of any equipment you intend to use in<br />
vicinity of battery. Review cautionary markings on these products and on engine.<br />
3. This equipment employs parts (switches, relays, etc.) that produce arcs or sparks.<br />
Therefore, if used in a garage or enclosed area, the unit MUST be placed not less<br />
than 18 inches above the floor.<br />
<strong>Battery</strong> Safety<br />
1. Use of an attachment not recommended or sold by the battery charger manufacturer may result in<br />
a risk of fire, electric shock, or injury to persons.<br />
2. To reduce risk of damage to electric plug and cord, pull by plug rather than cord when<br />
disconnecting charger.<br />
3. An extension cord should not be used unless absolutely necessary. Use of an improper extension<br />
cord could result in a risk of fire and electric shock, and will void warranty.<br />
If an extension cord must be used, make sure:<br />
a. that pins on plug of extension cord are the same number, size, and shape as those of plug on<br />
charger;<br />
b. that extension cord is properly wired and in good electrical condition; and<br />
c. that wire size is AWG#16 (16 gauge) for 100 feet and AWG#14 for distances over 100 feet.<br />
4. Do not operate charger with damaged cord or plug — take to a qualified technician for<br />
replacement of the plug or cord immediately.<br />
5. Do not operate charger if it has received a sharp blow, been dropped, or otherwise damaged in<br />
any way; take it to a qualified service technician.<br />
6. Do not disassemble charger; take it to a qualified service technician when service or repair is<br />
required. Incorrect re-assembly may result in a risk of electric shock or fire, and will void warranty.<br />
7. To reduce risk of electric shock, unplug charger from outlet before attempting any maintenance or<br />
cleaning. Turning off controls without unplugging will not reduce this risk.<br />
8. Do not expose charger to rain, snow or use when wet.<br />
Personal Safety<br />
1. Another person should be within range of your voice or close enough to come to your aid when<br />
you work near a lead-acid battery.<br />
2. Fresh water and soap should be nearby in case battery acid contacts skin, clothing, or eyes.<br />
3. Wear complete eye protection and clothing protection. Avoid touching eyes while working with a<br />
battery. Acid, acid particles or corrosion may get into eyes. Immediately flood eye with cold water<br />
(Eye Wash Station) for at least 15 minutes and seek medical attention immediately.<br />
4. If battery acid contacts skin or clothing, wash immediately with soap and water. If redness, pain or<br />
irritation occurs, seek immediate medical attention.<br />
5. NEVER smoke or allow a spark or flame in vicinity of battery or engine.<br />
6. Be extra cautious to reduce the risk of dropping a metal tool onto battery. This might cause sparks<br />
or short-circuit the battery or other electrical part, which can cause an explosion.<br />
7. Remove personal metal items such as rings, bracelets, necklaces and watches when working with<br />
a lead-acid battery. A lead-acid battery can produce a short-circuit current high enough to cause a<br />
severe burn.<br />
8. Use charger for charging a LEAD-ACID battery only. It is not intended to supply power to a lowvoltage<br />
electrical system other than in a starter-motor application. Do not use the battery charger<br />
for charging dry-cell batteries that are commonly used with home appliances. These batteries may<br />
burst and cause injury to persons and damage property.<br />
9. NEVER ATTEMPT TO CHARGE A FROZEN BATTERY.<br />
Power Cord Safety<br />
<strong>Charger</strong> should be grounded to reduce risk of electric shock. <strong>Charger</strong> is equipped with an AC cord having<br />
equipment-grounding conductor and a grounding plug. The plug must be plugged into a properly installed<br />
and grounded 110/120 volt AC outlet in accordance with all local codes and ordinances (see Figure 1A).<br />
ii<br />
Figure<br />
1A<br />
GROUNDING<br />
PIN (A)<br />
If a properly grounded outlet is not available, a temporary adapter (like the adapter shown in Figure1B)<br />
may be used to connect this plug to a two-pole receptacle. The temporary adapter should be used ONLY<br />
until a properly grounded outlet can be installed by a qualified electrician.<br />
DANGER — Before using an adapter as illustrated, make certain that the center screw<br />
of outlet plate is grounded.<br />
The green-colored rigid ear or tab extending from adapter must be connected to a properly grounded<br />
outlet. MAKE CERTAIN IT IS GROUNDED. If necessary, replace original outlet cover plate screw with a<br />
longer screw that will secure adapter ground tab to outlet cover plate and connect to grounded outlet.<br />
WARNING<br />
NEVER alter AC cord or plug. If it will not fit, have a proper outlet installed by a<br />
qualified electrician. Improper connection may result in an electric shock.<br />
Note: Use of an adapter is not allowed in Canada. If a grounding type receptacle is<br />
not available, do not use this appliance until the proper outlet has been<br />
installed by a qualified electrician.<br />
Preparing to Charge<br />
1. Determine voltage of battery to be charged by referring to the vehicle manual.<br />
2. If it is necessary to remove battery from vehicle to charge, or to clean terminals, always remove<br />
grounded terminal from battery first. Make sure all accessories in the vehicle are off, so as not to<br />
cause an arc.<br />
3. Clean battery terminals. Do not allow corrosion to come in contact with eyes.<br />
4. Add distilled water in each cell until battery acid reaches level specified by battery manufacturer.<br />
This helps purge excessive gas from cells. Do not overfill. For a battery without cell caps<br />
(maintenance free), carefully follow manufacturer's charging instructions.<br />
5. Study all battery manufacturer’s specific precautions, such as removing or not removing cell caps<br />
while charging, and recommended rates of charge.<br />
6. Area around battery should be well ventilated while battery is being charged. Gas can be forcefully<br />
blown away by using a piece of cardboard or other nonmetallic material as a fan.<br />
7. Make sure the initial charging rate does not exceed battery manufacturer’s requirement.<br />
<strong>Charger</strong> Location<br />
1. Locate charger as far away from battery as cables permit.<br />
2. NEVER place charger directly above battery being charged; gases from battery will corrode and<br />
damage charger.<br />
3. NEVER allow battery acid to drip on charger when reading gravity or filling battery.<br />
4. NEVER operate charger in a closed-in area or restrict ventilation in any way.<br />
5. Marine batteries must be removed and charged on shore.<br />
6. Do not set a battery on top of charger.<br />
DC Connection Precautions<br />
1. Connect and disconnect DC output clamps only after removing AC cord from electric outlet.<br />
2. Never allow clamps to touch each other.<br />
3. Attach clamps to battery chassis as indicated in “<strong>Battery</strong> Installed in Vehicle” steps 5 and 6, and<br />
in “<strong>Battery</strong> Outside of Vehicle” steps 2, 4 and 5.<br />
Follow these steps when the battery is installed in a vehicle. A spark near the battery<br />
may cause an explosion. To reduce risk of a spark near the battery:<br />
1. Position AC and DC cords to reduce risk of damage by hood, door, or moving engine part.<br />
2. Stay clear of fan blades, belts, pulleys, and other parts that can cause injury to persons.<br />
3. Check polarity of battery posts. POSITIVE (POS, P, +) battery post usually has larger diameter than<br />
NEGATIVE (NEG, N, –) post.<br />
4. Determine which post of battery is grounded (connected) to the chassis. If NEGATIVE post is<br />
grounded to chassis (as in most vehicles), see 5. If POSITIVE post is grounded to the chassis, see 6.<br />
iii<br />
Figure<br />
1B<br />
ADAPTER (B)<br />
GROUNDING<br />
MEANS<br />
METAL SCREW
VEC1089ABD_Manual_042805 5/9/05 2:40 PM Page iv<br />
5. For negative-grounded vehicle, connect POSITIVE (RED) clamp from battery charger to POSITIVE<br />
(POS, P, +) ungrounded post of battery. Connect NEGATIVE (BLACK) clamp to vehicle chassis or<br />
engine block away from battery. Do not connect clip to carburetor, fuel lines, or sheet-metal body<br />
parts. Connect to heavy gauge metal part of the frame or engine block.<br />
6. For positive-grounded vehicle, connect NEGATIVE (BLACK) clamp from battery charger to<br />
NEGATIVE (NEG, N, –) ungrounded post of battery. Connect POSITIVE (RED) clamp to vehicle<br />
chassis or engine block away from battery. Do not connect clip to carburetor, fuel lines or sheetmetal<br />
body parts. Connect to a heavy gauge metal part of the frame or engine block.<br />
7. When disconnecting charger, disconnect AC cord, remove clamp from vehicle chassis, and then<br />
remove clamp from battery terminal.<br />
8. Do not charge the battery while the engine is operating.<br />
9. See operating instructions for length of charge information.<br />
Follow these steps when the battery has been removed from a vehicle. A spark near<br />
the battery may cause an explosion. To reduce risk of a spark near the battery:<br />
1. Check polarity of battery posts, the Positive posts (marked POS,P, +) usually has a larger diameter<br />
than the Negative battery post (marked NEG, N, –).<br />
2. Attach a 24-inch (minimum length) 6 AWG insulated battery cable to the Negative battery post<br />
(marked NEG, N, –).<br />
3. Connect the Positive (RED) battery clamp to the Positive battery post (marked POS, P, + or red).<br />
4. Stand as far back from the battery as possible, and do not face battery when making final<br />
connection.<br />
5. Carefully connect the NEGATIVE (BLACK) charger clamp to the free end of the battery cable<br />
connected to the negative terminal.<br />
6. Set the charge rate to appropriate setting according to battery size.<br />
7. When disconnecting charger, always do so in reverse sequence of connecting procedure and break<br />
first connection while as far away from battery as practical.<br />
Note: A marine (boat) battery must be removed and charged on shore. To charge it<br />
on board requires equipment specially designed for marine use. This unit is<br />
NOT designed for such use.<br />
SAVE THESE INSTRUCTIONS<br />
TABLE OF CONTENTS<br />
Introduction . . . . . . . . . . . . . . . . . . . . . . . . . . . . . . . . . . . . . . . . . . . . . . . . . . 1<br />
Features . . . . . . . . . . . . . . . . . . . . . . . . . . . . . . . . . . . . . . . . . . . . . . . . . . . . 2<br />
Controls and Indicators . . . . . . . . . . . . . . . . . . . . . . . . . . . . . . . . . . . . . . . . 2<br />
Operating Instructions . . . . . . . . . . . . . . . . . . . . . . . . . . . . . . . . . . . . . . . . . . . 4<br />
Charge Rate Selection . . . . . . . . . . . . . . . . . . . . . . . . . . . . . . . . . . . . . . . . 4<br />
Charging the <strong>Battery</strong> . . . . . . . . . . . . . . . . . . . . . . . . . . . . . . . . . . . . . . . . . 4<br />
Automatic Float Charging . . . . . . . . . . . . . . . . . . . . . . . . . . . . . . . . . . . . . . 5<br />
Equalizing . . . . . . . . . . . . . . . . . . . . . . . . . . . . . . . . . . . . . . . . . . . . . . . . . 5<br />
Recondition Mode . . . . . . . . . . . . . . . . . . . . . . . . . . . . . . . . . . . . . . . . . . . 6<br />
Alternator Check . . . . . . . . . . . . . . . . . . . . . . . . . . . . . . . . . . . . . . . . . . . . 7<br />
Approximate Charging Times . . . . . . . . . . . . . . . . . . . . . . . . . . . . . . . . . . . . . 7<br />
Care and Maintenance . . . . . . . . . . . . . . . . . . . . . . . . . . . . . . . . . . . . . . . . . . 8<br />
Troubleshooting . . . . . . . . . . . . . . . . . . . . . . . . . . . . . . . . . . . . . . . . . . . . . . . 9<br />
INTRODUCTION<br />
Thank you for selecting the <strong>Black</strong> & <strong>Decker</strong> 2/10/15 Amp <strong>Smart</strong> <strong>Battery</strong><br />
<strong>Charger</strong>. With proper care and use, it will give you years of dependable service.<br />
This battery charger has a high charge rate of up to 15 amps, and low charge rate<br />
of 2 amps. It is designed for charging only 12 volt lead-acid batteries — conventional<br />
automotive, maintenance-free, marine deep cycle and gel — used in cars, trucks,<br />
farm equipment, boats, RVs and SUVs, lawn mowers/garden tractors, motorcycles,<br />
personal watercraft, snowmobiles, ATVs and various applications.<br />
<strong>Smart</strong> <strong>Battery</strong> <strong>Charger</strong>s feature 3-stage, high-efficiency charging technology, built-in<br />
microprocessor control that ensures fast, safe and complete charging of serviceable<br />
batteries.<br />
Charge Curve<br />
STAGE ONE<br />
BEEP<br />
BEEP<br />
This device complies with part 15 of the FCC rules. Operation is subject to the following two<br />
conditions: (1) this device may not cause harmful interference, and (2) this device must accept<br />
any interference received, including interference that may cause undesired operation.<br />
This equipment has been tested and found to comply with the limits for a Class B digital device,<br />
pursuant to part 15 of the FCC Rules. These limits are designed to provide reasonable protection<br />
against harmful interference in a residential installation. This equipment generates, uses and can<br />
radiate radio frequency energy and, if not installed and used in accordance with the<br />
instructions, may cause harmful interference to radio communications. However, there is no<br />
guarantee that interference will not occur in a particular installation. If equipment does cause<br />
harmful interference to radio or television reception, which can be determined by turning the<br />
equipment off and on, the user is encouraged to try to correct the interference by one or more<br />
of the following measures:<br />
• Reorient or relocate the receiving antenna.<br />
• Increase the separation between equipment and receiver.<br />
• Connect the equipment into an outlet on a circuit different from that to which the receiver is<br />
connected.<br />
• Consult the dealer or an experienced radio/TV technician for help.<br />
iv<br />
STAGE TWO<br />
Stage One — Rapid Start Charge at 15 amps delivers maximum charging<br />
amperage to “wake up” any serviceable 12 volt battery and allows for quick engine<br />
starting in just 3 1 ⁄2 minutes (based on a midsize vehicle battery at 50% charge level).<br />
When battery reaches a maximum safe predetermined voltage, the charger will<br />
automatically signal a "beep" and move into Stage 2 of the charging process.<br />
Stage Two — Absorption Charge maintains the maximum possible charge at a<br />
constant, safe, predetermined voltage. During this phase, the charging voltage remains<br />
constant, while the actual charging current is reduced to allow for the maximum proper<br />
1<br />
OFF BEEP<br />
STAGE THREE<br />
CHARGING<br />
COMPLETE
VEC1089ABD_Manual_042805 5/9/05 2:40 PM Page 2<br />
internal chemical energy transfer. At the end of Stage 2, the charger will automatically<br />
move into Stage 3 charge mode.<br />
Stage Three — Top-Off Charge — voltage is automatically maintained and<br />
reduced to a predetermined level while current is adjusted for a safe, effective battery<br />
charge. At the conclusion of Stage 3, the unit will BEEP signaling the completion of<br />
the charging cycle.<br />
The Automatic Float Charge feature is ideal for maintaining a battery. It automatically<br />
tops off battery as needed, to keep battery fully charged all the time.<br />
FEATURES<br />
• This unit has three charge rate settings, accessed by the 2/10/15 AMP button:<br />
a) 2 amps: smaller batteries, as in lawn mowers, snowmobiles, motorcycles, etc.<br />
b) 10 amps: mid-sized batteries, as in small cars<br />
c) 15 amps: automobiles and light trucks<br />
• Automatic Temperature Compensation<br />
• <strong>Battery</strong> type selection<br />
• Digital diagnostics<br />
• Alternator voltage and battery voltage check<br />
• Digital display<br />
• 3 1 ⁄2-minute engine start<br />
• 3-stage, high-frequency switch mode automatic rapid charging<br />
• Spark resistant reverse polarity and short circuit protection for user<br />
• Lightweight, high efficiency design<br />
• Cables and clamps self-stored<br />
• Microprocessor control (Digital <strong>Smart</strong> Control)/High frequency power<br />
• Compensates for low AC from extension cord use<br />
• Equalization function<br />
• <strong>Battery</strong> recondition function<br />
Controls and Indicators<br />
CONTROL PANEL<br />
DIGITAL READOUT<br />
CIRCULATING PATTERN<br />
<strong>Battery</strong> Voltage — enables a check that measures the battery voltage and displays<br />
it for 3 seconds.<br />
<strong>Battery</strong> Recond — improves performance of sulfated and aged batteries.<br />
Alternator Check — is a five-second check that measures the battery voltage. This<br />
check is repeated at various electrical load levels and the tests allow the user to<br />
determine if the alternator can keep up with the loads. It can indicate alternator<br />
voltage is out of typical operation voltage.<br />
INDICATORS:<br />
Large (.375”) 3-Character Digital Display in the upper left of the control panel<br />
indicates the various conditions and/or status codes:<br />
Status Codes are described in the following chart and on back of the charger.<br />
AC POWER INDICATOR - When connected to an AC outlet, digital display shows circulating pattern to indicate power<br />
is on. Disconnect charger after use.<br />
FAULT CODES<br />
F01 INTERNAL SHORTED CELL BATTERY - Cannot be charged. Have battery checked by certified auto service center.<br />
EXCESSIVE LOAD ON BATTERY WHILE CHARGING - Check load.<br />
F02 BAD BATTERY CONNECTION - Check battery connection.<br />
BATTERY VOLTAGE TOO LOW TO ACCEPT CHARGE - Have battery checked by certified auto service center.<br />
F03<br />
INTERNAL OPEN CELL - Have battery checked by certified auto service center.<br />
SULFATED CONDITION - <strong>Battery</strong> needs to be reconditioned. See manual.<br />
F04 OVERTIME CONDITION - <strong>Battery</strong> will not accept a charge after 18 hours of continuous charging. <strong>Battery</strong> may have<br />
internal damage. Have battery checked by certified auto service center.<br />
BATTERY CHARGE RATE IS SET TOO LOW - Set charger to higher charge rate. See manual.<br />
F05 OVERHEATED CONDITION - Disconnect charger and allow to cool for 30 min., check for ample ventilation.<br />
F06 REVERSE POLARITY<br />
F07 ALTERNATOR OUTPUT IS OUT OF TYPICAL OPERATION RANGE<br />
OPERATION CODES<br />
BATTERY RECONDITIONING - (The letters DES will display for the first 3 seconds.)<br />
ALTERNATOR VOLTAGE CHECK<br />
000 CHARGER STANDBY<br />
FUL BATTERY FULLY CHARGED<br />
CONTROL PANEL LED INDICATORS:<br />
WET — lights when battery type selector is on WET battery type<br />
GEL — lights when battery type selector is on GEL battery type<br />
AGM — lights when battery type selector is on AGM battery type<br />
Float Charge — lights when automatic charge monitoring is active<br />
Alternator Good — lights when load or no load checks show the alternator is<br />
keeping up with the electrical load<br />
BUTTON (BELOW THE DIGITAL DISPLAY):<br />
Equalizing — a recessed button used to start the equalization process.<br />
FUNCTION BUTTONS (FROM RIGHT TO LEFT):<br />
<strong>Battery</strong> Type — allows the user to select wet battery, gel battery or AGM battery.<br />
2/10/15 Charge Rate Selector — allows the user to select the charge rate<br />
based on battery size. This selection and actual battery charge rate are monitored by<br />
the microprocessor and will stop charging if the rate is too fast or too slow for battery<br />
size or condition.<br />
2<br />
3
VEC1089ABD_Manual_042805 5/9/05 2:40 PM Page 4<br />
OPERATING INSTRUCTIONS<br />
Ensure that all installation and operating instructions and safety<br />
precautions are understood and carefully followed by anyone<br />
installing or using the charger. Follow the steps outlined in “Important<br />
Safety Instructions” at the front of this manual.<br />
Charge Rate Selection<br />
After charger clamps are correctly connected, plug in the charger to a 120 volt AC<br />
outlet. The charger will show a circulating pattern on the Digital Display, indicating<br />
power has been applied. Select the proper charge current rate based on battery size.<br />
Press the 2/10/15 AMP button and the charger will begin charging at 2 amps.<br />
Pressing the 2/10/15 AMP button again will advance the charge rate to 10 amps,<br />
and again to 15 amps. Pressing the switch again will turn OFF the charger output<br />
and the display will show “000”.<br />
Note:<br />
The only time the selected charge rate does not display at the full selected rate<br />
is when the battery is nearly full and charging at either step two or three. The<br />
display will show a reduced charge rate. To return to 2A, press the 2/10/15<br />
AMP button. When the battery is fully charged, the charging complete and<br />
“FUL” is displayed on the Digital Display.<br />
WARNING<br />
If Digital Display shows “F02” and the Fault indicator lights, the<br />
connection to the battery terminals is bad. Follow the steps outlined in<br />
“Important Safety Instructions” at the front of this manual to<br />
disconnect, clean battery terminals, then reconnect.<br />
If Digital Display shows “F06”, the Red (Positive) and <strong>Black</strong> (Negative)<br />
clamps are incorrectly connected to battery terminals. Follow the steps<br />
outlined in “Important Safety Instructions” at the front of this manual<br />
to disconnect, then reconnect in correct polarity.<br />
Charging the <strong>Battery</strong><br />
1. Press <strong>Battery</strong> Type selector until desired battery type LED lights.<br />
Note: The default selection is “GEL” type battery.<br />
2. Press 2/10/15 AMP button to begin charging at the 2 amp rate; the unit sounds<br />
a beep and the charging current LED lights. The charger starts charging at 2 amp<br />
rate automatically if 2/10/15 AMP button is not pressed within 3 minutes after<br />
applying AC power.<br />
<strong>Charger</strong> occasionally sounds a beep and displays “0.0” during self-test or<br />
charging stage changes.<br />
3. Pressing the 2/10/15 AMP button again advances charging rate to 10 amps<br />
and pressing once more advances charging rate to 15 amps. (Pressing the button<br />
again will turn OFF the charger output and the Display will show “000”.) This<br />
selection and actual battery charge rate are monitored by the microprocessor<br />
and the unit will stop charging if the selected rate is too fast or too slow for battery<br />
size or condition.<br />
As the battery nears full charge capacity, the unit’s output will automatically drop<br />
to a lower charge rate.<br />
4<br />
4. Pressing the 2/10/15 AMP button repeatedly advances to standby mode; the<br />
unit sounds a beep, displays “000” and stops charging. The battery charger<br />
displays the charge current. To view the battery voltage, press BATTERY VOLTAGE<br />
button. The charger will sound a beep and display the battery voltage for 3<br />
seconds, then returns to displaying the charge current.<br />
5. The display shows “FUL” when the battery is fully charged.<br />
6. Follow the steps outlined in “Important Safety Instructions” at the front of this<br />
manual to disconnect.<br />
Automatic Float Charging<br />
Automatic Float Charging is ideal for maintaining a fully charged battery.<br />
1. Keep the AC power and battery connected after battery is fully charged.<br />
2. The charger monitors the battery and tops it off as needed.<br />
3. The Float Charge indicator lights.<br />
4. The display shows charge current when topping off the battery and returns to<br />
“FUL” when completed.<br />
5. To view battery voltage, press the <strong>Battery</strong> Voltage button.<br />
Notes: Charging can be terminated by pressing the Charge Rate selector repeatedly<br />
until the display shows “000.”<br />
After AC power interruption, charging restarts at 2 amp rate automatically.<br />
WARNING<br />
If battery size is not known, charge at the 2 amp rate. DO NOT<br />
overcharge batteries.<br />
Equalizing<br />
Equalizing is the process by which the fluid in each of a battery’s cells is equalized.<br />
This process occurs after charging is complete.<br />
WARNING<br />
• NEVER TRY TO EQUALIZE A GEL OR AGM CELL. THE RESULTING<br />
EXPLOSION COULD CAUSE PROPERTY DAMAGE, SERIOUS INJURY<br />
AND/OR DEATH.<br />
• Remove or disconnect the vehicle’s battery when equalizing.<br />
The frequency at which the equalization process needs to be run depends on the use<br />
of the battery. The more the battery is used, the more undercharged it becomes; thus<br />
the more frequently the battery should be equalized.<br />
1. Do not use this mode on sealed or valve regulated batteries. This mode is only<br />
meant for wet (unsealed/vented) batteries.<br />
2. Make sure there are no flammable sources near the recharging sight.<br />
3. Wear safety glasses, gloves and protective clothing.<br />
4. Remove battery from vehicle. MAKE SURE THAT THE BATTERY HAS GOOD<br />
VENTILATION. The process causes the release of hydrogen and oxygen. An<br />
accumulation of these gases presents a real danger of explosion.<br />
5. Open the battery cap, if removable.<br />
5
VEC1089ABD_Manual_042805 5/9/05 2:40 PM Page 6<br />
6. Fill the battery with distilled water according to the manufacturer’s instructions.<br />
Since batteries may rapidly bubble while being charged, remember to refill (only<br />
with distilled water) after the equalization process is complete and the voltage is<br />
back to normal.<br />
7. Follow the steps in the “Charging the <strong>Battery</strong>” section on page 4 of this manual.<br />
8. Push the <strong>Battery</strong> Type Selector Switch until “WET” is displayed. (This mode will<br />
only work if a WET battery is selected.)<br />
9. Choose the correct charge rate and start charging. You can check the battery<br />
voltage by pushing the <strong>Battery</strong> Voltage button. This will trigger the <strong>Battery</strong> Voltage<br />
indicator button.<br />
10. Push the Equalize button at any time and the battery will automatically begin to<br />
equalize in 2 amp limited current. Note that in order to push the recessed button<br />
you will need a small pin or ballpoint pen.<br />
11. Every hour, the temperature should be checked by touching the battery. If the<br />
battery is hot to the touch, stop the charging and allow the battery to cool.<br />
12. The voltage rises, but does not go over 15.3v to 16.2v (2.55-2.7v per cell)<br />
depending on ambient temperature, it will automatically adjust.<br />
13. The “WET” LED flashes while the charger is in equalize mode.<br />
14. The digital readout will show “FUL” when the equalization process is complete.<br />
Recondition Mode<br />
Whenever a lead-acid battery begins to discharge, lead sulfate, an insulator, begins<br />
to build up on the battery’s internal plates. This reduces the ability of the battery to<br />
hold a full charge. When that battery has an immediate charge, most of the lead<br />
sulfate is dissolved and the plates are free of this insulation. If a battery remains in a<br />
discharged condition over a longer period of time, the lead sulfate changes to a hard<br />
crystalline form, making a full charge difficult to achieve. Reconditioning may “save”<br />
a sulfated battery.<br />
BATTERY RECONDITION MODE should only be used with 10 Amp Hour (Ah) or<br />
larger capacity lead-acid batteries. Charge the battery to be treated for 20 minutes,<br />
before using RECONDITION Mode. Observe the Digital Display for any codes. This<br />
initial charge will check the battery for shorted cells (F01), open cells (F03) or battery<br />
too low to accept a charge (F02), and to ensure the battery can take a charge. If<br />
code (F03) is displayed, change to the BATTERY RECONDITION MODE.<br />
Remove or disconnect the vehicle’s battery when reconditioning.<br />
1. Make sure the charger is in initiation state with a circulating pattern on the<br />
display or in charge OFF mode with “000” on the display. If not, press 2/10/15<br />
AMP button repeatedly until “000” shows on the display.<br />
2. Press the <strong>Battery</strong> Recondition button to start the process.<br />
3. DES appears on the display for 3 seconds, then it changes to three horizontal<br />
moving bars.<br />
4. The process takes 24 hours and stops automatically. The display shows “000”<br />
when complete.<br />
Note: It may require more than one cycle to recondition a highly sulfated battery. The<br />
process can be terminated at any time by pressing the <strong>Battery</strong> Recondition<br />
button again.<br />
Alternator Check<br />
Part 1<br />
No Load<br />
(Turn OFF all vehicle’s accessories): The battery must be fully charged<br />
before testing the alternator. Run the engine long enough to achieve<br />
normal idle speed and verify there is a no-load voltage.<br />
1. Press Alternator Check to start the check.<br />
2. Alternator Good LED will light to indicate the alternator is good, or<br />
F07 will display to indicate the alternator voltage is out of typical<br />
operation range.<br />
3. Press Alternator Check again to stop the test.<br />
Part 2<br />
Under Load (Accessories ON): Next, load the alternator by turning on as many<br />
accessories as possible (except for A/C and DEFROST)<br />
1. Press Alternator Check to start the check.<br />
2. Alternator Good LED will light to indicate the alternator is good, or<br />
F07 will display to indicate the alternator voltage is out of typical<br />
operation range.<br />
3. Press Alternator Check again to stop the test.<br />
If the first alternator check indicates a good alternator and the second indicates the<br />
alternator is not good, the problem could stem from: loose fan belts, an intermittent diode<br />
failure or possibly bad connections between the battery and alternator and/or ground.<br />
Notes: BATTERY VOLTAGE button is disabled in Alternator Check mode.<br />
F07 may display because someone has added a number of accessory loads<br />
on the charging system, thereby increasing current demand from the<br />
alternator. MAKE SURE THAT THE ALTERNATOR IS RATED TO SUPPORT THE<br />
APPLICATION.<br />
This check may not be accurate for every make, manufacturer and model of<br />
vehicle.<br />
Check only 12 volt systems.<br />
APPROXIMATE CHARGING TIMES<br />
The 2/10/15 Amp 12 Volt <strong>Smart</strong> <strong>Battery</strong> <strong>Charger</strong> will automatically adjust<br />
the charge rate as the battery becomes charged and stop when the battery is fully<br />
charged. Deep cycle batteries may require longer charging time.<br />
For estimates of the time it takes to charge a battery, refer to the following table.<br />
Percent of charge<br />
in battery 75% 50% 25% 0%<br />
at 2 amp rate 7 HRS 14 HRS NR* NR*<br />
at 10 amp rate 1.4 HRS 2.8 HRS 4.2 HRS 5.5 HRS<br />
at 15 amp rate 1 HRS 2 HRS 2.8 HRS 3.7 HRS<br />
*NR = Not recommended at 2 amps — use a higher charge rate.<br />
6<br />
7
VEC1089ABD_Manual_042805 5/9/05 2:40 PM Page 8<br />
The times shown in the table on page 7 are approximate and refer to a 50 Ah<br />
automotive battery. For example, a 50 Ah (12 volt) battery is discharged (50%). How<br />
long should it be charged at the 15 amp rate See the chart above under “50%” and<br />
“at 15 amp rate.”<br />
In most cases, battery charging times will vary depending on the size, age and<br />
condition of the battery. Smaller batteries should be charged at a lower rate (2 amps)<br />
and an extra hour added to charge time.<br />
CARE AND MAINTENANCE<br />
With proper care and minimal maintenance, the 2/10/15 Amp 12 Volt <strong>Smart</strong><br />
<strong>Battery</strong> <strong>Charger</strong> will provide years of dependable service. For maximum<br />
performance, manufacturer recommends:<br />
• After each use, clean the battery charger clamps — be sure to remove any battery<br />
fluid that will cause corrosion of the copper clamps.<br />
• Clean the outside case of the charger with a soft cloth and, if necessary, mild soap<br />
solution.<br />
• Do not allow liquid to enter the charger. Do not operate when charger is wet.<br />
• Keep the charger cords loosely coiled during storage to prevent damage to the<br />
cords.<br />
WARNINGS<br />
• Do not use charger if cords or clamps have been damaged in any<br />
way — call Technical Support toll-free at (800) 618-5178.<br />
• There are no user-serviceable parts in this unit.<br />
• Do not open the unit. In the event of malfunction, it must be returned<br />
to manufacturer for professional testing and repair. OPENING THE<br />
UNIT WILL VOID THE MANUFACTURER’S WARRANTY.<br />
TROUBLESHOOTING<br />
Display Indications/Common Problems/Possible Solutions<br />
No Functions<br />
• Check and make sure the charger is plugged into a live 110/120 volt AC outlet.<br />
• Follow the steps outlined in the Operating Instructions section.<br />
F01 — Internal Shorted Cell <strong>Battery</strong><br />
If the battery being charged has an internal shorted cell, the F01 will show. We<br />
recommend taking your battery to a certified automotive service center for evaluation.<br />
F02 — Bad <strong>Battery</strong> Connection or <strong>Battery</strong> Voltage Too Low to Accept<br />
Charge<br />
When F02 appears, the most common cause is poor connection to battery.<br />
• Follow the steps outlined in “Important Safety Instructions” at the front of this manual<br />
to disconnect AC cord and clamps, clean battery terminal and reconnect.<br />
• If the situation persists, we recommend taking your battery to a certified automotive<br />
service center for evaluation.<br />
F03 — Sulfate or Unchargeable <strong>Battery</strong><br />
Appears when the battery is highly sulfated and cannot accept normal charge current.<br />
• Follow the steps in “Recondition Mode” to recondition the battery.<br />
• Follow the steps in “Equalizing” to equalize the battery.<br />
• If the situation persists after reconditioning and equalizing, we recommend taking<br />
your battery to a certified automotive service center for evaluation.<br />
F04 — Overtime Condition<br />
Appears when charging time exceeds 18 hours. You may be using a charge current<br />
rate too low for a large battery. Select higher charge rate to charge the battery.<br />
F05 — Overheated Condition<br />
The ventilation grill that prevents the air from flowing in and out of the charger may<br />
be blocked.<br />
• Follow the steps outlined in “Important Safety Instructions” at the front of this manual to<br />
disconnect AC cord and clamps, allow the unit to cool for 30 minutes and reconnect.<br />
• Make sure there is ample ventilation before resuming operation.<br />
F06 — Reverse Polarity<br />
The connections to the battery’s POSITIVE and NEGATIVE terminals are incorrect.<br />
Follow the steps outlined in “Important Safety Instructions” at the front of this manual<br />
to disconnect AC cord and clamps and reconnect to battery with correct polarity.<br />
F07 — Alternator Voltage<br />
Alternator output voltage is out of typical operation range.<br />
Charging a Very Cold <strong>Battery</strong><br />
If the battery to be charged is very cold (in temperatures below freezing — 0°C/ 32°F),<br />
it cannot accept a high rate of charge. The initial charge rate will be low. The charge<br />
rate will increase as the battery warms. Never attempt to charge a frozen battery.<br />
8<br />
9
VEC1089ABD_Manual_042805 5/9/05 2:40 PM Page 10<br />
10<br />
11