Sartorius YCC01-USBM2 YCO12 (USB-SBI), YCO13 ... - Windaus
Sartorius YCC01-USBM2 YCO12 (USB-SBI), YCO13 ... - Windaus
Sartorius YCC01-USBM2 YCO12 (USB-SBI), YCO13 ... - Windaus
- No tags were found...

Create successful ePaper yourself
Turn your PDF publications into a flip-book with our unique Google optimized e-Paper software.
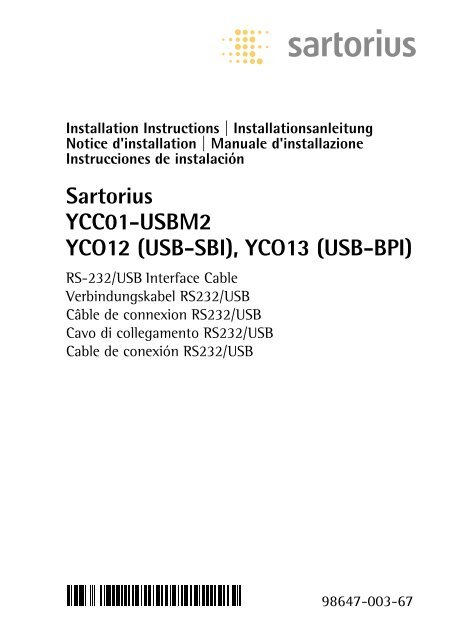
Installation Instructions | InstallationsanleitungNotice d'installation | Manuale d'installazioneInstrucciones de instalación<strong>Sartorius</strong><strong>YCC01</strong>-<strong><strong>USB</strong>M2</strong><strong>YCO12</strong> (<strong>USB</strong>-<strong>SBI</strong>), <strong>YCO13</strong> (<strong>USB</strong>-BPI)RS-232/<strong>USB</strong> Interface CableVerbindungskabel RS232/<strong>USB</strong>Câble de connexion RS232/<strong>USB</strong>Cavo di collegamento RS232/<strong>USB</strong>Cable de conexión RS232/<strong>USB</strong>98647-003-67
English page 3In cases involving questions ofinterpretation, the German-languageversion shall prevail.Deutsch Seite 8Im Auslegungsfall ist diedeutsche Sprache maßgeblich.Français Page 13En cas de problème d'interprétation,la version allemande fait référence.Tedesco pagina 18Nei casi di interpretazione dubbiaprevale la versione in lingua tedesca.Español Página 23En caso de duda o interpretacionesdispares sobre el contenido de estadocumentación, prevalecerá la versiónen idioma alemán.2
Intended UseThis <strong>USB</strong> interface cable is a solution that enables connectionof a balance to a computer on the <strong>USB</strong> (universalserial bus) port. The <strong>USB</strong> interface is implemented as avirtual serial interface over RS-232 (virtual COM port).For the application program running on the computer,there is no difference between a serial interface physicallyinstalled in the PC and one enabled in the formof a virtual interface.The interface offers the same capabilities in either case.The equipment supplied with the <strong>USB</strong> interface cableincludes a CD containing the software drivers you needto set up a virtual interface on your computer.Compatibility– <strong>YCC01</strong>-<strong><strong>USB</strong>M2</strong>:Connect a <strong>Sartorius</strong> weighing instrument with25-pin data interface– <strong>YCO12</strong> (<strong>USB</strong>-<strong>SBI</strong>), <strong>YCO13</strong> (<strong>USB</strong>-BPI):Connect a <strong>Sartorius</strong> PMA series scaleSystem Requirements– Computer (PC) running the Windows 98SE ® , WindowsME ® , Windows 2000 ® or Windows XP ® operating system– Available <strong>USB</strong> port3
Installation§ Disconnect the balance/scale power supply:Unplug the AC adapter from the wall socket (mains).§ Connect the cable to the balance/scale and to the <strong>USB</strong>port on the computer.§ Plug in the balance/scale and switch it on.> Windows ® detects the cable connected to the <strong>USB</strong> port.The first time the cable is detected, Windows ® automticallyruns the Wizard for adding/removing hardware(see “Initial Connection” below).4
Initial ConnectionInstalling the Drivers for the <strong>USB</strong> Interface1. Place the enclosed CD in your computer's CD-ROM drive.2. Each version of Windows ® may have slightly differentprocedures for uploading the driver from the CD.All versions have a Wizard for adding and removinghardware, which guides you through the process.3. After you click on “Finish” at the end of the process,the virtual port should be ready to operate.Windows ® usually adds the virtual port in the positionfollowing your highest-numbered COM port. For example,on a PC with 4 COM ports, the virtual interface is addedas COM5 (shown in the Device Manager).5
6Notes on InstallationThe following installation instructions can be foundon the enclosed CD-ROM:– for Windows 98SE ® : see “w98guide.htm”– for Windows ME ® : see “wmeguide.htm”– for Windows 2000 ® : see “w2kguide.htm”– for Windows XP ® : see “wxpguide.htm”Changing the Port NumberIf you use the <strong>USB</strong> interface with a program that limitsthe number of COM port designations (e.g., only COM1through COM4), you may have to assign one of these portnumbers to the new virtual port.– Select “Start” (on the task bar) “Settings” “ControlPanel”– Select “System”– Click on the “Hardware” tab and then on the“Device Manager” button– Expand the “Ports (COM & LPT)” node(click on the “+” sign)– Double-click on “<strong>USB</strong> Serial Port (COMx)” to open the“Porpoerties” page– Click on the “Port Settings” tab and then on the“Advanced…” buttonChanging the Latency TimerIn the dialog opened above for changing the port number,you can set the latency timer to 1 msec for faster datacommunication.
Plug & Play Mode with Autoprint (<strong>SBI</strong>)To use the autoprint function, you need to deactivate theplug & play mode. This setting in configured in the samedialog as that described above for changing the portnumber.Using Different <strong>USB</strong> Ports on a Single PCDriver installation must be performed each time the cableis connected to a different <strong>USB</strong> port. It is a good idea touse the same port every time, if possible.Deinstalling the Driver– Select "Start" "Settings" "Control Panel"– Select "Adding/Removing Software"– "FTD1<strong>USB</strong> Serial Converter Driver"– Click on "Add/Remove" to confirm> The software is deinstalled.7
VerwendungszweckDieses <strong>USB</strong>-Verbindungskabel bietet eine Lösung für denAnschluss der Waage an einen Rechner mit <strong>USB</strong>-Schnittstelle(Universal Serial Bus). Auf der <strong>USB</strong>-Schnittstelle wirdals Gerätetyp eine virtuelle serielle Schnittstelle (virtuellerCOM-Port) eingerichtet. Für das Applikationsprogrammauf dem PC besteht kein Unterschied, ob die serielleSchnittstelle im PC eingebaut ist oder ob sie als virtuelleSchnittstelle zur Verfügung gestellt wird. Die Schnittstellebietet immer die gleiche Funktion.Im Lieferumfang des <strong>USB</strong>-Verbindungskabels findenSie eine CD mit den Software-Treibern und InstallationGuides, mit denen Sie die virtuelle Schnittstelle auf demRechner einrichten können.8Einsatzmöglichkeit– <strong>YCC01</strong>-<strong><strong>USB</strong>M2</strong>:<strong>Sartorius</strong>-Waage mit 25-poliger Datenschnittstelleanschließen– <strong>YCO12</strong> (<strong>USB</strong>-<strong>SBI</strong>), <strong>YCO13</strong> (<strong>USB</strong>-BPI):<strong>Sartorius</strong>-Waage der PMA-Serie anschließenSystemvoraussetzungen– Rechner (PC) mit Windows 98SE ® , Windows ME ® ,Windows 2000 ® oder Windows XP ®– freier <strong>USB</strong>-Anschluss
Installation§ Spannungsversorgung der Waage trennen:Netzgerät aus der Steckdose ziehen.§ Verbindungskabel an die Waage und den <strong>USB</strong>-Port desRechners anschließen.§ Danach die Waage wieder an das Netz anschließen undeinschalten (ON).> Windows erkennt das an die <strong>USB</strong>-Schnittstelleangeschlossene Kabel. Beim erstmaligen Anschlussaktiviert es den Installations-Assistenten.9
Erstmaliger AnschlussTreiber-Software installieren für die <strong>USB</strong>-Schnittstelle1. Legen Sie die im Lieferumfang enthaltene CD in dasCD-Laufwerk Ihres Rechners ein.2. Die Ladeprozedur für den auf der CD enthaltenen Treiberweist je nach Windows ® -Version geringfügigeUnterschiede auf. Allen Versionen gemeinsam ist, dass sievon dem Installations-Assistenten durch die Auswahl desTreibers auf der CD geführt werden.3. Nach Klicken auf die Schaltfläche »Fertigstellen« sollte dievirtuelle Schnittstelle betriebsbereit sein.Bei Windows ® wird die virtuelle Schnittstellenormalerweise als weiterer Ausgang zur höchstmöglichenAnzahl der COM-Anschlüsse (Ports) hinzugefügt.Beispiel:Bei einem PC mit bis zu 4 COM-Anschlüssen ist dievirtuelle Schnittstelle dann COM5 (siehe Geräte-Manager).10
InstallationshinweiseInstallationsanleitungen auf beiliegender CD:– für Windows 98SE ® : siehe CD, w98guide.htm– für Windows ME ® : siehe CD, wmeguide.htm– für Windows 2000 ® : siehe CD, w2kguide.htm– für Windows XP ® : siehe CD, wxpguide.htmPort-Nr. ändernSoll die <strong>USB</strong>-Schnittstelle in Verbindung mit Programmeneingesetzt werden, bei denen die Anzahl der COM-Anschlüsse begrenzt ist (z.B. nur COM1, 2, 3, 4), kann eserforderlich sein, der neuen virtuellen Schnittstelle einedieser Nummern zuzuordnen.Die Einstellung erfolgt unter Windows:– Auswählen: START Einstellungen Systemsteuerung– Auswählen: System– Auswählen: Hardware Geräte-Manager– Öffnen: Anschlüsse– Doppelklick: <strong>USB</strong> Serial Port– Auswählen: Port Settings advancedWeitere Informationen siehe mitgelieferte CD:ComPortGuide.htmWartezeit ändern»Latency Timer« für eine schnellere Kommunikation auf1 msec stellen: siehe gleichen Dialog wie im Abschnitt»Port-Nr. ändern«.11
Plug & Play-Modus im Autoprint (<strong>SBI</strong>)»Plug & Play-Modus« hierzu abschalten: siehe gleichenDialog wie im Abschnitt »Port-Nr. ändern«.Anschluss an verschiedene <strong>USB</strong>-Ports eines PC´sAnschluss des Kabels an einen anderen <strong>USB</strong>-Port:Neue Treiber-Installation durchführen.Deshalb nach Möglichkeit immer den gleichen <strong>USB</strong>-Portverwenden.Treiber deinstallieren– Auswählen: START Einstellungen Systemsteuerung– Auswählen: Software– Selektieren: FTDI<strong>USB</strong> Serial Converter Driver– Betätigen: Schaltfläche »Ändern/Entfernen«> Uninstaller wird ausgeführt.12
ApplicationCe câble de connexion <strong>USB</strong> offre une solution pour laconnexion de la balance à un ordinateur équipé d'uneinterface <strong>USB</strong> (Universal Serial Bus). Sur l'interface <strong>USB</strong>,une interface série virtuelle (port COM virtuel) est installéeen tant que périphérique. Pour le programme d'applicationsur un PC, que l'interface série soit intégrée au PCou qu'elle soit disponible comme interface virtuelle nefait aucune différence.L'interface remplit toujours la même fonction.Dans le pack de livraison du câble de connexion <strong>USB</strong>,vous trouverez un CD contenant les pilotes du logiciel etles guides d'installation, qui vous permettront d'installerl'interface virtuelle sur l'ordinateur.Possibilités d'utilisation– <strong>YCC01</strong>-<strong><strong>USB</strong>M2</strong> :Raccorder la balance <strong>Sartorius</strong> à l'interface de donnéesà 25 pôles.– <strong>YCO12</strong> (<strong>USB</strong>-<strong>SBI</strong>), <strong>YCO13</strong> (<strong>USB</strong>-BPI) :Raccorder la balance <strong>Sartorius</strong> de la série PMA.Configuration requise– Ordinateur (PC) avec Windows 98SE®, Windows ME®,Windows 2000® ou Windows XP®– Port <strong>USB</strong> disponible13
Installation§ Couper l'alimentation de la balance :débrancher l'alimentation de la prise secteur.§ Brancher le câble de connexion à la balance et au port<strong>USB</strong> de l'ordinateur.§ Ensuite, raccorder la balance au secteur et la mettreen marche (ON).> Windows® reconnaît le câble connecté à l'interface <strong>USB</strong> etlance l'assistant d'installation lors de la connexion initiale.14
Connexion initialeInstallation du pilote de l'interface <strong>USB</strong>1. Placer le CD contenu dans le pack de livraison dans lelecteur de CD de l'ordinateur.2. La procédure de chargement du pilote contenu sur leCD présente de légères différences suivant la version deWindows®. Sur toutes les versions, vous serez amené, vial'assistant d'installation, à choisir le pilote sur le CD.3. Une fois que vous aurez cliqué sur le bouton «Terminer»,l'interface virtuelle sera normalement prête à fonctionner.Sur Windows®, l'interface virtuelle est ajoutée auxautres sorties avec un numéro supérieur au numéro deport COM le plus élevé.Exemple :sur un PC à 4 ports COM, l'interface virtuelle est définiecomme COM5 (voir le gestionnaire de périphériques).15
16Conseils d'installationGuide d'installation sur le CD joint à la livraison :– pour Windows 98SE® : voir CD, w98guide.htm– pour Windows ME® : voir CD, wmeguide.htm– pour Windows 2000® : voir CD, w2kguide.htm– pour Windows XP® : voir CD, wxpguide.htmModification du n° de portSi l'interface <strong>USB</strong> doit être utilisée avec des programmeslimitant le nombre de ports COM (par exemple uniquementCOM1 à COM4), il peut être nécessaire d'attribuerune nouvelle interface virtuelle à ces numéros.– Procédure de configuration sous Windows :– Sélectionner : Démarrer Paramètres Panneaude configuration– Sélectionner : Système– Sélectionner: Matériel Gestionnaire depériphériques– Ouvrir : Ports– Double-cliquer sur : Port série <strong>USB</strong>– Sélectionner : Paramètres du port AvancéPour de plus amples informations, se reporter au CDfourni : ComPortGuide.htmModification du temps d'attentePour une communication plus rapide, régler "LatencyTimer" sur 1 ms : voir la boîte de dialogue mentionnée auparagraphe «Modification du n° de port».
Mode Plug-and-Play dans Autoprint (<strong>SBI</strong>)Pour ce faire, déconnecter «Mode Plug-and-Play» :voir la boîte de dialogue mentionnée au paragraphe«Modification du n° de port».Connexion à différents ports <strong>USB</strong> d'un PCLa connexion du câble à un autre port <strong>USB</strong> requiert unenouvelle installation du pilote. Utiliser par conséquenttoujours le même port <strong>USB</strong> si possible.Désinstallation de pilote– Sélectionner : Démarrer Paramètres Panneau deconfiguration– Sélectionner : Ajout/Suppression de programmes– Sélectionner : FTDI<strong>USB</strong> Serial Converter Driver– Appuyer sur : «Modifier/Supprimer»> La désinstallation est effectuée.17
Impiego previstoQuesto cavo <strong>USB</strong> rappresenta una soluzione per ilcollegamento diretto della bilancia a un computer coninterfaccia <strong>USB</strong> (Universal Serial Bus). Sull'interfaccia <strong>USB</strong>si configura come tipo di apparecchio un'interfacciaseriale virtuale (porta COM virtuale). Per il programmaapplicativo sul PC non esiste alcuna differenza se l'interfacciaseriale è installata nel PC oppure è disponibile comeinterfaccia virtuale. L'interfaccia realizza sempre la stessafunzione.Nel materiale fornito con il cavo di collegamento <strong>USB</strong>è incluso un CD con i driver software e le guide diinstallazione, con cui si può configurare sul computerun'interfaccia virtuale.18Possibili applicazioni– <strong>YCC01</strong>-<strong><strong>USB</strong>M2</strong>:Collegare la bilancia <strong>Sartorius</strong> con l'interfaccia dati a25 poli– <strong>YCO12</strong> (<strong>USB</strong>-<strong>SBI</strong>), <strong>YCO13</strong> (<strong>USB</strong>-BPI):Collegare la bilancia <strong>Sartorius</strong> della serie PMARequisiti di sistema– Computer (PC) con Windows 98SE®, Windows ME®,Windows 2000® o Windows XP®– porta <strong>USB</strong> disponibile
Installazione§ Staccare l'alimentazione elettrica della bilancia:Togliere l’alimentatore dalla presa.Porta <strong>USB</strong>Porta serialeRS-232§ Collegare il cavo alla bilancia e alla porta <strong>USB</strong>del computer.§ In seguito collegare la bilancia alla rete e accenderla (ON).> Windows® riconosce il cavo collegato all'interfaccia <strong>USB</strong> e,alla prima connessione, attiva l'assistente di installazione.19
Prima connessioneInstallazione dei driver software per l'interfaccia <strong>USB</strong>1. Inserire nel lettore del computer il CD incluso nelmateriale fornito.2. La procedura di caricamento dei driver contenuti nel CDpresenta piccole differenze a seconda della versione diWindows®. L'assistente d'installazione è comune per tuttele versioni e fornisce una guida nella selezione del driversul CD.3. Dopo aver cliccato su «Completa», l'interfaccia virtualedovrebbe essere pronta a funzionare.In Windows® l'interfaccia virtuale viene di norma aggiuntaal numero massimo possibile di porte COM come uscitaaggiuntiva.Esempio:in un PC che ha fino a 4 porte COM, l'interfaccia virtualediventa COM5 (vedere Gestione periferiche).20
Note per l’installazioneIstruzioni per l'installazione nel CD allegato:– per Windows 98SE®: vedi CD, w98guide.htm– per Windows ME®: vedi CD, wmeguide.htm– per Windows 2000®: vedi CD, w2kguide.htm– per Windows XP®: vedi CD, wxpguide.htmModifica del numero della portaSe l'interfaccia <strong>USB</strong> viene impiegata in collegamento conprogrammi in cui il numero di porte COM è limitato (peres. solo COM1, 2, 3, 4), potrebbe essere necessario assegnareuno di questi numeri alla nuova interfaccia virtuale.L'impostazione si esegue sotto Windows:– Selezionare: AVVIO Impostazioni Pannello dicontrollo– Selezionare: Sistema– Selezionare: Hardware Gestione periferiche– Aprire: Collegamenti– Doppio clic su: Porta seriale <strong>USB</strong>– Selezionare: Impostazioni della porta avanzatePer ulteriori informazioni consultare il CD allegato:ComPortGuide.htmModifica del tempo di attesaPer una comunicazione più rapida impostare il «tempo diattesa» su 1 msec: seguire la stessa procedura descrittanella sezione «Modifica del numero della porta».21
Modalità plug & play in Autoprint (<strong>SBI</strong>)Disattivare la «modalità plug & play»: seguire la stessaprocedura descritta nella sezione «Modifica del numerodella porta».Collegamento a diverse porte <strong>USB</strong> di un PCCollegamento del cavo a un'altra porta <strong>USB</strong>: Effettuareuna nuova installazione dei driver. Per questo motivo, sepossibile, usare sempre la medesima porta <strong>USB</strong>.Disinstallazione dei driver– Selezionare: AVVIO Impostazioni Pannello dicontrollo– Selezionare: Software– Selezionare: FTDI<strong>USB</strong> Serial Converter Driver– Cliccare su: «Aggiungi/rimuovi»> La disinstallazione è completata.22
FinalidadEste cable de conexión <strong>USB</strong> permite conectar la balanza aun ordenador a través del puerto <strong>USB</strong> (bus serie universal).La interfaz <strong>USB</strong> está implementada como dispositivo deinterfaz serie virtual (puerto COM virtual). Para el programade aplicación ejecutado en el ordenador no suponeninguna diferencia si la interfaz serie está físicamenteintegrada en el ordenador o habilitada como interfazvirtual. La funcionalidad de la interfaz será siempre lamisma.Con el cable de conexión <strong>USB</strong> se incluye un CD con loscontroladores de software y manuales de instalación paraconfigurar una interfaz virtual en su ordenador.Campo de aplicación– <strong>YCC01</strong>-<strong><strong>USB</strong>M2</strong>:Conectar balanza <strong>Sartorius</strong> con interfaz de datos de25 polos– <strong>YCO12</strong> (<strong>USB</strong>-<strong>SBI</strong>), <strong>YCO13</strong> (<strong>USB</strong>-BPI):Conectar balanza de la serie PMA <strong>Sartorius</strong>Requisitos del sistema– Ordenador (PC) con Windows 98SE®, Windows ME®,Windows 2000® o Windows XP®– puerto <strong>USB</strong> libre23
Instalación§ Desconecte la fuente de alimentación de la balanza:Desenchufe el cable de alimentación de la toma decorriente.§ Enchufe el cable de conexión en la balanza y en el puerto<strong>USB</strong> del ordenador.§ A continuación, vuelva a enchufar la balanza a la toma decorriente y enciéndala (ON).> Windows® detectará el cable conectado a la interfaz <strong>USB</strong>.En la conexión inicial ejecutará el asistente para agregarhardware.24
Conexión inicialInstalar los controladores para la interfaz <strong>USB</strong>1. Coloque el CD incluido en la unidad correspondiente delordenador.2. El procedimiento de instalación de los controladoresincluidos en el CD puede variar ligeramente según laversión de Windows® que se esté utilizando. Aún así,todas las versiones tienen en común un asistente paraagregar y quitar hardware, que le irá guiando duranteel proceso de instalación.3. Cuando haga clic en “Finalizar”, el puerto virtual estarálisto para funcionar.Normalmente, Windows® agrega el puerto virtualasignándole el número inmediatamente superior al delpuerto COM más alto disponible.Por ejemplo, en un ordenador con 4 puertos COM, lainterfaz virtual se agregará como COM5 (comprobar enel administrador de dispositivos).25
26Notas sobre la instalaciónInstrucciones de instalación en el CD que se incluye:– para Windows 98SE®: consulte CD, w98guide.htm– para Windows ME®: consulte CD, wmeguide.htm– para Windows 2000®: consulte CD, w2kguide.htm– para Windows XP®: consulte CD, wxpguide.htmCambiar número de puertoSi desea utilizar la interfaz <strong>USB</strong> con programas que sóloreconozcan un número limitado de puertos COM (p. ej.,sólo COM1 a COM4), puede ser necesario asignar uno deestos números al nuevo puerto virtual.Este ajuste debe realizarse en el Panel de control deWindows.– Seleccione Inicio Configuración Panel de control– Haga doble clic en Sistema– Seleccione Administrador de dispositivos en la fichaHardware– Expanda el nodo Puertos (COM & LPT)– Haga doble clic en Puerto serie <strong>USB</strong>– Haga clic en la ficha Configuración de puerto y, acontinuación, en AvanzadoPara obtener más información, consulte el CD que seincluye: ComPortGuide.htmModificar el tiempo de esperaEn el cuadro de diálogo abierto más arriba para cambiarel número de puerto puede ajustar el tiempo de espera en1 ms para acelerar la comunicación de los datos.
Modo Plug & Play en Autoprint (<strong>SBI</strong>)Desconectar para ello el modo »Plug & Play«: consulte elmismo cuadro de diálogo que en el párrafo »Cambiarnúmero de puerto«.Enchufar en distintos puertos <strong>USB</strong> de un ordenadorEnchufe el cable en un puerto <strong>USB</strong> distinto y vuelva ainstalar los controladores.Por este motivo es preferible utilizar siempre el mismopuerto <strong>USB</strong>.Desinstalar controladores– Seleccione Inicio Configuración Panel de control– Haga doble clic en Agregar o quitar programas– Seleccione FTDI<strong>USB</strong> Serial Converter Driver– Pulse el botón Cambiar o Quitar> Los controladores se desinstalarán.27
<strong>Sartorius</strong> AGWeender Landstrasse 94–10837075 Goettingen, GermanyPhone +49.551.308.0Fax +49.551.308.3289www.sartorius.comCopyright by <strong>Sartorius</strong> AG, Goettingen, Germany.All rights reserved. No part of this publication may bereprinted or translated in any form or by any means withoutthe prior written permission of <strong>Sartorius</strong> AG.The status of the information, specifications andillustrations in this manual is indicated by the date givenbelow. <strong>Sartorius</strong> AG reserves the right to make changes tothe technology, features, specifications and design of theequipment without notice.Status:May 2005, <strong>Sartorius</strong> AG,Goettingen, GermanyPrinted in Germany on paper that hasbeen bleached without any use of chlorineW1A000 · KTPublication No.: WYC6029-p05053