You also want an ePaper? Increase the reach of your titles
YUMPU automatically turns print PDFs into web optimized ePapers that Google loves.
Operator's Manual<br />
lcRR.n.!<br />
' i<br />
12,0 AmpP,/ariable Speed<br />
Reciprocating Saw<br />
with Orbital Action<br />
Model Noo<br />
172,26043<br />
CAUTION: Read, understand andfo!low<br />
all Safety Rules and Operating Instructions<br />
in this manual before usingthis pmducL<br />
Sears,Roebuckand Co.,HoffmanEstates,IL60179UoS.A.<br />
Visit our Craftsman• webslte:www.sesrs.<strong>com</strong>/craftsman<br />
Double lnsuFated<br />
• WARRANTY<br />
SAFETY<br />
• UNPACKING<br />
• DESCRIPTION<br />
• OPERATION<br />
• MAINTENANCE
Warranty ................................................................................................................ Page 2<br />
Safety' Symbaf9 .............................................................................. Page 3<br />
Safety lnslructions .................................................................................. Pages 4-10<br />
Unpacking .................................................................................................. Page 10<br />
Description ....................................................................................................................................<br />
Pages 11-t2<br />
Operation .............................................................................................................................<br />
Pages 12-22<br />
Maintenance .............................................................................................................................<br />
Pages 23-24<br />
Accessodes .................................................................<br />
Page 25<br />
Parts List ............................................................................................................................................<br />
Pages 26-29<br />
Sears Repair Parts Phone Numbers ......................................................................... Back Cover<br />
ONEYEAR FULLWARRANTY ON CRAFTSMAN PROFESStONALTOOL<br />
if this Craftsman Professional Tool tails due to a detect In material or workmanship<br />
within one year from the dale of pumhase, RETURN tTTO ANY SEARS STORE OR<br />
PARTS AND REPAIR CENTER OR OTHER CRAFTSMAN OUTLET INTHE UNITED<br />
STATES FOR FREE REPAIR (OR REPLACEMENT 1F REPAIR PROVES<br />
IMPOSSIBLE),<br />
This warranty does not include expendable parts such as lamps, batteries, bits or<br />
blades,<br />
This warranty gives you specific legal rights, end you may have ether rights, which<br />
very from state to slate°<br />
Seam, Roebuck and Co,,, Heffmen Eslates, IL 60179<br />
SAVE THESE INSTRUCTIONS!<br />
READ ALL INSTRUCTIONS!<br />
ifk WARNING: some dust creeled by using power toots contains chemicals ]<br />
known to the State of California to cause cancer and birth defects or other<br />
reproductive harm,<br />
I
The purpose of safety symbois is to attract your attention to possible dangers.<br />
The safety symbols end the explanations with them, deserve your careful attention and<br />
understandlng_ The, symbol warnings DO NOT by themselves eliminate any danger.<br />
The Instructions and warnings they give are no substItules for proper accident prevention<br />
measures°<br />
,-_ WARNING: BE SURE to read and understand all safety instructions in<br />
thls manual, Including all sefety alert symbols such as "DANGER", "WARNING"<br />
end "CAUTION". BEFORE using this too!, Failure to follow all Instructions I_sted<br />
below may result in electric shock, fire and/or serious personal injury.<br />
SYMBOL MEANtNG<br />
SAFETY ALERT SYMBOL: IndleetesDANGER,WARNING, OR<br />
CAUTION, May be used in conjunction with other symbols or ptctographs,<br />
_ ailure to obey this safety warning WILL result In death or<br />
serious Injury to yourself or to ethers. Always follow the<br />
safety precautions to reduce the risk of fire, electric Shock<br />
and personal injury.<br />
Z_WARN1NG I Failure to obey this safety warning CAN result tn death or<br />
serious injury to yourself or to others, Always follow the<br />
safety precautions to reduce the risk of fire, electric shock<br />
and personal injury,<br />
[/_ CAUTION I! Failure Injury to toyourself obey this or safety others warning or property MAYdemega_ result In Always personal<br />
follow the safety precautions to reduce the risk of fire,<br />
electric shock and personal Injury,<br />
DAMAGE PREVENTION AND INFORMATION MESSAGES<br />
These Inform user of important Information andlor instructions that could teed to<br />
equipment or other property damage if not followed° Each message is preceded<br />
by the word "NOTE:" as in the example below:<br />
NOTE: not followed, Equipment andlor property damage may result If these instructions ere<br />
WEAR ¥oeR<br />
z_WARNING: The operation of any power tool can result<br />
In foreign oblecte being thrown into your eyes, which coo<br />
l_suit _n severe eye damage, Before begLnnlng power tool<br />
operetlon, ALWAYS wear safety goggles or safety glasses<br />
with slde shield end a full-face shleld when needed.<br />
We re<strong>com</strong>mend e Wide Vision Safety Mask for use over<br />
eyeglasses or standard safety gfesaes wffh side shield,<br />
available at Sears Stores or other Craftsman Outlets.
efore using this power toot. Failure to follow ell instructions may result In electric<br />
I shock, _ WARNING: fire _nd / orBE aerlous SURE persona! to read and injury. understand all instructions in thta manual<br />
WORK AREA SAFETY<br />
I. Keep your work area clean end well lit. Cluttered workbenches and dark areas<br />
invite accidents,<br />
2, DO NOT operate power tools in explosive atmospheres, such as in the presence<br />
of flammable liquids, gases, or dust. Power toots create sparks which may igntle the<br />
dust or fumes.<br />
3. Keep bystanders, children and visitors away while operating a power tool.<br />
Distractions can cause you to losecontrol<br />
4. Make your workshop chlldproof with padlocks and master switches Lock<br />
toots away when not in use<br />
5, MAKE SURE the work area has ample lighting so you can see the work and that<br />
there are no obstructions that will interfere with sale operation BEFORE using your saw<br />
PERSONAL SAFETY<br />
1,, KNOW your power tool, Read the operator's manual carefully. Learn the tours<br />
applications and limitations, as well as the specific potential hazards related to this tool<br />
2o STAY ALERT, watch what you ate doing and use <strong>com</strong>mon sense when operating a<br />
power tool.<br />
3. DO NOT use tool whta tired or under the influence of drugs, alcohol or medication.<br />
A moment of inattention white operating power toots may result in serious personal<br />
inJuP/.<br />
4o DRESS properly. DO NOT wear loose clothing or jewelry_ Pull back long hair. Keep your<br />
hair, clothing, and gloves away from moving parts. Loose clothing, or long hair can be<br />
caught in moving parts Air vents often cover moving parts and should also be avoided<br />
5,, AVOID accidental starling, Be sure switch is in "OFF" positron before plugging in.<br />
DO NOT carry tools with your finger on the switch. Carrying tools wtlh your finger on the<br />
switch or plugging in tools that have the switch in the "ON" position Invites accidents.<br />
6. REMOVE adjusting keys or blade wrenches before turning the tool "ON-, A wrench that<br />
is left attached to a rotating pad of the tool may resull in personal Injury<br />
77 Do not overreach. Keep proper footing and balance at all times. Proper footing and<br />
balance enables better control of the tool in unexpected situations.<br />
8. ALWAYS SECURE¥OUR WORK. Use c[arnps or a vise lo hold work when practical.<br />
It is safer than using your hand end frees both hands to operate tool<br />
g., USE SAFETY EQUIPMENT. Always wear eye protection, Dust mask, non-skid safety<br />
shoes, hard hat, or hearing protection must be used for appropriate conditions
TOOLUSEANDCARESAFETY<br />
Ak WARNING: BE SURE to read and understand all instructions before t<br />
operating this tool, Failure to follow all instructions listed below may result in<br />
electric shock, fire and/or serious personal injury.<br />
J<br />
t. ALWAYS use clamps or other practical ways to secure and support the<br />
workplace to a stable platform. Holding the work by hand or against your body<br />
is unstable and may lead to loss of conlro!,<br />
2.. DO NOT rome the tool. Use the correct tool and blade for your application. The<br />
correct tool end blade wf!l do the job better and safer at the rate lot which it is designed.<br />
3, DO NOT usa the tool If switch does not turn it "On" or "Off", Any tool that<br />
cannot be controlled with the switch is d_ngerous and must be repotted<br />
4, DISCONNECT the plug from the power source before making any<br />
od|ustments changing accessories or storing the tool, Such preventive<br />
safe[,/measures reduce the risk of starling the too acc denla y,<br />
5. STORE Idle tools out of the reach of children and other untralned persons.<br />
Tools are dangerous in the hands of untrained users,<br />
6 MAINTAIN tools wlth care, Keep cutting tools sharp and clean. Properly maintained<br />
tools wilh sharp cutting edges are loss likely to bind and are easier to conlrol,<br />
7. CHECK for misallgnment or binding of moving parts, breakage of parts, and<br />
any other condition that may affect the tooYs operatlono If damaged, have the<br />
tool serviced before using., Many accidents ore caused by poorly maintained tools.<br />
8. USE ONLY accessories that are re<strong>com</strong>mended for this tool. Accessories that<br />
may be suitable for one tool may be<strong>com</strong>e hazardous when used on another tool.<br />
ELECTRICAL SAFETY<br />
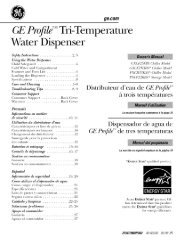
/h. installing WARNING: or removing Do not thepermit plug from fingersthetooutleL touch the terminals of plug when<br />
f_,Doub|o Insulated toots are equipped with a<br />
polarized plug (one blade Is wider than the other)_<br />
This plug will fit In a polarized outlet only' one way°<br />
If the plug does not fit fully' in the curtal, reverse the<br />
pIug, tf it still does not tit, contact a qualified<br />
electrician to lnslatl a polarized outlet, Do not change<br />
the plug In any way.<br />
2° Double Insulation 1Oleltmlnales the need for the<br />
three.Ire grounded power cord and grounded power<br />
suppfy syslem. Applicable only to Class Ii<br />
(double.lnsulaled} tools<br />
This tool is a double Insulated tool.<br />
I Z_ precautions WARNING: when Double operating Insulation this tool DOES NOT take the place of normal safety<br />
3. BEFORE plugging in the tool, BE SURE that the outlet voltage supplied ts within the<br />
voltage marked on the fool's data plate° DO NOT use "AC onty" rated tools with<br />
a DC power supply<br />
®,,!
ELECTRICAL SAFETY cont.<br />
4 AVOID body contact with grounded surfaces, such as pipes, radiators, ranges and<br />
refrigerators., There is an increased dBk of et_ctric shock if your body is grounded<br />
5 DO NOT expose power tools lo rain or wet conditions or use power tools tn wet<br />
or damp locations, Water entering a power tool will increase the risk el electric shock.<br />
6 INSPECT toot cords for damage,, Have damaged tool cords repaired at a Sears<br />
Service Center, BE SURE to stay constantb/aware of Ihe cord location and keep It well<br />
away from the moving blade,<br />
7 DO NOT abuse the cord,, NEVER use the oord to carry the tool by or to pull the<br />
plug from the outlet. Keep cord away from heat. oil sharp edges or moving parts<br />
Replace damaged cords tmmsdialely., Damaged cords increase the dsk of electric shock.,<br />
EXTENSION CORDS<br />
Use a proper extension cord., ONLY usa cords tfsisd by UnderwritersLaboratories(UL),<br />
Other extensioncords san cause a drop in line voltage, resultingin a loss of power and<br />
overheating of tool,For thistool an AWG (AmericanWire Gauge) size of a leasl 14-gauge<br />
is re<strong>com</strong>mendedfor an extensioncordo! 25oft, or less in length Use 12-gauge for an<br />
extension cordof 50-fL Extension cords lO0-ft, or longer are not re<strong>com</strong>mended.<br />
Remember. a smaller wire gauge size has greater capacity than a larger number<br />
(! 4-gauge wire has more capacity than 16-gauge wire; 12-gauge wire has more capacity<br />
than 14-gauge),,When indoubt use the smaller number.When operating a powertool<br />
outdoors, use an outdoor extension cordmarked '_/-A" or "W".These cords are rated lor<br />
outdooruse and reducethe riskof electricshock.<br />
1<br />
the cord so that It wlllnot get caught on lumber, tools or other obstructions while<br />
[Z_ you CAUTION: are working with<br />
Keep<br />
a<br />
the<br />
power<br />
extension<br />
tool.<br />
cord clear of the working area. Position | l<br />
Immediately. Never use too! with n damaged cord since touching the damaged<br />
/k areaWARNING: could cause electrical Check extension shock, resulting cords before In serious each use, Injury.<br />
if damaged replace 1J
SAFETY SYMBOLS FOR YOUR TOOL<br />
The Fabelon your tool may Include the following symbols.<br />
V ................................................................................. ,Volts<br />
A.............................................................................. Amps<br />
Hz ............................................................................... Hertz<br />
W........................................... ................................................ Watts<br />
..............................................................................................<br />
Alternalingcurrent<br />
...................................................................... Directcurrent<br />
n=.........................................................................................<br />
No-leadspeed<br />
I_ ........................................................................ Class II construction.DoubleInsulated<br />
RPM....................................................... RevolulJoespermiet,,te<br />
minute<br />
OPM...................................................... Orbits perminute<br />
Z_o........................................................................................<br />
Indicates danger, warningor caution.<br />
[! means atlentfonlYoursafety Is involved,<br />
SPM .<br />
.<br />
.<br />
.<br />
.<br />
.<br />
.<br />
.<br />
.<br />
.<br />
.<br />
.<br />
.<br />
.<br />
.<br />
.<br />
.<br />
.<br />
.<br />
.<br />
.<br />
.<br />
.<br />
.<br />
.<br />
.<br />
.<br />
.<br />
.<br />
.<br />
.<br />
.<br />
.<br />
.<br />
.<br />
.<br />
.<br />
.<br />
.<br />
.<br />
.<br />
.<br />
.<br />
.<br />
.<br />
.<br />
.<br />
.<br />
.<br />
.<br />
.<br />
.<br />
.<br />
.<br />
.<br />
.<br />
.<br />
.<br />
.<br />
.<br />
.<br />
.<br />
. Strokespar<br />
SERVICE SAFETY<br />
1, if any part of this tool Is missing or should break, bend, or fall in any way;<br />
or should any electrical <strong>com</strong>ponent fall to perform properly: SHUT OFF the power<br />
switch and remove lhe saw's plug from Ihe power source and have the m_ss{ng,<br />
damaged or failedparts replaced BEFORE resumtngeperatlom<br />
2, Tool service must be performed only at a Sears Service Center. Service or<br />
maintenance performedby unqualifiedpersonnel could resultin a risk of injury<br />
3_When servicing a tool, use only Identical replacement parts. Follow Instructions<br />
in the maintenance section of this manual. Use of unauthorized parts or failureto<br />
followmaintenance instructions may create a risk of etectrtcshock or tnJur_,<br />
SAFETY RULES FOR RECIPROCATING SAWS<br />
_Keep hands sway from cutting area and blade. Keep both<br />
hands on the saw (rear handle and front boot grip). I! both hands are holding<br />
the s_w, the blade cannot cut them_<br />
_ CAUTION: Blades coast after saw is switched off. ]<br />
t Hold tool by insulated gripping surfaces, (rear handle and front boot grip), when<br />
performing an operation where the cuffing toot may contsct hidden wiring or its<br />
own cord. Contact with a 'live" wire wilt make the exposed metal parts of the tool"liw"<br />
and shock the operator,<br />
electrical wlrlng may exist. If the situation ls unavoidable, DISCONNECT ALL<br />
Z_ ELECTRICAL CAUTION: POWER<br />
DO NOT<br />
to the<br />
sew<br />
area/workslte<br />
into existing walls<br />
BEFORE<br />
or other<br />
sawtng.,<br />
blind areas where / !
SAFETY RULES FOR RECIPROCATING SAWS cent,<br />
2. KEEP your body positioned to either side of the saw and not In direct ltne<br />
with the saw blade, Counter-fame (a jumping or kickback action) could cause the<br />
blade to bend or break, and the saw to jump backwards causing loss o! control,<br />
_esulltng In serious Injury.,<br />
3. ALWAYS keep your hands away from cutting area° DO NOT reach under the<br />
materiel being cut because the nearness o! the blade to your hand ts hidden from<br />
your sight,<br />
4. DO NOT use dull or damaged blades. Bent blades can break easfly, or cause<br />
kickback resulting In loss of control and serious injury,<br />
5 When slarllng a cut, lhe speed you use will be determined by the blade and reaterial<br />
you are cutling_ Fast speeds lor soft realerials and slow speeds for hard materials<br />
If the blade speed Is too slow, the saw could chaffer or vibrate at the beglnnlng of a<br />
cut, and posslb_ cause counter-fame (a jumping or kickback action) and vibration,<br />
which can result te loss of control and serlous pemonal injury. Use a stIghtly !aster<br />
speed at the very beginning of your cut. !1is always a good idea to practice your cuts<br />
in scrap material until you have a Ieal for the cutting and handling perforreance of<br />
the saw.<br />
6. NEVER hold the piece being cut In your hands or across your legs. It ls<br />
important to support the workplace properly tn order to minimize body exposure.<br />
b_de binding, or loss of contro!..<br />
7_ ALWAYS clamp the workplace securely so i! wItt not move when making the cut.<br />
8o ONLY USE the designated blades for cutting the type of materia! for which they<br />
are re<strong>com</strong>mended. Cutting materlal_ that are NOT re<strong>com</strong>mended could cause blade<br />
breakage and loss of control, resulting In serious injury.<br />
g_ ALWAYS Inspect and remove all nails from lumber before sawing. Following<br />
this rule will reduce the risk of counter*force (a jumping or kickback action)<br />
that could cause loss of control that can cause serious personal Injury,<br />
Ir this Is unavoidable, such as when performing demolition or renovation jobs,<br />
MAKE SURE to use b!-reetal blades lhat are thicker, with 4 Io 6 teeth per inch,<br />
and Bpeoiflcafiy designed to cut wood with imbedded nails. EXERCISE EXTREME<br />
CAUTION when performing this type of cutting operation=<br />
Z_ WARNING: To reduce the risk of explosion, electric shock, property<br />
damage and serious bodily injury, ALWAYS check the work area for hidden gas<br />
pipes, electrical wires, water pipes, and nail and cleat Imbedded 2 x 4's when<br />
making blind or plunge cuts Into wails during demo!itlon or renovation work°<br />
10. AVOID awkward operations and hand postllona where a sudden slip could<br />
cause your hand to move Into the blade.<br />
tl NEVER reach Into the cutting path of the blade,
Z_WARNING: Some dust created by using power tools contains chemicals<br />
known to the State of California to cause cancer and birth defects or other<br />
reproductive harm. Some examples of these chemicals are:<br />
• Lead from lead-based patnts_<br />
• Crystalline slllca from bricks and cement and other masonry pmductso<br />
• Arsenic and chromium, from chemically treated lumber_<br />
Your risk from these exposures varies, depending upon how often you do<br />
this type of work.To reduce your exposure to these chemicals:<br />
• Work in a wellwentllated area.<br />
• Work with approved safety equipment, such as those dust masks that<br />
ere specially designed to filter out microscopic particles.<br />
Avoid prolonged contact with dust from power sanding, sawing, grinding,<br />
drl!ltng and other construction activities, Wear protective clothing and wash<br />
exposed areas with soap and water. Allowing dust to get Into your mouth, eyes,<br />
or lay on the skin may promote absorption of harmful chemicals.,<br />
/h WARNING: Use of this tool can generate and/or disburse dust, whtch may<br />
cause serious and permanent respiratory or other Injury. Always use<br />
NIOSH/OSHA approved respiratory protection appropriate for the dust exposure_<br />
Direct particles away from face and body.<br />
ADDITIONAL RULES FOR SAFE OPERATION<br />
Z_ WARNING: BE SURE to read and understand etl instructions. ]<br />
Failure to follow all instructions listed below may result tn e_ectrlc shock, fire<br />
and / or serious personal injury.<br />
J<br />
t_, Know your power tool. Read operators manual carefully. Learn the appficalions and<br />
limitations, as wall as the specific potential hazards misted to this tool Following this rule<br />
wtU reduce the risk of electric shock, fits or sedous injury.,<br />
2, ALWAYS wear safety glasses or eye shields when using Uds tool, Everyday<br />
eyeglasses have only impact-resistant lenses; they are NOT safety glasses,<br />
3, PROTECT your lungs, Wear a face mask or dust mask if the operation }s dusty<br />
4_ PROTECT your hearing. Wear appropriate personal headng protection dudng use,<br />
Under some conditions noise from this producl may contribute to hearing ross<br />
5, ALLVISTORS AND BYSTANDERS MUST wear the same sa[ety equipment that the<br />
operator of the tool wears.<br />
6, INSPECT the tool cords periodically and if damaged have them repaired at your<br />
nearest Sears Service Center, ALWAYS BE AWARE of the cord location°<br />
7, ALWAYS check the tool for damaged parts. Before further use of the tool, a guard or<br />
other pad that is damaged should be carefully checked to determine if it will operate<br />
propedy and perform its intended function. Check for misaflgnment or binding of moving<br />
parts, breakage of pads, and any other condition thai may a|fect the tool's cperatiom<br />
A guard or other part that Is damaged should be properly repaired or replaced at a<br />
Sears Service center<br />
8 SAVETHESE INSTRUCTIONS. Refer to them frequently end use them to instruct<br />
others who may use this tool. If someone borrows this tool, make sure they have<br />
these Instructfons atsoo
Z_ WARNING: Your tool ehoutd NEVER be connected to the power source |<br />
when you are assembling parts, making adjustments, installing or removing<br />
blades, cleaning or when it is not in use. D!sconnectlng the sew wtll prevent<br />
accidental starting, which could cause serious personal injury. 1<br />
1. Remove the saw from lhe carrying / storage case and inspect it carefully to make sure<br />
lhat no breakage or damage has occurred during shipping,<br />
2, Do not discard any of the packing materials until aft pads are accounted for.<br />
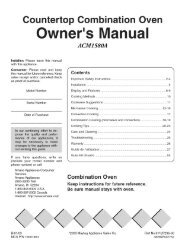
3, Three blades are included; wood culling, ferrous metal cutting, and general purpose<br />
culling (plastic, fiberglass, soft metal). Blades are located inside the carrying I storage<br />
ca_e.<br />
4, If any of the parts are damaged or missing (relar to PARTS LIST below), return the saw<br />
to your nearest Sears store or Craltsm_n outIel to have the saw replaced,<br />
missing parts are replaced. Failure to do so could result tn possible serious<br />
[ Z_ WARN,NG: ,f any parts are missing, DO NOT operate this saw until the ]<br />
personal injury,<br />
PARTS LIST (Fig. 1)<br />
-_- 2. Wood Culling Blade<br />
_'_-_ .... , 3, General Purpose Blade<br />
__o ,1. Metal Cutting Blade<br />
KNOW YOUR RECIPROCATING SAW<br />
5,,Carrying t Storage Case<br />
6, Operator's Manual<br />
oV the 1<br />
LNOTE: petering Before features attempting and snfaty to use requirements. your saw, femlllarlze yourself with all =<br />
Your reciprocating saw has a precision-built electric motor and it should be connected to a<br />
t20-voll060-Hz AC ONLY power supply (normal household current}. DO NOT operate on<br />
direct current (DC). The large voltage drop will cause a loss of power and the motor wil!<br />
overheat, if the saw does not operate when plugged into correct t20-volt, 6D-Hz AC ONLY<br />
outlet, check the power supply,, This saw has a 10*it, 2.wire power cord (no adapter needed)o<br />
lO
This Reciprocating Saw has the foliowlng features:<br />
Craftsman vibra free _" Reciprocating Saws are uniquely designed so that the<br />
reclprocattng md and the counter batance sleeve always move in opposite directions<br />
to each other This design platform virtually cancels out the saw's vibration making<br />
this saw more <strong>com</strong>fortable and easy Io use, It takes the vibration out of the saw and<br />
pule this energy to work saw+ng and removing matedaL<br />
1 Powerful motor 12.0 Amp and 043000 SPM (strokes per minute) no,,ioad speed<br />
provide sure cuts In wood, woodbase building materials, plastics, fiberglass ferrous<br />
and non-ferrous metal pipe. tublng and nails, with 3 different blades Included,,<br />
2 Four Position Orbital Action<br />
The cor_trolswitch regulates the 4 cutting modes of the saw<br />
0 SMOOTH minimal splintering, normal up and down blade motion., NO orbital action.<br />
1 LOW for culling most metals, few orbital acttom<br />
2. MEDIUM for cutting plastics+ hardwood, medium orbital action.<br />
3 FAST for maximum orbital action, use for fast cutting in plywood, softwoods,<br />
3, Variable speed allows matching cutting speed to blade and material,<br />
4 Two finger variable speed trigger switch contmis btade speed by the amo_Jnt of<br />
pressure you apply to the trigger switch+<br />
5 Full 1+h-inch blade stroke for fast cutting and extended blade life..<br />
6+ Tool+less blade clamp features lever action collar for easy, fast blade changes_<br />
Uses universal 1/2-in shank blades+<br />
7 Adjustable length / pivoting shoe Ior maximum control on workpiece in a variety of<br />
cuts+ Adjusts by pressing in on yellow button betow pivo!Ing shoe_<br />
B LED workfight <strong>com</strong>es on when trigger switch is turned on, Llluminetes cutting area for<br />
better vlstbtliiy+<br />
9 Easy-to-grip front boot and rear handle design wlth molded in <strong>com</strong>fort grip<br />
provide maximum control, balance and <strong>com</strong>fort.<br />
f0 Permanently lubricated bearings for smooth operation and long fife.<br />
11 Uses universal 1/2-inch shank blades<br />
Includes 3 blades: 1 blade for last wood cutting. 1 for smooth cuts in ferrous metal,<br />
pipe, and tubing, and 1 for cutting solt metal+ plastics and libergiass<br />
12 Impact resistant housing helps protect saw from damage, reduces weFght ior easier<br />
handitng,<br />
13 Includes rugged storage/carry case.<br />
• vibr_fr0ets on_ya tf_dem_,__,nd¢.aniesr,o expti_:il or impliedclaimas Iotile vthrgt+on reduclionoiIho product.<br />
11
ThisReciprocating Sewhasthefollowing<br />
features cent+:<br />
Rgo2 B_do Orbtt_lActionSwitch<br />
Two Fing_rVadable<br />
Speed Trlg_r Switch<br />
R_ar Hat, die<br />
wtth Soft Grip<br />
i Rating 12.0Amps ...........<br />
No_oad Speeds 0 to 300D SPM<br />
Blade Stroke .... i v4-incl_.............................<br />
Orbital Action 4 Position<br />
.....Blade Type 1/2-In, Universal Shank ...................<br />
Input 120 volt, 60Hz AC<br />
NOTE: operatingBefore features attempting end safety to use requirements, your tool, familiarize yourself with all of the t!<br />
t /_ Remember WARNING: that a careless D° n°t let free|Ion famtl|er'ty of a with second y°uris t°°i sufficient make to y°ucause careless" severe Injury. I<br />
i i<br />
Using any other blade could result In an accident caustng serious injury,<br />
See page 25 for designated blades and re<strong>com</strong>mended uses,<br />
SELECTINGTHE BLADE<br />
Forthe best blade performanceand longerblade It|e,ALWAYSselect the proper blade<br />
for yoursawingapplication.<br />
There aremany typesof 1/2_tn,.universal shank btades availablelor your reciprocatingsaw:<br />
Blades lot cuttingall typesof wood, netl._mbedded wood, woodbasebuikling<br />
matedats, non-ferrous and ferrousmetal, ptasfies end fiberglass.<br />
Blades for scroll culling,roughing-in, and cuttingcontours.Many blade lengths<br />
are also available.<br />
ALWAYS choose s blade length long enough to extend beyond the shoe and your<br />
workplace, throughout the cutting stroke (see page 1B).<br />
12
SAWBLADES<br />
Allsaw blades need to be kept clean, sharp and properlysat _norder to cutefficiently.<br />
Using a dull blade places a heawt load on the sawand increasesthe danger of<br />
counter-force(a jumpingor kickback action).Keep extra blades on hand, so sharp blades<br />
am always available.Gum and wood pitchhardened on the bladeslowsthe saw down.<br />
Use gum and pfLchremover,hot wateror kerosene to remove them° DO NOT use gasofine_<br />
BLADE INSTALLATION AND REMOVAL<br />
This saw is designed to use all 1t2--tnouniversal shank btades.,<br />
I _ WARNING: BE SURE to wear protective work gloves while handling a<br />
saw blade.The blade can Injure unprotected hands.<br />
TO INSTALL BLADE (Ftgure 3 and 3a)<br />
f Unplug the saw.<br />
[Z_ I<br />
WARNING:To prevent personal Inlury, ALWAYS disconnect the plug from<br />
power soume BEFORE assembling parts, making adjustments or changing blades. 1<br />
2, To Install the blade, extend the shoe away from the blade clamp for easier access<br />
(see Page 15. Fig. 6)o<br />
3 Locate the lever action cellar and titt collar up, (see arrow on collar, Fig, 3)_<br />
4 With collar"up" in raised posilion, install shank of 1he saw blade into the blade ciamp<br />
(see Fig° 3 and Fig. 3a),,<br />
5. Release the collar, and the blade should be securely locked Into the biade clamp,,<br />
Pull the blade to make sure it is locked in _lace<br />
g" E_L._ eCbmp<br />
NOTE: The Universal shanked blades only install one way, with the blade's shank<br />
installed into the blade clamp, with saw teeth down (Fig. 3 standard use) or saw<br />
teeth up (Fig. 3e for special applications sea page 21).<br />
TO REMOVE BLADE (Figure 3)<br />
1. Unplug the saw,<br />
t _ WARNING: Never touch blade Immediately after use as It may be<br />
extremely hot.<br />
2..Whenremovingthe blade,exlendthe adjustableI pivoting shoe awayfrom the blade clamp.<br />
3. Locateindeni witharrowon side of Ieveractioncollar(see Fig 3)<br />
4. Pull up on collarat_ndentandholdup.This loosenstheblade ctamp and enablesyou<br />
to pul/the blade out of theclamp.<br />
13
VARIABLE SPEEDCONTROLLED TRIGGER SWITCH (Fig, 4)<br />
Your saw is equipped with a twe-I_nger trigger swtlch<br />
that conlrols the variable speed.<br />
The saw is turned "ON" or =OFP by squeezing or<br />
releasing the tdgger.<br />
To vary the speed o! lhe blade:<br />
1, To Increase blade speed, apply more pressure<br />
to tdgger switch..<br />
2. To decrease blade speed, apply less pressure.<br />
3,. TOSTOP the saw release the trigger_<br />
Fig. 4<br />
and workplace) at the very beginning of a cut.Then Increase speed once the cut<br />
I Z_ CAUTION: Use the appropriate slower speed (for your cutting application<br />
Is sfmrted.Prolonged use st a very stow speed may damage your saw.<br />
I NOTE: ALWAYS allow the blade to <strong>com</strong>e to a <strong>com</strong>plete stop before ramovtng it<br />
from the workplace or laying the saw down.<br />
CHOOSING THE CORRECT SPEED<br />
The speed you use wilt depend on the type of material you are culling<br />
I Use high speeds for cutting wood and woodbase materials<br />
2. Medium speed is best for culling non-ferrous metals, plastics and fiberglass<br />
3 Low speed is re<strong>com</strong>mended for cutting ferrous metals, iron pipe and angle iron<br />
1<br />
NOTE: Material thickness and blade selection will also affect your speed selection. /<br />
As a general rule, use FASTER SPEEDS and blades with !ess teeth per Inch for<br />
softer materials. Use SLOWER SPEEDS and blades with more teeth per inch for<br />
thicker, more dense materiels.<br />
t<br />
LED WORKLIGHT (Fig. 5)<br />
Your reciprocating saw has<br />
a butit-in worklight lor better<br />
visibility when cutttng_ To turn<br />
on the LED worktight, the saw<br />
must be phJgged in. The LED<br />
workltght <strong>com</strong>es on when the<br />
two-linger trigger switch is<br />
squeezed to turn the saw "ON".,<br />
When the trigger is released<br />
and the saw is turned "OFF".<br />
the worklight goes ouL<br />
Rg,5<br />
!4<br />
J<br />
!<br />
J
THE ADJUSTABLE LENGTH / PWOTING SHOE (Figs, 6, and 6a)<br />
The saw's shoeslides in or out to adjust the b{ade's depth-o{_cui into tile workplace,<br />
The si_oealso pivotsinorder to keep as much of lhe shoe's surface as possibleInconlaot<br />
with the workpiece(Fig,,6a and see Page f 4. Fig, 5),,<br />
These adjustments are impodantIn lhat lhey providemaximum control against the<br />
surface being cut, optimizing blade life and reducing the blade's protrusionbeyond the<br />
and of the shoe, suchas when curlinginto larged}ameter pipe or into walls (see Page 20.<br />
Fig.g),<br />
Z_ WARNING: DO NOT operate the saw without the shoe In place, If the shoe<br />
Is not in place the spindle shaft (reciprocating mechanism) could strike the<br />
workplece and damage the saw, causing loss of control resulting in possible<br />
serious personal injury.<br />
ADJUSTING THE LENGTH OF THE SHOE (Fig. S)<br />
1. Unplug the saw_<br />
Z_WARNING: ALWAYS hold the saw by the insulated boot on the front houslng.lf<br />
you sow into a blind area where live wiring exists, you may be shocked or e_ectrocuted.<br />
It is always re<strong>com</strong>mended to shut power off to blind areas you are sawing Into,<br />
2. Locale the yellow bulton on the saw jusl below tile<br />
pivoting shoe,<br />
,3 Press in on bulton while either pulling or pushing tile<br />
adjustable shoe<br />
4 As soon aS shoe is positioned to length, is! go of<br />
button and shoe will be _ocked in posillon,<br />
5. Plug in saw and slowly squeeze the trigger to be sure<br />
the blade ALWAYS extends beyond Ihe shoe and the<br />
workp{eca during the cutting slinks<br />
Rg. 6 Mc,v_s ta or out<br />
z_WARNING: To reduce the rlsk of tn|ury, be sure the BLADE EXTENDS BEYOND<br />
the shoe and el!lthe way through the workpfece throughout the stroke, (see Figs. 7a<br />
and 7b), Blades may shatter, bend or break if the blade hits the shoe or hits the<br />
workplace at an angle that Is nearly he,_d on (see Figs. 7a and 7b).<br />
ADJUSTING THE PIVOT OF THE SHOE (Fig. 6a)<br />
I, Unplug the saw.<br />
Z_WARNING: To prevent personal lnlur=t,<br />
I ALWAYS disconnect the plug from power source<br />
I BEFORE assembling parts, making adjustments<br />
Lot changing blades,<br />
2 Firmfy hold saw and "pivot" the shoe, keeping as<br />
much of the shoe's surface up against the<br />
workpiece as pesslblewhen cutting.<br />
15<br />
Ftg.6a Pivols
4 POSITION ORBITAL ACTION<br />
The Orbital Action feature on this saw thrusts the blade up and forward on the cutting<br />
stroke to greatly increase the cutting speed over the normal back and Forth action of the<br />
slandard reciprocating action,<br />
The O position on the Orbital Aclion Swilch produces no orbital action, only the normal<br />
back and forth (reciprocating) action, for lhe smoothest cuts in wood with least splinleringo<br />
Good for all cuts in metal or plastic, or nail embedded wood<br />
The 1 position produces a sinai! amount oForbital blade action, with controlled splintering<br />
Use to cut pocket holes in flooring or holes in drywall.['---- /// "_'_'_, _'i<br />
The 2 position produces more orbital action than | /(Z---...._ ) ) i I<br />
the number t position, Use where cuts in wood wlth | /__'_,,_ /_ | I<br />
some splintering is okay Use for door and window | //.F_/_i_ / t/ 1<br />
cutouts and holes insub-flo0ring, t,/ i<br />
The 3 position produces the most orbital action, I _ _//_ / J _ I<br />
but leaves a very rough, splintered finish. Use this I _ "_ _// //<br />
speed when you need the fastest cutting. Ideal for I _ ./ -_------_ /1 I<br />
demolition and tear out jobs LLT_. [ //_ 1/ I<br />
The 4 Position Orbltet Action Switch regulates the 4 cutting modes of the saw,<br />
Position 0<br />
NO ORBITAL ACTION. For minimal<br />
splintering, smoothest cuffing. Normal back<br />
and forth blade motion. Use fine wood blade,<br />
20 teeth par inch, or smooth metal blade,<br />
36 teeth per inch°<br />
Posltton I<br />
LOW ORBITAL ACTION, Ideal for cutting<br />
most metals. Use wood and metal cutting<br />
blades with 10-t2 teeth per inch,<br />
Position 2<br />
MEDIUM ORBITAL ACTION. Ideal for cutting<br />
most plastics and hardwoods, Use wood<br />
and metal cutting blades with 10-12 teeth<br />
per inch.<br />
Position 3<br />
FAST I MAXIMUM ORBITAL ACTION. Use for<br />
fastest cutting in plywood, soft woods end<br />
wallboard. Use wood. metal and wallboard<br />
cutting blades with 8, B,12 teeth per inch,<br />
16
USING THE SAW (Fig., 7)<br />
I Ak CAUTION: ALWAYS wear eye protection while operating this power tool. ]<br />
i OTE: Before cutting any type of material, BE SURE It ta firmly enchored or I<br />
c!_mped to prevent slipping.<br />
1o Select the proper blade<br />
2. Select the proper orbital action.<br />
,_ WARNING: If you saw into a blind area where live wiring exists, you may be l<br />
shacked or eleetrocuted_ it Is always re<strong>com</strong>mended to shut power off to bffnd areas you<br />
are sawing into.<br />
J<br />
3+ Mark the t_naof cut on workp+ece.,<br />
4 Plug in saw<br />
5+ Hold the saw firmly in front of you and ctea{_ away from you. Make sure the blade +sclear<br />
of any foreign objects tn the workpiece.,<br />
6 Keep saw's pivot shoe firmly against workpiece to minimize counter+force (jumping) and<br />
vibration (see Fig+ 7) with brads lightly touching the surface to be cut+<br />
7 Squeeze Ihe trigger to alert saw, let saw reach desired futl speed (depending on blade type<br />
and material) before start+ng your cut, Fast speeds for self materials+ slow speeds lot hard<br />
materials,<br />
8 If blade speed is too slow, saw may chatter or vibrate at the beginning ot cut, and possibly<br />
cause counter+tome ( umping or klckback action) Use a sfightly lm'.oterspeed tf this<br />
happens. Atways practice your cuts on apiece of scrap material to familiarize<br />
yourself with the cutting and handling performance o1 the saw+<br />
9, Always hold the saw lirmly with both hands as you guide the blade through the cut line,<br />
Whenever pose+hie, hold the saw and the pivot shoe firmly agatne_ the workpiece to help<br />
prevent the saw from jumping or vibrating and mfnimtze brads breakage<br />
Fig. 7<br />
NOTE: DO NOT FORCE the saw or blade in the workpteca. Use only enough<br />
pressure to keep lhe saw cuffing° Let the blade and saw do the work.<br />
17
]<br />
In broken blades and loss of control, causing damage to werkp|ece end serious<br />
[ AWARNING: personal tnJury._<br />
Use of excessive pressure can bond and twist the blade, moult|rig I<br />
SAWINGTIPS (Figs. 7a and 7b)<br />
Following a few simple tips wlg help reduce wear on the saw. the blade, the workplace and<br />
the operator,<br />
1 Blades cut on the draw, or back stroke On fine work such as paneling or fiberglass.<br />
place the good side of the workp_ece lacing down<br />
2 Cut only with sharp blades; lhey cut cleaner, faster and put less strain on the motor,<br />
3. Always use the correct blade for the material being out and akvays keep extra blades on<br />
hand to use when blades be<strong>com</strong>e dull Replace dull. cracked or bent btades<br />
immediately.<br />
4. Ahvays select the prope!r cutting speed,<br />
5oAlways select the proper Orbital Postton,<br />
6. When cuging, always make sure that the shoe plate ts resting f_rmty against the<br />
workpleco, This wil! Improve operator control and mfnimfze vibration°<br />
Z_ WARNING: Blade breakage end damage to the workpiece may occur if<br />
the blade does not extend past the shoe and the workpfece throughout the cut.<br />
Loss of control and damage to the shoe can result, Increasing risk of serious<br />
personal Injury (see Fig. 7a and 7b)o<br />
Fig,7a Jl<br />
Cutting Wood<br />
Stroke<br />
' RIGHT<br />
RIGHT<br />
1B<br />
I Stroke<br />
|<br />
: _<br />
Stroke<br />
1 .!<br />
I_ WRONG<br />
WRONG
WOOD CUTTING (Fig. 8)<br />
! ,,ALWAYS c_amp the workpiece down to prevent it from s_ipping,,<br />
2. Select the proper blade.,<br />
3. Select the proper Orbital Position<br />
4., Mark the line of cut on workplace,<br />
5.. Ptug in saw.<br />
6. Place the saw's pivot shoe firmly against the workpiece wi{h the btade fightly touching<br />
the surface to be cut,<br />
7. Squeeze Idggar sw_lch, bflngtng the blade up to the appropriate srower speeds when<br />
sladlng the cut,before appiying pressure to blade and workplece (laster speeds tor<br />
soft woods, slower speeds for hard woods<br />
8. Do net torce Ihe saw or blade in the workptece, use only enough pressure to keep saw<br />
cuffing Let the blade and saw do the work,<br />
g.. ALWAYS hold the saw fltmty with both hands whiie cu;ttt_g.. Always hold saw with tile<br />
adjustable shoe firmly against the material lo be cut This will prevent the saw from<br />
jumplng or vibraiing and help mlntmtze blade breakage.<br />
10. Practice on a scrap piece ef wood, similar to your workplace, until you get a feel for<br />
the saw's performance.<br />
Fig_ 8<br />
NOTE: Wear gloves If cutting for long periods,<br />
z_WARNING: To reduce the risk of Injury, BE SURETHE BLADE EXTENDS<br />
I BEYOND the shoe end all the way through the workplace throughout the stroke<br />
[ (see Page t8, Figs. 7a and 7b), Blades may shalter_ bend or break If the blade<br />
_he shoe or hits the workptece at an angle that is nearly head on,<br />
19<br />
]
METAL CUTTING (Fig. 9)<br />
1, ALWAYS clamp the work down to prevent il from sfipplng<br />
2, Select the proper blade..<br />
3+ Select the proper Orbital Position+<br />
4, Mark the line el cut on workpfece+<br />
5, Ptug in saw+<br />
6_ PEace the saw's pivot shoe firmly against the workpieee with the btade lightly touching<br />
the surface to be cut.<br />
7. Squeeze trigger switch, using a slow speed (when cutting hard materials) or faster<br />
speed (when curling soil materials),<br />
8 Do not tome the saw or blade in the workpiece, use only enough pressure to keep saw<br />
cutting Let the blade and saw do the work,<br />
9+ ALWAYS hotd the saw lirmly with both hands while cutting and hold saw with the<br />
adjustable shoe firmly egatnst the matertal to be cut. This will prevent the saw from<br />
jumping or vibrating and he?p minimize blade breakage..<br />
10. Use a liner blade for ferrous metals and a coarse blade for non,ferrous metals_<br />
11+ When cutting thin gauge sheel metals, ALWAYS clamp wood on both sides el Ihs<br />
sheet. This wtit give you a clean cut without excess vibration or tearing of the metal<br />
!2. DO NOT force the cutt+ng blade. Forcing the blade w+Ureduce blade ISleand could<br />
cause the blade to break.<br />
Fig, g<br />
fluids along the line of cut ahead of the saw.This wil! allow easier operation and<br />
NOTE:<br />
help extend<br />
We re<strong>com</strong>mend<br />
blade life, When<br />
that you<br />
cutting<br />
spreed<br />
aluminum,<br />
a thin film<br />
use<br />
of<br />
kerosene,<br />
oil or other types of cutting<br />
2O
POCKET CUTTING INWOODONLY(Ftg.10)<br />
This saw is ideal lor plunge cuttingdirectly tnlo surfaces lhal cannot be cut from an edge,<br />
such as floors end wails. Plunge cuttingcan be done two dillerent ways, depending on<br />
how Ihe blade ts insertedinto the saw's blade clamp,,<br />
Fig. !0 columnA showshow to plunge cutwtlh lha teeth of the blade lacing up_<br />
Fig. 10 columnB showsplunge cuttingwith lhe teeth of the blade facing down,<br />
DO NOT plunge cut Into metal surfaces.<br />
2Y<br />
Teeth facing<br />
down towage<br />
bottom of<br />
2 _i ¸¸'¸<br />
! ..Measure the surface to be cut and mark clearly with a penctt_ scriber or chalk<br />
2, Insert proper blade In blade clamp and tfghlen securely<br />
3, Set the too{with one edge of the tootplate firmly against the malarial (seeA -B, 1}..<br />
4 Place the tip ol Ihe blade (not running) on the line !o be cut..<br />
5. Tilt the saw so the blade clears lhe workplace (Fig t0}.<br />
6o Squeeze lhe tdgger and carefully lower the moving saw blade into the workplace<br />
(see A - B, 2}<br />
7. Afler the blade penelrales lhrough the workplace, continue sawing along the cut line<br />
(see A - B, 3},<br />
2t
POCKET CUTTING IN WOOD ONLY (Fig_ 10) cant,<br />
[NOTE:<br />
To make<br />
plunge cutting easier, use a heavy gauge<br />
blade,<br />
]<br />
|n thickor very hard materials, plunge cuttingshould not be altempted_Pockelcutting in<br />
suchmaterialsshould oniy be done by starting thecut from a hatedrlfledal_the way<br />
through the material thatis large enoughtofit the saw blade.<br />
Follow all safety instructions regarding use of shoe, blade type and blade stroke.<br />
Z_ Make WARNING: sure branch use is firmly extreme anchored caution or attached if you usa beforeyou this saw for start light endwhile tree pruning. cutting. 1I<br />
Z_ andWARNING: debris ahead of DOtime. NOTPay CUTparticular overhead. attention Anticipate to overhead path of falling wires. branches lJ<br />
FLUSH CUTTING (Fig, 1t)<br />
The <strong>com</strong>pscl design of the<br />
motor housing and the adjustable<br />
tengthlpk_oting shoe on this sew<br />
allow you to make extremely<br />
close cuts in floors, corners and<br />
other extremely tight areas,<br />
To obtain the maximum flush<br />
cutting capacity of this sew:<br />
1 install the blade with the<br />
teeth facing up (towards<br />
top of saw),<br />
2 Make sure the shoe is in tls<br />
closest position to the saw<br />
housing, and the teeth of the<br />
blade are facing as close as<br />
possible to the work<br />
sudece (Fig_ 11)o<br />
Fig. tl<br />
A_ WARNING: Blade breakage and damage to the workplace may occur If I<br />
the blade does not extend past the shoe and the workplace throughout the cut.<br />
Loss of control and damage to the shoe can result, increasing risk of serious<br />
personal Injury (see Page 18, Figs. 7a and 7b).<br />
2.2<br />
1
Z_ WARNING: To ensure safety and reliability, repairs, maintenance and<br />
adjustments MUST be performed by e qualified sen/Ice technician at a<br />
Sears Service Center.<br />
WARNING: For your safety, ALWAYS turn off switch end unplug saw from<br />
the power source before performing any maintenance or cleaning°<br />
has been found that ereclric toots am subject to accelerated wear and possible<br />
)remature failure when they are used to work on fiber glass boats and sports cars,<br />
wallboard, spackling <strong>com</strong>pounds or pfasier, The chips and grindings from these materials<br />
are highly abrasive to electrical tool parts, such as bearings, brushes, <strong>com</strong>mutators, etc.<br />
Consequently, it is not re<strong>com</strong>mended that this tool be used for extended work on any<br />
fiberglass material, wallboard, spackling <strong>com</strong>pound or piaster. During any use on these<br />
materials, It ts extremely Important that the tool is cleaned frequently by blowing wilh<br />
an air Jet.<br />
WARNING: Always wear safety goggles or safety glasses with side shields<br />
during power tool operatlons_ or when blowing dust. I1 operation is dusty, also<br />
wear a dust mask.<br />
TO CHANGE CARBON BRUSHES (Figs. 12 and 12a)<br />
Replacement brush sels are available through Sears Parts and Repair Centers,<br />
Atways order with the correct part number, see paris list on page 27.<br />
1..Unplug the reciprocating saw before inspecting or replacing brushes<br />
2.. Replace bolh carbon brushes when eilher has less than 1/4-ira length el carbon<br />
remaining, or if the spring or wire is damaged or bumed_<br />
3. Using a slotted screwdriver, remove the black plastic cap on each side o! the<br />
reciprocating saw (Fig. !2) and carefully withdraw lha apringJoeded brush assemblles_<br />
Keep brushes clean end stiding freely in their guide channels<br />
NOTE: To reinstall the same brushes, make sure the brushes go back in the<br />
same way they came out, This will avoid a break*In period.<br />
23<br />
Fig. 12a
TO CHANGE CARBON BRUSHES cont_ (Figs. 12 and 12a)<br />
4o Insert new brush assemblies into guide channels, with the carbon part going in first,<br />
being certain to fit the two metal "ears" into their stets tn the channe_ (Ftg- 12a},<br />
5, Remember to replace bolh plastic end caps Biter inspecting or servicing brushes<br />
Tighten the caps snugly, but do not over-tighten.The reciprocating saw sheu]d be<br />
allowed to "RUN IN" (run at no load wtlhout a bYade) for 5 minutes before use, lo seat<br />
Ihe new brushes properly,<br />
ROUTINE MAINTENANCE<br />
WARNING: DO NOT at any lime let brM_efluids, gasoline, petroleumbased<br />
products, penetrating oils, eteo<strong>com</strong>e In contact with plastic parts.<br />
Chemicals can damage, weaken or destroy plastic, which may result in<br />
serious personal Injury.<br />
Periodicmaintenanceallowsfor long life and trouble*free operation A cleaning,<br />
lubrication end maintenance schedugashould be maintained, As a <strong>com</strong>mon<br />
preventive maintenance practice, follow these re<strong>com</strong>mendedsteps:<br />
I Z_ the WARNING: power source For before yourperforming safer, ALWAYS any maintenance turn off switch or cleaning. end unplug saw from 1<br />
t. When work has been <strong>com</strong>pleted, clean the tool to allowsmooth functioning of the tool<br />
over time,<br />
2 Use clean damp cloU_sto wipe the teoL<br />
3 Check the state of all power colds.<br />
4 Keep the motor air vent openingsfree from oil. grease and sawdust or woodchtps,<br />
and store toolin a dry place.<br />
5 Be certain that all moving palls are welt lubricated,particularlyafter lengthy exposure<br />
to damp andlor dirty conditions<br />
LUBRICATION<br />
Your Craftsman" Professional Reciprocating Saw has been properly lubricated and is<br />
ready to use. No lurther lubrication is needed under normal operattng condttlens,<br />
All bearings in the saw are lubricated for the lile of the tool<br />
24
[Z_re<strong>com</strong>mended WARNING: for The this usa toot of might attachments be dangerous or accessories and could that result areInnot serious injury, / J<br />
Sears and other Craftsman outlets have a large selection of rectpmcaling saw blades<br />
in a variety of blade tengths and teeth per inch that are ideal for a wide vartety of<br />
cutting appf_catIons,<br />
ALWAYS usa the shortest blade suilabla for your _eb, but long enough to keep the<br />
blade culling through the material<br />
/<br />
during usao During operation, longer blades may vibrato or shake, causing toss<br />
I Z_ of control, CAtYrlON: damage<br />
Longer<br />
to workpleee<br />
blades are<br />
and<br />
more<br />
possible<br />
likely<br />
serious<br />
to bend<br />
personal<br />
and be<strong>com</strong>e<br />
Injury,<br />
damaged / 1<br />
The material you are cutting delermines lfle type o! blade to use..<br />
Generally, tess teeth on ;he blade removes more material quicker, but produces<br />
a rough finfshed cut<br />
More teeth cut slower but smoother.<br />
Use a blade that is slightly larger (longer) that the depth of the material you are cutting_<br />
Wider (thicker) blades are more durable and ideal for tougher lobs like demolition.<br />
When cutltng wood that has embedded nails, use hi-metal blades that are specifically<br />
marked on the bfade or packaging that they are suited for this purpose,,<br />
Sears and other Craftsman outlets also have a large assortment of clamps, sawhorses,<br />
safety equipment, groves, extension cords and other equipment to harp you with<br />
sit your sawing needs<br />
Visit your loca! Sea;s store or other Craftsman outlets or shop seers <strong>com</strong>Jcreftsman,<br />
Z_ WARNING: Blade breakage and damage to the workplace may occur If I<br />
the blade does not extend past the shoe and the workplece Ihroughout the cut,<br />
Loss of control and damage to the shoe can result, Increasing rtsk of serious<br />
personal injury (see Page 18, Figs, 7a and 7b),<br />
25<br />
1<br />
I
l<br />
w<br />
26
RECIPROCATING SAW - MODEL NUMBER 172.26043<br />
........ item No. P_rts'No. P_rt Descdptlon<br />
..... i ' PSR_2Os:1 ....................... _, _Ri_ht,H_,_,: ......<br />
2 PSR120S*2 ............... Omanlent Cover ,<br />
3 GGT480PU*38 CordClamp....<br />
4 PES360U-24 Screw<br />
5 PSR120S=5 CablePtolaclor<br />
" 6 PSR12BS,-6 ......CordAndPtug<br />
B PDIBOOSU-5 Screw<br />
g PSR120S-9 Screw<br />
.......10<br />
11<br />
_2<br />
t3<br />
14<br />
15<br />
2oi<br />
IB<br />
19<br />
20<br />
21<br />
PSR 120S-,10.................. Switch<br />
PSR 120S-! I InnerWire<br />
22<br />
23 PES360U-27<br />
24 PSR120S-24<br />
25 PSR_20S_25<br />
202 PSR120S*202<br />
Qty,........<br />
I<br />
I<br />
I<br />
pS,R,!,,20S-I 2 InnerW_m<br />
PSRtBOSV*13 Screw<br />
I<br />
PSR120S-14 Terminel<br />
4<br />
PSRt20S-15<br />
fnnorWire 2<br />
PSR120S-201<br />
PSR120S-1B<br />
9rushHotderAssembly ' ............ , .... 2...........<br />
PSR120S-t9 ......<br />
PSR120S-20<br />
PSR120SV-21<br />
26 ............PSRtBOS-26<br />
27 PSR120S-27<br />
2a ....... PSR120S-2B .........<br />
4<br />
I<br />
I<br />
6<br />
4<br />
t<br />
ca_on,e_sh(Pa!r_ ...... 1<br />
Brush,,Cover ....... 2<br />
Rated Lab!e 1<br />
Staler 1<br />
Screw 2<br />
Baffb 1<br />
,, , , , ,,,<br />
Beating Sleeve 1<br />
Rolor 1<br />
Ba_lBeating ..................... I<br />
Dust P_oe! 1<br />
Armature !<br />
......P.g ...PSRi20S-2g ............. ::", Fla!al,n,!ngR'Ing ....<br />
30 PSR120S-30 Ford R{ng<br />
3I PsRt20S_3_ Retaining R{ng...................<br />
32 PSR120S-32 Bear;ngCover ...............<br />
33 PSRt20S_3 ................. Ball Beating .............<br />
34 , PSRI20S,,34 Washer<br />
_5 CDT218GU-41 ScrewAssembly,,<br />
203 PSR120S-203 _ eaS_ prate ,<br />
3B PSR120S-36 Botlom Cover<br />
37<br />
38<br />
39<br />
40<br />
41<br />
42<br />
43<br />
44<br />
4,s,<br />
4B<br />
.F_:SR120S_37 Ball 8ez_r_n,_ ..... ' , ...... :1<br />
PSR120SV*38 .......... A!_mof Rfn 9 ..... 1 .......<br />
PSRI20SV
RECIPROCATING SAW - MODEL NUMBER 172.26043<br />
Item No. Port= NO. part Oeecr,iptlon ............................. Q,ty*,<br />
47 PSR 120S-,47 Cylindr',cal Pin 1<br />
48 PSR't28S,..48 . E Ring 4<br />
49 PSR120s_Ig P,ubber s'k_eve ...................... 1......<br />
..... 50 PSRt20S-50 Push 8otlon ......... I ....<br />
51 PSRt2gS-102 Screw t<br />
52 PSR120S-52 Torsi55_,| Spring<br />
53 PSR 120S-53 Sp_nner I<br />
54<br />
55<br />
57<br />
5B<br />
59,<br />
60<br />
61<br />
62<br />
63<br />
64<br />
65<br />
204<br />
66 PSR120SV-GB<br />
67 PSR 120S..67<br />
6B PSR120S..68<br />
69 PSRt20S-69<br />
70 PSRi20S-70<br />
F'SRI20SV-54 Retatnifig Ring 1<br />
PSR120S_55 S_ppoM BmcketAssemb_, , , , I<br />
pSR!20E_7 Batl Bearing I<br />
PSR120S-58 Beating COvet ......... 1<br />
PSm2Os:s,_ ..............................................<br />
screw 3<br />
PSR120S.GO Tmns_orrmtion Ring ..... 1,<br />
PSR120SV.61 Pinion Shzd! Se! t<br />
PSR120S_52 ....................... ' N_dtaB_adn DCOmpOnent ' i<br />
GGT4501U-50 Relaln_ng R}ng 1<br />
PSR1EOS-IOB . Screw W_het ASSembly 4<br />
PSRIEOS-.65 ......... Pres_ P_le 1<br />
PSRi20SV-204 , ' Reciprocaior'Sat ..... 1<br />
71 PSRtEOS-71<br />
72 PSR120S-72<br />
73 PSR120S-73<br />
74 PSR120S-74<br />
Reciprocating Shalt ..... 1 ,<br />
0il SGai 8aadng 2<br />
Se_t Gasket I<br />
Fe_ Sea| 1<br />
Seat Ring 1<br />
' F'ait Seat 1<br />
trpmol Pstch 1<br />
Atrproa! Ring 1<br />
'_'pring Pin 1<br />
75 PeR i20S,.75 . Carder Base . 1<br />
76 GDTIOgGU-2B _ St_aJ Ba_l _ 1<br />
77 PSRi20S-77 C_,rrfe r Cam 1<br />
7B . PSR120S-78 , Pin, , 1<br />
205 PSR12gS-205 Angle Bracket ' 1<br />
79 ........ PSR_2os_79 ' RO_'t Guide ASsembly ..... 1<br />
BO PSR120S_80 Copper Cap 2<br />
B1 PSR120S'-8'I _ At_roof Ring " . 1<br />
B2 PSR120S,82 Screw Assembly, 4<br />
B3 PSR120S-83 Washer 4<br />
PSRi20S_4 E Ring 4<br />
B5 PSRt20SV_5 ' ' top' Covei ....... 1 "<br />
...... 86 ' PSR'_20S.8'6 ........... RQvok,o Pin 1<br />
................ I]7 PSR120S*S7 Pend_m Pb_B I<br />
B8 PSRI20S-aB ...... Outer Flange 1<br />
Cover I<br />
89 PSRt20S-ag ...........<br />
gO . PSR'tEOS-gD ...... Cbmp Leve,r . 1<br />
gt PSRI_2OSogl Pin 1<br />
28
RECIPROCATING SAW - MODEL NUMBER 172.26043<br />
item No,<br />
92<br />
g3<br />
94<br />
95<br />
g8<br />
97<br />
98<br />
Parts No,<br />
PSR120S-92<br />
PsRi20s-93<br />
PSR120s-g4<br />
PSR120S-g5<br />
PSRI20s*g6<br />
PSRt20S+97<br />
PSR120S-g8<br />
........... 9_.............. psm2osw9<br />
100 PSR120S-100<br />
1Ot PSRI20SV-1OI<br />
102 PSR120S*I02<br />
103 PSR120S-t(}3<br />
iO4 PSRt20S-104<br />
105 PSRt20SV405<br />
106 PSRI20SV*10B<br />
107 PSR120SV.107<br />
........!oe swsT.31.t-oo<br />
109 PSRI20SV*lOg<br />
.....!+o.........PSR_20SV-1+O<br />
111 PSRt20S-109<br />
Part Description ................ Qty.<br />
Holbw Pin 1<br />
Compress!onSpring 1<br />
Cytif_drIcalPin 1<br />
, , ,Spindk_Shaft<br />
A+rprea! n+ng<br />
............. ! ....<br />
1<br />
CompressionSpdng 2<br />
Press B_ck 1<br />
. Press Pla_<br />
t<br />
29<br />
Power SupplyBo_d 1<br />
Brand Lat]e| 1"<br />
Screw 1<br />
Washer 4<br />
TorsionalSpfln_ 1<br />
Counte_t,'atght i.<br />
Middle Cover t<br />
Pin 3<br />
ScrewAsssmbFi 4<br />
Washer I<br />
O+tSe=8o..._ , ,,:,,.......... ,£,:<br />
Screw 2
NOTES<br />
30
Manual del Operador<br />
t;n 0 ', s s , o ,, L l<br />
12.0 Amperios / Velocidad variable<br />
Sierra de Vaiv_n<br />
conAcci6n Orbital<br />
Modelo No.<br />
172.26043<br />
PRECAUCION: Lea, <strong>com</strong>prenda y stga todaslas<br />
Normas de Segurtdad e tnstruccfonesde Operaci6n<br />
en este Manual antes de usar este producto,<br />
Sears, Roebuck and Co,, Hoffman Estates, IL 60179 EE.UUo<br />
Vea nuestro sltIo web de Craftsman,:<br />
www.sears.<strong>com</strong>/craffsman<br />
Oobre Aisfamlento<br />
GARANT_A<br />
SEGURIDAD<br />
DESEMPACADO<br />
DESCRIPCJON<br />
OPERACI6N<br />
MANTENIM|ENTO
Gatantia ....................................................................................................................................<br />
P_gina 32<br />
Stmbotos de Seguridad ....................................................................................... P_Sgina 33<br />
lnstruciones de Seguridad ................................................................ Paginas 34-40<br />
Desempacado ......................................................................................................... P&gina 40<br />
Descripcidn ......................................................................................................................<br />
P_g[nas 4t-42<br />
Operaci6n .................................................................................................P>nas 42-52<br />
Mantentmiento ...................................................................................................... P_ginas 53-54<br />
Accesorios ......................................................................................................................<br />
P,Sgina 55<br />
Lista de Partes ...................................................................................................................<br />
P,_ginas 56-59<br />
N0meros deTel_fono de Partes de Repuesto de Sears ..................... Contraportada<br />
GARAN'HA DE UN AI_O COMPLETO SABRE PRODUCTOS<br />
PROFESIONAL CRAFTSMAN<br />
Sf este productopmfestonalCraftsmanfairs debldoa detectos en el material omano<br />
de obra entre unafro desde la fechade <strong>com</strong>pra, REGRI_SELO a LATtENDA<br />
O CENTRO DE PARTES¥ P|EZAS DE REPUESTOS U OTRO PUNTO DEVENTA<br />
CRAFTSMAN MAS CERCANO EN LOS ESTADOS UN|DOS PARA REPARACI(_N<br />
GRATIS {O REEMPLAZO St ES IMPOSIBLE REPARARLA).<br />
Esta garantfa no incluys partes desechables tales <strong>com</strong>a _mparas, piles, braces u<br />
hojas_<br />
Esta garantfa b otorga derechos legalesespeclflos yes posstblsqu usted tenga<br />
arras derechos, los cuales varfan de un estado s otto,.<br />
Seam, Roebuckand Co...Hoffman Estates, IL60179<br />
IGUARDE ESTAS INSTRUCCIONES!<br />
i LEA TODAS LAS INSTRUCClONES!<br />
/_ ADVERTENSIA: Algun potvogenerado par el use de herramtentaa ]<br />
elSe|rices conttsne qulmlcos conocldos par el estsdo de California par causer<br />
cancer y defectoa de naclmiento u arms defectos pars fe repmducct6n. ]<br />
32
Et prop6sitode los sfmbolos de seguridsd es Ilamar su atenci6ncon respectoa los posibles<br />
pc!lares.Los simbofos de seguddedy la expitcacI5nde sues merecen ¢utdadosa etenci6n<br />
y <strong>com</strong>prensi6n. La advertencia de !as slmbo!osNO elimine ning_npeligroen sL Las<br />
tnsfruccionesy a@_ertenciasque bdnden no son sustitutesde las medidas correc_asde<br />
prevenci_n de sccidentes.<br />
Z_ ADVERTENCIA: ASEGURESE de leer y <strong>com</strong>prender todas las !flstrucclones<br />
de segurldad de este manual, lncluso fades los aimbotoa de alerts tales <strong>com</strong>a<br />
"PELIGRO", "ADVERTENCIA'y "PRECAUCIt_N",ANTES de utilizer esta herramlenta.<br />
SI no se respetan fades tas tnstrucctones qua se lneluyen en Is stgufente lists se<br />
pueden pmducir descargas el_ctr!eas, tncendlos y/o lea|ones personatesgraves.<br />
SIGN|FICADO DE SIMBOLOS<br />
_ ADVERTENCIA O DEO PRECAUCti_N_ ALERTA DE Pueden SEGURIDAD: uesree an conlonct6n Indtce PELIGRO, con afros<br />
efmbalae o plctogramt=e.<br />
E! fncump|tmiento de est_ advertencla de seguridad RESULTARA<br />
en LESIONES graves pare usted u afros. Slempre alga lee<br />
preeauclones de de segurldad pars reduclr el rfesgo de Incend]o,<br />
descarga eldctr|ea y lestones personales.<br />
_ADVERTENCIA] l Incumpitmtento de eats advertencia do segurtdad PUEDE<br />
resultar en leslones persanales gr_ves pars uated u aires,<br />
Slempre slga las precauclonas de segurfdad pare raducir el<br />
dasge de tncendlo, descarga eldctrica y leslones personates.<br />
I _PRECAUCII_I ] J El resultar ineumplimtento en leslonsadepersonates esta advertenala pare uated de seguridad u afros o PUEDE daces<br />
materlales. Siempre siga las precsuclones de seguddad pars<br />
reduclt et r{esgo de lncendio, descarga el6ctdca y leslones<br />
......... personalas.<br />
PREVENCION DE DA_IOSY MENSAJES DE INFORMACION.<br />
Estos <strong>com</strong>untcan a! usus_to Informscl6n y/o Instrucclones importantes qua sl no no sa<br />
respelan, podfian pmducir el dal_o.. Cads mensajs as precedido per ;a patabm "NaTAl" <strong>com</strong>a<br />
en el stgutenle ejsmpla:<br />
NOTA: y/o Is propledad. S! no se respetan estee |nstruccionaa se puede produelr et daSo def aqulpo<br />
USE SUS Z_ ADVERTENCIA: El tunctanamlento de cualquler<br />
herremtenta el_ctrica puada causer le prayecci6n de objetos<br />
extrafios hacla los ojos Io cual puede ocaslonar da_os<br />
graves an los alas, Antes de porter an funcionamfanto una<br />
hermmienta el6ctdce, SIEMPRE use galas de segurlded o<br />
anteoJos de segurldad can protector lateral y protector facial<br />
<strong>com</strong>plete euertdo sea neceearlo. Re<strong>com</strong>endamoa el use de<br />
una m_scara de segurtdad de vial6n empire pars user sabre<br />
los anleotos a anieoJos de seguddsd estdndar con protector<br />
lateral, diaponibles en laa_endaa Sears u afros centros de<br />
ventss Craftsman.<br />
33
este menus! antes de user esta sierra vaiv_n e|_ctrfca. No segulr redes las Instrucciones<br />
I podrla _ ADVERTENCIA: resultar an descargas<br />
ASEGORESE<br />
el_ctrtcas,<br />
de<br />
tncendto<br />
leer y entender<br />
y/e leslones<br />
redes<br />
personales<br />
lss Instrucciones<br />
gmves_<br />
en<br />
AREA DE TRABAJO SEGURA<br />
I Mantenga su drea de trsba|o limpta y b_eniluminadaoLosbancos de trabajo<br />
desorganizados y fas _raas oscuras invitana los accidentes..<br />
2. NO opere herrsmlentss el_ctricas en atm6sferas explosivas_tales <strong>com</strong>e en<br />
presencta de liquldoa, gases o potvos tnflamables, Las herramtentsseldctricas<br />
crean chispas qua podrfan encender e| polvo o los gases<br />
3. Mantenga a los observadores, hires y vlsltantes atejades al operar une<br />
herramlenta e!6ctrleaoLas distracctones podrlan ocastonar que usted pisrda atcontrol<br />
4.. Mantenga su lugar de trabaJnsegum pare los nlfos tmp?ementandocandados e<br />
lnlerruptoresmaestros, Guards bajo llave las herremientascuando no las USer<br />
5. ASEGORESE qua el drea de traba]o euenta con amplta llumlnaet6n pare que pueda<br />
vet el trabajoy que no hays obstrucctonesqua tnterferlr_ncon una op_ract_nsegura<br />
ANTES de user su sterra_<br />
SEGURIDAD PERSONAL<br />
t, CONOZCA su hsrramlenta eldctrlca. Lea el manuaf de! operador cutdadosamente,<br />
Aprenda las apficactones y limttaciones de la su cepifladora, asi <strong>com</strong>e Zos pefigros<br />
potenciales aspen[rices zetacionados con esta herramienta<br />
2, MANT[_NGASE ALERTA, mira lo qua hacs y utitice sentldo <strong>com</strong>0n al operar una<br />
henamtenta e_ctdcB.<br />
3o NO use ta hermmIenta sl slants cansanclo e st est_ bajo la influencia de drogas, alcohol<br />
e rnedicamantos, Un memento de desatencf6n mtentras opera una herrarnlenta<br />
elL_ctrfca podrla resultar en lestones personales graves.<br />
4,,VISTA apropfadamenteo NO use rope suelta o joyas RecoJa e! cabello largo, Man[enga<br />
su cabello, mpa y guantes lejos de las ptezas m6vtles, La mpa suelta o el cabello largo<br />
poddan quedar alrepades on tas pfezas m6viles, Las aperlures de ventilacidn a rnenudo<br />
cubre ptezas m6vtles y tambtOn deben evilarse<br />
5_ EVITE encender accfdantafmente la herramtenta, Asegt_mse de que el interrupter re<br />
encuentm en poslet6n de "APAGADO"o Transporter ]as herram_entas con un dede en el<br />
interrupter o enchu_iar la herremlenta mfentras el tnter_ptor se encuentre en ta poslci6n<br />
"ENCENDIDO" Invite a accidenteso<br />
6o RETIRE lea Ilavas de eJuste de las hojas shies de encender la herramtenta, Una llave<br />
de eJuste que queda conectada a una pieze rotativa de ia herramlenta podda resultar en<br />
lesiones personates<br />
7,, No ea extlenda pare alcanzar sobre la herramienta. Manlenga el pie firms eel<br />
<strong>com</strong>e et balance en rode memento. Una poslci6n y balance apropiados permiten un<br />
major control de Is hermmienta en posiclones lnesparadas.<br />
8. ASEGURE SIEMPRE SU TRABAJO_ Use abrezaderes o un tomitlo pare sos|ener el<br />
trebajo cuando sea practice, Es m_s seguro qua usar sue manes y libera ambas manes<br />
pare operar la harramtenta,<br />
g. USE EQUIPO DE SEGURIDAD. Use SIEMPRE protecclSn pare los o)os M_scares<br />
antt-polvo, zapatos de segurtdad antfdesltzantes cases e protecct6n pare los otdes<br />
deben usarse en condlclonesque lo requ|eren,<br />
34
SEGURIDAD EN EL USOY CUtDADO DE LA HERRAMIENTA<br />
[Z_ antesADVERTENCIA: deopersr este herrsmfenta.<br />
ASEGURESE<br />
No segulr<br />
de leer<br />
lodes<br />
y enlender<br />
les instrucelones<br />
todee lee Inelrucclones<br />
Indlcedas ebsjo<br />
I<br />
podrfa resuitar en descergae el_ctrlces, Incendto y/o leslones personales graves. I<br />
! _SIEMPRE use abrazaderas u otra manera pr,_cflca de esegurar y epoyar la pleza de<br />
trabaJo sobm unn pfataforma est_ble, Soslener et t_eba_o con _esmanes o centre el<br />
cuerpo es tnestable y podrfa resuitar an p_rdida de control.<br />
2_ NO fuerca la herremlenta. Usa la herremlente y hoja carrecta pare su epllcacldn.<br />
La herramienta y hoja corrects hardn el trabaie de manera meier y m_s segura para Io<br />
cual ftteron diseP,adas<br />
3. NO use !n herramlenta sl el Interrupter no la Enclende o Apega. Toda herram]enta<br />
que no puede set conirolada pot el inlerruplor as peligrosa'y @be ser reparede,<br />
4, DESCONECTE el enchufe de la fuente de ellmentact6n antes de hacer cualquter<br />
ejuete, ¢amblar los accesorlos o guarder la herramlenta. Tales medldas preventdas<br />
reducen et rlesgo de encender la herramlenta accldentafmente<br />
5,_GUARDE tes herramlentas sTn user fuera del elcence de !as nlSos y arras<br />
personas no capecitedeso Nines NO DEBEN OPERAR eeta herramfante, Las<br />
herrsmientas son pe[_grosae en [as manes de usuedos no capecitedos.<br />
6o DELEa las herrsmlentas un msntenimtento ouldadosoo SIEMPRE mentenge las<br />
herramienlas Iimpisdas y err buen arden de trabaja_<br />
7 VERIFIQUE st lee piezas m6viles estdn desaltne_das o se atascan, se mmpen oei<br />
exists nfguna otre condtcl6n qua podria efeclar In operact_n de [a her_amienta÷ SI est_<br />
daSeda, la herramienta debe rectblr mantenimtento antes det use. Muchos accidentes<br />
oeurren debtda a herramtentas con un mantentmtento pobre.<br />
8, USE S6LO los accesorlos re<strong>com</strong>endedoe pare esta herramtenta. Los accesor}os<br />
aptes pare una hetramienta poddan set daSinos sf se utitizan con otra herramlenta.<br />
SEGURIDAD ELiECTRICA<br />
Z_ ADVERTENCIA: No permits que los dedos toquen los termlnales de un<br />
enchufe el Instalar o retlrar el enchuie de le tame.<br />
t_ Las herramientas con doble atslamtento est_n<br />
equlpadas con un enchufe poterlzado (una hoja<br />
as rods ancha qua la errs), Este enchute entrer_i en Cublertadel<br />
une lama polarlzada de un solo mode, Si el enchufe cajeltn de If _ _ li<br />
no catza lotalmente en la tome, invierta el enchufe St<br />
a0n as{ no catza, contacts aun electrlcfsln calfflcado<br />
Alimentac_n it<br />
conconoxt6, l[<br />
a T_erra--.-,,----]_<br />
\..._L/<br />
_<br />
/F_ f;'_\<br />
It<br />
tl<br />
pare qua Instals una tome poiadzada, No modfitque e!<br />
enchufe de forms atguna,<br />
2,, Oobt_ Atslemiento _t e(imine le necestdad de un<br />
oo_d6n de atimentaci6n con conexfbn a tierra de tres<br />
alambres y un ststema de sumintslro de energla can<br />
conext6n a tierra. Aptlca s61o pare herramientas Class If<br />
(con doble nislamlento). Esta cepilledora de esuna<br />
herramtenta con dable alslamlento.<br />
Z_,ADVERTENCIA: E! dobte alslamlento NO reempleza !as preceuclones de<br />
segurldnd normales el operar esta herramlenta,,<br />
3, ANTES de enchufar la herramienta. ASEGrJRESE de qua el voltaic de la tomE_provtslo<br />
se encuentra en el range de voile e marcado en In place de identificncfdn de ta<br />
herramtenta, NO use herramien_as con ctasf! cec (_n ' CA so amenle _en una fuenle de<br />
ailmentact6n CC<br />
35
SEGURIDAD ELP-CTRICA cant,<br />
4, EVITE el con|aciD corporal con superf|cias con conexibn a |terra. |ales <strong>com</strong>a<br />
tubertas, rad_adores, estufas y re[rigeradores,, Existe un riesgo mayor de de_carga<br />
el_clrica si su cuerpo liens conexiSn a tlerra,<br />
5_ NO exponga las herramlentaa eI_ctrtces ele tluvla o a condtclones h0medaa nl<br />
use las harramlentas el_ctrlcas en ublcaclones h_medas o majadeso Ei ague que<br />
ingress ala herramienta ei_ctdca incrementar_ el riesgo de descargas el_ctrtcas<br />
6, INSPECCIONE el cordbn de le herramlenta pare varifiear la preaencta de daSoa.<br />
So[tolls al Centre de Servicto Sears qua repare todd cord6n dafiado. ASEGORESE<br />
de eslar constanlemente atenlo ala ubicaci6n del cord6n y manl_ngalo lej0s de la hoja<br />
en movtmianto,,<br />
7, NO abuse del cordbn_ NUNCE use el cordbn pare trasiadar le herramlenta nlto<br />
hale pare sacar la tame dot enchufe. Reemplace tOdD corddn dafiado de<br />
Inmediato, Los cordones de,adDs _ncrementan el riesgo de descargas oleo|rices.<br />
CABLES DE EXTENSI6N<br />
Use un cable de axtanet6n apropiado, S6LO use !as cables y cordones que indica<br />
Underwriters Labors!odes (UL). aires cables de extensiSn podr|an acast0nar una cards en<br />
la linaa da vof_aje, resuttando en p_rdida de energfa y sobrecalentamienlo de la<br />
herramienta. Pare asia herramlenta, se re<strong>com</strong>tenda un cable de extenst6n con un tamaSo<br />
AWG (American Wire Gauge) de par Io mends 14 pare un cable de extenst6n de 25 pies c<br />
mends de largo, Use uno calibre 12 pare un cable de extenst6n de 50 pies No sa<br />
re<strong>com</strong>lenda el usa de cables de extenel6n de 100 pies o m_s de largo. Recuerde, un<br />
calibre de alambre m_s pequeF=o tlene mayor capacldad qua una de mayor n_mero<br />
(un afambm calibre 14 tiene m_s capacidad qua uno calibre 16: un atambre calibre 12<br />
tlene m&s capacldad qua uno calibre 14), En case de dudes, use un n0mero meno_<br />
AI opemr herramfentas el_ctdcas en exteriores, use un cable de e_tensl6n pare exter;ores<br />
marcado _W-A" o "W _, Estos cables estdn claslftcades pare uso an exieriores y reducen el<br />
riesgo de descargas el_ctdcas.<br />
3<br />
Poslctone el cord6n de manera tat qua na so atascar_ en la readers, las<br />
[Z_herramientaa PRECAUCION: u arras obetrucclones<br />
Msntenga el cable<br />
mlentrss<br />
de extenai6n<br />
ueled trabaja<br />
libra<br />
con<br />
del _rea<br />
una herram!anta<br />
de trabaJo. |<br />
et(;ctrlca,<br />
]<br />
Z_ ADVERTENCIA: Revise todD cable de extensi6n antes de cads usa, SI<br />
extsten daiioa, reemplaca el cable de Inmed;ato. Nunca use la herramlenta con<br />
un cerd6n 'o cable dafiado, ya qua racer el _rea da_ada podria oces!enar<br />
descargas el_clrlcae, resultado en teslenes graves.<br />
36
SiMBOLOS DESEGt.IRIDAD PARASUHERRAMIENTA<br />
Laetiqueta de su herramienta puede Inclulr lea atgutentes afmbolos<br />
V ......................................................................................... .Voltios<br />
A ....................................................................................<br />
Amperes<br />
Hz............................................................................ Herc{os<br />
W ............................................................................ Varies<br />
,',.. .............................................................................. Cordenie allema<br />
................................................................................. Co,ante continua<br />
no ............................................................................ _Jeloctdad librade carga<br />
_j .................................................................................... Constn.,tcci6nC]ase li, Doble a_slamien{e<br />
RPM ...................................................... Revoluclones per minute<br />
(Strokes) per minute<br />
OPM ...................................................... X3rbitos per minute<br />
SPM .<br />
.<br />
.<br />
.<br />
.<br />
.<br />
.<br />
.<br />
.<br />
.<br />
.<br />
.<br />
.<br />
.<br />
.<br />
.<br />
.<br />
.<br />
.<br />
.<br />
.<br />
.<br />
.<br />
.<br />
.<br />
.<br />
.<br />
.<br />
.<br />
.<br />
.<br />
.<br />
.<br />
.<br />
.<br />
.<br />
.<br />
.<br />
.<br />
.<br />
.<br />
.<br />
.<br />
.<br />
.<br />
.<br />
.<br />
.<br />
.<br />
.<br />
.<br />
.<br />
.<br />
. Ca_<br />
Z_- .............................................................................................<br />
Indtca petigm, advertencia o precauci6n.<br />
Signtfica: lllAlenc16n]ll Su segurtdad se<br />
encuentra<strong>com</strong>pmmatldao<br />
SEGURIDAD EN EL SERVICIO Tt_CNICO<br />
I. SI cuatquier parle se pterde, se rompe, se dobla o fatla de cuelquier forma; o sl<br />
cualquler <strong>com</strong>ponente eldctrtco no funclona adecuadamente: APAGUE el<br />
interrupter de potencia desanchufe la cepitladomde ta luenie de energfa y haga<br />
reemplazar la parle perdida, daAada o qua no funciona ANTES de ut [zar nuevamenleo<br />
2..El aervicio t_.cntco de la herramlenta se debe realizer solamente en un Centre de<br />
servlclo t_cnlco de Sears, El SerVtCIOt_cnico o mantentmiento qua se malice per<br />
personal no calificadopodria pmducirflesgo de lesiones..<br />
3..Cu_mdo reaflce el servlcIo tdcnlco de una herramienla, uttlice sotamente laa<br />
plazas de repuesto id_nticas. Reepete tas instrucclonea de la seccldn de<br />
manlenlmlento de este manual, St se uttiizanparles no autortzadas o no se respelan<br />
Ins instrucclenes de mantenimienio, se puede crear un riesgo de descarga el6clrica o<br />
lesi6n.<br />
REGLAS DE SEGURIDAD PARA LAS SIERRAS DE VAIV!_N<br />
_ Queda lee manes lejos del area de corlando y la hola,<br />
Sostenga las dos manes en la sierra (manlja trasera y empu_adura de suJeclbn<br />
frontal). SItas dos manes est6rt sujetendo la sierra, la hoja no puede cortartes_<br />
Z_ PRECAUCION: La hoja se des|iza despuds de qua apague la sierra.<br />
Sostenga la herramlenta per tas superficies de sujecl6n eisladas (mango<br />
posterior y empuBadura de su|ect6n frontal) cuando reetlce una ectlvldad en fa<br />
cual ta herramlenta de corte pueda entrar en contacto con cableado oculto o con<br />
su proplo cable, El contacto con un cable "vivo" expondr_ Ias pertes met_licas a<br />
corrien{e y provocar_ una descarga en el usuario<br />
Z_ PRECAUCI()N: NO utllice ia sierra en paredee extstentes u otrae zones<br />
cfegas en las cuales pueden exist& cableados el_ctricos. El la situact6n no se<br />
puede evltar, DESCONECTE TODA LA ENERGIA ELECTRICA del _rea de trabajo<br />
ANTES de utttizar la sierra.<br />
37
REGLAS DE SEGURIDAD PARA LAS SIERRAS DE VAIVEN cDnt,<br />
2 MANTENGA el cuerpo ublcado hacla cualqulera de los laterales de la sierra y no<br />
en lfnea direcls con ta hoja de |a slerra_ El contrafuerza (acci6n de salter o<br />
contmgolpe) puede causer qua la hoja se doble o se romps y qua la sierra salte hacla<br />
atr_sprovocande la p_rdida de control y produclendo fesiones graves,<br />
3, SIEMPRE mantenga sue manes fuera det elcence det _rea de carte. NO coloque la<br />
mane deba o de| material que se est,', certendo proqua la cercanfa de la heja a su<br />
mane esl,=_oculta ds su v s_e,<br />
4, NO UTILICE hoJas deeaflledae o decades. Lee hojes dobladae se pueden romper<br />
con tacit|dad e causar contragolpes 1oqua puede producer la p_rdida de control y<br />
lea|onesgmveso<br />
5. Cuando <strong>com</strong>lence un carte, Is velocidad qua utllice estar_ determfnada per ia hoja y el<br />
material que estd corlando, Las veioctdades rdpidas son pare los materlales bfandos y<br />
las veloc|dades lentas pare los matertales duros. 51 la vetocldad de la heja es<br />
demaelado lent.a, la sierra puede traquetear o vlbrar al pdneiplo dal carte y<br />
posfblemente causer una contra-fuerza (una acct6n de satlo o conlragolpe) y vibracl6n,<br />
qua pueds productr la p_rdtda de conlrol y lesienes personalss graves, Utilice una<br />
velocidad tevamante m_s r_pida al pdnctpio de! cortm Siempre esuna buena idea<br />
pmclicar los codes en material de descarte haste qua so tamiliedzarse con el carte y<br />
et desempeSe de! manejo de la sierra,,<br />
6, NUNCA soslenga la plaza de carte con sue manes o entre sue plernas. Es<br />
tmportante sostaner la plaza de trabajo edecuadarnente pare minimizer la exposlci6n<br />
detcuerpe, eviler qua la heja do atesque o perder el conlroL<br />
7, StEMPRE sulete la pleza de trabeJo ltrmemenle pare qua no se mueva mien|tee se<br />
estd cortando<br />
8,. UTILICE SOLAMENTE lee holes dealgnadas pera el carte do| tlpo de material<br />
pare el eual se recemfende. El carte de matenales que NO se re<strong>com</strong>tenda puede<br />
causer la rotura de la hoja y la pdrdida de contro!, y productr lestones graven,<br />
9.,SIEMPRE Inspections y retire lodes los clavos de la readers antes de peser Is<br />
alerts, Si slgue esta regla reducfr_ el riesgo de contra-tuerza (une accidn de sallo e<br />
contragalpe)que podrfa causer le pdrdtda de control y lestones personates graves<br />
SIesto no sepuade evltar, <strong>com</strong>e cuando se reaiizan trabajos de demolici6n o de<br />
renovact6n, ASEGORESE DE utffiz_r heJas bt..meldticas qua son mSs gruesas, con 4 a<br />
6 dientes per pulgada y dtsefiadas especlitcamente pare co_lar madam con ctavos<br />
incruslades.<br />
TENGA EXTREMA PRECAUCI_)N cuando reallce este ripe de operaclbn de corte_<br />
Z_ ADVERTENCIA: Pare reduclr el rlesgo de explosl6n, deecarge eldctrlca,<br />
defies a ia proptedad y lesiones corporales graves, SIEMPRE ver]flque el _ree de<br />
trabaJo pare detormtfler sl hay tuberias de gas eculles, cables el_ctrlcos,<br />
caSert!aa de egua y clavoa e grapaa Incruatades de 2 X 4 cuendo resllce cortes<br />
cleges u codes en profundlded Internee en parades durante el trabaJo de<br />
demollclbn o renovael6n.<br />
10, EVITE postures y poelctenes de la mane Inconvenlentes en lea cuales un<br />
deslizamiento repentlno podria causer qua su mane se mueva heels le hejm<br />
11, NUNCA coloque Is mane en el treyecto de carte de la he]a,<br />
38
_ADVERTENCIA: Algunpolvc generado per el use de herremJentae el_clrlcas<br />
coat,one qu[mlcoe conccl0te per el eetado de California per cauear cancer y defectoe<br />
de nacimiento u circe de/ectos pare la reproduction.<br />
Algunos ejemplos de estos quimlcos son:<br />
• El plomc de tas pin{urea a base de plomo.<br />
• La ellice cdsL_tlna de los ladrlllos, el csmento y circe ptodiJctcsde albsr3iler;a.<br />
• El ars_ntco yet creme, de la modem lrelada quimicemente<br />
El rlesgo de estas exposicienes vet|a, dependlendo de I_ frecuencte con qua reeflza<br />
eete ttpo de trebsjo. Pare reducir su exposfci6n a cotes qufmtcos:<br />
• Trabeje an _rees bten ventiladas,<br />
• Tmbaje con los squlpos de seg,Jdded aprobades, tales <strong>com</strong>e re&scares conlra el pclvo que<br />
est_n especlalmante dlsefiedas pare flitmr part{culas mlcmscr_picas,<br />
Evils el contacto protengado con el polvo de lljedcrae, sierras, pulidores, perfor_doree<br />
eV_ctrloes y arras acttv|dades de Is conetrucclbn. Utfflce rope de proteccl6n y rove lea<br />
=trees expuestae con ague y Jaban_ Sl porto;to que el polvo Ingress seu boca, ojos o<br />
permseezca en la plel, se puede fomenter la ebscrclbn de qufmlcos noclvoe.<br />
Z_ ADVERTENCIA: La utlllzacI6n de esta herramlenta puede generar ylo<br />
esperclr potvo, que puede causer lestonee mspiratodas groves y permenentes o de<br />
otto tipo. Slempre utiltce le protecet6n resplmtcrte spmbada per el Instltuto Nacional<br />
pare |e Segttridad y Salud en el TrebaJo/Departamento gubernamental de ice EE.UU_<br />
pare Is edmtnlstraclOn de ?a Segurldad y Salud en et TrabaJo (NIOSWOSHA,por sus<br />
elgfes on Ingles) apropfade pars fa expos]c{6n el polvoo DlrtJe los partfculas lucre del<br />
alcance de le care y e_cuerpo.<br />
REGLAS ADICIONALES PARA EL FUNCIONAMIENTO SEGURO<br />
Si no se mspelan todas los Instrucclones que se Incluyen en le s_gulente lists se<br />
I Z_<br />
pueden<br />
ADVERTENCIA:<br />
productr descargas<br />
ASEGORESE<br />
et_ctrtcas,<br />
de<br />
Incendlos<br />
leer y <strong>com</strong>prender<br />
yto lesiones<br />
redes<br />
personales<br />
los tnstrucciones,<br />
graves.<br />
1<br />
1=Conozca su herramfenla el_clrica. Lea culdadosamente el manuel de operaclonee,<br />
Aprende tas apficaclones yfimitscianes de _lacepitfadcra, as! <strong>com</strong>e tembt_n los peltgtos<br />
potenctales especiflcos ref_,ctonados con esta herramlenla. SI reapers ssta regis, reducirfi ice<br />
riesgoS de descargas et_cldcas, lncendios o les_cnesg_ves<br />
2 S|EMPRE ut!lfce galas de segurided o protectores pare le vista cuando emplee esta<br />
cep;lladera, Los aeteeJospera redes los dlas seisments tfenee lentes reslstentes a foe<br />
_mpactos: NO sort galas de seguddad<br />
3 PROTEJA sue pulmoneao Utllice una m_scera pare _ care o una mdscara centre el polvo sl el<br />
trabaJo es po_orientc,<br />
4 PROTEJA su audlcl6n. Utlllce una proleccion audittva personal sdecuada durenie el staples.<br />
Bets clerics c_ndlctones, el ruido de este products puede contrtbu[ra Ia pdrdtda de la audition,<br />
5 TODOS LOS VISITAHTES Y PERSONAS PRESENTES DEBEN utlttzer el mismo equips<br />
de sagudded que el usuedo de ta cepfltadom<br />
6 INSPECCIONE los cables de ta herramienta perl6dtcemente y s| est_n de,odes h_gelos<br />
reperer en el Centre de servlclo t_cnico Seers m_ts cerceno,, TENGA PRESENTE SIEMPRE<br />
In ublcac!6n del cable.<br />
7 SIEMPRE verlftque lee herramientes pare determiner st ex_sten partes dafiadas. At_tesde<br />
ssguir utili_ando taherramienta, se deberla veri_car con cuidsdo el protector u otto pads q_e<br />
se hays da_ads pare determiner ei lunciona_ apmpiademente y realtzard la funci_n desead_<br />
Verllique st extslen desa usles o atescamienlos de lee partss mOvtles, rupture de pades o<br />
cualquter ctta condtciOnque pueda elector el funclcnsmlentc de la herramtenla., Se dsbe repaint<br />
o cambtar una proteccidn u elm parts defieda en un centre de Servlcto l_cnlco de Sears,<br />
8, CONSERVE ESTAS INSTRUCCIONES. Remgeee a elias {recusntemente y ufiltce|as<br />
pare capacitor a elms personas que pueden uUgzar esta herramtenta. Sl elgulen le<br />
plde eels herramlenta prostatic, esegureee de qoe se Ileve tambl_n eetas instrucctcrtee.<br />
39
energia cuando erme laspartes, hags ajustee, instals o quite las hoJas, I_mp|e<br />
o cuando ta sierra no est_en use. AI desconeclar<br />
enclenda Z_ ADVERTENCtA: accidentalmente,<br />
NUNCA<br />
Io cuel<br />
deberie<br />
pedrfa<br />
conectar<br />
causer<br />
la sierra, evlta qua dste se<br />
lestones<br />
la sierra a<br />
personales<br />
la tuente de<br />
graves.<br />
!_ Saquela sierra det estuehe de aimscenamiento I transporte e Inspeccl6nela con<br />
cuIdadc pare asegurarse de que no hayan ocurddo re|urea o daSos durante et envlm<br />
2., No deseche ning_n material de embala]e hasla que se cuenie con redes los contentdos_<br />
3. So Incluyen tree hoJss: pare carter madera, pare carter metal ferrosc y pare cor_es de<br />
epTicacion garteral (ptL_shco.fibra de vid_io, metal blar_do),, Las hojas se encuentran en<br />
e/eetucha de elmacenamIenlo I transports,<br />
4o St alguns de las patios eat& daSeda o no se encuentra (remitase e la LtSTA DE<br />
REPUESTOS de abaJc), regrese la sierra al <strong>com</strong>ereto Sears oal punic de vents de<br />
Craftsman m_s corcsno pare qua se la cambien.<br />
/1k se reemplace ADVERTENCIA: ta parts qua<br />
St fells<br />
felts.<br />
alguna<br />
SI no se<br />
par|e,<br />
hace<br />
NO<br />
esto<br />
utlilce<br />
podr|an<br />
eeta<br />
produclrse<br />
sierra haste<br />
postbies<br />
qua t<br />
lealones perscnales graves,<br />
I<br />
LISTA DE PARTES<br />
(Fig. 1)<br />
I ,.Sierra de vatv_n<br />
....................... 2.. Hoja pare cedar readers<br />
_----_ 3 Hoja pare aplleactones generalee<br />
,_"_:7_ 4 Hoja pare cortar metal<br />
6oManual de| Operador<br />
CONOZCA SU SIERRA VAIVI_N<br />
5 Estuche de<br />
Atmacenamlanto / Transports<br />
NOTA: Antes de in|enter ut;|izer |a sterra, fer!!tier|case con redes |as<br />
caracter[stlcas de funcfonemlento y requisites de segurldad.<br />
LB sierra de veiv_n pmfesional ttene un motor et_cldco incorporado y sSIo debe<br />
conectarse a una iuente de sumintstro de energla de 120 veil|as, 60 Hz CA 0HICAMENTE<br />
(cements domestics normal). NO hags [uncionar con corriente continue (CC)o La gran<br />
calda de voItaje causar_ una p_rdlda de potencta y el motor se sobrecafantar_, Si la sierra<br />
no funeione cuando se la censers a una saIida de corrlenta altema de 60 Hz y 120 voItias,<br />
verif_que el sumintstro de energtm Esta s_erra liana un cable de potancle de 10 ptee_<br />
de 2 hilos (no se neceeita adeptador),<br />
4O
ThisReciprocating Sawhasthefollowing features:<br />
vlbrafree _1'_*V|bra Llbrementa Sierras deValvdn se dIseSan 0ntcamenle asi que<br />
el eje de vatvdny ia mange de centre balanzase mueven stempre en dtreceiones<br />
opuesiss el uno al otro_Esla plataforrnadel d+seSocance_ virtuafmente la vtbraci6n<br />
de lasierra, ilac+endoasia sierra de vatv6nm_s c6moday elictenteuser. El disefio<br />
toms la vtbracl6nde ta sierra y pone esta energia al trabajoeserrsndo y qutfendo<br />
el matedaL<br />
t El potanta motor de t2 Ampertos y 0.3000 GPM (golpes per minute) velocldad<br />
sin carga propom+ona codes seguros en readers, matedafes de construcctOn a base<br />
de readers pl_stlcos, f_bra de v_drio, morales ferrosos y no fermsos, car3os, tuberias y<br />
clavos+ con tree hojas dfferenies nclu des<br />
2 Acci6n Orbital de 4 Poaictones El interrupter de conlrol regula los 4 modes de<br />
cortando de b sierra,<br />
0. SUAVFe con el aslillar mfntmo, con movimiento arr+ba y abajo del hijo normal<br />
NINGUN ac¢i6n orbital.<br />
1. BAJO para codando !a mayorra de morales, acct6n orbital bajo.<br />
2. MEDIA pare codando plasticos, readers dote, con sce_on orbital media.<br />
3. RAPtDO pare ecci6n orbital m_xlmo, use pars codando r_pldo en readers de<br />
contrachapads, madetas soaves,<br />
3 La veiocldad variable permtle siustar ta vetocidad de code ala hoja y al material<br />
4. El Interrupter de get]llo de velocldad variable pare dos dedos controls la velocIdad<br />
de la hoja per la cantidad de prest_,n qua splisa al interrupter de gatifto+<br />
5 Carrots de hoja <strong>com</strong>plete de 11/4.,pulgedes pare codes r_pidos y una vfda 0Ill de la<br />
hoja profongada<br />
6 Abrazadera sln-herramlenta l+ene la caracteflstica de cuetlo con acci6n de palancs<br />
pars cambfos de hoJa f_c+l y r_,pIdo Utilize hojas on eje universal de _,_puigada_<br />
7+ Zapata de Iongltud ajustable I gtratarta pare m_imo control de fa pteza de trsbajo<br />
en una vadedad de cortes Ajusta per apretar el bot6n amarillo debaJo de la zapata<br />
glratoda.<br />
8, La Luz de trabaJo LED se adelant_ cuando est_ incendIda el interrupter del get[tie,<br />
lifum{na at _rea de corte pare mayor visibi[idad<br />
9 La empuSedura con facllidad de suJecl6n y el dtseSo de mango posterior con<br />
empuP, adura moldeado de confort proporcionan el maxlmo control, equilibrio y<br />
<strong>com</strong>odldad<br />
10, Rodamtentos lubrleados permenentementa pare un funclonamlento<br />
sin <strong>com</strong>pltcactones y una vida 0til proiongsda<br />
tt Utlltza hojas con ll2+pulgada eje universal. Inctuye 3 he|as: 1 hoja pare corlando<br />
r_pide en readers t hoja pare cortes ltsos en metal ferroeo, tuberla, y atslanle de tube.<br />
y 1 heja pars cortando metal suave, p astlcos, y fibre de v dr eo<br />
12_ tncluye estuche rugoso del almacenamlento ! transports.<br />
* vibrafzee e_ sotamenle una mama reg_stmda y no i_sva ntng_n exp_icto demands impficada _,rt<br />
cuanto ata mducci6n de Is vibraci6n dol produc|o,<br />
41
Po|enclal Nominal 120 vo!tfos,60 Hz CA<br />
I f',_OTA:Antes da In|enter da user su harramlenta, famltiarfcase con redes los rasgoa<br />
, de opemr y requisites de sagurldsd,<br />
,/k ADVERTENSIA: No permit° qua la faml|tarldad con !_asierra to tome<br />
deaculdado. Recuerde qua una fraccl6n de segundo de desculdo ee euficlente par°<br />
causer lesiones graves.<br />
/k ADVERTENS|A: UTILIZE SOLAMENTE lea hojaa de sierra design°des par°<br />
usa con estn sierra, Usa de cualqu_ar otra hoja puede taBu|tar en accident°, causando<br />
leelonas personates gmves+V6ase p6g|na 55 par° las hojas disefiadas y los uses<br />
re<strong>com</strong>endados,<br />
C(_MO SELECCIONAR LA HOJA<br />
a un major dasemper_o de la hoje y un_ viola_tIl m6s pTolongada, StEMPRE _eleccione<br />
a_a aaecuaae pars ta apllcac_6n oe _as+arm,,<br />
Ha,y toucher; tipos de ho]a_, de v_siago universal de 112 putg, dispon_blss par° su sierra de<br />
vafvBR:<br />
HoJas par° cortpr rode tlpo de reader°s, madsic con clavos incrust°dos, maJefiales de.<br />
construccl6n a case oe maoera, melmes no tsrrosos y lerrosos, pl,6sticosy tiDra _le viario,<br />
ojas par° Fortes d+ade spla+za.relents,.InFtalacIenes ocultas y codes de centomo., Tambi6n<br />
y alspoi3tDia mucnas tong+tuo_s aa nojas+<br />
StEMPFI+E al_a un_.hoJa _osufic!antamonle la.rga par° qua .se pro fo._gpa m_s all6 d.a<br />
2_.pal_ay Qa gu plezJ_loe rraDajo, a io largo ae la cerr_ra us cone |verse acceeorlo9,<br />
p,6gma 4B)<br />
42
HOJAS DE SIERRA<br />
Es necesado que todas las ho|as de ia sierra est_n siempre tmpias, altadas y bier,<br />
co ocadas para qua corten de forma etciente. Una hoja desailada es una carga muy pesada<br />
pare a sierra y aumenta el des go de contra4uarza (un sato o acctdn de ceniragolpe), Tenga a<br />
mano hoJas de sierra adlcionalas, de manera tar que seimpre est_n disponbles ;as holas<br />
afladas. La brea y la mstna de madera soldlicadas sobr la hoJa vueban lanto el<br />
(unctonambnto de la sterna. Uttice removedor de reslna y brea, agua calente o kamseno para<br />
efminafias NO UTILICE gasotnm<br />
PARA tNSTALAR Y SACAR LA HOJA<br />
Esla sierra estd disefiada para uttzar con vdstagos unlversales de tt2 pulg.<br />
Z_ ADVERTENSIA: ASEGORASE de protegerse con guarttes de trabafo mienlras /<br />
uttliza la hoja de Is sierra, Lr, hoJa puede lastlmarle las manos sl no est_n protegldas. I<br />
INSTALAR LA HOJA (Fig. 3 y 3a)<br />
1, Desenchub fs sierra.<br />
herramelnts de la fuente de energra ANTES de mon_r I_tspartes, realizar ajuates o<br />
/_ camblar ADVERTENSIA: las ho|_s+<br />
Para evtar teslones personales, SIEMPRE desenchufe (a / 1<br />
2. Para instalar la ho a0extbnds Is zapsta _jos de la abmzsdem de la hoJa pare un acceso<br />
rods fdct (vet Pdgina 45, Fig. 6).<br />
3 UbIca el cuelo de ecci6n de palanca y levan(a el cuelo (yea la flecha en ef cuetlo, Fig. 3).<br />
4 Con el cueflo "anlba" an la postcl6n bvantada, {nstala el v=_stagode ia hoJa de la sierra en<br />
ts ab_az_._dersde hoJa (ver Ftg.,3 y 3a),<br />
5, Suela el cueflo, y la hola debe ser tjado bien en la _brazadera de hoJa.Tire la hoIa para<br />
ensegurar que la hoJa se_ fijada en su [ugar..<br />
I<br />
NOTA: Lss hojss con vdstagos unlvers_les sola ;nstsla en urea manera, con el I<br />
v_istago de la hoJa Instnl_da en I_ _brazader_ de ho)a, con los dientes de la hoJa<br />
hac(a _bsto (Fig. 3 uso est_nder) o con dienles de hoJa hacfa arrIba (Fig. 3a p_ra<br />
=zpllcacfones espe¢iabs, vet p_girm 51).<br />
SACAR LA HOJA (Fig. 3)<br />
I.Desenchufe la siena,<br />
I L_ ADVERTENSIA." Nunca toque I,_hoja ,nmed,'ttamente despu_s de su uso Ya I<br />
que puede estar extremadamente caliente.<br />
2..Cuando saque I_ ho)_, extenda la zap_Ia ajus(abb / glratmla (uera deI alcsnce de la abrazad_ra<br />
de tahojm<br />
3. Ubtca ta he_dtdura con tech_ en e! lado del cuelIo de p_fa_ca de accI_n (vet Fig 3)<br />
4 Tira en el cuelIo a hendIdura y suj_t_b arriba Es(e elbja _aabrazadera de hoj_ y (e permila<br />
sacar _ ho)a de (aabrazadera,<br />
43<br />
q
VELOCIDAD VARIABLE CONTROLADA PeR<br />
INTERRUPTER DE GATILLO (Fig. 4)<br />
Su sierra est_ aquipeda con un tnterruplor de gatllle pare<br />
dos dedos qua controla la veioctdad vartabte<br />
Se "ENCIENDE" o "APAGA" ta s_erra presionando o<br />
softando et gettllo.<br />
Pare variat ta vetocldad de la heja:<br />
1, Pare aumerttar la veloctdad de ta heja, aplique m_s<br />
presf6n al fnierrupler de gatttlo,<br />
2, Pare reduclr le velacidad de la hoja. aplique manes presiSn,<br />
3 Pare DETENER la sierra, sue[re e_gattl]o,,<br />
Fig, 4<br />
apptlcacl6n de carter y ptezo de trabejo) a! principle de un carte,, Luego eumenle<br />
t Z_ la velocldad PRECAUCI()N: una vez qua<br />
Utllice<br />
eomtenza<br />
Is velocIdad<br />
a cortarr<br />
apmplado<br />
El use prolongedo<br />
mtfs lenta (pare<br />
a una<br />
su<br />
velocldad<br />
1I<br />
muy baJa puede dafter eu sterta.<br />
i NOTA: SIMEPRE de|e que ta sierra se derange <strong>com</strong>pletamente antes de seearla I<br />
de la plaza de trabajo o de dejar|a a un |ado. I<br />
C6MO ELEGIR LA VELOCIDAD CORRECTA<br />
L_ vsfocidad que utitice depender& del tips de material que carte,<br />
1, Utilice aires velocidades para cedar madara y materfales e base de maderao<br />
2. La velocfdad media es major pare cedar meleres no fermsoe_ pl_elices y libra de vidrto.,<br />
3, Se re<strong>com</strong>lenda ts veloctdad m&s baJa pars tartar metales ferresos, cases de hierro e<br />
hlerro angular.<br />
NOTA: El espesor dei material y la sefecchSn de la hoja tambl_n afectardn su<br />
aelaccl6n de velecldad. Come regla general, uUUce VELOCIDADES M_S RAPIDAS<br />
y hojaa con meno_ dtentes per pulgeda pare materialee m_s blandos. Utllice<br />
VELOCIDADES MAS LENTAS y he|as con m_s d{entea per pulgada para los<br />
malerleles m_a gruesos y denaDs.<br />
LED WORKLIGHT (Fig. 5) F_g.S Luzdel LED<br />
Su sierra de vaiv_n tlene una .__<br />
iuz de trabajo tncorporada par<br />
ala vislblfided major durante el<br />
carte. Pare eneender la luz de<br />
trabajo LED, la sierra liens qua<br />
estar enchulada. La tuz de<br />
trabajo LED enclende cuando<br />
se presiona el in_,erruptor de<br />
gatilto pare dos dedoa pare<br />
"ENCENDER" LA SIERRA.<br />
Cuartdo se suelta el gatlflo y se<br />
=APAGA" la sierra, la luz de<br />
t_abajo tambfen se apsga°<br />
44
ZAPATA DE LONGITUD AJUSTABLE / GIRATORIA (Ftgs. 6 and 6a)<br />
La zapaia de {a sierra se desliza hNcia adentro o hacia Nfuera pa_N ajustNr la pmfundidad<br />
de corte de la hoja en la pleza de tmbajo,<br />
La zapata lambl6n gila a fin de conserver tanlo <strong>com</strong>e sea postble fa supedrice de ta<br />
zapNta en contacto con la pteza de trabslo (vedse Ftg_Sa, y va_,se P_,g_na 44, Flg_5)_<br />
EsIos aJustes sen lmportanles ya que propcrc{onan el mdxlmo control de IN superfic[e que<br />
se corta, opttmfzan la vide _tll de IN hoja y reducen IN protongact6n de la hoJa m_r_saftd del<br />
exlrsmo de la zapata, <strong>com</strong>e cuando se cortan cases de gran di_metro o parades<br />
(v6ase P_gina 50, Fig. 9),<br />
estd an eu lugsr, el v_stago del hueillo {Mecenismo de velvdn) puede goipeer la<br />
I pieza _ADVERTENCIA: de Irabajo, dNfiar NO la sierra, uttltce causer Is sierralasin pdrdlda la zepata de control en su lugar. y producir St |e zapata postblesno<br />
l<br />
leslones personNles graves,<br />
COMe AJUSTAR LA LONGITUD DE LA ZAPATA (Fig, 6)<br />
I, Desenchufela sierra°<br />
herrameinte de la [uenle de energia ANTES de montar lss parlee, rsefizar ajusles o<br />
{ _ADVERTENSIA: Pareeviler les!enes personales, SIEMPRE desenchufe la<br />
cambtar las hoj_s,<br />
2_Ublca el bot6n amarilloen la sierraabajo de la<br />
zspataptvola.<br />
3_Oprimaenrebot6n mienirss ttrandoo empuJandoa<br />
!s zepa{aajuslable,<br />
4Ten pmnlo <strong>com</strong>e is zapsta seub{caen Iongffud,<br />
suefts el bot6ny Is zspata ssr_ fijsda en posfcion<br />
5 Enchu{e Is sierray apr_eletenlementee! interrupter<br />
pareensegumrqua Is hejaSIEMPRE exltendajuslo<br />
pasandeel zapsloy el pedszode trsbajoduranleel<br />
gofpedecarter.<br />
Fig.6 Muevs adentm o !'rectafuera<br />
SE PROLONGUEMAS ALLA de Is zapata y a |rsv_s de Is plaza de carte s Io largo de<br />
toda<br />
Z_ ADVERTENSIA:<br />
ls carters, Les hejas<br />
Par_reduclr<br />
se pueden<br />
ei<br />
romper,<br />
rlesgo<br />
dobtsr<br />
de lesiones,<br />
o quebrar<br />
ssegdrase<br />
sl is hoJagelpea<br />
de qua la HOJA<br />
la<br />
zapata o la Neza de trebaie eun _tngulo qua sea cast franlal (verse Fig°7s y 7b).<br />
C6MO AJUSTAR EL GtRO DE LA ZAPATA (Fig. 6a)<br />
t- Desenchufe la sierra<br />
Rg, 6_ Pivots<br />
Z_ADVERTENSIA: Pareeviler leslertes<br />
persenales, SIEMPREdesenchufe la herramelnta<br />
de ia fuenle de energie ANTES de reenter tas<br />
partes, resltzsrajustes e cembtarles hojss,<br />
2, Sonstenga la sierra firmaments y"gire" la zapata,<br />
mantentendo la mayor pads postbfede la<br />
superflcie de Fazspa!a sobre Eapieza de lrabajo<br />
cuando corte_<br />
45<br />
l
ACCION ORBITAL DE 4 POSICIONES<br />
El rasgo de acct6n Orbital en esla sierra empuja ia hoja ardba y detantero en el golpe de<br />
co_te pare aumentar la veloctdad de corte sobre _a acci6n normal de hacia adetanle y<br />
hacia atr;_s de la sierra eatS.rider de vatv_n.<br />
La poslct6n 0 en e! interrupter de accPJn orbtlal no produce ntng_n acci6n orbital, sate la<br />
acclSn normal de hacta adelante y hacfa atr,'_s (valv_n), pare ios cortes m_s lisos an<br />
readers con e! Io manes asfiflar. Buena pare todos cortes en metal o plastico, e readers<br />
La posict6n 1 produce un peque_o confided de<br />
accl6n orbital con astillar controtado. Use pare carter<br />
agujeros de bolsifle en susie o agujeros en cart6n de<br />
yeso<br />
Posfct6n 2 produce m_s acci6n o_bilal qua en le<br />
posicl6n nomero t. Use en donde caries de madera<br />
con alg0n asl_ftedo son aceptab_a. Usa pa_rarecortes<br />
de puedo o ventane y agujeros en subpiso.<br />
La _ostci6n 3 produce la m_s acciSn orbital, pare deja un acabado muy _spere y con<br />
asUtles. Use esta veioc_dad cuando necesilas el cortando m_s r&pidoEs ideal pare<br />
demoItc_6n y trabajas de rasg6n hacia fuera<br />
Et Interrupter de Accl6n Orbltat de 4 Poslclones Regula tea 4 Modes de Carter de<br />
la Sierra.<br />
PosiclSn 0<br />
NINGUN ACCI6N ORBITAL,, Pare estillando<br />
minimal, corlando m_s lisa. Movlmlento<br />
haole adelante y hacta atr_s normal. Use hoJa<br />
de readers line, 20 dlentes par pulgada, o hoJa<br />
de metal lisa, con 36 dlentes per pulgeda.,<br />
Poslcl6n t<br />
ACCI6t',I ORBITAL BAJO. Ideal pare cortando<br />
la mayorfs de restates. Use hojas pars<br />
cortando madam y metal con 10-12 dientee<br />
per pulgada°<br />
Poslct6n 2<br />
ACCIISN ORBITAL MEDIANO. Ideal pare<br />
cortartdo la mayoria de pleat|cos y maderas<br />
duras, Use hojas psra cortando readers y<br />
metal con 10.12 dlentes per pufgada.<br />
Posfcl6n 3<br />
R/_PIDO / MAXIMa ACCION ORBITAL Use<br />
pare el cortando rods rdpldo en madera de<br />
contrachepsds, mederas auaves, y carl6n de<br />
yeso. Use he]as pars cortando readers, metal<br />
y csrtSn de yeso con 6,8,12 delntes<br />
por pulgada.<br />
46
PARAUTtLIZAR LASIERRA (Fig.7)<br />
l Z_ lasts PRECAUCI(_)N: herram,enta. S'EMPRE utilice pr°tecci_Snpars la vista cuand° utlflza<br />
NOTA:Antes firmaments asegurado de cortar eualqufer o sujeto con ttpoabrazaderas de material par ASEGL_RASEde eviler el desllzamlento. qua est_ 1•<br />
1 Selecoionela hojaapropfada<br />
2 Sefscclone la acctbn orbitalspmptada<br />
cableedos vivos, pueds reciblr una dasoarga o ser eloctmcutado Mteniraautilize Ia<br />
[ z_<br />
sierra<br />
ADVERTENS'A<br />
so ro<strong>com</strong>tenda¢ortar<br />
S, atll,za<br />
b energ{a<br />
,a sierra<br />
delos<br />
on una<br />
zones<br />
zone<br />
degas<br />
c,ega<br />
stempro<br />
en ,a cue, existan 1<br />
3 Marque Ia lines de corts sobrele pteza detrabajo<br />
4 Enchufe la sierra<br />
5 SostengaIs sierra firmamentsan frente de ustedy c_aramenieen d_recciSnopuestaa su<br />
persons,Aseg_rasede qua no hays mater!stextrafio en la hoja,<br />
6 Manlenga fazapata de giro firmaments sobre faplaza de trabajo pars minimizer la<br />
contm-fuerza (saltande) y la vtbracl6n(vor Fig 7)con la heja tocandoflgemmenteet<br />
superflcto sercorrode<br />
7 Aprteteeigatillo pars encenderis herramlenladale qua la s_orraalcance Is velocidad<br />
<strong>com</strong>pletedeseeda (dependiendo de! ttpodo hojay del malarial) antes de <strong>com</strong>enzara<br />
cerlar Lea velocldsdesrdpidassonpars losmatertatesblondes y los veloctdadeslentas<br />
pars los materfales duros_<br />
8 St ravetectdedde la hojaes demastado lenta,fa sierra puedetraquetearo vibraral<br />
principledol cortey posibtementecausaruna contra-fuerza(una accc}6nde saltoo<br />
contragolpe), Uli/ica una velocidad levemento m_o r_pidasi occure_,Sismpre practice sus<br />
codesen material de descade haste qua se famtltarfz_rseconel eerie y el desempeSodel<br />
manejode la sierra<br />
g S{empmsostenga la sierrafirmaments conlas dos manes s medida qua la gu[aa lo largo<br />
de ia l_neade code Cuandoquterapostble sujetala sierra y ta zapata de gim Iirmemente<br />
sob,s la _lezade Irabato pravenirqua la sierra sa!Sao vibra,y para minimizer mtura de hols<br />
Fig. 7<br />
I<br />
prest6n sulictente pars mantener e/corte de la sierra Deje qua la hoja y la sierra<br />
NOTA: hagen el NOtrabajo. FUERCE le sierra o is hole en la plaza de trabaJo.Utlltr:esolamante fa | J<br />
47
pmduclr ia rotura de las hojas y la p_rdida de control, y pmvocar dafios a Is pteza de<br />
[ t_ADVERTENCIA: E! usa de exceslva presi6n puede doblar o retorter ta hoja,<br />
trabajo y leslones persansles graves<br />
CONSEJOS PARA LA SIERRA (Fig. 7a y 7b)<br />
SI slgue estos slmptes consejos ayudard a reducfr el desgasie de _asierra, ta hoJa, la<br />
pfeza de trabajo y de! operador.<br />
1, Las hojas cortan par tracdSn o carrera de retmceso_ En trab_Jos _nos <strong>com</strong>a pane[as o<br />
libra de vidrlo, co}oque el lado buena de la pteza de tmb_jo hacla abajo<br />
2 Corte sofamente con hojas aflladas; hacen el corte m_s defintdo y r_ptdo y ejercen<br />
menos tensiSn on el motor<br />
3 Stempre uliilce ls hoja corrects pars el material qua se coda y stempre tenga hoJas<br />
adictonales a mano para usar cuando las hojas se desafilan Reemplace las hojas<br />
desaflladas, agrieladas o dobladas Inmedtamenteo<br />
4, Stempre selecclones ta ve!ocldad de carte apropiado<br />
5, Stempre selecciones la poslc_Sn orbital apropfado.<br />
6.,Cuando code, siempre aseg,3rase de qua fa place de Is zapala descanse itrmemenle<br />
sobre la pieza de trabajo_ Esto mejorard el control del operador y minlmfzard la vlbrac[Sn.<br />
lrabajo slla ho|a no se prolongs m_s alt_ de is zapata y fa pteza de trabaJo a Io<br />
largo det code. Puede pmductr la p_rdtda de contm! y el dafio de la zapata, Io<br />
que aumenta el rtesgo de lesions personales graves (vdaee Fig., 7a y 7b),<br />
Fig, 7a J<br />
Cartando Madera ,rT_-' _<br />
Correcto<br />
48<br />
............i<br />
Carrera / i<br />
|!r !i; i _!',_I_! !!',il_lncorreclo<br />
CaPcera<br />
[ncorrecto
CARTE DE MADERA (Fig, 8)<br />
t. S1EMPRE asegure la pieza de trajabo con abrazadaras parr eviler qua se des_tce<br />
2o Saleccione la hoje ap_optada<br />
3. Seleccione ta posicfOn orbital apropiada.<br />
4, Marque ta tfnea de eerie sabre la p_eza de trabajo+<br />
5, Ertchule la sierra,<br />
6, Coloque la zapata de giro de la sierra flrmementa sabre ia plaza de trabajo con la hoja<br />
tocando tigemmente Ia superltcte de earle,,<br />
7+ Pres+one et interrupter de galtllo y Ilave ta sierra o unas valocidades m_s lenlos<br />
aproptades at empezar un carte, antes de apllcar pres+_n a to hoja y plaza de trabajo<br />
(velocldades ads r_pidos pare mate_ales m,_s blondes, y mds lentos pare matedales<br />
m_,s duros+)<br />
8+ Ho tuerce la sierra ofa heir en fa pieza de trabajo, uttf+ce solamenla prest6n suflcfente<br />
pare qua Io sierra stga codando, Dejo qua la hoJa y la sierra hogan el tmbajoo<br />
9, SIEMPRE sestenga la sierra flrmemente can ambas manes mlenlres eat& certando,<br />
Siempre soster_ga la sierra con la zapala adjustable lirrnemente sabre el malarial de<br />
code,, Esto evttar_ qua la sierra salte o vIbre y ayudard a mlntmtzar ta rolura de ta hoja-<br />
t0. Practice en un padazo de madera de desearte similar o su pedazo de Ifabato+ haste<br />
qua tienee un sentido pare lo funet6n de la sierra°<br />
NOTA: Uffilce guantes sl realize cortes dumntas per|odes prolongados+<br />
AADVENTENSIA: Pare reduclr el rEesgo de lesions, asegdrase de qua la<br />
HOJA SE PROLONGUE MAS ALLA de Is zapete y o travda de |a pleza de carte a<br />
!o largo de toda lo carrera (vdase Pdglna 48, Fig, 7a y 7b)+ Los hojas se pueden<br />
romper, doblar o quebrar sf la hoja golpea le zapata ota pteza de lraba|o a un<br />
_ingulo qua sea cast frontal,<br />
49
CARTEDEMETAL (Fig,9)<br />
1, SIEMPRE asegure el t_abajocon abrazaderas pare evllarqua se deslice,<br />
2, Se_ecctonela hoja adecuada.<br />
3. Seteccfone la postciSnorbital apropiado,<br />
4, Marque la Ifnea de carte sabre la plaza de trabejo<br />
5. Enchufela sierra.<br />
6. Coloque le zapata de gtrode ia sierra firmemente sabre ta pteza de trabajocon la<br />
heja tecando ligeramentela supedicie de cede,<br />
7 Presfonee! Interrupter de gatillo,utft_ceuna velocldadbaja (cuando carte malertales<br />
duma) o velocidad m_s rbpido (cusndo <strong>com</strong>emaleriales m_s blandos)<br />
B No fuerce ta sierra o la hoiaen la pteza de trabaJoulilicesolamente preet6nsulictenle<br />
pare qua ta sierra alga cortando.Deje que ta hoja y la sierra hagen el trabajo<br />
9. SIEMPRE sostenga la sferra flrmemsntecon ambasmanes mientrasest_ cortandoy<br />
sostenga la sierra con la zapeta ad_usiableflrmementesabre el material de carte<br />
EstoevttarA qua te sierra salte o vibrey ayudarA a minimizertarecursde Eahoja,<br />
10. Ulificeuna hojam_ fine pare los metales fermses y una m6s gruesa pare los metales<br />
no |BITDSOB,<br />
11. Cuando coda places melt[ices de calibrefine, SIEMPRE sujetecon abrezaderas<br />
madera a ambos lades de la ptaca_Estoproporctonarbun carte definidosin excesode<br />
vibracibno rasgaduradel metal.<br />
t2, NO tuerce la hojs de corte_Si fuerza tahoja reducirb tavide Otil y podria causerqua se<br />
tampa ta hoja.<br />
NOTA: Re<strong>com</strong>endamos qua extlenda una palicuta fine de acelte u aires tlpos de<br />
liquldos del torte a Io large de la |inca de carte delanle de la sierra, Esto<br />
permlttr,_un funclonamlento m_s fd¢ll y ayudar/, a prolonger ia vlda _tl! de la<br />
hole. Cuendo carte alumlnlo, utlllce queros_n.<br />
50
CORTEDECAVIDADES ENMADERA SOLAMENTE (Fig.10)<br />
Esta sierra es Ideal pate cortes per penetrack_ndirectamenle en superficies qua no se<br />
puedan cedar des'de un borde, Isles <strong>com</strong>e piece o parades. Se puede hacer el corte per<br />
penelractSn de dos manatee diferentes, dependiendo de c{_mose introduzca{ahoja en la<br />
abrazadera de la hoja de ta slerra.<br />
Fig. 10, columnaA mueslra el eerie per penetraciSncon toe deintes de _ hoja hacla<br />
arrlbm<br />
Fig. I0, columna B muestrac6mo hacer el corte per penetracl6ncon los dlentesde la heja<br />
hacta abeJo_<br />
NO h_ga un corte per penetracfan en superficies metales<br />
t. Mida _a superflcie a ser codada y marque claramente con un l_plz, gramtl o tiza,<br />
2_ Tntroduzca la hoja adecuada en la abrazadefa pare hoJas y ajuste bfen<br />
3. Cotoque la herramlenta con un borde en la place de zapata flrmemente sobre el<br />
matedal (v_,aee A - B- t),<br />
4_ Coleque la exlremldad de la hoja (apegada) en la tinea de corte.<br />
5_ incline la sierra de manera ta! qua Ia hoJa despeje a pteza de Irabajo (v(_ase A - B, 1).<br />
6_ Prestene el gatitlo y con cutdade baje ta hoja de la sierra m6vt! hacta la plaza de trabajo<br />
(v_,ase A - B, 2),,<br />
7 Luego de qua [a hoja penetre la pieza de trabaJo, continue codando con {a sierra per la<br />
Iinea de code (v_ase A - B, 3)<br />
51<br />
2
CORTE DE CAV|DADES EN MADERA SOLAMENTE (Fig. lg) cortt.<br />
I NOTA: Pars facititar e! code per penetraci6n,<br />
utillce<br />
una hoja<br />
de oaJ_bre<br />
gruesoo 1<br />
En matertales gruesos o muy duros, no se debe Inientar reatizar cortes per penetrect6n,<br />
Los cortes de cav_dades en dichos materlales se deben hacer sofamente <strong>com</strong>enzando el<br />
carte deeds un otificto perforedo de lade a lade en el material qua sea io sufictentemente<br />
grende pars qua entre la hoja,<br />
/_ ADVERTENSIA: Uttllce extrema precauct6n st emplea esta sierra pars 1<br />
podar drboles llvlanos. Slgs todas lss Instrucctonea de segur|dad con respecto al<br />
use de la zapsts, ttpo de hojs y carters de le hoJa, Aseg_rase de qua la rams est_<br />
flrmemente suJeta o fiJa antes de <strong>com</strong>enzar y mlentras esld cortando,.<br />
/_ ADVERTENSIA: NO REALICE CORTES per enclma de su cabeza. Anttcipe j<br />
la treyector|a de la caida de las ramasy asserin con antelacl6n. Preste atenct6n<br />
padlcularmente s los cables que se encuentran ardba. I<br />
CORTE EMBUTIDO (Fig. t'I)<br />
Et diseho <strong>com</strong>pactode ia carcass<br />
del motor y la zapata de !ongi_ud<br />
ajustab_eI giretoriade es_ sierra le<br />
permite reellzar <strong>com</strong>es<br />
extremadamente cemanosen pIsos,<br />
e_qutnesy otres _reas<br />
extremadamente ajustadas,Pare<br />
oblenerla m_.ximacapacida de<br />
esta sierrapars etcort embulido:<br />
1. Instate la hojacon los dfentes<br />
hacia abaJo (haole la taps de<br />
la sierra).<br />
2oAseg_resedequa lazapata se<br />
encuentre an la posict6nm_s<br />
cercanaa la carcass de la sierra<br />
y el dienlede lahojaest_tan<br />
cema <strong>com</strong>esea posibie de la<br />
supedicte de tmbajo(Figure 1!)<br />
Fig, t I<br />
Ak ADVERTENCIA: Puede ocurrlr la rotura de la hoJay el dafio de la plaza de<br />
trabajo at la hoja no se prolongs rods a!l_ de Is zapata y ta plaza de treba]o e Io<br />
largo de; corte. Puede pmduclr la p_.rdidade control y e! daBo de le znpata, lo<br />
qua aumenta el rlesgo de leelonaa personales graves (v(rese Paglna 48,<br />
Figures 7a y 7b),=<br />
52<br />
!<br />
i<br />
i<br />
i<br />
l<br />
i<br />
l<br />
i<br />
i<br />
i<br />
i<br />
i<br />
i<br />
i<br />
i<br />
i<br />
i<br />
=<br />
1
eparacl6n debeser reallzada per un t_cnEco c.'_liftcado en un Centre de Serviette<br />
t Sears, _ ADVERTENCIA: Pare asegurar le segurtdnd y conflabtlldad, toda '1<br />
desenchu!'e la sierra de la fuente de allmentac|6n antes de realizer cualquier<br />
i Z_SADVERTENCIA: Per su segurldad, SIEMPRE apague el tnterrup|or y ]<br />
mantenlmlenlo o tlmpleza,<br />
]<br />
Se ha detefmtnado qua las herramlentas eldctdcas es_n sujetas a fallas premaluras<br />
postbles y desgaste aceletado cuando se utilizan sobre betas de libra de vlddo y autos<br />
deportlvos, tablones de pared, <strong>com</strong>puestos de retteno o yeso. Las asfiilas y residues de<br />
estos metertalos son altamente abrasives psra las plezas de herramtentas eldclrfcas, tales<br />
<strong>com</strong>e rodamientos, cepil{os, cenmutadores, etc. Consecuentemenie. no se re<strong>com</strong>tenda<br />
qua esta herramienta sea utilizada pard Irabalo extenso sobre material de libra de vidrio,<br />
lab_ones de pared, <strong>com</strong>puesto de relleno o ysso.. Dumnte cuatquIer use sobre eslos<br />
matarIales, es extremadamente Importante limplar la herramtenta frecuentemente<br />
sopi_,.ndola con un chorro de airs..<br />
[ Z_S<br />
f_terales<br />
ADVERTENC'A:<br />
durante l_s operaclones<br />
Use s'empre<br />
con<br />
galas<br />
hertamtent_s<br />
de seguridad<br />
el_)etrlcas,<br />
o gafas<br />
o st<br />
con<br />
soplar<br />
p rotectores<br />
el<br />
1<br />
poivo, SI la operaclbn es polvorlenta, use tambi_n una m_scara antl.-polvo.<br />
CAMBIAR LAS ESCOBILLAS DE CARBON (Figs 12 y 12a)<br />
Juegos de escebtllas de reempfazo estdn d_spontbies per El Centre de Par|as y<br />
Repuestos Sears, S]empre hags un order con el n_mero correcto del parrs, yea la lists<br />
de partss de p_glne 57..<br />
1, Desenchufe la sierra vaivdn antes de revtsando o reempiazar las escobiflas<br />
2. Reemptaza |as dos escobifias de carb6n cuando cue{quiet una tlene manes que t/4<br />
pulg_da longitud de carbSn quedaba, osf el resorte o alambre est_ da,Sado o quemada,<br />
3. Usando un destornlllador ranumdo, quits Is taps negra de plastlca en eada lade de la<br />
simTa de vaiv_in (Fig. 12 y t2a) cuidosamenle retire lss montajes de escobillas<br />
cargado-<strong>com</strong>resortes, Queda ltmpia _a_ escobitlas y desiizando Jibremenle an sus<br />
canales de guia,<br />
Fig. 12<br />
Ap_<br />
do<br />
_scobii'lo<br />
(an_'nd_ b_oIre Tap_<br />
E.q=_biIIa<br />
R_so_e<br />
dr_Cad_On<br />
mlsma NOTA: Pare manera reempfazar qua salleron, las mismee Esto evite escoblllss, un periodo ensegl3rase de demando,. de qua ilnstelan en la 1I<br />
_3
CAMBIAR LAS ESCOBILLAS DE CARBI_N (Figs 12 y 12a) coal<br />
4 Encarta 1as montajes de escobillas nuevas en los canaEes de gula con la parle de<br />
carb6n entrando primate, ansegurando co!ocar las dos "orajas" metales an sue ranuTas<br />
en el canal {vet Fig, 12a)o<br />
5 Recuerdas de reemplazar las dos tapes pt_sticNs despu_s de inspaccionar o hacer el<br />
manetentmIento a Ias escobiilaso Aprieta la tapes bten, pare no las aprieta demasiado,<br />
La sierra de vatv6n debe permftase hacer el rodaje de, (an marchaa vefocldad sin<br />
carga y sin hoJa) pars 5 minutes antes de u_ar, asentar las escobillas nuevas bten<br />
MANTENIMIENTO DE RUTINA<br />
gasoline, pmductos a base de petr61eo, sce!tes penetrantes, etc. entren en<br />
contacto con las plazas pl_stlcas_ Los quimlcos pueden daSar, debiliter o<br />
I _ ADVERTENCIA: NO permlte en ntng_n momenta que flufdo de frenos,<br />
deetrulr et pl_sllco, to cual podHa resultar en leslones personalee graves.<br />
El mantentmfenlo peribdico lactlita una large vide y una operaci6n libre de problemas,<br />
Mantenga un cronograma de limpiado, lubricacJSn y msntanimiento, Coma pr&ctiea de<br />
mantenimien!o preventive corot]n, stga _os psso_ slgutenles:<br />
Z_ ADVERTENCtA: Pare su segurtdad, SIEMPRE apague et Interrupter y<br />
desenchufa |a starts de ta fuente de alimentact6n antes de realizer cualqutar<br />
mantentmlento o llmpiez_,<br />
1. Una vez finalizado el lrabaJo, limpie IN herram|enta pars permttfr un buen funclonamlento<br />
de ta herramlenta a !o largo del tfempo<br />
2, Use pat_os limpios y h0medos pars limpiar b hermmienta,<br />
3,,Vefl_ique el estado de lodes lob cables el_clricoso<br />
4, Mantenga las aberturas de alre del motor fibres de acelte, grass y aserdn o asttIlas de<br />
readers y guards IN hermmienla an un lugar seco..<br />
5, AsegOrese de qua lodes las pfezas mSvlles esi_n bten lubdcadas, parltcularmente<br />
despu_s de una exposiciSn larga a condicfones de humeclad ylo suciedad.<br />
LUBRICACIC)N<br />
Ls Sierrade valv6nCraftsman®se ha lubrteado adecuadamente y estd lists para utilizer,<br />
No es necesarts m_s lubrtcactSn bale condicfonesde funcionamlento normales,<br />
Se lubrfcaroa lodes los cojinetesde ta sierra pars lode la vfdN_3tilde INherramlenta_<br />
54
I<br />
ik, ADVERTENCIA: La utlltzacl6n de repuestos o aeceeortos qua no son I<br />
re<strong>com</strong>endedos pare esta herramienta podria resultar pelfgrosa y podrfa causer<br />
leetones graves.<br />
I<br />
Lospun[oede venta Seam y otrosde Craftsman ttenen una granseleccISn de hoj_s pare<br />
sierrasde valvdnen una variedadde longitudes de hojay dfentes per pulgada que son<br />
ldeales pare una ampliavariedad de apticactones de <strong>com</strong>e.<br />
SIEMPRE ulfltcela hoJarods corta adecuada pare su tmbajo_peru fo suftctentemente<br />
large <strong>com</strong>epare qua ta hoja corte a trav_sde! matertai<br />
y da_arse durente el use. Ourante el funeionamiento, las hojaa m_s larges<br />
I Z_<br />
pueden<br />
PRECAUCI6N:<br />
vtbraro egltarse<br />
Lee<br />
y causer<br />
holes rods<br />
la pdrdlda<br />
largas<br />
del<br />
tfenen<br />
control,<br />
m6s pmbabi!_dedde<br />
daSoa a |a pieza<br />
doblarse<br />
de<br />
i<br />
|rabajo y poslbles les_oneapersonales graves.<br />
E1material qua sorts determine et ripede hoja qua debe utilizer-<br />
Generalmente, manes dIentes en la hoJa sacan m_s material y rods rdp_da, pero producen<br />
un torte de acabado brusco_.<br />
M_s dientes cor_n rods lento peru queda m_s liso<br />
Uttlica una hoja qua sea tevamente m_s grands (larga) qua la pro[undtdad del material<br />
qua va a cortes.<br />
Lee hojas rods anchas (de mayor eepesar) son m_s dumderas y son ideates pare traba10s<br />
bnJsces <strong>com</strong>e fa demolicf6n..<br />
Cuande corte madera que tenga clavos incrustados, utilice hojas bi,met_licas con la<br />
fndlcac{On espec{!_ca en la hoja a en el envase de qua son adecuadas para este propds{Io,<br />
Los puntos de venta de Sears y Qtms de Craftsman tambi@n ofrecen una gran vadedad<br />
de abrazaderas, cabatletes, equipo de seguddad, guantee, alargues y o_ros equtpoe para<br />
ayudarlocon sus necesidades de asen'ado_<br />
Visits su <strong>com</strong>ercto Sears tocai u otros puntos de vents Craftsman o <strong>com</strong>pre en<br />
sears_cem/craftsman,<br />
/_ ADVERTENCIA: Puede ocurrlr la mtura de la hoja y el daSo de la pteza 1<br />
de trebajo slla hoja no se pmlonga mr]s atld de la base y la ptezs de trabajo a Io<br />
largo def eerie, Puede productr la p_rdlda de control y el daSo de la base, lo qua<br />
aumenta el riesgo de lestones persanales graves° J<br />
55
_ i_I_°_<br />
_w<br />
w<br />
w_<br />
56
Sierra de Vaivdn - Modelo No. 172.26043<br />
No. deiitem N_mero de Parte ........... OescrlpcfSn del Parte Cent!dad<br />
! PSR120S-t MANUA IZQUIERDA Y DERECHA 1<br />
2 PSRI_OS-2 .......... C UBiERTA DEL ORNAMENTO 1<br />
3 GGT480PU*3B Abrez_dBm dB _ Cuerda t<br />
4 • : p.ES360U-24. Tomt_lo . 4<br />
.......... 5 .......................... PSR120S-5 Protectar del C_bte t<br />
6 , PSR120S-6 , , ,Cua_.y, Enc,hu!e ......................................... t<br />
8 , PDIBOOSU-5 , Tomi[b .... B ,<br />
9 PSR!20S*9 Tcmt_[o 4<br />
io . Psm2os-lo _ , Tom_i_ ......... '"' ,,,,,,',,,<br />
. PSRlZOs-_l A_MSRE _TERIOR t<br />
............... 13..................... PSR120SV-!3 Tom}$!o 1<br />
14 : PSR120S-14 . TERMINAL ......... 4,<br />
t5 PSR120S-I5 ALAMBRE INTERIOR 2<br />
..........,201 . PSR120S-20t MONq'AJE DR SOSTENEDOR DE _scOBIL_ _=2 .....<br />
tB PSR120S-18 SOSTENEDOR DE ESCOBILLA 1<br />
19 , pSR120S*I9 , , ESTA,NTE,,,O,E,,ESCO,BfLLA ...... 2;<br />
,?.0 PSR120S-20 BASTIDOR t<br />
2t F_SR 12(}SV-2_ ................. ETtQ U F"TA CLAS IFiCA [_A t<br />
23 PES3SQU-27 TORNILLO 2<br />
24 ......... PSR120S=24 BAFLE I<br />
25 PSR120S-25 MANGA DE COJINETE ................ ......... I<br />
.............. '202 ' PSRt20S-202 ROTOR 1<br />
2B PSR120S-2B ............ COJINETE DE BOLA I<br />
PSRI20S-27 PRUEBA {}EL POLVO t<br />
2B PSR120S-2B ARMADURA 1<br />
............2'9 PSR_20S-29 ANILLO DE RETENIENDO .......<br />
30 PSRI20S_3(} ANtLLO OE FERRI i<br />
31 PSR120S-31 ANILLO DE RETENIENDO 1<br />
.................<br />
32 ................<br />
P.S,R'I,20S-32 TAPA DE COJINETE I :<br />
33 PSR1208-33 .... COJINETE DE BOLA ..................... 1.......<br />
34 PSRt20S-34 ARANDELA 1<br />
35 ..... CDT,21BGU-41 MONTAJE DE TORNILLO , 6 ,, ,<br />
203 PSR120S-203 PLACA DE BASE I<br />
3B PSR120S-36 TAPA DE FONDO t<br />
37 PSR120S=37 COJINETE DE BOLA 1<br />
3B ....... PSR!20,SV_8 , ANILLO PRUEBA D,E AiRE 1<br />
3g PSRI20SV-39 TUERCA I<br />
40' ', PSRt 20Sv-40 ................ ARANDE:_ bE'RESORTE ..... i<br />
41 PSR120SV41 ENGRANAJE 1<br />
42 PSR120S-42 coJIN I<br />
43 PSR 120SV-,4.3 ............ ESTUCHE DE ENGRANAJES ................... 1 ..........<br />
44, , CGTIB3uA-46 ............ i'i i'i"i'; .................. _E_O,_TE DE C0MPRESION .............1.....<br />
45 PSR120S,45 APOYO 1<br />
46 PSR t 20S-46 CLAVUA 2<br />
57
Sierra de Vaiv_n - Modelo No. 172.26043<br />
No. dei Item N_mero de Parte .... Deect}pcl6n del Perle Canttd.d<br />
47 _PSRi_OS-_7 C_VUACi_l_O<br />
48 PSR_2OS_B AN=LLO-E 4<br />
49 PSR120S-49 MANGA DE GO},t,,A 1<br />
50 , PSR12(_S:50 ' ....... BOTON DE EMPUJE .............. 1<br />
t<br />
51 ,PSRt2Ds=lO2 .................... TORNLLO<br />
52 PSR120S-52 , FIESOR_,_RSIONAL ......... 1<br />
....... 53 ............ PSR120S-53 LLAVE ..... 1<br />
54 PSRt20SV-54 .... ANILLO DE RETENIENDO I<br />
55 PSR120S-55 _ MON_TAJE DE ABRAZADERA DE SDPORTE f<br />
57 PSR120S-57 COJINETE DE BOLA I i<br />
5B PSR120S*SB TAPA DE COJINE']'E 1_<br />
59 PSR120S-59 TDRNILLO 3<br />
.......60 PSR120SJSO ANILLO DE TP,AN'SFO'MACi(_N .... !i<br />
6t PSR_2oSV,61 P!NfON SHAFT 1<br />
..... B2 , PSR120S_62 , COMPOhtENTE DE RODAM1ENTO DE AGUJA 1<br />
63 GGT45DIU-SD ANILLO DE RETEN[ENDO 1<br />
64 PSR12DS-10B , MONTAJE,,pE ARANDELA DE "[ORNILLO , 4<br />
B5 PSR12DS_5 PLACA DE OPRIMA t<br />
.............. 204 PSR 120SV-,_D4 _ CONJU_ DEL REctPR|CATOR ............ .............. 1 ......<br />
BB PSR120SV.6B F..JEDE RECIPRICANDO 1<br />
. 67 _ PSR120S-67 _ RODAM_K) DE CDJNE3E DELSEI..LD 2<br />
6B PSR12DS.,6B JUNTA DEL SELLO 1<br />
69 PSRt20S.69 SELLO DE FI;ELTRO 1<br />
7D ! PSR120S-70 : ANILLO DEL SELLO ................................ , 1<br />
71 PSRt20S-7_ SELLO DE FIELTRO 1<br />
72 PSRt20S-72 CORRECCION PRUEBA DE AiRE 1<br />
73 PSR 120S-73 . AN!LLO PRUEBA DE AIRE ............................ ! ..............<br />
74 , PSR120S-74 ' CLAVUA DE RESORrE 1<br />
75 PSR120S-75 .....PORTADOR 2 BASE ......1........<br />
7B CDT10gGU,.2B BOLA DE ACERO 1<br />
......... 77 . PSR120S*77 . LEVA DE PORTADOR ............................... ! ............<br />
7B PSR120S,-78 ......... CLAVUA 1<br />
205 PSR1205-205 ..... ABRAZADERA DEL ANGULQ ....... i _1.....<br />
.... 79 PSR120S-79 MONTAJE DE GUiA DE RODFLLO ....... 1.......<br />
aO PSRi2OS-80 TAPA DE COBRE 2<br />
B1 PSR120S-81 _ AN_LLO PRUEBA DE A|FIE ......................................... 1<br />
B2 PSm20S-82 , ,MONTAJE,_E,TQ,RN!t.LO ............. 4, ,,<br />
B3 PSR120S-83 ,, ARANDEL_,, ' 4<br />
B4 PBR120S_4 AN_LLO E 4<br />
B5 .... P:SRi 205V.85 ' 'TAPA suPER'iOR i',........<br />
BB PSFI120S-SB CLAVUA DE GIRA 1<br />
B7 PSR120S-87 PLACA DEL FENDULO 1<br />
BB ..... PSR12OS-BB P ESTA£-tA EXTERNO ................ 1<br />
e9 PSRI2DS-S9 TAPA I<br />
9D PSR120S-BO PALANCA DE PRENSA ............................ 1_<br />
9'_ PSRI2DS-gl C LAVIJA , ,!_ ....<br />
5B
Sierra de Vaiv_n - Modelo No. 172.26043<br />
No, de| item<br />
92<br />
93<br />
94<br />
95<br />
96<br />
97<br />
98<br />
99<br />
100<br />
10t<br />
102<br />
103<br />
t04<br />
105<br />
!08<br />
107<br />
108<br />
!Q9<br />
110<br />
111<br />
CanUdad<br />
PSRt20S*92 CLAVUAAHUECADO .......... 1<br />
PSR120S-93 RESORTE DE COMPRESION 1<br />
PSRtEOS-g4 CLAVIJA C_t._NDRICO I<br />
Psm2os-gs EJEDEL_E DEROTACtON 1<br />
PSR12QS-96 ANILLO FRUEBA DE AIRE 1<br />
PSR120S-97 ::RESORTE DE COMPREStON 2<br />
PSR120S*gB BLOQUE DE OPRIMA 1<br />
PSR120SV-99 PLACA DE OPRfMA t<br />
PSR 120S-t O0 TA_ETA DE _ FUEN_ DE ALiME'NTAClON t<br />
PSR1EOSV-I0t _iQUETA DE MARCA i<br />
FSR1EOS-102 TORN|LLO I<br />
PSR120S-t03<br />
PSRt20S*I04<br />
PSRI2OSV*105<br />
PSR!20SV-t06<br />
PSRI20SV-I07<br />
SW57.31ol-OD<br />
PSRt20SV-t09<br />
PSRI20SV-110<br />
PSR120S.i09<br />
ARANDELA 4<br />
RESORTE TORSIONAL 1<br />
CONTRAPESO , 1<br />
CUSIERTA MEDIA ......... 1<br />
C_vtIa 3<br />
MONTAJE DE TORNILLO , 4<br />
ARANDELA 1<br />
EOOA_ ENTD DE COJ_ETE, DEL8ELLO .................. 1<br />
TORNILLO 2<br />
59
lawn and garden equipment, or heaEing and cooling systems,<br />
no matter who made it, no matter who sold Itl<br />
For the replacement parts, accessories and<br />
owner's manuals that you need to do-it-yourself<br />
For Sears professional installation of home appliances<br />
and items like garage door openers and water heaters.<br />
1-800.4-MY-HOME _ (1-e_o.4_.4Bs_)<br />
Call anylima, day or nlght(U SA_ and Canada)<br />
Our Home .:<br />
!:z:ilr:::_<br />
::_:i;i<br />
For repair of carry-in items like vaculJms, lawn equipment, _:::ii<br />
and etectronlcs, call anytime [or the location of your nearest _-::_; ......<br />
Sears Paris & Repair Service Center :;':<br />
1-800.488-1222 (u.sJ_,) 1-800.469.4663 (Canada)<br />
W'WW,.t; _a_ .corn _J_aarB j::._<br />
To purchase a proteclion agreement on a product servicad by Sears:<br />
1.,800-827-6655(U.S.A.) 1.800-361-6665 (Canada)<br />
Para pedirserv[ctode r_paracf_n Au Canadapourserviceen fran_;.afs: ! :ii::;<br />
a domlc_lio,y paraordenar plazas: 1.800 j..E.FOYER_ :_;!i<br />
1,.SBB.SU-HOGAR ® (1-800-G33-6937)<br />
:i 11.,BB8-784-6427) www_saars,ca<br />
, ealrN