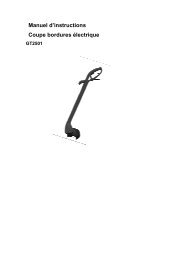
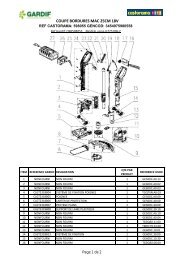
Notice d'utilisation
Notice d'utilisation
Notice d'utilisation

You also want an ePaper? Increase the reach of your titles
YUMPU automatically turns print PDFs into web optimized ePapers that Google loves.
UK<br />
12<br />
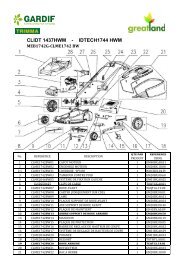
SHREDDERS<br />
Your shredder is a sturdy and safe machine; before<br />
operating it please carefully read the following use and<br />
safety - instructions. Ensure that anyone who uses the<br />
shredder perfectly knows the following instructions.<br />
Keep the same for future reference.<br />
USE<br />
Garden organic waste material, when shredded, can<br />
be used as biological fertilisation for your garden.<br />
Put biodegradeable waste material, such as leaves,<br />
small branches and grass into the feeding hopper in<br />
measured quantities so as to avoid clogging.<br />
Collection of shredded material<br />
You can use both a cardboard box and an ordinary<br />
plastic bag, putting it under the discharge opening.<br />
In order not to compromise the stability of thr shedder,<br />
the bag should stand on the groung.<br />
PARTS OF SHREDDER<br />
1) Funnel<br />
2) Plate-hopper<br />
3) Wheels<br />
4) Motor-blade unit<br />
5) Support frame<br />
5<br />
SAFETY BRAKE<br />
Electric motor is fitted with a safety brake and stops<br />
within 5 seconds from being switched off (Fig. N) as a<br />
consequence the blades rotation stops as well.<br />
OVERLOAD PROTECTION<br />
(Fig. M-N) The on/off switch (I = on; = off), ineludes<br />
an automatic overload protector against motor overload.<br />
Should the motor become overloaded, move the on/off<br />
switch of = OFF position (Fig. N). Wait at least 1<br />
minute before restarting the motor.<br />
Safety brake intervenes also in the a.m. automatic<br />
power supply interruption.<br />
Should the motor not re-start, act as follows:<br />
1<br />
2<br />
INSTRUCTION MANUAL<br />
4<br />
3<br />
OPENING THE PLATE-HOPPER (Fig. H-I-<br />
L)<br />
- always wear gloves<br />
- ensure that the switch be on OFF position (Fig. N)<br />
- disconnect the plug from the mains<br />
- loosen the 2 knobs (Fig. H-10) to open the plate-hopper<br />
(Fig. I);<br />
- place a piece of wood in the unit to prevent the hopperplate<br />
closing (Fig. L-11-13)<br />
- clean cut and discharge area and remove wood sticks<br />
or objects which may clog the blades.<br />
Close the plate-hopper (Fig. I) and tighten the 2 knobs<br />
(Fig. H-10) before operating the ON switch.<br />
SAFETY INTERLOCK<br />
The apparatus is fitted with a safety switch on the closure<br />
between the hopper (Fig. L, Part 11) and the lower plate<br />
(Fig. L, Part 12).<br />
If the hopper is not perfectly placed and fixed against the<br />
lower plate, the SAFETY SWITCH will trigger, stopping<br />
the motor from working; should this occur, disassemble<br />
the hopper as explained in the previous paragraph.<br />
Carefully clean the 2 plates contacting faces.<br />
Re-position and tighten the 2 knobs.<br />
CAUTION: NEVER unscrew the knob (Fig. H-10) without<br />
before turning the switch OFF (Fig. N) and disconecting<br />
the mains.<br />
BLADES<br />
The blades (Fig. L-15) of the blade-holding (Fig. L-14<br />
plate are reversible.<br />
For quality safety' sake, we recommend that, in case of<br />
substitution, you use original blades only.<br />
REVERSING, SUBSTITUTION OF BLADES (Fig. O-<br />
P)<br />
We suggest that the above operations be carried out by<br />
qualified Service Stations.<br />
The (reversible) blades (Fig. L-15) are fixed to the rotary<br />
plate with two screws each. Before any maintenance<br />
or cleaning work on the blades, always turn the switch<br />
OFF (Fig. N) snd disconnect the plug from the socket.<br />
SAFETY INSTRUCTIONS<br />
WARNING: SWITCH 0FF AND REMOVE PLUG<br />
FROM MAINS BEFORE ADJUSTING THE MACHINE,<br />
CLEANING IT OR IF CABLE IS ENTANGLED.<br />
REMEMBER: THE MACHINE CONTINUES TO<br />
RUN FOR A SHORT PERIOD AFTER IT IS SWIT-<br />
CHED OFF.