und Montageanleitung von RADEMACHER Rohrmotoren ...
und Montageanleitung von RADEMACHER Rohrmotoren ...
und Montageanleitung von RADEMACHER Rohrmotoren ...

Create successful ePaper yourself
Turn your PDF publications into a flip-book with our unique Google optimized e-Paper software.
48<br />
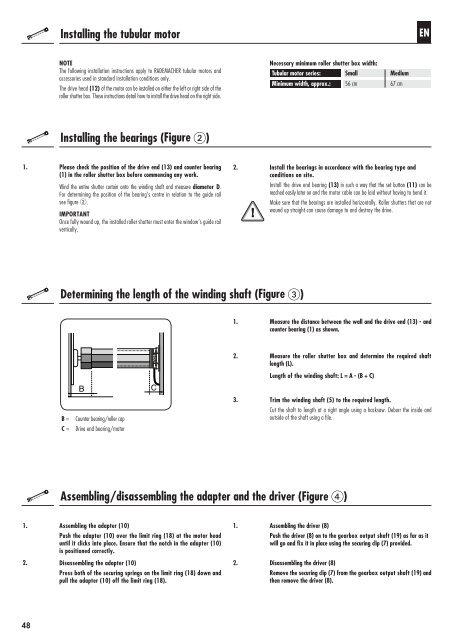
Installing the tubular motor<br />
NOtE<br />
The following installation instructions apply to <strong>RADEMACHER</strong> tubular motors and<br />
accessories used in standard installation conditions only.<br />
The drive head (12) of the motor can be installed on either the left or right side of the<br />
roller shutter box. These instructions detail how to install the drive head on the right side.<br />
Installing the bearings (Figure )<br />
1. Please check the position of the drive end (13) and counter bearing<br />
(1) in the roller shutter box before commencing any work.<br />
Wind the entire shutter curtain onto the winding shaft and measure diameter D.<br />
For determining the position of the bearing’s centre in relation to the guide rail<br />
see figure .<br />
IMPORtANt<br />
Once fully wo<strong>und</strong> up, the installed roller shutter must enter the window’s guide rail<br />
vertically.<br />
Determining the length of the winding shaft (Figure )<br />
B<br />
B = Counter bearing/roller cap<br />
C = Drive end bearing/motor<br />
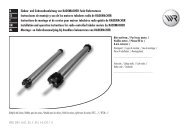
Assembling/disassembling the adapter and the driver (Figure )<br />
1. Assembling the adapter (10)<br />
Push the adapter (10) over the limit ring (18) at the motor head<br />
until it clicks into place. Ensure that the notch in the adapter (10)<br />
is positioned correctly.<br />
2.<br />
Disassembling the adapter (10)<br />
Press both of the securing springs on the limit ring (18) down and<br />
pull the adapter (10) off the limit ring (18).<br />
C<br />
2.<br />
1. Measure the distance between the wall and the drive end (13) - and<br />
counter bearing (1) as shown.<br />
2.<br />
3.<br />
1.<br />
2.<br />
Necessary minimum roller shutter box width:<br />
tubular motor series: Small Medium<br />
Minimum width, approx.: 56 cm 67 cm<br />
EN<br />
Install the bearings in accordance with the bearing type and<br />
conditions on site.<br />
Install the drive end bearing (13) in such a way that the set button (11) can be<br />
reached easily later on and the motor cable can be laid without having to bend it.<br />
Make sure that the bearings are installed horizontally. Roller shutters that are not<br />
wo<strong>und</strong> up straight can cause damage to and destroy the drive.<br />
Measure the roller shutter box and determine the required shaft<br />
length (L).<br />
Length of the winding shaft: L = A - (B + C)<br />
trim the winding shaft (5) to the required length.<br />
Cut the shaft to length at a right angle using a hacksaw. Deburr the inside and<br />
outside of the shaft using a file.<br />
Assembling the driver (8)<br />
Push the driver (8) on to the gearbox output shaft (19) as far as it<br />
will go and fix it in place using the securing clip (7) provided.<br />
Disassembling the driver (8)<br />
Remove the securing clip (7) from the gearbox output shaft (19) and<br />
then remove the driver (8).