Ma 1209-18.1.pdf - Firma Servotool GmbH
Ma 1209-18.1.pdf - Firma Servotool GmbH
Ma 1209-18.1.pdf - Firma Servotool GmbH
Create successful ePaper yourself
Turn your PDF publications into a flip-book with our unique Google optimized e-Paper software.
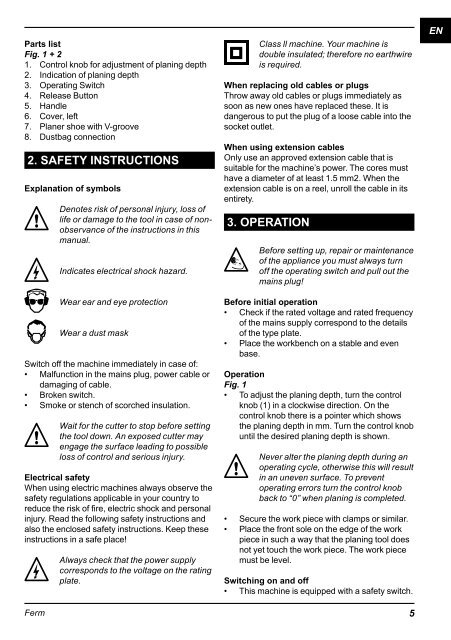
Parts list<br />
Fig. 1 + 2<br />
1. Control knob for adjustment of planing depth<br />
2. Indication of planing depth<br />
3. Operating Switch<br />
4. Release Button<br />
5. Handle<br />
6. Cover, left<br />
7. Planer shoe with V-groove<br />
8. Dustbag connection<br />
2. SAFETY INSTRUCTIONS<br />
Explanation of symbols<br />
Ferm<br />
Denotes risk of personal injury, loss of<br />
life or damage to the tool in case of nonobservance<br />
of the instructions in this<br />
manual.<br />
Indicates electrical shock hazard.<br />
Wear ear and eye protection<br />
Wear a dust mask<br />
Switch off the machine immediately in case of:<br />
• <strong>Ma</strong>lfunction in the mains plug, power cable or<br />
damaging of cable.<br />
• Broken switch.<br />
• Smoke or stench of scorched insulation.<br />
Wait for the cutter to stop before setting<br />
the tool down. An exposed cutter may<br />
engage the surface leading to possible<br />
loss of control and serious injury.<br />
Electrical safety<br />
When using electric machines always observe the<br />
safety regulations applicable in your country to<br />
reduce the risk of fire, electric shock and personal<br />
injury. Read the following safety instructions and<br />
also the enclosed safety instructions. Keep these<br />
instructions in a safe place!<br />
Always check that the power supply<br />
corresponds to the voltage on the rating<br />
plate.<br />
Class ll machine. Your machine is<br />
double insulated; therefore no earthwire<br />
is required.<br />
When replacing old cables or plugs<br />
Throw away old cables or plugs immediately as<br />
soon as new ones have replaced these. It is<br />
dangerous to put the plug of a loose cable into the<br />
socket outlet.<br />
When using extension cables<br />
Only use an approved extension cable that is<br />
suitable for the machine’s power. The cores must<br />
have a diameter of at least 1.5 mm2. When the<br />
extension cable is on a reel, unroll the cable in its<br />
entirety.<br />
3. OPERATION<br />
Before setting up, repair or maintenance<br />
of the appliance you must always turn<br />
off the operating switch and pull out the<br />
mains plug!<br />
Before initial operation<br />
• Check if the rated voltage and rated frequency<br />
of the mains supply correspond to the details<br />
of the type plate.<br />
• Place the workbench on a stable and even<br />
base.<br />
Operation<br />
Fig. 1<br />
• To adjust the planing depth, turn the control<br />
knob (1) in a clockwise direction. On the<br />
control knob there is a pointer which shows<br />
the planing depth in mm. Turn the control knob<br />
until the desired planing depth is shown.<br />
Never alter the planing depth during an<br />
operating cycle, otherwise this will result<br />
in an uneven surface. To prevent<br />
operating errors turn the control knob<br />
back to “0” when planing is completed.<br />
• Secure the work piece with clamps or similar.<br />
• Place the front sole on the edge of the work<br />
piece in such a way that the planing tool does<br />
not yet touch the work piece. The work piece<br />
must be level.<br />
Switching on and off<br />
• This machine is equipped with a safety switch.<br />
5<br />
EN


