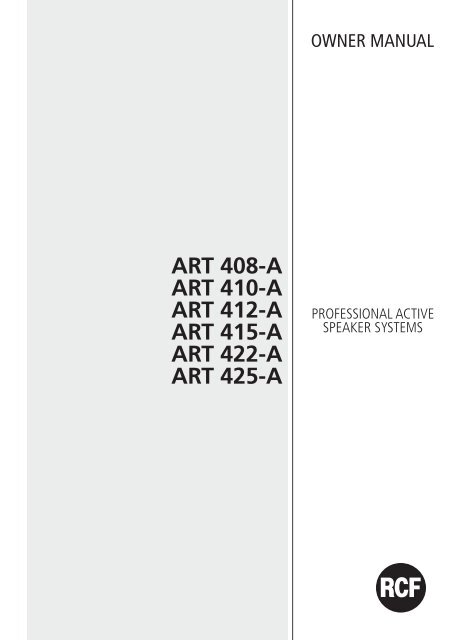
ART 408-A ART 410-A ART 412-A ART 415-A ART 422-A ... - RCF
ART 408-A ART 410-A ART 412-A ART 415-A ART 422-A ... - RCF
ART 408-A ART 410-A ART 412-A ART 415-A ART 422-A ... - RCF

You also want an ePaper? Increase the reach of your titles
YUMPU automatically turns print PDFs into web optimized ePapers that Google loves.
<strong>ART</strong> <strong>408</strong>-A<br />
<strong>ART</strong> <strong>410</strong>-A<br />
<strong>ART</strong> <strong>412</strong>-A<br />
<strong>ART</strong> <strong>415</strong>-A<br />
<strong>ART</strong> <strong>422</strong>-A<br />
<strong>ART</strong> 425-A<br />
OWNER MANUAL<br />
PROFESSIONAL ACTIVE<br />
SPEAKER SYSTEMS
ENGLISH<br />
2<br />
ENGLISH<br />
ITALIANO<br />
FRANÇAIS<br />
DEUTSCH<br />
LANGUAGE<br />
3<br />
8<br />
13<br />
18
SAFETY PRECAUTIONS<br />
1. All the precautions, in particular the safety ones, must be read with special attention, as<br />
they provide important information.<br />
2. Power supply from mains<br />
a. The mains voltage is sufficiently high to involve a risk of electrocution; install and<br />
connect this product before plugging it in.<br />
b. Before powering up, make sure that all the connections have been made correctly and<br />
the voltage of your mains corresponds to the voltage shown on the rating plate on the<br />
unit, if not, please contact your <strong>RCF</strong> dealer.<br />
c. The metallic parts of the unit are earthed through the power cable. An apparatus with<br />
CLASS I construction shall be connected to a mains socket outlet with a protective<br />
earthing connection.<br />
d. Protect the power cable from damage; make sure it is positioned in a way that it<br />
cannot be stepped on or crushed by objects.<br />
e. To prevent the risk of electric shock, never open this product: there are no parts inside<br />
that the user needs to access.<br />
3. Make sure that no objects or liquids can get into this product, as this may cause a short<br />
circuit.<br />
This apparatus shall not be exposed to dripping or splashing. No objects filled with liquid,<br />
such as vases, shall be placed on this apparatus. No naked sources (such as lighted candles)<br />
should be placed on this apparatus.<br />
4. Never attempt to carry out any operations, modifications or repairs that are not expressly<br />
described in this manual.<br />
Contact your authorized service centre or qualified personnel should any of the following<br />
occur:<br />
- The product does not function (or functions in an anomalous way).<br />
- The power cable has been damaged.<br />
- Objects or liquids have got in the unit.<br />
- The product has been subject to a heavy impact.<br />
5. If this product is not used for a long period, disconnect the power cable.<br />
6. If this product begins emitting any strange odours or smoke, switch it off immediately<br />
and disconnect the power cable.<br />
7. Do not connect this product to any equipment or accessories not foreseen.<br />
For suspended installation, only use the dedicated anchoring points and do not try to hang<br />
this product by using elements that are unsuitable or not specific for this purpose. Also<br />
check the suitability of the support surface to which the product is anchored (wall, ceiling,<br />
structure, etc.), and the components used for attachment (screw anchors, screws, brackets<br />
not supplied by <strong>RCF</strong> etc.), which must guarantee the security of the system / installation<br />
over time, also considering, for example, the mechanical vibrations normally generated by<br />
transducers.<br />
To prevent the risk of falling equipment, do not stack multiple units of this product unless<br />
this possibility is specified in the user manual.<br />
8. <strong>RCF</strong> S.p.A. strongly recommends this product is only installed by professional<br />
qualified installers (or specialised firms) who can ensure correct installation<br />
and certify it according to the regulations in force.<br />
The entire audio system must comply with the current standards and regulations<br />
regarding electrical systems.<br />
9. Supports and trolleys<br />
The equipment should be only used on trolleys or supports, where necessary, that are<br />
recommended by the manufacturer. The equipment / support / trolley assembly must be<br />
SAFETY<br />
PRECAUTIONS<br />
IMPORTANT<br />
3<br />
ENGLISH
ENGLISH<br />
4<br />
moved with extreme caution. Sudden stops, excessive pushing force and uneven floors may<br />
cause the assembly to overturn.<br />
10. There are numerous mechanical and electrical factors to be considered when installing<br />
a professional audio system (in addition to those which are strictly acoustic, such as sound<br />
pressure, angles of coverage, frequency response, etc.).<br />
11. Hearing loss<br />
Exposure to high sound levels can cause permanent hearing loss. The acoustic pressure level<br />
that leads to hearing loss is different from person to person and depends on the duration<br />
of exposure. To prevent potentially dangerous exposure to high levels of acoustic pressure,<br />
anyone who is exposed to these levels should use adequate protection devices. When a<br />
transducer capable of producing high sound levels is being used, it is therefore necessary<br />
to wear ear plugs or protective earphones. See the manual technical specifications to know<br />
the maximum sound pressure level.<br />
IMPORTANT NOTES<br />
To prevent the occurrence of noise on line signal cables, use screened cables only and avoid<br />
putting them close to:<br />
- Equipment that produces high-intensity electromagnetic fields<br />
- Power cables<br />
- Loudspeaker lines.<br />
OPERATING PRECAUTIONS<br />
- Place this product far from any heat sources and always ensure an adequate air<br />
circulation around it.<br />
- Do not overload this product for a long time.<br />
- Never force the control elements (keys, knobs, etc. ).<br />
- Do not use solvents, alcohol, benzene or other volatile substances for cleaning the<br />
external parts of this product.<br />
IMPORTANT NOTES<br />
Before connecting and using this product, please read this instruction manual carefully and<br />
keep it on hand for future reference. The manual is to be considered an integral part of<br />
this product and must accompany it when it changes ownership as a reference for correct<br />
installation and use as well as for the safety precautions. <strong>RCF</strong> S.p.A. will not assume any<br />
responsibility for the incorrect installation and / or use of this product.<br />
WARNING: To prevent the risk of fire or electric shock, never expose this product to rain<br />
or humidity.<br />
IMPORTANT NOTES<br />
OPERATING<br />
PRECAUTIONS<br />
IMPORTANT NOTES<br />
WARNING
Evolution in technology, revolution in sound.<br />
Back in 1996 <strong>RCF</strong> moved into the forefront of the active loudspeaker technology with<br />
the introduction of the <strong>ART</strong> Series: a loudspeakers range that was able to deliver perfect<br />
and powerful sound with a lightweight cabinet strong enough to withstand everyday use.<br />
The <strong>RCF</strong> R&D team kept evolving the <strong>ART</strong> technology during the last decade, developing<br />
reference products such as the <strong>ART</strong> 322-A, the <strong>ART</strong> 310-A and the new digitally amplified<br />
<strong>ART</strong> 725-A.<br />
The <strong>RCF</strong> Team always has the performer’s needs at the forefront of the design in order to<br />
create new lines of speakers with renewed features, improved sound clarity and definition<br />
and even lighter weight systems.<br />
The latest iconic design is the <strong>ART</strong> 4 Series: an evolution in the active loudspeaker<br />
technology with a revolutionary design and sound. Every detail of the 4 Series has been<br />
carefully studied in order to offer musicians and professionals the perfect tool to amplify<br />
their performance, night after night.<br />
High quality materials, precise manufacturing, careful assembly and extensive quality<br />
control procedures complete the groundbreaking design work of the <strong>RCF</strong> R&D team.<br />
All the transducers in the Art 4 Series speakers feature light weight neodymium magnets<br />
in order to guarantee a better performance and make for easier transportation.<br />
All Compression drivers and Transducers are precision built taking advantage of <strong>RCF</strong>’s<br />
superior moulding, assembly technologies and a wealth of professional knowledge and<br />
experience dedicated to achieving extremely high standards.<br />
All Art 4 Series two-way speakers are equipped with a new generation of 400 Watt digital<br />
amplifiers, 300 Watt for the woofers and 100 Watt for the compression drivers. The result<br />
of this is very high output, extremely low distortion and an incredible natural sound.<br />
Each amplifier presents both XLR/jack balanced inputs, XLR output link, mic/line switch,<br />
volume and a switchable EQ Mode (Flat/Boost). The amplifier features a solid mechanical<br />
aluminium structure which not only stabilize the amplifier during transportation but also<br />
assist in the heat dissipation.<br />
All the Art 4 Series amplifiers presents SMPS power supply section in order to produce<br />
maximum output and minimum transportation weight.<br />
The new loudspeaker design looks aggressive whilst retaining familiar Art ergonomics and<br />
is the result of extensive combined functional and acoustic research.<br />
The Art 4 Series two-way system cabinets are moulded in a special polypropylene composite<br />
material and are designed to dampen down vibrations even at maximum volume settings.<br />
The reflex porting has been resized to offer a better efficiency. The <strong>ART</strong> <strong>410</strong> and <strong>408</strong> models<br />
are equipped with a top handle with rubber handgrip for greater portability; the bigger<br />
models have 3 ergonomically designed forged handles with rubber handgrip, 2 on the<br />
sides and one at the top. At the bottom a rugged steel pole mount has been installed in<br />
all models.<br />
The new cabinet shape will allow every <strong>ART</strong> 4 Series model to be used in the standard<br />
configuration as well as in stage monitor mode.<br />
Two M10 threaded inserts are provided for optional mounting hardware in Installed Sound<br />
Applications.<br />
PRODUCT<br />
INFORMATIONS<br />
COMPONENTS<br />
AMPLIFIERS<br />
CABINETS<br />
5<br />
ENGLISH
ENGLISH<br />
6<br />
1 JACK/FEMALE XLR INPUTS (BAL/UNBAL). The system accept jack or XLR<br />
input connectors. These balanced inputs can be used to connect balanced or<br />
unbalanced microphones or audio sources at line level. The balanced connector<br />
is connected in parallel and can be used to send the audio signal to other<br />
amplified speakers, recorders or supplementary amplifiers.<br />
2 LIMITER LED. The amplifier has a built in limiter circuit to prevent clipping<br />
of the amplifiers or overdriving the transducers. When the soft clipping circuit<br />
is active the LED blinks RED. It is okay if the limit LED blinks occasionally. If the<br />
LED blinks frequently or lights continuously, turn down the signal level.<br />
3 SIGNAL LED. The signal indicator lights green if there is signal present on<br />
the main input.<br />
4 POWER STATUS LED. This green led is ON when the speaker is connected<br />
to the main power supply and the ON/OFF is in ON position.<br />
5 MALE XLR SIGNAL OUTPUT. The output XLR connector provides a loop<br />
trough for speakers daisy chaining.<br />
6 VOLUME CONTROL. Adjust the amplifier volume. This control does not<br />
affect the “Link” - “Input - Link” output level.<br />
7 FLAT/BOOST SWITCH. Set the flat or boost equalization. “Boost” equalization<br />
is a loudness recommended for background music applications, when the<br />
system plays at a low level. For all other applications “Flat” equalisation is<br />
recommended.<br />
8 INPUT SENSITIVITY SWITCH. Position the switch in LINE to use a line level<br />
source (0 dB) or MIC to use a microphone source.<br />
9<br />
10<br />
IEC AC SOCKET. The IEC AC socket connect the power cord to the socket.<br />
FUSE CARRIER. Mains fuse housing.<br />
11 POWER MAIN SWITCH. The power switch turns the AC power ON and<br />
OFF.<br />
The XLR connectors<br />
use the following AES standard:<br />
PIN 1 = GROUND (SHIELD)<br />
PIN 2 = HOT (+)<br />
PIN 3 = COLD (-)<br />
HOT GND<br />
COLD<br />
BAL. XLR<br />
REAR<br />
PANEL<br />
1<br />
11<br />
6<br />
5 7<br />
1<br />
CONNECTIONS<br />
9<br />
10<br />
2<br />
3<br />
4<br />
8
On the back panel you will find all the controls, the signal and current inputs. In case<br />
is necessary to change the voltage please call your vendor or authorized <strong>RCF</strong> SERVICE<br />
CENTRE. This operation require the substitution of the fuse value and is reserved to an <strong>RCF</strong><br />
SERVICE CENTRE.<br />
At this point you can connect the power supply cable and the signal cable, but before<br />
turning on the speaker make sure that the volume control is at the minimum level (even<br />
on the mixer output). It is important that the mixer is already ON before turning on the<br />
speaker. This will avoid damage to the speakers and noisy “bumps” due to turning on parts<br />
on the audio chain. It is a good practice to always turn on speakers at last and turn them<br />
off immediately after the show. Now you can turn ON the speaker and adjust the volume<br />
control to a proper level.<br />
The amplifiers are equipped with a microprocessor to control the DSP and the amplifier. The<br />
correct switch on of the amplifier is ensured by an initialisation procedure; during this test<br />
stage the LEDs (Limiter, Signal and Power Status), located on the amplifier module, remain<br />
off for approx. 2 sec. At the end of the switch on procedure on the amplifier module the<br />
Ready green LED only remains steadily on. In case of severe failure of the speaker, the LED<br />
on the front panel flashes several times and on the amplifier module, the Limiter red LED<br />
flashes. The speaker switches to “mute”.<br />
A 35 mm socket for mounting the loudspeaker on a speaker stand is provided in the bottom<br />
of the cabinet. <strong>ART</strong> speakers MUST be suspended only with approved rigging hardware. In<br />
any case always use at least 2 M10 threaded inserts on opposite sides of the cabinet.<br />
WARNING: Never suspend <strong>ART</strong> speakers by there handles. Handles are intended for<br />
transportation, not for rigging.<br />
The microprocessor is able to signal three different kinds of failure by flashing the “Limiter”<br />
red LED on the amplifier panel before the lighting up of the “Power status” green LED. The<br />
three types of failure are: WARNING: a non severe error or auto-ripristinate malfunction<br />
is detected and the performance of the speaker is not limited. LIMITATIONS: an error is<br />
detected and the performance of the speaker is limited (the sound level is reduced by 3 dB).<br />
This does not affect the operation of the speaker since it continues to operate. However, it<br />
is necessary to call the service centre to solve the issue. FAILURE: a severe malfunction is<br />
detected. The speaker switches to “mute”.<br />
FLASHING INDICATION: 1 or 2 >Warning 3 or 4 >Limitation from 5 to 8 >Failure.<br />
In case of failure, the “Ready” green LED remains off.<br />
Perform the checks listed below:<br />
- check if the speaker is properly connected to the power supply<br />
- make sure that the power supply is of correct voltage<br />
- check that the amplifier is not overheated<br />
- disconnect the speaker from the mains power supply, wait for a few minutes and connect<br />
it again. If after these tests the red “LIMITER” LED is still on, please contact an authorised<br />
service centre.<br />
230 Volt, 50 Hz SETUP: FUSE VALUE T 1.6 A 250 V<br />
115 Volt, 60 Hz SETUP: FUSE VALUE T 3.15 A 250 V<br />
BEFORE CONNECTING<br />
THE SPEAKER<br />
BEFORE TURNING ON<br />
THE SPEAKER<br />
TURNING ON<br />
THE SPEAKER<br />
INSTALLATION<br />
WARNING<br />
FAILURE INDICATION<br />
!<br />
AND SAFETY<br />
VOLTAGE SETUP<br />
(RESERVED TO THE <strong>RCF</strong> SERVICE CENTRE)<br />
7<br />
ENGLISH
ITALIANO<br />
8<br />
AVVERTENZE PER LA SICUREZZA<br />
1. Tutte le avvertenze, in particolare quelle relative alla sicurezza, devono essere lette<br />
con particolare attenzione, in quanto contengono importanti informazioni.<br />
2. Alimentazione diretta da rete<br />
a. La tensione di alimentazione dell’apparecchio ha un valore sufficientemente alto da<br />
costituire un rischio di folgorazione per le persone: non procedere mai all’installazione<br />
o connessione dell’apparecchio con l’alimentazione inserita.<br />
b. Prima di alimentare questo prodotto, assicurarsi che tutte le connessioni siano corrette<br />
e che la tensione della vostra rete di alimentazione corrisponda quella di targa<br />
dell’apparecchio, in caso contrario rivolgetevi ad un rivenditore <strong>RCF</strong>.<br />
c. Le parti metalliche dell’apparecchio sono collegate a terra tramite il cavo di<br />
alimentazione. Un apparecchio avente costruzione di CLASSE I deve essere connesso<br />
alla presa di rete con un collegamento alla terra di protezione.<br />
d. Accertarsi che il cavo di alimentazione dell’apparecchio non possa essere calpestato o<br />
schiacciato da oggetti, al fine di salvaguardarne la perfetta integrità.<br />
e. Per evitare il rischio di shock elettrici, non aprire mai l’apparecchio: all’interno non vi<br />
sono parti che possono essere utilizzate dall’utente.<br />
3. Impedire che oggetti o liquidi entrino all’interno del prodotto, perché potrebbero causare<br />
un corto circuito. L’apparecchio non deve essere esposto a stillicidio o a spruzzi d’acqua;<br />
nessun oggetto pieno di liquido, quali vasi, deve essere posto sull’apparecchio.<br />
Nessuna sorgente di fiamma nuda (es. candele accese) deve essere posta<br />
sull’apparecchio.<br />
4. Non eseguire sul prodotto interventi / modifiche / riparazioni se non quelle espressamente<br />
descritte sul manuale istruzioni.<br />
Contattare centri di assistenza autorizzati o personale altamente qualificato quando:<br />
- l’apparecchio non funziona (o funziona in modo anomalo);<br />
- il cavo di alimentazione è danneggiato;<br />
- oggetti o liquidi sono entrati nell’apparecchio;<br />
- l’apparecchio ha subito forti urti.<br />
5. Qualora questo prodotto non sia utilizzato per lunghi periodi, scollegare il cavo<br />
d’alimentazione.<br />
6. Nel caso che dal prodotto provengano odori anomali o fumo, spegnerlo immediatamente<br />
e scollegare il cavo d’alimentazione.<br />
7. Non collegare a questo prodotto altri apparecchi e accessori non previsti.<br />
Quando è prevista l’installazione sospesa, utilizzare solamente gli appositi punti di<br />
ancoraggio e non cercare di appendere questo prodotto tramite elementi non idonei o<br />
previsti allo scopo.<br />
Verificare inoltre l’idoneità del supporto (parete, soffitto, struttura ecc., al quale è ancorato<br />
il prodotto) e dei componenti utilizzati per il fissaggio (tasselli, viti, staffe non fornite<br />
da <strong>RCF</strong> ecc.) che devono garantire la sicurezza dell’impianto / installazione nel tempo,<br />
anche considerando, ad esempio, vibrazioni meccaniche normalmente generate da un<br />
trasduttore.<br />
Per evitare il pericolo di cadute, non sovrapporre fra loro più unità di questo prodotto,<br />
quando questa possibilità non è espressamente contemplata dal manuale istruzioni.<br />
8. La <strong>RCF</strong> S.p.A. raccomanda vivamente che l’installazione di questo prodotto<br />
sia eseguita solamente da installatori professionali qualificati (oppure da ditte<br />
specializzate) in grado di farla correttamente e certificarla in accordo con le<br />
normative vigenti. Tutto il sistema audio dovrà essere in conformità con le<br />
norme e le leggi vigenti in materia di impianti elettrici.<br />
AVVERTENZE PER<br />
LA SICUREZZA<br />
IMPORTANTE
9. Sostegni e Carrelli. Se previsto, il prodotto va utilizzato solo su carrelli o sostegni<br />
consigliati dal produttore. L’insieme apparecchio-sostegno / carrello va mosso con estrema<br />
cura. Arresti improvvisi, spinte eccessive e superfici irregolari o inclinate possono provocare<br />
il ribaltamento dell’assieme.<br />
10. Vi sono numerosi fattori meccanici ed elettrici da considerare quando si installa un<br />
sistema audio professionale (oltre a quelli prettamente acustici, come la pressione sonora,<br />
gli angoli di copertura, la risposta in frequenza, ecc.).<br />
11. Perdita dell’udito<br />
L’esposizione ad elevati livelli sonori può provocare la perdita permanente dell’udito. Il<br />
livello di pressione acustica pericolosa per l’udito varia sensibilmente da persona a<br />
persona e dipende dalla durata dell’esposizione. Per evitare un’esposizione potenzialmente<br />
pericolosa ad elevati livelli di pressione acustica, è necessario che chiunque sia sottoposto a<br />
tali livelli utilizzi delle adeguate protezioni; quando si fa funzionare un trasduttore in grado<br />
di produrre elevati livelli sonori è necessario indossare dei tappi per orecchie o delle cuffie<br />
protettive. Consultare i dati tecnici del manuale d’uso per conoscere le massime pressioni<br />
sonore che i monitor da studio sono in grado di produrre.<br />
NOTE IMPORTANTI<br />
Per evitare fenomeni di rumorosità indotta sui cavi che trasportano segnali dai microfoni<br />
o di linea (per esempio 0dB), usare solo cavi schermati ed evitare di posarli nelle<br />
vicinanze di:<br />
- apparecchiature che producono campi elettromagnetici di forte intensità;<br />
- cavi di rete;<br />
- linee che alimentano altoparlanti.<br />
PRECAUZIONI D’USO<br />
- Collocare il prodotto lontano da fonti di calore e lasciare dello spazio libero intorno per<br />
garantire la circolazione dell’aria.<br />
- Non sovraccaricare questo prodotto per lunghi periodi.<br />
- Non forzare mai gli organi di comando (tasti, manopole ecc.).<br />
- Non usare solventi, alcool, benzina o altre sostanze volatili per la pulitura delle parti<br />
esterne.<br />
NOTE IMPORTANTI<br />
Prima di collegare ed utilizzare questo prodotto, leggere attentamente le istruzioni<br />
contenute in questo manuale, il quale è da conservare per riferimenti futuri.<br />
Il presente manuale costituisce parte integrante del prodotto e deve accompagnare<br />
quest’ultimo anche nei passaggi di proprietà, per permettere al nuovo proprietario di<br />
conoscere le modalità d’installazione e d’utilizzo e le avvertenze per la sicurezza.<br />
L’installazione e l’utilizzo errati del prodotto esimono la <strong>RCF</strong> S.p.A. da ogni responsabilità.<br />
ATTENZIONE: Per prevenire i rischi di fiamme o scosse elettriche, non esporre mai questo<br />
prodotto alla pioggia o all’umidità.<br />
NOTE IMPORTANTI<br />
PRECAUZIONI<br />
D’USO<br />
NOTE IMPORTANTI<br />
ATTENZIONE<br />
9<br />
ITALIANO
ITALIANO<br />
10<br />
Evoluzione tecnologica, Rivoluzione nel suono.<br />
<strong>RCF</strong> già nel 1996, con la prima introduzione della serie <strong>ART</strong>, si è posta come azienda<br />
leader nella tecnologia delle casse acustiche attive: un range di diffusori capaci di produrre<br />
un suono perfetto e potente con un cabinet leggero e capace di sopportare l’uso di ogni<br />
giorno. Durante gli ultimi dieci anni il team di ricerca e sviluppo di <strong>RCF</strong> ha continuato ad<br />
evolvere la tecnologia <strong>ART</strong>, sviluppando prodotti di riferimento quali <strong>ART</strong> 322-A, <strong>ART</strong> 310-A<br />
e l’ultima cassa con amplificatore digitale <strong>ART</strong> 725-A.<br />
Il team <strong>RCF</strong> ha sempre i desideri dei propri clienti come primo obiettivo di ogni progetto,<br />
creando nuove linee di casse acustiche con caratteristiche rinnovate, sempre migliori<br />
definizione e chiarezza del suono, pesi sempre più contenuti.<br />
L’ultimo progetto icona è <strong>ART</strong> 4 Series: un’evoluzione nella tecnologia dei diffusori attivi<br />
con un design e suono rivoluzionari. Ogni dettaglio della <strong>ART</strong> 4 Series è stato attentamente<br />
studiato per offrire a musicisti e professionisti strumenti perfetti per amplificare le proprie<br />
performances, serata dopo serata. Materiali di alta qualità, lavorazioni di precisione, cura<br />
nell’assemblaggio e controlli di qualità estesi completano l’incredibile lavoro del team R&D<br />
di <strong>RCF</strong>.<br />
Tutti i trasduttori della Art 4 Series sono dotati di magneti in neodimio per una perfetta<br />
performance e per offrire il minimo peso e rendere più facile il trasporto.<br />
Tutti i driver a compressione sono costruiti con la massima precisione grazie alle superiori<br />
tecnologie <strong>RCF</strong> di stampaggio, lavorazione ed assemblaggio. Risultati di eccellenza sono<br />
ottenuti grazie all’esperienza, il know how distribuito e standard produttivi estremamente<br />
elevati.<br />
Tutti i diffusori Art 4 Series sono equipaggiati con un amplificatore digitale di nuova<br />
generazione da 400 Watt, 300 Watt per i woofers e 100 Watt per i compression drivers.<br />
Il risultato sono una pressione acustica elevatissima, distorsioni bassissime ed un suono<br />
incredibilmente naturale. Ogni amplificatore presenta ingressi bilanciati XLR/jack, link di<br />
uscita XLR, commutazione sensibilità mic/linea, controllo di volume ed un tasto di selezione<br />
dell’equalizzazione EQ Mode (Flat/Boost). L’amplificatore è dotato di una robusta struttura<br />
di alluminio che non solo lo rende robusto durante il trasporto e gli urti ma assiste la<br />
dissipazione termica.<br />
Tutti gli amplificatori Art 4 Series sono dotati di sezione di alimentazione SMPS per erogare<br />
la massima potenza anche con minimo peso del diffusore.<br />
Il nuovo design della <strong>ART</strong> 4 Series risulta aggressivo pur mantenendo caratteristiche<br />
ergonomiche familiari alla serie <strong>ART</strong> ed è il risultato di estese ricerche sia acustiche che<br />
funzionali.<br />
I diffusori a 2 vie Art 4 Series sono stampati in speciale polipropilene composito e sono<br />
progettati in modo da smorzare le vibrazioni della struttura anche ai massimi volumi.<br />
I condotti reflex sono stati riprogettati per offrire una maggior efficienza. Il modelli <strong>ART</strong><br />
<strong>410</strong>-A ed <strong>ART</strong> <strong>408</strong>-A sono dotati di una maniglia superiore con inserto in gomma per<br />
una perfetta trasportabilità; i modelli più grandi sono dotati di 3 maniglie dal design<br />
ergonomico, tutte con inserto in gomma, 2 sui lati ed una superiore. Su tutti i modelli è<br />
presente un inserto a tazza in acciaio per l’installazione del diffusore. La forma dei nuovi<br />
cabinet consente per tutti i modelli l’uso in configurazione standard o in posizione stage<br />
monitor. Due inserti filettati M10 permettono il collegamento agli accessori di installazione<br />
nelle applicazioni fisse.<br />
DESCRIZIONE<br />
GENERALE<br />
COMPONENTI<br />
AMPLIFICATORI<br />
MOBILI
1 INGRESSO JACK/XLR (SBILANCIATO/BILANCIATO). Il sistema accetta<br />
connettori di ingresso Jack o XLR che essere utilizzati come ingressi bilanciati<br />
per il collegamento di microfoni bilanciati o sbilanciati o di sorgenti audio a<br />
livello linea.<br />
2 LED DI INSERIMENTO DEL LIMITER. L’amplificatore è dotato di un circuito<br />
di limiter in modo da prevenire il clipping dell’amplificatore o di sovraccaricare<br />
gli altoparlanti. Quando il circuito di soft clipping è attivo il LED lampeggia<br />
con colore ROSSO. È accettabile che il LED lampeggi occasionalmente. Se il<br />
LED lampeggia frequentemente o si accende di continuo ridurre il segnale in<br />
ingresso.<br />
3 LED DI PRESENZA DEL SEGNALE. Il LED di segnale si accende con colore<br />
VERDE se è presente segnale audio all’ingresso XLR.<br />
4 LED DI POWER STATUS. Il LED verde è acceso quando il diffusore è alimentato<br />
e il commutatore di accensione è nella posizione ON.<br />
5 USCITA SEGNALE XLR MASCHIO. Il connettore XLR di loop del segnale<br />
permette la connessione a catena di più diffusori.<br />
6<br />
CONTROLLO DI LIVELLO. Varia il volume del diffusore.<br />
7 FLAT/BOOST. Il pulsante imposta l’equalizzazione “Flat” o “Boost”.<br />
Quest’ultima agisce come loudness per applicazioni musica quando il<br />
diffusore acustico viene impiegato a bassi livelli di volume. Per tutte le altre<br />
applicazioni voce, dal vivo o di musica riprodotta ad alto volume si consiglia<br />
l’uso dell’equalizzazione nella posizione “Flat”.<br />
8 MIC/LINE. Posizionare il selettore in LINE per l’utilizzo di una sorgente a<br />
livello linea (0 dB) o MIC per l’utilizzo di un microfono.<br />
9 VASCHETTA IEC DEL CONNETTORE DI ALIMENTAZIONE. Presa per il cavo<br />
di rete.<br />
10<br />
PORTAFUSIBILE. Alloggio per fusibile di rete.<br />
11 INTERRUTTORE GENERALE. L’interruttore generale permette l’accensione<br />
e lo spegnimento dell’apparecchio una volta che questo sia collegato alla rete<br />
di alimentazione.<br />
Il connettore di ingresso XLR<br />
segue il seguente standard AES:<br />
PIN 1 = TERRA (GROUND; SHIELD)<br />
PIN 2 = LATO CALDO (HOT; +)<br />
PIN 3 = LATO FREDDO (COLD; -)<br />
HOT GND<br />
COLD<br />
BAL. XLR<br />
PANNELLO<br />
POSTERIORE<br />
1<br />
11<br />
6<br />
5 7<br />
1<br />
CONNESSIONI<br />
9<br />
10<br />
2<br />
3<br />
4<br />
8<br />
11<br />
ITALIANO
ITALIANO<br />
12<br />
Sul pannello posteriore trovano posto tutti i controlli, gli ingressi di segnale e di corrente.<br />
In caso sia necessario cambiare la tensione di alimentazione rivolgersi al proprio rivenditore o<br />
centro assistenza. Questa operazione che richiede la sostituzione del fusibile di protezione<br />
con valore appropriato è da effettuarsi presso un centro autorizzato da <strong>RCF</strong> Spa.<br />
A questo punto potete inserire il connettore di alimentazione e il connettore di segnale, ma<br />
prima di accendere il diffusore assicuratevi che il controllo di volume sia al minimo sia sul<br />
diffusore che sulla sorgente sonora collegata al diffusore (che generalmente sarà un mixer);<br />
è importante anche che il mixer sia già acceso al momento in cui viene acceso il diffusore<br />
a lui collegato. Queste due precauzioni vi eviteranno innanzitutto di accendere i diffusori<br />
in presenza di forti segnali in ingresso (evitando di causare danni al diffusore stesso ma<br />
soprattutto alle persone che vi si possono trovare davanti) e inoltre di far arrivare agli<br />
altoparlanti e al pubblico i fastidiosi “bump” causati dall’accensione delle apparecchiature<br />
audio a monte dei diffusori. Infatti è buona regola che i diffusori amplificati e gli amplificatori<br />
in genere siano sempre le ultime apparecchiature ad essere accese dopo il montaggio e<br />
le prime ad essere spente alla fine dello spettacolo. A questo punto potete accendere il<br />
diffusore e alzare il controllo di livello fino alla linea marcatrice presente sulla scala tra “0”<br />
e “MAX”, per poi correggere successivamente il livello a seconda delle necessità.<br />
Gli amplificatori sono equipaggiati con un microprocessore per la gestione del DSP ed<br />
il controllo dell’amplificatore. La regolare accensione del diffusore è garantita da una<br />
procedura di inizializzazione; durante questa fase di test i LED (”Limiter”, “Signal” e “Power<br />
status”), posti sul modulo amplificatore rimangono spenti per circa 2 secondi. Al termine<br />
della procedura di avvio il LED verde “Power status” rimane acceso fisso. Nel caso di un<br />
malfunzionamento grave del diffusore sul modulo amplificatore il LED rosso “Limiter”<br />
lampeggia. Il diffusore viene posto in stato “mute”.<br />
Il diffusore è provvisto di un adattatore per supporto a stand di 35 mm. I diffusori <strong>ART</strong> devono<br />
essere sospesi solo per mezzo di accessori originali ed approvati. In ogni caso utilizzare<br />
sempre almeno 2 appositi inserti filettati M10 situati su lati opposti del diffusore.<br />
ATTENZIONE: Non sospendere mai il diffusore per mezzo delle maniglie. Le maniglie sono<br />
state progettate per il trasporto del diffusore, non per la sua sospensione.<br />
Il microprocessore è in grado di segnalare tre diversi tipi di guasti tramite il lampeggio<br />
del LED rosso “Limiter” sul pannello amplificatore prima dell’accensione del LED verde<br />
“Power status”. I tre tipi di guasto sono: ATTENZIONE: viene rilevato un errore o un<br />
malfunzionamento autoripristinante non grave e le prestazioni del diffusore non vengono<br />
limitate. LIMITAZIONE: viene rilevato un errore e vengono limitate le prestazioni del<br />
diffusore (il livello sonoro viene ridotto di 3 dB). Questo però non influisce sul funzionamento<br />
generale del diffusore. È comunque necessario contattare il centro assistenza per risolvere il<br />
guasto. GUASTO: viene rilevato un malfunzionamento grave. Il diffusore viene posto nello<br />
stato di “mute”.<br />
INDICAZIONI: 1 o 2 >Attenzione 3 o 4 >Limitazione da 5 a 8 >Guasto<br />
Nel caso di guasto, il LED verde “Power status” rimane spento.<br />
Nel caso si presenti un qualsiasi avviso luminoso da parte del LED rosso “LIMITER”, provare<br />
le seguenti procedure:<br />
- controllare che il diffusore sia correttamente collegato all’alimentazione.<br />
- disconnettere il diffusore dall’alimentazione, attendere 5 minuti quindi ricollegare il<br />
diffusore all’alimentazione.<br />
Se dopo aver effettuato i test, il LED rosso “LIMITER” continua a lampeggiare, contattare<br />
il centro assistenza autorizzato.<br />
SELEZIONE 230 Volt, 50 Hz: VALORE FUSIBILE T 1.6 A 250 V<br />
SELEZIONE 115 Volt, 60 Hz: VALORE FUSIBILE T 3.15 A 250 V<br />
PRIMA DI CONNETTERE<br />
IL DIFFUSORE<br />
PRIMA DI ACCENDERE<br />
IL DIFFUSORE<br />
ACCENSIONE<br />
DEL DIFFUSORE<br />
INSTALLAZIONE<br />
ATTENZIONE<br />
PROTEZIONI ED<br />
INDICAZIONI DI GUASTO!<br />
SELEZIONE DELLA TENSIONE<br />
DI ALIMENTAZIONE<br />
(RISERVATO AI CENTRI SERVIZIO <strong>RCF</strong>)
CONSIGNES DE SÉCURITÉ<br />
1. Toutes les précautions d’utilisation, en particulier les consignes de sécurité, doivent être<br />
lues très attentivement car elles fournissent des informations importantes.<br />
2. Alimentation secteur<br />
a. La tension secteur est suffisamment élevée pour engendrer un risque d’électrocution ;<br />
par conséquent, n’installez ou ne branchez jamais ce produit alors qu’il est allumé.<br />
b. Avant d’allumer le produit, assurez-vous que toutes les connexions ont été réalisées<br />
correctement et que la tension secteur correspond bien au voltage indiqué sur la<br />
plaque d’identification du produit ; dans le cas contraire, veuillez contacter votre<br />
revendeur <strong>RCF</strong>.<br />
c. Les parties métalliques du produit sont reliées à la terre par l’intermédiaire du cordon<br />
secteur. Tout produit de CLASSE I doit être branché à une prise terre.<br />
d. Protégez le cordon secteur contre tout dommage ; assurez-vous qu’il est placé de<br />
sorte qu’il ne soit ni piétiné, ni écrasé par des objets.<br />
e. Pour prévenir tout risque de choc électrique, n’ouvrez jamais le produit: aucun<br />
composant à l’intérieur n’est destiné à l’utilisateur.<br />
3. Assurez-vous qu’aucun objet ou liquide ne pénètre dans l’appareil afin d’éviter tout<br />
risque de court-circuit. N’exposez ce produit ni aux gouttes ni aux éclaboussures. Ne placez<br />
aucun récipient contenant un liquide, par exemple un vase, sur le produit. Ne placez aucune<br />
source de flamme, par exemple des bougies allumées, sur le produit.<br />
4. Ne tentez jamais d’opération, de modification ou de réparation si elle n’est pas<br />
expressément décrite dans ce manuel. Contactez le centre de SAV ou du personnel qualifié<br />
agréé dans chacun des cas suivants :<br />
- Le produit ne fonctionne pas (ou ne fonctionne pas normalement).<br />
- Le cordon secteur est endommagé.<br />
- Des objets ou des liquides se sont introduits dans le produit.<br />
- Le produit a subi un choc violent.<br />
5. Avant de laisser ce produit inutilisé pendant longtemps, débranchez son cordon<br />
secteur.<br />
6. Si ce produit commence à émettre une odeur ou une fumée bizarre, éteignez-le<br />
immédiatement et débranchez le cordon secteur.<br />
7. Ne connectez ce produit à aucun équipement ou accessoire non prévu. Pour suspendre<br />
le produit, utilisez uniquement les points de fixation dédiés ; n’essayez pas de suspendre<br />
le produit en utilisant des éléments inadaptés ou n’ayant pas été conçus pour cet usage<br />
particulier. Vérifiez également que le support auquel le produit est fixé (mur, plafond,<br />
armature, etc.) est approprié et que les composants utilisés pour la fixation (scellement,<br />
vis, arceaux, etc. non fournis par <strong>RCF</strong>) sont adéquats ; ils doivent garantir la sécurité du<br />
système / de l’installation dans le temps et supporter notamment les vibrations mécaniques<br />
générées par les transducteurs. Pour prévenir tout risque de chute, n’empilez pas plusieurs<br />
exemplaires de ce produit sauf si cela est spécifié dans le manuel d’utilisation.<br />
8. <strong>RCF</strong> S.p.A. recommande fortement de faire installer ce produit par du personnel<br />
professionnel qualifié (ou par une société spécialisée) qui pourra garantir<br />
que l’installation est correcte et la certifier conforme à la réglementation<br />
en vigueur. L’ensemble du système audio doit être conforme aux normes et<br />
réglementations actuelles relatives aux systèmes électriques.<br />
9. Supports et chariots<br />
Dans certains cas, les équipements doivent être utilisés exclusivement sur des chariots et<br />
supports recommandés par le fabricant. Déplacez l’ensemble produit / support / chariot<br />
avec une extrême prudence. L’ensemble peut se renverser en raison d’arrêts soudains,<br />
d’une poussée excessive ou même d’un sol irrégulier.<br />
CONSIGNES<br />
DE SÉCURITÉ<br />
IMPORTANT<br />
13<br />
FRANÇAIS
FRANÇAIS<br />
14<br />
10. L’installation d’un système audio professionnel nécessite de tenir compte de nombreux<br />
facteurs mécaniques et électriques (en plus des paramètres strictement acoustiques tels<br />
que la pression sonore, les angles de couverture, la réponse en fréquence, etc.).<br />
11. Surdité<br />
L’exposition à des niveaux de pression acoustique élevés peut entraîner des dommages<br />
auditifs permanents. Le niveau de pression acoustique à partir duquel on peut constater des<br />
pertes du sens de l’ouïe varie en fonction des individus et dépend de la durée d’exposition.<br />
Pour se prémunir contre les niveaux de pression acoustique élevés, toute personne exposée<br />
doit s’équiper d’un dispositif de protection adapté. Vous devez porter des bouchons d’oreille<br />
ou un casque antibruit pendant le fonctionnement d’un transducteur capable de produire<br />
des niveaux de pression sonore élevés. Consultez les spécifications techniques du manuel<br />
d’utilisation pour connaître le niveau de pression acoustique maximal.<br />
NOTES IMPORTANTES<br />
Pour éviter l’apparition de bruit indésirable dans les câbles des signaux ligne, utilisez<br />
exclusivement des câbles blindés et évitez de les faire passer à proximité:<br />
- des équipements qui produisent de puissants champs électromagnétiques<br />
- des câbles secteur<br />
- des câbles d’enceinte.<br />
PRÉCAUTIONS D’UTILISATION<br />
- Placez ce produit loin de toute source de chaleur et veillez toujours à ce que l’air circule<br />
librement autour de lui.<br />
- Ne faites pas fonctionner ce produit en surcharge pendant longtemps.<br />
- Ne forcez jamais sur les commandes du produit (touches, boutons, etc.).<br />
- N’utilisez pas de solvant, d’alcool, de benzène ou d’autre produit volatile pour nettoyer<br />
les parties extérieures de ce produit.<br />
NOTES IMPORTANTES<br />
Avant de connecter et d’utiliser ce produit, veuillez lire ce manuel avec attention et le<br />
conserver à portée de main pour pouvoir le consulter ultérieurement. Le manuel doit être<br />
considéré comme faisant partie intégrante de ce produit et doit être transmis lors de tout<br />
changement de propriétaire car il décrit l’installation et l’utilisation correctes du produit<br />
ainsi que les précautions d’emploi à respecter. <strong>RCF</strong> S.p.A. décline toute responsabilité<br />
concernant l’installation et/ou l’utilisation incorrecte(s) de ce produit.<br />
AVERTISSEMENT: Pour prévenir tout risque d’incendie et de choc électrique, n’exposez<br />
jamais ce produit à la pluie ou à l’humidité.<br />
NOTES IMPORTANTES<br />
PRÉCAUTIONS<br />
D’UTILISATION<br />
NOTES IMPORTANTES<br />
ATTENTION
Évolution technologique, révolution sonore.<br />
En présentant sa série <strong>ART</strong> en 1996, <strong>RCF</strong> s’est positionné aux avant-postes des technologies<br />
relatives aux enceintes actives. Cette gamme d’enceintes se distinguait pas ses performances<br />
exceptionnelles en matière de puissance sonore et de qualité audio malgré un poids réduit<br />
et une robustesse à toute épreuve parfaits pour résister aux usages quotidiens intensifs.<br />
L’équipe de recherche et développement de <strong>RCF</strong> a fait évoluer la technologie <strong>ART</strong> pendant<br />
toute la dernière décennie pour créer des produits référentiels, notamment les <strong>ART</strong> 322-A<br />
et <strong>ART</strong> 310-A ainsi que la nouvelle enceinte <strong>ART</strong> 725-A à amplification numérique.<br />
Pour la conception de ses produits, <strong>RCF</strong> place systématiquement les besoins des artistes<br />
au centre de ses préoccupations afin de proposer des enceintes aux caractéristiques<br />
irréprochables, autant en matière de clarté et de définition sonores que de réduction du<br />
poids du système.<br />
La dernière création de <strong>RCF</strong> est la série <strong>ART</strong> 4. Elle introduit des évolutions technologiques<br />
majeures dans le domaine des enceintes actives qui aboutissent à un concept et un<br />
son révolutionnaires. Le moindre détail de la série <strong>ART</strong> 4 a été étudié pour fournir aux<br />
musiciens et aux professionnels du son un outil d’amplification et de diffusion parfait pour<br />
leurs performances, et cela soir après soir. Les matériaux de haute qualité, la fabrication<br />
extrêmement précise, l’assemblage particulièrement soigné et les nombreux processus de<br />
contrôle qualité complètent idéalement le travail de conception réalisé par l’équipe de<br />
recherche et développement de <strong>RCF</strong>.<br />
Tous les transducteurs des enceintes de la série <strong>ART</strong> 4 utilisent des aimants légers en<br />
néodyme qui garantissent des performances sonores améliorées et réduisent le poids du<br />
système pour faciliter son transport.<br />
Tous les moteurs à compression et tous les transducteurs bénéficient d’une fabrication de<br />
haute précision grâce aux technologies de pointe mises en place par <strong>RCF</strong> en matière de<br />
moulage et d’assemblage. Grâce à la richesse des compétences et de l’expérience de <strong>RCF</strong>,<br />
ces composants sont conformes aux standards de fabrication les plus exigeants.<br />
Toutes les enceintes deux voies de la série <strong>ART</strong> 4 sont équipées d’étages d’amplification<br />
de 400 watts, dont 300 watts sont alloués au woofer et 100 watts au moteur à compression.<br />
Le résultat est un volume de sortie très élevé, un niveau de distorsion extrêmement réduit<br />
et un son incroyablement naturel. Chaque amplificateur dispose d’entrées symétriques<br />
sur XLR et jack, d’une sortie de chaînage sur XLR, d’un commutateur micro/ligne, d’un<br />
réglage de volume et d’un mode d’égalisation commutable (Flat/Boost). L’amplificateur<br />
possède une structure mécanique en aluminium qui le stabilise pendant le transport<br />
et contribue à la dissipation de la chaleur.<br />
Tous les amplificateurs de la série <strong>ART</strong> 4 sont associés à une alimentation électrique SMPS<br />
qui assure une puissance de sortie maximale et un poids minimal.<br />
Le nouveau design de l’enceinte possède un look agressif tout en s’inscrivant dans la<br />
tradition <strong>ART</strong>. Il est le résultat de recherches combinées visant à l’optimisation des qualités<br />
fonctionnelles et acoustiques.<br />
Les enceintes deux voies de la série <strong>ART</strong> 4 possèdent un coffret moulé en polypropylène<br />
composite conçu pour amortir les vibrations, même aux volumes sonores les plus élevés.<br />
L’évent bass reflex a été redimensionné pour améliorer le rendement. Le sommet des<br />
modèles <strong>ART</strong> <strong>410</strong> et <strong>408</strong> est équipé d’une poignée ergonomique avec revêtement en<br />
caoutchouc conçue pour optimiser le transport. Les modèles plus volumineux possèdent<br />
3 poignées ergonomiques scellées (2 latérales et 1 supérieure) avec revêtement en<br />
caoutchouc. La base de chaque enceinte dispose d’une solide embase en acier pour pied<br />
ou tube d’espacement.<br />
La nouvelle forme du coffret des enceintes de la série <strong>ART</strong> 4 permet une utilisation standard<br />
ou en retour de scène. Deux cavités filetées M10 sont prévus pour les accessoires de<br />
montage optionnels destinés aux installations fixes.<br />
INFORMATIONS<br />
RELATIVES<br />
AU PRODUIT<br />
COMPOSANTS<br />
AMPLIFICATEURS<br />
ENCEINTES<br />
15<br />
FRANÇAIS
FRANÇAIS<br />
16<br />
1 ENTRÉES SUR JACK/XLR FEMELLE (SYMÉTRIQUES/ASYMÉTRIQUES). Le<br />
système possède des connecteurs Jack et XLR. Ces entrées symétriques peuvent<br />
être utilisées avec des liaisons symétriques ou asymétriques transportant des<br />
signaux source de niveau micro ou ligne. Le second connecteur symétrique<br />
est câblé en parallèle pour permettre d’envoyer le signal audio à d’autres<br />
enceintes, à des enregistreurs ou à des amplificateurs supplémentaires.<br />
2 LED LIMITER. L’étage de puissance possède un circuit limiteur pour<br />
empêcher l’apparition d’écrêtage (clipping) dans les amplificateurs et de<br />
distorsion dans les haut-parleurs. La LED clignote en ROUGE quand le circuit<br />
d’écrêtage doux (soft clipping) est actif. Le fait que la LED «Limiter» clignote<br />
occasionnellement est acceptable. En revanche, si elle clignote fréquemment<br />
ou reste continuellement allumée, réduisez le niveau du signal.<br />
3 LED SIGNAL. L’indicateur de signal s’allume en vert lorsqu’un signal est<br />
présent dans l’entrée principale.<br />
4 LED POWER STATUS. Cette LED s’allume quand le système est connecté à<br />
la tension secteur et le commutateur secteur est en position marche (ON).<br />
5 SORTIE DE SIGNAL SUR ALR MÂLE. Cette sortie sur XLR délivre le signal<br />
source non traité pour alimenter d’autres enceintes.<br />
6 RÉGLAGE DE VOLUME. Détermine le volume de l’amplificateur. Ce réglage<br />
n’affecte pas le niveau de sortie «LINK» / «INPUT-LINK».<br />
7 SÉLECTEUR FLAT/BOOST. Sélectionne le mode d’égalisation «Flat» ou<br />
«Boost». L’égalisation «Boost» est un loudness recommandé pour la diffusion<br />
de musique de fond lorsque le système fonctionne à bas volume. Pour toutes<br />
les autres applications, nous vous recommandons d’utiliser l’égalisation<br />
«Flat».<br />
8 SÉLECTEUR DE SENSIBILITÉ D’ENTRÉE. Placez le sélecteur en position<br />
«LINE» avec les sources de niveau ligne (0 dB) et en position «MIC» avec les<br />
sources de niveau micro.<br />
9 CONNECTEUR SECTEUR IEC. Le connecteur secteur AC de type IEC est<br />
destiné au raccordement du cordon d’alimentation.<br />
10<br />
PORTE-FUSIBLE. Logement du fusible de la tension secteur.<br />
11 INTERRUPTEUR MARCHE/ARRÊT. Ce commutateur allume/éteint<br />
l’alimentation électrique AC.<br />
Les connecteurs XLR sont conformes<br />
au standard AES suivant:<br />
BROCHE 1 = MASSE (BLINDAGE)<br />
BROCHE 2 = POINT CHAUD (+)<br />
BROCHE 3 = POINT FROID (-)<br />
POINT<br />
CHAUD MASSE<br />
POINT<br />
FROID<br />
XLR<br />
SYMÉTRIQUE<br />
PANNEAU<br />
ARRIÈRE<br />
1<br />
11<br />
6<br />
5 7<br />
CONNEXIONS<br />
1<br />
9<br />
10<br />
2<br />
3<br />
4<br />
8
Vous trouverez tous les réglages, le signal et les entrées utilisées sur le panneau arrière. S’il<br />
est nécessaire de modifier le voltage, contacter votre revendeur ou un centre de SAV agréé<br />
par <strong>RCF</strong>. Cette opération nécessitant un changement de fusible est réservée à un centre de<br />
SAV agréé par <strong>RCF</strong>.<br />
Vous pouvez déjà connecter le cordon secteur et le câble audio ; cependant, avant d’allumer<br />
l’enceinte, vérifiez que son réglage de niveau ainsi que celui de la table de mixage qui<br />
l’alimente sont au minimum. Il est très important que la table de mixage soit déjà en<br />
marche avant d’allumer l’enceinte. Cela permet d’éviter tout dommage aux haut-parleurs<br />
et toute apparition de bruit de mise sous tension émis par des éléments de la chaîne audio.<br />
La bonne habitude à prendre consiste à toujours allumer les enceintes en dernier et à les<br />
éteindre en premier après utilisation. À présent, vous pouvez allumer l’enceinte et la régler<br />
au volume approprié.<br />
L’enceinte possède un microprocesseur qui contrôle les traitements par DSP et l’amplificateur.<br />
Un processus d’initialisation est déclenché à l’allumage de l’enceinte. Pendant cette phase<br />
de test, les LED «Limiter», «Signal» et «Power Status» du module d’amplification restent<br />
éteintes pendant environ deux secondes. À la fin du processus d’initialisation du module<br />
d’amplification, seule la LED verte «Ready» reste constamment allumée. Si une grave erreur<br />
de fonctionnement est constatée dans l’enceinte, la LED de la face avant clignote un certain<br />
nombre de fois tandis que la LED «Limiter» du module d’amplification clignote. L’enceinte<br />
passe en mode muet («mute»).<br />
La base de l’enceinte est équipée d’une embase de 35 mm destinée au montage de<br />
l’enceinte sur un pied ou un tube d’espacement. Les enceintes <strong>ART</strong> ne doivent être<br />
suspendues qu’avec des accessoires adaptés. Quelle que soit la situation, utilisez au moins<br />
deux cavités filetées M10 sur les faces opposées de l’enceinte.<br />
ATTENTION: Ne suspendez jamais les enceintes <strong>ART</strong> par leurs poignées. Les poignées<br />
permettent de transporter l’enceinte mais pas de la suspendre.<br />
Le microprocesseur peut identifier trois types d’erreurs différentes signalées par le<br />
clignotement de la LED rouge «Limiter» du module d’amplification avant l’allumage de la<br />
LED verte «Power Status». Les trois types d’erreurs sont : AVERTISSEMENT: une légère<br />
erreur ou un disfonctionnement résolu automatiquement a été détecté. Les performances de<br />
l’enceinte ne sont pas limitées. LIMITATION: une erreur a été détectée. Les performances<br />
de l’enceinte sont limitées (le volume sonore est réduit de 3 dB). Cela n’affecte pas l’activité<br />
de l’enceinte qui continue de fonctionner. Cependant, il faudra contacter un centre de SAV<br />
pour résoudre le problème. PANNE: une erreur grave a été détectée. L’enceinte passe en<br />
mode muet («mute»).<br />
INDICATIONS LUMINEUSES: 1 ou 2 clignotements > Avertissement<br />
3 ou 4 clignotements > Limitation 5 à 8 clignotements > Panne.<br />
En cas de panne, la LED verte «Ready» reste éteinte. Effectuez les vérifications ci-dessous:<br />
- Vérifiez que l’enceinte est correctement branchée au secteur.<br />
- Assurez-vous que le secteur délivre la tension correcte.<br />
- Vérifiez que l’enceinte n’est pas en surchauffe.<br />
- Débranchez l’enceinte de la tension secteur, attendez quelques minutes puis branchezla<br />
de nouveau. Si la LED «Limiter» est toujours allumée à la suite de ces tests, veuillez<br />
contacter un centre de SAV agréé.<br />
ALIMENTATION SECTEUR 115 Volt, 60 Hz: FUSIBLE T 3.15 A 250 V<br />
ALIMENTATION SECTEUR 115 Volt, 60 Hz: FUSIBLE T 3.15 A 250 V<br />
AVANT DE CONNECTER<br />
L’ENCEINTE<br />
AVANT LA MISE EN<br />
SERVICE DE L’ENCEINTE<br />
MISE EN SERVICE<br />
DE L’ENCEINTE<br />
INSTALLATION<br />
ATTENTION<br />
INDICATIONS D’ERREUR<br />
ET SÉCURITÉ<br />
RÉGLAGE DE LA TENSION<br />
D’ALIMENTATION<br />
(RÉSERVÉ AUX SERVICES TECHNIQUES <strong>RCF</strong>)<br />
!<br />
17<br />
FRANÇAIS
DEUTSCH<br />
18<br />
SICHERHEITSHINWEISE<br />
1. Alle Anweisungen, im Besonderen die sicherheitsrelevanten, sollten mit besonderer<br />
Aufmerksamkeit gelesen werden, da sie entscheidende Informationen enthalten.<br />
2. Hauptstromversorgung<br />
a. Die Netzspannung ist ausreichend hoch, um einen tödlichen Stromschlag zu<br />
verursachen. Installieren oder verbinden Sie das Gerät deshalb nicht bei eingeschalteter<br />
Stromversorgung.<br />
b. Stellen Sie vor dem Einschalten sicher, dass alle Anschlüsse korrekt vorgenommen<br />
wurden und dass die Netzspannung mit der auf dem Typenschild des Gerätes<br />
angegeben Spannung übereinstimmt, anderenfalls nehmen Sie bitte Kontakt zu Ihrem<br />
<strong>RCF</strong>-Händler auf.<br />
c. Die Metallteile des Gerätes sind über das Netzanschlusskabel geerdet. Ein Gerät<br />
in CLASS 1 Bauweise sollte immer über ein Schutzkontaktkabel mit geerdetem<br />
Schutzleiter an eine Netzsteckdose angeschlossen werden.<br />
d. Schützen Sie das Netzkabel vor Beschädigungen. Stellen Sie sicher, dass dieses so<br />
positioniert wird, dass nicht darauf getreten oder von Gegenständen eingedrückt<br />
werden kann.<br />
e. Um vor der Gefahr eines Stromschlags zu schützen, öffnen Sie niemals das Gehäuse des<br />
Gerätes. Im Inneren des Gerätes befinden sich keine für die Bedienung notwendigen<br />
Bauteile.<br />
3. Stellen Sie sicher, dass keine Gegenstände oder Flüssigkeiten ins Innere des Gerätes<br />
gelangen können, da dies zu einem Kurzschluss führen kann. Schützen Sie das Gerät vor<br />
Tropf- und Spritzwasser. Stellen Sie keine mit Flüssigkeit gefüllten Behälter (z.B. Vasen) oder<br />
offene Brandquellen (z.B. Kerzen) auf das Gerät.<br />
4. Versuchen Sie niemals Funktionen, Modifikationen oder Reparaturen am Gerät<br />
durchzuführen, die nicht ausdrücklich in dieser Bedienungsanleitung beschrieben werden.<br />
Kontaktieren Sie Ihr autorisiertes Service-Center oder qualifiziertes Fachpersonal, sollte<br />
eines der folgenden Ereignisse auftreten:<br />
- Das Gerät funktioniert nicht (oder funktioniert nicht korrekt)<br />
- Das Netzkabel wurde beschädigt<br />
- Gegenstände oder Flüssigkeiten sind ins Innere des Gerätes gelangt<br />
- Das Produkt war einer hohen Belastung/ einem heftigen Stoß ausgesetzt.<br />
5. Sollten Sie das Gerät längere Zeit nicht in Betrieb nehmen, trennen Sie das<br />
Stromanschlusskabel vom Netz.<br />
6. Sollte von dem Gerät ein ungewohnter Geruch oder Rauch ausgehen, schalten Sie dieses<br />
unverzüglich aus und ziehen Sie das Netzanschlusskabel.<br />
7. Verbinden Sie das Produkt nur mit dafür vorgesehenen Geräten und Zubehörteilen. Nutzen<br />
Sie für eine hängende Installation ausschließlich die vorgesehenen Verankerungspunkte<br />
und versuchen Sie nicht, das Produkt mit für diesen Zweck ungeeigneten Bauteilen zu<br />
montieren. Prüfen Sie zudem die Eignung der Stützfläche (Wand, Decke, Struktur etc.)<br />
und des Befestigungsmaterials (Dübel, Schrauben, Winkel etc., nicht im Lieferumfang<br />
von <strong>RCF</strong>), um eine langfristige Sicherheit des Systems/ der Installation zu gewährleisten.<br />
Berücksichtigen Sie dabei beispielsweise auch die mechanischen Vibrationen, die gewöhnlich<br />
von einem akustischen Strahler ausgehen. Um die Gefahr von herunterfallenden Geräten<br />
zu verhindern, stapeln Sie nicht mehrere Einheiten dieses Produkts aufeinander, wenn diese<br />
Möglichkeit nicht explizit in der Bedienungsanleitung beschrieben wird.<br />
8. <strong>RCF</strong> S.p.A. empfiehlt nachdrücklich, die Installation des Gerätes ausschließlich<br />
von qualifiziertem Fachpersonal (oder spezialisierten Firmen) durchführen<br />
zu lassen, die eine korrekte Installierung sicherstellen und diese gemäß der<br />
geltenden Bestimmungen zertifizieren können. Das gesamte Audio-System<br />
muss die aktuellen Standards sowie die Vorschriften für elektrische Anlagen<br />
einhalten.<br />
SICHERHEITSVORKEHRUNGEN<br />
WICHTIG
9. Halterungen und Gerätewagen<br />
Das Gerät sollte, falls erforderlich, nur mit vom Hersteller empfohlenen Halterungen<br />
oder Gerätewagen genutzt werden. Der Gesamtaufbau von Gerät/ Halterung/<br />
Gerätewagen sollte mit extremer Vorsicht bewegt werden. Plötzliches Stoppen, zu<br />
starkes Anschieben und unebene Böden könnten zum Umkippen des Aufbaus<br />
führen.<br />
10. Bei der Installation eines professionellen Audiosystems sollten neben rein<br />
akustischen Parametern (wie etwa Schalldruck, Abdeckungswinkel, Frequenzgang<br />
etc.) einige mechanische und elektrische Faktoren beachtet werden.<br />
11. Gehörschädigung<br />
Die Einwirkung hoher Lautstärkepegel kann zu dauerhaften Gehörschädigungen führen. Der<br />
Schalldruckpegel, der zu einer Schädigung des Gehörs führt, unterscheidet sich von Person<br />
zu Person und ist von der Dauer der Einwirkung abhängig. Um potentielle Gefahren durch<br />
hohe Schalldruckpegel zu vermeiden, sollte jeder, der diesen Pegeln ausgesetzt ist, einen<br />
geeigneten Gehörschutz verwenden. Beim Einsatz eines leistungsfähigen Schallerzeugers,<br />
der hohe Lautstärkepegel erzeugt, ist es erforderlich Gehörschutzstöpsel oder Ohrenschützer<br />
zu tragen. Lesen Sie hierzu die Angaben des maximal zulässigen Schalldruckpegels in der<br />
Betriebsanleitung der Lautsprecher.<br />
WICHTIGE HINWEISE<br />
Um das Auftreten von Rauschen durch Mikrofon- oder Linesignalleitungen zu vermeiden,<br />
verwenden Sie ausschließlich abgeschirmte Verbindungskabel und platzieren Sie diese<br />
nicht in der Nähe von:<br />
- Geräten, die starke elektromagnetische Felder erzeugen (z.B.<br />
-<br />
Hochleistungstransformatoren)<br />
Netzstromkabeln<br />
- Lautsprecherleitungen<br />
VORSICHTSMASSNAHMEN<br />
- Stellen Sie das Gerät nicht in der Nähe von Wärmequellen auf UND SORGEN Sie für eine<br />
ausreichende Luftzirkulation<br />
- Überlasten Sie diese Produkt niemals für eine längere Zeit.<br />
- Forcieren Sie niemals die Bedienelemente (Tasten, Kontrollvorrichtungen, usw.).<br />
- Verwenden Sie für die Reinigung der Außenteile keine Lösungsmittel, Alkohol, Benzin<br />
oder andere flüchtige Substanzen.<br />
WICHTIGE HINWEISE<br />
Bevor Sie dieses Gerät in Betrieb nehmen, lesen Sie die Bedienungsanleitung bitte sorgfältig<br />
durch und halten Sie diese zur weiteren Einsichtnahme bereit. Die Bedienungsanleitung<br />
sollte als wesentlicher Bestandteil dieses Produkts verstanden werden und sollte<br />
diesem entsprechend immer beiliegen; auch wenn das Gerät den Besitzer wechselt, um<br />
eine korrekte Installation und Benutzung zu gewährleisten sowie um als Referenz für<br />
Sicherheitsvorkehrungen zu dienen.<br />
R.C.F S.p.A. übernimmt keine Haftung im Falle einer unsachgemäßen Installation und/ oder<br />
Benutzung dieses Produkts.<br />
WARNUNG: Um die Gefahr eines Brandes oder eines Stromschlags auszuschließen, setzen<br />
Sie dieses Produkt niemals Regen oder sonstiger Feuchtigkeit aus.<br />
WICHTIGE HINWEISE<br />
VORSICHTSMASSNAHMEN<br />
WICHTIGE HINWEISE<br />
WARNUNG<br />
19<br />
DEUTSCH
DEUTSCH<br />
20<br />
Technologische evolution, Klangliche revolution<br />
Im Jahr 1996 stieß <strong>RCF</strong> mit der Einführung der Serie <strong>ART</strong> zur Spitze aktiver<br />
Lautsprechertechnologie vor: eine Lautsprecherserie mit perfektem und kraftvollem Klang<br />
sowie leichtem Gehäuse, das stark genug war, dem täglichen Einsatz zu widerstehen.<br />
Das Forschungs- und Entwicklungsteam von <strong>RCF</strong> entwickelte die <strong>ART</strong>-Technologie im<br />
darauffolgenden Jahrzehnt kontinuierlich weiter und brachte Referenzprodukte hervor, wie<br />
die <strong>ART</strong> 322-A, die <strong>ART</strong> 310-A und die neue <strong>ART</strong> 725-A mit digitalen Verstärkern.<br />
Für das <strong>RCF</strong>-Team sind die Bedürfnisse des Benutzers immer das wichtigste Kriterium bei<br />
der Entwicklung neuer Lautsprecherserien mit innovativen Eigenschaften, verbesserter<br />
klanglicher Klarheit und Auflösung sowie noch geringerem Gewicht.<br />
Die neueste Entwicklung ist die Serie <strong>ART</strong> 4: eine Evolutionsstufe aktiver<br />
Lautsprechertechnologie, die revolutionär in Klang und Design ist. Jedes Detail der Serie<br />
<strong>ART</strong> 4 ist sorgfältig durchdacht, um Musikern und Beschallern das perfekte Werkzeug<br />
zur Verstärkung ihrer Darbietung zu geben, Nacht für Nacht. Hohe Materialqualität,<br />
präzise Herstellungsverfahren, sorgfältige Montage und aufwändige Qualitätskontrollen<br />
vervollständigen die bahnbrechenden Konstruktionsleistungen der Forschungs- und<br />
Entwicklungsabteilung von <strong>RCF</strong>.<br />
Alle Lautsprecher in der Serie <strong>ART</strong> 4 verfügen über leichte Neodym-Magnete, die bessere<br />
Wiedergabe und bequemeren Transport garantieren.<br />
Die Kompressionstreiber und Lautsprecher sind Präzisionsprodukte, deren extrem hohes<br />
Qualitätsniveau aus der überlegenen Guss- und Montagetechnologie sowie einem Reichtum<br />
an Erfahrung und Wissen resultiert.<br />
Alle Zweiweg-Lautsprechersysteme der Serie <strong>ART</strong> 4 verfügen über Digitalendstufen der<br />
neuesten Generation mit 400 W, davon 300 W für den Tieftöner und 100 W für den<br />
Kompressionstreiber. Sehr hoher Schalldruck, extrem niedrige Verzerrungen und unglaublich<br />
natürlicher Klang sind das Ergebnis. Jeder Verstärker der Serie <strong>ART</strong> 4 besitzt einen<br />
symmetrischen Eingang mit einer XLR- und einer Klinkenbuchse, eine XLR-Ausgangsbuchse<br />
zum Durchschleifen, einen Eingangsschalter „MIC/LINE“, einen Lautstärkeregler sowie<br />
einen schaltbaren Equalizer-Modus („FLAT/BOOST“). Die mechanische Basis der Endstufe<br />
ist ein robustes Aluminiumprofil, das nicht nur die Verstärkereinheit beim Transport<br />
stabilisiert, sondern auch zur Kühlung dient.<br />
Alle Verstärkereinheiten der Serie <strong>ART</strong> 4 verfügen über Schaltnetzteile (SMPS = switchedmode<br />
power supply), die bei minimalem Transportgewicht maximale Ausgangsleistung<br />
liefern.<br />
Das moderne und zugleich ergonomische Design der Serie <strong>ART</strong> 4 ist das Ergebnis<br />
aufwändiger kombinierter Forschung sowohl auf funktionellem als auch auf akustischem<br />
Gebiet.<br />
Die Gehäuse der Zweiweg-Lautsprecher der Serie <strong>ART</strong> 4 sind aus einem speziellen<br />
Polypropylen-Verbundmaterial gegossen und so konstruiert, dass sie sogar bei maximalen<br />
Pegeln Gehäuseschwingungen dämpfen. Die Bassreflexöffnung ist zur Erreichung eines<br />
noch besseren Wirkungsgrads neu berechnet. Für bequemeres Tragen haben die Modelle<br />
<strong>ART</strong> <strong>408</strong>-A und <strong>ART</strong> <strong>410</strong>-A einen Aluminiumgriff mit Gummi-Handgriff an der Oberseite.<br />
Die größeren Modelle <strong>ART</strong> <strong>412</strong>-A, <strong>ART</strong> <strong>415</strong>-A und <strong>ART</strong> <strong>422</strong>-A und <strong>ART</strong> 425-A besitzen<br />
drei ergonomisch geformte, geschmiedete Aluminiumgriffe mit gummiummantelten<br />
Handgriffen - zwei an den Seiten und einen an der Oberseite. Auf der Unterseite verfügen<br />
alle Modelle über eine stabile Flanschbuchse aus Stahl für ein Lautsprecherstativ oder eine<br />
Distanzstange (zur Montage auf einem Subwoofer).<br />
Durch die neue Gehäuseform lässt sich jedes Modell der Serie <strong>ART</strong> 4 nicht nur aufrecht,<br />
sondern auch als Bühnenmonitor betreiben. Zwei M10-Gewindebuchsen sind zur Aufnahme<br />
optionaler Befestigungskomponenten (U-Bügel) bei Festinstallationen vorgesehen.<br />
ALLGEMEINE<br />
BESCHREIBUNG<br />
KOMPONENTEN<br />
VERSTÄRKER<br />
GEHÄUSE
1 EINGANG, STEREOKLINKE/XLR WEIBLICH (SYMM. / UNSYMM.). Ein<br />
Klinken- oder ein XLR-Stecker lässt sich anschließen. Diese symmetrischen<br />
Eingangsbuchsen sind für den symmetrischen oder unsymmetrischen<br />
Anschluss eines Mikrofons oder einer Hochpegelquelle (line) geeignet. Die<br />
Stereoklinkenbuchse ist parallel zur weiblichen XLR-Buchse angeschlossen und<br />
eignet sich deshalb zum Weiterleiten des Audiosignals an eine zweite Aktivbox,<br />
ein Aufnahmegerät oder einen anderen Verstärker (ggf. symmetrischer Eingang<br />
erforderlich).<br />
2 LIMITER-LED. Die Verstärkereinheit hat eine eingebaute Limiterschaltung<br />
zur Vermeidung von Übersteuerung der Verstärker und Überlastung der<br />
Lautsprecher. Wenn diese Schaltung zur weichen Signalbegrenzung eingreift,<br />
leuchtet die Limiter-Leuchtdiode ROT auf. Dabei ist gelegentliches Aufleuchten<br />
in Ordnung. Wenn die LED häufig blinkt oder permanent leuchtet, reduzieren<br />
Sie den Signalpegel.<br />
3 SIGNAL-LED. Die Signal-Leuchtdiode leuchtet grün, wenn die<br />
Verstärkereinheit am Eingang ein Signal detektiert.<br />
4 NETZKONTROLL-UND ZUSTANDS-LED „STATUS“. Diese LED leuchtet grün,<br />
wenn das Gerät ans Stromnetz angeschlossen ist, der Netzschalter in der<br />
Position ON ist und die Schutzschaltung keinen Fehler (siehe „Fehlermeldungen<br />
der Schutzeinrichtungen“) feststellt.<br />
5 MÄNNLICHER XLR-SIGNALAUSGANG. An dieser XLR-Buchse liegt das<br />
Eingangssignal für das Durchschleifen zu einer weiteren aktiven<br />
Lautsprecherbox.<br />
6 LAUTSTÄRKEREGLER. Bestimmen Sie hiermit die Lautstärke. Der Signalpegel<br />
der männlichen XLR-Ausgangsbuchse (5) bleibt hiervon<br />
unbeeinflusst.<br />
7 SCHALTER „FLAT/BOOST“. Der „Boost“-Equalizer ist eine Loudness-<br />
Korrektur für die Übertragung von Hintergrundmusik bei geringen Lautstärken.<br />
Für alle anderen Anwendungen ist die lineare Stellung „Flat“ empfohlen.<br />
8 EINGANGSEMPFINDLICHKEITSSCHALTER „MIC/LINE“. Schalten Sie auf<br />
LINE bei Benutzung einer Hochpegelquelle (line, 0 dBu) und auf MIC, wenn<br />
Sie ein Mikrofon direkt angeschlossen haben.<br />
9 KALTGERÄTE-EINGANGSBUCHSE (VDE, IEC). Schließen Sie hier das<br />
Netzkabel an.<br />
10<br />
11<br />
SICHERUNGSHALTER. Halter für die Netzsicherung.<br />
NETZSCHALTER. Dieser schaltet die Netzwechselspannung.<br />
Die XLR-Anschlüsse sind nach<br />
folgendem AES-Standard belegt:<br />
PIN 1 = Masse (Abschirmung)<br />
PIN 2 = Nichtinvertiert (HOT; +)<br />
PIN 3 = Invertiert (COLD; -)<br />
(Abbildung XLR-Stecker)<br />
HOT GND<br />
COLD<br />
BAL. XLR<br />
RÜCKSEITE<br />
1<br />
11<br />
6<br />
5 7<br />
ANSCHLÜSSE<br />
1<br />
9<br />
10<br />
2<br />
3<br />
4<br />
8<br />
21<br />
DEUTSCH
DEUTSCH<br />
22<br />
Auf der Rückseite finden Sie alle Bedienelemente sowie die Signal- und die Netzanschlüsse.<br />
Vergewissern Sie sich zuerst, dass der Netzspannungswahlschalter des Lautsprechersystems<br />
sich in der richtigen Position befindet, welche für die europäischen Länder 230 Volt ist.<br />
Der Schalter wird wahrscheinlich in der korrekten Position sein (wenn ihn keine<br />
unautorisierten Person betätigt hat), aber eine kurze Überprüfung kann Probleme<br />
vermeiden. Sollte es doch notwendig sein, die Spannungseinstellung zu ändern, treten<br />
Sie bitte mit Ihrem Händler oder einer autorisierten Service-Werkstatt in Kontakt. Dieser<br />
Vorgang erfordert den Austausch der Sicherung und ist einer von <strong>RCF</strong> autorisierten Service-<br />
Werkstatt vorbehalten.<br />
Schließen Sie nun das Netzkabel und das Signalkabel an, aber stellen Sie vor dem<br />
Einschalten des Lautsprechersystems sicher, dass der Lautstärkeregler (auch der des<br />
Mischpultausgangs) in Minimalstellung steht. Es ist wichtig, dass vor dem Anschalten des<br />
Lautsprechersystems schon das Mischpult angeschaltet ist. Dies vermeidet sowohl eine<br />
Beschädigung des Lautsprechers als auch Knall-artige Einschaltgeräusche von anderen<br />
Teilen der Signalkette. Es ist eine gute Gewohnheit, die Endverstärker immer als Letzte<br />
einzuschalten und sie unmittelbar nach dem Auftritt auszuschalten. Nun können Sie das<br />
Lautsprechersystem anschalten und mit dem Lautstärkeregler einen geeigneten Pegel<br />
einstellen.<br />
Die Flanschbuchse an der Unterseite zum Betrieb der Lautsprecherbox auf einem<br />
Lautsprecherstativ hat den Normdurchmesser von 35 mm. Zum Aufhängen von <strong>ART</strong>-<br />
Lautsprecherboxen DÜRFEN NUR zugelassene Befestigungskomponenten zum Einsatz<br />
kommen. Benutzen Sie dazu in jedem Fall beide an den Gehäuseseiten befindlichen M10-<br />
Gewinde.<br />
/!\ WARNUNG: Hängen Sie Lautsprecherboxen nie an ihren Griffen auf. Griffe sind für den<br />
Transport vorgesehen, nicht für rigging.<br />
Der Mikroprozessor ist in der Lage, drei verschiedene Arten von Störungen durch<br />
unterschiedliches Blinken der roten LED „LIMITER” auf dem Bedienfeld des Verstärkers<br />
vor dem Aufleuchten der grünen LED „READY” anzuzeigen. Bei den drei Störungsarten<br />
handelt es sich um: WARNUNG: ein leichter Fehler oder eine selbst wiederherstellbare<br />
Fehlfunktion liegt vor, und die Wiedergabe der Lautsprecherbox ist nicht eingeschränkt.<br />
SIGNALBEGRENZUNG (Limiting): die Schutzschaltung hat einen Fehler festgestellt und<br />
das Audiosignal der Lautsprecherbox begrenzt (der Schallpegel ist um 3 dB reduziert). Dies<br />
beeinträchtigt die Funktion der Lautsprecherbox nicht, da sie weiterarbeitet. Es ist dennoch<br />
notwendig, eine Service-Werkstatt zu kontaktieren, um dieses Problem zu beheben.<br />
SCHWERER FEHLER: eine ernste Fehlfunktion ist aufgetreten. Die Lautsprecherbox ist<br />
stummgeschaltet. Zahl der Blinksignale:<br />
1 oder 2 > Warnung 3 oder 4 > Signalbegrenzung 5 bis 8 > Schwerer Fehler<br />
Im Fall eines schweren Fehlers bleibt die grüne „Status“- LED ausgeschaltet.<br />
Führen Sie im Fall einer dieser Fehlermeldungen folgende Tests durch:<br />
- Überprüfen Sie, ob die Lautsprecherbox richtig ans Spannungsnetz angeschlossen ist.<br />
- Stellen Sie sicher, dass die richtige Netzspannung eingestellt ist.<br />
- Vergewissern Sie sich, dass die Verstärkereinheit nicht überhitzt ist.<br />
- Trennen Sie die Lautsprecherbox vom Spannungsnetz, warten Sie einige Minuten, und<br />
schließen Sie diese dann wieder an. Wenn nach diesen Überprüfungen die rote „LIMITER“-<br />
LED noch leuchtet, treten Sie bitte mit einer autorisierten Service-Werkstatt in Kontakt.<br />
230 Volt, 50 Hz: SICHERUNG T 1.6 A 250 V<br />
115 Volt, 60 Hz: SICHERUNG T 3.15 A 250 V<br />
VOR DEM ANSCHLIESSEN<br />
DES LAUTSPRECHERSYSTEMS<br />
VOR DEM EINSCHALTEN<br />
DES LAUTSPRECHERSYSTEMS<br />
INSTALLATION<br />
WARNUNG<br />
FEHLERMELDUNGEN DER<br />
SCHUTZEINRICHTUNGEN<br />
NETZSPANNUNGSEINSTELLUNG<br />
(AUTORISIERTEN SERVICE-WERKSTÄTTEN<br />
VORBEHALTEN)<br />
!
ACOUSTICAL<br />
Frequency<br />
response<br />
Max SPL<br />
Horizontal<br />
Coverage<br />
Vertical<br />
Coverage<br />
Crossover point<br />
TRANSDUCERS<br />
Low frequency<br />
High frequency<br />
AMPLIFIER<br />
Total power<br />
Low section<br />
High section<br />
CONNECTIONS<br />
Signal input/<br />
output<br />
Power input<br />
DSP and<br />
Protection<br />
Circuits<br />
PHISICAL<br />
SPECIFICATIONS<br />
Dimensions<br />
(w, h, d)<br />
Weight<br />
Colour<br />
<strong>ART</strong> <strong>408</strong>-A<br />
65 - 20 kHz<br />
126 dB<br />
90°<br />
70°<br />
1.800<br />
8” neo, 2.5” v.c.<br />
1” neo, 1.4” v.c.<br />
480, 291, 274 mm<br />
9.2 Kg<br />
Anthracite grey<br />
<strong>ART</strong> <strong>410</strong>-A<br />
50 - 20 kHz<br />
127 dB<br />
90°<br />
70°<br />
1.800<br />
10” neo, 2.5” v.c.<br />
1” neo, 1.4” v.c.<br />
549, 340, 304 mm<br />
10.6 Kg<br />
Anthracite grey<br />
<strong>ART</strong> <strong>412</strong>-A<br />
50 - 20 kHz<br />
127 dB<br />
90°<br />
60°<br />
1.800<br />
12” neo, 2.5” v.c.<br />
1” neo, 1.4” v.c.<br />
637, 384, 363 mm<br />
14.4 Kg<br />
Anthracite grey<br />
400 Watt<br />
300 Watt<br />
100 Watt<br />
<strong>ART</strong> <strong>415</strong>-A<br />
50 - 20 kHz<br />
128 dB<br />
90°<br />
60°<br />
1.800<br />
15” neo, 2.5” v.c.<br />
1” neo, 1.4” v.c.<br />
Jack-XLR male / XLR female<br />
VDE AC socket<br />
708, 437, 389 mm<br />
17.8 Kg<br />
Anthracite grey<br />
SPECIFICATIONS<br />
<strong>ART</strong> <strong>422</strong>-A<br />
45 - 20 kHz<br />
128 dB<br />
90°<br />
60°<br />
1.300<br />
12” neo, 3” v.c.<br />
2 way equalisation, crossover filtering, Fast limiter, RMS limiter<br />
2” neo, 2.5” v.c.<br />
637, 384, 363 mm<br />
16.4 Kg<br />
Anthracite grey<br />
µ<br />
<strong>ART</strong> 425-A<br />
45 - 20 kHz<br />
129 dB<br />
90°<br />
60°<br />
1.300<br />
±<br />
÷<br />
15” neo, 3” v.c.<br />
2” neo, 2.5” v.c.<br />
708, 437, 389 mm<br />
17.8 Kg<br />
Anthracite grey
www.rcf.it<br />
HEADQU<strong>ART</strong>ERS:<br />
<strong>RCF</strong> S.p.A. Italy<br />
tel. +39 0522 274 411<br />
e-mail: info@rcf.it<br />
<strong>RCF</strong> UK<br />
tel. 0844 745 1234<br />
Int. +44 870 626 3142<br />
e-mail: info@rcfaudio.co.uk<br />
<strong>RCF</strong> France<br />
tel. +33 1 49 01 02 31<br />
e-mail: france@rcf.it<br />
<strong>RCF</strong> Germany<br />
tel. +49 2203 925370<br />
e-mail: germany@rcf.it<br />
<strong>RCF</strong> Spain<br />
tel. +34 91 817 42 66<br />
e-mail: info@rcfaudio.es<br />
<strong>RCF</strong> Belgium<br />
tel. +32 (0) 3 - 3268104<br />
e-mail: belgium@rcf.it<br />
<strong>RCF</strong> USA Inc.<br />
tel. +1 (603) 926-4604<br />
e-mail: info@rcf-usa.com<br />
10307225 RevE