freestanding outdoor grill asador autónomo para exteriores gril d ...
freestanding outdoor grill asador autónomo para exteriores gril d ...
freestanding outdoor grill asador autónomo para exteriores gril d ...

Create successful ePaper yourself
Turn your PDF publications into a flip-book with our unique Google optimized e-Paper software.
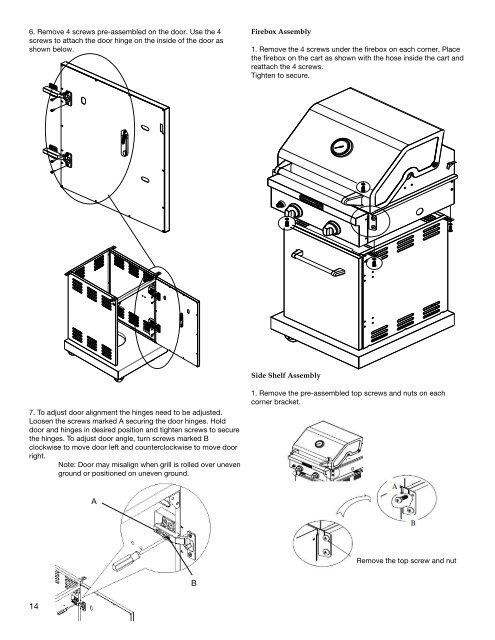
6. Remove 4 screws pre-assembled on the door. Use the 4<br />
screws to attach the door hinge on the inside of the door as<br />
shown below.<br />
7. To adjust door alignment the hinges need to be adjusted.<br />
Loosen the screws marked A securing the door hinges. Hold<br />
door and hinges in desired position and tighten screws to secure<br />
the hinges. To adjust door angle, turn screws marked B<br />
clockwise to move door left and counterclockwise to move door<br />
right.<br />
Note: Door may misalign when <strong><strong>gril</strong>l</strong> is rolled over uneven<br />
ground or positioned on uneven ground.<br />
14<br />
A<br />
B<br />
Firebox Assembly<br />
1. Remove the 4 screws under the firebox on each corner. Place<br />
the firebox on the cart as shown with the hose inside the cart and<br />
reattach the 4 screws.<br />
Tighten to secure.<br />
Side Shelf Assembly<br />
1. Remove the pre-assembled top screws and nuts on each<br />
corner bracket.<br />
Remove the top screw and nut