Create successful ePaper yourself
Turn your PDF publications into a flip-book with our unique Google optimized e-Paper software.
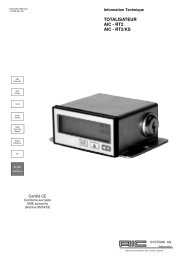
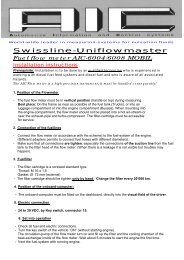
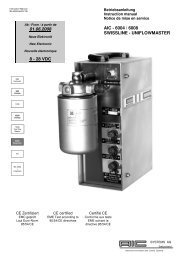
Instruction Manual<br />
<strong>BA</strong> 900-<strong>4000</strong>/<strong>def</strong>/05.06<br />
888<br />
Instruktor<br />
900<br />
Veritas<br />
1000<br />
<strong>4000</strong><br />
Veritas<br />
5000<br />
Fuel flow<br />
Master<br />
6000<br />
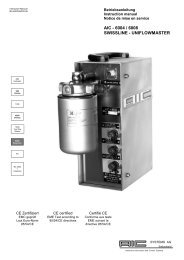
Swissline<br />
FS<br />
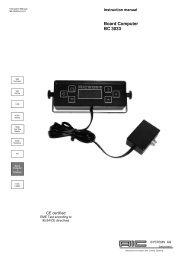
BC 2022<br />
+<br />
Totalizers<br />
CE Zertifiziert<br />
EMC geprüft<br />
Laut Euro-Norm<br />
95/54/CE<br />
CE certified<br />
EME Test according to<br />
95/54/CE directives<br />
Certifié CE<br />
Conforme aux tests<br />
EME suivant la<br />
directive 95/54/CE<br />
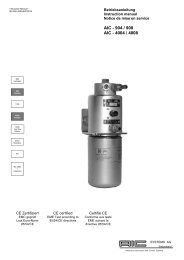
Betriebsanleitung<br />
Instruction manual<br />
Notice de mise en service<br />
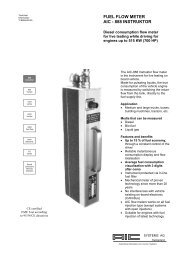
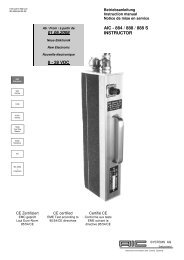
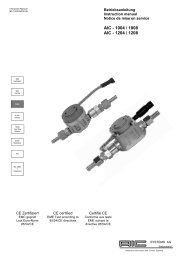
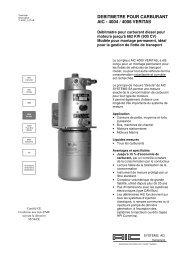
<strong>AIC</strong> - 904 / 908<br />
<strong>AIC</strong> - 4004 / 4008<br />
SYSTEMS AG<br />
Switzerland<br />
Automotive Information and Control <strong>Systems</strong>
d Inhalt<br />
e Contents<br />
f<br />
Sicherheitshinweise<br />
Behandlung<br />
Bevor Einbau<br />
Einbau an Fahrgestell<br />
Stellungen<br />
Anschluss an<br />
Kraftstoffleitungen<br />
Entlüftung<br />
Wartung<br />
Prinzip Schema<br />
Elektrische<br />
Anschlussschema<br />
Geräte Identifikation<br />
und Technische Daten<br />
d Sicherheitshinweise<br />
e Safety first<br />
f<br />
Die <strong>AIC</strong> 904, 908, 4004 und<br />
The <strong>AIC</strong> 900 and <strong>4000</strong> meters<br />
4008 Messgeräten können für can only be installed for any fuel<br />
alle flüssigen Kraftstoffen<br />
verwendet werden.<br />
flow metering.<br />
Other applications are not<br />
guaranteed by <strong>AIC</strong>.<br />
Anderen Anwendungen sind<br />
nicht von <strong>AIC</strong> garantiert.<br />
2<br />
2<br />
3<br />
4<br />
5<br />
6<br />
7<br />
8<br />
9<br />
10<br />
11<br />
Der Geräteeinbau erfolgt unter<br />
Leitung eines Dieselmotoren<br />
vertrauten Fachmannes, welcher<br />
mit Arbeiten an Dieselkraftstoffanlagen<br />
vertraut ist und alle<br />
damit verbundenen<br />
Gefahrenmomente kennt.<br />
Note on Safety<br />
Handling<br />
Before mounting<br />
Mounting on frame<br />
Positioning<br />
Connection to fuel lines<br />
Bleeding / venting<br />
Maintenance<br />
Working principle<br />
Electrical connection<br />
Device identification and<br />
Technical data<br />
The meters shall be installed,<br />
connected, commissioned,<br />
operated and maintained under<br />
supervision of a qualified engine<br />
engineer, who is aware of all<br />
danger factors.<br />
d Behandlung<br />
e Handling<br />
f<br />
Die <strong>AIC</strong> Messgeräten sind<br />
The <strong>AIC</strong> measuring instruments<br />
Messinstrumenten und sollten are accurate measuring<br />
entsprechend behandelt werden. equipment and shall be used as<br />
such.<br />
Achtung !<br />
= verboten, kann zu<br />
fehlerhaftem Betrieb<br />
oder Zerstörung<br />
führen.<br />
2<br />
2<br />
2<br />
3<br />
4<br />
5<br />
6<br />
7<br />
8<br />
9<br />
10<br />
11<br />
Caution !<br />
= forbidden, can lead<br />
to incorrect operation<br />
or destruction.<br />
Sommaire<br />
Conseils de sécurité<br />
Manipulation<br />
Avant montage<br />
Montage sur châssis<br />
Positionnement<br />
Connexion aux tuyaux<br />
de carburant<br />
Purge<br />
Entretien<br />
Schéma de principe<br />
Connexion électrique<br />
Identification des<br />
appareils et données<br />
techniques<br />
Sécurité d'abord<br />
Les appareils <strong>AIC</strong> 900 et <strong>4000</strong><br />
doivent être exclusivement<br />
utilisés comme débitmètre pour<br />
carburant.<br />
<strong>AIC</strong> ne garanti pas les<br />
applications avec d'autres<br />
liquides.<br />
2<br />
2<br />
3<br />
4<br />
5<br />
6<br />
7<br />
8<br />
9<br />
10<br />
11<br />
Les appareils devront être<br />
installés, raccordés, mis en<br />
service et entretenus sous la<br />
surveillance d'un ingénieur<br />
motoriste qualifié, qui aura<br />
connaissance des dangers<br />
inhérent à ce montage.<br />
Manipulation<br />
Les appareils de mesure <strong>AIC</strong><br />
sont des instruments de<br />
précision et doivent être utilisé<br />
comme tel.<br />
Attention !<br />
= interdit, peut<br />
provoquer des<br />
dysfonctionnements<br />
ou la destruction.
d Bevor Einbau:<br />
e Before mounting:<br />
f<br />
Die Kraftstoffleitungen werden The fuel line connection shall be<br />
gemäss Anschlussschema<br />
done as per the working<br />
Seite 9 angeschlossen.<br />
principle given in annex (p 9).<br />
Bitte Anschlussnippel vor der<br />
Nipples shall be oiled before<br />
Montage ölen.<br />
mounting.<br />
Bemerkung 1:<br />
Vor der Demontage der<br />
Kraftstoffleitungen müssen diese<br />
eindeutig als "Vorlaufleitung"<br />
und "Rücklaufleitung" markiert<br />
werden, damit keine<br />
Verwechselung entstehen kann.<br />
Bemerkung 2:<br />
Der Anschluss der<br />
"Vorlaufleitung" und<br />
"Rücklaufleitung" an der<br />
Vortex-Killer © ist nicht<br />
vorgeschrieben.<br />
Der optionale Universal-<br />
Anschlusssatz erlaubt eine<br />
einfache und schnelle Montage.<br />
Sind die Kraftstoffleitungen am<br />
Tank mit Schneidring /<br />
Überwurfmutter oder<br />
Schnellkupplung angeschlossen,<br />
so wird der Anschluss direkt mit<br />
den entsprechenden Nippel<br />
gemacht (Montage ohne<br />
Zerstörung).<br />
NB : Fahrzeugspezifische<br />
Stecknippel können vom<br />
Fahrzeuglieferanten beschafft<br />
werden.<br />
Sollten die "Kraftstoffleitungen<br />
am Tank nicht lösbar sein, so<br />
muss Mann die Leitungen ,in der<br />
nähe des Messgerätes ,an<br />
einem gut zugänglichen Ort<br />
trennen. Die Leitungen werden<br />
mit Nippeln aus dem Universal-<br />
Anschlusssatz verlängert und<br />
am Messgerät angeschlossen.<br />
Rücklaufleitungsanschluss am<br />
Tank mit Mutter und Kugel (DN<br />
14 oder DN 16) schliessen um<br />
eine Verschmutzung durch<br />
Staub oder Wasser zu<br />
verhindern.<br />
Verschiedene<br />
Fahrzeugspezifische<br />
Anschlusssätze sind optional<br />
erhältlich von <strong>AIC</strong>.<br />
Remark 1:<br />
It is absolutely necessary to<br />
mark the fuel lines "feed line to<br />
the engine" and "return line<br />
from the engine" before<br />
disconnecting them, to avoid<br />
mixing.<br />
Remark 2:<br />
The connection of the fuel lines<br />
"feed line to the engine" and<br />
"return line from the engine"<br />
to the Vortex-Killer © can be done<br />
indifferently.<br />
Using the optional universal<br />
connection kit, reduces the<br />
mounting time and makes the<br />
installation easier.<br />
If the original fuel lines of the<br />
truck are screwed, or fixed with<br />
plug type connectors on the fuel<br />
tank, it is advantageous to fit the<br />
fuel lines, necessary to connect<br />
the <strong>AIC</strong>-measuring-unit, with<br />
appropriate fittings. This allows<br />
a « non-destructive »<br />
connection.<br />
NB : Vehicle specific connectors<br />
can be from vehicle dealer<br />
supplied.<br />
If the fuel lines can not be easily<br />
disconnected, they must then be<br />
cut at an accessible place as<br />
close as possible to the fuel oil<br />
meter.<br />
Fit to the 4 hose ends the<br />
nipples and bolt, in order to<br />
connect them to the fuel oil<br />
meter.<br />
Close the "return line from<br />
engine" connection of the tank<br />
with the stainless steel ball (DN<br />
14 or DN 16) and a bolt, to avoid<br />
water or dirt to come into the<br />
tank.<br />
Various vehicle specific<br />
connection-kits are available<br />
optionally from <strong>AIC</strong>.<br />
3<br />
Avant montage:<br />
Le raccordement des conduites<br />
à carburant s’effectue selon le<br />
schéma de raccordement fourni<br />
en annexe (p 9).<br />
Nous recommandons de huiler<br />
les raccords avant le montage.<br />
Remarque 1:<br />
Il est primordial de marquer<br />
clairement la conduite<br />
"alimentation moteur" et la<br />
conduite de "retour du moteur"<br />
avant de les débrancher afin de<br />
ne jamais les confondre !<br />
Remarque 2:<br />
La connexion au Vortex-Killer ©<br />
par les conduites "alimentation<br />
moteur" et "retour du moteur"<br />
est indifférente.<br />
En utilisant le kit de montage<br />
universel optionnel, le montage<br />
est plus simple et le temps de<br />
travail sera réduit.<br />
Si les conduites d’alimentation et<br />
de retour sont montées au<br />
réservoir par raccords à bague<br />
coupante et écrou de rappel ou<br />
par raccords rapides, le<br />
raccordement se fait directement<br />
par des raccords appropriés<br />
(montage sans destruction).<br />
NB : des raccords spécifiques au<br />
véhicules peuvent être fournis<br />
par le revendeur.<br />
Si, par contre, les conduites ne<br />
sont pas démontables côté<br />
réservoir, il faut les sectionner à<br />
un endroit bien accessible<br />
près du débitmètre. Insérez dans<br />
les 4 bouts de tube ainsi obtenus<br />
les raccords sphériques et<br />
écrous de rappel pour effectuer<br />
le raccordement avec le<br />
débitmètre.<br />
Fermez la connexion de retour<br />
au réservoir par un écrou de<br />
rappel avec bille (DN 14 ou DN<br />
16) pour éviter la pénétration<br />
d'eau ou de saletés.<br />
Différents kits de montage,<br />
spécifique pour chaque type de<br />
véhicule, sont disponibles en<br />
option chez <strong>AIC</strong>.
d Einbau an Fahrgestell<br />
e Mounting on frame<br />
f<br />
Das Messgerät soll in der Nähe Fit the <strong>AIC</strong>-measuring unit in<br />
des Fahrzeugtankes montiert<br />
vertical position (filter pointing<br />
werden (kurze<br />
downwards) as near as possible<br />
Anschlussleitungen), in<br />
of the fuel tank, on a frame<br />
vertikaler Lage (Filter nach<br />
member, (inner or outer), on a<br />
unten), am Fahrgestellträger<br />
crossbeam of the frame or on a<br />
(innen oder aussen), an einer<br />
support behind the cab. The<br />
Traverse des Fahrgestelles oder filter cartridge of the measuring<br />
hinter der Kabine. Die<br />
unit must be easily accessible<br />
Filterpatrone des Messgeräte for maintenance.<br />
muss gut zugänglich sein<br />
The measuring unit should<br />
(Wartung).<br />
not be subjected to a stream<br />
Das Messgerät darf nicht im<br />
of hot air, i.e. from the exhaust<br />
heissem Luftstrom z.B.<br />
pipe or the turbocharger. Never<br />
Auspuffkollektor- oder Turbo-<br />
fit the measuring-unit on the<br />
Abluft ausgesetzt sein.<br />
engine body or on a jointed part<br />
Gerät nie direkt am Motor oder of it (vibration).<br />
an einem starr mit dem Motor<br />
In travel coaches and buses are<br />
verbundenen Teil montieren<br />
the tank or frame are not<br />
(Schwingungen).<br />
accessible. In these cases the<br />
Bei Autobussen und Reisecars fuel oil meter will be installed in<br />
ist der Kraftstofftank und das<br />
the engine room at a convenient<br />
Fahrgestell nicht zugänglich.<br />
place. Make sure that the<br />
Das Messgerät wird in diesem connection "Supply from tank" is<br />
Falle an geeigneter Stelle im<br />
connected directly to the meter<br />
Motorraum montiert. Es ist zu<br />
(before the fuel feed pump).<br />
beachten dass an Anschluss<br />
Fix the measuring unit on the<br />
"Vorlauf vom Tank" des Gerätes vehicle with 2 bolts M 10 and<br />
die direkt vom Fahrzeugtank<br />
with solid washers<br />
kommende Vorlaufleitung (vor<br />
der Förderpumpe)<br />
angeschlossen wird.<br />
Gerät mit mindestens 2<br />
Schrauben M10 und<br />
Geräteseitig mit<br />
Unterlegscheiben mit<br />
30 x 10 x 2 mm montieren.<br />
30 x 10 x 2 mm.<br />
Tank /<br />
Reservoir<br />
Empfohlene Lage<br />
Recommended positioning<br />
Positionnement recommandé<br />
4<br />
Montage sur châssis<br />
Le montage se fera de<br />
préférence près du réservoir à<br />
carburant (permettant des<br />
conduites de raccordement<br />
courtes).Monter le débitmètre<br />
<strong>AIC</strong> en position verticale (filtre<br />
vers le bas), au longeron du<br />
châssis (à l’intérieur ou à<br />
l’extérieur), sur une traverse ou<br />
derrière la cabine. La cartouche<br />
de filtrage du débitmètre doit<br />
être facilement accessible<br />
(entretien).<br />
Le débitmètre ne doit pas être<br />
exposé à l’air chaud, près du<br />
collecteur d’échappement ou du<br />
turbo par exemple.<br />
Ne montez jamais le débitmètre<br />
directement sur le moteur ou sur<br />
un support solidaire au moteur<br />
(vibrations).<br />
Pour les bus de voyage ainsi<br />
que les car l'accès au réservoir<br />
ou au châssis n'est souvent pas<br />
possible. Le débitmètre devra<br />
alors être fixé à une place<br />
convenable dans le<br />
compartiment moteur.<br />
Veuillez porter attention au fait<br />
que le tuyau "alimentation depuis<br />
réservoir" soit connecté<br />
directement au réservoir, après<br />
la pompe de circulation de<br />
carburant.<br />
Fixez le débitmètre avec 2 vis M<br />
10 munis de rondelles<br />
30 x 10 x 2 mm.
Stellungen:<br />
Um den Einbau des Gerätes zu<br />
optimieren, kann die Vortex-<br />
Killer © Positioning:<br />
in order to facilitate the<br />
connection of the piping to the<br />
(Mischkammer)<br />
flow meter, the Vortex-Killer<br />
gedreht und auch das Messgerät<br />
in die zweckmässigen Position<br />
gedreht werden.<br />
© d e f<br />
<br />
head can be turned. Is it also<br />
possible to turn the body of the<br />
meter.<br />
Drehung desVortex-Killer © :<br />
Schraube (SW 19) auf der<br />
Vortex-Killer © lösen . Vortex-<br />
Killer © in die gewünschte<br />
Position drehen damit die<br />
Leitungen "Vorlauf zum Motor"<br />
und "Rücklauf vom Motor" gut<br />
angeschlossen werden können.<br />
Vortex-Killer © mit der Schraube<br />
(SW 19) mit 40 Nm Drehmoment<br />
festziehen.<br />
Drehung des Messgeräts:<br />
Treibstofffilter abschrauben.<br />
Schrauben Sie die 4<br />
Inbusschrauben die das<br />
Messgerät am Montagewinkel<br />
befestigen ab. Jetzt können Sie<br />
das Messgerät um 90 ° nach<br />
rechts oder nach links drehen<br />
um eventuell die Leitung<br />
"Vorlauf vom Tank" besser<br />
anschliessen zu können.<br />
Schrauben Sie wieder die 4<br />
Inbusschrauben wieder mit 2<br />
Nm Drehmoment fest,<br />
Treibstofffilter anschrauben.<br />
+/- 90°<br />
<br />
Nicht lösen<br />
Do not lose<br />
Ne pas desserrer<br />
Positioning of the Vortex-Killer © :<br />
Unscrew the valve - banjo bolt<br />
on the top of the meter (19<br />
mm). Turn the Vortex-Killer ©<br />
in the appropriate position for the<br />
"feed line to engine" and for the<br />
"runback from engine". After<br />
positioning, tight the valve -<br />
banjo bolt to a torque of 40 Nm.<br />
NB: gaskets have O-rings thus, it<br />
is not necessary to change them<br />
while positioning the Vortex-<br />
Killer © .<br />
Positioning of the meter body:<br />
Remove the screw-in filter.<br />
Unscrew the 4 Allen-screws M5<br />
, that fixes the body of the<br />
meter to the mounting plate, you<br />
can then turn the body to the left<br />
or to the right by 90° of angle. An<br />
easier connection of the "feed<br />
line from tank" is then possible.<br />
Mount back the 4 Allen screw<br />
M5 (2 Nm torque). Put the<br />
screw-filter back in position.<br />
5<br />
<br />
Positionnement:<br />
Afin de faciliter le montage des<br />
conduites de raccordement au<br />
débitmètre, il est possible de<br />
tourner la tête du Vortex-Killer ©<br />
, ainsi que de faire pivoter le<br />
corps du débitmètre.<br />
Orientation du Vortex-Killer © :<br />
Desserrez la soupape - vis<br />
creuse en haut du débitmètre<br />
(clef de 19mm). Tournez le<br />
Vortex-Killer © dans la position la<br />
plus adéquate pour le montage<br />
des conduites "alimentation du<br />
moteur" et "retour du moteur".<br />
Après positionement, resserrez<br />
la soupape - vis creuse avec un<br />
couple de serrage de 40 Nm.<br />
NB : les joints de la soupape<br />
sont munis de O-ring et n'ont pas<br />
besoin d'être changés !<br />
Orientation du corps :<br />
Enlevez le filtre à visser.<br />
Desserrez les 4 vis à 6 pan<br />
creux M5 , qui fixent le corps<br />
du débitmètre au support, vous<br />
pouvez alors tourner le boîtier de<br />
90° vers la gauche ou vers la<br />
droite pour faciliter<br />
éventuellement la connexion de<br />
la conduite "alimentation depuis<br />
le réservoir". Resserrez les 4 vis<br />
M5 (2 Nm). Remettez le filtre à<br />
visser en position.<br />
+/- 360°
d Anschluss an<br />
e Connection to the fuel hoses f<br />
Kraftstoffleitungen<br />
If the vehicle fuel lines are not<br />
Wenn die Kraftstoffleitungen des screwed, but plugged-in or<br />
Fahrzeuges nicht an den<br />
inserted only, and if no filter is<br />
Tankanschlüssen verschraubt, mounted close to the fuel tank,<br />
sondern auf- oder eingesteckt shall the supply and return fuel<br />
sind, und wenn in Tanknähe kein lines be cut at an easy and<br />
Vorfilter montiert ist, werden die accessible place.<br />
Vorlauf- und die Rücklaufleitung With the help of the optional<br />
am besten an gut zugänglicher connection kit, the 4 hoses-end<br />
Stelle nahe der Tankanschlüsse will then be mounted with<br />
getrennt.<br />
nipples and female screws M16<br />
In die so entstehenden 4<br />
x 1.5. The connection to the <strong>AIC</strong><br />
Leitungs-Anschlussstellen<br />
flow meter will be made with the<br />
werden je 1 Kugelnippel mit M16<br />
x 1.5 Überwurfmutter<br />
UNIPRESS hoses and adaptors.<br />
eingeschlagen. Mit den im<br />
Important : all connections<br />
optionalen Anschlusssatz<br />
from tank, couplings and<br />
enthaltenen Verschraubungen measuring instrument must be<br />
und UNIPRESS -<br />
absolutely tight. When fuel<br />
Kraftstoffschlauch werden die<br />
leakage happens on suction<br />
Verbindungen zum <strong>AIC</strong>-<br />
side, no fuel leak can be seen,<br />
Messgerät hergestellt.<br />
Wichtig : alle Anschlüsse,<br />
but engine malfunctions can be<br />
expected.<br />
von Tank, Kupplungen und<br />
After installation of the <strong>AIC</strong>-<br />
Messgerät und sollen absolut<br />
measuring-unit, the filter<br />
dicht sein. Bei Undichtheit auf cartridge must be filled up with<br />
der Saugseite ist keine Leckage clean Diesel fuel (approx. 1 litre)<br />
sichtbar aber Motorenstörungen before starting the engine.<br />
vorprogrammiert.<br />
It is recommended to fill the<br />
filter via the external holes<br />
Nach dem Einbau des<br />
(inlet side of the filter) in order to<br />
Messgerätes muss die<br />
to filter the fuel brought in.<br />
Filterpatrone vor dem Starten Tighten up the filter cartridge by<br />
des Motors mit sauberem<br />
Dieselkraftstoff gefüllt werden<br />
(ca. 1 Lt.).<br />
Es ist zu empfehlen, den<br />
Filter über die äußeren<br />
Löcher (Einlassseite des Filters)<br />
zu befüllen, damit auch der<br />
eingefüllte Kraftstoff filtriert wird.<br />
Die Filterpatrone nur von Hand<br />
festziehen.<br />
hand only.<br />
Diesel nicht hier auffühlen<br />
Do not fill Diesel this side<br />
Ne pas verser de Diesel par<br />
l'orifice central<br />
6<br />
Connexion aux tuyaux de<br />
carburant<br />
Si les conduites d’alimentation et<br />
de retour montées au réservoir<br />
ne sont pas vissées, mais serties<br />
ou indémontables, les tuyaux<br />
devront alors être coupés à un<br />
endroit dégagé et accessible.<br />
Les 4 bouts de tuyaux coupés<br />
devront, avec l'aide du kit de<br />
montage, être équipés avec les<br />
écrous M 16 x 1,5 et les douilles<br />
cannelées fournies. Le<br />
débitmètre <strong>AIC</strong> sera alors<br />
raccordé aux tuyaux UNIPRESS<br />
et aux adaptateurs<br />
Important : toutes les<br />
connexions au réservoir, aux<br />
adaptateurs et au débitmètre<br />
doivent être absolument<br />
étanches. Une fuite sur les<br />
tuyaux en dépression ne laisse<br />
apparaître aucune fuite de<br />
carburant, mais de mauvais<br />
fonctionnements du moteur sont<br />
à prévoir.<br />
Après le montage du débitmètre,<br />
la cartouche de filtrage doit être<br />
remplie avant le démarrage du<br />
moteur avec du carburant<br />
Diesel propre (env. 1 litre).<br />
Il est recommandé de remplir le<br />
filtre par les trous extérieurs<br />
(côté entrée du filtre), afin que<br />
le carburant ainsi versé soit<br />
également filtré.<br />
Serrer le filtre à carburant à la<br />
main uniquement.<br />
Diesel diese Seite auffühlen<br />
Fill Diesel this side<br />
Remplissage du Diesel par ce<br />
côté
d Entlüftung :<br />
e Bleeding / Venting<br />
f<br />
Nach der Montage des<br />
Once the flow meter is mounted<br />
Kraftstoffmessgerätes muss bei on the vehicle, meter, filter and<br />
der Montage der<br />
Anschlussleitungen eingetretene<br />
piping system must be vented.<br />
Luft evakuiert werden.<br />
Important notice:<br />
If the Diesel piping system<br />
is not vented correctly, an<br />
accurate measurement cannot<br />
be guaranteed.<br />
Wichtig :<br />
Wenn die Kraftstoffanlage<br />
nicht einwandfrei entlüftet ist,<br />
kann die Messgenauigkeit<br />
nicht gewährleistet werden.<br />
NB: die Entlüftung kann nach<br />
folgender Anleitung bei<br />
laufendem Motor, ohne<br />
vorgängige Betätigung der<br />
Handpumpe erfolgen.<br />
Entlüftungsvorgang:<br />
Schrauben Sie die<br />
Rücklaufleitung am Messgerät<br />
ab, und verschließen Sie den<br />
Anschlussstutzen am Messgerät<br />
mit Überwurfmutter M16 x 1.5<br />
und Stahlkugel DM 14 mm, oder<br />
wenn vorhanden, mit der<br />
Schutz-Schraubkappe. (Der<br />
Anschluss muss dicht<br />
verschlossen sein, damit<br />
während dem<br />
Entlüftungsvorgang keine Luft<br />
angesaugt werden kann).<br />
Führen Sie die Rücklaufleitung<br />
in den Tankeinfüllstutzen oder in<br />
einen Behälter.<br />
Starten Sie den Motor. Bei<br />
Leerlaufdrehzahl entlüftet sich<br />
die Kraftstoffanlage.<br />
Der Motor sollte mindestens 10<br />
Min. drehen damit alle Luft vom<br />
Messgerät über den Feinfilter<br />
des Motors und die<br />
Rücklaufleitung evakuiert wird.<br />
Der Kraftstoff soll sauber und<br />
blasenfrei austreten.<br />
Motor abstellen, und<br />
Rücklaufleitung wieder am<br />
Rücklaufstutzen des<br />
Messgerätes anschließen.<br />
Motor starten und Dichtigkeit<br />
überprüfen, nach den Testfahrt.<br />
Achtung: Bei gewissen<br />
Motoren, welche mit<br />
speziellen<br />
Entlüftungsvorrichtungen z.B.<br />
am Feinfilter ausgerüstet sind,<br />
muss die Entlüftung laut den<br />
Anweisungen des<br />
Motorenherstellers erfolgen.<br />
NB: the bleeding can be done by<br />
starting the engine then, it is not<br />
necessary to use the hand pump<br />
first!<br />
Bleeding / venting, step by<br />
step:<br />
On the flow meter, disconnect<br />
the return-line coming from the<br />
engine. (Cap nut M16 x 1.5).<br />
Close the return-fitting on the<br />
flow meter with an cap-nut M16<br />
x 1.5 and an steel-ball DM 14<br />
mm. The pipe connections need<br />
to be hermetically closed, to<br />
avoid air coming into the piping<br />
system during the bleeding /<br />
venting.<br />
Introduce the return-line into the<br />
filler-cap of the fuel-tank or into<br />
an other receptacle.<br />
Start the engine and run it in<br />
idling rpm. Run the engine<br />
minimum 10 minutes as long as<br />
bubbles remain in the fuel.<br />
Stop the engine, remove the M<br />
16 x 1.5 bolt and steel ball, and<br />
connect the return-line to the<br />
flow meter<br />
Start again the engine and check<br />
the tightness after the test drive.<br />
Attention: engines with<br />
specific bleeding arrangement<br />
(fine filter for exp.), must be<br />
vented according to the<br />
engine manufacturer<br />
recommendations.<br />
7<br />
Purge<br />
Après le montage du débitmètre<br />
sur le véhicule, les circuits<br />
d'alimentation de diesel doivent<br />
être purgés.<br />
Important<br />
Si le circuit d'alimentation<br />
du moteur n'est pas purgé<br />
correctement, une mesure<br />
précise ne peut être garanti.<br />
NB : la purge du système<br />
d'alimentation peut se faire en<br />
démarrant le moteur, il n'est pas<br />
nécessaire de faire fonctionner<br />
la pompe manuelle.<br />
Purger, étape par étape:<br />
Dévissez la conduite de retour<br />
du carburant du débitmètre.<br />
Fermez le raccord du débitmètre<br />
par un écrou de rappel M 16 x<br />
1,5 et une bille DM 14 mm de<br />
façon étanche, ceci pour éviter<br />
que de l'air ne puisse pénétrer<br />
dans le circuit pendant la purge.<br />
Introduisez la conduite de retour<br />
dans le manchon de remplissage<br />
du réservoir à carburant ou dans<br />
un récipient approprié.<br />
Démarrez le moteur. Laissez le<br />
tourner environ 10 minutes au<br />
ralenti, jusqu'à ce que l'air<br />
pénétré lors du montage soit<br />
complètement évacuée.<br />
Arrêtez le moteur et rebranchez<br />
la conduite de retour sur le<br />
débitmètre.<br />
Redémarrez le moteur et<br />
contrôlez l'étanchéité après la<br />
course d'essai.<br />
Attention : pour les moteurs<br />
dont une purge spécifique est<br />
à faire (avec les filtres fins par<br />
exp.), les recommandations du<br />
constructeur doivent être<br />
suivies.
d Wartung<br />
e Maintenance<br />
f<br />
Die <strong>AIC</strong> Durchflusszähler<br />
The maintenance of the <strong>AIC</strong> flow<br />
Wartung limitiert sich zu der<br />
meters is limited to the exchange<br />
Wechsel des Filterpatrone, der of the filter, to the periodical<br />
Überwachung von<br />
check of the fuel lines and to the<br />
Kraftstoffleitungen, und die<br />
Dichtigkeit von Verbindungen.<br />
tightness of the connectors.<br />
According to the fuel quality, we<br />
Gemäss Kraftstoffsqualität soll recommend to exchange the<br />
der Filterpatrone alle 20'000<br />
oder 40'000 Km gewechselt<br />
werden.<br />
filter every 20 000 or 40 000 Km.<br />
8<br />
Entretien<br />
L'entretien des débitmètres <strong>AIC</strong><br />
se limite à l'échange du filtre, au<br />
contrôle des conduites de<br />
carburant et à l'étanchéité<br />
des raccords.<br />
Selon la qualité du carburant,<br />
nous recommandons de changer<br />
le filtre tous les 20 000 à 40 000<br />
Km.<br />
Nie Druckluft in die Messkammer einblasen !<br />
Never blast compressed air into the flow meter !<br />
Ne jamais souffler de l'air comprimé dans le débitmètre !<br />
d Filter Bezeichnung<br />
e Filter characteristics<br />
f<br />
Filterpatrone zum Aufschrauben, Filter cartridge to be screwed on:<br />
0.75 bis 1 Liter<br />
0.75 to 1 litre<br />
Gewinde: M16 x 1.5<br />
Thread: M16 x 1.5<br />
Dichtring Diameter: 71 /62 mm Gasket diameter: 71 /62 mm<br />
Filterpatrone Diameter: 93 mm Filter cartridge diameter: 93 mm<br />
Beispiel / Sample / Exemples: HENGST H 17 WK 03 (L = 142 mm)<br />
MANN WK 940 / 5 (L = 142 mm)<br />
MANN WK 962 / 4 (L = 210 mm)<br />
HIFI FF 231 (L = 142 mm)<br />
HIFI FF 4070 (L = 210 mm)<br />
Caractéristiques du filtre<br />
Cartouche à visser standard :<br />
0,75 à 1 litre<br />
Filetage: M16 x 1,5<br />
Diamètre du joint: 71 / 62 mm<br />
Diamètre hors tout: 93 mm
Prinzipschema<br />
Working principle<br />
Schéma de principe<br />
1. Kraftstofftank / fuel tank / reservoir à carburant<br />
2. <strong>AIC</strong> Messgerät/ <strong>AIC</strong> measuring instrument / débiitmètre <strong>AIC</strong><br />
3. Vorlauf zum Motor / feedline from tank / alimentation depuis<br />
réservoir<br />
4. Kraftstoffförderpumpe / fuel pump / pompe à carburant<br />
5. Feinfilter / fine filter / filtre fin<br />
6. Einspritzpumpe / injection pump / pompe à injection<br />
7. Rücklauf vom Motor / runback from engine / retour du moteur<br />
8. Einspritzleitung / injection line / ligne d'injection<br />
9. Motor / engine / moteur<br />
7<br />
8<br />
7<br />
6<br />
5<br />
4<br />
9<br />
Grün / green / vert = 0 V<br />
3<br />
9<br />
Braun / Brun = 4004 / 4008 8 - 15 VDC<br />
904 / 908 8 - 28 VDC<br />
7<br />
Weiss / White / Blanc = signal<br />
Anschluss an / Connection to / Connection à<br />
3<br />
• Datenerfassungssystem, Data logging system,<br />
système de banque de données<br />
• Ferntotalisator, remote totaliser, totalisateur à<br />
distance (<strong>AIC</strong> RT/VR)<br />
• Bordcomputer, board computer, ordinateur de<br />
bord (BC2022)<br />
2<br />
1
d Elektrische Anschlussschema e Electrical connection<br />
f<br />
Kable<br />
Für den Anschluss des Bord<br />
Computer, den Totalisator oder<br />
zur einen anderen Aufnehmer ist<br />
mit dem <strong>AIC</strong> Messgerät ein 10 m<br />
Kable mit geliefert.<br />
Cable<br />
For connection to the Board<br />
Computer, remote totalizer or<br />
any other on-board electronic<br />
system, a 10 m cable is<br />
delivered.<br />
1. Kable Stecker anschliessen<br />
1st Connect the cable<br />
1er Connectez le câble<br />
10<br />
2. Schutzkappe aufstecken<br />
2nd Put protection cap<br />
2e Mettez le capuchon de protection<br />
d Kable Drahten<br />
e Cable wires<br />
f<br />
Die Speisung des <strong>AIC</strong><br />
Messgerät ist wie folgt:<br />
<strong>AIC</strong> - 900 Serie mit Totalisator<br />
<strong>AIC</strong> - 900 Series with Totalizer<br />
Série <strong>AIC</strong> - 900 avec totalisateur<br />
Grün<br />
Green 0 Volt (Masse)<br />
Vert<br />
Braun<br />
Brown +8...28 VDC<br />
Brun<br />
Weiss<br />
White Signal<br />
Blanc<br />
Signal :<br />
Rechteck, Tastverhältnis 50 %<br />
Square pulse, duty cycle 50 %<br />
Rectangulaire, cycle de 50 %<br />
Pulse:<br />
<strong>AIC</strong> - 904 200 ppl<br />
<strong>AIC</strong> - 908 80 ppl<br />
The power supply of the <strong>AIC</strong><br />
meter is as follows:<br />
Connections électriques<br />
Câble<br />
Pour la connexion à l'ordinateur<br />
de bord, du totalisateur à<br />
distance ou de tout autre<br />
électronique embarqué, un câble<br />
de 10 m est fourni.<br />
Ames des câble<br />
L'alimentation électrique des<br />
appareils <strong>AIC</strong> est la suivante:<br />
<strong>AIC</strong> - <strong>4000</strong> Serie mit Bord Computer<br />
<strong>AIC</strong> - <strong>4000</strong> Series with board computer<br />
Série <strong>AIC</strong> -<strong>4000</strong> avec ordinateur de bord<br />
Grün<br />
Green 0 Volt (Masse)<br />
Vert<br />
Braun<br />
Brown +8...15 VDC<br />
Brun<br />
Weiss<br />
White Signal<br />
Blanc<br />
Signal :<br />
Rechteck, NPN Open-Collector, pulsbreite 0.7 ms<br />
Square pulse, NPN Open-Collector, pulse width<br />
0.7 ms<br />
Rectangulaire, NPN à collecteur ouvert, largeur<br />
d'impulsion 0,7 ms<br />
Pulse:<br />
<strong>AIC</strong> - 4004 2000 ppl<br />
<strong>AIC</strong> - 4008 800 ppl
d Geräte Identifikation<br />
e Device identification<br />
f<br />
Diese Geräten sind Verteilt unter These meters are divided in 2<br />
2 Familie:<br />
family:<br />
<strong>AIC</strong> - 900 VERITAS und<br />
<strong>AIC</strong> - 900 VERITAS and<br />
<strong>AIC</strong> - <strong>4000</strong> VERITAS.<br />
<strong>AIC</strong> - <strong>4000</strong> VERITAS<br />
Alle Geräten haben die<br />
folgenden Eigenschaften:<br />
Rücklaufeinspeisung : Drucklos<br />
Max. Viskosität. : 100 mPa.s<br />
Messgenauigkeit : +/- 1 %<br />
Wiederholbarkeit: +/- 0.2 %<br />
Druckbereich: -1 bis 20 bar<br />
Temperaturbereich: -30 bis 90°C<br />
Schutz: IP 68<br />
und sonder Spezifikation:<br />
<strong>AIC</strong> - 904 VERITAS<br />
Dimension : 280 x 100 x 160 mm<br />
(inkl. filtre)<br />
Gewicht: 2.5 Kg (inkl. filtre)<br />
Messbereich: 1 bis 80 l/h<br />
Puls menge: 200 ppl<br />
<strong>AIC</strong> - 908 VERITAS<br />
Dimension : 300 x 100 x 160 mm<br />
(inkl. filtre)<br />
Gewicht: 2.8 Kg (inkl. filtre)<br />
Messbereich: 4 bis 200 l/h<br />
Puls menge: 80 ppl<br />
<strong>AIC</strong> - 4004 VERITAS<br />
Dimension : 280 x 100 x 160 mm<br />
(inkl. filtre)<br />
Gewicht: 2.5 Kg (inkl. filtre)<br />
Messbereich: 1 bis 80 l/h<br />
Puls menge: 2000 ppl<br />
<strong>AIC</strong> - 4008 VERITAS<br />
Dimension : 300 x 100 x 160 mm<br />
(inkl. filtre)<br />
Gewicht: 2.8 Kg (inkl. filtre)<br />
Messbereich: 4 bis 200 l/h<br />
Puls menge: 800 ppl<br />
Typenschild von <strong>AIC</strong><br />
Messgeräten :<br />
All meters have the following<br />
characteristics:<br />
Return line backpressure : none<br />
Viscosity Max. : 100 mPa.s<br />
Accuracy: +/- 1 %<br />
Repeatability: +/- 0.2 %<br />
Pressure range: -1 to 20 bar<br />
Temperature range: -30 to 90°C<br />
Protection: IP 68<br />
and specific characteristics:<br />
<strong>AIC</strong> - 904 VERITAS<br />
Dimension : 280 x 100 x 160 mm<br />
(incl. filter)<br />
Weight: 2.5 Kg (incl. filter)<br />
Measuring range: 1 to 80 l/h<br />
Pulse rate: 200 ppl<br />
<strong>AIC</strong> - 908 VERITAS<br />
Dimension : 300 x 100 x160 mm<br />
(incl. filter)<br />
Weight: 2.8 Kg (incl. filter)<br />
Measuring range: 4 to 200 l/h<br />
Pulse rate: 80 ppl<br />
<strong>AIC</strong> - 4004 VERITAS<br />
Dimension : 280 x 100 x160 mm<br />
(incl. filter)<br />
Weight: 2.5 Kg (incl. filter)<br />
Measuring range: 1 to 80 l/h<br />
Pulse rate: 2000 ppl<br />
<strong>AIC</strong> - 4008 VERITAS<br />
Dimension : 300 x 100 x160 mm<br />
(incl. filter)<br />
Weight: 2.8 Kg (incl. filter)<br />
Measuring range: 4 to 200 l/h<br />
Pulse rate: 800 ppl<br />
Name plate of <strong>AIC</strong> flow meters :<br />
Puls menge pro Liter<br />
Pulse rate per litre<br />
Nombre de pulse par litre<br />
11<br />
Serie No.<br />
Serial No.<br />
No. de série<br />
Identification des appareils<br />
Ces instruments de mesure sont<br />
divisés en 2 familles:<br />
<strong>AIC</strong> - 900 VERITAS et<br />
<strong>AIC</strong> - <strong>4000</strong> VERITAS<br />
Tous les instruments ont les<br />
caractéristiques suivante:<br />
Chute de pression sur le<br />
retour de carburant : aucune<br />
Viscosité max. : 100 mPa.s<br />
Précision : +/- 1 %<br />
Répétitivité : +/- 0,2 %<br />
Plage de pression: -1 à 20 bar<br />
Plage de température:-30 à 90°C<br />
Protection: IP 68<br />
et les caractéristiques<br />
suivantes:<br />
<strong>AIC</strong> - 904 VERITAS<br />
Dimension : 280 x 100 x 160 mm<br />
(filtre inclus)<br />
Poids: 2,5 Kg (filtre inclus)<br />
Echelle de mesure: 1 à 80 l/h<br />
Nombre de pulses: 200 ppl<br />
<strong>AIC</strong> - 908 VERITAS<br />
Dimension : 300 x 100 x 160 mm<br />
(filtre inclus)<br />
Poids: 2,5 Kg (filtre inclus)<br />
Echelle de mesure: 4 à 200 l/h<br />
Nombre de pulses: 80 ppl<br />
<strong>AIC</strong> - 4004 VERITAS<br />
Dimension : 280 x 100 x 160 mm<br />
(filtre inclus)<br />
Poids: 2,5 Kg (filtre inclus)<br />
Echelle de mesure: 1 à 80 l/h<br />
Nombre de pulses: 2000 ppl<br />
<strong>AIC</strong> - 4008 VERITAS<br />
Dimension : 300 x 100 x 160 mm<br />
(filtre inclus)<br />
Poids: 2,5 Kg (filtre inclus)<br />
Echelle de mesure: 4 à 200 l/h<br />
Nombre de pulses: 800 ppl<br />
Plaque signalétique des<br />
instruments <strong>AIC</strong> :
<strong>AIC</strong> Services Hotline: +41 79 212 28 31<br />
Doc. ref. <strong>BA</strong> 900-<strong>4000</strong>/<strong>def</strong>/05.06<br />
12<br />
<strong>AIC</strong> SYSTEMS S.A.<br />
Postfach / P.O. Box 341<br />
Ringstrasse 9<br />
CH - 4123 Allschwil<br />
Switzerland<br />
T +41 61 841 84 39<br />
F +41 61 841 84 40<br />
M +41 79 212 28 31<br />
www.flowmeter-aic.com<br />
info@flowmeter-aic.com<br />
SYSTEMS AG<br />
Switzerland<br />
Automotive Information and Control <strong>Systems</strong>