Installation instructions - Fisher & Paykel
Installation instructions - Fisher & Paykel
Installation instructions - Fisher & Paykel

Create successful ePaper yourself
Turn your PDF publications into a flip-book with our unique Google optimized e-Paper software.
Leak testing<br />
<strong>Installation</strong> <strong>instructions</strong><br />
Leak testing of the appliance shall be conducted according to the manufacturer’s<br />
<strong>instructions</strong>.<br />
The appliance and its individual shut-off valve must be disconnected from the gas supply piping<br />
system during any pressure testing of that system in excess of ½ psi (3.5kPa).<br />
The appliance must be isolated from the gas supply piping system by closing its individual<br />
manual shut-off valve during any pressure testing of the gas supply piping system at test<br />
pressures at or less than ½ psi (3.5 kPa).<br />
Maximum inlet gas supply pressure 20” W.C. (5 kPa)<br />
Minimum gas supply pressure for regulator testing 5” W.C. Natural Gas, 12” W.C. LP Gas.<br />
After installing the gas supply and making all connections, check thoroughly for possible leaks:<br />
1 Turn all control dials on unit to “off” position.<br />
2 Open the valve on the gas supply.<br />
3 Using a leak detection fluid (eg Rocol leak detection spray), check each gas connection one at a<br />
time by brushing the solution over the connection. The presence of bubbles will indicate a leak.<br />
4 If necessary, tighten the fitting and recheck for leaks.<br />
5 Turn on burner valve and light each burner.<br />
6 Check for a clear blue flame without yellow tipping. If burners show any abnormalities, check<br />
that they are located properly and in line with the injector orifice.<br />
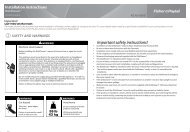
Minimum setting or turn-down<br />
After installation check the minimum setting. This has been preset at the factory for NG but<br />
needs to be checked and then reset if necessary. To adjust for minimum setting (if applicable),<br />
you will need a Ø 7⁄64 “ x 1 ¾ ” (Ø 2.5 x 45 mm) screwdriver.<br />
(A suitable screwdriver is available as <strong>Fisher</strong> & <strong>Paykel</strong> spare part FB200467).<br />
1 Ignite the burner and set the dial to its minimum position.<br />
2 Remove the dials.<br />
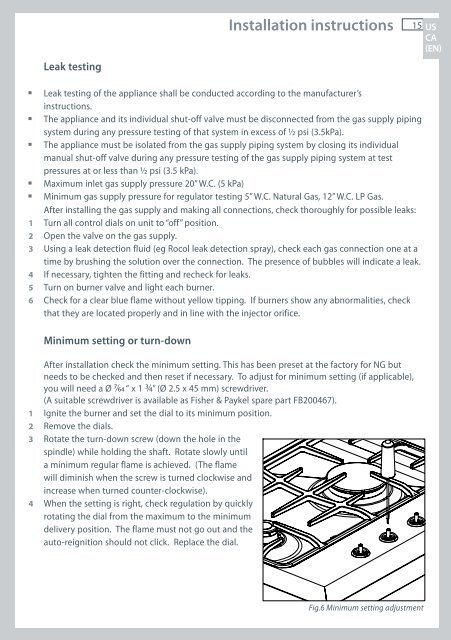
3 Rotate the turn-down screw (down the hole in the<br />
spindle) while holding the shaft. Rotate slowly until<br />
a minimum regular flame is achieved. (The flame<br />
will diminish when the screw is turned clockwise and<br />
increase when turned counter-clockwise).<br />
4 When the setting is right, check regulation by quickly<br />
rotating the dial from the maximum to the minimum<br />
delivery position. The flame must not go out and the<br />
auto-reignition should not click. Replace the dial.<br />
Fig.6 Minimum setting adjustment<br />
15 US<br />
CA<br />
(EN)