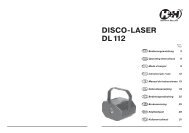
BL 7 GS, Bed.-Anl. - Hartig + Helling GmbH & Co. KG
BL 7 GS, Bed.-Anl. - Hartig + Helling GmbH & Co. KG
BL 7 GS, Bed.-Anl. - Hartig + Helling GmbH & Co. KG

You also want an ePaper? Increase the reach of your titles
YUMPU automatically turns print PDFs into web optimized ePapers that Google loves.
eventuales componentes y no<br />
utilice productos de limpieza<br />
agresivos.<br />
Este aparato ha sido sometido a<br />
una minuciosa inspección final.<br />
Si a pesar de ello tuviera un motivo<br />
de reclamación, envíenos el<br />
aparato acompañado del<br />
justificante de compra. Ofrecemos<br />
una garantía de 3 años a partir de<br />
la fecha de compra.<br />
Nuestra garantía no cubre los daños<br />
causados por un manejo incorrecto,<br />
una utilización inapropiada o por<br />
el desgaste natural de los<br />
componentes.<br />
Nos reservamos el derecho de<br />
introducir modificaciones técnicas.<br />
Datos técnicos<br />
Entrada:<br />
230V/50 Hz; 4,8W<br />
Salida:<br />
4 x 1,2V/120 mA<br />
2 x 9 V/13 mA<br />
Vea las informaciones más<br />
actuales sobre nuestros<br />
productos en nuestro sitio web<br />
http://www.hartig-helling.de.<br />
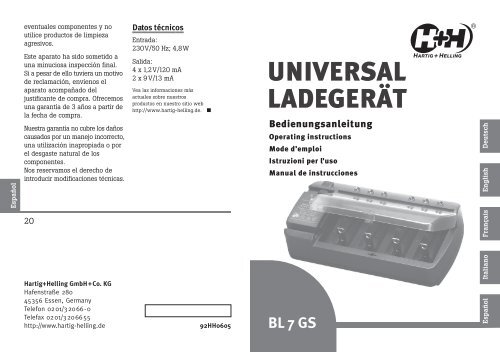
UNIVERSAL<br />
LADEGERÄT<br />
<strong>Bed</strong>ienungsanleitung<br />
Operating instructions<br />
Mode d’emploi<br />
Istruzioni per l’uso<br />
Manual de instrucciones<br />
20<br />
<strong>Hartig</strong>+<strong>Helling</strong> <strong>GmbH</strong>+<strong>Co</strong>. <strong>KG</strong><br />
Hafenstraße 280<br />
45356 Essen, Germany<br />
Telefon 0201/32066-0<br />
Telefax 0201/3206655<br />
http://www.hartig-helling.de<br />
92HH0605<br />
<strong>BL</strong> 7 <strong>GS</strong>
Das <strong>BL</strong> 7 <strong>GS</strong> ist ein kombiniertes<br />
Lade-/Entladegerät, mit dem<br />
Sie bis zu vier Mono-, Baby-,<br />
Mignon- oder Microakkus laden<br />
bzw. entladen können.<br />
Selbstverständlich können diese<br />
Akkus auch gemischt geladen<br />
werden.<br />
Außerdem können Sie ebenfalls<br />
zwei 9-Volt-Blockakkus (5) laden.<br />
Beachten Sie aber bitte,<br />
dass dabei rechts und links vom<br />
Blockakku keine Mono- bzw.<br />
Babyakkus in die Lademulden<br />
eingelegt werden können.<br />
Das Gerät ist zusätzlich mit einer<br />
Testlampe (2) ausgestattet,<br />
die es Ihnen ermöglicht, Akkus<br />
oder Batterien auf ihren momentanen<br />
Ladezustand hin zu<br />
testen.<br />
1<br />
2<br />
4<br />
5<br />
4<br />
3<br />
4<br />
5<br />
4<br />
Laden<br />
Schieben Sie den Schalter (1) in<br />
die Position „LADEN“.<br />
Legen Sie die zu ladenden Akkus<br />
in die Lademulden (4) ein und verbinden<br />
Sie das <strong>BL</strong> 7 <strong>GS</strong> mit dem<br />
Netz. Achten Sie beim Einlegen<br />
der Mono-, Baby-, Mignon- und<br />
Microakkus darauf, dass der Pluspol<br />
zu der roten LED (3) zeigt.<br />
Ein Aufleuchten einer LED bedeutet,<br />
dass der Akku in der entsprechenden<br />
Lademulde geladen wird.<br />
Wir empfehlen, alle Akkus, von<br />
denen Sie den Ladezustand nicht<br />
kennen, vor dem Laden mit der<br />
eingebauten Testlampe zu überprüfen<br />
und gegebenenfalls die noch<br />
nicht vollständig entladenen Akkus<br />
zu entladen.<br />
Dadurch wird bei NiCd-Akkus der<br />
sogenannte „Memory-Effekt“ vermieden<br />
und die Lebensdauer von<br />
NiCd- und NiMH-Akkus nicht durch<br />
Überladen verringert.<br />
Die Ladezeit wird nicht automatisch<br />
begrenzt. Entnehmen Sie nach erfolgter<br />
Aufladung die Akkus aus<br />
dem <strong>BL</strong> 7 <strong>GS</strong>. Mehrfaches Überladen<br />
verkürzt die Lebensdauer Ihrer<br />
3
Akkus bzw. führt in extremen Fällen<br />
zur Zerstörung Ihrer Akkus.<br />
Achtung! Versuchen Sie niemals,<br />
normale alkalische Batterien zu<br />
laden. Es besteht Explosionsgefahr!<br />
Ladezeiten<br />
Die Ladezeit für die Akkus ist abhängig<br />
von der Nennkapazität. Um<br />
die Ladezeit für Ihre Akkus zu bestimmen,<br />
teilen Sie die aufgedruckte<br />
Kapazität durch den Ladestrom<br />
und multiplizieren diesen Wert<br />
mit 1,4.<br />
Die Ladezeit für z. B. einen entladenen<br />
NiCd-Mignonakku mit<br />
700 mAh Speicherkapazität ermitteln<br />
Sie folgendermaßen:<br />
Teilen Sie 700 (mAh) durch 120<br />
(Ladestrom des <strong>BL</strong> 7 <strong>GS</strong> in mA für<br />
Mignonakkus) und multiplizieren<br />
Sie das Ergebnis anschließend mit<br />
dem Faktor 1,4. Die daraus resultierende<br />
Ladezeit beträgt ca.<br />
8 Stunden.<br />
In der folgenden Tabelle finden<br />
Sie typische Ladezeiten für verschiedene<br />
Akkus.<br />
Batterietyp NiCd NiMH<br />
Mono/D 12-25<br />
Stunden<br />
Baby/C 10-20<br />
Stunden<br />
Mignon/AA 5-8<br />
Stunden<br />
Micro/AAA 3-6<br />
Stunden<br />
9-V-Block 5-10<br />
Stunden<br />
20-40<br />
Stunden<br />
15-25<br />
Stunden<br />
10-20<br />
Stunden<br />
6-12<br />
Stunden<br />
8-15<br />
Stunden<br />
Entladen<br />
Schieben Sie den Schalter (1) in<br />
die Position „ENTLADEN“.<br />
Legen Sie die zu entladenden Akkus<br />
in die Lademulden (4). Beachten<br />
Sie bitte, dass das <strong>BL</strong> 7 <strong>GS</strong><br />
9-V-Blockakkus nicht entladen<br />
kann.<br />
Die Entladezeit richtet sich nach<br />
dem Ladezustand des Akkus. Kontrollieren<br />
Sie bitte deshalb regelmäßig<br />
die Akkus mit der eingebauten<br />
Testlampe.<br />
Akku-/Batterietest<br />
Zum Testen benutzen Sie bitte die<br />
linke Lademulde (4). Nach dem<br />
Einsetzen des Akkus oder der Batterie<br />
schieben Sie den Schalter (1)<br />
in die Position „TEST“.<br />
Leuchtet die Lampe hell auf, so ist<br />
Ihr Akku bzw. Ihre Batterie noch<br />
geladen.<br />
Glimmt die Lampe nur noch oder<br />
verlischt sie ganz, so ist der Akku<br />
oder die Batterie leer und muss<br />
geladen werden.<br />
9-V-Blockakkus können nicht getestet<br />
werden.<br />
Entsorgungshinweis<br />
Altgeräte, die mit dem<br />
abgebildeten Symbol<br />
gekennzeichnet sind, dürfen nicht<br />
mit dem Hausmüll entsorgt<br />
werden.<br />
Verbrauchte Batterien und<br />
Akkumulatoren (Akkus), die mit<br />
einem der abgebildeten Symbole<br />
gekennzeichnet sind, dürfen nicht<br />
mit dem Hausmüll entsorgt<br />
werden.<br />
Sie müssen sie bei einer<br />
Sammelstelle für Altgeräte,<br />
Altbatterien bzw. Sondermüll<br />
(informieren Sie sich bitte bei Ihrer<br />
Gemeinde) oder bei Ihrem Händler,<br />
bei dem Sie sie gekauft haben,<br />
abgeben. Diese sorgen für eine<br />
umweltfreundliche Entsorgung.<br />
Pflege und<br />
Gewährleistung<br />
Trennen Sie das Gerät vor dem<br />
Reinigen gegebenenfalls von anderen<br />
Komponenten und verwenden<br />
Sie bitte keine aggressiven<br />
Reiniger.<br />
Das Gerät wurde einer sorgfältigen<br />
Endkontrolle unterzogen. Sollten<br />
Sie trotzdem Grund zu einer<br />
Beanstandung haben, senden Sie<br />
uns das Gerät mit der Kaufquittung<br />
ein. Wir bieten eine Gewährleistung<br />
von 3 Jahren ab Kaufdatum.<br />
Für Schäden, die durch falsche<br />
Handhabung, unsachgemäße<br />
4<br />
5
Nutzung oder Verschleiß verursacht<br />
wurden, übernehmen wir keine<br />
Haftung.<br />
Technische Änderungen sind<br />
vorbehalten.<br />
Technische Daten<br />
Eingang:<br />
230 V/50 Hz; 4,8 W<br />
Ausgang:<br />
4 x 1,2 V/120 mA<br />
2x9V/13 mA<br />
Aktuelle Produktinformationen finden<br />
Sie auf unserer Internet-Seite<br />
http://www.hartig-helling.de.<br />
<strong>BL</strong> 7 <strong>GS</strong> is a combined<br />
charger/discharger which can<br />
be applied for<br />
charging/discharging up to<br />
4 cells of the following type:<br />
Mono, Baby, Mignon or Micro.<br />
It can also be used to charge a<br />
combination of the named<br />
types. In addition, it is possible<br />
to charge two 9V Block<br />
accumulators (5).<br />
Please note, however, that no<br />
Mono- or Baby cells can be<br />
placed in the charging box left<br />
and right beside the 9V Block.<br />
The appliance is equipped with<br />
a test lamp (2) indicating the<br />
current state of the accumulator.<br />
Of course it is also possible to<br />
test ordinary batteries.<br />
1<br />
2<br />
4<br />
5<br />
4<br />
3<br />
4<br />
5<br />
4<br />
Charging<br />
Move the function switch (1) to<br />
position “LADEN”. Insert the<br />
batteries to be charged in the<br />
charging positions (4) and connect<br />
<strong>BL</strong> 7 <strong>GS</strong> to mains supply. Make sure<br />
that the positive pole is on the red<br />
LED side (3) when inserting Mono,<br />
Baby, Mignon and Micro<br />
accumulators. Lighting up of LED<br />
confirms charging operation in the<br />
corresponding charging slot.<br />
We recommend use of the test lamp<br />
to check accumulators prior to<br />
charging and, if neccessary,<br />
discharge before recharging.<br />
You can thus avoid the so-called<br />
“memory effect” on NiCd<br />
accumulators as well as durability<br />
reduction through inadvertent<br />
overcharging of NiCd and NiMH<br />
accumulators.<br />
The battery charger does not<br />
possess a built-in charging timer.<br />
Please remove the accumulators<br />
from the <strong>BL</strong> 7 <strong>GS</strong> after charging to<br />
avoid reduction of durability or<br />
destruction of your accumulators.<br />
Caution! Never try to charge<br />
ordinary alkaline batteries -<br />
danger of explosion!<br />
6<br />
7
Charging times<br />
The charging time for the<br />
accumulators depends on their<br />
nominal capacity. To determine the<br />
charging time for your<br />
accumulators, please divide the<br />
imprinted capacity by the charging<br />
current and multiply the result<br />
by 1.4.<br />
For example a Mignon-NiCd<br />
accumulator with 700 mAh storage<br />
capacity needs a charging time as<br />
follows:<br />
700 (mAh) divided by 120 (mA<br />
charging current of <strong>BL</strong> 7 <strong>GS</strong> in case<br />
of Mignon accumulator) and then<br />
multiplied by 1.4. The result is<br />
around 8 hours charging time.<br />
The table below shows the typical<br />
charging times for the different<br />
accumulators.<br />
Battery type NiCd<br />
Mono/D 12-25<br />
hours<br />
Baby/C 10-20<br />
hours<br />
Mignon/AA 5-8<br />
hours<br />
Micro/AAA 3-6<br />
hours<br />
NiMH<br />
20-40<br />
hours<br />
15-25<br />
hours<br />
10-20<br />
hours<br />
6-12<br />
hours<br />
9 V-Block 5-10<br />
hours<br />
8-15<br />
hours<br />
Discharging<br />
Switch function switch (1) to<br />
position “ENTLADEN”.<br />
Insert the accumulators to be<br />
discharged in the charging<br />
positions (4). Please note that<br />
discharge of 9 V Block accumulators<br />
is not possible with <strong>BL</strong> 7 <strong>GS</strong>.<br />
Discharge time depends on<br />
charging state of the accumulator.<br />
We therefore recommend regular<br />
use of the built-in test lamp.<br />
Testing accumulators<br />
or batteries<br />
Please use the left charging slot<br />
(4). Insert accumulator or battery<br />
and switch to position “TEST”.<br />
Accumulators/batteries are fully<br />
charged if test lamp is very bright.<br />
Accumulators/batteries are<br />
discharged and need charging if<br />
test lamp is dim or goes out.<br />
Testing of 9 V Block accumulators<br />
is not possible.<br />
Notes on Disposal<br />
Old units, marked with the symbol<br />
as illustrated, may not be disposed<br />
of in the household rubbish.<br />
Used rechargeable and nonrechargeable<br />
batteries which are<br />
marked with one of the symbols<br />
illustrated may not be disposed of<br />
in the household rubbish.<br />
You must take them to a collection<br />
point for old units, old batteries or<br />
special waste (enquire at your local<br />
authority) or the dealer from whom<br />
you bought them. These agencies<br />
will ensure environmentally<br />
friendly disposal.<br />
Care and warranty<br />
Separate the device from other<br />
components prior to cleaning, if<br />
necessary, do not use aggressive<br />
cleansing agents.<br />
The device has been subjected to<br />
a careful final inspection. In case<br />
of complaints, however, please<br />
return the device together with<br />
the receipt. We grant a guarantee<br />
period of 3 years from the date of<br />
purchase. No claims will be<br />
accepted for damage due to wrong<br />
handling, improper use or wear.<br />
We reserve the right for technical<br />
modifications.<br />
Technical data<br />
Input:<br />
230 V/50 Hz; 4,8 W<br />
Charge current:<br />
4 x 1,2V/120 mA<br />
2 x 9 V/13 mA<br />
For current product information<br />
please refer to our Internet Site<br />
http://www.hartig-helling.de.<br />
8<br />
9
<strong>BL</strong> 7 <strong>GS</strong> est un chargeur/<br />
déchargeur combiné permettant<br />
de charger voire de décharger<br />
jusqu'à quatre piles LR20, LR14,<br />
LR6 ou LR03. Il est bien sûr<br />
possible de charger des piles<br />
différentes en même temps. En<br />
outre, il est également possible<br />
de charger deux 6LR61<br />
9 volts (5).<br />
Tenir compte du fait que ni à<br />
droite ni à gauche du 6LR61, des<br />
piles LR14 ne peuvent être<br />
placées dans les compartiments<br />
de charge.<br />
L'appareil est également équipé<br />
d'une lampe témoin (2)<br />
permettant de tester l'état de<br />
charge des piles ou accus.<br />
1<br />
2<br />
4<br />
5<br />
4<br />
3<br />
4<br />
5<br />
4<br />
Charge<br />
Mettre l'interrupteur (1) en position<br />
«LADEN».<br />
Placer les accus à recharger dans<br />
les compartiments de charge (4)<br />
et connecter le <strong>BL</strong> 7 <strong>GS</strong> au réseau.<br />
Lors de l'introduction des piles<br />
LR20, LR14, LR6 ou LR03, veiller<br />
à ce que le pole positif soit dirigé<br />
vers la DEL rouge (3).<br />
Une DEL allumée signifie que l'accu<br />
est dans le compartiment de charge<br />
correspondant.<br />
Avant la charge, nous<br />
recommandons de tester tous les<br />
accus dont l'état de charge n'est<br />
pas connu à l'aide de la lampe<br />
témoin intégrée et, le cas échéant,<br />
de décharger les accus n'étant pas<br />
encore totalement vides.<br />
On évite ainsi pour les accus NiCd<br />
le soi-disant « effet de mémoire »<br />
et la diminution de la durée de vie<br />
des accus NiCd et NiMH en raison<br />
de surcharges.<br />
La durée de charge n'est pas limitée<br />
automatiquement. Après la<br />
recharge, retirer les accus du<br />
<strong>BL</strong> 7 <strong>GS</strong>. Une surcharge répétée<br />
diminue la durée de vie des accus<br />
voire, dans des cas extrêmes,<br />
conduit à la destruction des accus.<br />
Attention ! Ne jamais essayer de<br />
charger des piles alcalines.<br />
Danger d'explosion !<br />
Duree de charge<br />
La durée de charge des accus<br />
dépend de la capacité nominale.<br />
Pour pouvoir déterminer la durée<br />
de charge des accus, diviser la<br />
capacité indiquée par le courant<br />
de charge et multiplier cette valeur<br />
par 1,4.<br />
La durée de charge, p.ex., d'un<br />
accu LR6 NiCd déchargé à capacité<br />
de mémorisation de 700 mAh se<br />
calcule comme suit:<br />
Diviser 700 (mAh) par 120 (courant<br />
de charge du <strong>BL</strong> 7 <strong>GS</strong> en mA pour<br />
accus LR6) et multiplier le résultat<br />
par le coefficient 1,4. La durée de<br />
charge en résultant est d'env. 8<br />
heures.<br />
Le tableau ci-dessous indique les<br />
durées de charge typiques des<br />
différents accus.<br />
Type de piles NiCd<br />
LR20/D 12-25<br />
heures<br />
LR14 /C 10-20<br />
heures<br />
NiMH<br />
20-40<br />
heures<br />
15-25<br />
heures<br />
LR6 /A A 5-8<br />
heures<br />
LR03 /AAA 3-6<br />
heures<br />
6LR61 9V 5-10<br />
heures<br />
10-20<br />
heures<br />
6-12<br />
heures<br />
8-15<br />
heures<br />
Decharge<br />
Pousser l'interrupteur (1) en position<br />
« ENTLADEN ».<br />
Placer les accus à décharger dans<br />
les compartiments de charge (4).<br />
Tenir compte du fait que le <strong>BL</strong> 7 <strong>GS</strong><br />
ne peut pas décharger les 6LR61<br />
9V.<br />
La durée de décharge dépend de<br />
l'état de charge des accus. C'est la<br />
raison pour laquelle, il faut<br />
contrôler régulièrement les accus<br />
à l'aide de la lampe témoin<br />
intégrée.<br />
Test accus/piles<br />
Pour tester, utiliser le compartiment<br />
de charge de gauche (4). Après<br />
avoir placé les accus ou les piles,<br />
mettre l'interrupteur (1) en position<br />
« TEST».<br />
Si la lampe s'éclaire, l'accu/la pile<br />
est encore chargé.<br />
10<br />
11
Si la lampe est faible ou ne s'allume<br />
plus du tout, l'accu ou la pile est<br />
vide et doit être rechargé.<br />
Les 6LR61 9V ne peuvent pas être<br />
testés.<br />
<strong>Co</strong>nseils pour l’élimination<br />
Les vieux appareils marqués du<br />
symbole représenté sur la figure<br />
ne doivent pas être éliminés avec<br />
les ordures ménagères.<br />
Les piles et accumulateurs usés qui<br />
sont marqués de l’un des symboles<br />
représentés ne doivent pas être<br />
éliminés avec les ordures<br />
ménagères.<br />
Vous devez les apporter à un point<br />
de collecte pour vieux appareils,<br />
piles usées ou déchets spéciaux<br />
(renseignez-vous auprès de votre<br />
mairie) ou les rapporter chez le<br />
commerçant où vous les avez<br />
achetés. De cette manière, ils<br />
seront éliminés en respectant<br />
l’environnement.<br />
Entretien et garantie<br />
Avant le nettoyage, coupez si<br />
nécessaire l’appareil d'autres<br />
composants et n'utilisez pas de<br />
produits de nettoyage agressifs.<br />
L’appareil a été soumis à un<br />
contrôle final minutieux. Si vous<br />
deviez toutefois avoir une<br />
réclamation, envoyez-nous les<br />
appareils avec le bon d'achat. Nous<br />
proposons une garantie de 3 ans<br />
à compter de la date d'achat.<br />
Nous ne nous portons pas garants<br />
pour les dommages occasionnés<br />
par une manipulation incorrecte,<br />
une utilisation non conforme ou<br />
l'usure.<br />
Sous toutes réserves de<br />
modifications techniques.<br />
Spécifications techniques<br />
Entrée :<br />
230 V/50 Hz ; 4,8 W<br />
Sortie :<br />
4 x 1,2 V/120 mA<br />
2 x 9V/13 mA<br />
Notre site Internet<br />
http://www.hartig-helling.de vous<br />
informe sur les produits actuels.<br />
<strong>BL</strong> 7 <strong>GS</strong> è un apparecchio<br />
combinato mediante il quale è<br />
possibile ricaricare e scaricare<br />
fino a quattro accumulatori<br />
Mono, Baby, Mignon e Micro.<br />
Ovviamente, i suddetti<br />
accumulatori possono essere<br />
ricaricati mescolati insieme.<br />
Inoltre è possibile caricare<br />
anche due blocchi batteria da<br />
9 volt (5).<br />
Tuttavia va tenuto presente che<br />
nei vani di carica, a destra e a<br />
sinistra del blocco batteria, non<br />
si può inserire nessun<br />
accumulatore Mono o Baby.<br />
L’apparecchio è inoltre dotato<br />
di una spia di prova (2) che<br />
permette di controllare lo stato<br />
di carica di accumulatori o<br />
batterie.<br />
1<br />
2<br />
4<br />
5<br />
4<br />
3<br />
4<br />
5<br />
4<br />
Carica<br />
Portate il commutatore (1) nella<br />
posizione « LADEN ».<br />
Inserite gli accumulatori da caricare<br />
nei vani di carica (4) e collegate il<br />
<strong>BL</strong> 7 <strong>GS</strong> alla rete di alimentazione<br />
elettrica. Nell’inserire gli<br />
accumulatori Mono, Baby, Mignon<br />
e Micro, assicuratevi che il polo<br />
positivo indichi in direzione della<br />
spia rossa (3).<br />
Se una spia luminosa s’illumina,<br />
ciò significa che l’accumulatore<br />
disposto nel corrispondente vano<br />
di carica viene caricato.<br />
Prima di eseguire la carica di<br />
accumulatori di cui non conoscete<br />
lo stato di carica, vi consigliamo di<br />
controllarli mediante la spia di<br />
prova integrata ed eventualmente<br />
di scaricare gli accumulatori non<br />
ancora completamente scarichi.<br />
In tal modo si evita l’insorgere del<br />
cosiddetto « effetto memoria » negli<br />
accumulatori NiCd, mentre la durata<br />
degli accumulatori NiCd e NiMH<br />
non si riduce a causa di una<br />
sovraccarica.<br />
Il tempo di carica non viene limitato<br />
automaticamente. Una volta<br />
caricati, gli accumulatori devono<br />
essere estratti dal <strong>BL</strong> 7 <strong>GS</strong>. Le<br />
12<br />
13
ipetute sovraccariche riducono la<br />
durata dei vostri accumulatori e,<br />
in casi estremi, possono causarne<br />
il danneggiamento.<br />
Attenzione ! Non tentate mai di<br />
caricare pile alcaline. Pericolo<br />
di esplosione !<br />
Tempi di carica<br />
Il tempo di carica degli accumulatori<br />
dipende dalla loro capacità<br />
nominale. Per determinare il tempo<br />
di carica dei vostri accumulatori,<br />
dovete dividerne la capacità<br />
indicata per la corrente di carica e<br />
moltiplicare poi il valore ottenuto<br />
per 1,4.<br />
Per esempio, per determinare il<br />
tempo di carica di un accumulatore<br />
Mignon al NiCd scarico e avente<br />
una capacità di 700 mAh, si<br />
procede nel seguente modo :<br />
si divide 700 (mAh) per 120<br />
(corrente di carica del <strong>BL</strong> 7 <strong>GS</strong> in<br />
mA per accumulatori Mignon) e poi<br />
si moltiplica il risultato ottenuto<br />
per il fattore 1,4. Da tale calcolo<br />
risulta un tempo di carica di circa<br />
8 ore.<br />
Nella tabella sottostante sono<br />
riportati i tipici tempi di carica di<br />
vari accumulatori.<br />
Tipo di<br />
batteria<br />
NiCd<br />
Mono/D 12-25<br />
ore<br />
Baby/C 10-20<br />
ore<br />
Mignon/AA 5-8<br />
ore<br />
Micro/AAA 3-6<br />
ore<br />
Blocco<br />
batteria 9 V<br />
5-10<br />
ore<br />
NiMH<br />
20-40<br />
ore<br />
15-25<br />
ore<br />
10-20<br />
ore<br />
6-12<br />
ore<br />
8-15<br />
ore<br />
Scarica<br />
Portate il commutatore (1) nella<br />
posizione « ENTLADEN ».<br />
Inserite gli accumulatori da<br />
scaricare nei vani di carica (4).<br />
Tenete presente che il <strong>BL</strong> 7 <strong>GS</strong> non<br />
permette di scaricare blocchi<br />
batteria da 9V.<br />
Il tempo di scarica dipende dallo<br />
stato di carica dell’accumulatore.<br />
Vogliate perciò controllare<br />
regolarmente gli accumulatori<br />
mediante la spia di prova integrata.<br />
Prova di<br />
accumulatori/batterie<br />
Per la prova si deve utilizzare il<br />
vano di carica sinistro (4). Una volta<br />
inserito l’accumulatore o la batteria<br />
si deve portare il commutatore (1)<br />
nella posizione «TEST».<br />
Se la spia s’illumina<br />
completamente, ciò significa che<br />
l’accumulatore o la batteria sono<br />
ancora carichi.<br />
Se la spia lampeggia lievemente o<br />
si spegne del tutto, ciò significa<br />
che l’accumulatore o la batteria<br />
sono scarichi e devono essere<br />
ricaricati.<br />
Non è possibile provare i blocchi<br />
batteria da 9V.<br />
Avvertenze per lo<br />
smaltimento<br />
Le apparecchiature usate,<br />
contrassegnate dal simbolo<br />
illustrato, non devono essere<br />
smaltite tra i rifiuti domestici.<br />
Le batterie usate e le pile ricaricabili<br />
contrassegnate da uno dei simboli<br />
illustrati non devono essere smaltite<br />
tra i rifiuti domestici.<br />
Devono essere portate presso un<br />
centro di raccolta per<br />
apparecchiature usate, batterie<br />
usate o rifiuti speciali (informarsi<br />
presso il proprio comune) oppure<br />
presso il rivenditore dal quale sono<br />
state acquistate. Presso questi<br />
centri è possibile lo smaltimento<br />
ecologico.<br />
Manutenzione e garanzia<br />
Prima di procedere alla pulizia<br />
dell’apparecchio lo si deve<br />
eventualmente scollegare dagli altri<br />
componenti e non si deve fare uso<br />
di detersivi corrosivi.<br />
L’apparecchio è stato sottoposto ad<br />
un accurato controllo finale. Se<br />
ciononostante avete motivi di<br />
reclamo, spediteci l’apparecchio<br />
unitamente alla ricevuta d’acquisto.<br />
La nostra azienda offre una<br />
garanzia di 3 anni a partire dalla<br />
data di acquisto.<br />
Si declina ogni responsabilità per<br />
danni dovuti a manipolazione<br />
errata, uso inappropriato o usura.<br />
<strong>Co</strong>n riserva di modifiche tecniche.<br />
14<br />
15
Dati tecnici<br />
Entrata :<br />
230V/50 Hz ; 4,8 W<br />
Uscita :<br />
4 x 1,2V/120 mA<br />
2 x 9V/13 mA<br />
Per informazioni aggiornate sui nostri<br />
prodotti consultate il nostro sito Internet :<br />
http://www.hartig-helling.de.<br />
<strong>BL</strong> 7 <strong>GS</strong> es un aparato<br />
combinado de carga y descarga,<br />
con él usted podrá cargar, si<br />
bien, descargar, hasta cuatro<br />
mono-acumuladores, babyacumuladores<br />
acumuladores de<br />
Mignon o micro-acumuladores.<br />
Estos acumuladores podrán<br />
también cargarse intercambiadamente.<br />
Además, podrá cargar<br />
igualmente dos acumuladores<br />
de bloque (5) de 9 voltios. Sin<br />
embargo, tenga en cuenta, por<br />
favor, que aquí, en la bandeja<br />
de carga, a la derecha e<br />
izquierda del acumulador de<br />
bloque no podrá colocarse<br />
ningún mono-acumulador, si<br />
bien, baby-acumulador.<br />
El aparato está equipado<br />
adicionalmente con una<br />
lámpara de test (2), que le<br />
posibilitará comprobar el<br />
estado de carga actual de<br />
acumuladores o pilas.<br />
1<br />
2<br />
4<br />
5<br />
4<br />
Cargar<br />
Desplace el interruptor (1) a la<br />
posición “LADEN”.<br />
<strong>Co</strong>loque los acumuladores que se<br />
están cargando en las bandejas de<br />
carga (4) y una el <strong>BL</strong> 7 <strong>GS</strong> a la red.<br />
Al colocar los mono-acumuladores,<br />
baby-acumuladores, acumuladores<br />
de Mignon y micro-acumuladores,<br />
ponga atención en que el polo<br />
positivo indique hacia el LED rojo<br />
(3).<br />
Un encendido de un LED significa,<br />
que el acumulador se está cargando<br />
en la bandeja de carga<br />
correspondiente.<br />
Nosotros recomendamos controlar<br />
todos los acumuladores, del que<br />
no conocen el estado de carga del<br />
mismo, con la lámpara de ensayo<br />
3<br />
4<br />
5<br />
4<br />
16<br />
17
instalada, y, dado el caso, descargar<br />
los acumuladores aún no<br />
descargados completamente.<br />
<strong>Co</strong>n ello, se evitará en los<br />
acumuladores NiCd el “efecto<br />
memory” y la duración de vida de<br />
acumuladores NiCd y NiMH no se<br />
reducirá por sobrecarga.<br />
El tiempo de carga no se limita<br />
automáticamente. Después de<br />
haber realizado la carga saque los<br />
acumuladores del <strong>BL</strong> 7 <strong>GS</strong>. Una<br />
sobrecarga repetida reduce la<br />
duración de vida de sus<br />
acumuladores, si bien, ésta induce<br />
en casos extremos a destrucción<br />
de sus acumuladores.<br />
¡Atención!<br />
No intente nunca cargar pilas<br />
alcalinas normales ¡Existe<br />
peligro de explosión!<br />
Tiempos de carga<br />
El tiempo de carga para los<br />
acumuladores depende de la<br />
capacidad nominal. Para<br />
determinar el tiempo de carga de<br />
sus acumuladores, divida la<br />
capacidad imprimida por la<br />
corriente de carga y multiplique<br />
este valor por 1,4.<br />
El tiempo de carga para, por<br />
ejemplo, un acumulador<br />
descargado de Mignon NiCd con<br />
capacidad de carga 700 mAh, lo<br />
determinará de la siguiente<br />
manera:<br />
Divida 700 (mAh) por 120<br />
(corriente de carga del <strong>BL</strong> 7 <strong>GS</strong> en<br />
mA para acumuladores de Mignon)<br />
y seguidamente multiplique el<br />
resultado por el factor 1,4. El tiempo<br />
de carga que resulte de ello<br />
comprenderá unas 8 horas.<br />
En la tabla abajo expuesta<br />
encontrará tiempos de carga típicos<br />
para diferentes acumuladores.<br />
Tipo de pila NiCd<br />
Mono/D 12-25<br />
horas<br />
Baby/C 10-20<br />
horas<br />
Mignon/AA 5-8<br />
horas<br />
Micro/AAA 3-6<br />
horas<br />
bloque 9-V 5-10<br />
horas<br />
NiMH<br />
20-40<br />
horas<br />
15-25<br />
horas<br />
10-20<br />
horas<br />
6-12<br />
horas<br />
8-15<br />
horas<br />
Descargar<br />
Desplace el interruptor (1) a la<br />
posición “ENTLADEN”.<br />
<strong>Co</strong>loque los acumuladores a<br />
descargar en las bandejas de carga<br />
(4). Por favor, tenga en cuenta que<br />
el acumulador de bloque <strong>BL</strong> 7 <strong>GS</strong><br />
9V no puede descargarse.<br />
El tiempo de descarga se rige según<br />
el estado de carga del acumulador.<br />
Por favor, controle con regularidad,<br />
por consiguiente, los acumuladores<br />
con la lámpara de ensayo instalada.<br />
<strong>Co</strong>mprobación de<br />
acumulador/pila<br />
Para comprobar utilice, por favor,<br />
la bandeja de carga izquierda (4).<br />
Después de colocar el acumulador<br />
o la pila desplace el interruptor (1)<br />
a la posición estado de carga actual<br />
“TEST”.<br />
Si la lámpara está encendida, aún<br />
está cargada su acumulador/pila.<br />
Si la lámpara está en efluvio<br />
(débilmente encendida) o se apaga<br />
del todo, el acumulador o la pila<br />
estarán entonces vacíos y tendrán<br />
que cargarse.<br />
Acumuladores de bloque de 9V no<br />
pueden ser ensayados.<br />
Instrucciones de eliminación<br />
Los aparatos usados y marcados<br />
por el símbolo que muestra la<br />
ilustración no deberán eliminarse<br />
junto con la basura doméstica.<br />
Las pilas y acumuladores usados<br />
marcados con el símbolo que<br />
muestra la ilustaración no deberán<br />
eliminarse junto con la basura<br />
doméstica.<br />
Deberá entregarlos en un centro<br />
de reciclaje adecuado para aparatos<br />
usados, pilas o baterías usadas o<br />
residuos especiales (infórmese en<br />
su comunidad) o diríjase a su<br />
distribuidor o al punto de venta<br />
donde adquirió el aparato, en pro<br />
de una eliminación del aparato<br />
respetuosa con el medio ambiente.<br />
Cuidados y garantía<br />
Antes de proceder a la limpieza<br />
desconecte el aparato de otros<br />
18<br />
19