Laminatset hecht englisch_französisch.des - hecht-international ...
Laminatset hecht englisch_französisch.des - hecht-international ...
Laminatset hecht englisch_französisch.des - hecht-international ...

Create successful ePaper yourself
Turn your PDF publications into a flip-book with our unique Google optimized e-Paper software.
Bedienungsanleitung<br />
mit Anwendungsvideo im Web unter:<br />
www.<strong>hecht</strong>-<strong>international</strong>.com<br />
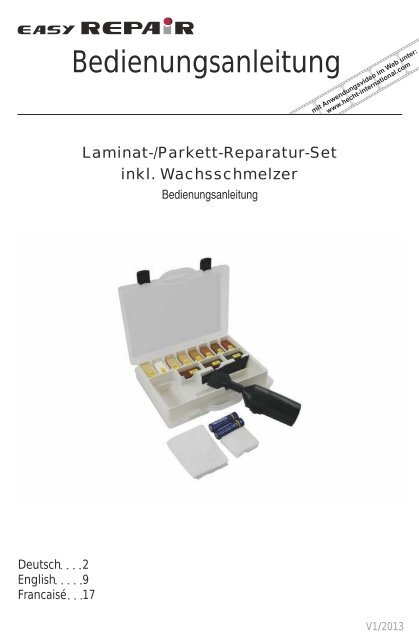
Laminat-/Parkett-Reparatur-Set<br />
inkl. Wachsschmelzer<br />
Bedienungsanleitung<br />
Deutsch<br />
English<br />
Francaisé<br />
2<br />
9<br />
17<br />
V1/2013
Bedienungsanleitung<br />
Reparatur-Set, Artikel-Nr. 500060199, inkl. Wachsschmelzer S01 für:<br />
Laminat, Kork, Parkett, sämtliche Holz- und Kunststoffoberflächen inkl.<br />
batteriebetriebenen Wachsschmelzer.<br />
Inhalt<br />
Allgemeine Hinweise / Sicherheitshinweise<br />
Inbetriebnahme<br />
Batterie einlegen / wechseln<br />
Lieferumfang / Technische Daten<br />
Anwendung<br />
2 – 4<br />
4<br />
4 – 5<br />
6<br />
7 – 8<br />
Allgemeine Sicherheitshinweise<br />
• Lesen Sie die Betriebsanleitung vor Inbetriebnahme vollständig und<br />
beachten Sie die Sicherheitshinweise. Versäumnisse bei der Einhaltung<br />
der Sicherheitshinweise und Anweisungen können elektrischen<br />
Schlag, Brand und/oder schwere Verletzungen verursachen.<br />
• Bewahren Sie die Betriebsanleitung für alle zugänglich auf und<br />
händigen Sie diese bei Weitergabe <strong>des</strong> Produktes mit aus.<br />
• Arbeiten Sie mit dem Wachsschmelzer nicht in explosionsgefährdeter<br />
Umgebung, in der sich brennbare Flüssigkeiten, Gase<br />
oder Stäube befinden. Elektrowerkzeuge erzeugen Funken<br />
und / oder Wärme, die Staub oder Dämpfe entzünden können.<br />
• Halten Sie Kinder und andere Personen während der Benutzung <strong>des</strong><br />
Wachsschmelzers fern.<br />
Elektrische Sicherheit<br />
• Arbeiten Sie mit diesem Elektrowerkzeug nicht in feuchter oder<br />
nasser Umgebung.<br />
Sicherheit von Personen<br />
• Seien Sie aufmerksam, achten Sie darauf was Sie tun und gehen Sie<br />
mit Vernunft an die Arbeit mit einem Elektrowerkzeug. Benutzen Sie<br />
kein Elektrowerkzeug, wenn Sie müde sind oder unter dem Einfluss<br />
von Drogen, Alkohol oder Medikamenten stehen. Ein Moment der<br />
Unachtsamkeit beim Gebrauch <strong>des</strong> Elektrowerkzeuges kann zu<br />
ernsthaften Verletzungen führen.<br />
• Vermeiden Sie eine unbeabsichtigte Inbetriebnahme <strong>des</strong> Wachsschmelzers.<br />
Vergewissern Sie sich, dass der Wachsschmelzer ausgeschaltet<br />
ist, bevor Sie diesen aufnehmen oder tragen.<br />
2 V1/2013
• Verbrennungsgefahr! Vermeiden Sie Hautkontakt mit der Wachsschmelzerspitze<br />
und schützen Sie sich vor tropfendem Wachs!<br />
Verwendung und Behandlung <strong>des</strong> Elektrowerkzeugs<br />
• Prüfen Sie vor jeder Verwendung Gerät und Zubehör auf Beschädigungen<br />
und Funktionalität.<br />
• Bewahren Sie den Wachsschmelzer außerhalb der Reichweite<br />
von Kindern auf. Lassen Sie Personen den Wachsschmelzer nicht<br />
benutzen, die mit diesem nicht vertraut sind oder diese Anweisungen<br />
nicht gelesen haben. Der Wachsschmelzer ist kein Spielzeug und<br />
gefährlich, wenn dieser von unerfahrenen Personen benutzt wird.<br />
Bestimmungsgemäßer Gebrauch<br />
• Der Wachsschmelzer ist bestimmt zur Reparatur durch thermisches<br />
Schmelzen von hierfür geeignetem Wachs auf Laminat, Kork,<br />
Parkett, Holz- und Kunststoffoberflächen.<br />
Verwendung und Behandlung <strong>des</strong> Batteriewerkzeugs und der Batterien<br />
• Bitte beachten Sie die folgenden Sicherheitshinweise für den Umgang<br />
mit Batterien. Batterien können auslaufen oder explodieren.<br />
Die enthaltenen giftigen oder ätzenden Stoffe können frei werden.<br />
Dadurch können erhebliche Sach-, Gesundheits- und Personenschäden<br />
verursacht werden!<br />
• Laden Sie niemals Batterien auf. Es besteht Explosionsgefahr und es<br />
drohen Schäden durch austretende Säure.<br />
• Verwenden Sie nur die dafür vorgesehenen Batterien in - den Elektrowerkzeugen.<br />
Der Gebrauch von anderen Batterien kann zu Verletzungen<br />
und Brandgefahr führen. Verwenden Sie keinen anderen Batterie-Typ<br />
und benutzen Sie keinesfalls eine andere Spannungsquelle.<br />
• Verwenden Sie keine Batterien, die ausgelaufen, verfärbt, deformiert<br />
oder in anderer Weise beschädigt sind.<br />
• Undichte oder beschädigte Batterien müssen unter Beachtung der<br />
üblichen Vorsichtsmaßnahmen (Schutzhandschuhe) fachgerecht<br />
entsorgt werden.<br />
• Öffnen, zerlegen, durchstechen, ändern und werfen Sie Batterien<br />
nicht und setzen Sie sie keinen unnötigen Stößen aus.<br />
• Setzen Sie Batterien nicht dem Feuer oder Temperaturen von über<br />
50°C aus. Lagern Sie Batterien nicht an heißen Orten und setzen Sie<br />
diese nicht direkter Sonneneinstrahlung aus.<br />
• Legen Sie Batterien nie in eine Mikrowelle oder in Hoch- bzw. Unterdruckbehälter.<br />
• Bei falscher Anwendung kann Flüssigkeit aus den Batterien austreten.<br />
Vermeiden Sie den Kontakt damit. Bei Kontakt mit Batterieflüssigkeit<br />
mit Wasser abspülen.<br />
3 V1/2013
Wenn die Flüssigkeit in die Augen kommt, nehmen Sie zusätzlich<br />
ärztliche Hilfe in Anspruch. Austretende Batterief lüssigkeit kann zu<br />
Hautreizungen oder Verbrennungen führen.<br />
• Bei falscher Anwendung der Batterien können Dämpfe austreten,<br />
die gesundheitsschädlich sind und die Atemwege reizen. Führen Sie<br />
Frischluft zu und suchen Sie bei Beschwerden einen Arzt auf.<br />
• Bei unsachgemäßer Behandlung der Batterien besteht die Gefahr<br />
eines Kurzschlusses oder einer Explosion!<br />
• Entsorgen Sie verbrauchte Batterien und defekte Geräte den gesetzlichen<br />
Bestimmungen entsprechend.<br />
Gerätespezif ische Sicherheitshinweise<br />
• Die Wachsschmelzerspitze 3 wird heiß – Verbrennungsgefahr! Berühren<br />
Sie die Wachsschmelzerspitze nicht und schützen Sie sich vor<br />
tropfendem Wachs!<br />
• Schalten Sie den Wachsschmelzer 1 am Schiebeschalter 4 aus,<br />
wenn Sie diesen aus der Hand legen.<br />
• Lassen Sie die Wachsschmelzerspitze 3 abkühlen und setzen Sie<br />
die Schutzkappe 5 auf die Wachsschmelzerspitze 3 , bevor Sie den<br />
Wachsschmelzer 1 verstauen.<br />
• Halten Sie den Wachsschmelzer 1 gut fest.<br />
• Halten Sie den Wachsschmelzer 1 und seine Komponenten von<br />
Feuchtigkeit fern.<br />
• Vermeiden Sie ein versehentliches Einschalten. Vergewissern Sie<br />
sich, dass der Ein-/Aus-Schalter 4 nicht an ist, wenn Sie eine<br />
Batterie einsetzen. Das Einsetzen von Batterien in den eingeschalteten<br />
Wachsschmelzer kann zu Unfällen führen.<br />
Inbetriebnahme<br />
5<br />
Falsch eingelegte Batterien können das Gerät beschädigen.<br />
4<br />
3<br />
1<br />
2<br />
Batterien einlegen<br />
• Batterieabdeckung 2 nach oben abnehmen<br />
• Achten Sie auf die im Gerät gekennzeichnete<br />
Polung. Legen Sie die Batterien ein.<br />
• Batterieabdeckung 2 schließen<br />
Ein-/Ausschalten<br />
• Schiebeschalter 4 in Richtung Schmelzerspitze 3<br />
schieben<br />
• Ein/Aus Taster betätigen/loslassen<br />
Abschaltung<br />
• Schiebeschalter 4 in Richtung Batteriefach schieben<br />
4 V1/2013
Batterien wechseln<br />
• Entfernen Sie die Batterien, wenn das Gerät längere Zeit nicht<br />
benutzt wird.<br />
• Wenn es länger als 30 Sekunden dauert bis die Arbeitstemperatur<br />
erreicht wird, sollten Sie die Batterien ersetzen (siehe<br />
„Inbetriebnahme“). Verwenden Sie nur 1,5 V Batterien der Größe AA.<br />
Der Gebrauch vonanderen Batterien kann zu Verletzungen und<br />
Brandgefahr führen.<br />
Wartung, Reinigung und Service<br />
• Halten Sie den Wachsschmelzer 1 sauber, um gut und sicher zu<br />
arbeiten.<br />
• Beim Reinigen darf keine Feuchtigkeit in den Wachsschmelzer 1<br />
dringen.<br />
• Sollte der Wachsschmelzer 1 trotz sorgfältiger Herstellungs- und<br />
Prüfverfahren einmal ausfallen, wenden Sie sich an unseren<br />
Kundenservice unter www.<strong>hecht</strong>-<strong>international</strong>.com oder Hotline<br />
0180-5007992 (0,14 Euro/Min. aus dem Festnetz, Mobilfunk<br />
max. 0,42 Euro/Min., Verbindungen aus dem Ausland abweichend.)<br />
Entsorgung<br />
Elektrowerkzeuge, Zubehör und Verpackungen sollen einer umweltgerechten<br />
Wiederverwertung zugeführt werden. Nur für EU-Länder:<br />
Werfen Sie Elektrowerkzeuge nicht in den Hausmüll! Gemäß der Europäischen<br />
Richtlinie 2002/96/EG über Elektro- und Elektronik-Altgeräte<br />
und ihrer Umsetzung in nationales Recht müssen nicht mehr gebrauchsfähige<br />
Elektrowerkzeuge getrennt gesammelt und einer umweltgerechten<br />
Wiederverwertung zugeführt werden.<br />
Akkus / Batterien: Werfen Sie Akkus / Batterien nicht in den Hausmüll, ins<br />
Feuer oder ins Wasser. Akkus / Batterien sollen gesammelt, recycelt oder<br />
auf umweltfreundliche Weise entsorgt werden.<br />
Nur für EU-Länder: Gemäß der Richtlinie 91/157/EWG müssen defekte oder<br />
verbrauchte Batterien recycelt werden. Nicht mehr gebrauchsfähige<br />
Batterien können direkt abgegeben werden. Auskünfte über Sammelstellen<br />
und aktuelle Bestimmungen erhalten Sie bei Ihrer Stadt- oder<br />
Gemeindeverwaltung.<br />
CE-Konformitätserklärung<br />
Für das Gerät,<br />
Wachsschmelzer Typ S01,<br />
Inverkehrbringer: <strong>hecht</strong> <strong>international</strong> GmbH<br />
Hiermit erklären wir als verantwortlicher Inverkehrbringer, dass das oben<br />
bezeichnete Gerät den folgenden EU-Richtlinien entspricht:<br />
• EMV Richtlinie (2004/108/EG)<br />
5<br />
V1/2013
folgende harmonisierte Normen wurden herangezogen:<br />
• EN 55014-1:2006 + A1:2009<br />
• EN 55014-2:1997 + A1:2001+ A2:2008<br />
Das bezeichnete Gerät wird daher mit CE Zeichen sowie Chargennummer<br />
gekennzeichnet.<br />
Diese Konformitätserklärung verliert ihre Gültigkeit, wenn das Produkt<br />
verändert wird, sowie bei nicht bestimmungsgemäßer Verwendung.<br />
<strong>hecht</strong> <strong>international</strong> GmbH, Im Herrmannshof 10, 91595 Burgoberbach<br />
Lieferumfang<br />
• 1x Wachsschmelzer S01 mit Hobelfunktion<br />
• 2x Batterie Typ Mignonzelle LR6 / AA / 1,5 V<br />
• 1x Schutzkappe mit Reinigungsfunktion<br />
• 1x Spachtel<br />
• 1x Schleifschwamm zum Entfetten der Oberfläche<br />
• 1x Reinigungstuch<br />
• 11x Wachsstangen<br />
• 1x Bedienungsanleitung<br />
• 1x Stabile Aufbewahrungsbox<br />
Technische Daten Wachsschmelzer<br />
Betriebsspannung 2,8 V / 2,65 A<br />
Batterietyp Mignonzelle LR6 / AA / 1,5 V<br />
Leistung 7 W<br />
Gewicht ca. 43 g (ohne Batterien)<br />
6 V1/2013
Anwendung<br />
1. Vorbereiten<br />
Schaden mit Spachtel reinigen<br />
und alle losen Teile entfernen.<br />
Tipp: Drücken Sie den<br />
Schadensrand rund.<br />
2. Farbauswahl<br />
Passende Farbtöne heraussuchen.<br />
Darauf achten, dass immer mehrere<br />
Farbtöne von hell bis dunkel eingesetzt<br />
werden. Bei Echtholz zusätzlich<br />
mit Transparent (01) befüllen, um<br />
Tiefenwirkung zu erzielen.<br />
3. Schmelzen<br />
Kleine Portionen Füllstoff<br />
abschmelzen...<br />
4. Füllen<br />
... und portionsweise in die Schadstelle<br />
einbringen, bis diese leicht<br />
überfüllt ist. Immer von hell nach<br />
dunkel arbeiten.<br />
Tipp: Bei Druckstellen benutzen Sie<br />
nur den transparenten Füllstoff.<br />
7 V1/2013
Hobelrillen<br />
5. Spachteln<br />
Bei senkrechten Flächen<br />
empfehlen wir den Farbton<br />
vorher anzumischen, mit dem<br />
Spachtel aufzunehmen und<br />
einzufüllen.<br />
6. Abtragen<br />
Den Füllstoff ca. 5-7 Sek. abkühlen<br />
lassen. Nach dem Erkalten die Überstände<br />
mit den Hobelrillen (siehe<br />
Abb.) <strong>des</strong> Schmelzers abtragen.<br />
Tipp: Tragen Sie den Überstand nur<br />
mit leichten Druck ab.<br />
7. Feinabstimmung<br />
Zur Feinabstimmung nun die<br />
Maserung mit einem dunkleren<br />
Füllstoff nachahmen. Danach die<br />
Überstände wieder mit den<br />
Hobelrillen abtragen.<br />
8. Entfetten<br />
Zum Schluss werden letzte Füllstoffreste<br />
mit dem weißen Schleifschwamm<br />
entfernt und gleichzeitig<br />
der Glanzgrad der Oberfläche angepasst.<br />
Fertig!<br />
9. Reinigung <strong>des</strong> Schmelzers<br />
Die Hobelrillen werden mit dem<br />
mitgelieferten Reinigungskamm<br />
der Schmelzerspitzenabdeckung<br />
abgeschabt. Die Schmelzerspitze<br />
nur im abgekühlten Zustand mit<br />
dem Reinigungstuch abwischen.<br />
8 V1/2013
Instructions<br />
instructional video at:<br />
www.<strong>hecht</strong>-<strong>international</strong>.com<br />
Repair set for laminate and parquet flooring<br />
including smelter<br />
Instructions<br />
English<br />
9<br />
V1/2013
Instructions<br />
Rapair set for laminate and parquet flooring, article no.500060199,<br />
including smelter S01 for:<br />
Laminate, cork, parquet, and all wood and artificial surfaces.<br />
Including battery operated smelter.<br />
Contents<br />
General information / Safety precautions<br />
Implementation<br />
Insert / replace battery<br />
Delivery / technical details<br />
Use<br />
2 – 4<br />
4<br />
4 – 5<br />
6<br />
7 – 8<br />
General Safety Precautions<br />
• Read the instructions completely before implementation and follow<br />
the safety precautions. Failing to adhere to the safety precautions<br />
and instructions can result in electrocution, burns and / or severe<br />
injuries.<br />
• Keep the instructions accessible and include them when<br />
passing the product on to third parties.<br />
• Do not work with the smelter in an area deemed hazardous, in<br />
wich flammable liquids, gas or dust are found. Electrical tools<br />
produce sparks and/or heat, wich could ignite dust or vapors.<br />
• Keep children and other persons away while using the smelter.<br />
Electrical Safety<br />
• Do not work with this electrical tool in a damp or wet area.<br />
Personal Safety<br />
• Be cautious and alert when working with an electrical tool.<br />
Do not use an electrical tool when you are tired or under the<br />
influence of drugs, alcohol or medication. One moment of carelessness,<br />
while using the electrical tool, could lead to serious injury.<br />
• Avoid starting the smelter inadvertently. Make sure that the smelter<br />
is turned off before storing or carrying.<br />
• Risk of burns! Avoid skin contact with the smelter tip and avoid<br />
dripping material!<br />
10 V1/2013
Use and handling the electrical tool<br />
• Check the device and accessories before each use for damage and<br />
functionality.<br />
• Keep the smelter beyond the reach of children. Do not allow<br />
persons who are not familiar with the smelter or have not read the<br />
instructions to use it. The smelter is not a toy and is dangerous if<br />
used by inexperienced persons.<br />
Approved use<br />
• The smelter is intended, by thermal smelting with the suitable<br />
material, for repairing laminate, cork, parquet, and all wood<br />
and artificial surfaces.<br />
Use and handling of the battery tool and batteries<br />
• Please adhere to the following safety precautions when handling<br />
batteries. Batteries may leak or explode. Poisonous substances or<br />
corrosives may be released. This can cause considerable damage to<br />
material, and harm to health and person!<br />
• Never charge batteries. There is a risk of explosion and the threat of<br />
harm and damage due to released corrosives.<br />
• Use only approved batteries in electrical tools. Using non-approved<br />
-<br />
batteries can lead to injury and burns. Do not use other battery<br />
types and do not use another voltage source.<br />
• Do not use batteries, which are leaking, discolored, deformed or are<br />
damaged in any other manner.<br />
• Leaking or damaged batteries are to be disposed correctly<br />
according to the normal safety precautions (wear safety gloves).<br />
• Do not open, take apart, puncture, modify or throw batteries.<br />
Do not expose batteries to unnecessary impact.<br />
• Do not expose batteries to fire or temperatures above 50°C.<br />
Do not store batteries in hot areas and do not expose them to direct<br />
sunlight.<br />
• Never place batteries in a microwave or in a high or a low pressure<br />
vessel.<br />
• Improper use can cause fluid to leak from the batteries. Do not come<br />
into contact with corrosive fluids. Rinse with water in case of contact.<br />
Seek medical attention in case corrosive fluids come into contact<br />
with the eyes. Leaking battery fluids can cause skin irritation or burns.<br />
• Improper use can cause vapors to escape from the batteries, wich are<br />
harmful and can irritate the respiratory passages. Breathe in fresh air<br />
and seek medical attention in case of complications.<br />
11<br />
V1/2013
• Improper handling of the batteries risks the danger of a short circuit<br />
or explosion!<br />
• Dispose used batteries and defective devices as stipulated by law.<br />
Specific safety precautions<br />
• The smelter tip 3 is hot – risk of burns! Do not touch the<br />
smelter tip and avoid dripping material!<br />
• Turn off the smelter 1 off with the slider 4 switch when laying it<br />
aside.<br />
• Allow the smelter tip 3 to cool off and place the protective cap<br />
5 on the tip before putting the smelter 3 away.<br />
• Grip the smelter 1 securely.<br />
• Keep the smelter 1 and its components away from moisture.<br />
• Avoid turning on the device unintentionally. Make certain<br />
that the on/off switch 4 is not on when inserting a battery.<br />
Inserting batteries in the activated smelter can lead to accidents.<br />
Implementation<br />
5<br />
Batteries inserted incorrectly can damage the device.<br />
4<br />
3<br />
1<br />
2<br />
Insert batteries<br />
• Remove the battery cover 2 upwards<br />
• Pay attention to the polarity shown in the<br />
device. Insert the batteries.<br />
• Close the battery cover 2 .<br />
Turn off/on<br />
• Move the slide switch 4 towards the<br />
melting tip 3 .<br />
•· Activate and release on/off button<br />
Turn off<br />
• Move slide switch 4<br />
compartment.<br />
towards the battery<br />
12<br />
V1/2013
Replace batteries<br />
• Remove the batteries if the device is not used for long periods.<br />
• If it takes more than 30 seconds to reach the operating temperature,<br />
the batteries should be replaced (read „Implementation“).<br />
Only use 1,5 V / AA batteries. Using other batteries can lead to injury<br />
and risk of fire.<br />
Maintenance, cleaning and service<br />
• Keep the smelter 1 clean in order to work securely and safely.<br />
• Do not allow any moisture into the smelter 1 when cleaning it.<br />
• If the smelter 1 should stop working, <strong>des</strong>pite careful<br />
manufacturing and controlling procedures, contact our customer<br />
service at www.<strong>hecht</strong>-<strong>international</strong>.com.<br />
Disposal<br />
Electrical tools, accessories and packaging should be recycled in an<br />
environmentally friendly manner. Only for EU countries: Do not dispose<br />
of our electrical tools in household waste! In accordance with the European<br />
Directive 2002/96/EG, regarding used electrical and electronic appliances<br />
and its transposition into national law, no longer serviceable electrical<br />
tools have to be collected and recycled in an environmentally friendly<br />
manner.<br />
Rechargeable batteries / regular batteries: Do not dispose of rechargeable<br />
batteries in household waste, in fire or in water. Rechargeable batteries /<br />
regular batteries should be collected, recycled or disposed of in an<br />
enviromentally friendly manner.<br />
Only for EU countries: In accordance with the directive 91/157/EWG<br />
defective or used batteries have to be recycled. Non usable batteries can<br />
be turned in directly. You can obtain information on <strong>des</strong>ignated collection<br />
points and current regulations from your city or municipal authority.<br />
CE Declaration of Conformity<br />
For the device,<br />
Smelter Typ S01,<br />
Distributor: <strong>hecht</strong> <strong>international</strong> GmbH<br />
We hereby declare as the responsible distributor that the device <strong>des</strong>cribed<br />
above corresponds to the following EU Directives<br />
• EMV Directive (2004/108/EG)<br />
13<br />
V1/2013
The following harmonized standards were used<br />
• EN 55014-1:2006 + A1:2009<br />
• EN 55014-2:1997 + A1:2001+ A2:2008<br />
The device <strong>des</strong>cribed is therefore identified with a CE label and batch<br />
number.<br />
This conformity declaration is no longer valid when the product is<br />
modified and used improperly.<br />
<strong>hecht</strong> <strong>international</strong> GmbH, Im Herrmannshof 10, 91595 Burgoberbach<br />
Scope of delivery<br />
• 1x Smelter S01 with smoothing grooves<br />
• 2x Battery type mignon cell LR6 / AA / 1.5 V<br />
• 1x Protective cap with cleaning part<br />
• 1x Spatula<br />
• 1x Abrasive sponge<br />
• 1x Cleaning cloth<br />
• 11x Smelting sticks<br />
• 1x Instructions<br />
• 1x Sturdy storage box<br />
Technical data<br />
Smelter operating voltage 2,8 V / 2,65 A<br />
Battery type mignon cell LR6 / AA / 1,5 V<br />
Power 7 W<br />
Weight ca. 43 g (without batteries)<br />
14<br />
V1/2013
Use<br />
1. Preparation<br />
Clean damaged area with spatula<br />
and remove all loose particles.<br />
Note: Round off the edges of the<br />
damaged area.<br />
2. Color selection<br />
Select matching colors. Keep in mind,<br />
always several colors ranging from<br />
light to dark will be used. Fill real<br />
wood additionally with transparent<br />
(01), in order to get deeper penetration.<br />
3. Smelting<br />
Smelt small portions of filler...<br />
4. Filling<br />
... and add portions in the damaged<br />
area, until it is slightly overfilled.<br />
Always work from light to dark.<br />
Note: Use only transparent filler for<br />
surface dents.<br />
15<br />
V1/2013
5. Applying filler<br />
For vertical surfaces we suggest<br />
you first mix the color. Use the<br />
spatula or smelter to scoop and<br />
fill.<br />
smoothing<br />
grooves<br />
6. Remove excess filler<br />
Allow filler to cool for ca. 5-7 sec.<br />
After cooling remove the excess filler<br />
with the smoothing grooves on the<br />
smelter (see image).<br />
Note: Use only light pressure to<br />
remove excess filler.<br />
7. Final touch<br />
Now use the darker filler to match<br />
the grain as the final touch. Afterwards<br />
remove the excess filler with<br />
the smoothing grooves.<br />
8. Degreasing<br />
As the last step remove the last<br />
residual filler with the white abrasive<br />
sponge and at the same time the<br />
polish is matched to the surface.<br />
Finished!<br />
9. Cleaning the smelter<br />
Scrape the smoothing grooves clean<br />
with the cleaning comb from the<br />
smelter protection cap. Only clean<br />
the smelter tip with the cleaning<br />
cloth wehn cooled.<br />
16<br />
V1/2013
Notice d'utilisation<br />
Avec vidéo de montage sur le web sous:<br />
www.<strong>hecht</strong>-<strong>international</strong>.com<br />
Kit de réparation pour stratifié / parquet<br />
avec fondoir à cuir<br />
Notice d'utilisation<br />
Francaise<br />
17<br />
V1/2013
Notice d'utilisation<br />
Kit de réparation pour stratifié / parquet, n de réf. 500060199, avec<br />
fondoir à cire S01 pour:<br />
stratifié, parquet, liège, toutes les surfaces en bois et en plastique avec<br />
fondoir à cuir alimenté par piles.<br />
Sommaire<br />
Indications générales / Consignes de sécurité<br />
Mise en service<br />
Mise en place / remplacement de la pile<br />
Contenu de la livraison / Caractéristiques techniques<br />
Utilisation<br />
18 – 20<br />
20<br />
20 – 21<br />
22<br />
23 – 24<br />
Avertissements généraux de sécurité<br />
• Lisez l'intégralité de la présente notice d´utilisation avant sa mise<br />
en service et respectez les consignes de sécurité. Le non respect <strong>des</strong><br />
consignes de sécurité et <strong>des</strong> instructions peut provoquer un choc<br />
électrique, un incendie et/ou <strong>des</strong> blessures graves.<br />
• Conservez la présente notice dans un endroit accessible à tous<br />
les utilisateurs et remettez-là aussi en cas de transfert du produit.<br />
• Ne travaillez pas avec le fondoir à cire dans un environnement à<br />
risque d'explosion, là où se trouvent <strong>des</strong> liqui<strong>des</strong>, gaz ou poussières<br />
inflammables. Les outils électriques génèrent <strong>des</strong> étincelles et / ou<br />
de la chaleur qui peuvent enflammer la poussière ou les vapeurs.<br />
• Maintenez les enfants et les autres personnes à distance<br />
pendant l'utilisation du fondoir à cire.<br />
Sécurité électrique<br />
• Ne travaillez pas avec cet outil électrique dans un environnement<br />
humide ou mouillé.<br />
Sécurité <strong>des</strong> personnes<br />
• Soyez attentif à ce que vous faites et faites preuve de bon sens lors<br />
de l'utilisation d'un outil électrique. N'utilisez pas l´appareil si vous<br />
êtes fatigué ou sous l'influence de drogues, de l´alcool ou de<br />
médicaments. Un moment d'inattention lors de l´utilisation de<br />
l'appareil peut provoquer <strong>des</strong> blessures sérieuses.<br />
• Evitez toute mise en service intempestive du fondoir à cire.<br />
Vérifiez que le fondoir à cire est désactivé avant de prendre<br />
ou de porter celui-ci.<br />
18<br />
V1/2013
• Risque de brûlures !! Evitez tout contact du bec du fondoir à cire<br />
avec la peau et protégez-vous contre les gouttes de cire!<br />
Utilisation et traitement de l'outil électrique<br />
• Vérifiez l'absence d'endommagement et la fonctionnalité de<br />
l'appareil et <strong>des</strong> accessoires avant de les utiliser.<br />
• Conservez le fondoir à cire hors de portée <strong>des</strong> enfants. Ne<br />
laissez aucune personne utiliser le fondoir à cire si elle<br />
n'est pas familiarisée avec celui-ci ou n'a pas lu ces<br />
instructions. Le fondoir à cire n'est pas un jouet et est<br />
dangereux lorsqu'il est utilisé par <strong>des</strong> personnes inexpérimentées.<br />
Utilisation conforme<br />
• Le fondoir à cire est <strong>des</strong>tiné à la réparation <strong>des</strong> sols stratifiés<br />
en liège, parquets, et surfaces en bois et en plastique par traitement<br />
thermique effectué par fusion de la cire prévue à cet effet.<br />
Utilisation et traitement de l'outil à pile et <strong>des</strong> piles<br />
• Veuillez observer les consignes de sécurité suivantes pour le<br />
maniement <strong>des</strong> piles. Celles-ci peuvent fuire ou exploser. Les<br />
substances toxiques ou corrosives qu'elles contiennent<br />
peuvent se libérer et entraîner <strong>des</strong> dommages matériels,<br />
corporels et <strong>des</strong> effets sanitaires!<br />
• Ne rechargez jamais les piles. Il y a risque d'explosion et<br />
d'endommagements liés à l'acide qui fuit.<br />
• N'utiliser que les piles prévues à cet effet dans les outils -<br />
électriques. L'utilisation d'autres types de piles peuvent<br />
entraîner <strong>des</strong> blessures et un risque d'incendie. N'utiliser en<br />
aucun cas un autre type de pile et une autre source de tension.<br />
• Ne pas utiliser de piles qui fuient, sont décolorées,<br />
déformées ou abîmées de quelque manière que ce soit.<br />
• Les piles non étanches ou endommagées doivent être<br />
éliminées dans le respect <strong>des</strong> mesures de précaution<br />
usuelles (gants de protection).<br />
• Ne pas ouvrir, démonter, percer, modifier ni lancer les piles,<br />
ni les soumettre à <strong>des</strong> chocs inutiles.<br />
• Ne pas exposer les piles au feu ou à <strong>des</strong> températures supérieures<br />
à 50°C. Ne pas stocker les piles dans <strong>des</strong> lieux exposés à de fortes<br />
chaleurs et ne pas les exposer directement aux rayons du soleil.<br />
• Ne jamais mettre les piles dans un four à micro-on<strong>des</strong> ni<br />
dans un récipient sous haute pression ou sous vide.<br />
• En cas de mauvaise utilisation, du liquide peut s'échapper<br />
<strong>des</strong> piles. Eviter tout contact avec ce liquide. En cas de contact<br />
accidentel, rincer avec de l'eau.<br />
19<br />
V1/2013
Si le liquide pénètre dans les yeux, consulter aussi<br />
immédiatement un médecin. Du liquide de pile qui fuit<br />
peut provoquer <strong>des</strong> irritations cutanées ou <strong>des</strong> brûlures.<br />
• En cas d'utilisation incorrecte <strong>des</strong> piles, <strong>des</strong> vapeurs nocives peuvent<br />
s'échapper; celles-ci sont nocives pour la santé et irritent les voies respiratoires.<br />
Ventiler le lieu de travail et, en cas de malaises,<br />
consulter un médecin.<br />
• Une utilisation incorrecte <strong>des</strong> piles présente un risque<br />
de court-circuit ou d'explosion!<br />
• Eliminer les piles usées et les appareils défectueux<br />
conformément aux dispositions légales.<br />
Consignes de sécurité spécifiques à l'appareil<br />
• Le bec du fondoir à cire 3 devient très chaude - Risque de brûlures!<br />
Ne touchez pas le bec du fondoir; protégez-vous contre les<br />
gouttes de cire!<br />
• Désactivez le fondoir à cire 1 sur l'interrupteur à coulisse 4<br />
lorsque vous le lâchez.<br />
• Laisser le bec 3 du fondoir à cire refroidir et mettrespitze<br />
le capuchon de protection 5 sur le bec 3 avant<br />
de ranger le fondoir 1 .<br />
• Bien tenir bien le fondoir à cire 1 .<br />
• Tenir le fondoir à cire 1 et ses composants à l'abri de l'humidité.<br />
• Eviter tout un déclenchement intempestif. S'assurer<br />
que l'interrupteur marche/arrêt 4 n'est pas activé lorsque<br />
vous insérez une pile. Une mise en place <strong>des</strong> piles dans<br />
le fondoir à cire allumé peut entraîner <strong>des</strong> accidents.<br />
Mise en service<br />
Les piles qui ne sont pas insérées correctement peuvent<br />
endommager l'appareil.<br />
Mise en place <strong>des</strong> piles<br />
3<br />
• Retirer le cache du compartiment à pile 2 vers<br />
5<br />
le haut.<br />
• Tenir compte de la polarité indiquée dans<br />
l'appareil. Insérer les piles.<br />
1 · Fermer le cache du compartiment à pile 2 .<br />
4<br />
Mise en route/arrêt<br />
• Pousser l'interrupteur à coulisse dans 4 vers le bec<br />
2 du fondoir 3 .<br />
• Actionner/relâcher le bouton. marche/arrêt.<br />
Désactivation<br />
· Pousser l'interrupteur à coulisse dans 4 vers le<br />
compartiment à pile.<br />
20<br />
V1/2013
Remplacer les piles.<br />
• Enlever les piles en cas d'inutilisation prolongé de l'appareil.<br />
• Il faut remplacer les piles si l'obtention de la température de travail<br />
prend plus de 30 secon<strong>des</strong> (voir "Mise en service"). N'utiliser que<br />
<strong>des</strong> piles de 1,5 V de la taille AA. L'utilisation d'autres types de piles<br />
peut entraîner <strong>des</strong> blessures et un risque d'incendie.<br />
Maintenance, nettoyage et service<br />
• Garder le fondoir à cire 1 propre pour travailler correctement et<br />
en toute sécurité.<br />
• Aucun liquide ne doit pénétrer dans le fondoir à cire 1<br />
lors du nettoyage.<br />
• Si, malgré tous les soins apportés à la fabrication et au contrôle<br />
fondoir à cire 1 , celui-ci devait avoir un défaut, adressez-vous à<br />
notre service après-vente sous www.<strong>hecht</strong>-<strong>international</strong>.com.<br />
Elimination<br />
Les outils électriques, les accessoires et les emballages doivent être recyclés<br />
de manière écologique. Pour les pays européens uniquement : ne pas<br />
jeter les outils électriques dans les ordures ménagères! Conformément<br />
à la directive 2002/96/CE relative aux déchets d'équipements électriques<br />
et électroniques et sa transposition en droit national, les outils être utilisés<br />
outils électriques ne pouvant doivent être collectés séparément et recyclés<br />
d'une manière respectueuse de l'environnement. Batteries et piles :<br />
ne pas jeter les batteries ni les piles dans les ordures ménagères, dans le<br />
feu ou l'eau. Les batteries/piles doivent être collectées, recyclées ou éliminées<br />
en respectant l'environnement. Pour les pays UE uniquement : les<br />
piles défectueuses ou usagées doivent être recyclées conformément à la<br />
directive 91/157/CEE. Les piles ne pouvant plus être utilisées peuvent être<br />
directement apportées à un point de collecte. Vous obtiendrez les renseignements<br />
sur les centres de récupération et les dispositions actuelles<br />
auprès de votre municipalité ou de votre administration communale.<br />
Déclaration de conformité CE<br />
Pour l'appareil,<br />
Fondoir à cire type S01,<br />
Procédant à la mise sur le marché: <strong>hecht</strong> <strong>international</strong> GmbH<br />
Nous déclarons en tant que procédant responsable de la mise en<br />
Nous déclarons en tant que procédant responsable de la mise en l'appareil<br />
susmentionné est conforme aux directives européennes suivantes:<br />
• Directive sur la compatibilité électromagnétique (2004/108/CEE)<br />
21<br />
V1/2013
Les normes harmonisées suivantes ont été respectées:<br />
• EN 55014-1:2006 + A1:2009<br />
• EN 55014-2:1997 + A1:2001+ A2:2008<br />
L'appareil désigné porte donc un marquage CE et un numéro de<br />
charge.<br />
Ce certificat de conformité perd toute validité si le produit est<br />
modifié, et s'il est utilisé de manière non conforme.<br />
<strong>hecht</strong> <strong>international</strong> GmbH, Im Herrmannshof 10, 91595 Burgoberbach<br />
Étendue de la livraison<br />
• 1x fondeur à cire S01 avec une fonction rabot<br />
• 2x piles de type mignon LR6 / AA / 1,5 V<br />
• 1x capuchon de protection avec fonction de nettoyage<br />
• 1x spatule<br />
• 1x éponge émeri<br />
• 1x chiffon<br />
• 11x bâtons de cire<br />
• 1x Notice d'utilisation<br />
• 1x boîte de rangement solide<br />
Caractéristiques techniques du fondeur de cire<br />
Tension de service 2,8 V / 2,65 A<br />
Type de pile mignon LR6 / AA / 1,5 V<br />
Puissance 7 W<br />
Poids env. 43 g (sans piles)<br />
22<br />
V1/2013
Application<br />
1. Préparation<br />
Nettoyer la partie endommagée<br />
avec une spatule et enlever toutes<br />
les particules volantes. Conseil:<br />
Arrondir le bord abîmé.<br />
2. Sélection de la teinte<br />
Trouver les teintes appropriées<br />
Veiller à toujours utiliser plusieurs<br />
teintes du clair au foncé. Pour le bois<br />
véritable, ajouter en plus un<br />
transparent (01) profondeur.<br />
3. Fusion<br />
Faire fondre de petites portions<br />
d'agent de charge...<br />
4. Remplissage<br />
... Introduire par portion dans la<br />
partie endommagée jusqu'à ce<br />
qu'elle soit remplie à bord. Toujours<br />
travailler de la teinte claire vers la<br />
teinte foncée. Conseil: Utiliser l'agent<br />
de charge transparent pour les<br />
marques.<br />
23<br />
V1/2013
Rainures de rabot<br />
5. Rebouchage<br />
Pour les surfaces verticales, nous<br />
recommandons de mélanger au<br />
préalable la teinte, prendre avec la<br />
spatule ou le fondoir et reboucher.<br />
6. Enlèvement<br />
Laisser l'agent de remplissage refroidir<br />
pendant env. 5 à 7 secon<strong>des</strong>.<br />
Une fois refroidi, enlever les excès<br />
avec les rainures de rabot<br />
(voir figure) du fondoir.<br />
Conseil: Enlever l'excédent en exercant<br />
seulement une légère pression.<br />
7. Finition<br />
Pour la finition, imiter la veinure<br />
avec un agent de charge plus<br />
foncé. Puis enlever les excédents<br />
avec les rainures du rabot.<br />
8. Dégraissage<br />
Pour finir, nettoyer les derniers<br />
résidus d'agent de remplissage avec<br />
l'éponge à poncer blanche et ajuster<br />
en même temps le degré de brillance<br />
de la surface. C´est terminé!<br />
9. Nettoyage du fondoir<br />
Racler les rainures du rabot avec le<br />
peigne de nettoyage du cache du<br />
bec de fondoir. Essuyer le bec<br />
uniquement lorsqu'il est refroidi<br />
avec un chiffon de nettoyage.<br />
24<br />
V1/2013