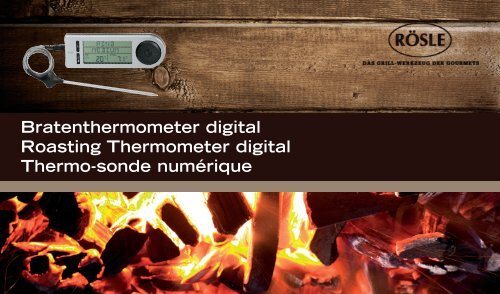
Bratenthermometer digital Roasting Thermometer digital ... - Rösle
Bratenthermometer digital Roasting Thermometer digital ... - Rösle
Bratenthermometer digital Roasting Thermometer digital ... - Rösle

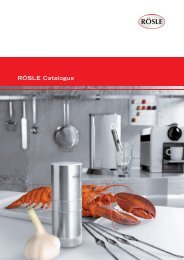
Create successful ePaper yourself
Turn your PDF publications into a flip-book with our unique Google optimized e-Paper software.
<strong>Bratenthermometer</strong> <strong>digital</strong><br />
<strong>Roasting</strong> <strong>Thermometer</strong> <strong>digital</strong><br />
Thermo-sonde numérique
Sehr geehrter RÖSLE Kunde,<br />
vielen Dank, dass Sie sich für das hochwertige <strong>digital</strong>e<br />
<strong>Bratenthermometer</strong> aus dem Hause RÖSLE entschieden<br />
haben. Eine gute Wahl. Und eine Entscheidung für ein<br />
langlebiges Qualitätsprodukt. Damit Sie über viele Jahre<br />
Freude haben, lesen Sie bitte die folgenden Produktinformationen,<br />
Hinweise zur optimalen Handhabung<br />
und Pflege sowie Sicherheitsempfehlungen.
Alle Vorteile auf einen Blick:<br />
Das <strong>digital</strong>e <strong>Bratenthermometer</strong> von RÖSLE ist ein zuverlässiger und praktischer<br />
Helfer beim Braten und Grillen.<br />
3 Digitales <strong>Thermometer</strong> zur Überwachung der Kerntemperatur<br />
3 Einfache Handhabung durch voreingestellte Gartemperaturen für Rind-, Kalb-,<br />
Schweine- und Lammfleisch sowie für Geflügel<br />
3 Möglichkeit zur individuellen Temperatureinstellung<br />
3 Im Backofen und auf dem Grill einsetzbar<br />
3 Messbereich von –20 °C bis +250 °C / –4 °F bis +482 °F<br />
3 Messfühler mit zwei Sensoren für Kern- und Umgebungs temperatur<br />
3 Anzeige der Informationen wahlweise in Deutsch, Englisch und Französisch<br />
3 Mit integriertem Timer<br />
3 Rückseite mit integrierten Magneten<br />
3 Verwendbar mit handelsüblichen Knopfzellen (2 x CR2032 mit 3V)
1. Das <strong>digital</strong>e <strong>Bratenthermometer</strong> im Detail<br />
1 Drehrad<br />
2 Set-Taste<br />
3 Ein- / Aus<br />
4 Anschlussbuchse für Messfühler<br />
5 Umschalten <strong>Thermometer</strong> / Timer<br />
Abbildung 1
6 Halter für Messfühler<br />
7 Umschalten °C / °F<br />
8 Abdeckung Batteriefach<br />
9 Standbügel ausklappbar<br />
10 Position Magnete<br />
Abbildung 2
Messfühler<br />
11 Sensor Umgebungstemperatur<br />
12 Sensor Kerntemperatur<br />
Abbildung 3
Displayinformationen im <strong>Thermometer</strong>-Modus<br />
13 Auswahl Fleischsorten / Manuell<br />
14 Auswahl Garstufen<br />
15 Anzeige Kerntemperatur<br />
16 Anzeige Umgebungstemperatur (wahlweise)<br />
17 Anzeige aktuelle Kerntemperatur / Umgebungstemperatur<br />
18 Zieltemperatur<br />
Abbildung 4
Displayinformationen im Timer-Modus<br />
19 Anzeige Stunden / Minuten / Sekunden<br />
Abbildung 5
2. Inbetriebnahme<br />
Öffnen Sie die Abdeckung des Batteriefachs auf der Rückseite des <strong>Thermometer</strong>s<br />
und legen Sie die Batterien wie unten abgebildet ein.<br />
+<br />
CR-2032<br />
+<br />
CR-2032<br />
−<br />
−<br />
Abbildung 6<br />
Das Gerät schaltet selbstständig ein und befindet sich im SprachMenü.<br />
Wählen Sie eine der verfügbaren Sprachen (Deutsch, Englisch, Französisch) aus.<br />
Verwenden Sie dazu das Drehrad und bestätigen Sie Ihre Auswahl mit der Set<br />
Taste. Stecken Sie anschließend das Kabel des Messfühlers in die entsprechende<br />
Buchse (siehe Detail Nr. 4).
Wählen Sie auf der Rückseite des <strong>Thermometer</strong>s die gewünschte Anzeige in Grad<br />
Celsius oder Grad Fahrenheit (siehe Detail Nr. 7). Ihr <strong>Bratenthermometer</strong> ist nun<br />
betriebsbereit.<br />
Hinweis:<br />
Sollte der Stecker des Messfühlers nicht korrekt angeschlossen sein, wird dies auf dem Display anstelle<br />
der Temperatur durch drei Striche angezeigt.<br />
Übersicht Fleischsorten mit entsprechenden Garzuständen und Kerntemperaturen<br />
Fleisch roh englisch medium durch<br />
Rind 51 °C 55 °C 60 °C 76 °C<br />
Schwein 82 °C<br />
Geflügel 82 °C<br />
Kalb 57 °C 60 °C 68 °C 74 °C<br />
Lamm 60 °C 63 °C 71 °C 77 °C
3. <strong>Thermometer</strong>betrieb<br />
Es blinkt die erste Zeile der Anzeige mit der Abfrage der Fleischsorte. Bestimmen<br />
Sie über das Drehrad die gewünschte Fleischsorte und bestätigen Sie mit der<br />
Set-Taste. Zur Auswahl stehen Rind-, Kalb-, Schweine- und Lammfleisch sowie<br />
Geflügel.<br />
Bestimmen Sie als Nächstes den gewünschten Garzustand. Je nach Fleischsorte<br />
stehen verschiedene Auswahlmöglichkeiten zur Verfügung. Die Auswahl erfolgt<br />
ebenfalls über das Drehrad, die Bestätigung der Auswahl über die Set-Taste.<br />
Für individuelle Einstellungen – siehe unter Punkt 3.3.
Nach Auswahl der Fleischsorte und des entsprechenden Garzustandes blinkt im<br />
Display die Anzeige TEMP (über dem Fleischsymbol, Detail Nr. 15). Der Messvorgang<br />
wurde gestartet. Solange die Anzeige TEMP blinkt, misst der Fühler<br />
und im Display erscheint die aktuelle Kerntemperatur (Detail Nr. 17). Durch<br />
Drehen am Drehrad wechselt die Anzeige auf die aktuelle Ofen- bzw. Umgebungstemperatur.<br />
Nach 10 Sekunden geht die Anzeige wieder in den normalen<br />
Modus zurück.<br />
Auf der rechten Seite wird im Display entsprechend dem gewählten Garzustand<br />
die Zieltemperatur angezeigt.
3.1 Anwendung<br />
Der Messfühler verbleibt während des gesamten Bratvorgangs im Fleisch. Beim<br />
Schließen der Backofentür achten Sie darauf, dass das Kabel an der weichen Dichtung<br />
der Tür anliegt und nicht versehentlich an den Scharnieren eingeklemmt wird.<br />
Wählen Sie einen Platz für Ihr <strong>Bratenthermometer</strong> in unmittelbarer Nähe des Ofens<br />
(Kabellänge 1 Meter). Das <strong>Bratenthermometer</strong> ist auf der Rückseite mit Magneten<br />
ausgestattet, somit besteht die Möglichkeit zur Platzierung an der Backofentür.<br />
Nutzen Sie dazu den äußeren Rand der Backofentür und achten Sie darauf,<br />
dass die Fläche nicht heißer als auf 50 °C erhitzt ist.<br />
Erreicht die gemessene Kerntemperatur die vorgegebene Zieltemperatur, wird<br />
der Alarm aktiviert. Um den Alarm zu beenden, drücken Sie die SetTaste.
3.2 Vorgegebene Kerntemperatur ändern<br />
Wenn die vorgegebenen Kerntemperaturen für die unterschiedlichen Fleischsorten<br />
und Garpunkte nicht ihrem persönlichen Gusto entsprechen, können Sie diese<br />
verändern und dauerhaft abspeichern. Fleischsorte aus wählen und mit der Set<br />
Taste bestätigen und anschließend den gewünschten Garzustand wählen (bei Kalb,<br />
Lamm, Rind) und ebenfalls mit der SetTaste bestätigen. SetTaste für 3 sec.<br />
gedrückt halten. Die optimale Temperatur beginnt zu blinken, Sie können nun<br />
mit dem Drehrad die gewünschte Kerntemperatur selbst wählen. Durch Betätigen<br />
der SetTaste bleibt die ausgewählte Temperatur gespeichert.
3.3 Individuelle Temperatureinstellung<br />
Zur Einstellung einer individuellen Zieltemperatur wählen Sie anstelle einer<br />
Fleisch sorte den Punkt „MANUELL“ und bestätigen mit der Set-Taste. Die<br />
Anzeige der Zieltemperatur beginnt zu blinken und kann über das Drehrad<br />
eingestellt werden.<br />
3.4 Reset – Rücksetzen auf Werkseinstellung<br />
Um das Gerät wieder auf die Werkseinstellung zurückzusetzen, drücken Sie die<br />
Taste <strong>Thermometer</strong>/Timer und die Set-Taste zugleich und halten diese für 3 sec.<br />
gedrückt.<br />
Nun sind alle individuellen Einstellungen gelöscht und die Temperaturen sind<br />
wieder auf den Auslieferungszustand zurück gesetzt.
4. Timerbetrieb<br />
4.1 Timer starten<br />
Um das <strong>Bratenthermometer</strong> als Timer zu verwenden, drücken Sie Taste Nr. 5.<br />
Im Display erscheint die Anzeige für den Timer wie Abbildung 5.<br />
Wählen Sie mit dem Drehrad die gewünschte Einstellung für Stunden,<br />
Minuten und Sekunden und bestätigen jede Einstellung mit der Set-Taste.<br />
Maximale Einstellzeit: 9 Stunden, 59 Minuten und 59 Sekunden.<br />
Ist die Timerzeit abgelaufen, wird ein akustisches Alarmsignal ausgelöst.<br />
Um den Alarm zu beenden, drücken Sie die Set-Taste. Die Timerzeit läuft<br />
weiter bis maximal 30 Minuten nach dem Erreichen der ursprünglichen<br />
Zeiteinstellung.
In dieser Zeit und nach dem Abstellen des Signaltons erfolgt kein weiteres<br />
akustisches Signal. Erst nach Ablauf der 30 Minuten wird der Timer durch<br />
einen langen Signalton beendet.<br />
Timer und <strong>Bratenthermometer</strong> können auch zeitgleich betrieben werden.
4.2 Timer anhalten<br />
Das Anhalten des Timers im laufenden Betrieb erfolgt durch Drücken der Set<br />
Taste. Durch erneutes Drücken der SetTaste wird der Countdown fortgesetzt.<br />
4.3 Timer zurücksetzen<br />
Um den Timer zurückzusetzen, muss die Zeitmessung durch kurzes Drücken<br />
der SetTaste unterbrochen werden. Anschließend die SetTaste 3 Sekunden<br />
lang gedrückt halten.
5. Aufbewahrung<br />
Um Beschädigungen zu vermeiden, sollte der Messfühler ausgesteckt und im<br />
vorgesehenen Halter aufbewahrt werden.<br />
Um das <strong>Bratenthermometer</strong> an der RÖSLE Küchenleiste aufzubewahren,<br />
empfehlen wir den Halter für die Offene Küche (Art.-Nr. 19223).<br />
6. Reinigung<br />
Messfühler und Kabel sollten nur mit einem feuchten Tuch gereinigt werden.<br />
Da es sich um ein elektronisches Gerät handelt, darf das <strong>Bratenthermometer</strong><br />
nicht mit Feuchtigkeit in Berührung kommen. Reinigen Sie es bei Bedarf nur<br />
mit einem trockenen Tuch.<br />
Bitte beachten Sie, dass jegliche Art von Feuchtigkeit zu Beschädigungen führen<br />
kann. Eine Reinigung in der Spülmaschine ist nicht möglich.
7. Sicherheitshinweise<br />
3 Bei Anwendung auf dem Grill oder im Backofen können Messfühler und<br />
Kabel heiß werden. Verwenden Sie deshalb immer Schutzhandschuhe<br />
bei der Handhabung.<br />
3 Das <strong>Bratenthermometer</strong> und der Messfühler sind für Temperaturen von –20 °C<br />
bis maximal +250 °C geeignet. Temperaturen außerhalb des Messbereiches<br />
beschädigen den Artikel und werden im Display nicht angezeigt.<br />
3 Zur Verwendung im Backofen mit eingeschalteter Grillstufe ist das <strong>Bratenthermometer</strong><br />
nicht geeignet.<br />
3 Das <strong>Bratenthermometer</strong> ist stets außerhalb des Backofens zu platzieren.<br />
Übermäßige Hitze führt zu Beschädigungen.<br />
3 Bei Temperaturen über 250 °C erscheint im Display „ZU HEISS“ und es<br />
ertönt zusätzlich ein Signalton, bitte entfernen Sie den Messfühler mit<br />
Schutzhandschuhen sofort aus dem Hitzebereich.
8. Hinweis zur Entsorgung von Batterien<br />
Die beigelegten Lithium Knopfzellen/Batterien sind nicht aufladbar. Batterien<br />
dürfen grundsätzlich nie beschädigt, aufgebohrt oder in offenes Feuer geworfen<br />
werden. Bitte mischen Sie niemals alte und neue Batterien.<br />
Die leeren Batterien dürfen Sie nicht in den Hausmüll werfen. Altbatterien<br />
enthalten möglicherweise Schadstoffe, die Umwelt und Gesundheit schaden<br />
können. Bitte geben Sie die Batterien im Handel oder an den Recyclinghöfen<br />
der Kommunen ab. Die Rückgabe ist unentgeltlich und gesetzlich vorgeschrieben.<br />
Bitte werfen Sie nur entladene Batterien in die aufgestellten Behälter.<br />
Alle Batterien werden wiederverwertet. So lassen sich wertvolle Rohstoffe wie<br />
Eisen, Zink oder Nickel wieder gewinnen. Batterierecycling ist ein wichtiger<br />
Beitrag zum Umweltschutz.<br />
Weitere Infos zur umweltverträglichen Entsorgung von Batterien erhalten Sie<br />
bei Ihrer Kommune.
9. Entsorgung<br />
Dieses Produkt ist nicht als normaler Haushaltsabfall zu behandeln,<br />
sondern muss an einer Annahmestelle für das Recycling von elektrischen<br />
und elektronischen Geräten abgegeben werden. Weitere Informationen<br />
erhalten Sie über Ihre Gemeinde, die kommunalen Entsorgungsbetriebe<br />
oder das Geschäft, in dem Sie das Produkt gekauft haben.<br />
Allgemeine Sicherheitshinweise<br />
Das <strong>Bratenthermometer</strong> ist kein Spielzeug und ist mit der notwendigen Sorgfalt<br />
zu behandeln. Kleinteile können von Kindern verschluckt werden oder sie<br />
könnten sich an dem Messfühler stechen, bitte daher von Kindern fernhalten.<br />
Für medi zinische Anwendungen nicht geeignet.
CE-Konformität. Dieses Gerät ist funkentstört entsprechend der geltenden<br />
EG-Richtlinie 89/336/EWG.<br />
Technische Änderungen vorenthalten.<br />
Wir wünschen Ihnen viel Spaß und Freude<br />
mit Ihrem neuen RÖSLE Küchen werkzeug.<br />
Ihr RÖSLE Team
Dear RÖSLE Customer,<br />
Thank you for choosing the high quality <strong>digital</strong> <strong>Roasting</strong><br />
<strong>Thermometer</strong> from RÖSLE. It’s a wise choice and one<br />
that will prove the test of time as a durable top quality<br />
product. To make sure you get optimum results and<br />
longlasting service from your new kitchen accessory,<br />
we’ve compiled some important information plus tips<br />
for optimal use and aftercare, as well as important safety<br />
guidelines.
Outstanding product features at a glance:<br />
The <strong>digital</strong> <strong>Roasting</strong> <strong>Thermometer</strong> from RÖSLE is a reliable and practical aid<br />
for roasting and grilling.<br />
3 Digital <strong>Thermometer</strong> to determine the core temperature<br />
3 Easy to operate with pre-set temperature values for beef, veal, pork, lamb<br />
and poultry<br />
3 Temperature settings can be set manually if desired<br />
3 For use at the grill and in the oven<br />
3 Measuring range –20 °C to +250 °C / –4 °F to +482 °F<br />
3 Probe with two sensors gives reliable core and ambient temperature readings<br />
3 Display language selectable from English, French or German<br />
3 With integrated timer<br />
3 Magnets integrated into back plate<br />
3 Uses commonly available batteries (2 pieces of type CR2032, 3V)
1. Close-up on the <strong>digital</strong> <strong>Roasting</strong> <strong>Thermometer</strong><br />
1 Setting dial<br />
2 Set Button<br />
3 On / Off<br />
4 Socket to attach Probe<br />
5 Switch <strong>Thermometer</strong> / Timer<br />
figure 1
6 Probe holder<br />
7 Selector switch °C / °F<br />
8 Cover of battery compartment<br />
9 Foldable stand<br />
10 Position of magnets<br />
figure 2
Probe<br />
11 Sensor for ambient temperature<br />
12 Sensor for core temperature<br />
figure 3
Display in <strong>Thermometer</strong> mode<br />
13 Selected meat type / manual<br />
14 Selected consistency<br />
15 Core temperature symbol<br />
16 Ambient temperature symbol (selectable)<br />
17 Current core temperature / ambient temperature<br />
18 Selected temperature<br />
figure 4
Display in Timer mode<br />
19 Hours / minutes / seconds<br />
figure 5
2. First time use<br />
Open the battery compartment on the rear of the product and position the two<br />
provided batteries according to the illustration below.<br />
+<br />
CR-2032<br />
+<br />
CR-2032<br />
−<br />
−<br />
figure 6<br />
The apparatus switches on automatically and displays the language menu.<br />
Choose one of the available languages: English, French, or German. Use the<br />
setting dial to make your choice and confirm by pressing the Set button. Insert<br />
the probe’s cable into the socket (see detail 4 in illustration).
On the rear of the thermometer select measuring units in °Celsius or Fahrenheit<br />
(see detail 7 in illustration). Your <strong>digital</strong> <strong>Roasting</strong> <strong>Thermometer</strong> is now ready for<br />
use.<br />
Note:<br />
If the probe’s cable is not inserted correctly, the display will show three strokes instead of the temperature.<br />
Meat types at a glance with selectable consistencies and core temperatures<br />
Meat very rare rare medium well done<br />
Beef 60 °C / 140 °F 63 °C / 145 °F 71 °C / 160 °F 77 °C / 170 °F<br />
Pork 74 °C / 165 °F<br />
Poultry 74 °C / 165 °F<br />
Veal 57 °C / 135 °F 60 °C / 140 °F 68 °C / 155 °F 74 °C / 165 °F<br />
Lamb 60 °C / 140 °F 63 °C / 145 °F 71 °C / 160 °F 77 °C / 170 °F
3. Using the <strong>Thermometer</strong><br />
The first line of the display flashes for selection of meat type. Select the meat<br />
type using the setting dial and confirm by pressing the Set button. Choose from<br />
beef, veal, pork, lamb or poultry.<br />
Next select the desired consistency. The available settings depend on the meat<br />
type setting. Use the setting dial to choose and confirm by pressing the Set<br />
button.<br />
For user defined settings – see section 3.3.
After selection of meat type and consistency, ‘TEMP’ will flash on the display<br />
(above the meat symbol, see detail 15 in illustration). Temperature measurement<br />
has now commenced. As long as ‘TEMP’ flashes, the probe is measuring<br />
and the current core temperature is shown on the display (see detail 17 in<br />
illustration). Using the setting dial the readout will change to the current oven,<br />
i.e. ambient temperature. After 10 seconds the display will return to normal<br />
mode.<br />
On the right side of the display the desired target temperature will be shown<br />
depending on the selection for consistency.
3.1 Application<br />
The probe remains in the meat throughout the cooking process. When closing the<br />
oven door check that the probe’s cable is in contact with the soft seal of the door<br />
and is not jammed by the door’s hinges.<br />
Choose a convenient spot to position your <strong>digital</strong> <strong>Roasting</strong> <strong>Thermometer</strong> near the<br />
oven (cable length 1 metre / 39.4 in.). The thermometer is equipped with magnets<br />
on the back plate so that it can be also positioned onto the oven door. Position<br />
only on the rim of the oven door and be careful that surface heat does not exceed<br />
50 °C / 122 °F.<br />
An acoustic signal will be activated when the preset core temperature is reached.<br />
To stop the signal press the Set button.
3.2 Changing preset values for optimum core temperature<br />
When the preset values for core temperature for the various types of meat do<br />
not comply with your personal preference, they can be changed and stored.<br />
Select meat type (veal, lamb, beef) using the Set Button and then select the<br />
desired consistency.<br />
Press the Set Button and hold it down for 3 seconds. The readout for the preset<br />
optimum temperature will start to light intermittently. Using the Setting dial you<br />
can now set the desired value. Press the Set Button to store the new value.<br />
3.3 Setting temperature manually<br />
To set the temperature manually, choose the setting ‘MANUAL’ instead of a meat<br />
type and confirm by pressing the Set button. The target temperature readout will<br />
light intermittently and the value can be changed using the setting dial.
3.4 Resetting to pre-defined factory values<br />
If you wish to reset the appliance to the original factory values, press the<br />
<strong>Thermometer</strong>/Timer switch and the Set Button at the same time and hold<br />
pressed down for 3 seconds.<br />
Now all user defined settings are deleted and the temperature values are reset<br />
to the pre-defined factory values.
4. Timer function<br />
4.1 Starting Timer<br />
To use the Timer function of the <strong>digital</strong> thermometer press button No. 5.<br />
The timer display mode will be activated as shown in illustration 5.<br />
Use the setting dial to choose the time setting for hours, minutes and seconds<br />
and confirm each setting by pressing the Set button.<br />
Maximum countdown: 9 hours, 59 minutes and 59 seconds.
When countdown has terminated, an acoustic signal will be activated. To stop the<br />
signal press the Set button. The timing display will continue to run for 30 minutes<br />
after completion of countdown. After interruption of the original signal no further<br />
acoustic signal will be given during this time span. After 30 minutes and stopping<br />
of the timer function, a prolonged acoustic signal will be emitted.<br />
The timer and thermometer can be operated simultaneously.
4.2 Stopping the Timer<br />
To stop the timer while running press the Set button. Pressing the Set button<br />
again will reactivate the countdown.<br />
4.3 Resetting Timer<br />
To reset the timer briefly press the Set button to interrupt the countdown.<br />
Then hold the Set button pressed down for 3 seconds.
5. Storing<br />
To avoid damage the probe’s cable should be unplugged and the probe should<br />
be inserted into the holder intended for its storage.<br />
For storage of the thermometer on a RÖSLE Standard Rail, we recommend<br />
the Open Kitchen Holder (Art. No. 19223).<br />
6. Cleaning<br />
To clean probe and cable both should only be given a wipe with a damp cloth.<br />
Since the display unit is an electronic device it should at no time come into<br />
contact with liquid. If necessary it can be wiped clean using a dry cloth.<br />
Please note that any type of humidity may lead to malfunctioning and damage<br />
to the instrument. Cleaning in a dishwasher is not possible.
7. Safety Instructions<br />
3 The probe and cable can become hot when used at the grill or in the oven.<br />
So always use protective gloves for handling.<br />
3 The <strong>digital</strong> thermometer and probe are for use with temperatures from –20 °C /<br />
–4 °F to maximum +250 °C / +482 °F. Temperatures beyond this range will<br />
cause damage to the instrument and will not appear on the display.<br />
3 When using the grill function of an oven, the thermometer can not be used.<br />
3 The <strong>Roasting</strong> <strong>Thermometer</strong> must always be placed outside the oven. Excessive<br />
heat causes damage to the display unit.<br />
3 At temperatures above 250 °C / +482 °F the display reads ‘TOO HOT’ and<br />
an acoustic signal is emitted. Please remove the probe from the heated area<br />
immediately using protective kitchen gloves.
8. Note on disposal of batteries<br />
The lithium batteries provided are not rechargeable. Batteries should never be<br />
damaged, drilled through or thrown into an open fire. Never use a combination<br />
of old and new batteries.<br />
Used batteries should never be disposed of with ordinary household waste. Used<br />
batteries may contain hazardous material which can be harmful to health and<br />
the environment. Please deliver used batteries to retailers’ recycling facilities or<br />
to your local waste disposal service for battery return. Return of used batteries is<br />
a service free of charge and a legal obligation. Please use recycling containers<br />
for return of exhausted batteries. All batteries will be recycled. In this way valuable<br />
natural resources such as iron, zinc and nickel will be reused. Recycling<br />
of batteries is an important contribution to environmental protection.<br />
Your local waste disposal facility will provide you with further information on<br />
request.
9. Disposal<br />
This product should not be disposed of with ordinary household waste<br />
but must be channelled to an appropriate recycling facility for electric<br />
and electronic equipment. For further information contact your local<br />
authority, communal waste disposal facilities or the shop where you<br />
purchased the item.<br />
General Safety Guidelines<br />
The <strong>digital</strong> <strong>Roasting</strong> <strong>Thermometer</strong> should not be used as a toy and should be<br />
handled with caution at all times. Small components could be accidentally<br />
swallowed by children or injury caused by the probe’s tip – so please keep the<br />
appliance safely out of reach. Not suitable for medical application.
CE Conformity. This appliance complies with EU Directive 89/336/EWG<br />
pertaining to electro-magnetic interference.<br />
We reserve the right to technical modification without prior notice.<br />
We wish you long lasting service from<br />
your new RÖSLE Kitchen Accessory.<br />
Your RÖSLE Team
Chère Cliente, cher Client RÖSLE,<br />
Nous vous remercions d’avoir choisi la Thermosonde<br />
haut de gamme de notre maison. Le choix d’un article<br />
de qualité. Afin qu’il vous apporte entière satisfaction<br />
pendant de nombreuses années, nous avons réuni ici<br />
les informations importantes sur l’article ainsi que les<br />
conseils d’utilisation, d’entretien et de sécurité.
Tous les avantages en un clin d’œil:<br />
La Thermo-sonde RÖSLE est un article fiable et pratique pour rôtir et faire griller.<br />
3 Thermomètre numérique pour le contrôle de la température de cuisson<br />
3 Utilisation simple grâce aux températures de cuisson prédéfinies pour le<br />
bœuf, le veau, le porc, l’agneau ainsi que la volaille. Possibilité de régler<br />
la température manuellement<br />
3 Utilisable au four et sur le grill / barbecue<br />
3 Mesures de températures allant de –20 °C à +250 °C<br />
3 Sonde avec deux capteurs pour mesurer la température de la viande et<br />
la température environnante<br />
3 Indication des informations soit en allemand, anglais ou français<br />
3 Avec minuteur intégré<br />
3 Verso avec aimants intégrés<br />
3 Utilisable avec des piles boutons vendues dans le commerce (2x CR2032 de 3V)
1. La Thermo-sonde en détails<br />
1 Bouton rotatif<br />
2 Touche Set<br />
3 Allumé / Eteint<br />
4 Prise pour la sonde<br />
5 Commutation Thermomètre /<br />
Minuteur<br />
schéma 1
6 Support pour sonde<br />
7 Commutation °C / °F<br />
8 Couvercle du compartiment à piles<br />
9 Support pliable<br />
10 Position des aimants<br />
schéma 2
Sonde<br />
11 Capteur de la température environnante<br />
12 Capteur de la température de la viande<br />
schéma 3
Information de l’écran en position Thermomètre<br />
13 Choix des viandes / manual<br />
14 Choix de la cuisson<br />
15 Indication de la température de la viande<br />
16 Indication de la température environnante<br />
(au choix)<br />
17 Indication de la température actuelle de la viande /<br />
de la température environnante<br />
18 Température à atteindre<br />
schéma 4
Information de l’écran en position Minuteur<br />
19 Affichage Heures / Minutes / Secondes<br />
schéma 5
2. Mise en marche<br />
Ouvrez le couvercle du compartiment à piles au verso du thermomètre et insérez<br />
les piles comme indiqué cidessous.<br />
+<br />
CR-2032<br />
+<br />
CR-2032<br />
−<br />
−<br />
schéma 6<br />
L’appareil se met seul en marche et se trouve dans le mode des langues. Choisissez<br />
l’une des langues (allemand, anglais ou français). Pour cela utilisez le bouton<br />
rotatif et confirmez votre choix en appuyant sur la touche « Set ». Mettez ensuite le<br />
fil de la sonde dans la prise correspondante (voir détail n °4).
Choisissez au verso du thermomètre l’indication souhaitée en degrés Celsius ou<br />
en degrés Fahrenheit (voir détail n °7). Votre Thermosonde est maintenant prête<br />
à l’emploi.<br />
Conseil:<br />
Au cas où la prise de la sonde n’était pas correctement branchée, ceci serait indiqué sur l’écran par des<br />
tirets au lieu de la température.<br />
Tableau des viandes et leur cuisson correspondante<br />
Viande bleu saignant à point bien cuit<br />
Bœuf 60 °C 63 °C 71 °C 77 °C<br />
Porc 82 °C<br />
Volaille 82 °C<br />
Veau 57 °C 60 °C 68 °C 74 °C<br />
Agneau 60 °C 63 °C 71 °C 77 °C
3. Fonctionnement du Thermomètre<br />
La première ligne de l’écran clignote avec la demande de la sorte de viande.<br />
Choisissez la viande en tournant le bouton rotatif et confirmez votre choix avec<br />
la touche « Set ». Vous pouvez choisir entre le bœuf, le veau, le porc, l’agneau<br />
ou la volaille.<br />
Choisissez ensuite la cuisson. Selon la viande, diverses possibilités de choix<br />
vous sont proposées. La sélection se fait également par le bouton rotatif et la<br />
confirmation du choix par la touche « Set ».<br />
Pour régler les températures individuellement – voir point 3.3
Après avoir sélectionné la sorte de viande et sa cuisson correspondante, l’indication<br />
TEMP clignote à l’écran (au-dessus du symbole de la viande, détail n °15).<br />
Le procédé de mesure de température vient de débuter. Tant que l’indication<br />
TEMP clignote, la sonde est en train de mesurer, et la température actuelle de la<br />
viande s’affiche à l’écran. (détail n °17). En tournant le bouton rotatif l’affichage<br />
permute sur la température du four ou la température environnante actuelle.<br />
Après 10 secondes l’affichage se remet en mode normal.<br />
Sur le côté droit de l’écran s’affiche la température à atteindre correspondant à<br />
la sélection de la cuisson de la viande.
3.1 Utilisation<br />
La sonde reste durant toute la cuisson dans la viande. En fermant la porte du four,<br />
faites attention à ce que le câble repose sur le joint souple de la porte et ne soit<br />
pas coincé dans les charnières de la porte.<br />
Choisissez une place pour votre Thermosonde directement auprès de votre four<br />
(longueur du câble de 1 mètre). La Thermosonde est dotée d’aimants au verso<br />
afin qu’elle puisse être fixée sur la porte du four. Utilisez pour cela uniquement<br />
l’entourage de la porte et faites attention à ce que la surface ne chauffe pas à<br />
plus de 50 °C.<br />
Lorsque la température de cuisson prédéfinie de la viande est atteinte, l’alarme<br />
se met en marche. Pour arrêter l’alarme, appuyez sur la touche « Set ».
3.2 Changer la température de cuisson prédéfinie<br />
Si la température de cuisson prédéfinie pour les différentes sortes de viandes<br />
et cuisson ne correspond pas à votre goût, vous pouvez changer cellesci et les<br />
enregistrer à long terme.<br />
Choisir la sorte de viande et confirmer par la touche Set et régler ensuite la cuisson<br />
souhaitée (veau, agneau, bœuf).<br />
Maintenir la touche Set appuyée pendant 3 secondes. La température idéale<br />
commence à clignoter. Vous pouvez alors choisir vousmême la température<br />
souhaitée à l’aide du bouton rotatif. En appuyant sur la touche Set vous enregistrez<br />
la nouvelle température choisie.
3.3. Réglage individuel de la température<br />
Pour régler une température individuelle à atteindre, choisissez au lieu de la<br />
sorte de viande le point « MANUEL » et confirmez votre choix par la touche<br />
« Set ». L’affichage de la température à atteindre commence à clignoter et<br />
peut être réglé par le bouton rotatif.<br />
3.4 Reset – Retour aux réglages de l’usine<br />
Pour remettre la thermosonde aux réglages prédefinis par l’usine, appuyez en<br />
même temps sur la touche Thermomètre/Timer et sur la touche Set pendant<br />
3 secondes.<br />
Tous les réglages individuels sont effacés et les températures sont de nouveau<br />
réglées comme elles l’étaient à l’origine.
4. Fonctionnement du Minuteur<br />
4.1 Démarrer le Minuteur<br />
Pour utiliser la Thermo-sonde comme Minuteur, appuyez sur la touche n °5.<br />
Sur l’écran apparaît le mode minuteur comme indiqué sur le schéma 5.<br />
Sélectionnez à l’aide du bouton rotatif le réglage souhaité pour les heures, les<br />
minutes et les secondes et confirmez chaque position par la touche « Set ».<br />
Réglage maximum de : 9 heures, 59 minutes et 59 secondes.
Lorsque la minuterie est écoulée, un signal d’alarme se déclenche. Pour arrêter<br />
le signal sonore, appuyez tout simplement sur la touche « Set ». La minuterie<br />
continue à s’écouler jusqu’à 30 minutes maximum après avoir atteint l’heure<br />
réglée initialement. Durant ce temps et après avoir arrêté l’alarme, il n’y aura<br />
plus aucun signal sonore de donné. Uniquement après que le temps des<br />
30 minutes se soit écoulé, la minuterie s’arrêtera par un long signal sonore.<br />
Le Minuteur et la Thermosonde peuvent être utilisés en même temps.
4.2 Arrêter le Minuteur<br />
Pour arrêtez le Minuteur lors de l’écoulement du temps, il suffit d’appuyer sur la<br />
touche « Set ». En appuyant de nouveau sur la touche « Set », le temps continue<br />
à s’écouler.<br />
4.3 Remettre le Minuteur à zéro<br />
Pour remettre la minuterie à zéro, il faut d’abord interrompre celleci en appuyant<br />
rapidement sur la touche « Set ». Ensuite appuyez pendant 3 secondes sur la<br />
touche « Set ».
5. Rangement<br />
Afin d’éviter des dommages, la sonde doit être débranchée et rangée dans le<br />
support prévu à cet effet.<br />
Pour ranger la Thermo-sonde sur une tringle de la Cuisine Ouverte RÖSLE,<br />
nous recommandons le support pour Minuteur numérique (art. n ° 19223).<br />
6. Entretien<br />
La sonde et le câble doivent être nettoyés uniquement à l’aide d’un torchon humide.<br />
Etant donné qu’il s’agit d’un appareil électronique, la Thermo-sonde ne doit pas<br />
entrer en contact avec l’humidité. Nettoyez-la si besoin est, à l’aide d’un torchon<br />
sec.<br />
Veuillez noter que toute sorte d’humidité peut engendrer des dommages. Le nettoyage<br />
au lave-vaisselle est impossible.
7. Conseils de sécurité<br />
3 Lors de l’utilisation au four ou sur le barbecue la sonde et le câble peuvent<br />
devenir brûlants. C’est pourquoi vous devez utiliser des maniques ou gants<br />
de protection lors de l’utilisation.<br />
3 La Thermo-sonde ainsi que les capteurs sont adaptés pour des températures<br />
allant de –20 °C à maximum +250 °C. Les températures au-delà de cette<br />
fourchette endommagent l’article et ne sont pas affichées sur l’écran.<br />
3 La Thermo-sonde n’est pas adaptée pour l’utilisation au four avec le<br />
programme grill.<br />
3 La Thermo-sonde doit toujours être placée en dehors du four. Une source<br />
de chaleur excessive engendre des dommages.<br />
3 Lors de températures supérieures à 250 °C, il apparaît sur le display<br />
« DANGER » et un signale sonore retentit. Retirez immédiatement la<br />
sonde de la source de chaleur en vous protégeant avec des gants à four.
8. Conseil pour le traitement des piles<br />
Les piles boutons lithium jointes ne sont pas rechargeables. Les piles ne doivent en<br />
aucun cas être endommagées, percées ou jetées au feu. Ne mélangez jamais des<br />
piles neuves avec des piles anciennes.<br />
Ne jetez pas les piles à la poubelle. Les piles peuvent contenir des substances<br />
nuisibles à la santé et à l’environnement. Vous pouvez redonner les piles usagées<br />
dans les commerces ou dans les déchetteries communales. La restitution des<br />
piles est gratuite et régie par une loi. Ne jetez que des piles usagées dans les<br />
containers prévus. Toutes les piles sont recyclées. Ainsi des matières premières<br />
précieuses comme le fer, le zinc ou le nickel peuvent en être extraites. Le recyclage<br />
des piles est une contribution à la protection de l’environnement.<br />
Vous pouvez recevoir de plus amples informations auprès de votre commune.
9. Traitement des déchets<br />
Cet article ne doit pas être considéré comme un déchet ménager mais<br />
doit être déposé dans les déchetteries pour recyclage des appareils<br />
électriques et électroniques. Vous pouvez recevoir de plus amples<br />
informations auprès de votre commune, des déchetteries communales<br />
ou dans le magasin où vous avez acheté l’article.<br />
Conseils généraux de sécurité<br />
La Thermosonde n’est pas un jouet et doit être utilisé avec précaution. De petits<br />
éléments peuvent être avalés par les enfants ou ceuxci peuvent se blesser en<br />
se piquant avec la sonde, c’est pourquoi l’article est à tenir hors de portée des<br />
enfants. L’article ne doit pas être utilisé à des fins médicales.
CE-conformité. Cet article est antiparasité conformément à la loi<br />
Européenne en vigueur 89/336/EWG.<br />
Sous réserve de modification technique.<br />
Nous vous souhaitons entière satisfaction<br />
et plaisir avec votre nouvel ustensile RÖSLE.<br />
Votre équipe RÖSLE
RÖSLE GmbH & Co. KG<br />
Johann-Georg-Fendt-Straße 38<br />
87616 Marktoberdorf<br />
Deutschland<br />
Tel. +49 8342 912 0<br />
Fax +49 8342 912-190<br />
www.roesle.de<br />
0411