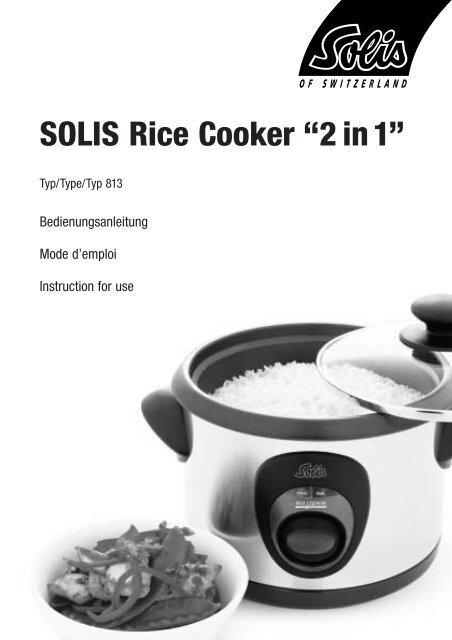
SOLIS Rice Cooker “2 in 1”
SOLIS Rice Cooker “2 in 1”
SOLIS Rice Cooker “2 in 1”

Create successful ePaper yourself
Turn your PDF publications into a flip-book with our unique Google optimized e-Paper software.
<strong>SOLIS</strong> <strong>Rice</strong> <strong>Cooker</strong> <strong>“2</strong> <strong>in</strong> <strong>1”</strong><br />
Typ/Type/Typ 813<br />
Bedienungsanleitung<br />
Mode d’emploi<br />
Instruction for use
Deutsch Seiten 3–15<br />
Français Pages 17–29<br />
English Pages 31–43<br />
2
Inhalt<br />
Herzlichen Glückwunsch Seite 4<br />
Die Sicherheit steht bei <strong>SOLIS</strong> an erster Stelle Seite 5<br />
Lernen Sie Ihren <strong>SOLIS</strong> Reiskocher «2 IN 1» kennen Seite 6<br />
So bedienen Sie Ihren <strong>SOLIS</strong> Reiskocher «2 IN 1» Seite 7<br />
Reiskochtabellen Seite 9<br />
Dämpfen Seite 11<br />
Re<strong>in</strong>igung und Pflege Seite 15<br />
31
<strong>SOLIS</strong><br />
gratuliert<br />
Ihnen ganz herzlich zum Erwerb Ihres neuen <strong>SOLIS</strong> Reiskocher «2 IN 1»<br />
4
Die Sicherheit steht bei <strong>SOLIS</strong> an erster Stelle<br />
Wir von der <strong>SOLIS</strong> s<strong>in</strong>d sehr sicherheitsbewusst und<br />
behalten bei der Konstruktion und Montage unserer<br />
Produkte, stets die Sicherheit unserer Kunden im<br />
Blick. Zusätzlich bitten wir Sie um e<strong>in</strong> gewisses Mass<br />
an Vorsicht bei der Arbeit mit Elektrogeräten. Bitte<br />
befolgen Sie die hier aufgeführten<br />
Sicherheitsmassnahmen:<br />
Wichtige Sicherheitsh<strong>in</strong>weise zu Ihrem <strong>SOLIS</strong><br />
Reiskocher «2 IN 1»<br />
• Bitte lesen Sie die Gebrauchsanleitung vor<br />
Inbetriebnahme sorgfältig durch und bewahren Sie<br />
sie für zukünftiges Nachschlagen auf.<br />
• Verwenden Sie den <strong>SOLIS</strong> Reiskocher «2 IN 1»<br />
stets auf e<strong>in</strong>er trockenen und ebenen Fläche.<br />
• Entfernen Sie vor Gebrauch des <strong>SOLIS</strong> <strong>SOLIS</strong><br />
Reiskochers «2 IN 1» sämtliche Werbeaufkleber.<br />
• Wenn das Gerät unbeaufsichtigt ist, nicht verwendet<br />
wird, zur Re<strong>in</strong>igung bewegt oder zerlegt wird<br />
oder wenn Sie es lagern, ziehen Sie den Stecker<br />
aus.<br />
• Lassen Sie das Kabel nicht über die Kante von<br />
Tischen oder Arbeitsflächen hängen, mit heissen<br />
Oberflächen <strong>in</strong> Berührung kommen oder verknoten.<br />
• Stellen Sie dieses Gerät nicht <strong>in</strong> die Nähe e<strong>in</strong>es<br />
heissen Gas- oder Elektrobrenners oder dorth<strong>in</strong>, wo<br />
es mit e<strong>in</strong>em heissen Ofen <strong>in</strong> Berührung kommen<br />
könnte.<br />
• Lassen Sie das Gerät nicht unbeaufsichtigt, wenn<br />
es <strong>in</strong> Gebrauch ist.<br />
• Dieses Gerät ist nicht zum Gebrauch <strong>in</strong> den Händen<br />
von K<strong>in</strong>dern oder gebrechlichen Personen ohne<br />
Aufsicht bestimmt.<br />
• Kle<strong>in</strong>e K<strong>in</strong>der sollten beaufsichtigt werden, um<br />
sicherzustellen, dass sie nicht mit dem Gerät<br />
spielen.<br />
• Tauchen Sie das Kabel oder das Gerät nicht <strong>in</strong><br />
Wasser oder e<strong>in</strong>e andere Flüssigkeit.<br />
• Dieses Gerät ist nur für den häuslichen Gebrauch<br />
bestimmt.<br />
Verwenden Sie dieses Gerät ausschliesslich zu dem<br />
Zweck, für den es bestimmt ist. Verwenden Sie es<br />
nicht <strong>in</strong> fahrenden Fahrzeugen oder auf Booten.<br />
Verwenden Sie es nicht im Freien.<br />
• Heisse Oberflächen nicht berühren! Den herausnehmbaren<br />
Koche<strong>in</strong>satz und den Dampfe<strong>in</strong>satz<br />
mit Topflappen anfassen.<br />
• Der <strong>SOLIS</strong> Reiskocher «2 IN 1» darf nie ans Netz<br />
gesteckt oder e<strong>in</strong>geschaltet werden, solange sich<br />
der herausnehmbare Koche<strong>in</strong>satz nicht im Edelstahlgehäuse<br />
bef<strong>in</strong>det.<br />
• Das Edelstahlgehäuse darf nicht mit Flüssigkeit <strong>in</strong><br />
Berührung kommen. Nur der herausnehmbare<br />
Koche<strong>in</strong>satz ist für die Aufnahme von Flüssigkeit<br />
vorgesehen.<br />
• Den Deckel immer vorsichtig anheben und abnehmen;<br />
dabei von sich weg neigen, um Verbrennungen<br />
durch den austretenden Dampf zu vermeiden.<br />
Achten Sie darauf, dass das vom Deckel abr<strong>in</strong>nende<br />
Wasser nicht <strong>in</strong> das Edelstahlgehäuse, sondern<br />
<strong>in</strong> den herausnehmbaren Koche<strong>in</strong>satz tropft.<br />
• Nach Beendigung des Kochvorgangs den Stecker<br />
aus der Steckdose ziehen. Lassen Sie das Gerät<br />
abkühlen, bevor Sie es zur Re<strong>in</strong>igung ause<strong>in</strong>andernehmen.<br />
• E<strong>in</strong>en beschädigten oder verbeulten Koche<strong>in</strong>satz<br />
nicht mehr verwenden, sondern durch e<strong>in</strong>en neuen<br />
ersetzen.<br />
• Der E<strong>in</strong>bau e<strong>in</strong>es Fehlerstromschutzschalters<br />
(Sicherung) wird für zusätzliche Sicherheit beim<br />
Betrieb elektrischer Geräte empfohlen. Es empfiehlt<br />
sich, e<strong>in</strong>e Sicherung mit e<strong>in</strong>er maximalen Nennstromleistung<br />
von 30mA <strong>in</strong> den Stromkreis zu<br />
<strong>in</strong>stallieren, an den das Gerät angeschlossen ist.<br />
Wenden Sie sich für sachkundigen Rat an Ihren<br />
Elektriker.<br />
• Sämtliche Wartungsarbeiten ausser der Re<strong>in</strong>igung<br />
sollten von e<strong>in</strong>em autorisierten <strong>SOLIS</strong> Servicecenter<br />
durchgeführt werden.<br />
• Beachten Sie die Re<strong>in</strong>igungs- und Pflegeh<strong>in</strong>weise<br />
genau.<br />
• Überprüfen Sie regelmässig Kabel, Stecker und<br />
das Gerät selbst auf eventuelle Schäden. Sollten<br />
Sie irgendwelche Schäden feststellen, stellen Sie<br />
bitte sofort den Betrieb e<strong>in</strong> und br<strong>in</strong>gen Sie das<br />
komplette Gerät zum nächsten autorisierten <strong>SOLIS</strong><br />
Händler oder direkt zum Solis Kundendienst, um<br />
es prüfen, ersetzen oder reparieren zu lassen.<br />
5
Lernen Sie Ihren <strong>SOLIS</strong> Reiskocher «2 IN 1» kennen<br />
Hohe 6-Tassen-Kapazität<br />
für bis zu 12 Tassen gekochten Reis.<br />
Herausnehmbarer Koche<strong>in</strong>satz<br />
mit Antihaft-Beschichtung, verh<strong>in</strong>dert,<br />
dass der Reis anbrennt oder festklebt.<br />
Verstärkter Glasdeckel<br />
«Cook & Look».<br />
Anzeigeleuchten für Kochen und Warmhalten<br />
– Die rote «Cook»-Leuchte zeigt an,<br />
dass der <strong>SOLIS</strong> Reiskocher «2 IN 1»<br />
<strong>in</strong> der Kochstellung ist. Die orange «Warm»-<br />
Leuchte zeigt an, dass der <strong>SOLIS</strong> Reiskocher<br />
«2 IN 1» e<strong>in</strong>geschaltet ist und<br />
automatisch <strong>in</strong> die Warmhaltefunktion<br />
gewechselt hat.<br />
Edelstahlgehäuse.<br />
Abnehmbares Kabel<br />
zum Servieren bei Tisch.<br />
Kontrollschalter mit automatischen<br />
E<strong>in</strong>stellungen «Cook» (Kochen) und<br />
«Keep Warm» (Warmhalten).<br />
E<strong>in</strong> Kl<strong>in</strong>gelzeichen ertönt, wenn<br />
die Kochfunktion beendet ist und<br />
die Warmhaltefunktion beg<strong>in</strong>nt.<br />
Edelstahl-Dampfe<strong>in</strong>satz – ideal für<br />
Gemüse, Meeresfrüchte und Geflügel<br />
<strong>SOLIS</strong>-Messbecher<br />
und -Schöpflöffel.<br />
Grosse, stapelbare Edelstahl-<br />
Dampfe<strong>in</strong>sätze – ideal für grösseres<br />
Gemüse, Meeresfrüchte und<br />
Geflügel. Die beiden Dampfe<strong>in</strong>sätze<br />
können übere<strong>in</strong>ander gestapelt<br />
oder e<strong>in</strong>zeln verwendet werden.<br />
6
So bedienen Sie Ihren <strong>SOLIS</strong> Reiskocher «2 IN 1»<br />
Vor der ersten Verwendung alle Etiketten entfernen<br />
und den herausnehmbaren Antihaft-Koche<strong>in</strong>satz, die<br />
Edelstahl-Dampfe<strong>in</strong>sätze und den Glasdeckel <strong>in</strong><br />
heissem Spülmittelwasser gründlich waschen, spülen<br />
und trocknen.<br />
Reis kochen<br />
1. Die benötigte Reismenge mit dem beiliegenden<br />
Messbecher abmessen (vgl. Kochtabellen auf<br />
Seite 9). Die Tassen s<strong>in</strong>d gestrichen voll zu<br />
messen, nicht gehäuft (Abb. 1).<br />
Abb. 2<br />
5. Wasser <strong>in</strong> folgenden Mengen h<strong>in</strong>zufügen:<br />
Weisser Reis = 1 Tasse Wasser : 1 Tasse Reis<br />
Brauner Reis = 1 1 ⁄2 Tassen Wasser : 1 Tasse Reis<br />
(vgl. auch Tabelle auf Seite 9)<br />
6. Glasdeckel auflegen.<br />
Abb. 1<br />
2. Den Reis <strong>in</strong> e<strong>in</strong>en separaten Topf leeren und<br />
unter fliessendem kalten Wasser waschen,<br />
um überschüssige Stärke zu entfernen. Der Reis<br />
ist kochbereit, wenn das vom Reis abfliessende<br />
Wasser klar ist.<br />
3. Vergewissern Sie sich, dass der herausnehmbare<br />
Koche<strong>in</strong>satz an se<strong>in</strong>er Aussenseite sauber und<br />
trocken ist, bevor sie diesen <strong>in</strong> das Edelstahlgehäuse<br />
setzen. Nur so ist e<strong>in</strong> guter Kontakt zur<br />
<strong>in</strong>neren Kochoberfläche gewährleistet (vgl. Abb. 2).<br />
4. Prüfen Sie, ob der Koche<strong>in</strong>satz mit der ganzen<br />
Bodenfläche gerade im Gehäuse steht (vgl. Abb.<br />
2), füllen Sie den gewaschenen Reis e<strong>in</strong> und<br />
verteilen Sie diesen gleichmässig im Koche<strong>in</strong>satz,<br />
also nicht auf e<strong>in</strong>er Seite angehäuft (Abb. 2).<br />
7. Stecker <strong>in</strong> 230-Volt-Anschluss e<strong>in</strong>stecken.<br />
Die orange «Warm»-Leuchte leuchtet.<br />
8. Um den Kochvorgang zu starten, drücken Sie den<br />
Kontrollschalter abwärts. Die rote «Koch»-Leuchte<br />
leuchtet.<br />
9. Nach Abschluss des Kochvorgangs ertönt die<br />
Kl<strong>in</strong>gel, und der <strong>SOLIS</strong> Reiskocher «2 IN 1»<br />
schaltet automatisch <strong>in</strong> die Position «Warmhalten».<br />
Die orange Leuchte leuchtet.<br />
10. Den Deckel öffnen und den Reis mit dem mitgelieferten<br />
Schöpflöffel umrühren. Den Deckel<br />
wieder auflegen und vor dem Servieren noch<br />
10–15 M<strong>in</strong>uten stehen lassen. So kann die restliche<br />
Feuchtigkeit absorbiert werden und der<br />
Reis wird lockerer.<br />
H<strong>in</strong>weis:<br />
1 gestrichener Messbecher = 140 Gramm ungekochter Reis<br />
1 gestrichener Messbecher ungekochter Reis = ca. 2 Messbecher gekochter Reis<br />
Höchstmenge ungekochter Reis zum Kochen = 6 Messbecher<br />
M<strong>in</strong>destmenge ungekochter Reis zum Kochen = 2 Messbecher<br />
7
So bedienen Sie Ihren <strong>SOLIS</strong> Reiskocher «2 IN 1» (Forts.)<br />
H<strong>in</strong>weis:<br />
Der Reis kann bis zu 5 Stunden <strong>in</strong> der automatischen Warmhalteposition bleiben.<br />
Den Glasdeckel bitte erst abnehmen, wenn der Reis bereit zum Servieren ist (ausgenommen zum Umrühren<br />
nach abgeschlossenem Kochvorgang).<br />
Zum Ausschalten der Warmhalteposition das Stromkabel herausziehen.<br />
Wichtig<br />
• Vor E<strong>in</strong>schalten der Kochfunktion immer Flüssigkeit <strong>in</strong> den herausnehmbaren Koche<strong>in</strong>satz giessen oder<br />
allenfalls Öl, Butter oder Margar<strong>in</strong>e zur Zugabe bereithalten.<br />
• Versuchen Sie nie, den Kontrollschalter mit Gewalt <strong>in</strong> der «Cook»-Stellung zu halten, nachdem er automatisch<br />
<strong>in</strong> die Stellung «Warmhalten» gewechselt hat.<br />
• Im Betrieb bitte nicht <strong>in</strong> die Funktionsweise des automatischen Kontrollschalters e<strong>in</strong>greifen.<br />
• Um die Antihaft-Oberfläche des herausnehmbaren Koche<strong>in</strong>satzes nicht zu zerkratzen, immer Küchengeräte<br />
aus Holz oder Kunststoff benutzen.<br />
Den Deckel immer vorsichtig anheben und abnehmen; dabei von sich weg neigen, um<br />
Verbrennungen durch den austretenden Dampf zu vermeiden.<br />
8
Reiskochtabellen<br />
In den nachstehenden Tabellen wird auf den Reis-Messbecher Bezug genommen, der mit Ihrem <strong>SOLIS</strong><br />
Reiskocher «2 <strong>in</strong> 1» mitgeliefert wurde.<br />
H<strong>in</strong>weis!<br />
Der Solis-Messbecher hat ke<strong>in</strong> metrisches Standardmass.<br />
1 Solis-Messbecher entspricht 140g ungekochtem Reis oder 185ml Wasser.<br />
Wenn Sie Ihren Solis-Messbecher verlieren oder verlegen sollten, benützen Sie e<strong>in</strong>e Tasse, achten Sie auf<br />
dieselben Kochverhältnisse und überschreiten Sie die Maximum-L<strong>in</strong>e (6 Messbecher) im Koche<strong>in</strong>satz nicht:<br />
Weisser Reis = 1 Tasse Wasser : 1 Tasse Reis<br />
Brauner Reis = 1 1 ⁄2 Tassen Wasser : 1 Tasse Reis<br />
Weisser Reis<br />
Ungekochter weisser Kaltes Leitungswasser Gekochter Reis Kochzeit<br />
Reis (Messbecher) (Messbecher) (ca.) (ca.)<br />
(Messbecher)<br />
(M<strong>in</strong>uten)<br />
2 2 4 15<br />
4 4 8 20<br />
6 6 12 28<br />
Brauner Reis<br />
Ungekochter brauner Kaltes Leitungswasser Gekochter Reis Kochzeit<br />
Reis (Messbecher) (Messbecher) (ca.) (ca.)<br />
(Messbecher)<br />
(M<strong>in</strong>uten)<br />
2 3 5 18–20<br />
4 6 10 25–30<br />
Tipps<br />
• Etwas mehr Wasserzugabe ergibt e<strong>in</strong>en lockereren Reis, etwas weniger Wasser e<strong>in</strong>en festeren Reis.<br />
• E<strong>in</strong>ige Reissorten benötigen mehr Kochwasser, beispielsweise Wildreismischungen, Arborio-Reis oder<br />
Kurzkornreis. Folgen Sie der Anleitung auf der Packung oder halten Sie sich an die Kochtabelle für braunen<br />
Reis.<br />
• Aufgrund des zusätzlichen Wassers zum Kochen von braunem Reis können beim Kochen e<strong>in</strong>ige stärkehaltige<br />
Wasserblasen zum Deckel hochsteigen. Beste Ergebnisse erzielen Sie, wenn Sie den Reis vor dem Kochen<br />
waschen und nach dem Kochen 20 M<strong>in</strong>uten warm halten, damit die restliche Flüssigkeit absorbiert werden<br />
kann.<br />
9
Reisvarianten<br />
Pikanter Reis<br />
Den Reis im <strong>SOLIS</strong> Reiskocher «2 IN 1» wie angegeben<br />
zubereiten, dabei aber das gesamte Wasser<br />
mit derselben Menge Hühner-, R<strong>in</strong>d-, Fisch- oder<br />
Gemüsebrühe ersetzen.<br />
Süsser Reis<br />
Den Reis im <strong>SOLIS</strong> Reiskocher «2 IN 1» wie angegeben<br />
zubereiten, dabei die Hälfte des Wassers mit<br />
Apfelsaft , Orangensaft oder Ananassaft ersetzen.<br />
Das Reiskochen mit Milch oder Rahm empfiehlt sich<br />
wegen der Gefahr des Anbrennens nicht.<br />
Safranreis<br />
1<br />
⁄4 Teelöffel Safranpulver oder 2 Safranfäden pro<br />
2 Tassen Wasser zugeben.<br />
Halten Sie sich an die Kochtabellen für weissen Reis.<br />
Gut durchmischen.<br />
Arborio-Reis<br />
Arborio-Reis ist e<strong>in</strong> kurzer, perliger Rundkornreis, der<br />
häufig für italienische Risotti verwendet wird. Halten<br />
Sie sich an die Kochtabellen für braunen Reis.<br />
Jasm<strong>in</strong>reis<br />
Jasm<strong>in</strong>reis ist e<strong>in</strong> duftender Langkornreis. Halten Sie<br />
sich an die Kochtabellen für weissen Reis.<br />
Basmatireis<br />
Basmatireis ist e<strong>in</strong> aromatischer Langkornreis. Halten<br />
Sie sich an die Kochtabellen für weissen Reis.<br />
Wildreis<br />
Es wird nicht empfohlen, Wildreis alle<strong>in</strong> im <strong>SOLIS</strong><br />
Reiskocher «2 IN 1» zu kochen, da hierfür sehr<br />
viel Wasser benötigt wird. Es ist aber gut möglich,<br />
Wildreis <strong>in</strong> e<strong>in</strong>er Mischung mit weissem oder<br />
braunem Reis zuzubereiten.<br />
Über Reis<br />
Reis ist e<strong>in</strong>e wertvolle fettarme Quelle aus komplexen<br />
Kohlenhydraten und reichlich Vitam<strong>in</strong>en wie Thiam<strong>in</strong>,<br />
Niac<strong>in</strong> und Eisen. Reis ist e<strong>in</strong> wesentlicher Bestandteil<br />
e<strong>in</strong>er gesunden Diät.<br />
Es gibt viele verschiedene Variationen von Reis auf<br />
dem Markt. Mit dem <strong>SOLIS</strong> Reiskocher «2 IN 1»<br />
wird jede Sorte Reis perfekt zubereitet. Nachfolgend<br />
e<strong>in</strong>e Aufstellung üblich verwendeter Reissorten und<br />
ihre Eigenschaften.<br />
Langkornreis<br />
Typisch für den stärkefreien Langkornreis ist die<br />
noch immer körnige Konsistenz nach dem kochen.<br />
Der «California» Reis ist <strong>in</strong> se<strong>in</strong>er Konsistenz weich.<br />
Der «Carol<strong>in</strong>a» ist etwas faseriger. Der würzige und<br />
aromatische «Jasm<strong>in</strong>» ist der faserigste unter dem<br />
Langkorn Reis.<br />
Kurzkornreis<br />
Dieser Reis ist <strong>in</strong> se<strong>in</strong>er Konsistenz weich, klebrig<br />
und zäh. Er wird bevorzugt zu Sushi gereicht. «Süsser<br />
Reis» oft als «Perl Reis», bezeichnet, (durch se<strong>in</strong>e<br />
runde Form), ist sehr stark klebrig und bestens für<br />
Reispudd<strong>in</strong>g geeignet.<br />
Brauner Reis<br />
Brauner Reis ist der gesündeste Reis mit se<strong>in</strong>en<br />
Kleieschichten, den hohen Vitam<strong>in</strong> B Komplexen plus<br />
Eisen und Kalzium. Er ist fasriger als der polierte<br />
weisse Reis. Der meist verwendete braune Reis ist<br />
e<strong>in</strong> Langkornreis mit klebriger Konsistenz.<br />
Wildreis<br />
Wildreis gibt es <strong>in</strong> verschiedenen, fe<strong>in</strong>en Variationen<br />
und <strong>in</strong> diversen Mischungen. Oft wird Wildreis mit<br />
Langkornreis gemischt. Er variiert von braun zu<br />
schwarz und ist von fasriger Beschaffenheit. Wildreis<br />
mit getrockneten Früchten gemischt, ist e<strong>in</strong>e wunderbare<br />
Beilage zu Suppe und gekochtem Geflügel.<br />
10
Dämpfen<br />
Gedämpfte Lebensmittel bewahren bei der Zubereitung<br />
im <strong>SOLIS</strong> Reiskocher «2 IN 1» e<strong>in</strong>en Grossteil<br />
ihres Nährwerts. Sie können Essen dämpfen, <strong>in</strong>dem<br />
Sie dieses über Brühe oder Wasser <strong>in</strong> die Dampfe<strong>in</strong>sätze<br />
legen und mit dem Glasdeckel abdecken. Beim<br />
Dämpfen den Glasdeckel aufgelegt lassen. Durch<br />
Abnehmen des Deckels geht unnötig Dampf verloren<br />
und die Kochzeit muss <strong>in</strong> der Folge verlängert<br />
werden.<br />
1. 3 oder mehr Messbecher Wasser oder Brühe <strong>in</strong><br />
den herausnehmbaren Koche<strong>in</strong>satz leeren. Nicht<br />
mehr als 6 Messbecher Flüssigkeit verwenden.<br />
2. Die zum Dämpfen vorgesehenen Lebensmittel<br />
direkt auf die Dampfe<strong>in</strong>sätze legen und <strong>in</strong> den<br />
herausnehmbaren Koche<strong>in</strong>satz e<strong>in</strong>setzen (annähernde<br />
Kochzeiten f<strong>in</strong>den Sie <strong>in</strong> den Dämpflisten<br />
auf den Seiten 12–14).<br />
3. Herausnehmbaren Koche<strong>in</strong>satz mitsamt Dampfe<strong>in</strong>satz<br />
<strong>in</strong> das Edelstahlgehäuse stellen und mit<br />
dem Glasdeckel abdecken.<br />
4. Stecker <strong>in</strong> die 230-Volt-Dose stecken. Die orange<br />
Leuchte ‘Warm’ leuchtet.<br />
5. Den Kontrollschalter nach unten drücken, um den<br />
Kochvorgang zu starten. Die rote Leuchte ‘Kochen’<br />
leuchtet.<br />
H<strong>in</strong>weis!<br />
Achten Sie darauf, dass während des Dämpfens nicht<br />
die gesamte Flüssigkeit aus dem herausnehmbaren<br />
Koche<strong>in</strong>satz verdampft.<br />
Sie können während des Dämpfens heisse Flüssigkeit<br />
zugeben.<br />
Die beiden Dampfe<strong>in</strong>sätze können übere<strong>in</strong>ander<br />
gestapelt oder auch e<strong>in</strong>zeln verwendet werden.<br />
Tipps und Tricks zum Dämpfen von Gemüse<br />
• Kle<strong>in</strong>e Stücke s<strong>in</strong>d schneller gar als Grosse.<br />
• Versuchen Sie, gleich grosse Stücke zu dämpfen,<br />
damit e<strong>in</strong>e gleichmässige Garung erreicht wird.<br />
• Sie können frisches ebenso wie gefrorenes<br />
Gemüse dämpfen.<br />
• Gefrorenes Gemüse vor dem dämpfen nicht<br />
auftauen.<br />
• Grösse und Form des Gemüses, aber auch<br />
persönliche Vorlieben können Kochzeitänderungen<br />
erforderlich machen. Ist weicheres Gemüse<br />
erwünscht, muss die Garzeit verlängert werden.<br />
• Das Wasser bzw. die Brühe darf nicht bis zum<br />
Dämpfe<strong>in</strong>satz reichen, weil sonst der Dampf nicht<br />
gut e<strong>in</strong>wirken kann.<br />
6. Nach Abschluss des Dämpfvorgangs ertönt die<br />
Kl<strong>in</strong>gel, und die orange Leuchte ‘Warm’ schaltet<br />
sich e<strong>in</strong>. Nehmen Sie das Gargut aus dem <strong>SOLIS</strong><br />
Reiskocher «2 IN 1». Wollen Sie noch weiteres<br />
Essen dämpfen, vergewissern Sie sich, dass ausreichend<br />
Flüssigkeit im Koche<strong>in</strong>satz ist. Gegebenenfalls<br />
Wasser oder Brühe nachfüllen.<br />
7. Den <strong>SOLIS</strong> Reiskocher «2 IN 1» ausstecken. Vor<br />
dem Re<strong>in</strong>igen abkühlen lassen.<br />
Den Deckel immer vorsichtig anheben und abnehmen und immer so von sich weg neigen, dass e<strong>in</strong><br />
Verbrennen am austretenden Dampf vermieden wird.<br />
11
Dämpfen (Forts.)<br />
Gemüse Zubereitung & Tipps Menge Dämpfzeit<br />
(M<strong>in</strong>uten)<br />
Artischocke Harte Aussenblätter 2 mittelgrosse 30–35<br />
und Stängel entfernen<br />
Spargel Schälen, ganz lassen 2 Bund 12–14<br />
Bohnen Zurichten, ganz lassen 250g 13–15<br />
Randen Schälen, Haut nicht 300g 12–13<br />
e<strong>in</strong>schneiden<br />
kle<strong>in</strong>-mittel<br />
Broccoli In Röschen schneiden 250g 8–10<br />
Rosenkohl In den Strunkansatz 375g 17–19<br />
e<strong>in</strong> Kreuz schneiden<br />
Kohl Grosse Stücke 500g 10–12<br />
Karotten In Streifen schneiden 3 mittelgrosse 14–16<br />
Spanischer Pfeffer In Streifen schneiden 3 mittelgrosse 14–16<br />
Blumenkohl In Rosen schneiden 375g 17–19<br />
Stangensellerie In Streifen schneiden 3 Stängel 5– 6<br />
Kichererbsen 12 Stunden e<strong>in</strong>weichen 1 Tasse getrocknet 40–45<br />
Mais Ganze Maiskolben 2 kle<strong>in</strong>e Kolben 20–22<br />
Pilze Ganz, ungewaschen 300g 8–10<br />
Zwiebel (Perlzwiebel) Geschält, ganz lassen 6 mittelgross 20–25<br />
Kefen Zurichten 250g 4– 5<br />
Erbsen Frisch geschält 250g 8–10<br />
tiefgekühlt 250g 4– 5<br />
Kartoffeln Allzwecksorte, ganz 4 (je 150–180g) 35–40<br />
Kartoffeln Neue, ganz 6 (je 125g) 25–30<br />
Süsskartoffeln In Stücke schneiden 500g 20–25<br />
Kumara<br />
Gartenkürbis In Stücke schneiden 500g 20–25<br />
Sp<strong>in</strong>at (Blätter) Blätter und Stängel, 1<br />
⁄2 Bund 5<br />
gesäubert<br />
Babykürbis Zurichten 350g 8<br />
Kohlrabi Geschält, <strong>in</strong> Scheiben 350g 15–17<br />
und <strong>in</strong> 50 g-Stücke<br />
geschnitten<br />
Zucch<strong>in</strong>i In Scheiben 350g 6<br />
12
Dämpfen (Forts.)<br />
Tipps und Tricks für das Dämpfen von Fisch und Meeresfrüchten<br />
• Fische vor dem Garen mit frischen Kräutern, Zwiebeln, Zitrone usw. würzen.<br />
• Fische <strong>in</strong> e<strong>in</strong>er e<strong>in</strong>zigen Schicht e<strong>in</strong>legen, so dass sie nicht überlappen.<br />
• Die Fische s<strong>in</strong>d gar, wenn sie sich mit e<strong>in</strong>er Gabel leicht teilen lassen und e<strong>in</strong>e undurchsichtige Farbe<br />
angenommen haben.<br />
Sorte Kochzeit Vorschläge und Tipps<br />
(M<strong>in</strong>uten)<br />
Fischfilets 8–10 Dämpfen, bis nicht mehr glasig und leicht teilbar.<br />
– ganz 15–20 E<strong>in</strong> Kotelett ist gar, wenn sich die Mittelgräte<br />
– Kotelett 12–14 leicht herauslösen lässt<br />
Hummerschwänze 18–20 Untere Schale entfernen<br />
Muscheln – <strong>in</strong> Schale 12–14 Dämpfen, bis ganz geöffnet<br />
Venus- und 8–10 Dämpfen, bis eben geöffnet<br />
Herzmuscheln<br />
Garnelen – <strong>in</strong> Schale 8–10 Dämpfen, bis sie rosa s<strong>in</strong>d<br />
Jakobsmuscheln 4– 6 Dämpfen, bis nicht mehr glasig<br />
Austern – geschlossen 10–12 Dämpfen, bis die obere Schale sich zu öffnen<br />
beg<strong>in</strong>nt. Wenn sich diese nicht ganz öffnet, mit<br />
e<strong>in</strong>em Messer nachhelfen.<br />
13
Dämpfen (Forts.)<br />
Tipps und Tricks zum Dämpfen von Geflügel<br />
• Für gleichmässiges Garen nehmen Sie Stücke ähnlicher Grösse.<br />
• Bessere Ergebnisse erzielen Sie, wenn Sie die Teile <strong>in</strong> nur e<strong>in</strong>er Lage e<strong>in</strong>schichten.<br />
• Sichtbares Fett und Haut entfernen.<br />
• Wenn Sie e<strong>in</strong>e Braunfärbung wünschen, das Geflügel vorher kurz anbraten.<br />
• Die Garprobe nehmen Sie durch E<strong>in</strong>stechen an der dicksten Stelle vor. Wenn klarer Saft austritt,<br />
ist das Fleisch durchgegart.<br />
Art Vorschläge und Tipps Kochzeit<br />
(M<strong>in</strong>uten)<br />
Brustfilet Mit der Hautseite nach oben e<strong>in</strong>legen 20–25<br />
Unterschenkel Dickere Seite an die Aussenseite 30–35<br />
des Dämpfe<strong>in</strong>satzes legen.<br />
Oberschenkel Dickere Seite an die Aussenseite 18–20<br />
des Dämpfe<strong>in</strong>satzes legen.<br />
Tipps und Tricks zum Dämpfen von Klössen und gefüllten Taschen<br />
• Frische oder gefrorene Klösse und gefüllte Täschchen können gedämpft werden.<br />
• Kle<strong>in</strong>e Backpapierstücke oder Kohl- oder Salatblätter unter die Klösse legen, damit sie nicht am Dämpfe<strong>in</strong>satz<br />
ankleben.<br />
Art Vorschläge und Tipps Kochzeit<br />
(M<strong>in</strong>uten)<br />
Gefüllte Schwe<strong>in</strong>s- oder Tiefgefroren dämpfen. 10–12<br />
Poulet-Taschen (BBQ)<br />
Klösse – gefroren Vor dem Dämpfen trennen 8–10<br />
Klösse – frisch 5– 6<br />
14
Re<strong>in</strong>igung und Pflege<br />
Den <strong>SOLIS</strong> Reiskocher «2 IN 1» ausstecken.<br />
Alle Teile abkühlen lassen, bevor Sie den Koche<strong>in</strong>satz<br />
herausheben. Den Koche<strong>in</strong>satz, die Dampfe<strong>in</strong>sätze<br />
und den Glasdeckel <strong>in</strong> heissem Spülmittelwasser<br />
waschen, abspülen und gründlich trocknen.<br />
H<strong>in</strong>weis!<br />
Wenn sich Reis auf dem Boden des Koche<strong>in</strong>satzes<br />
festgeklebt hat, füllen Sie den E<strong>in</strong>satz mit heissem<br />
Spülmittelwasser und lassen ihn ca. 10 M<strong>in</strong>uten<br />
stehen, bevor Sie ihn re<strong>in</strong>igen.<br />
Solis empfiehlt, ke<strong>in</strong>en Teil Ihres <strong>SOLIS</strong> Reiskochers<br />
«2 IN 1» <strong>in</strong> e<strong>in</strong>em Geschirrspüler zu waschen, da<br />
aggressive Waschmittel und sehr hohe Wassertemperaturen<br />
den Koche<strong>in</strong>satz und das Zubehör verfärben<br />
oder verziehen könnten.<br />
Ke<strong>in</strong>e scheuernden Re<strong>in</strong>igungsmittel, Stahlwolle<br />
oder Drahtkissen verwenden, da diese die Antihaftbeschichtung<br />
beschädigen können.<br />
Das Edelstahlgehäuse kann mit e<strong>in</strong>em feuchten Tuch<br />
abgewischt und dann gründlich getrocknet werden.<br />
Das Edelstahlgehäuse oder das Stromkabel nicht <strong>in</strong> Wasser oder e<strong>in</strong>e andere Flüssigkeit tauchen,<br />
da es zu Stromschlägen kommen könnte!<br />
15
Contenu<br />
Félicitations Page 18<br />
Solis – la sécurité d'abord Page 19<br />
Faites la connaissance de votre <strong>SOLIS</strong> Cuiseur à riz « 2 en 1 » Page 20<br />
Utilisation de votre <strong>SOLIS</strong> Cuiseur à riz « 2 en 1 » Page 21<br />
Tableaux de cuisson du riz Page 23<br />
Cuisson à la vapeur Page 25<br />
Entretien et nettoyage Page 29<br />
17
<strong>SOLIS</strong><br />
vous félicite<br />
pour l'achat de votre nouveau <strong>SOLIS</strong> Cuiseur à riz « 2 en 1 »<br />
18
Solis – la sécurité d'abord<br />
Chez Solis, nous somme très soucieux de la sécurité.<br />
Lors de la conception et de la fabrication de nos<br />
produits grand public, notre préoccupation pr<strong>in</strong>cipale<br />
est la sécurité du client apprécié que vous êtes.<br />
D'autre part, nous vous prions d'user de beaucoup<br />
de so<strong>in</strong> lors de l'utilisation d'appareils électriques et,<br />
en particulier, de prendre les précautions suivantes:<br />
Mesures de sécurité importantes pour votre<br />
<strong>SOLIS</strong> Cuiseur à riz « 2 en 1 »<br />
• Veuillez lire attentivement toutes les <strong>in</strong>structions<br />
avant l’utilisation et les conserver à un endroit sûr<br />
pour une référence future.<br />
• Utilisez toujours le <strong>SOLIS</strong> Cuiseur à riz « 2 en 1 »<br />
sur une surface sèche et plane.<br />
• Enlevez tous les autocollants publicitaires avant<br />
l’utilisation du <strong>SOLIS</strong> Cuiseur à riz « 2 en 1 ».<br />
• Lorsque l’appareil est laissé sans surveillance,<br />
n’est pas utilisé ou alors aux f<strong>in</strong>s de démontage, de<br />
nettoyage et stockage, débranchez l’appareil.<br />
• Ne laissez pas le cordon d’alimentation pendre au<br />
bord d'une table ou du plan de travail, en contact<br />
avec des surfaces chaudes ou s’enrouler (et former<br />
des noeuds).<br />
• Ne placez pas cet appareil sur ou à proximité d'un<br />
brûleur à gaz ou d’une plaque électrique chaude,<br />
ou à un endroit où il pourrait entrer en contact avec<br />
un four chauffé.<br />
• Ne laissez pas l'appareil sans surveillance durant<br />
l'utilisation.<br />
• Cet appareil n’est pas dest<strong>in</strong>é à être utilisé par des<br />
enfants en bas âge ou des <strong>in</strong>firmes sans<br />
surveillance.<br />
• Surveillez les enfants en bas âge, pour veiller à ce<br />
qu'ils ne jouent pas avec l'appareil.<br />
• Évitez toute immersion du cordon d’alimentation ou<br />
de l'appareil dans de l'eau ou dans tout autre type<br />
de liquide.<br />
• Cet appareil est dest<strong>in</strong>é uniquement à l’usage<br />
domestique. N’utilisez pas cet appareil à des f<strong>in</strong>s<br />
autres que l’usage prévu. Ne l’utilisez pas dans des<br />
véhicules ou bateaux en mouvement. Ne l’utilisez<br />
pas en ple<strong>in</strong> air.<br />
• Évitez de toucher les surfaces chaudes; utilisez des<br />
gants de cuis<strong>in</strong>e pour enlever le panier de cuisson<br />
amovible et le panier vapeur.<br />
• Ne branchez ou n'allumez jamais le <strong>SOLIS</strong><br />
Cuiseur à riz « 2 en 1 » avant d'avoir <strong>in</strong>stallé le<br />
panier de cuisson amovible dans le boîtier <strong>in</strong>ox.<br />
• Évitez de faire pénétrer du liquide dans le boîtier<br />
<strong>in</strong>ox. Seul le panier de cuisson amovible est prévu<br />
pour recevoir et contenir du liquide.<br />
• Soyez prudent lorsque vous soulevez le couvercle<br />
en verre, ôtez-le en l'éloignant de vous, pour éviter<br />
d'être brûlé par la vapeur qui s'en échappe. Veillez<br />
à ce que l'eau qui s'égoutte du couvercle ne<br />
pénètre pas dans le boîtier <strong>in</strong>ox, mais uniquement<br />
dans le panier de cuisson amovible.<br />
• Débranchez le cuiseur à la f<strong>in</strong> de la cuisson.<br />
Attendez que tous les composants se refroidissent<br />
avant de démonter et nettoyer l'appareil.<br />
• Évitez d'utiliser un panier de cuisson amovible<br />
endommagé ou bosselé. Remplacez-le avant de<br />
l'utiliser.<br />
• L’<strong>in</strong>stallation d'un <strong>in</strong>terrupteur de protection contre<br />
les courts-circuits (<strong>in</strong>terrupteur de sécurité) est<br />
recommandée, pour assurer une protection supplémentaire<br />
lors de l’utilisation d'appareils électriques.<br />
Il est conseillé d'<strong>in</strong>staller un <strong>in</strong>terrupteur de sécurité<br />
– pour un courant résiduel nom<strong>in</strong>al <strong>in</strong>férieur à<br />
30mA – dans le circuit électrique qui alimente<br />
l’appareil. Pour un conseil professionnel, veuillez<br />
contacter votre électricien.<br />
• Tout travail de ma<strong>in</strong>tenance autre que le nettoyage<br />
devra être effectué auprès d'un concessionnaire<br />
Solis (Solis Service Centre) autorisé.<br />
• Suivez strictement les <strong>in</strong>structions d’entretien et de<br />
nettoyage.<br />
• Inspectez régulièrement le cordon d'alimentation, la<br />
prise et l'appareil, pour vous assurer de l’absence<br />
de tout dommage. En cas de constatation d'un<br />
dommage quelconque, <strong>in</strong>terrompez immédiatement<br />
l'utilisation de l'appareil et envoyez-le tout entier<br />
au concessionnaire Solis le plus proche (Solis<br />
Service Centre) ou envoyez-le à Solis SA, 8152<br />
Glattbrugg aux f<strong>in</strong>s d’<strong>in</strong>spection, de remplacement<br />
ou de réparation.<br />
19
Faites la connaissance de votre <strong>SOLIS</strong> Cuiseur à riz « 2 en 1 »<br />
Grande capacité de 6 tasses<br />
permettant de préparer jusqu'à<br />
12 tasses de riz cuit.<br />
Le panier de cuisson amovible<br />
antiadhésif empêche le riz de coller.<br />
Voyants lum<strong>in</strong>eux « Cuisson » et « Chaud » –<br />
Le voyant lum<strong>in</strong>eux rouge « Cook » <strong>in</strong>dique<br />
que le <strong>SOLIS</strong> Cuiseur à riz « 2 en 1 » est<br />
réglé sur la fonction « Cuire ».<br />
Le voyant lum<strong>in</strong>eux orange « Warm » <strong>in</strong>dique<br />
que le <strong>SOLIS</strong> Cuiseur à riz « 2 en 1 » est<br />
réglé sur « Garder au chaud ».<br />
Couvercle en verre trempé avec hublot.<br />
Boîtier <strong>in</strong>ox.<br />
Cordon électrique<br />
amovible permettant<br />
le service à table.<br />
Sélecteur de fonction avec les fonctions<br />
automatiques « Cook » ( Cuire ) et « Keep<br />
Warm » ( Garder au chaud ).<br />
L'avertisseur sonore « Prêt » retentit<br />
lorsque la fonction « Cuire » est term<strong>in</strong>ée ;<br />
et la fonction « Garder au chaud » démarre<br />
alors automatiquement.<br />
Panier vapeur <strong>in</strong>ox – idéal pour les<br />
légumes, les fruits de mer et la volaille.<br />
Gobelet gradué et<br />
louche Solis.<br />
Grands paniers vapeur <strong>in</strong>ox –<br />
idéaux pour les légumes, les fruits<br />
de mer et la volaille. Les deux<br />
paniers vapeur peuvent être empilés<br />
ou utilisés séparément.<br />
20
Utilisation de votre <strong>SOLIS</strong> Cuiseur à riz « 2 en 1 »<br />
Avant la première utilisation, enlevez toutes les étiquettes<br />
de publicité et lavez le panier de cuisson<br />
amovible antiadhésif, les paniers vapeur <strong>in</strong>ox et le<br />
couvercle en verre dans de l'eau savonneuse chaude,<br />
r<strong>in</strong>cez-les et laissez-les sécher complètement.<br />
Comment préparer du riz<br />
1. Utilisez le gobelet gradué fournie pour doser la<br />
quantité de riz requise (référez-vous aux tableaux<br />
de cuisson – page 23). Mesurez toujours des<br />
gobelets ple<strong>in</strong>s à ras bords, mais non tassés (Fig. 1).<br />
Fig. 2<br />
5. Ajoutez de l'eau dans les proportions suivantes :<br />
Riz blanc = 1 tasse d'eau : 1 tasse de riz<br />
Riz brun complet = 1 1 ⁄2 tasse d'eau : 1 tasse<br />
de riz<br />
(pour plus de détails, voir les tableaux à la<br />
page 23)<br />
6. Mettez le couvercle en verre en place.<br />
Fig. 1<br />
2. Mettez le riz dans un récipient séparé et lavez-le<br />
en le r<strong>in</strong>çant à l'eau froide, pour élim<strong>in</strong>er l'excès<br />
d'amidon. Le riz est prêt pour la cuisson, lorsque<br />
l'eau qui s'en écoule est claire.<br />
3. Assurez-vous que la partie extérieure du panier<br />
de cuisson amovible est propre et sèche, avant<br />
de le placer dans le boîtier <strong>in</strong>ox ; ceci permet de<br />
garantir un bon contact avec la plaque chauffante<br />
<strong>in</strong>terne (voir Fig. 2).<br />
4. Mettez le riz lavé dans le panier de cuisson<br />
amovible, en vous assurant que celui-ci est bien<br />
en contact avec la plaque chauffante du boîtier<br />
(voir Fig. 2), et veillez à ce que le riz soit réparti<br />
régulièrement sur le fond du récipient et pas<br />
entassé d'un côté (Fig. 2).<br />
7. Branchez le cuiseur sur une prise électrique de<br />
230 volts. Le voyant lum<strong>in</strong>eux orange « Warm »<br />
s'allume alors.<br />
8. Pour commencer la cuisson, appuyez le sélecteur<br />
de fonction vers le bas. Le voyant lum<strong>in</strong>eux<br />
rouge « Cook » s'allume.<br />
9. Lorsque la cuisson est term<strong>in</strong>ée, l'avertisseur<br />
sonore « Prêt » retentit et le <strong>SOLIS</strong> Cuiseur à<br />
riz « 2 en 1 » passe automatiquement en mode<br />
« Garder au chaud ». Le voyant lum<strong>in</strong>eux orange<br />
s'allume.<br />
10. Ôtez le couvercle et remuez le riz à l'aide de la<br />
louche fournie. Remettez le couvercle en place et<br />
attendez 10 à 15 m<strong>in</strong>utes avant de servir. Ceci<br />
permet l'absorption de l'excès d'humidité<br />
éventuel et donne au riz une texture plus douce.<br />
Note!<br />
1 gobelet gradué ple<strong>in</strong> à ras bords = 140 grammes de riz non cuit<br />
1 gobelet gradué ple<strong>in</strong> à ras bords de riz non cuit = 2 gobelets gradués de riz cuit (approximativement).<br />
Quantité maximale de riz blanc non cuit pouvant être préparée = 6 gobelets gradués<br />
Quantité m<strong>in</strong>imale de riz blanc non cuit pouvant être préparée = 2 gobelets gradués<br />
21
Utilisation de votre <strong>SOLIS</strong> Cuiseur à riz « 2 en 1 » (suite)<br />
Note !<br />
Le riz peut être conservé jusqu'à 5 heures en mode automatique « Garder au chaud ».<br />
N'enlevez pas le couvercle en verre avant que le riz ne soit prêt à être servi (excepté pour le remuer après la<br />
cuisson).<br />
Pour arrêter la fonction « Garder au chaud », débranchez le cordon électrique.<br />
Important<br />
• Mettez toujours du liquide dans le panier de cuisson amovible ou ajoutez de l'huile, du beurre ou de la<br />
margar<strong>in</strong>e avant de placer le sélecteur de fonction sur « Cuire ».<br />
• N'essayez jamais de ma<strong>in</strong>tenir avec force le sélecteur de fonction sur « Cook » après qu'il soit passé<br />
automatiquement à la fonction « Garder au chaud ».<br />
• Évitez tout contact et toute <strong>in</strong>terférence avec le sélecteur de fonction durant le fonctionnement.<br />
• Pour éviter toute rayure sur la surface antiadhésive du panier de cuisson amovible, utilisez toujours des<br />
ustensiles en bois ou en plastique.<br />
Faites toujours usage de prudence lorsque vous soulevez et enlevez le couvercle en verre, en<br />
l'éloignant de vous, pour éviter d'être brûlé par la vapeur qui s'en échappe.<br />
22
Tableaux de cuisson du riz<br />
Le gobelet gradué fourni avec votre <strong>SOLIS</strong> Cuiseur à riz « 2 en 1 » est utilisé pour les <strong>in</strong>dications de dosage<br />
dans les tableaux suivants.<br />
Note !<br />
Le gobelet gradué Solis n’est pas un gobelet standard à mesure métrique.<br />
1 gobelet gradué Solis correspond à 140 g de riz non cuit et à 185 ml d'eau.<br />
Si vous perdez ou n'arrivez pas à retrouver votre gobelet gradué Solis, utilisez une tasse tout en conservant les<br />
proportions <strong>in</strong>diquées et en veillant à ne pas dépasser la ligne <strong>in</strong>diquant la quantité maximum de 6 tasses dans<br />
le panier de cuisson amovible :<br />
Riz blanc = 1 tasse d'eau : 1 tasse de riz<br />
Riz brun complet = 1 1 ⁄2 tasse d'eau : 1 tasse de riz<br />
Riz blanc<br />
Riz blanc non cuit Eau courante froide Riz cuit Temps de cuisson<br />
(nombre de gobelets) (nombre de gobelets) (environ) (environ)<br />
(nombre de gobelets) (m<strong>in</strong>utes)<br />
2 2 4 15<br />
4 4 8 20<br />
6 6 12 28<br />
Riz complet<br />
Riz complet non cuit Eau courante froide Riz cuit Temps de cuisson<br />
(nombre de gobelets) (nombre de gobelets) (environ) (environ)<br />
(nombre de gobelets) (m<strong>in</strong>utes)<br />
2 3 5 18–20<br />
4 6 10 25–30<br />
Conseils<br />
• Ajoutez un peu plus d'eau pour rendre le riz plus doux, ou un peu mo<strong>in</strong>s d'eau pour le rendre plus ferme.<br />
• Certa<strong>in</strong>es variétés de riz pourront exiger plus d'eau pour la cuisson ; c’est le cas des mélanges de riz<br />
sauvage, du riz Arborio ou du riz à gra<strong>in</strong>s courts. Suivez les <strong>in</strong>structions données sur le paquet ou utilisez le<br />
tableau de cuisson pour le riz complet.<br />
• En raison de l'eau supplémentaire requise pour la cuisson du riz brun complet, des bulles d'eau amidonnées<br />
pourraient s'élever vers le couvercle durant la cuisson. Pour obtenir de meilleurs résultats, lavez le riz avant<br />
de le préparer et gardez-le au chaud pendant 20 m<strong>in</strong>utes après la cuisson, pour permettre l'absorption de<br />
l'humidité résiduelle.<br />
23
Variations de riz<br />
Riz savoureux<br />
Préparez le riz dans le <strong>SOLIS</strong> Cuiseur à riz<br />
« 2 en 1 » comme <strong>in</strong>diqué, en remplaçant toute<br />
l'eau par la même quantité de bouillon de poulet,<br />
de viande de boeuf, de poisson ou de légumes.<br />
Riz sucré<br />
Préparez le riz dans le <strong>SOLIS</strong> Cuiseur à riz<br />
« 2 en 1 » comme <strong>in</strong>diqué, en remplaçant la moitié<br />
de l'eau par du jus de pomme, d'orange ou d'ananas.<br />
Il n'est pas recommandé de préparer le riz avec du<br />
lait ou de la crème, car il brûlerait sur le fond du<br />
panier de cuisson amovible.<br />
Riz au safran<br />
Ajoutez 1 ⁄4 de cuillère à thé de poudre de safran ou<br />
2 fils de safran pour 2 tasses d'eau.<br />
Utilisez les tableaux de cuisson pour le riz blanc.<br />
Mélangez bien.<br />
Riz Arborio<br />
Le riz Arborio est un type de riz très f<strong>in</strong> à gra<strong>in</strong>s<br />
courts souvent utilisé pour le risotto italien. Utilisez<br />
le tableau de cuisson pour le riz brun complet.<br />
Riz jasm<strong>in</strong><br />
Le riz jasm<strong>in</strong> est un riz parfumé à longs gra<strong>in</strong>s.<br />
Utilisez les tableaux de cuisson pour le riz blanc.<br />
Riz Basmati<br />
Le riz Basmati est un riz aromatique à longs gra<strong>in</strong>s.<br />
Utilisez les tableaux de cuisson pour le riz blanc.<br />
Riz sauvage<br />
Il n'est pas recommandé de préparer le riz sauvage<br />
tout seul dans le <strong>SOLIS</strong> Cuiseur à riz « 2 en 1 »,<br />
car il exige une grande quantité d'eau. Il est possible<br />
de préparer le riz sauvage mélangé avec du riz brun<br />
complet ou du riz blanc.<br />
A propos du riz<br />
Le riz, très pauvre en matières grasses, est une précieuse<br />
source de glucides complexes, de fer et de<br />
vitam<strong>in</strong>es B, telles que la thiam<strong>in</strong>e et la niac<strong>in</strong>e. A<br />
ce titre, il constitue un élément central d’une<br />
alimentation équilibrée.<br />
Le marché propose une grande diversité en matière<br />
de variétés de riz. Grâce au <strong>SOLIS</strong> Cuiseur à riz<br />
« 2 en 1 », chaque sorte est parfaitement préparée.<br />
Ci-dessous, une sélection des variétés de riz les plus<br />
utilisées a<strong>in</strong>si que leurs propriétés.<br />
Riz à longs gra<strong>in</strong>s<br />
Une consistance encore granuleuse après la cuisson<br />
est caractéristique du riz à long gra<strong>in</strong> sans amidon.<br />
La consistance du riz « California » est molle et celle<br />
du « Carol<strong>in</strong>a » un peu plus fibreuse. Relevée et aromatique,<br />
la sorte « Jasm<strong>in</strong> » est la plus fibreuse<br />
parmi les riz à longs gra<strong>in</strong>s.<br />
Riz à gra<strong>in</strong>s courts<br />
Ce riz se dist<strong>in</strong>gue par une consistance moelleuse,<br />
collante bien que ferme. On le sert volontiers avec<br />
des sushis. Appelé également « riz doux » ou « riz<br />
perlé » en raison de sa forme ronde, il est très collant<br />
et convient idéalement pour les gâteaux et pudd<strong>in</strong>gs<br />
de riz.<br />
Riz brun complet<br />
Le riz brun ou riz complet est le plus sa<strong>in</strong>, parce qu’il<br />
a conservé le son qui le rend plus nutritif et contient<br />
beaucoup de vitam<strong>in</strong>es B complexes a<strong>in</strong>si que du fer<br />
et du calcium. Il est plus riche en fibres que le riz<br />
blanc poli. Le riz brun le plus courant est à longs<br />
gra<strong>in</strong>s avec une consistance collante.<br />
Riz sauvage<br />
Le riz sauvage est proposé en différentes comb<strong>in</strong>aisons<br />
et variations goûteuses. On le mélange souvent<br />
à du riz à longs gra<strong>in</strong>s. Sa couleur varie de brun à<br />
noir et sa consistance est fibreuse. Agrémenté de<br />
fruits secs, le riz sauvage accompagne merveilleusement<br />
un potage ou une volaille cuite.<br />
24
Cuisson à la vapeur<br />
Les aliments cuits à la vapeur conservent la majeure<br />
partie de leurs éléments nutritionnels lorsqu'ils sont<br />
préparés avec le <strong>SOLIS</strong> Cuiseur à riz « 2 en 1 ».<br />
Pour cuire les aliments à la vapeur, mettez-les sur les<br />
paniers vapeur <strong>in</strong>ox, placez-les au-dessus d'un bouillon<br />
ou de l'eau et recouvrez le tout avec le couvercle<br />
en verre. Laissez le couvercle en verre en place<br />
durant la cuisson des aliments à la vapeur. Si vous<br />
ôtez le couvercle alors que ce n'est pas nécessaire,<br />
ceci entraînerait une perte de vapeur et le prolongement<br />
du temps de cuisson.<br />
1. Mettez 3 gobelets gradués d'eau/de bouillon ou<br />
plus dans le panier de cuisson amovible. Utilisez<br />
au maximum 6 gobelets gradués d'eau.<br />
2. Placez les aliments devant être cuits à la vapeur<br />
directement sur les paniers vapeur <strong>in</strong>ox et placez<br />
ceux-ci sur le panier de cuisson amovible. (Référez-vous<br />
aux graphiques de cuisson à la vapeur<br />
aux pages 26 à 28) pour les temps de cuisson<br />
approximatifs).<br />
3. Placez le panier de cuisson amovible avec les<br />
paniers vapeur dans le boîtier <strong>in</strong>ox et recouvrez<br />
avec le couvercle en verre.<br />
4. Branchez le cuiseur sur une prise électrique de<br />
230 volts. Le voyant lum<strong>in</strong>eux orange « Chaud »<br />
s'allume alors.<br />
5. Appuyez le sélecteur de fonction vers le bas, pour<br />
commencer la cuisson. Le voyant lum<strong>in</strong>eux rouge<br />
« Cuisson » s'allume.<br />
6. Lorsque la cuisson à la vapeur est term<strong>in</strong>ée,<br />
l'avertisseur sonore retentit et le voyant lum<strong>in</strong>eux<br />
orange « Chaud » s'allume. Enlevez les aliments du<br />
<strong>SOLIS</strong> Cuiseur à riz « 2 en 1 ». Si une nouvelle<br />
cuisson à la vapeur est nécessaire, assurez-vous<br />
qu'il y a suffisamment d'eau dans le panier de<br />
cuisson amovible. Si ce n'est pas le cas, ajoutez<br />
de l'eau chaude ou du bouillon.<br />
7. Débranchez le <strong>SOLIS</strong> Cuiseur à riz « 2 en 1 ».<br />
Attendez que l'appareil se refroidisse, avant de le<br />
nettoyer.<br />
Note !<br />
Veillez à ce l’eau du panier de cuisson amovible ne<br />
s’évapore pas entièrement durant la cuisson à la<br />
vapeur.<br />
Du liquide chaud peut être ajouté durant le processus<br />
de cuisson à la vapeur.<br />
Les deux paniers vapeurs peuvent être empilés ou<br />
utilisés séparément.<br />
Suggestions et conseils pour la cuisson de<br />
légumes à la vapeur<br />
• Les aliments de faible taille cuiront plus<br />
rapidement que les aliments de grande taille.<br />
• Essayez de couper les légumes à taille égale, pour<br />
garantir une cuisson homogène.<br />
• Il est possible de cuire à la vapeur aussi bien des<br />
légumes frais que des légumes surgelés.<br />
• Pour les légumes surgelés, ne les décongelez pas<br />
avant de les cuire à la vapeur.<br />
• La taille et la forme des légumes, a<strong>in</strong>si que le goût<br />
personnel, peuvent exiger d'autres réglages des<br />
temps de cuisson. Pour obtenir des légumes plus<br />
tendres, prolongez le temps de cuisson.<br />
• Veillez à ce que l'eau ou le bouillon ne parviennent<br />
pas sur le panier vapeur <strong>in</strong>ox. La cuisson à la<br />
vapeur ne sera pas efficace.<br />
Faites toujours usage de prudence lorsque vous soulevez et enlevez le couvercle en verre,<br />
en l'éloignant de vous, pour éviter d'être brûlé par la vapeur qui s'en échappe.<br />
25
Cuisson a la vapeur (suite)<br />
Légumes Préparation & Quantité Temps de cuisson<br />
conseils<br />
(m<strong>in</strong>utes)<br />
Artichauts Enlever les feuilles la tige 2 de taille moyenne 30–35<br />
externes dures et couper<br />
la tige<br />
Asperges Les tailler et les laisser 2 bottes 12–14<br />
sous forme de lances<br />
Haricots Couper les parties 250g 13–15<br />
<strong>in</strong>férieure et supérieure,<br />
les laisser entiers<br />
Betteraves Tailler, ne pas éplucher 300g 12–13<br />
(petites et moyennes)<br />
Brocoli Couper en fleurons 250g 8–10<br />
Choux de Bruxelles Couper en croix à la base 375g 17–19<br />
Choux, laitues Couper en gros morceaux 500 g 10–12<br />
Carottes Couper en lamelles 3 de taille moyenne 14–16<br />
Poivrons Couper en lamelles 3 de taille moyenne 14–16<br />
Chou-fleur Couper en fleurons 375g 17–19<br />
Céleri Couper en lamelles 3 tiges 5– 6<br />
Pois chiches Tremper pendant 1 tasse, secs 40–45<br />
12 heures<br />
Maïs Epis de maïs entiers 2 petits épis 20–22<br />
Champignons Entiers, non lavés 300g 8–10<br />
(Petits) Oignons Epluchés, entiers 6 de taille moyenne 20–25<br />
Pois mange-tout Couper les parties 250g 4– 5<br />
<strong>in</strong>férieure et supérieure<br />
Petits pois Frais, écossés 250g 8–10<br />
Surgelés 250g 4– 5<br />
Pommes de terre Tout usage, entières 4 (150 –180 g chacune) 35–40<br />
Pommes de terre Nouvelles, entières 6 (125 g chacune) 25–30<br />
Patate douces Couper en morceaux 500 g 20–25<br />
Kumara<br />
Citrouilles Couper en morceaux 500 g 20–25<br />
Ép<strong>in</strong>ards (anglais) Nettoyer les feuilles 1<br />
/2 botte 5<br />
et les tiges<br />
Courges (petites) Couper les parties 350g 8<br />
<strong>in</strong>férieure et supérieure<br />
Navets Eplucher, couper en 350g 15–17<br />
tranches de 50 g<br />
Courgettes Coupés en tranches 350g 6<br />
26
Cuisson a la vapeur (suite)<br />
Suggestions et conseils pour la cuisson à la vapeur du poisson et de fruits de mer<br />
• Assaisonner le poisson avec des herbes fraîches, des oignons, du citron etc. avant de le faire cuire.<br />
• Assurez-vous que les filets de poisson sont disposés en couches simples et ne se chevauchent pas.<br />
• Le poisson est cuit quand on peut l'effriter facilement avec une fourchette et quand il présente une<br />
couleur opaque.<br />
Type Temps de cuisson Suggestions et conseils<br />
(m<strong>in</strong>utes)<br />
– filets 8–10 Cuire à la vapeur jusqu'à ce qu'ils prennent une<br />
couleur opaque et s'effritent facilement<br />
– entier 15–20<br />
– tranches 12–14 La tranche de poisson est cuite lorsque l'arête<br />
centrale peut être facilement enlevée<br />
Homards – queues 18–20 Enlever la partie <strong>in</strong>férieure de la carapace<br />
Moules – en coquille 12–14 Cuire à la vapeur jusqu'à ce qu'ils soient bien<br />
ouverts<br />
Palourdes, coques 8–10 Cuire à la vapeur jusqu'à ce qu'elles commencent à<br />
communes<br />
s'ouvrir<br />
Crevettes – en coquille 8–10 Cuire à la vapeur jusqu'à ce qu'elles deviennent<br />
roses<br />
Coquilles Sa<strong>in</strong>t-Jacques 4– 6 Cuire à la vapeur jusqu'à ce qu'elles deviennent<br />
opaques<br />
Huîtres – fermées 10–12 Cuire à la vapeur jusqu'à ce que la coquille<br />
supérieure commence à s'ouvrir ; Si la coquille<br />
supérieure ne s'ouvre pas complètement, un<br />
couteau sera nécessaire pour l'ouvrir<br />
27
Cuisson a la vapeur (suite)<br />
Suggestions et conseils pour la cuisson la volaille é la vapeur<br />
• Choisissez des morceaux de volaille de même taille pour une cuisson homogène.<br />
• Pour obtenir une cuisson homogène, disposez la volaille en couches simples.<br />
• Enlevez la graisse visible et la peau.<br />
• Pour obtenir un aspect doré, saisissez le poulet avant de le cuire à la vapeur.<br />
• Vérifiez si la volaille est cuite en perçant la partie la plus épaisse. La volaille est cuite lorsqu'un jus clair s'en<br />
écoule.<br />
Type Suggestions et conseils Temps de cuisson<br />
(m<strong>in</strong>utes)<br />
Filet de blanc de poulet Placer le côté de la peau vers le haut 20–25<br />
Pilon<br />
Placer la partie la plus épaisse vers l'extérieur<br />
du panier vapeur <strong>in</strong>ox 30–35<br />
Filet de cuisse<br />
Placer la partie la plus épaisse vers l'extérieur<br />
du panier vapeur <strong>in</strong>ox 18–20<br />
Suggestions et conseils pour la cuisson à la vapeur de boulettes de pâte<br />
• Aussi bien les boulettes de pâte fraîches que les boulettes surgelées peuvent être cuites à la vapeur.<br />
• Placez des petits morceaux papier sulfurisé de cuisson, ou des feuilles de chou ou de laitue en dessous des<br />
boulettes de pâte, pour éviter que celles-ci collent sur le panier vapeur.<br />
Type Suggestions et conseils Temps de cuisson<br />
(m<strong>in</strong>utes)<br />
Barbecue de porc ou de Surgelés 10–12<br />
brioches de poulet (buns)<br />
Boulettes de pâte – Séparer avant la cuisson 8–10<br />
surgelées (dumpl<strong>in</strong>gs)<br />
Boulettes de pâte – 5– 6<br />
fraîches (dumpl<strong>in</strong>gs)<br />
28
Entretien et nettoyage<br />
Débranchez le <strong>SOLIS</strong> Cuiseur à riz « 2 en 1 ».<br />
Attendez que tous les composants se refroidissent<br />
avant de retirer le panier de cuisson amovible. Lavez<br />
le panier de cuisson amovible, les paniers vapeur<br />
<strong>in</strong>ox et le couvercle en verre dans de l'eau chaude,<br />
savonneuse, r<strong>in</strong>cez-les et laissez-les sécher<br />
complètement.<br />
NOTE !<br />
Si le riz cuit colle sur le fond du panier de cuisson<br />
amovible, remplissez celui-ci d'eau chaude<br />
savonneuse et attendez environ 10 m<strong>in</strong>utes avant de<br />
le nettoyer.<br />
Solis recommande de ne laver aucun composant de<br />
votre <strong>SOLIS</strong> Cuiseur à riz « 2 en 1 » dans un lavevaisselle,<br />
car des détergents agressifs et les<br />
températures élevées de l'eau chaude pourraient<br />
tacher ou déformer le panier de cuisson amovible et<br />
les accessoires.<br />
Évitez d'utiliser des nettoyants abrasifs, des pailles<br />
de fer ou des éponges à récurer métalliques, car ils<br />
pourraient endommager la surface antiadhésive.<br />
Pour nettoyer le boîtier <strong>in</strong>ox, essuyez-le avec une<br />
étoffe humide et laissez-le sécher complètement.<br />
Évitez toute immersion du boîtier <strong>in</strong>ox ou du cordon d'alimentation dans de l'eau ou tout autre<br />
liquide, car ceci pourrait provoquer une électrocution.<br />
29
Contents<br />
Congratulations Page 32<br />
Solis Recommends Safety First Page 33<br />
Know your <strong>SOLIS</strong> <strong>Rice</strong> <strong>Cooker</strong> <strong>“2</strong> <strong>in</strong> <strong>1”</strong> Page 34<br />
Operat<strong>in</strong>g your <strong>SOLIS</strong> <strong>Rice</strong> <strong>Cooker</strong> <strong>“2</strong> <strong>in</strong> <strong>1”</strong> Page 35<br />
<strong>Rice</strong> Cook<strong>in</strong>g Tables Page 37<br />
Steam<strong>in</strong>g Foods Page 39<br />
Care and Clean<strong>in</strong>g Page 43<br />
31
<strong>SOLIS</strong><br />
Congratulations<br />
on the purchase of your new <strong>SOLIS</strong> <strong>Rice</strong> <strong>Cooker</strong> <strong>“2</strong> <strong>in</strong> <strong>1”</strong><br />
32
Solis recommends safety first<br />
We at Solis are very safety conscious. We always<br />
keep the safety of our customers foremost dur<strong>in</strong>g the<br />
design and manufacture of our products.<br />
In addition, we ask you to take a certa<strong>in</strong> amount of<br />
care when work<strong>in</strong>g with electrical appliances. Please<br />
follow the safety measures listed here<br />
Important safequards for your<br />
<strong>SOLIS</strong> <strong>Rice</strong> <strong>Cooker</strong> <strong>“2</strong> <strong>in</strong> <strong>1”</strong><br />
• Carefully read all <strong>in</strong>structions before operat<strong>in</strong>g and<br />
save for future reference.<br />
• Always use the <strong>SOLIS</strong> <strong>Rice</strong> <strong>Cooker</strong> <strong>“2</strong> <strong>in</strong> <strong>1”</strong> on a<br />
dry, level surface.<br />
• Remove any promotional stickers before us<strong>in</strong>g the<br />
<strong>SOLIS</strong> <strong>Rice</strong> <strong>Cooker</strong> <strong>“2</strong> <strong>in</strong> <strong>1”</strong>.<br />
• Always remove the plug, if the appliance is left<br />
unattended, if not <strong>in</strong> use, if moved or dismantled<br />
for clean<strong>in</strong>g and when stor<strong>in</strong>g.<br />
• Do not let the cord hang over the edge of a table or<br />
counter, touch hot surfaces, or become knotted.<br />
• Do not place this appliance on or near a hot gas or<br />
electric burner, or where it could touch a heated<br />
oven.<br />
• Do not leave the appliance unattended when <strong>in</strong> use.<br />
• This appliance is not <strong>in</strong>tended for use by young<br />
children or <strong>in</strong>firm persons without supervision.<br />
• Young children should be supervised to ensure that<br />
they do not play with the appliance.<br />
• Do not immerse appliance or power cord <strong>in</strong> water<br />
or any other liquid.<br />
• This appliance is for household use only. Do not<br />
use this appliance for anyth<strong>in</strong>g other than its<br />
<strong>in</strong>tended use. Do not use <strong>in</strong> mov<strong>in</strong>g vehicles or<br />
boats. Do not use outdoors.<br />
• Do not touch hot surfaces; use potholders to remove<br />
the removable cook<strong>in</strong>g bowl and steam<strong>in</strong>g tray.<br />
• Never plug <strong>in</strong> or switch on the <strong>SOLIS</strong> <strong>Rice</strong> <strong>Cooker</strong><br />
<strong>“2</strong> <strong>in</strong> <strong>1”</strong> without hav<strong>in</strong>g the removable cook<strong>in</strong>g<br />
bowl placed <strong>in</strong>side the Sta<strong>in</strong>less Steel Hous<strong>in</strong>g.<br />
• Do not put liquid <strong>in</strong>to the Sta<strong>in</strong>less Steel Hous<strong>in</strong>g.<br />
Only the removable cook<strong>in</strong>g bowl is designed to<br />
conta<strong>in</strong> liquid.<br />
• Lift and remove the glass lid carefully and angled<br />
away from yourself to avoid scald<strong>in</strong>g from escap<strong>in</strong>g<br />
steam. Do not allow water from the lid to drip <strong>in</strong>to<br />
the Sta<strong>in</strong>less Steel Hous<strong>in</strong>g, only <strong>in</strong>to the<br />
removable cook<strong>in</strong>g bowl.<br />
• Unplug when f<strong>in</strong>ished. Allow all parts to cool before<br />
disassembl<strong>in</strong>g for clean<strong>in</strong>g.<br />
• Do not use a damaged or dented removable<br />
cook<strong>in</strong>g bowl. Replace before us<strong>in</strong>g.<br />
• The <strong>in</strong>stallation of a residual current device (safety<br />
switch) is recommended to provide additional<br />
safety protection when us<strong>in</strong>g electrical appliances.<br />
It is advisable that a safety switch with a rated<br />
residual operat<strong>in</strong>g current not exceed<strong>in</strong>g 30 mA<br />
be <strong>in</strong>stalled <strong>in</strong> the electrical circuit supply<strong>in</strong>g the<br />
appliance. See your electrician for professional<br />
advice.<br />
• Any ma<strong>in</strong>tenance other than clean<strong>in</strong>g should be<br />
performed at an authorised Solis Service Centre.<br />
• Strictly follow clean<strong>in</strong>g and care <strong>in</strong>structions.<br />
• Regularly <strong>in</strong>spect the supply cord, plug and actual<br />
appliance for any damage. For service and<br />
repairs only take the appliance to an authorized<br />
electrical workshop or send it back to <strong>SOLIS</strong> AG,<br />
8152 Glattbrugg<br />
33
Know your <strong>SOLIS</strong> <strong>Rice</strong> <strong>Cooker</strong> <strong>“2</strong> <strong>in</strong> <strong>1”</strong><br />
Large 6 cup capacity cooks up to<br />
12 cups of cooked rice.<br />
Non-stick removable cook<strong>in</strong>g bowl<br />
prevents rice from stick<strong>in</strong>g.<br />
Toughened, Cook ‘n’ Look glass lid.<br />
Cook and Warm Lights –<br />
Red ‘Cook’ light <strong>in</strong>dicates that<br />
the <strong>SOLIS</strong> <strong>Rice</strong> <strong>Cooker</strong> <strong>“2</strong> <strong>in</strong> <strong>1”</strong><br />
is <strong>in</strong> the ‘Cook’ sett<strong>in</strong>g.<br />
Amber ‘Warm’ light <strong>in</strong>dicates that<br />
the <strong>SOLIS</strong> <strong>Rice</strong> <strong>Cooker</strong> <strong>“2</strong> <strong>in</strong> <strong>1”</strong> is<br />
turned ‘On’ and has switched automatically<br />
to the ‘Keep Warm’ sett<strong>in</strong>g.<br />
Sta<strong>in</strong>less Steel Hous<strong>in</strong>g.<br />
Removable Cord<br />
for serv<strong>in</strong>g at the table.<br />
Selector Control with automatic<br />
“Cook” and “Keep Warm” sett<strong>in</strong>gs.<br />
Ready Bell will sound when<br />
the ‘Cook’ sett<strong>in</strong>g has f<strong>in</strong>ished<br />
and the ‘Keep Warm’ sett<strong>in</strong>g starts.<br />
Sta<strong>in</strong>less steel steam<strong>in</strong>g tray – ideal for<br />
vegetables, seafood and poultry<br />
Solis measur<strong>in</strong>g cup<br />
and serv<strong>in</strong>g spoon.<br />
Large stackable sta<strong>in</strong>less steel<br />
steam<strong>in</strong>g trays – ideal for larger<br />
vegetables, seafood and poultry.<br />
Both steam<strong>in</strong>g trays can be<br />
stacked or used separately.<br />
34
Operat<strong>in</strong>g your <strong>SOLIS</strong> <strong>Rice</strong> <strong>Cooker</strong> <strong>“2</strong> <strong>in</strong> <strong>1”</strong><br />
Before first use, remove all promotional labels and<br />
wash the non-stick removable cook<strong>in</strong>g bowl,<br />
sta<strong>in</strong>less steel steam<strong>in</strong>g trays and glass lid <strong>in</strong> hot<br />
soapy water, r<strong>in</strong>se and dry thoroughly.<br />
How to cook rice<br />
1. Use the measur<strong>in</strong>g cup provided to measure<br />
the required quantity of rice (refer to cook<strong>in</strong>g<br />
tables – page 37). Always measure level cups,<br />
not heaped (Fig 1).<br />
Figure 2<br />
5. Add water us<strong>in</strong>g the follow<strong>in</strong>g ratios:<br />
White <strong>Rice</strong> = 1 cup water: 1 cup rice<br />
Brown <strong>Rice</strong> = 1 1 ⁄2 cups water: 1 cup rice<br />
(see table on Page 37 for more details)<br />
6. Place the glass lid <strong>in</strong>to position.<br />
Figure 1<br />
2. Place the rice <strong>in</strong>to a separate bowl and wash rice<br />
by r<strong>in</strong>s<strong>in</strong>g with cold water to remove any excess<br />
starch. The rice is ready for cook<strong>in</strong>g when water<br />
runs clear from the rice.<br />
3. Ensure the exterior of the removable cook<strong>in</strong>g<br />
bowl is clean and dry before plac<strong>in</strong>g it <strong>in</strong> the<br />
Sta<strong>in</strong>less Steel Hous<strong>in</strong>g, this will ensure proper<br />
contact with the <strong>in</strong>ner cook<strong>in</strong>g surface (see Fig 2).<br />
4. Mak<strong>in</strong>g sure the bowl is sitt<strong>in</strong>g flat <strong>in</strong> the hous<strong>in</strong>g<br />
(see Fig 2), add the washed rice to the removable<br />
cook<strong>in</strong>g bowl, ensur<strong>in</strong>g rice is spread evenly<br />
across the bottom of the bowl and not heaped to<br />
one side (Fig 2)<br />
7. Plug <strong>in</strong>to a 230 Volt power outlet. The amber<br />
‘Warm’ light will illum<strong>in</strong>ate.<br />
8. To commence cook<strong>in</strong>g, depress the Selector<br />
Control down. The red ‘Cook’ light will illum<strong>in</strong>ate.<br />
9. When cook<strong>in</strong>g is complete, the Ready Bell<br />
will sound and the <strong>SOLIS</strong> <strong>Rice</strong> <strong>Cooker</strong> <strong>“2</strong> <strong>in</strong> <strong>1”</strong><br />
will automatically switch to the ‘Keep Warm’<br />
sett<strong>in</strong>g. The amber light will illum<strong>in</strong>ate.<br />
10. Open the lid and turn the rice over with the<br />
serv<strong>in</strong>g spoon provided. Replace the lid and<br />
allow the rice to stand for 10–15 m<strong>in</strong>utes before<br />
serv<strong>in</strong>g. This allows any excess moisture to be<br />
absorbed, result<strong>in</strong>g <strong>in</strong> a fluffier rice texture.<br />
Note!<br />
1 level measur<strong>in</strong>g cup = 140 grams uncooked rice<br />
1 level measur<strong>in</strong>g cup uncooked rice = 2 measur<strong>in</strong>g cups cooked rice (approx.)<br />
The maximum quantity of uncooked white rice to be cooked = 6 measur<strong>in</strong>g cups<br />
The m<strong>in</strong>imum quantity of uncooked white rice to be cooked = 2 measur<strong>in</strong>g cups<br />
35
Operat<strong>in</strong>g your <strong>SOLIS</strong> <strong>Rice</strong> <strong>Cooker</strong> <strong>“2</strong> <strong>in</strong> <strong>1”</strong> cont’d<br />
Note!<br />
<strong>Rice</strong> can be kept <strong>in</strong> the automatic ‘Keep Warm’ sett<strong>in</strong>g for up to 5 hours.<br />
Do not remove the glass lid until ready to serve (except for when turn<strong>in</strong>g over rice after cook<strong>in</strong>g is<br />
complete.)<br />
To stop the ‘Keep Warm’ sett<strong>in</strong>g unplug the cord.<br />
Important<br />
• Always place liquid <strong>in</strong>to the removable cook<strong>in</strong>g bowl, or be ready to add oil, butter or margar<strong>in</strong>e,<br />
before depress<strong>in</strong>g the Selector Control to the ‘Cook’ sett<strong>in</strong>g.<br />
• Never try to force the Selector Control to stay <strong>in</strong> the ‘Cook’ sett<strong>in</strong>g after it has automatically switched<br />
to the ‘Keep Warm’ sett<strong>in</strong>g.<br />
• Do not <strong>in</strong>terfere with the automatic Selector Control dur<strong>in</strong>g operation.<br />
• To prevent scratch<strong>in</strong>g the non-stick surface of the removable cook<strong>in</strong>g bowl, always use wooden<br />
or plastic utensils.<br />
Always lift and remove the lid carefully, angl<strong>in</strong>g it away from yourself to avoid scald<strong>in</strong>g<br />
from escap<strong>in</strong>g steam.<br />
36
<strong>Rice</strong> cook<strong>in</strong>g tables<br />
The rice measur<strong>in</strong>g cup provided with your <strong>SOLIS</strong> <strong>Rice</strong> <strong>Cooker</strong> <strong>“2</strong> <strong>in</strong> <strong>1”</strong> is used <strong>in</strong> the follow<strong>in</strong>g tables.<br />
Note!<br />
The Solis measur<strong>in</strong>g cup is not a standard metric measur<strong>in</strong>g cup.<br />
1 Solis measur<strong>in</strong>g cup is equal to 140g of uncooked rice and 185ml of water.<br />
If your Solis measur<strong>in</strong>g cup is lost or misplaced, use another cup but ma<strong>in</strong>ta<strong>in</strong> the same cook<strong>in</strong>g ratios<br />
and ensure you do not exceed the 6 cup maximum l<strong>in</strong>e <strong>in</strong> the removable cook<strong>in</strong>g bowl:<br />
White <strong>Rice</strong> = 1 cup water: 1 cup rice<br />
Brown <strong>Rice</strong> = 1 1 ⁄2 cups water: 1 cup rice<br />
Withe <strong>Rice</strong><br />
Uncooked White <strong>Rice</strong> Cold tap water Cooked rice Cook<strong>in</strong>g time<br />
(measur<strong>in</strong>g cups) (measur<strong>in</strong>g cups) (approximate) (approximate)<br />
(measur<strong>in</strong>g cups) (m<strong>in</strong>utes)<br />
2 2 4 15<br />
4 4 8 20<br />
6 6 12 28<br />
Brown <strong>Rice</strong><br />
Uncooked White <strong>Rice</strong> Cold tap water Cooked rice Cook<strong>in</strong>g time<br />
(measur<strong>in</strong>g cups) (measur<strong>in</strong>g cups) (approximate) (approximate)<br />
(measur<strong>in</strong>g cups) (m<strong>in</strong>utes)<br />
2 3 5 18–20<br />
4 6 10 25–30<br />
TIPS<br />
• Add a little extra water for fluffier rice and a little less water for firmer rice.<br />
• Some rice varieties may require more water for cook<strong>in</strong>g, such as wild rice blends, Arborio rice or short gra<strong>in</strong><br />
rice. Follow the directions on the packet or use the brown rice cook<strong>in</strong>g table.<br />
• Due to the additional water needed to cook brown rice, some starchy water bubbles may rise to the lid while<br />
cook<strong>in</strong>g. For best results, wash rice before cook<strong>in</strong>g and keep warm for 20 m<strong>in</strong>utes after cook<strong>in</strong>g to absorb the<br />
rema<strong>in</strong><strong>in</strong>g moisture.<br />
37
<strong>Rice</strong> Variations<br />
Savoury <strong>Rice</strong><br />
Prepare the rice <strong>in</strong> the <strong>SOLIS</strong> <strong>Rice</strong> <strong>Cooker</strong> <strong>“2</strong> <strong>in</strong> <strong>1”</strong><br />
as specified, substitut<strong>in</strong>g all the water with the same<br />
quantity of chicken, beef, fish, or vegetable stock.<br />
Sweet <strong>Rice</strong><br />
Prepare the rice <strong>in</strong> the <strong>SOLIS</strong> <strong>Rice</strong> <strong>Cooker</strong> <strong>“2</strong> <strong>in</strong> <strong>1”</strong><br />
as specified substitut<strong>in</strong>g half the water with apple<br />
juice, orange juice or p<strong>in</strong>eapple juice. Cook<strong>in</strong>g rice<br />
with milk or cream is not recommended as it will<br />
burn onto the bottom of the removable cook<strong>in</strong>g bowl.<br />
Saffron <strong>Rice</strong><br />
Add 1 ⁄4 teaspoon of saffron powder or 2 saffron<br />
threads to every 2 cups of water.<br />
Use the white rice cook<strong>in</strong>g tables. Mix well.<br />
Arborio <strong>Rice</strong><br />
Arborio rice is short round-gra<strong>in</strong>ed pearly rice often<br />
used for Italian risotto cook<strong>in</strong>g. Use the brown rice<br />
cook<strong>in</strong>g tables.<br />
Jasm<strong>in</strong>e <strong>Rice</strong><br />
Jasm<strong>in</strong>e rice is fragrant long gra<strong>in</strong> rice. Use the<br />
white rice cook<strong>in</strong>g tables.<br />
Basmati <strong>Rice</strong><br />
Basmati rice is an aromatic long gra<strong>in</strong> rice. Use the<br />
white rice cook<strong>in</strong>g tables.<br />
Wild <strong>Rice</strong><br />
It is not recommended to cook wild rice alone <strong>in</strong> the<br />
<strong>SOLIS</strong> <strong>Rice</strong> <strong>Cooker</strong> <strong>“2</strong> <strong>in</strong> <strong>1”</strong> as it requires a<br />
substantial amount of water. It is possible to cook<br />
wild rice as a blend with white or brown rice.<br />
About rice<br />
<strong>Rice</strong> is a nutritious, low-fat food consist<strong>in</strong>g of<br />
complex carbohydrates and is rich <strong>in</strong> vitam<strong>in</strong>s such<br />
as thiam<strong>in</strong>, niac<strong>in</strong> and iron. <strong>Rice</strong> is an essential part<br />
of a healthy diet.<br />
There are numerous different types of rice on the<br />
market. Every sort of rice can be cooked to perfection<br />
<strong>in</strong> the <strong>SOLIS</strong> <strong>Rice</strong> <strong>Cooker</strong> „2 <strong>in</strong> 1“. What follows is<br />
a list of the varieties of rice generally available and<br />
their particular properties.<br />
Long-gra<strong>in</strong> rice<br />
Starch-free long-gra<strong>in</strong> rice typically has a gra<strong>in</strong>y<br />
consistency, even after cook<strong>in</strong>g. While “California”<br />
rice is soft, “Carol<strong>in</strong>a” rice is rather more fibrous.<br />
Spicy and aromatic “Jasm<strong>in</strong>” rice, however, is the<br />
most fibrous of all the long-gra<strong>in</strong>ed rice varieties.<br />
Short-gra<strong>in</strong> rice<br />
This rice has a soft and sticky consistency. It is the<br />
rice of choice for sushi. “Sweet <strong>Rice</strong>”, also known as<br />
“Pearl <strong>Rice</strong>” (ow<strong>in</strong>g to its round shape), is extremely<br />
sticky and ideal for rice pudd<strong>in</strong>g.<br />
Brown rice<br />
Brown rice is the healthiest rice available as it is still<br />
coated with bran and is especially rich <strong>in</strong> the B<br />
vitam<strong>in</strong> complexes, iron and calcium. It is more<br />
fibrous than polished white rice. The brown rice most<br />
frequently used is a long-gra<strong>in</strong>ed rice with a sticky<br />
consistency.<br />
Wild rice<br />
Wild rice is available <strong>in</strong> several different variations<br />
and mixtures. Wild rice is often mixed together with<br />
long-gra<strong>in</strong> rice. It varies <strong>in</strong> colour between brown and<br />
black and is fibrous <strong>in</strong> texture. Wild rice can be mixed<br />
with dried fruit, too, and makes a wonderful addition<br />
to soups and cooked poultry.<br />
38
Steam<strong>in</strong>g Foods<br />
Steamed foods reta<strong>in</strong> most of their nutritional value<br />
when cooked <strong>in</strong> the <strong>SOLIS</strong> <strong>Rice</strong> <strong>Cooker</strong> <strong>“2</strong> <strong>in</strong> <strong>1”</strong>.<br />
Foods may be steamed by plac<strong>in</strong>g food <strong>in</strong> the sta<strong>in</strong>less<br />
steel steam<strong>in</strong>g trays over stock or water and<br />
cover<strong>in</strong>g with the glass lid. Keep the glass lid on<br />
while steam<strong>in</strong>g food. By remov<strong>in</strong>g the lid unnecessarily<br />
steam is lost and the cook<strong>in</strong>g time will need<br />
to be extended.<br />
1. Measure 3 measur<strong>in</strong>g cups or more of water or<br />
stock <strong>in</strong>to the removable cook<strong>in</strong>g bowl. Use up to<br />
a maximum of 6 measur<strong>in</strong>g cups of water.<br />
2. Place food to be steamed directly onto the<br />
sta<strong>in</strong>less steel steam<strong>in</strong>g trays and <strong>in</strong>sert <strong>in</strong>to the<br />
removable cook<strong>in</strong>g bowl. (Refer to the Steam<strong>in</strong>g<br />
Charts on the pages 40–42 for approximate<br />
cook<strong>in</strong>g times).<br />
3. Place removable cook<strong>in</strong>g bowl with the steam<strong>in</strong>g<br />
trays <strong>in</strong>to Sta<strong>in</strong>less Steel Hous<strong>in</strong>g and cover with<br />
the glass lid.<br />
4. Plug <strong>in</strong>to a 230 Volt power outlet. The amber<br />
‘Warm’ light will illum<strong>in</strong>ate.<br />
Note!<br />
Do not let the removable cook<strong>in</strong>g bowl boil dry dur<strong>in</strong>g<br />
steam<strong>in</strong>g.<br />
Hot liquid can be added dur<strong>in</strong>g the steam<strong>in</strong>g process.<br />
Both steam<strong>in</strong>g trays can be stacked or used<br />
separately.<br />
H<strong>in</strong>ts and tips for steam<strong>in</strong>g vegetables<br />
• Smaller pieces will steam faster than larger pieces.<br />
• Try to keep vegetables to a standard size to ensure<br />
even cook<strong>in</strong>g.<br />
• Fresh or frozen vegetables may be steamed.<br />
• If steam<strong>in</strong>g frozen vegetables, do not thaw.<br />
• The size and shape of vegetables, as well as<br />
personal taste, may call for adjustments to the<br />
cook<strong>in</strong>g time. If softer vegetables are required,<br />
allow extra cook<strong>in</strong>g time.<br />
• Do not allow water or stock to reach the sta<strong>in</strong>less<br />
steel tray. The steam<strong>in</strong>g will not be effective.<br />
5. Push the Selector Control down to beg<strong>in</strong> cook<strong>in</strong>g.<br />
The red “Cook” light will illum<strong>in</strong>ate.<br />
6. When steam<strong>in</strong>g is complete, the bell with sound<br />
and the amber ‘Warm’ light will illum<strong>in</strong>ate. Remove<br />
foods from the <strong>SOLIS</strong> <strong>Rice</strong> <strong>Cooker</strong> <strong>“2</strong> <strong>in</strong> <strong>1”</strong>.<br />
If further steam<strong>in</strong>g is required ensure sufficient<br />
water is <strong>in</strong> the removable cook<strong>in</strong>g bowl. If not, add<br />
more hot water or stock.<br />
7. Unplug the <strong>SOLIS</strong> <strong>Rice</strong> <strong>Cooker</strong> <strong>“2</strong> <strong>in</strong> <strong>1”</strong>. Allow to<br />
cool before clean<strong>in</strong>g.<br />
Always lift and remove the lid carefully, angl<strong>in</strong>g it away from yourself to avoid scald<strong>in</strong>g from<br />
escap<strong>in</strong>g steam.<br />
39
Steam<strong>in</strong>g Foods cont’d<br />
Vegetables Preparation & Tips Quantity Cook<strong>in</strong>g Time<br />
(m<strong>in</strong>utes)<br />
Artichoke remove the hard 2 medium 30–35<br />
outer leaves and stalk<br />
Asparagus trim, leave as spears 2 bunches 12–14<br />
Beans top and tail, leave whole 250g 13–15<br />
Beetroot trim, do not break sk<strong>in</strong> 300g 12–13<br />
small-medium<br />
Broccoli cut <strong>in</strong>to florets 250g 8–10<br />
Brussel Sprouts cut a cross <strong>in</strong> the base 375g 17–19<br />
Cabbage large pieces 500g 10–12<br />
Carrots cut <strong>in</strong>to strips 3 medium 14–16<br />
Capsicums cut <strong>in</strong>to strips 3 medium 14–16<br />
Cauliflower cut <strong>in</strong>to florets 375g 17–19<br />
Celery slice <strong>in</strong>to strips 3 stalk 5– 6<br />
Chickpeas soak for 12 hours 1 cup dried 40–45<br />
Corn whole corn cobs 2 small cobs 20–22<br />
Mushrooms whole, unwashed 300g 8–10<br />
Onions(pickl<strong>in</strong>g) peeled, leave whole 6 medium 20–25<br />
Snow peas topped and tailed 250g 4– 5<br />
Peas fresh, peeled 250g 8–10<br />
frozen 250g 4– 5<br />
Potatoes all purpose, whole 4 (150–180g each) 35–40<br />
Potatoes new, whole 6 (125g each) 25–30<br />
Sweet Potato cut <strong>in</strong>to pieces 500g 20–25<br />
Kumara<br />
Pumpk<strong>in</strong> cut <strong>in</strong>to pieces 500g 20–25<br />
Sp<strong>in</strong>ach (English) leaves and 1<br />
⁄2 bunch 5<br />
stems cleaned<br />
Squash (baby) topped and tailed 350g 8<br />
Turnips peeled, sliced and 350g 15–17<br />
cut to 50g pieces<br />
Zucch<strong>in</strong>i sliced 350g 6<br />
40
Steam<strong>in</strong>g Foods cont’d<br />
H<strong>in</strong>tes and tips for steam<strong>in</strong>g Fish and Seafood<br />
• Season fish with fresh herbs, onions, lemon etc. before cook<strong>in</strong>g.<br />
• Ensure fish fillets are <strong>in</strong> a s<strong>in</strong>gle layer and do not overlap.<br />
• Fish is cooked when it flakes easily with a fork and is opaque <strong>in</strong> colour.<br />
Type Cook<strong>in</strong>g Time Suggestions and Tips<br />
(m<strong>in</strong>utes)<br />
Fish – Fillets 8–10 Steam until opaque and easy to flake<br />
– Whole 15–20 A cutlet is cooked when the centre<br />
– cutlets 12–14 bone is able to be easily removed<br />
Lobster – tails 18–20 Remove underside of shell<br />
Mussels – <strong>in</strong> shell 12–14 Steam until well open<br />
Clams and Pipis 8–10 Steam until just opened<br />
Prawns – <strong>in</strong> shell 8–10 Steam until p<strong>in</strong>k<br />
Scallops 4– 6 Steam until opaque<br />
Oysters-unopened 10–12 Steam until the top shell starts to open.<br />
If the top shell does not completely open,<br />
it will need to be opened with a knife<br />
41
Steam<strong>in</strong>g Foods cont’d<br />
H<strong>in</strong>ts and tips for steam<strong>in</strong>g poultry<br />
• Select similar sized pieces of poultry for even cook<strong>in</strong>g.<br />
• For even cook<strong>in</strong>g results arrange poultry <strong>in</strong> a s<strong>in</strong>gle layer.<br />
• Remove visible fat and sk<strong>in</strong>.<br />
• To obta<strong>in</strong> a browned appearance, sear the chicken before steam<strong>in</strong>g.<br />
• Check poultry is cooked by pierc<strong>in</strong>g the thickest part. The poultry is cooked when the juices run clear.<br />
Type Suggestions and Tips Cook<strong>in</strong>g Time<br />
(m<strong>in</strong>utes)<br />
Breast Fillet Place sk<strong>in</strong> side up 20–25<br />
Drumstick Place thickest part to outside of 30–35<br />
sta<strong>in</strong>less steel steam<strong>in</strong>g tray<br />
Thigh Fillet Place thickest part to outside of 18–20<br />
sta<strong>in</strong>less steel steam<strong>in</strong>g tray<br />
H<strong>in</strong>ts and tips for steam<strong>in</strong>g poultry dumpl<strong>in</strong>gs<br />
• Fresh or frozen dumpl<strong>in</strong>gs and savoury buns can be steamed.<br />
• Place small pieces of bak<strong>in</strong>g paper, or cabbage or lettuce leaves, under the dumpl<strong>in</strong>gs to avoid stick<strong>in</strong>g<br />
to the steam<strong>in</strong>g tray.<br />
Type Suggestions and Tips Cook<strong>in</strong>g Time<br />
(m<strong>in</strong>utes)<br />
BBQ pork or Cook from frozen 10–12<br />
chicken buns<br />
Dumpl<strong>in</strong>gs – frozen Separate before cook<strong>in</strong>g 8–10<br />
Dumpl<strong>in</strong>gs – fresh 5– 6<br />
42
CARE AND CLEANING<br />
Unplug the <strong>SOLIS</strong> <strong>Rice</strong> <strong>Cooker</strong> <strong>“2</strong> IN <strong>1”</strong>.<br />
Allow all parts to cool before remov<strong>in</strong>g the removable<br />
cook<strong>in</strong>g bowl. Wash the removable cook<strong>in</strong>g bowl,<br />
sta<strong>in</strong>less steel steam<strong>in</strong>g trays and glass lid <strong>in</strong> hot,<br />
soapy water, r<strong>in</strong>se and dry thoroughly.<br />
NOTE!<br />
If rice has cooked onto the bottom of the removable<br />
cook<strong>in</strong>g bowl, fill the bowl with hot, soapy water and<br />
leave to stand for approximately 10 m<strong>in</strong>utes before<br />
clean<strong>in</strong>g.<br />
Solis does not recommend to wash any parts of<br />
your <strong>SOLIS</strong> <strong>Rice</strong> <strong>Cooker</strong> <strong>“2</strong> IN <strong>1”</strong> <strong>in</strong> a dishwasher<br />
as harsh detergents and hot water temperatures may<br />
sta<strong>in</strong> or distort the removable cook<strong>in</strong>g bowl and<br />
accessories.<br />
Do not use abrasive cleaners, steel wool, or metal<br />
scour<strong>in</strong>g pads as these can damage the non-stick<br />
surface.<br />
The Sta<strong>in</strong>less Steel Hous<strong>in</strong>g can be wiped over with a<br />
damp cloth and then dried thoroughly.<br />
Do not immerse Sta<strong>in</strong>less Steel Hous<strong>in</strong>g or power cord <strong>in</strong> water or any other liquid as this may<br />
cause electrocution.<br />
43
Schweiz<br />
Nr. 003.07<br />
<strong>SOLIS</strong> AG<br />
Solis-Haus<br />
Europastrasse 11<br />
8152 Glattbrugg<br />
Tel. 044 874 64 64<br />
Fax 044 874 64 99<br />
E-Mail: <strong>in</strong>fo@solis.ch<br />
Internet: www.solis.ch