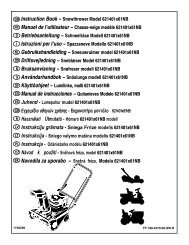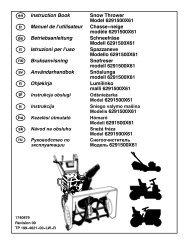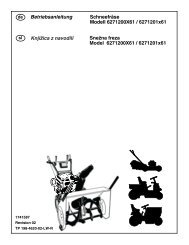
Instruction Book Snow Thrower Model 6291570X61 ... - Technik.sk
Instruction Book Snow Thrower Model 6291570X61 ... - Technik.sk
Instruction Book Snow Thrower Model 6291570X61 ... - Technik.sk

Create successful ePaper yourself
Turn your PDF publications into a flip-book with our unique Google optimized e-Paper software.
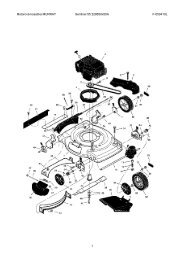
MAINTENANCE<br />
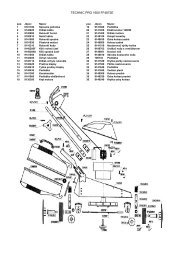
NOTE: Illustrations are located on page 2<br />
and on pages 173 through 178.<br />
Use the following maintenance section to keep<br />
your unit in good operating condition. All the<br />
maintenance information for the engine is in the<br />
engine manufacturer’s instructions. Before you<br />
start the engine, read this book.<br />
WARNING: Before you make an<br />
inspection, adjustment (except<br />
carburettor), or repair, disconnect<br />
the wire from the spark plug.<br />
General Recommendations<br />
The warranty on this snow thrower does not<br />
cover items that have been subjected to<br />
operator abuse or negligence. To receive full<br />
value from the warranty, the operator must<br />
maintain the snow thrower as instructed in this<br />
manual.<br />
Some adjustments must be made periodically to<br />
properly maintain the snow thrower.<br />
After Each Use<br />
Check for any loose or damaged parts.<br />
Tighten any loose fasteners.<br />
Check and maintain the auger.<br />
Check controls to make sure they are<br />
functioning properly.<br />
If any parts are worn or damaged, replace<br />
immediately.<br />
Check all safety and instruction decals and<br />
labels. Replace any decals or labels that are<br />
missing or cannot be clearly read.<br />
All adjustments in the Maintenance section of<br />
this manual should be checked at least once<br />
each season.<br />
As Required<br />
The following adjustment should be preformed<br />
more than once each season.<br />
1. Adjust the auger drive belt after the first 2 to<br />
4 hours, again at mid−season, and twice<br />
each season thereafter. See “How To Adjust<br />
The Auger Drive Belt” in the Maintenance<br />
section.<br />
Lubrication<br />
Every 10 Hours (Figure 13)<br />
1. Lubricate the Zerk fittings (1) every ten<br />
hours with a grease gun.<br />
2. Each time a shear bolt is replaced, the auger<br />
shaft must also be greased.<br />
3. Lubricate all pivot points.<br />
Every 25 Hours<br />
Chute Rotation Gear<br />
(Figure 5) Lubricate the chute rotation gear (1)<br />
with automotive type oil.<br />
1740876<br />
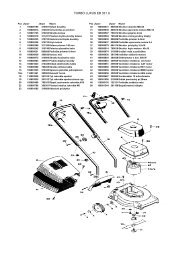
Chains<br />
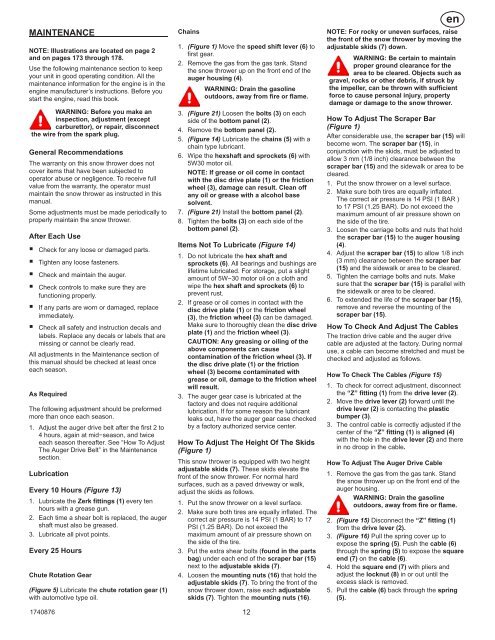
1. (Figure 1) Move the speed shift lever (6) to<br />
first gear.<br />
2. Remove the gas from the gas tank. Stand<br />
the snow thrower up on the front end of the<br />
auger housing (4).<br />
WARNING: Drain the gasoline<br />
outdoors, away from fire or flame.<br />
3. (Figure 21) Loosen the bolts (3) on each<br />
side of the bottom panel (2).<br />
4. Remove the bottom panel (2).<br />
5. (Figure 14) Lubricate the chains (5) with a<br />
chain type lubricant.<br />
6. Wipe the hexshaft and sprockets (6) with<br />
5W30 motor oil.<br />
NOTE: If grease or oil come in contact<br />
with the disc drive plate (1) or the friction<br />
wheel (3), damage can result. Clean off<br />
any oil or grease with a alcohol base<br />
solvent.<br />
7. (Figure 21) Install the bottom panel (2).<br />
8. Tighten the bolts (3) on each side of the<br />
bottom panel (2).<br />
Items Not To Lubricate (Figure 14)<br />
1. Do not lubricate the hex shaft and<br />
sprockets (6). All bearings and bushings are<br />
lifetime lubricated. For storage, put a slight<br />
amount of 5W−30 motor oil on a cloth and<br />
wipe the hex shaft and sprockets (6) to<br />
prevent rust.<br />
2. If grease or oil comes in contact with the<br />
disc drive plate (1) or the friction wheel<br />
(3), the friction wheel (3) can be damaged.<br />
Make sure to thoroughly clean the disc drive<br />
plate (1) and the friction wheel (3).<br />
CAUTION: Any greasing or oiling of the<br />
above components can cause<br />
contamination of the friction wheel (3). If<br />
the disc drive plate (1) or the friction<br />
wheel (3) become contaminated with<br />
grease or oil, damage to the friction wheel<br />
will result.<br />
3. The auger gear case is lubricated at the<br />
factory and does not require additional<br />
lubrication. If for some reason the lubricant<br />
leaks out, have the auger gear case checked<br />
by a factory authorized service center.<br />
How To Adjust The Height Of The Skids<br />
(Figure 1)<br />
This snow thrower is equipped with two height<br />
adjustable <strong>sk</strong>ids (7). These <strong>sk</strong>ids elevate the<br />
front of the snow thrower. For normal hard<br />
surfaces, such as a paved driveway or walk,<br />
adjust the <strong>sk</strong>ids as follows.<br />
1. Put the snow thrower on a level surface.<br />
2. Make sure both tires are equally inflated. The<br />
correct air pressure is 14 PSI (1 BAR) to 17<br />
PSI (1.25 BAR). Do not exceed the<br />
maximum amount of air pressure shown on<br />
the side of the tire.<br />
3. Put the extra shear bolts (found in the parts<br />
bag) under each end of the scraper bar (15)<br />
next to the adjustable <strong>sk</strong>ids (7).<br />
4. Loosen the mounting nuts (16) that hold the<br />
adjustable <strong>sk</strong>ids (7). To bring the front of the<br />
snow thrower down, raise each adjustable<br />
<strong>sk</strong>ids (7). Tighten the mounting nuts (16).<br />
12<br />
en<br />
NOTE: For rocky or uneven surfaces, raise<br />
the front of the snow thrower by moving the<br />
adjustable <strong>sk</strong>ids (7) down.<br />
WARNING: Be certain to maintain<br />
proper ground clearance for the<br />
area to be cleared. Objects such as<br />
gravel, rocks or other debris, if struck by<br />
the impeller, can be thrown with sufficient<br />
force to cause personal injury, property<br />
damage or damage to the snow thrower.<br />
How To Adjust The Scraper Bar<br />
(Figure 1)<br />
After considerable use, the scraper bar (15) will<br />
become worn. The scraper bar (15), in<br />
conjunction with the <strong>sk</strong>ids, must be adjusted to<br />
allow 3 mm (1/8 inch) clearance between the<br />
scraper bar (15) and the sidewalk or area to be<br />
cleared.<br />
1. Put the snow thrower on a level surface.<br />
2. Make sure both tires are equally inflated.<br />
The correct air pressure is 14 PSI (1 BAR )<br />
to 17 PSI (1.25 BAR). Do not exceed the<br />
maximum amount of air pressure shown on<br />
the side of the tire.<br />
3. Loosen the carriage bolts and nuts that hold<br />
the scraper bar (15) to the auger housing<br />
(4).<br />
4. Adjust the scraper bar (15) to allow 1/8 inch<br />
(3 mm) clearance between the scraper bar<br />
(15) and the sidewalk or area to be cleared.<br />
5. Tighten the carriage bolts and nuts. Make<br />
sure that the scraper bar (15) is parallel with<br />
the sidewalk or area to be cleared.<br />
6. To extended the life of the scraper bar (15),<br />
remove and reverse the mounting of the<br />
scraper bar (15).<br />
How To Check And Adjust The Cables<br />
The traction drive cable and the auger drive<br />
cable are adjusted at the factory. During normal<br />
use, a cable can become stretched and must be<br />
checked and adjusted as follows.<br />
How To Check The Cables (Figure 15)<br />
1. To check for correct adjustment, disconnect<br />
the “Z” fitting (1) from the drive lever (2).<br />
2. Move the drive lever (2) forward until the<br />
drive lever (2) is contacting the plastic<br />
bumper (3).<br />
3. The control cable is correctly adjusted if the<br />
center of the “Z” fitting (1) is aligned (4)<br />
with the hole in the drive lever (2) and there<br />
in no droop in the cable.<br />
How To Adjust The Auger Drive Cable<br />
1. Remove the gas from the gas tank. Stand<br />
the snow thrower up on the front end of the<br />
auger housing.<br />
WARNING: Drain the gasoline<br />
outdoors, away from fire or flame.<br />
2. (Figure 15) Disconnect the “Z” fitting (1)<br />
from the drive lever (2).<br />
3. (Figure 16) Pull the spring cover up to<br />
expose the spring (5). Push the cable (6)<br />
through the spring (5) to expose the square<br />
end (7) on the cable (6).<br />
4. Hold the square end (7) with pliers and<br />
adjust the locknut (8) in or out until the<br />
excess slack is removed.<br />
5. Pull the cable (6) back through the spring<br />
(5).