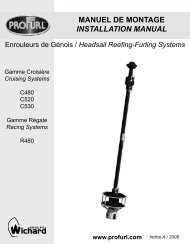
Manuel de montage
Manuel de montage
Manuel de montage

Create successful ePaper yourself
Turn your PDF publications into a flip-book with our unique Google optimized e-Paper software.
nex 0.9, 1.5, 2.5, 5.0<br />
<strong>Manuel</strong> <strong>de</strong> <strong>montage</strong> / Installation manual<br />
Vous venez d’acquérir un NEX, la nouvelle génération d’emmagasineurs Profurl, nous vous remercions <strong>de</strong> la confiance que vous portez dans<br />
nos produits et espérons que ceux-ci vous apporteront satisfaction.<br />
You have purchased NEX, the new generation of Profurl flying sail furler. Thank you for your interest and confi<strong>de</strong>nce in our products, we hope that<br />
NEX will meet your satisfaction.<br />
Composition d’un système standard<br />
Components <strong>de</strong>livered as standard<br />
Composition d’un système NEX /<br />
NEX components<br />
Options disponibles sur <strong>de</strong>man<strong>de</strong> /<br />
Options <strong>de</strong>livered upon request<br />
+<br />
Ou<br />
Or<br />
Ou<br />
Or<br />
Manille <strong>de</strong> mouflage MX<br />
MX halyard shackle<br />
Manille droite<br />
D shackle<br />
Poulie <strong>de</strong> mouflage<br />
Halyard block<br />
1. Montage du mousqueton à chape /<br />
Fitting of the snap shackle<br />
Insérer l’axe dans le mousqueton et le moyeu du système (tête <strong>de</strong> l’axe vers le bras du mousqueton).<br />
Puis installer l’anneau brisé. Vérifier que le mousqueton est bien positionné verticalement.<br />
Seq.1<br />
Fit the pin in the snap shackle and in the hub (head of the pin towards the snap shackle arm). Fit the<br />
cotter pin. Check that the snap shackle is standing upright.<br />
Installer la manille sur l’émerillon.<br />
Fit the shackle on the swivel.<br />
2. Montage <strong>de</strong> la terminaison d’émerillon: manille droite /<br />
Fitting of the swivel terminal: D shackle<br />
Seq.2<br />
Accrocher la drisse sur la manille.<br />
Seq. 3<br />
Attach the halyard onto the shackle.<br />
3. Montage <strong>de</strong> la terminaison d’émerillon: manille <strong>de</strong> mouflage MX /<br />
Fitting of the swivel terminal: MX halyard shackle<br />
Positionner la drisse mouflée<br />
dans la manille <strong>de</strong> mouflage MX.<br />
Fit the halyard into the MX halyard<br />
shackle.<br />
Attacher la manille <strong>de</strong> mouflage<br />
MX à l’émerillon.<br />
Attach the MX halyard shackle on<br />
the swivel.<br />
Seq.4 Seq. 5
4. Réglage du carter /<br />
Cage adjustment<br />
Le carter est livré monté mais non bloqué<br />
pour permettre son réglage. Orienter le<br />
carter afin que la drosse <strong>de</strong> manoeuvre soit<br />
correctement alignée. Eviter que la drosse<br />
ne frotte sur les entrées du carter. When<br />
<strong>de</strong>livered, the cage is fitted but not locked to<br />
allow adjustment. Orientate the cage so that the<br />
furling line is properly aligned. Avoid the furling<br />
line scrapping against the si<strong>de</strong>s of the cage.<br />
Seq.6<br />
Avertissement: ne<br />
pas dévisser la vis<br />
(risque d’endommager<br />
le frein filet).<br />
Warning: do not<br />
unscrew the screw to<br />
avoid damaging the<br />
threadlocker.<br />
Seq.7<br />
Serrer la vis pré montée pour<br />
immobiliser le carter (15 Nm).<br />
Tighten the screw to lock the cage.<br />
(15 Nm).<br />
5. Installation <strong>de</strong> la drosse épissée /<br />
Furling line fitting<br />
L’installation et dé<strong>montage</strong> <strong>de</strong> la drosse épissée se fait facilement grâce à l’encoche situé sur la poulie crantée. Lors <strong>de</strong> ces étapes, il est nécessaire<br />
que la voile ne soit pas attachée au mécanisme.<br />
Thanks to the notch of the spool, the furling line can be installed and removed easily. The sail has to be disconnected to install the furling line.<br />
Faire une boucle avec la drosse<br />
Make a loop with the furling line .<br />
Passer la boucle dans la fenêtre<br />
du carter.<br />
Thread the loop through the cage.<br />
Seq. 8<br />
Seq. 9<br />
Positionner un <strong>de</strong>s brins dans<br />
l’encoche <strong>de</strong> la tourelle.<br />
Engage one si<strong>de</strong> of the furling line<br />
into the notch of the spool<br />
mechanism.<br />
Faire tourner le mécanisme<br />
pour faire ressortir le brin <strong>de</strong><br />
l’autre coté.<br />
Turn the spool mechanism<br />
to take out the furling line on<br />
the other si<strong>de</strong> of the cage.<br />
Seq. 10<br />
Seq. 11<br />
Seq. 12<br />
Drosse installée / Installed furling line
6. Installation <strong>de</strong> la voile /<br />
Sail fitting<br />
Ouvrir le système d’attache rapi<strong>de</strong><br />
en poussant sur le ressort, puis<br />
pousser et tirer l’axe imperdable.<br />
I<strong>de</strong>m pour l’émerillon.<br />
Open the quick attachment <strong>de</strong>vice<br />
by pushing the spring and pushing<br />
and pulling the pin. (same step for<br />
the swivel)<br />
Seq. 13 Installer le point d’amure <strong>de</strong> la<br />
voile, puis repositionner l’axe.<br />
I<strong>de</strong>m pour le point <strong>de</strong> drisse <strong>de</strong><br />
la voile.<br />
Attach the tack of the sail and push<br />
the pin only. (same step for the<br />
head of the sail).<br />
Seq. 14<br />
Clic!!<br />
Entretien - Garantie / Maintenance - Warranty<br />
Les emmagasineurs NEX ont été conçus pour fonctionner sans entretien pendant <strong>de</strong> nombreuses années. Cependant un<br />
rinçage à l’eau claire <strong>de</strong>s mécanismes peut être réalisé autant <strong>de</strong> fois que nécessaire. NE JAMAIS UTILISER DE LUBRIFIANT TYPE<br />
WD40 (ou équivalent). Les emmagasineurs NEX sont garantis 3 ans. En cas <strong>de</strong> questions, contacter notre service technique<br />
(coordonnées ci-<strong>de</strong>ssous).<br />
Your NEX flying sail furler requires no special maintenance. You can rinse it with fresh water as often as necessary to remove salt<br />
and dirt from components. NEVER USE WD40 (or similar) on the seals in the mechanisms as it will permanently damage them. In<br />
case of questions, contact our hotline (see contact <strong>de</strong>tails below). The NEX flying sail furler benefits from a 3 year world-wi<strong>de</strong> limited<br />
warranty.<br />
Avertissement / Warning<br />
ATTENTION: ne jamais utiliser l’émerillon soit pour monter au mât soit pour hisser une charge.<br />
WARNING: never use the swivel either to climb the mast or to lift a load.<br />
Coordonnées / Contact <strong>de</strong>tails<br />
WICHARD France<br />
Hotline / Support technique / SAV<br />
Z.A Pornichet Atlantique<br />
16 rue du Gulf Stream<br />
44380 Pornichet<br />
France<br />
Tel +33 (0)2 51 76 00 35<br />
Fax +33 (0)2 40 01 40 43<br />
Email : hotline@wichard.com<br />
WICHARD, Inc<br />
148a Bryce Blvd<br />
Fairfax - VT05454<br />
USA<br />
Tel : +1 401 683 5055<br />
Fax :+1 802 655 4689<br />
Free toll number: + 1 866 621 10 62<br />
Email : info@wichard-usa.com<br />
WICHARD PACIFIC Pty Ltd<br />
Unit 13, 2 Bishop Street<br />
St Peters NSW 2044,<br />
Australia<br />
Tel : + 61 2 9516 0677<br />
Fax : + 61 2 9516 0688<br />
Freecall from Australia: 1800 639 767<br />
Email : info@wichard.com.au<br />
www.profurl.com<br />
Indice A / 2010<br />
P78FGB10