Oxi 330i Oxi 340i - LUIW
Oxi 330i Oxi 340i - LUIW
Oxi 330i Oxi 340i - LUIW

You also want an ePaper? Increase the reach of your titles
YUMPU automatically turns print PDFs into web optimized ePapers that Google loves.
<strong>Oxi</strong> <strong>330i</strong>/<strong>340i</strong><br />
Saving data<br />
Saving data<br />
Saving data<br />
manually<br />
Saving data<br />
automatically<br />
Int 1<br />
Press the key in the measuring mode (display No. with the number of<br />
the next free memory location). Then, press and enter the ID<br />
number with . Terminate the save with . The instrument<br />
changes to the measuring mode.<br />
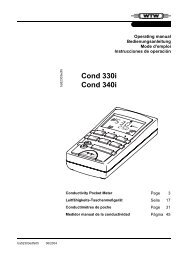
The portable measuring instrument <strong>Oxi</strong> <strong>330i</strong>/<strong>340i</strong> has an internal data memory.<br />
It can store up to 800 datasets. The save interval (Int 1) determines the<br />
chronological interval between automatic save processes.<br />
To set up the save interval, press while pressing the <br />
key (display Int 1) and set the interval with key. Then, press<br />
and enter the ID number with . Change to the last<br />
active measuring mode with . The automatic save is switched<br />
on (display Auto Store)<br />
Outputting the data memory<br />
You can output the data memory with the key. By repeatedly pressing<br />
the key, you reach the following functions:<br />
StO dISP Output stored data on the display<br />
StO SEr Output stored data via the serial interface (only <strong>Oxi</strong> <strong>340i</strong>)<br />
CAL dISP Output calibration data on the display<br />
CAL SEr Output calibration data via the serial interface (only <strong>Oxi</strong> <strong>340i</strong>)<br />
Start the output with .<br />
Transmitting data (only <strong>Oxi</strong> <strong>340i</strong>)<br />
Transmitting data<br />
manually<br />
Transmitting data<br />
automatically<br />
Int 2<br />
Press the key in the measuring mode.<br />
This manually triggers a data transmission of the current measured value to<br />
the serial interface at any time - independently of the selected intervals.<br />
The interval to the data transmission (Int 2) determines the chronological interval<br />
between automatic data transmissions. After the selected interval expires,<br />
the current data record is transmitted to the interface. To set up the<br />
transmission interval, press while holding down the <br />
key (display Int 2). Then, set the interval with .<br />
9