Vi-Go Systems Manual - Miller Fall Protection
Vi-Go Systems Manual - Miller Fall Protection
Vi-Go Systems Manual - Miller Fall Protection
- No tags were found...

Create successful ePaper yourself
Turn your PDF publications into a flip-book with our unique Google optimized e-Paper software.
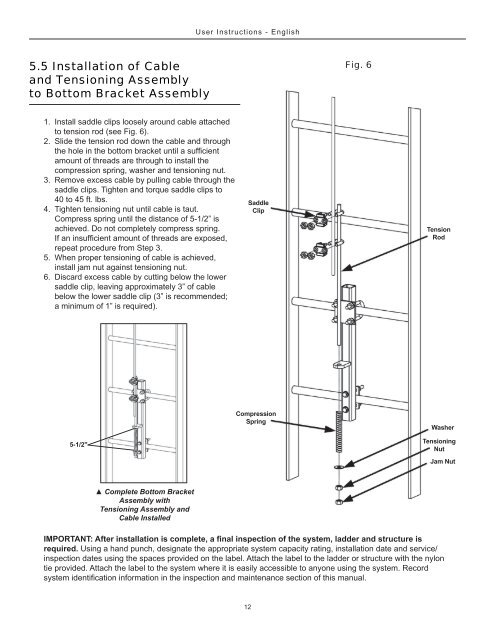
User Instructions - English5.5 Installation of Cableand Tensioning Assemblyto Bottom Bracket AssemblyFig. 61. Install saddle clips loosely around cable attachedto tension rod (see Fig. 6).2. Slide the tension rod down the cable and throughamount of threads are through to install thecompression spring, washer and tensioning nut.3. Remove excess cable by pulling cable through thesaddle clips. Tighten and torque saddle clips to40 to 45 ft. lbs.4. Tighten tensioning nut until cable is taut.achieved. Do not completely compress spring.repeat procedure from Step 3.5. When proper tensioning of cable is achieved,install jam nut against tensioning nut.6. Discard excess cable by cutting below the lowerSaddleClipTensionRodCompressionSpringWasher5-1/2"TensioningNutJam NutAssembly withTensioning Assembly andCable Installedrequired. Using a hand punch, designate the appropriate system capacity rating, installation date and service/inspection dates using the spaces provided on the label. Attach the label to the ladder or structure with the nylontie provided. Attach the label to the system where it is easily accessible to anyone using the system. Record12