Funktionskontroll - ppm
Funktionskontroll - ppm
Funktionskontroll - ppm

You also want an ePaper? Increase the reach of your titles
YUMPU automatically turns print PDFs into web optimized ePapers that Google loves.
Installation<br />
Installing the flusher-disinfector<br />
Carry out the installation in the following order:<br />
1. Free-standing model:<br />
• Measure up and drill the holes for securing the machine to the wall.<br />
For the wall-mounted model:<br />
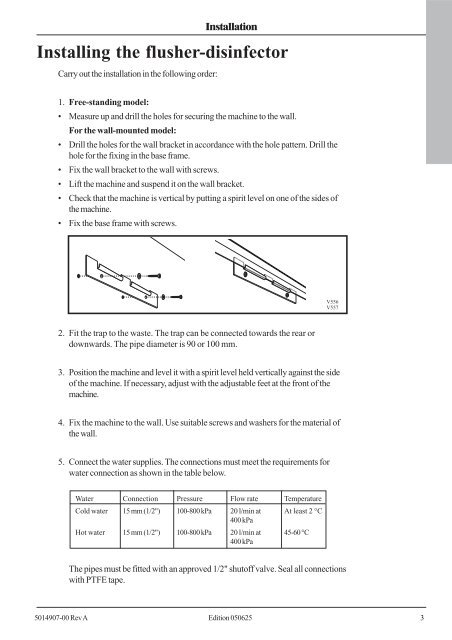
• Drill the holes for the wall bracket in accordance with the hole pattern. Drill the<br />
hole for the fixing in the base frame.<br />
• Fix the wall bracket to the wall with screws.<br />
• Lift the machine and suspend it on the wall bracket.<br />
• Check that the machine is vertical by putting a spirit level on one of the sides of<br />
the machine.<br />
• Fix the base frame with screws.<br />
2. Fit the trap to the waste. The trap can be connected towards the rear or<br />
downwards. The pipe diameter is 90 or 100 mm.<br />
5014907-00 Rev A Edition 050625 3<br />
V556<br />
V557<br />
3. Position the machine and level it with a spirit level held vertically against the side<br />
of the machine. If necessary, adjust with the adjustable feet at the front of the<br />
machine.<br />
4. Fix the machine to the wall. Use suitable screws and washers for the material of<br />
the wall.<br />
5. Connect the water supplies. The connections must meet the requirements for<br />
water connection as shown in the table below.<br />
Water Connection Pressure Flow rate Temperature<br />
Cold water 15 mm (1/2") 100-800 kPa 20 l/min at<br />
400 kPa<br />
At least 2 °C<br />
Hot water 15 mm (1/2") 100-800 kPa 20 l/min at<br />
400 kPa<br />
45-60 °C<br />
The pipes must be fitted with an approved 1/2" shutoff valve. Seal all connections<br />
with PTFE tape.