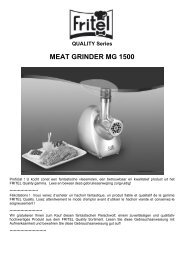
D Espressoautomat ES 80 / ES 81 EN Espresso Machine ES ... - Graef
D Espressoautomat ES 80 / ES 81 EN Espresso Machine ES ... - Graef
D Espressoautomat ES 80 / ES 81 EN Espresso Machine ES ... - Graef

You also want an ePaper? Increase the reach of your titles
YUMPU automatically turns print PDFs into web optimized ePapers that Google loves.
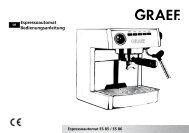
<strong>Espresso</strong> <strong>Machine</strong> <strong>ES</strong> <strong>80</strong> / <strong>ES</strong> <strong>81</strong><br />
■ Do not set up the unit in a hot,<br />
wet or moist environment.<br />
■ The electric socket must be readily<br />
accessible so that the power<br />
cord can be easily unplugged.<br />
Electric connection<br />
Follow these instructions about<br />
the electrical connection for safe<br />
and flawless operation of the unit:<br />
■ Before connecting the unit,<br />
compare the connection information<br />
(voltage and frequency)<br />
on the rating plate with those of<br />
your electrical network. This information<br />
must match to avoid<br />
damage to the unit. If in doubt,<br />
ask your electrician.<br />
■ The socket must be fused with<br />
at least a 10A circuit breaker.<br />
■ Make sure that the power cord<br />
is not damaged. Do not conduct<br />
it over hot surfaces or sharp<br />
edges.<br />
■ The supply cord must not be<br />
pulled tight.<br />
■ The electrical safety of the unit<br />
is only ensured if it is connected<br />
to a properly installed protective<br />
conductor system. Operation<br />
on a socket without a protective<br />
conductor is prohibited. If in<br />
doubt, have the building installation<br />
checked by an electrician.<br />
The manufacturer does not<br />
assume any responsibility for<br />
damages caused by a missing<br />
or interrupted protective conductor.<br />
© Gebr. <strong>Graef</strong> GmbH & Co. KG - 03<br />
Before the first use<br />
Before using for the first time or<br />
after a long period of non-use,<br />
you should prepare several cups<br />
of water (without coffee grounds)<br />
to thoroughly flush the system.<br />
Proceed as described in the "Preparing<br />
espresso" section.<br />
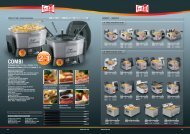
Setup and Functioning<br />
Features<br />
● Filter support automatic machine<br />
● Aluminium/stainless steel<br />
housing<br />
● Single thermoblock heater<br />
● Brass filter support<br />
● 360 °C swivelling milk frother/<br />
hot water nozzle<br />
● 2.5 litre water tank<br />
● Freely programmable water volume<br />
● Freely programmable temperature<br />
● Water level indicator<br />
● Warming plate for cups<br />
● Removable drip dish<br />
● Double-walled filter insert for<br />
1 cup<br />
● Double-walled filter insert for 2<br />
cups<br />
● Stainless steel milk container<br />
● Coffee spoon<br />
● Cleaning set<br />
33<br />
<strong>EN</strong>