Manuel Utilisateur - Cuisimat
Manuel Utilisateur - Cuisimat
Manuel Utilisateur - Cuisimat

You also want an ePaper? Increase the reach of your titles
YUMPU automatically turns print PDFs into web optimized ePapers that Google loves.
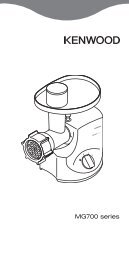
ENGLISH<br />
For any intervention type or for the parts change that are damaged, activate the maintenance service. The possible change<br />
must happen with manufacturer original products or at least of quality, safety and equivalent characteristics. For analysis<br />
contact the Authorized Assistance Center.<br />
PUT IN FUNCTION<br />
The machine operator can put in function the machine following in order the under reported indications:<br />
1. Controls positive result for the preparation preliminary operations,<br />
2. Controls positive result for the electric feeding,<br />
3. Plug connection in opportune current socket,<br />
4. For the functioning of the GRINDING GROUP:<br />
a. Checks positive result for the grinding group assembly,<br />
b. Checks positive result for the Archimedean screw correct rotation,<br />
c. Checks positive result / verifications before starting,<br />
d. Finalized checks positive result and verify the all safety conditions respect,<br />
e. Lower in its lowest position the pressure handle of the grater group,<br />
f. Place a gathering basin in the machine anterior zone in correspondence of the ground meat exit zone,<br />
g. Put in the machine left side and start the machine acting the control device of start “I”,<br />
h. Introduce manually the food product within the machine neck and drive it towards the Archimedean screw using<br />
the pestle in equipment,<br />
i. At the end of the food product introduction, or when from the drilled plate doesn’t come out more the product,<br />
stop the machine acting the control device of stop “0”.<br />
5. For the functioning of the GRATER GROUP:<br />
a. Grinding group disassembly,<br />
b. Checks positive result for the grater roll correct rotation,<br />
c. Checks positive result / verifications before the starting,<br />
d. Finalized checks positive result and verify the all safety conditions respect,<br />
e. Place a gathering basin in the machine anterior zone in correspondence of the grated product exit zone,<br />
f. Put in the machine left side and start the machine acting the control device of start “I”,<br />
g. Introduce manually the food product within the grater mouth and drive it towards the grater roll lowering the<br />
pressure roll,<br />
h. At the end of the food product introduction, or when in the basins the product is not more left, stop the machine<br />
acting the control device of stop “0”.<br />
It is recommended to make not work the machine in vain, without the food product.<br />
It is recommended to make not work the grater group, with the assembled grinding group.<br />
SWITCHING OFF<br />
In succession, the switching off must follow what here under indicated:<br />
1. Before the switching off wait the food product exile conclusion from the drilled plate or in the grater roll inferior zone,<br />
2. Stop the machine acting the control device of stop “0”,<br />
3. Disconnect the machine plug from the feeding socket,<br />
4. Perform the cleaning interventions.<br />
UNBLOCK IN CASE OF OBSTACLE<br />
During the working, or during the Archimedean screw rotation or of the grater group, due to:<br />
1. The introduction of food products with not homogeneous parts, as for example bones, or other,<br />
2. The introduction of products excessively hard and dry,<br />
the machine could block.<br />
The same situation can determine after an electric feeding break, or when the machine is stopped with inside the food product.<br />
To be able to resume normally the working:<br />
1. If the block is happened in the grinding group, this must be disassembled: the disassembly must not happen slacking<br />
the blockage wheel, but slacking the grinding mouth block knob,<br />
2. If the block is happened in the grater roll, the blocked food product must be removed manually.<br />
03-2008-TRITACARNE-GRAT-STAMPA.doc<br />
Pag. di<br />
13 13