Istruzioni CARTY - Plebani, linea prima infanzia
Istruzioni CARTY - Plebani, linea prima infanzia
Istruzioni CARTY - Plebani, linea prima infanzia

You also want an ePaper? Increase the reach of your titles
YUMPU automatically turns print PDFs into web optimized ePapers that Google loves.
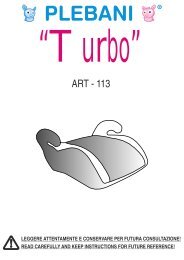
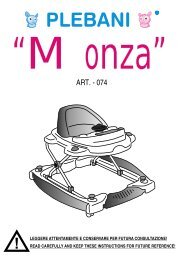
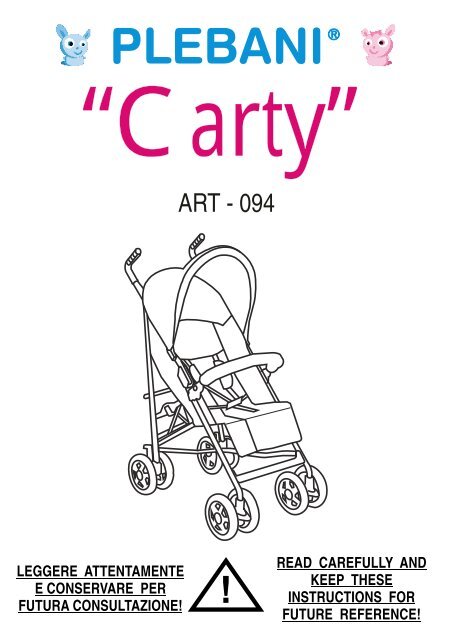
“Carty”<br />
ART - 094<br />
LEGGERE ATTENTAMENTE<br />
E CONSERVARE PER<br />
FUTURA CONSULTAZIONE!<br />
!<br />
READ CAREFULLY AND<br />
KEEP THESE<br />
INSTRUCTIONS FOR<br />
FUTURE REFERENCE!
1<br />
2 3<br />
4<br />
5 6<br />
7<br />
8 9<br />
11<br />
10<br />
12
I<br />
ISTRUZIONI DI MONTAGGIO ED USO<br />
LEGGERE ATTENTAMENTE E CONSERVARE PER FUTURA CONSULTAZIONE<br />
GARANZIA DI QUALITÀ:<br />
- ll nostro passeggino è fabbricato secondo le norme europee EN 1888.<br />
- Questo prodotto è garantito per il periodo previsto dalle leggi vigenti.<br />
- Non possono essere reclamati difetti o deterioramenti dovuti ad un utilizzo non adeguato, al non<br />
rispetto delle norme di sicurezza, di montaggio e d’ uso descritte o a modifiche fatte al prodotto.<br />
- Il naturale consumo e i danni causati da uso improprio o scorretto non sono contestabili.<br />
- Graffi, usura, opacizzazione o ingiallimento delle parti dovuto allo sfregamento, all’uso di detergenti,<br />
sudore o fenomeni atmosferici non sono un difetto di fabbricazione.<br />
- Errati lavaggi, tessuti lasciati umidi, non ben asciugati possono dar vita a forme di muffa e non sono<br />
difetti di fabbricazione.<br />
IMPORTANTE!<br />
PRIMA DI UTILIZZARE QUESTO ARTICOLO, LEGGERE ATTENTAMENTE LE ISTRUZIONI E LA<br />
SEQUENZA DI MONTAGGIO PER EVITARE INUTILI PERICOLI AL VOSTRO BAMBINO!<br />
RIMUOVERE ED ELIMINARE TUTTI I SACCHETTI DI PLASTICA, POTREBBERO ESSERE FONTE DI<br />
SOFFOCAMENTO O STRANGOLAMENTO PER I VOSTRI BAMBINI!<br />
MAI LASCIARE IL BAMBINO INCUSTODITO!<br />
APERTURA<br />
Dopo aver rimosso e gettato l’ imballo, inserire le ruote anteriori negli appositi supporti sul telaio inserendole dal lato del<br />
foro più largo. Inserire poi le ruote posteriori tenendo IL FRENO ALL’ ESTERNO.<br />
Sganciare il fermo di chiusura (Foto 1), quindi aprire il passeggino spingendolo verso il basso (Foto 2) e successivamente<br />
bloccare le leve di sicurezza spingendo verso il basso (Foto3). Agganciare la capottina al tubo (Foto 4), spingerla verso il<br />
basso inserendo il perno nell’apposita guida (Foto 5). Eseguire la stessa operazione su ambo i lati. Fissare il velcro sullo<br />
schienale. Ruotarla in avanti e bloccarla spingendo sulle cerniere a compasso laterali. Per sganciarla, alzare il gancio<br />
(Foto 6) e togliere la capotte.<br />
Per fissare la barra di sicurezza frontale, appoggiarla sul telaio col bottone verso l’ esterno e il blocco di posizione rivolto<br />
verso il basso. Spingere il gancio fino a farlo chiudere contro il tubo (CLICK)(Foto 7). Compiere l’ operazione su entrambi i<br />
lati. Per rimuoverlo, sbloccare i ganci e toglierlo.<br />
Ora il vostro passeggino è pronto per l’uso.<br />
Assicuratevi che esso sia ben aperto, saldamente montato e stabile, che non ci siano parti rotte, difettose o mancanti.<br />
AVVERTENZA: Utilizzare SEMPRE le cinture e lo spartigambe ben tesi e regolati!<br />
Regolare gli spallacci e agganciarli alle fibbie delle cinture (Foto 8). Regolare le cinture e agganciarle alla cintura<br />
spartigambe (Foto 9).<br />
MODO D’ USO:<br />
Il nostro passeggino è fornito di freno unico. Per bloccare le ruote spingere la leva del freno verso il basso (Foto 10). Per<br />
sbloccarle, spingere la leva verso l’alto (Foto 10).<br />
UTILIZZARE SEMPRE I FRENI QUANDO SI È FERMI E SU SUPERFICI NON PIANE!<br />
RUOTE ANTERIORI PIROETTANTI:<br />
Questo passeggino è dotato di ruote piroettanti e molleggiate per consentire una maneggevolezza maggiore negli<br />
spostamenti. Per disattivare tale funzione bloccando le ruote, basta sollevare le leve poste sulle ruote. In questo modo il<br />
passeggino potrà seguire solamente un percorso rettilineo. Per ripristinarle, spingere verso il basso le stesse leve<br />
(Foto11).
CHIUSURA<br />
Per chiudere il passeggino bisogna sbloccare i sistemi di sicurezza. Alzare la <strong>prima</strong> e poi sbloccare la seconda (Foto 12).<br />
Spingere le maniglie di impugnatura in avanti fino alla completa chiusura del passeggino. Bloccarlo con l' apposito gancio<br />
di sicurezza.<br />
ATTENZIONE: NON EFFETTUARE NESSUNA MANOVRA DI APERTURA O CHIUSURA DEL PASSEGGINO CON<br />
ALL’INTERNO IL BAMBINO O OGGETTI VARI.<br />
AVVERTENZE<br />
LEGGERE ATTENTAMENTE LE ISTRUZIONI PRIMA DELL’ASSEMBLAGGIO DEL PASSEGGINO.<br />
CONSERVARE QUESTO MANUALE PER RIFERIMENTI FUTURI.<br />
L'INOSSERVANZA DI QUESTE AVVERTENZE E DELLE ISTRUZIONI DI UTILIZZO PUÒ CAUSARE GRAVI<br />
CONSEGUENZE ALLA SICUREZZA DEL VOSTRO BAMBINO.<br />
- ATTENZIONE: MAI LASCIARE IL BAMBINO INCUSTODITO, SENZA LA SORVEGLIANZA DI UN ADULTO.<br />
- Verificare <strong>prima</strong> dell’utilizzo che tutti i meccanismi di bloccaggio siano funzionanti correttamente e tutte le componenti<br />
non presentino difetti o danneggiamenti, in tal caso non utilizzare il passeggino.<br />
- ATTENZIONE: Questo passeggino è studiato per trasportare un solo bambino per volta.<br />
- AVVERTENZA: Ogni peso attaccato al manico influisce sulla stabilità del passeggino e ne compromette la stabilità e la<br />
sicurezza.<br />
- Il cestello è studiato per un carico massimo di 5Kg; ogni carico superiore ne compromette la stabilità.<br />
- Gettare o tenere fuori dalla portata dei bambini i sacchetti di plastica dell’imballo, per evitare casi di soffocamento.<br />
- AVVERTENZA: Questo prodotto non è adatto a correre o pattinare.<br />
- Questo passeggino è dotato di cintura di sicurezza e sparti-gambe. Utilizzarle sempre e ben regolate.<br />
- Il passeggino deve essere maneggiato e montato da adulti.<br />
- Tenere lontano da fonti di calore, prese elettriche, forni, fuochi, finestre,...e altri tipi di pericoli.<br />
- Verificare che il passeggino non abbia viti allentate o avvitate scorrettamente o altri elementi che potrebbero ferire il<br />
bambino.<br />
- AVVERTENZA: Questo passeggino non è adatto a bambini di età inferiore a 6 mesi.<br />
- Utilizzare il passeggino per bambini di età superiore a sei mesi e fino a un peso massimo di 15 kg .<br />
- BLOCCARE SEMPRE LE RUOTE OGNI VOLTA CHE SI EFFETTUA UNA SOSTA!<br />
- NON LASCIARE MAI IL PICCOLO DENTRO IL PASSEGGINO SU PIANI INCLINATI O RIPIDI, anche se con ruote<br />
bloccate.<br />
- Non far avvicinare bambini nelle vicinanze del passeggino.<br />
- Non utilizzare con parti rotte, difettose o mancanti.<br />
- Non apportare alcuna modifica che possa compromettere la sicurezza del articolo.<br />
- ATTENZIONE: Non effettuare nessuna manovra di apertura o chiusura del passeggino con all’interno il bambino o<br />
oggetti vari.<br />
- Allontanare il bambino quando si effettuano operazioni di apertura e chiusura del prodotto.<br />
- Questo articolo è provvisto di punti di ancoraggio per agganci di qualsiasi sistema di ritenuta, diversi da quello già<br />
installato.<br />
CURA E MANTENIMENTO DEL PRODOTTO<br />
- Per pulire i tessuti e le parti plastiche, usare strofinacci con acqua tiepida e detergenti neutri.<br />
- Non usare solventi. Non candeggiare. Asciugare perfettamente <strong>prima</strong> di utilizzarlo o riporlo.<br />
- Asciugare bene la parti in ferro per prevenire la ruggine.<br />
- Tenere il passeggino in luogo asciutto e riparato dal sole per evitare variazioni o danneggiamenti ai<br />
materiali.<br />
- Usare esclusivamente pezzi di ricambio approvati e forniti dal produttore.<br />
Il produttore potrà apportare in qualsiasi momento modifiche all'articolo al fine di migliorarlo.<br />
<strong>Plebani</strong> s.r.l. declina ogni responsabilità per danni a cose o persone derivanti da un utilizzo improprio e/o<br />
scorretto del prodotto.
UK ASSEMBLY AND USE INSTRUCTIONS<br />
READ CAREFULLY AND KEEP THESE INSTRUCTIONS FOR FUTURE REFERENCE<br />
QUALITY GUARANTY:<br />
- Our stroller is made according to the European standards EN 1888.<br />
- This product is guaranteed for a period as stated by the laws in force.<br />
- All the defects and deteriorations caused by the wrong use, by the non respect of the standards of security, by the non<br />
respect of the mentioned assembly and use Instructions or by modifications made on the playpen can’t be claimed.<br />
- The natural wear of time and the damages caused by the improper or wrong use can’t be claimed.<br />
- Scratches, wear of time, opacity or the turning yellow of the parts caused by the rubbing, by the improper use of<br />
detergents, sweat or atmospheric phenomenons cannot be considered as manufacturing defects.<br />
- Wrong washing and not dry fabrics can create moulds and cannot be considered as manufacturing defects.<br />
IMPORTANT!<br />
BEFORE USE THIS ITEM, READ CAREFULLY INSTRUCTIONS AND ASSEMBLING SEQUENCE TO<br />
AVOID USELESS DANGER TO YOUR BABY!<br />
THROW AWAY AND KEEP OUT OF BABY’S REACH THE POLY BAGS OF THE PACKING, THEY MIGHT<br />
BE RISKS OF SUFFOCATION!<br />
NEVER LEAVE YOUR CHILD UNATTENDED!<br />
OPENING<br />
After remove and thrown away the packing, insert rear wheels into supports on the frame, inserting them by<br />
the bigger hole. After, insert rear wheels with brake outside.<br />
Unhook the storage latch (Photo1), than open the stroller pushing downward (Photo 2) and lock the safety<br />
levels pushing down with the foot (Photo 3). Fix canopy on tube (Photo 4), push it downward insert hinge into<br />
hole (Photo 5). Make same operation on both sides. Fix Velcro on the back-rest. Turn it forward and lock<br />
pushing on the two sides compass hinges. To unlock, take plastic part off of the hinge (Photo 6) and take<br />
canopy away.<br />
To fix safety front bar, lean it on frame with red button outside and position lock downward. Push the hook<br />
until close spooling against frame (CLICK) (Photo 7). Make operation on both sides. To remove, unlock hooks<br />
and take it away.<br />
Now your stroller is ready to be used.<br />
Be sure it's well opened, strongly assembled and stable, check there are no broken, damaged or missing<br />
parts.<br />
WARNING: ALWAYS use safety belts and crotch strap, properly adjusted and fixed!<br />
Adjust shoulder straps and hook to buckles' belts (Photo 8). Adjusts belts and hook them to crotch strap<br />
(Photo 9).<br />
USING OF STROLLER:<br />
Our stroller has one link brake. To lock wheels, push brake lever downward (Photo 10). To unlock, pull it<br />
upward (Photo 10).<br />
ALWAY USE BRAKES WHEN STOPPED AND ON NOT PLANE SURFACES!<br />
FRONT SWIVEL WHEELS:<br />
This stroller has swivel and springy front wheels to allow a better handy during movements. To deaction this<br />
function fixing wheels, pull up levers on wheels. This way stroller can run only straightly. To restore swivel<br />
function, push levers downward (Photo 10).
CLOSING<br />
To close stroller unlock the safety systems. Pull up first and unlock second (Photo 11). Push handles forward<br />
until stroller is totally closed. Lock it with its provided safety hook.<br />
WARNING: NEVER MAKE ANY OPENING OR CLOSING OPERATION OF STROLLER IF BABIES OR<br />
OTHER OBJECTS ARE INSIDE.<br />
WARNINGS<br />
BEFORE ASSEMBLING THE STROLLER READ CAREFULLY THESE INSTRUCTIONS. KEEP THEM FOR<br />
FUTURE REFERENCE. THE NON-OBSERVANCE OF THESE WARNINGS AND USE INSTRUCTIONS<br />
COULD CAUSE SERIOUS CONSEQUENCES TO YOUR BABY’ S SAFETY.<br />
- WARNING: NEVER LEAVE YOUR CHILD UNATTENDED, WITHOUT THE SUPERVISION OF AN ADULT.<br />
- Before using check all locking systems correctly work and all components are not defected or damaged. In<br />
this case do not use the stroller any longer.<br />
- WARNING: This stroller is studied to bring only one child by time.<br />
- WARNING: Any weight attached on handles change stroller stability and may affect its stability and safety.<br />
- Storage basket can load maximum weight of 5 Kgs, any overload might make it unstable.<br />
- Throw away and keep out of baby’s reach the poly bags of the packing, they might be risks of suffocation.<br />
- WARNING: This item is not suitable to run or skate.<br />
- This stroller has safety belts and crotch strap. Always use them properly adjusted and fixed.<br />
- Strollers must be used and assembled only by adults.<br />
- Keep the stroller far from sources of heat, current-taps, ovens, fires, windows and any other type of danger.<br />
- Check that the item doesn’t have any loosened or improperly assembled screw, or any other elements which<br />
can injure your baby.<br />
- WARNING: This stroller is not suitable for babies under 6 months.<br />
- Use stroller for children over 6 months age and to 15 Kgs. maximum.<br />
- ALWAYS LOCK WHEELS WHEN MAKE ANY STOPS!<br />
- NEVER LEAVE THE BABY INSIDE STROLLER ON TILTED OR STEEP SURFACES, even if wheels are<br />
locked.<br />
- Take babies away from stroller.<br />
- Do not use the stroller if a component is broken, damaged or missing.<br />
- Do not carry any modification that could affect the safety of the item.<br />
- WARNING: Do not make any opening or closing operation of the stroller with baby or any object inside.<br />
- Keep the baby away when you open or close the item.<br />
- This article is provided with fixing points for hooks of any restraint system, other than the one already<br />
installed.<br />
CARE AND MAINTENANCE OF THE PRODUCT<br />
- Use dish-clothes with warm water and neutral detergents to clean the fabrics and the plastic parts.<br />
- Do not use solvents. Do not bleach. Dry perfectly the item before using it or putting it away.<br />
- Dry very well all the iron parts to avoid the rust.<br />
- Keep stroller in dry place and away from sun to avoid damages or changes on materials.<br />
- Use only spare parts approved and supplied by the manufacturer.<br />
The manufacturer may make changes to the article at any time in order to improve it.<br />
<strong>Plebani</strong> s.r.l. disclaims any liability for damage to persons or property resulting from misuse and/or misuse of<br />
the product.
LINEA GIARDINO - GARDEN RANGE<br />
PLEBANI s.r.l.<br />
VIA DELL’ ARTIGIANATO, 1 24060 TELGATE (BG) ITALY<br />
Tel.: + 39 035 830314 - Fax: +39 035 831350<br />
www.plebani.it - e-mail: info@plebani.it
COLLEZIONE PLEBANI - LINEA PRIMA INFANZIA<br />
altri prodotti - other products<br />
mobiletti / bagnetti - dresserettes / changing baths<br />
seggioloni - highchairs<br />
girelli - walkers<br />
fasciatoi - changing tables<br />
cancellettI - safety gates<br />
recinti / box - playpens<br />
seggiolini auto - car seats<br />
tricicli - tricycle<br />
macchinine - baby-cars<br />
passeggini & sistemi modulari - strollers & modular systems<br />
...E TANTI, TANTI ALTRI ANCORA !!...<br />
...AND MANY, MANY OTHERS MORE!!...<br />
Grazie per aver scelto un prodotto <strong>Plebani</strong>. - Thank you for choosing a <strong>Plebani</strong>’ s product.<br />
PLEBANI s.r.l.<br />
VIA DELL’ ARTIGIANATO 1 , 24060 TELGATE (BG) ITALY<br />
Tel. +39 035 830314 • Fax +39 035 831350<br />
www.plebani.it • e-mail : info@plebani.it