Powerful Remote Surveillance
Powerful Remote Surveillance
Powerful Remote Surveillance

You also want an ePaper? Increase the reach of your titles
YUMPU automatically turns print PDFs into web optimized ePapers that Google loves.
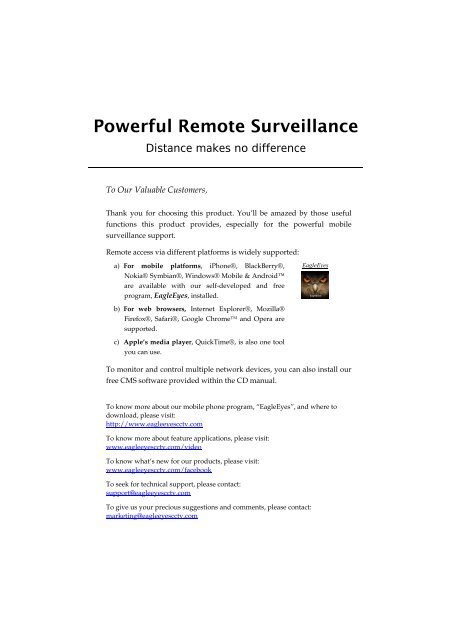
<strong>Powerful</strong> <strong>Remote</strong> <strong>Surveillance</strong><br />
Distance makes no difference<br />
To Our Valuable Customers,<br />
Thank you for choosing this product. You’ll be amazed by those useful<br />
functions this product provides, especially for the powerful mobile<br />
surveillance support.<br />
<strong>Remote</strong> access via different platforms is widely supported:<br />
a) For mobile platforms, iPhone®, BlackBerry®,<br />
Nokia® Symbian®, Windows® Mobile & Android<br />
are available with our self-developed and free<br />
program, EagleEyes, installed.<br />
EagleEyes<br />
b) For web browsers, Internet Explorer®, Mozilla®<br />
Firefox®, Safari®, Google Chrome and Opera are<br />
supported.<br />
c) Apple’s media player, QuickTime®, is also one tool<br />
you can use.<br />
To monitor and control multiple network devices, you can also install our<br />
free CMS software provided within the CD manual.<br />
To know more about our mobile phone program, “EagleEyes”, and where to<br />
download, please visit:<br />
http://www.eagleeyescctv.com<br />
To know more about feature applications, please visit:<br />
www.eagleeyescctv.com/video<br />
To know what’s new for our products, please visit:<br />
www.eagleeyescctv.com/facebook<br />
To seek for technical support, please contact:<br />
support@eagleeyescctv.com<br />
To give us your precious suggestions and comments, please contact:<br />
marketing@eagleeyescctv.com
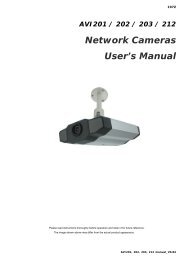
H.264 DAY & NIGHT<br />
NETWORK CAMERA<br />
USER MANUAL<br />
Please read instructions thoroughly before operation and retain it for future reference.<br />
N204_212_212v_system_V1.1
IMPORTANT SAFEGUARD<br />
All lead-free products offered by the company comply with the requirements of the<br />
European law on the Restriction of Hazardous Substances (RoHS) directive, which means<br />
our manufacture processes and products are strictly “lead-free” and without the hazardous<br />
substances cited in the directive.<br />
The crossed-out wheeled bin mark symbolizes that within the European Union the product<br />
must be collected separately at the product end-of-life. This applies to your product and<br />
any peripherals marked with this symbol. Do not dispose of these products as unsorted<br />
municipal waste. Contact your local dealer for procedures for recycling this equipment.<br />
Disclaimer<br />
We reserve the right to revise or remove any content in this manual at any time. We do not warrant or assume<br />
any legal liability or responsibility for the accuracy, completeness, or usefulness of this manual. The content of<br />
this manual is subject to change without notice.<br />
Grounding<br />
This is a Safety Class 1 Product (provided with a protective earthing ground incorporated in the power cord).<br />
The mains plug shall only be inserted in a socket outlet provided with a protective earth contact. Any<br />
interruption of the protective conductor inside or outside of the instrument is likely to make the instrument<br />
dangerous. Intentional interruption is prohibited.<br />
Water & Moisture<br />
Do not expose this product to dripping or splashing and that no objects filled with liquids, such as vases, shall<br />
be placed on the product.<br />
Trademark Acknowledgements<br />
iPhone® is the registered trademark of Apple Inc.<br />
BlackBerry® and related trademarks, names and logos are the property of Research In Motion Limited and<br />
are registered and/or used in the U.S. and countries around the world. Used under license from Research In<br />
Motion Limited.<br />
Android is a trademark of Google Inc. Use of this trademark is subject to Google Permissions.<br />
Microsoft, Windows, Internet Explorer, Mozilla Firefox, Google Chrome, Safari, Opera, QuickTime, Windows<br />
Mobile & Symbian mentioned in this document are the registered trademarks of their respective holders.<br />
MPEG4 Licensing<br />
THIS PRODUCT IS LICENSED UNDER THE MPEG4 VISUAL PATENT PORTFOLIO LICENSE FOR<br />
THE PERSONAL AND NON-COMMERCIAL USE OF A CONSUMER FOR (i) ENCODING VIDEO IN<br />
COMPLIANCE WITH THE MPEG4 VISUAL STANDARD (“MPEG-4 VIDEO”) AND/OR (ii) DECODING<br />
MPEG4 VIDEO THAT WAS ENCODED BY A CONSUMER ENGAGED IN A PERSONAL AND<br />
NON-COMMERCIAL ACTIVITY AND/OR WAS OBTAINED FROM A VIDEO PROVIDER LICENSED BY<br />
MPEG LA TO PROVIDE MPEG4 VIDEO. NO LICENSE IS GRANTED OR SHALL BE IMPLIED FOR ANY<br />
OTHER USE. ADDITIONAL INFORMATION INCLUDING THAT RELATING TO PROMOTIONAL INTERNAL<br />
AND COMMERCIAL USES AND LICENSING MAY BE OBTAINED FROM MPEG LA, LLC. SEE<br />
HTTP://WWW.MPEGLA.COM.<br />
GPL Licensing<br />
This product contains codes which are developed by Third-Party-Companies and which<br />
are subject to the GNU General Public License (“GPL”) or the GNU Lesser Public License<br />
(“LGPL”).<br />
The GPL Code used in this product is released without warranty and is subject to the<br />
copyright of the corresponding author.<br />
Further source codes which are subject to the GPL-licenses are available upon request.<br />
We are pleased to provide our modifications to the Linux Kernel, as well as a few new<br />
commands, and some tools to get you into the code. The codes are provided on the FTP<br />
site, and please download them from the following site or you can refer to your distributor:<br />
http://download.dvrtw.com.tw/GPL/076D_Series/arm-linux-2.6.tar.gz<br />
Firmware: 1W76-1W17-1W34-1W07
TABLE OF CONTENTS<br />
1. OVERVIEW......................................................................................................................................... 1<br />
1.1 Product Features....................................................................................................................................... 1<br />
1.2 Package Content....................................................................................................................................... 1<br />
1.3 Hardware Overview................................................................................................................................... 1<br />
1.4 Rear Panel ................................................................................................................................................ 2<br />
2. BEFORE USING THE NETWORK CAMERA ..................................................................................... 3<br />
3. ACCESSING THE CAMERA VIA VIDEO VIEWER ............................................................................. 4<br />
3.1 Install the software .................................................................................................................................... 4<br />
3.2 Accessing the camera ............................................................................................................................... 4<br />
3.3 Control panel overview.............................................................................................................................. 5<br />
3.3.1 Simplified Version (Default)..............................................................................................................................5<br />
3.3.2 Full Function Version........................................................................................................................................6<br />
3.3.3 Main Button Overview ......................................................................................................................................6<br />
3.4 Frequently-used functions......................................................................................................................... 7<br />
3.4.1 Record..............................................................................................................................................................7<br />
3.4.2 Playback...........................................................................................................................................................7<br />
3.4.3 Firmware Upgrade ...........................................................................................................................................8<br />
3.4.4 E-Map...............................................................................................................................................................8<br />
4. CAMERA CONFIGURATIONS VIA YOUR WEB BROWSER ........................................................... 13<br />
4.1 Accessing the camera ............................................................................................................................. 13<br />
4.2 Control panel overview............................................................................................................................ 14<br />
4.2.1 Live View Panel..............................................................................................................................................14<br />
4.2.2 System Configuration Panel...........................................................................................................................15<br />
4.3 Network ................................................................................................................................................... 16<br />
4.3.1 Network ..........................................................................................................................................................16<br />
4.3.2 QoS ................................................................................................................................................................16<br />
4.3.3 DDNS .............................................................................................................................................................16<br />
4.3.4 SNTP..............................................................................................................................................................16<br />
4.3.5 FTP.................................................................................................................................................................17<br />
4.3.6 MAIL ...............................................................................................................................................................17<br />
4.3.7 SMS................................................................................................................................................................18<br />
4.3.8 Filter ...............................................................................................................................................................18<br />
4.3.9 UPnP / Bonjour...............................................................................................................................................19<br />
4.4 Camera ................................................................................................................................................... 20<br />
4.4.1 Color...............................................................................................................................................................20<br />
4.4.2 Time................................................................................................................................................................20<br />
4.4.3 Record............................................................................................................................................................21<br />
4.5 External Device ....................................................................................................................................... 21<br />
4.5.1 USB ................................................................................................................................................................21<br />
4.6 General ................................................................................................................................................... 21<br />
4.6.1 General...........................................................................................................................................................21<br />
4.6.2 Server Log......................................................................................................................................................22<br />
4.6.3 Online.............................................................................................................................................................22<br />
4.6.4 Account...........................................................................................................................................................23<br />
4.6.5 Trigger ............................................................................................................................................................23<br />
4.6.6 Video ..............................................................................................................................................................24<br />
4.6.7 Google Maps..................................................................................................................................................25<br />
4.6.8 Upgrade..........................................................................................................................................................25<br />
5 VIDEO RECORDING TO USB FLASH DRIVE .................................................................................. 27
5.1 Before Using This Function..................................................................................................................... 27<br />
5.2 Live View Panel....................................................................................................................................... 27<br />
5.3 USB Device Status.................................................................................................................................. 27<br />
5.4 Recorded Data Playback and Download................................................................................................. 28<br />
APPENDIX 1 SPECIFICATIONS .......................................................................................................... 29<br />
APPENDIX 2 COMPATIBLE USB FLASH DRIVE LIST........................................................................ 30<br />
APPENDIX 3 API ID APPLICATION FOR SMS MESSAGING.............................................................. 31<br />
APPENDIX 4 BIT RATE TABLE FOR REFERENCE ............................................................................ 33
1. OVERVIEW<br />
1.1 Product Features<br />
• <strong>Powerful</strong> <strong>Remote</strong> <strong>Surveillance</strong> on Multiple Mobile Platforms<br />
-- For mobile device platforms, iPad®, iPod®, iPhone®, BlackBerry®, Nokia® Symbian,<br />
Windows® Mobile & Android (with their built-in web browsers or EagleEyes)<br />
-- For web browsers, Internet Explorer®, Mozilla Firefox®, Safari®,<br />
Google Chrome and Opera<br />
-- For operating systems, Windows & Mac<br />
-- For multiple device control, our CMS software, Video Viewer, is provided for free<br />
• Free CMS software with E-Map for multiple devices control & surveillance<br />
• Supports Wireless function with an optional Wireless dongle<br />
• Low-latency video streaming with H.264 compression format for sharp and clear images<br />
• 1/3” CCD image sensor with high quality pictures<br />
• Hybrid digital / analog video output<br />
• Motion detection and alarm notification functions<br />
• External microphone in / audio out for two-way voice communication<br />
• Day & night functionality with Smart Light Control feature for clear and accurate image<br />
• (AVN212V Only) ONVIF standard supported to simplify system integration<br />
1.2 Package Content<br />
□ Network camera<br />
□ RJ45 network cable<br />
□ Installation Guide<br />
□ Adapter and power cord<br />
□ Bracket<br />
□ CD-ROM disc (including user manuals & CMS software “Video Viewer”)<br />
1.3 Hardware Overview<br />
1
1.4 Rear Panel<br />
CONNECTOR / BUTTON<br />
Reset Default<br />
Power Indicator<br />
Audio Output<br />
Audio Input<br />
Video Output<br />
LAN<br />
Power Connector<br />
Alarm Connector<br />
DESCRIPTION<br />
This button is hidden in the pinhole. Press and hold the reset button until the<br />
network camera rebooted. This will reset all parameters, including the IP<br />
address to factory default settings.<br />
When the camera is power-supplied, this indicator will be on as red.<br />
Support the connection to an audio device, such as a speaker, for voice<br />
transmission of the remote side.<br />
Support the connection to an audio device, such as a microphone, for voice<br />
transmission of the local side.<br />
Connect to the video input connector of your monitor with a video cable (i.e. a<br />
RCA cable with the BNC connector, or a coaxial cable for video output.<br />
* The video cable is optional.<br />
Connect the camera to the network with the supplied RJ45 cable.<br />
Connect the DC 12V adapter for power supply.<br />
Support the connection to an alarm device with an optional alarm cable for<br />
function scalability.<br />
USB Port<br />
Connect to the optional wireless dongle to have the wireless function, or USB<br />
flash drive for video recording.<br />
2
2. BEFORE USING THE NETWORK CAMERA<br />
This network camera can be accessed via our supplied CMS software “Video Viewer”, the web<br />
browser (such as “Microsoft Internet Explorer” or “Mozilla Firefox”), and smart phones with our<br />
self-developed program “EagleEyes” installed depending on different using situations.<br />
Note: For details about accessing network cameras via smart phones, please refer to<br />
http://www.eagleeyescctv.com.<br />
Before using the network camera, make sure:<br />
1) You have installed the supplied CMS software, “Video Viewer”, or a web browser.<br />
2) You have configured the network settings, and the network connection is fine.<br />
• To check or configure up to 16 surveillance devices simultaneously with the record function, please use<br />
“Video Viewer”.<br />
For details about using Video Viewer, please refer to “3. ACCESSING THE CAMERA VIA VIDEO<br />
VIEWER” at page 4.<br />
Note: You may also download its complete user manual from the link below for reference:<br />
www.surveillance-download.com/user/CMS.pdf.<br />
• To check or configure this network camera only, it’s recommended to use the web browser, such as<br />
“Microsoft Internet Explorer” or “Mozilla Firefox”.<br />
For details about using the web browser, please refer to “4. CAMERA CONFIGURATIONS VIA YOUR<br />
WEB BROWSER” at page 13.<br />
3
3. ACCESSING THE CAMERA VIA VIDEO VIEWER<br />
3.1 Install the software<br />
Step1: Place the supplied CD into your CD-ROM or DVD-ROM drive. The program will be<br />
automatically run.<br />
Step2: Go to the “Video Viewer” section to install the program, or click “Download The Latest<br />
Version” to download the latest version of Video Viewer from the Internet (if your PC is<br />
connected to Internet).<br />
Step3: Follow the on-screen instructions to finish the installation. When the installation is<br />
completed, a shortcut icon “ ” will be placed on your PC desktop.<br />
3.2 Accessing the camera<br />
Step1: Double-click “ ” on your PC desktop to open Video Viewer and enter the control panel.<br />
By defaults, the “Address Book” panel will be displayed on the right side of the control<br />
panel.<br />
Step2: Click “ ” “ ” to key in the IP address or host name, user name, password, and<br />
port number of the camera you intend to connect.<br />
OR<br />
Click “ ” “ ” to search the available IP address(es) of other camera(s). The<br />
found address(es) will be listed, and can be added into the address book by clicking<br />
“ ”.<br />
Step3: Double-click the IP address you just added into the address book to log in.<br />
The live view is displayed in the Video Viewer.<br />
4
3.3 Control panel overview<br />
Two control panels are available and can be switched depending on your using habit.<br />
3.3.1 Simplified Version (Default)<br />
5
3.3.2 Full Function Version<br />
3.3.3 Main Button Overview<br />
Simplified<br />
Button<br />
Full Function<br />
Function<br />
Address Book<br />
Description<br />
Click to show the predefined IP address(es). You can add, remove or search<br />
the IP address to log in the DVR remotely.<br />
<strong>Remote</strong><br />
Config<br />
Click to go to the detailed system configuration.<br />
Miscellaneous<br />
Control<br />
Record<br />
Setting<br />
Custom<br />
Setting<br />
Click to go to the detailed record setting. For details,<br />
please refer to “3.4.1 Record” at page 7.<br />
Click to choose the language of this program. The<br />
language change will take effect when this program is<br />
closed and executed again.<br />
/ /<br />
Log<br />
Record / Record<br />
Stop<br />
Snapshot<br />
Click to view all event and recording logs, search the desired log(s) by date, or<br />
playback the recording of the selected log.<br />
Click to start / stop the manual recording.<br />
The record button will be disabled when the reserved disk capacity set in<br />
“Record Setting” is larger than the current disk capacity. For details, please<br />
refer to “3.4.1 Record” at page 7.<br />
Click to take a snapshot of the current view. The snapshot will be saved in the<br />
path you specified in “Record Setting”.<br />
Information<br />
Click to show the current network connection details.<br />
6
3.4 Frequently-used functions<br />
3.4.1 Record<br />
To record remotely, click “ ” or “ ” → “ ” to go to the “Record Setting” page.<br />
In the “Record Setting” page, you can set the following items:<br />
‧Record type<br />
‧Pre- / post-event record<br />
‧Record time setting<br />
‧Record path<br />
Note: The record function will be disabled when the reserved disk capacity in “Reserved(MB)” is larger<br />
than the current disk capacity in “Free(MB)”.<br />
When “Manual” is checked, click “ ” or “ ” on the main control panel to start the manual recording<br />
immediately, and the recordings will be saved in the location specified in “Record Path”.<br />
When “Motion” and / or “Alarm” are checked, the recording function will be enabled for any motion or alarm event,<br />
and the recordings will be saved in the location specified in “Record Path”.<br />
3.4.2 Playback<br />
To play a recording, click “ ” or “ ”, and select the “Record” tab. A list of all the recordings will be shown by<br />
defaults, and you can also sort out the logs you want to speed up the search time.<br />
7
3.4.3 Firmware Upgrade<br />
This function is used when users need to upgrade the network camera for function scalability.<br />
Note: Before using this function, make sure you have the correct upgrade files provided by your installer<br />
or distributor.<br />
Step1: Click “<br />
Step2: Click “<br />
”, and select the IP address of your network camera in the address book.<br />
” to show the upgrade page, “Update Server”.<br />
Step3: Click “Add” to browse to the upgrade files.<br />
Step4: Click “Upgrade Firmware” to start firmware upgrade.<br />
Note: It takes a few minutes to finish the upgrade process. Do not disconnect the power during firmware<br />
upgrade, or the upgrade may be failed. The camera will reboot after the upgrade.<br />
Step5: Select the IP address of the camera and click “<br />
” again to check if the firmware is upgraded.<br />
3.4.4 E-Map<br />
Video Viewer is also a Central Management System (CMS) software, which allows network device control &<br />
management for up to 16 devices simultaneously.<br />
Note: Before using this function, make sure Video Viewer is connected to all the devices (up to 16) you<br />
want to monitor.<br />
E-Map is ONLY available when the control panel is switch to the full function version.<br />
How to Add an E-Map Group<br />
STEP1: In the simplified version, click “ ” to switch the control panel to the full function version, and click “ ”<br />
to enter the E-Map page as follows.<br />
Note: To know where the buttons are, please refer to “3.3.1 Simplified Version (Default) at page 5, and<br />
“3.3.2 Full Function Version” at page 6.<br />
8
STEP2: Right-click to show the shortcut menu on the top-left panel, and select the E-Map group you want to add.<br />
There are three E-Map groups you can add: Google E-MAP, Single E-MAP, and Building E-MAP.<br />
9
STEP3: When the E-Map group is created, you will see the tree on the top-left panel, showing all the devices<br />
you’ve added to this group.<br />
Icon<br />
Description<br />
The connected device is camera. When it’s selected, it will become red.<br />
The connected device is DVR. When it’s selected, it will become red.<br />
For any motion or alarm event, it will appear on the screen to catch your attention.<br />
To know what’s happening quickly, double-click the device icon on the E-Map to show the live view.<br />
10
How to Edit / Remove an Existing E-Map Group<br />
‣ For Google E-Map Group<br />
Right-click on the group name to show the shortcut menu list, and select<br />
“Edit E-MAP” or “Remove E-MAP” as needed.<br />
You can also add a single E-Map group (Add Single E-MAP) or Building<br />
E-Map group (Add Building E-MAP) into the existing Google E-Map<br />
group.<br />
‣ For Single E-Map Group<br />
Right-click on the group name to show the shortcut menu list, and select<br />
“Edit E-MAP” or “Remove E-MAP” as needed.<br />
11
‣ For Building E-Map Group<br />
Right-click on the group name to show the shortcut menu list, and select<br />
“Edit Building E-MAP” or “Remove E-MAP” as needed.<br />
12
4. CAMERA CONFIGURATIONS VIA YOUR WEB BROWSER<br />
Users can also access the network camera via a web browser, such as Microsoft Internet Explorer,<br />
Mozilla Firefox, Google Chrome and Safari.<br />
Note: It’s recommended to consult with your installer before changing system<br />
configurations.<br />
Note: You need to be the supervisor to enter the system configuration page. If not,<br />
please re-log into the camera with the supervisor user level.<br />
However, the web browser is only available for single device access. If users want to access more<br />
than two devices through one interface, it’s recommended to use our supplied software, Video<br />
Viewer. For details, please refer to “3. ACCESSING THE CAMERA VIA VIDEO VIEWER” at page 4.<br />
Before using the network camera, make sure you have configured the network settings and have the<br />
IP address, user name and password used for accessing the camera in hand. If not, please refer to<br />
the installation guide.<br />
4.1 Accessing the camera<br />
Step1: Open your web browser, and key in http://ipaddress:portnum in the URL address box.<br />
For example, for IP address 60.121.46.236 and port No. 888, please key<br />
in ”http://60.121.46.236:888” into the URL address box, and press “Enter”.<br />
Step2: In the login page, key in the user name and password, and enter the security code from the<br />
image below. Then, click “LOGIN”.<br />
Step3: The wizard is then starting analyzing your network environment, and shows your network<br />
environment.<br />
‧ To continue setting the password, date & time, and network, click “Next” and follow the step-by-step<br />
instructions.<br />
‧ To skip the wizard and directly access the camera live view, click “Close”.<br />
‧ To directly access the camera live view without starting the wizard for the login next time, check “Do not start<br />
wizard at login”.<br />
Step3: When the login is successful, you’ll see the live view.<br />
13
4.2 Control panel overview<br />
4.2.1 Live View Panel<br />
Function Icon User Level Description<br />
Playback -- Supervisor / Power User *Available only when a compatible USB flash drive is connected.<br />
Click to enter the record list for event playback.<br />
For more details, please refer to “5 VIDEO RECORDING TO<br />
USB FLASH DRIVE” at page 27.<br />
Media Type -- Supervisor / Power User /<br />
Normal User / Guest<br />
Video Quality -- Supervisor / Power User /<br />
Normal User / Guest<br />
Video Resolution Supervisor / Power User /<br />
Normal User / Guest<br />
Select the web transmission format from the drop-down list:<br />
H.264 / MPEG-4 / Motion JPEG / QuickTime<br />
For users using Mozilla Firefox, only “QuickTime” is selectable.<br />
QuickTime is Apple Inc.’s multimedia software. You need to have<br />
QuickTime installed in you operating system before selecting<br />
“QuickTime”. When it is selected, you will be promoted to enter<br />
the user name and password to access the camera.<br />
Click & drag the slider to select the video quality:<br />
Basic / Normal / High / Best.<br />
Select the video resolution from the drop list: 4CIF / CIF.<br />
Snapshot<br />
Supervisor / Power User /<br />
Normal User / Guest<br />
Click to take a snapshot for the current view, and a new browser<br />
window will be opened to display the captured image.<br />
Full Screen<br />
Supervisor / Power User /<br />
Normal User / Guest<br />
Click to display the image in full screen.<br />
Flip<br />
Supervisor / Power User /<br />
Normal User / Guest<br />
Click to rotate the image 180 0 counterclockwise when necessary.<br />
Audio On / Off<br />
/<br />
Supervisor / Power User /<br />
Normal User / Guest<br />
Click to hear the live audio or switch it off when an audio device is<br />
connected properly.<br />
Speaker On / Off / Supervisor / Power User<br />
Click to speak or switch it off when a microphone is connected<br />
properly.<br />
*Available only when a compatible USB flash drive is connected.<br />
Record On / Off<br />
/<br />
Supervisor<br />
Click to start or stop manual recording.<br />
For more details, please refer to “5 VIDEO RECORDING TO USB<br />
FLASH DRIVE” at page 27.<br />
14
4.2.2 System Configuration Panel<br />
Click “Configuration” to enter the configuration page.<br />
Note: You need to be the supervisor to enter the system configuration page. If not, please<br />
re-log into the camera with the supervisor user level.<br />
The functions are categorized into three menus: Network, Camera and General.<br />
• For details about “Network”, please refer to “4.3 Network” at page 16.<br />
• For details about “Camera”, please refer to “4.4 Camera’ at page 20.<br />
• For details about “General”, please refer to “4.6 General” at page 21.<br />
Main Menu Sub-Menu Reference<br />
Network Network Configure network settings.<br />
QoS<br />
DDNS<br />
SNTP<br />
FTP<br />
Mail<br />
SMS<br />
Filter<br />
UPnP<br />
Bonjour<br />
Limit the data flow for live streaming.<br />
Enter DDNS information when the network type is PPPOE or DHCP.<br />
Synchronize your camera time with the networked computer systems.<br />
Enter the FTP information for event notifications when “FTP” is<br />
chosen in “General” → “Trigger”.<br />
Enter Email information for event notifications when “Email” is chosen<br />
in “General” → “Trigger”.<br />
Enter text messaging information for SMS notifications when “SMS” is<br />
chosen in “General” → “Trigger”.<br />
Choose to permit or block the IP address(es) which can access this<br />
camera.<br />
*Suitable for Windows-based operating system.<br />
1. Allow this camera to be detected among devices within the same<br />
network area for easy and quick usage.<br />
2. Configure port mapping.<br />
*Suitable for Apple Mac-based operating system.<br />
Allow this camera to be detected among devices within the same<br />
network area for easy and quick usage.<br />
Camera Color Adjust the color performance.<br />
External Device<br />
General<br />
Time<br />
Record<br />
USB<br />
General<br />
Server Log<br />
Online<br />
Account<br />
Trigger<br />
Video<br />
Google Maps<br />
Upgrade<br />
Set daylight saving time and the current time.<br />
*Available only when a compatible USB flash drive is connected.<br />
1. Configure the record function.<br />
3. Set the timer record for alarm and motion detection.<br />
*Available only when a compatible USB flash drive is connected.<br />
1. Check the remaining capacity of the built-in memory storage.<br />
2. Clear all data.<br />
3. Reload to check the most updated storage status.<br />
1. Select the language of the web browser.<br />
2. Check the MAC address of the camera.<br />
3. Lock camera access after the specified time.<br />
Check the system event logs.<br />
1. Check current online user(s).<br />
2. Set anonymous login<br />
3. Set image code verification at login<br />
1. Create a new user account with different access privilege.<br />
2. Modify or delete an existing user account.<br />
1. Enable / disable motion detection.<br />
2. Set the motion detection area.<br />
3. Select the event notification method.<br />
Select video file size and image quality.<br />
Allow you to know where the network camera is.<br />
Check the current firmware version and upgrade.<br />
15
4.3 Network<br />
4.3.1 Network<br />
You can set the network configuration of the network camera depending on your network type.<br />
For details, please refer to your installation guide.<br />
4.3.2 QoS<br />
QoS, Quality of Service, is the ability to control the data flow for real-time streaming. This<br />
function is important if your network bandwidth is insufficient and you have other devices to<br />
share the network bandwidth.<br />
Check “QoS Enable”, and set the max. upload rate from 256 to 10240 kbps.<br />
4.3.3 DDNS<br />
Select “On” when the selected network type in “Network” is “PPPOE” or “DHCP”. For details,<br />
please refer to the installation guide.<br />
4.3.4 SNTP<br />
SNTP (Simple Network Time Protocol) is used to synchronize your camera time with the<br />
networked computer systems.<br />
Function<br />
GMT<br />
NTP Server<br />
Sync. Period<br />
Description<br />
Once users choose the time zone, the network camera will adjust the local area time<br />
of the system automatically.<br />
Simply use the default SNTP server (For example, tock.stdtime.gov.tw) or change to<br />
another server with which users are familiar.<br />
Select “Daily” to synchronize the camera time with the network time every day or<br />
“None” to turn off this function.<br />
16
Function<br />
Server Time<br />
Description<br />
Click and the network camera will synchronize the time with the network time.<br />
4.3.5 FTP<br />
Enter the detailed FTP information and click “Save” to confirm. The information you set here will<br />
be applied when “FTP” is selected in “General” → "Trigger".<br />
4.3.6 MAIL<br />
Enter the detailed e-mail information and click “Save” to confirm. The information you set here<br />
will be applied when “Email” is selected in “General” → "Trigger".<br />
Function<br />
SMTP Server<br />
Port<br />
Mail From<br />
SSL Encryption<br />
Verify Password<br />
E-Mail Address List<br />
Test<br />
Description<br />
Enter the SMTP server address provided from your e-mail system supplier.<br />
Enter the port number provided from your e-mail system supplier. If this column is left blank, the<br />
e-mail server will use port 25 to send e-mails.<br />
Enter the entire mail address to ensure e-mails will not be blocked by SMTP.<br />
Select “Yes” if your e-mail server is using SSL encryption to protect your e-mail content from<br />
unauthorized access.<br />
Some mail servers are required to verify the password. Please enter the “user name” and<br />
“password”.<br />
Add the e-mail address(s) of the assigned recipient(s).<br />
When all information is entered, click “Test Mail” to try if the recipe.<br />
17
4.3.7 SMS<br />
Note: Before using this function, you need to apply an API ID from the mobile<br />
messaging company, Clickatell, and you will be charged starting from the 11 th<br />
message. For details, please refer to “APPENDIX 3 API ID APPLICATION FOR SMS<br />
MESSAGING’ at page 31.<br />
Enter the detailed information needed for text messaging, and click “Save” to confirm. The<br />
information you set here will be applied when “SMS” is selected in “General” → "Trigger".<br />
Function<br />
System<br />
User name / Password<br />
API ID<br />
Recipient<br />
Transfer Interval<br />
Reset Counter<br />
Message<br />
Test SMS<br />
Description<br />
The text messaging service provider is Clickatell.<br />
Enter the account user name and password you created in Clickatell.<br />
Enter the API ID you applied from Clickatell.<br />
Click “Add” to enter the phone number, including the country code, to receive the text<br />
message. Five sets of phone numbers are allowed.<br />
Set the interval time in minutes between two-message sending.<br />
The options are 0, 15, 30 & 60.<br />
Click to restart the text messaging, and the SMS will be sent after the specified time interval<br />
since you click this button.<br />
Enter the text content (up to 70 characters) you want to send with the text message.<br />
To know whether your SMS setting is correct, click this button to immediately send a SMS to<br />
your phone.<br />
Note: This testing is not free and you will be charged for SMS sending base on your<br />
local rate.<br />
4.3.8 Filter<br />
Choose to permit or block the IP address(es) which can access this camera, and click “Save” to<br />
confirm.<br />
18
Function<br />
• Filter Configuration<br />
Description<br />
Error Count<br />
Error Lock Time<br />
Echo Request<br />
Set the maximum count for login failure. When the maximum count is reached, the IP address<br />
trying to access the network camera will be locked.<br />
Set the lock time in minutes when the maximum count of error login for an IP address is reached.<br />
Select “Non-Block” to allow other users to use the ping command to detect the IP address of your<br />
network camera, or “Block” to deny the ping command request.<br />
• IP/MAC Filter Configuration<br />
IP/MAC Filter<br />
IP/MAC Filter Policy<br />
Choose to enable or disable the filter function.<br />
If “Enable” is selected, choose whether you want to permit (Allow) or block (Deny) the IP address<br />
list below.<br />
• IP/MAC Filter Rules<br />
Rule<br />
‧ To add an item to the IP address list, key in the IP address in “Rule”, and click “Add”.<br />
‧ To remove an existing item in the IP address list, click the item you want to remove, and click<br />
“Delete”.<br />
4.3.9 UPnP / Bonjour<br />
“UPnP” stands for “Universal Plug and Play”, which allows devices to connect seamlessly in the<br />
home and corporate environments and simplify installation of computer components, and is<br />
only suitable for Microsoft Windows-based operating system.<br />
“Bonjour” functions the same as “UPnP”, but it’s only suitable for Apple Mac-based operating<br />
system.<br />
‣ UPnP<br />
‣ Bonjour<br />
Check “Enable” to allow the network camera to be detected among devices within the same<br />
network area, and set the identification name of the camera in “Friendly name”.<br />
When this function is activated, the other PC within the same domain as this camera will be<br />
able to search this camera in:<br />
‣ “Network Neighbor” with the identification name set in “Friendly name” for Windows-based PC, or<br />
‣ “ ” (finder) or “Bookmark” with the identification name set in “Device Name” for Mac-based PC.<br />
Double-click it to quickly open the web browser for camera access.<br />
Port Mapping (Available only in UPnP)<br />
When your device is connected to Internet via a router and you need to additionally access the<br />
router to configure port mapping, this function can eliminate the need to additionally access the<br />
router for port forwarding.<br />
Note: Before using this function, make sure the UPnP function of your router is also<br />
enabled.<br />
19
When “Port Mapping” is set to “Enable”, the system will automatically assign an IP address or<br />
port number for you if no IP address or port number is entered.<br />
Note: When the configurations are saved successfully, you’ll see a message indicating<br />
the IP address and port number assigned to your device.<br />
4.4 Camera<br />
4.4.1 Color<br />
Adjust the color performance from Brightness, Contract, Hue and Saturation. Click and drag the<br />
slider to preview the color change on the right side of ths page and adjust the image color.<br />
To restore the default values, click “Back to Default”.<br />
4.4.2 Time<br />
Set daylight saving time and the current time, and click “Save” to confirm.<br />
Function Description<br />
• Time Configuration<br />
Date<br />
Set the current date.<br />
Time<br />
Set the current time.<br />
• Daylight Saving Time Configuration<br />
Daylight Saving Time<br />
Specify whether to use daylight saving time (Enable / Disable).<br />
If this function is enabled, set the time period (Start Time / End Time), and adjust the daylight<br />
saving time in hours (Adjust Time).<br />
20
4.4.3 Record<br />
In “Record”, you can enable and configure the recording for manual, alarm and motion events.<br />
Note: This function is available only when a compatible USB flash drive is connected to<br />
the camera for local recording. For the compatible USB flash drive list, please refer<br />
to “APPENDIX 2 COMPATIBLE USB FLASH DRIVE LIST” at page 30.<br />
4.5 External Device<br />
4.5.1 USB<br />
This camera supports local recording with an optional compatible USB flash drive.<br />
Note: When a USB flash drive is connected to this camera, you’ll be unable to access this<br />
camera wirelessly.<br />
In “USB”, you can check the remaining capacity of the external USB flash drive, clear all data,<br />
or reload to check the most updated storage status.<br />
Note: This function is available only when a compatible USB flash drive is connected to<br />
the camera for local recording. For the compatible USB flash drive list, please refer<br />
to “APPENDIX 2 COMPATIBLE USB FLASH DRIVE LIST” at page 30.<br />
4.6 General<br />
4.6.1 General<br />
In “General”, you can select the UI language to English or Chinese, and check the MAC<br />
address of your camera.<br />
To lock camera access when it’s not used after the specified time, select “5 MIN”, “15 MIN” or<br />
“30 MIN” from the drop-down list of “Auto Lock Time”, or select “NEVER” to disable this<br />
function.<br />
21
Note: When the camera access is locked after the specified time, to resume camera<br />
access, please enter the password.<br />
4.6.2 Server Log<br />
To quickly search the system logs you want by event type, click “Prev. Page” or “Next Page” to<br />
find the logs you want, or check the event type(s) and click “Reload” to start searching.<br />
To clear all system event logs, click “Clear All”.<br />
4.6.3 Online<br />
You can check the current online user(s) with respective online information. To refresh the list,<br />
click “Reload”.<br />
‣ To allow anonymous login, select “Enable” in “Anonymous Viewer Login”.<br />
‣ To disable image code verification at login, select “No” in “Login with CAPTCHA Image”.<br />
22
4.6.4 Account<br />
You can create a new account with different user access privilege, or delete or modify an<br />
existing account setting.<br />
How to create a new account<br />
Step1: Click “New”, and fill in the following columns.<br />
Column<br />
User Name<br />
Password<br />
Description<br />
Set a user name that will be used for camera access. The user name allows up to 16 alphanumeric<br />
characters.<br />
Set the password that will be used for remote login. The password allows up to 16 alphanumeric characters.<br />
Confirm Password<br />
User Level<br />
Life Time<br />
Enter the password again to confirm.<br />
Set the security level of an account to give the permission to control different functions. There are four<br />
user levels: SUPERVISOR, POWER USER, NORMAL USER and GUEST.<br />
Select how long this account is allowed to stay online (1 MIN / 5 MIN / 10 MIN / 1 HOUR / 1 DAY / INFINITE)<br />
Step2: Then, click “Save” to save your setting and create a new account.<br />
How to modify or delete an existing account<br />
Step1: Select the account you want to modify or delete.<br />
Step2: To modify the account, click “Edit” to change the settings, and click “Save”.<br />
To remove the account, click “Delete”.<br />
Note: It’s not allowed to remove an account when there’s only one account in the<br />
account list.<br />
4.6.5 Trigger<br />
You can set the alarm or motion detection and select the notification function.<br />
23
Trigger Setting<br />
In this section, you can select to enable or disable alarm or motion detection.<br />
Item<br />
Trigger Alarm /<br />
Motion<br />
Description<br />
Select to enable or disable the alarm or motion detection function.<br />
‧ Motion Detection Area Setting<br />
When “Enable” is selected, click “Detection” to enter the motion detection area setting page as follows:<br />
Level of Sensitivity:<br />
Set the detection sensitivity from High / Normal / Low.<br />
Area Setting:<br />
Set the motion detection area by selecting the area grids with your mouse. Pink grids represent the area that is not<br />
being detected while the transparent grids are the area under detection. You can set multiple areas under detection.<br />
Click “Clear All” to set the whole area undetected.<br />
Click “Select All” to set the whole area under detection.<br />
Trigger Duration<br />
Set the duration time for trigger recording (5 / 10 / 20 / 40 seconds).<br />
<br />
Notification Setting<br />
In this section, you can select to enable e-mail / FTP / SMS notification when an alarm or a<br />
motion event happens.<br />
Item<br />
Trigger Method<br />
Media Type<br />
Record Time<br />
Description<br />
‧Email<br />
When this option is checked, the network camera will upload the captured video clip to the assigned<br />
e-mail address(s) once motion or alarm recording happened.<br />
‧FTP<br />
When this option is checked, the network camera will upload the captured video clip to the specified<br />
FTP site once motion or alarm recording happened.<br />
‧SMS<br />
When this option is checked, the network camera will send a text message to the specified mobile<br />
phone number once a motion detection event occurs. For details, please refer to “4.3.7 SMS” at<br />
page 18.<br />
Select the file type of the notification files: H264 (video) / MPEG4 (video) / JPEG (image).<br />
Set the record time of the notification video clip (1 ~ 5 seconds).<br />
4.6.6 Video<br />
Set the image resolution, quality and frame rate.<br />
24
Item<br />
JPEG / MPEG / H264<br />
Frame Rate<br />
Description<br />
Select the image resolution and quality.<br />
Image Resolution: CIF / 4CIF<br />
Image Quality: BEST / HIGH / NORMAL / LOW<br />
The frame rate allowed to each viewer can be adjusted to adapt to the bandwidth on the network.<br />
Set the desired image frequency to the maximum (FULL) or to a specified frame rate (1/2; 1/3;<br />
1/4; 1/5; 1/10; 1/15; 1/20; 1/25; 1/30).<br />
The actual frame rate depends on the actual network connection, and may be lower than the<br />
specified one.<br />
4.6.7 Google Maps<br />
This function is used to let you know where the network camera is.<br />
The system will prompt you to apply a Goole Maps Key if your access is denied. Please follow<br />
the instructions below when you’re denied:<br />
Step1: Click “Sign up for a Google Maps key” to enter the application page.<br />
Step2: Check the terms and conditions, and enter the IP address of the network camera. Then,<br />
click “Generate API Key”.<br />
Step3: Copy the generated API key, and click “Update Google Maps Key” on the web browser to<br />
paste it.<br />
4.6.8 Upgrade<br />
This function is used when users need to upgrade the network camera for function scalability.<br />
Note: Before using this function, make sure you have the correct upgrade files provided<br />
by your installer or distributor.<br />
Step1: Click “ ” to browse to where you save the upgrade files, and select them one by one<br />
until all files are selected (up to four files).<br />
25
Step2: To make a system backup for restore all camera configurations later, click “Backup”.<br />
Step3: Click “Upgrade” to start system upgrading.<br />
Note: It takes a few minutes to finish the upgrade process. Do not disconnect the power<br />
during firmware upgrade, or the upgrade may be failed. The camera will reboot<br />
after the upgrade.<br />
26
5 VIDEO RECORDING TO USB FLASH DRIVE<br />
Besides recording remotely, this network camera also supports local recording directly to a USB<br />
flash drive when a compatible USB flash drive is inserted to the camera and detected correctly.<br />
5.1 Before Using This Function<br />
• This function and wireless application cannot be coexisted because there’s only one USB port for<br />
this device.<br />
• This device doesn’t support USB hot-swapping or hot-plugging. Before the camera is powered on,<br />
make sure the USB flash drive you need is connected properly. For the compatible USB flash drive<br />
list, please refer to “APPENDIX 2 COMPATIBLE USB FLASH DRIVE LIST” at page 30.<br />
• Make sure the record function(s) you want (manual / motion / timer / alarm) is enabled.<br />
• The recorded data is saved on EXT3 file system and can’t be read directly from your PC. To read,<br />
play and download the recorded data, please access the camera via the web browser. For details,<br />
please refer to the following sections.<br />
5.2 Live View Panel<br />
When the USB flash drive is detected correctly, you will see the panel similar as follows:<br />
5.3 USB Device Status<br />
Click “Configuration” “External Device” “USB”to enter the USB device page where you can<br />
check the remaining capacity of the connected USB flash drive, format it when necessary, or<br />
remove it from the camera safely.<br />
Note: You need to be the supervisor to enter the system configuration page. If not,<br />
please re-log into the camera with the supervisor user level.<br />
27
5.4 Recorded Data Playback and Download<br />
Click “Playback” to enter the playback panel where you can search or select the event you want<br />
to play and download to your PC simultaneously.<br />
28
APPENDIX 1 SPECIFICATIONS<br />
▓ Network<br />
LAN Port<br />
LAN Speed<br />
Supported Protocols<br />
AVN204 AVN212 AVN212V<br />
YES<br />
10/100 Based-T Ethernet<br />
DDNS, DNS , PPPoE, DHCP, NTP, SNTP, TCP/IP,UDP ICMP, SMTP,<br />
FTP, HTTP, RTP, RTSP, RTCP, IPv4, Bonjour, UPnP, DNS, UDP<br />
ONVIF Compatible NO YES<br />
USB Port<br />
For optional wireless dongle & USB flash drive<br />
Wireless Features (optional)<br />
(1) Supports 802.11 n/b/g wireless dongle (WU5214)<br />
(2) Ad-Hoc and infrastructure mode<br />
(3) WPS function with “Push Button Config”<br />
Frame Rate NTSC: 30, PAL: 25<br />
Number of Online Users 10<br />
Multiple user access levels with password protection,<br />
Security<br />
WEP 64/128 bit, WPA-PSK, WPA2-PSK,<br />
IP address filtering<br />
Web management<br />
(1) The licensed software “Video Viewer” for up to 16 network cameras<br />
control simultaneously<br />
(2) AJAX management user interface for web browsers<br />
such as Internet Explorer, Mozilla Firefox, Google Chrome, Safari &<br />
Opera for single device access<br />
▓ Video / Audio<br />
Video Compression<br />
H.264 / MPEG4 / MJPEG<br />
Video <strong>Remote</strong> Control<br />
YES<br />
Video Adjustment<br />
Brightness, Contrast, Saturation and Hue<br />
Mobile<br />
Support 3GPP mobile surveillance<br />
Audio Compression<br />
ULaw, 128kbps<br />
Audio Input<br />
Built-in Microphone, External Microphone Input<br />
Audio Output<br />
YES<br />
▓ Camera<br />
Image Sensor<br />
1/3” CCD image<br />
sensor<br />
1/3” High Resolution CCD image sensor<br />
Pixels<br />
NTSC: 512(H) x<br />
492(V) / PAL: 512(H) x NTSC: 768(H) x 494(V) / PAL: 752(H) x 582(V)<br />
582(V)<br />
Lens<br />
f4.6mm<br />
F-number F1.9<br />
Viewing Angle 60°<br />
Shutter Speed<br />
1 / 60 (1/50) to 1 / 100,000 sec.<br />
IR LED<br />
YES<br />
Min Illumination<br />
0 Lux (10m IR ON)<br />
Video Output<br />
1.0 Vp-p. 75Ω<br />
BLC<br />
AUTO<br />
White Balance<br />
ATW<br />
▓ Others<br />
Mobile <strong>Surveillance</strong><br />
iPad, iPod, iPhone, BlackBerry, Windows Mobile, Symbian & Android<br />
Motion Detection<br />
YES<br />
Alarm & Event Notification<br />
FTP / Email / SMS<br />
General I/O<br />
Alarm in x1<br />
Power<br />
DC 12V, 1A<br />
Operating Temperature 0~40℃<br />
Humidity 85%<br />
• Pentium 4 CPU 1.3 GHz or higher, or equivalent AMD<br />
• 256 MB RAM<br />
Minimum Web Browsing Requirements • AGP graphics card, Direct Draw, 32MB RAM<br />
• Windows 7, Vista & XP, DirectX 9.0 or later<br />
• Internet Explorer 7.x or later<br />
Dimensions (mm)** 152.5(L) x 115.2(W) x 40.2(H) (6.00” x 4.54” x 1.58”)<br />
Shipping Weight<br />
812g (1.79 lbs)<br />
including mounting bracket and power supply<br />
In/Out Door Use<br />
Indoor<br />
* The specifications are subject to change without notice.<br />
** Dimensional tolerance: (± 5mm)<br />
29
APPENDIX 2 COMPATIBLE USB FLASH DRIVE LIST<br />
MANUFACTURER MODEL CAPACITY<br />
Transcend JFV35 4G<br />
JFV30<br />
8G<br />
Kingston DataTraveler 1G<br />
PQI U172P 4G<br />
Apacer AH320 2GB<br />
AH320A<br />
8GB<br />
AH220<br />
1GB<br />
AH320<br />
4GB<br />
A-data RB-18 1GB<br />
Sandisk Cruzer Micro 2G<br />
Cruzer Micro<br />
4G<br />
Cruzer4-pk<br />
2G<br />
Netac U208 1G<br />
MSI F200 4G<br />
SONY Micro Vault Tiny 2G 2G<br />
Micro Vault Tiny 4G<br />
4G<br />
Micro Vault Tiny<br />
1G<br />
30
APPENDIX 3 API ID APPLICATION FOR SMS MESSAGING<br />
To allow the camera automatically sending a text message when an event happens, you need to<br />
apply an API ID from Clickatell, one mobile messaging company, first.<br />
Note: The SMS messaging is not totally free. You will be charged starting from the 11 th<br />
message.<br />
Please follow the steps below for application.<br />
Step1: Go to http://www.clickatell.com/login.php. In “New Customers”, select “Clickatell Central<br />
(API)” from the drop-down list.<br />
Step2: Fill in your information to create an account, and click “CONTINUE”.<br />
Note: Note down the user name and password, and the mobile phone number you specified<br />
here for SMS notification setting later.<br />
Step2: When the account is created, the system will automatically send an Email to your specified<br />
31
Email address and ask you to activate your account.<br />
Click the link in the Email to complete account activation, and enter the login page as follows.<br />
Enter the password you set, and click “Login”.<br />
Step3: Enter the mobile phone number (including your country code) you want the text message to<br />
be sent, and click “SEND ACTIVATION CODE”. The system will send an activation code to<br />
that number for verification.<br />
Check if you receive a text message from Clickatell.<br />
Step4: Go back to Clickatell, and click the tab “Manage my Products”.<br />
Then, select “HTTP” from the drop-down list “My Connections”.<br />
Step5: In “Add HTTP API”, enter a descriptive name for this service, and make sure the dial prefix is<br />
correct and callback type is “HTTP GET”. Then, click “Submit”.<br />
Step5: You will get an API ID as follows.<br />
Note: Note down the API ID for SMS notification setting later.<br />
32
APPENDIX 4 BIT RATE TABLE FOR REFERENCE<br />
The data below is for reference only.<br />
The bit rates listed here may vary depending on the resolution, image quality & frame rate you<br />
choose, the complexity of your monitoring area, and how often the moving objects show in your<br />
monitoring area.<br />
Testing Environment<br />
• Place: Office Entrance<br />
• Network translation: H.264<br />
Static: No one coming in and out<br />
Dynamic: One or two people coming in and out<br />
Resolution Quality Frame Rate (Dynamic) kbps (Static) kbps<br />
4CIF Best FULL 2786 1546<br />
High 1375 705<br />
Normal 1234 425<br />
Basic 441 245<br />
CIF Best 955 290<br />
High 364 171<br />
Normal 328 111<br />
Basic 161 68<br />
4CIF Best 1/5 935 474<br />
High 506 272<br />
Normal 297 175<br />
Basic 223 108<br />
CIF Best 222 109<br />
High 133 67<br />
Normal 81 49<br />
Basic 71 32<br />
4CIF Best 1/30 127 70<br />
High 197 20<br />
Normal 61 11<br />
Basic 50 4<br />
CIF Best 42 7<br />
High 38 2<br />
Normal 22 1<br />
Basic 28 0<br />
33
H.264 日 夜 兩 用 型<br />
網 路 攝 影 機<br />
使 用 說 明 書<br />
在 使 用 本 機 前 請 務 必 詳 細 閱 讀 安 全 須 知 及 操 作 說 明 , 並 保 存 此 手 冊 以 備 後 續 參 考 。<br />
Chinese_N204_212_system_V1.0
安 全 須 知<br />
本 公 提 供 的 所 有 無 鉛 產 品 皆 符 合 歐 盟 有 害 物 質 使 用 限 制 指 引 (Restriction of Hazardous<br />
Substances, (RoHS)), 意 即 本 公 司 的 生 產 流 程 與 產 品 均 嚴 格 遵 守 無 鉛 守 則 , 而 且 不 包 含<br />
該 指 引 內 提 供 的 任 何 有 害 物 質 。<br />
此 劃 叉 的 滾 輪 垃 圾 筒 圖 示 代 表 在 歐 盟 境 內 , 本 產 品 於 丟 棄 時 必 須 另 行 收 集 。 此 原 則 適 用 於<br />
您 的 產 品 與 任 何 標 有 此 圖 示 的 週 邊 設 備 。 請 勿 隨 意 丟 棄 這 些 產 品 。 請 洽 詢 您 當 地 的 經 銷<br />
商 , 以 得 知 回 收 此 設 備 的 程 序 。<br />
免 責 聲 明<br />
本 公 司 保 留 可 隨 時 修 改 或 刪 除 說 明 書 內 容 的 任 何 權 利 。 本 公 司 不 保 證 此 說 明 書 的 內 容 完 全 無 誤 、 完 整 或 實<br />
用 。 此 說 明 書 內 容 更 改 以 實 際 產 品 為 準 , 將 不 另 行 通 知 。<br />
接 地<br />
此 為 符 合 Safety Class 1 Product ( 隨 附 的 電 源 插 頭 有 內 建 接 地 線 ) 的 產 品 , 其 主 電 源 插 頭 應 插 入 支 援 接 地<br />
線 的 三 孔 電 源 插 座 。 任 何 破 壞 接 地 保 護 的 舉 動 都 可 能 會 使 得 本 產 品 具 有 危 險 性 。 因 此 , 請 勿 刻 意 破 壞 接 地 保 護 。<br />
遠 離 有 水 或 潮 溼 的 環 境<br />
請 勿 讓 本 產 品 曝 露 在 任 何 有 水 或 潮 溼 的 環 境 下 , 例 如 將 水 瓶 放 在 本 產 品 上 , 或 者 容 易 滴 到 雨 水 的 窗 戶 邊 。<br />
商 標 聲 明<br />
Internet Explorer、Microsoft、Windows、Mozilla & QuickTime 為 其 各 自 擁 有 者 之 註 冊 商 標 。<br />
MPEG-4 授 權<br />
THIS PRODUCT IS LICENSED UNDER THE MPEG-4 VISUAL PATENT PORTFOLIO LICENSE FOR<br />
THE PERSONAL AND NON-COMMERCIAL USE OF A CONSUMER FOR (i) ENCODING VIDEO IN<br />
COMPLIANCE WITH THE MPEG-4 VISUAL STANDARD (“MPEG-4 VIDEO”) AND/OR (ii) DECODING<br />
MPEG-4 VIDEO THAT WAS ENCODED BY A CONSUMER ENGAGED IN A PERSONAL AND<br />
NON-COMMERCIAL ACTIVITY AND/OR WAS OBTAINED FROM A VIDEO PROVIDER LICENSED BY<br />
MPEG LA TO PROVIDE MPEG-4 VIDEO. NO LICENSE IS GRANTED OR SHALL BE IMPLIED FOR ANY<br />
OTHER USE. ADDITIONAL INFORMATION INCLUDING THAT RELATING TO PROMOTIONAL INTERNAL<br />
AND COMMERCIAL USES AND LICENSING MAY BE OBTAINED FROM MPEG LA, LLC. SEE<br />
HTTP://WWW.MPEGLA.COM.<br />
GPL 授 權<br />
This product contains codes which are developed by Third-Party-Companies and<br />
which are subject to the GNU General Public License (“GPL”) or the<br />
GNU Lesser Public License (“LGPL”).<br />
The GPL Code used in this product is released without warranty and is subject to the<br />
copyright of the corresponding author.<br />
Further source codes which are subject to the GPL-licenses are available upon<br />
request.<br />
We are pleased to provide our modifications to the Linux Kernel, as well as a few new<br />
commands, and some tools to get you into the code.The codes are provided on<br />
the FTP site, and please download them from the following site or you can refer to your<br />
distributor:<br />
ftp://ftp.dvrtw.com.tw/GPL/AV074/<br />
版 本<br />
韌 體 版 本 :1W35-1W14-1W13-1W04-A2<br />
Video Viewer 版 本 : 0130
目 錄<br />
1. 產 品 概 述 ............................................................................................................................................. 1<br />
1.1 產 品 特 點 ................................................................................................................................................... 1<br />
1.2 包 裝 明 細 ................................................................................................................................................... 1<br />
1.3 外 觀 簡 介 ................................................................................................................................................... 1<br />
1.4 背 板 .......................................................................................................................................................... 2<br />
2. 在 使 用 網 路 攝 影 機 之 前 ....................................................................................................................... 3<br />
3. 透 過 VIDEO VIEWER 登 入 攝 影 機 ...................................................................................................... 4<br />
3.1 安 裝 軟 體 .................................................................................................................................................... 4<br />
3.2 登 入 攝 影 機 ................................................................................................................................................ 4<br />
3.3 控 制 面 板 簡 介 ............................................................................................................................................ 5<br />
3.3.1 簡 化 版 ( 預 設 ) ..................................................................................................................................................5<br />
3.3.2 完 整 功 能 版 .......................................................................................................................................................6<br />
3.3.3 主 要 按 鈕 簡 介 ...................................................................................................................................................6<br />
3.4 常 用 功 能 .................................................................................................................................................... 7<br />
3.4.1 錄 影 設 定 ...........................................................................................................................................................7<br />
3.4.2 影 像 回 放 ...........................................................................................................................................................7<br />
3.4.3 韌 體 升 級 ...........................................................................................................................................................8<br />
3.4.4 E-Map...............................................................................................................................................................8<br />
4. 系 統 設 定 ........................................................................................................................................... 13<br />
4.1 General ( 一 般 )......................................................................................................................................... 14<br />
4.1.1 Log ( 記 錄 ).......................................................................................................................................................14<br />
4.1.2 Account ( 帳 號 )................................................................................................................................................14<br />
4.1.3 OnLineUser ( 連 線 使 用 者 )...............................................................................................................................16<br />
4.1.4 Trigger ( 觸 發 )..................................................................................................................................................16<br />
4.2 Network ( 網 路 ) ........................................................................................................................................ 17<br />
4.2.1 QoS ................................................................................................................................................................19<br />
4.2.2 SNTP..............................................................................................................................................................19<br />
4.2.3 FTP.................................................................................................................................................................19<br />
4.2.4 Email ..............................................................................................................................................................20<br />
4.2.5 Filter ...............................................................................................................................................................20<br />
4.2.6 UPnP..............................................................................................................................................................21<br />
4.3 Video ( 影 像 )............................................................................................................................................. 21<br />
4.4 Color ( 顏 色 ) ............................................................................................................................................. 22<br />
4.5 Time ( 時 間 ).............................................................................................................................................. 22<br />
5. 透 過 網 路 瀏 覽 器 來 登 入 攝 影 機 ........................................................................................................... 23<br />
5.1 登 入 攝 影 機 ............................................................................................................................................. 23<br />
5.2 控 制 面 板 簡 介 .......................................................................................................................................... 24<br />
5.2.1 即 時 畫 面 ........................................................................................................................................................24<br />
5.2.2 系 統 設 定 畫 面 .................................................................................................................................................24<br />
5.3 儲 存 錄 影 資 料 到 USB 隨 身 碟 ................................................................................................................... 26<br />
5.3.1 在 使 用 此 功 能 之 前 ...........................................................................................................................................26<br />
5.3.2 即 時 畫 面 .........................................................................................................................................................27<br />
5.3.3 USB 隨 身 碟 狀 態 .............................................................................................................................................27<br />
5.3.4 錄 影 資 料 回 放 和 下 載 .......................................................................................................................................28<br />
附 錄 1 規 格 ............................................................................................................................................ 29<br />
附 錄 2 相 容 USB 隨 身 碟 品 牌 ................................................................................................................. 30
1. 產 品 概 述<br />
1.1 產 品 特 點<br />
• 影 片 傳 輸 不 延 遲 ,H.264 壓 縮 格 式 提 供 清 晰 流 暢 的 影 像<br />
• 支 援 插 入 選 購 的 無 線 接 收 器 以 使 用 無 線 連 線<br />
• 數 位 / 類 比 影 像 輸 出<br />
• 位 移 偵 測 與 警 報 通 知 功 能<br />
• 支 援 外 接 式 聲 音 輸 入 / 聲 音 輸 出 , 以 進 行 雙 向 語 音 傳 輸<br />
• 具 有 智 慧 型 光 源 控 制 功 能 , 有 效 達 到 日 夜 監 控 並 提 供 清 晰 影 像<br />
1.2 包 裝 明 細<br />
□ 網 路 攝 影 機<br />
□ 安 裝 指 南<br />
□ 支 架<br />
□ 變 壓 器 與 電 源 線<br />
□ RJ45 網 路 線<br />
□ 外 接 警 報 線<br />
□ 光 碟 說 明 書 ( 含 使 用 說 明 書 以 及 Video<br />
Viewer 影 像 中 控 軟 體 )<br />
1.3 外 觀 簡 介<br />
1
1.4 背 板<br />
連 接 孔 / 按 鈕<br />
回 復 原 廠 值<br />
說 明<br />
此 按 鈕 是 隱 藏 在 針 孔 之 中 。 請 按 住 此 按 鈕 , 直 到 網 路 攝 影 機 重 新 開 機 為 止 。 此 舉<br />
將 會 重 設 所 有 參 數 回 原 廠 設 定 值 , 包 括 IP 位 址 。<br />
電 源 指 示 燈 將 攝 影 機 上 電 後 , 此 指 示 燈 會 顯 示 為 紅 色 。<br />
聲 音 輸 出 支 援 到 聲 音 裝 置 的 連 接 , 例 如 喇 叭 , 以 進 行 遠 端 聲 音 傳 輸 。<br />
聲 音 輸 入 支 援 到 聲 音 裝 置 的 連 接 , 例 如 麥 克 風 , 以 進 行 本 機 端 聲 音 傳 輸 。<br />
影 像 輸 出<br />
使 用 影 像 傳 輸 線 ( 例 如 有 BNC 接 頭 的 RCA 線 , 或 者 同 軸 電 纜 ) 連 接 到 螢 幕 的 影<br />
像 輸 入 孔 , 以 進 行 影 像 輸 出 。<br />
* 影 像 傳 輸 線 為 選 購 配 備 。<br />
LAN 使 用 隨 附 的 RJ45 網 路 線 , 將 攝 影 機 連 線 上 網 。<br />
電 源 插 孔 連 接 到 DC 12V 變 壓 器 來 提 供 電 源 。<br />
外 接 警 報 線 插 孔 插 入 隨 附 的 外 接 警 報 線 , 即 可 支 援 到 警 報 裝 置 的 連 接 。<br />
USB 埠 可 連 接 到 選 購 的 無 線 接 收 器 進 行 無 線 傳 輸 , 或 者 插 入 USB 隨 身 碟 儲 存 錄 影 資 料 。<br />
2
2. 在 使 用 網 路 攝 影 機 之 前<br />
在 使 用 網 路 攝 影 機 之 前 , 請 先 確 認 以 下 事 項 :<br />
1) 電 腦 已 安 裝 隨 附 的 Video Viewer CMS 中 控 軟 體 。<br />
2) 攝 影 機 已 完 成 網 路 設 定 , 而 且 網 路 連 線 沒 問 題 。<br />
如 果 還 沒 , 請 參 閱 安 裝 指 南 進 行 設 定 。<br />
您 可 以 透 過 隨 附 的 Video Viewer CMS 中 控 軟 體 , 或 者 網 路 瀏 覽 器 來 登 入 攝 影 機 。<br />
• 若 要 同 時 一 次 查 看 或 設 定 多 達 16 台 監 控 裝 置 , 請 使 用 Video Viewer。<br />
如 需 得 知 使 用 Video Viewer 的 詳 細 資 訊 , 請 參 閱 第 4 頁 的 「3. 透 過 VIDEO VIEWER 登 入 攝 影 機 」 和 第<br />
13 頁 的 「4. 系 統 設 定 」。<br />
• 若 只 要 查 看 或 設 定 單 隻 網 路 攝 影 機 , 建 議 可 透 過 網 路 瀏 覽 器 。<br />
如 需 使 用 網 路 瀏 覽 器 進 行 設 定 的 詳 細 資 訊 , 請 參 閱 第 23 頁 的 「5. 透 過 網 路 瀏 覽 器 來 登 入 攝 影 機 」。<br />
3
3. 透 過 VIDEO VIEWER 登 入 攝 影 機<br />
3.1 安 裝 軟 體<br />
步 驟 1: 將 隨 附 的 光 碟 放 到 CD-ROM 或 DVD-ROM 光 碟 機 中 , 之 後 會 自 動 啟 動 下 載 介 面 。<br />
步 驟 2: 按 [Licensed Software AP] 直 接 安 裝 Video Viewer, 或 者 按 [Licensed Software AP] 下<br />
方 的 [Download The Latest Version] 從 網 路 下 載 最 新 版 Video Viewer ( 若 電 腦 已 連 線 上<br />
網 )。<br />
步 驟 3: 遵 照 螢 幕 上 的 指 示 完 成 軟 體 安 裝 。 安 裝 完 成 後 , 電 腦 桌 面 會 出 現 捷 徑 圖 示 。<br />
3.2 登 入 攝 影 機<br />
步 驟 1: 連 按 兩 下 桌 面 上 的<br />
圖 示 進 入 Video Viewer 控 制 面 板 。 依 據 預 設 , 控 制 面 板 右 側 會 顯<br />
示 [Address Book] 連 線 位 址 簿 畫 面 。<br />
步 驟 2: 按 輸 入 您 要 連 線 的 攝 影 機 IP 位 址 、 使 用 者 名 稱 、 密 碼 和 連 接 埠 號 。<br />
或 者<br />
按 搜 尋 可 連 線 的 攝 影 機 IP 位 址 。 之 後 會 列 出 找 到 的 位 址 。 您 可 以 按<br />
將 該 位 址 加 入 連 線 位 址 簿 。<br />
步 驟 3: 連 按 兩 下 剛 加 入 位 址 簿 的 IP 位 址 來 登 入 。Video Viewer 會 顯 示 即 時 畫 面 。<br />
4
3.3 控 制 面 板 簡 介<br />
依 據 個 人 使 用 習 慣 , 總 共 有 兩 種 控 制 面 板 可 供 選 擇 。<br />
3.3.1 簡 化 版 ( 預 設 )<br />
5
3.3.2 完 整 功 能 版<br />
3.3.3 主 要 按 鈕 簡 介<br />
簡 化 版<br />
按 鈕<br />
完 整 版<br />
功 能<br />
說 明<br />
位 址 簿<br />
按 一 下 可 顯 示 預 設 的 IP 位 址 。 您 可 以 新 增 、 移 除 或 搜 尋 要 遠 端 登 入 的 DVR<br />
IP 位 址 。<br />
其 他 控 制 功 能<br />
遠 端 設 定<br />
錄 影 設 定<br />
自 訂 設 定<br />
按 一 下 可 進 入 詳 細 的 系 統 設 定 頁 面 。 詳 情 請 參 閱<br />
第 13 頁 的 「4. 系 統 設 定 」。<br />
按 一 下 可 進 入 詳 細 的 錄 影 設 定 頁 面 。 詳 情 請 參 閱<br />
第 7 頁 的 「3.4.1 錄 影 設 定 」。<br />
按 一 下 可 選 擇 此 程 式 的 語 言 。 語 言 變 更 會 在 程 式<br />
下 次 執 行 時 生 效 。<br />
記 錄 按 一 下 可 查 看 所 有 的 事 件 和 錄 影 記 錄 、 依 日 期 搜 尋 想 要 的 記 錄 。<br />
/ / 錄 影 / 停 止 錄 影<br />
快 照<br />
按 一 下 可 開 始 / 停 止 手 動 錄 影 。<br />
若 在 [ 錄 影 設 定 ] 設 定 的 保 留 磁 碟 容 量 大 於 目 前 的 磁 碟 容 量 , 就 無 法 使 用 此<br />
功 能 。 詳 情 請 參 閱 第 7 頁 的 「3.4.1 錄 影 設 定 」。<br />
按 一 下 可 擷 取 目 前 畫 面 的 快 照 。 影 像 快 照 會 儲 存 在 “Record Setting” ( 錄 影<br />
設 定 ) 下 指 定 的 位 置 。<br />
資 訊 按 一 下 可 顯 示 目 前 的 網 路 連 線 詳 細 資 訊 。<br />
6
3.4 常 用 功 能<br />
3.4.1 錄 影 設 定<br />
若 要 遠 端 錄 影 , 按 或 → 進 入 錄 影 設 定 頁 面 。<br />
在 此 頁 面 可 以 設 定 以 下 功 能 :<br />
‧ 錄 影 類 型<br />
‧ 事 件 前 / 後 錄 影 時 間 (0~10 秒 )<br />
‧ 錄 影 時 間 設 定<br />
‧ 錄 影 檔 案 存 放 路 徑<br />
註 : 若 在 保 留 (MB) 設 定 的 保 留 磁 碟 容 量 大 於 可 用 空 間 (MB) 內 的 磁 碟 容 量 , 就 無 法 使 用 此 功 能 。<br />
若 勾 選 了 手 動 , 則 按 或 就 會 立 即 啟 動 手 動 錄 影 , 而 且 錄 影 檔 會 儲 存 在 錄 影 路 徑 指 定 的 位 置 。<br />
若 勾 選 了 位 移 偵 測 和 / 或 警 報 , 則 當 有 位 移 或 警 報 事 件 發 生 時 , 遠 端 會 立 即 啟 動 錄 影 功 能 , 而 且 錄 影 檔 會 儲 存 在 錄<br />
影 路 徑 指 定 的 位 置 。<br />
3.4.2 影 像 回 放<br />
若 要 回 放 錄 影 檔 , 請 按 或 , 然 後 選 擇 錄 影 標 籤 。 預 設 會 顯 示 所 有 的 錄 影 檔 清 單 , 您 也 可 以 依 類 型 列 出 想<br />
要 的 記 錄 來 加 快 搜 尋 的 速 度 。<br />
7
3.4.3 韌 體 升 級<br />
此 功 能 可 用 來 升 級 網 路 攝 影 機 。<br />
註 : 在 使 用 此 功 能 之 外 , 請 確 認 已 從 安 裝 商 或 經 銷 商 處 取 得 升 級 檔 案 。<br />
步 驟 1: 按 , 然 後 在 位 址 簿 選 取 您 要 連 線 的 網 路 攝 影 機 IP 位 址 。<br />
步 驟 2: 按 顯 示 更 新 伺 服 器 頁 面 。<br />
步 驟 3: 按 新 增 找 到 升 級 檔 案 。<br />
步 驟 4: 按 升 級 韌 體 即 可 開 始 升 級 韌 體 。<br />
註 : 升 級 需 要 一 些 時 間 , 請 勿 在 這 期 間 中 斷 電 源 , 否 則 升 級 可 能 會 失 敗 。 升 級 完 成 後 , 攝 影 機 會 重 新 啟 動 。<br />
步 驟 5: 選 擇 攝 影 機 的 IP 位 址 , 然 後 再 按 一 次 確 認 韌 體 版 本 是 否 有 升 級 。<br />
3.4.4 E-Map<br />
Video Viewer 同 時 也 是 一 套 中 控 系 統 (CMS) 軟 體 , 可 讓 您 同 時 管 控 高 達 16 個 網 路 裝 置 。<br />
註 : 在 使 用 此 功 能 之 前 , 請 先 確 認 Video Viewer 是 否 已 連 接 到 您 要 監 控 的 裝 置 ( 最 多 16 個 )。<br />
E-MAP 只 有 在 切 換 到 完 整 功 能 版 控 制 面 板 時 才 能 使 用 。<br />
如 何 新 增 E-MAP 群 組<br />
步 驟 1: 在 簡 化 版 控 制 面 板 下 , 按 切 換 到 完 整 功 能 版 , 然 後 按 進 入 E-MAP 頁 面 如 下 。<br />
註 : 如 需 得 知 各 按 鈕 的 位 置 , 請 參 閱 第 5 頁 的 「3.3.1 簡 化 版 ( 預 設 )」 和 第 6 頁 的 「3.3.2 完 整 功 能 版 」。<br />
8
步 驟 2: 在 左 上 區 域 按 右 鍵 顯 示 快 捷 選 單 , 然 後 選 擇 您 要 新 增 的 E-MAP 群 組 。 您 可 以 新 增 三 種 E-MAP 群 組 :<br />
Google E-MAP、 單 一 E-MAP 和 樓 層 E-MAP。<br />
9
步 驟 3: 新 增 E-MAP 群 組 後 , 您 會 看 見 左 上 區 域 出 現 一 個 樹 狀 架 構 , 顯 示 您 新 增 到 此 群 組 的 所 有 裝 置 。<br />
圖 示<br />
說 明<br />
連 接 裝 置 為 攝 影 機 。 選 取 時 會 變 成 紅 色 的 。<br />
連 接 裝 置 為 DVR。 選 取 時 會 變 成 紅 色 的 。<br />
若 發 生 位 移 或 警 報 事 件 , 此 圖 示 就 會 出 現 在 螢 幕 上 。<br />
若 需 快 速 得 知 發 生 什 麼 事 , 只 要 連 按 兩 下 E-MAP 上 的 裝 置 圖 示 , 就 會 立 即 顯 示 即 時 畫 面 。<br />
10
如 何 編 輯 / 移 除 現 有 E-MAP 群 組<br />
‣ Google E-MAP 群 組<br />
在 群 組 名 稱 上 按 右 鍵 顯 示 快 捷 選 單 , 然 後 選 擇 編 輯 E-MAP 或 移 除 E-MAP。<br />
您 也 可 以 新 增 單 一 E-MAP 群 組 ( 新 增 [ 單 一 E-MAP]) 或 樓 層 E-MAP 群 組<br />
( 新 增 [ 樓 層 E-MAP]) 到 現 有 的 Google E-MAP 群 組 中 。<br />
‣ 單 一 E-MAP 群 組<br />
在 群 組 名 稱 上 按 右 鍵 顯 示 快 捷 選 單 , 然 後 選 擇 編 輯 E-MAP 或 移 除 E-MAP。<br />
11
‣ 樓 層 E-MAP 群 組<br />
在 群 組 名 稱 上 按 右 鍵 顯 示 快 捷 選 單 , 然 後 選 擇 編 輯 [ 樓 層 E-MAP] 或 移 除<br />
E-MAP。<br />
12
4. 系 統 設 定<br />
在 使 用 此 網 路 攝 影 機 之 前 , 請 先 確 認 您 已 安 裝 随 附 的 Video Viewer 軟 體 , 並 做 好 網 路 設 定 。 如 果 還 沒 ,<br />
請 參 閱 第 4 頁 的 「3.1 安 裝 軟 體 」 或 洽 詢 您 的 安 裝 商 。<br />
註 : 在 變 更 系 統 設 定 之 前 , 建 議 您 先 洽 詢 您 的 安 裝 商 。<br />
註 : 您 必 須 具 備 管 理 者 權 限 才 能 進 入 系 統 設 定 頁 面 。 若 不 是 以 管 理 者 權 限 登 入 , 請 以 該 權 限 重 新 登 入<br />
攝 影 機 。<br />
按 , 然 後 選 擇 即 可 進 入 系 統 設 定 頁 面 。 左 側 面 板 會 顯 示 所 有 的 系 統 設 定 。<br />
主 目 錄 子 選 單 您 可 以 進 入 此 選 單 做 什 麼 ?<br />
General ( 一 般 ) 1. 查 看 攝 影 機 的 韌 體 版 本 和 MAC 位 址 。<br />
2. 變 更 攝 影 機 名 稱 。<br />
Log ( 記 錄 ) 查 看 系 統 事 件 日 誌 。<br />
Account ( 帳 號 ) 1. 建 立 具 有 不 同 存 取 權 限 的 使 用 者 帳 號 。<br />
2. 修 改 或 刪 除 現 有 使 用 者 帳 號 。<br />
OnLineUser<br />
( 連 線 使 用 者 )<br />
查 看 目 前 的 線 上 使 用 者 資 訊 。<br />
Trigger ( 觸 發 ) 1. 啟 用 / 停 用 警 報 或 位 移 偵 測 。<br />
2. 設 定 位 移 偵 測 區 域 。<br />
3. 選 擇 事 件 通 知 方 式 。<br />
Network ( 網 路 ) 設 定 網 路 連 線 。<br />
QoS 限 制 網 路 串 流 的 資 料 量 。<br />
DDNS 若 使 用 的 網 路 類 型 為 PPPOE 或 DHCP, 需 輸 入 DDNS 資 訊 。<br />
SNTP 將 攝 影 機 的 時 間 和 網 路 電 腦 系 統 同 步 化 。<br />
FTP 若 在 [General] → [Trigger] 裡 選 擇 [FTP], 需 在 此 輸 入 FTP 資 訊 。<br />
Email 若 在 [General] → [Trigger] 裡 選 擇 [Email], 需 在 此 輸 入 Email 資 訊 。<br />
Filter 選 擇 要 允 許 或 封 鎖 能 登 入 此 攝 影 機 的 IP 位 址 。<br />
UPnP 允 許 在 相 同 網 域 下 的 其 他 裝 置 能 偵 測 得 到 這 隻 攝 影 機 並 可 快 速 使 用 。<br />
Video ( 影 像 ) 設 定 影 像 解 析 度 、 畫 質 和 傳 輸 速 率 。<br />
Color ( 顏 色 ) 調 整 色 彩 效 能 。<br />
Time ( 時 間 ) 設 定 日 光 節 約 時 間 和 目 前 的 時 間 。<br />
13
4.1 General ( 一 般 )<br />
在 [General] 裡 , 您 可 以 查 看 網 路 攝 影 機 的 一 般 資 訊 , 例 如 韌 體 版 本 和 MAC 位 址 , 也 可 以 修 改 攝 影<br />
機 的 顯 示 名 稱 ( 最 多 15 個 由 字 母 + 數 字 組 成 的 字 元 )。<br />
4.1.1 Log ( 記 錄 )<br />
若 想 要 依 事 件 類 型 快 速 搜 尋 系 統 記 錄 , 請 按 下 拉 式 選 單 選 取 想 要 查 看 的 系 統 記 錄 類 型 , 然 後 按<br />
[Reload] ( 重 新 載 入 ) 更 新 顯 示 清 單 。<br />
若 要 清 除 所 有 事 件 記 錄 , 請 按 [Clear] ( 清 除 )。<br />
4.1.2 Account ( 帳 號 )<br />
您 可 以 新 增 擁 有 不 同 使 用 者 權 限 的 帳 號 , 或 者 刪 除 或 修 改 現 有 帳 號 設 定 。<br />
如 何 新 增 帳 號<br />
步 驟 1: 按 [New] ( 新 增 ), 然 後 輸 入 以 下 欄 位 。<br />
14
欄 位<br />
說 明<br />
User Name ( 使 用 者 名 稱 ) 設 定 要 用 來 登 入 攝 影 機 的 帳 號 。 帳 號 最 多 只 允 許 16 個 由 字 母 和 數 字 組 成 的 字 元 。<br />
Password ( 密 碼 ) 設 定 要 用 來 進 行 遠 端 登 入 的 密 碼 。 密 碼 最 多 只 允 許 16 個 由 字 母 和 數 字 組 成 的 字 元 。<br />
User Level ( 使 用 者 等 級 )<br />
設 定 帳 號 的 安 全 權 限 , 以 允 許 控 制 不 同 的 功 能 。 使 用 者 權 限 共 有 四 種 :Supervisor ( 管 理 者 )、Power<br />
User ( 高 級 使 用 者 )、Normal User ( 一 般 使 用 者 ) 和 Guest ( 訪 客 )。<br />
Life Time ( 連 線 時 間 ) 選 擇 此 帳 號 可 停 留 線 上 的 時 間 :1 MIN (1 分 鐘 ) / 5 MIN ( 五 分 鐘 ) / 10 MIN (10 分 鐘 ) / 1 HOUR (1 小 時 ) /<br />
1 DAY (1 天 ) / INFINITE ( 無 限 )<br />
步 驟 2: 接 著 , 按 一 下 [Apply] ( 套 用 ) 來 儲 存 設 定 與 完 成 帳 號 的 建 立 。<br />
如 何 修 改 或 刪 除 現 有 帳 號<br />
步 驟 1: 選 取 想 要 修 改 或 刪 除 的 帳 號 。<br />
步 驟 2: 若 要 修 改 帳 號 設 定 , 請 直 接 變 更 設 定 , 然 後 按 [Apply] ( 套 用 )。<br />
若 要 刪 除 帳 號 , 請 按 [Delete] ( 刪 除 )。<br />
註 : 若 帳 號 清 單 中 只 有 一 個 帳 號 , 則 無 法 刪 除 該 帳 號 。<br />
15
4.1.3 OnLineUser ( 連 線 使 用 者 )<br />
您 可 以 查 看 目 前 連 線 到 此 攝 影 機 的 使 用 者 與 其 連 線 資 訊 。 若 要 更 新 清 單 , 請 按 [Refresh] ( 更 新 )。<br />
4.1.4 Trigger ( 觸 發 )<br />
您 可 以 在 此 設 定 位 移 或 警 報 偵 測 , 並 選 擇 想 要 的 通 知 方 式 。<br />
<br />
觸 發 設 定<br />
您 可 以 選 擇 要 啟 用 或 停 用 警 報 或 位 移 偵 測 。<br />
項 目<br />
說 明<br />
Alarm ( 警 報 ) 選 擇 要 啟 用 或 停 用 警 報 功 能 。<br />
Motion ( 位 移 偵 測 )<br />
選 擇 要 啟 用 或 停 用 位 移 偵 測 功 能 。<br />
‧ 位 移 偵 測 區 域 設 定<br />
選 取 [Enable] ( 啟 用 ) 後 , 按 [Setting] ( 設 定 ) 進 入 位 移 偵 測 區 域 頁 面 如 下 :<br />
Sensitivity ( 敏 感 度 ):<br />
設 定 偵 測 敏 感 度 :High ( 高 ) / Normal ( 一 般 ) / Low ( 低 )。<br />
區 域 設 定 :<br />
使 用 電 腦 滑 鼠 設 定 位 移 偵 測 區 域 。 粉 紅 色 格 子 代 表 未 被 偵 測 的 區 域 , 而 透 明 的 格 子 代 表 有 偵 測 的 區 域 。 您 可 以 設<br />
定 多 個 偵 測 區 域 。<br />
按 “-” ( 全 部 清 除 ) 清 除 先 前 選 擇 的 偵 測 區 域 , 變 成 全 部 不 偵 測 。<br />
按 “+” ( 全 選 ) 選 取 全 區 域 進 行 偵 測 。<br />
Duration ( 持 續 時 間 ) 設 定 觸 發 時 的 錄 影 時 間 (5 / 10 / 20 / 40 秒 )。<br />
16
通 知 設 定<br />
您 可 以 選 擇 在 發 生 警 報 或 位 移 事 件 時 , 要 啟 用 E-mail 和 / 或 FTP 通 知 。<br />
項 目<br />
Method ( 方 式 )<br />
說 明<br />
‧Email<br />
勾 選 此 選 項 後 , 網 路 攝 影 機 就 會 在 發 生 位 移 或 警 報 事 件 時 , 上 傳 事 件 影 片 到 指 定 的 電 子 信 箱 。<br />
‧FTP<br />
勾 選 此 選 項 後 , 網 路 攝 影 機 就 會 在 發 生 位 移 或 警 報 事 件 時 , 上 傳 事 件 影 片 到 指 定 的 FTP 位 置 。<br />
Video Type ( 影 像 類 型 ) 選 擇 通 知 檔 案 的 類 型 :H264 ( 影 像 ) / MPEG4 ( 影 像 ) / JPEG ( 照 片 ).<br />
Total ( 總 時 間 ) 設 定 影 片 片 段 的 錄 影 時 間 (1 ~ 5 秒 )。<br />
4.2 Network ( 網 路 )<br />
視 您 的 網 路 環 境 而 定 , 進 入 [Network] ( 網 路 ) 來 設 定 網 路 。 共 支 援 3 種 網 路 連 線 類 型 :<br />
Static IP ( 固 定 IP)、PPPOE 和 DHCP。<br />
註 : 此 攝 影 機 不 支 援 POE 路 由 器 或 hub 集 線 器 。<br />
Static IP ( 固 定 IP):<br />
a) 輸 入 從 您 的 網 際 網 路 供 應 商 取 得 的 [Server IP] ( 伺 服 器 IP)、[Gateway] ( 閘 道 ) 和 [NetMask] ( 網 路<br />
遮 罩 ) 資 訊 。<br />
b) 輸 入 埠 號 。 有 效 數 值 範 圍 為 1 到 9999。 預 設 值 為 80。 一 般 而 言 ,HTTP 所 使 用 的 TCP 埠 多 半 為 80<br />
埠 。 然 而 有 些 情 形 下 , 建 議 您 最 好 變 更 此 埠 值 以 增 加 彈 性 或 安 全 性 。<br />
c) 按 [Apply] ( 套 用 ), 然 後 按 [OK] ( 確 定 ) 退 出 設 定 頁 面 。<br />
PPPOE:<br />
a) 進 入 [Network] [DDNS], 然 後 從 [System Name] ( 系 統 名 稱 ) 下 拉 式 清 單 選 擇 [default]。<br />
b) 在 [Hostname] 裡 , 您 可 以 保 留 預 設 值 ( 即 此 攝 影 機 的 MAC 位 址 ), 或 者 更 改 成 更 好 記 的 名 稱 。<br />
c) 記 下 攝 影 機 的 完 整 位 址 , 例 如 :MAC000E530D93E3.ddns.dvrtw.com.tw。<br />
註 : 您 也 可 以 從 提 供 免 費 DDNS 服 務 的 網 站 新 增 一 個 DDNS 帳 號 。 詳 情 請 參 閱 安 裝 指 南 的 「 附 錄 1」。<br />
d) 進 入 [Network], 然 後 選 擇 [PPPOE]。 然 後 , 輸 入 從 您 的 網 際 網 路 供 應 商 取 得 的 使 用 者 名 稱 和 密 碼 。<br />
17
e) 按 [Apply] ( 套 用 ), 然 後 按 [OK] ( 確 定 ) 退 出 設 定 頁 面 。<br />
DHCP:<br />
a) 完 成 DHCP 路 由 器 設 定 。<br />
將 路 由 器 透 過 電 腦 連 到 網 路 ( 透 過 固 定 IP 或 PPPoE 設 定 )。 不 同 的 路 由 器 有 不 同 的 設 定 方 式 。 請 參<br />
閱 其 各 自 的 使 用 說 明 書 。<br />
b) 進 入 [Network] [DDNS], 然 後 從 [System Name] ( 系 統 名 稱 ) 下 拉 式 清 單 選 擇 [default]。<br />
c) 在 [Hostname] 裡 , 您 可 以 保 留 預 設 值 ( 即 此 攝 影 機 的 MAC 位 址 ), 或 者 更 改 成 更 好 記 的 名 稱 。<br />
d) 記 下 攝 影 機 的 完 整 位 址 , 例 如 :MAC000E530D93E3.ddns.dvrtw.com.tw。<br />
註 : 您 也 可 以 從 提 供 免 費 DDNS 服 務 的 網 站 新 增 一 個 DDNS 帳 號 。 詳 情 請 參 閱 安 裝 指 南 的 「 附 錄 1」。<br />
e) 進 入 [Network], 然 後 選 擇 [DHCP]。<br />
f) 按 [Apply] ( 套 用 ), 然 後 按 [OK] ( 確 定 ) 退 出 設 定 頁 面 。<br />
步 驟 3: 中 斷 攝 影 機 和 電 腦 連 接 , 然 後 將 它 們 分 別 連 線 上 網 。<br />
步 驟 4: 在 Video Viewer 的<br />
新 增 攝 影 機 的 IP 位 址 或 主 機 名 稱 , 並 輸 入 正 確 的 使 用 者 名 稱 和<br />
密 碼 , 再 連 按 兩 下 確 認 是 否 能 登 入 攝 影 機 。<br />
18
4.2.1 QoS<br />
QoS (Quality of Service) 為 控 制 即 時 網 路 傳 輸 資 料 量 的 功 能 。 若 您 的 網 路 頻 寬 已 不 足 而 且 還 需 分<br />
給 其 他 裝 置 使 用 , 就 適 合 使 用 此 功 能 。<br />
勾 選 [QoS Enable] ( 啟 動 頻 寬 限 制 ), 然 後 設 定 最 大 上 傳 率 ( 介 於 256 到 10240 kbps 之 間 )。<br />
4.2.2 SNTP<br />
SNTP ( 網 路 對 時 ) 是 用 來 同 步 化 攝 影 機 和 網 路 電 腦 系 統 的 時 間 。<br />
功 能<br />
說 明<br />
GMT 只 要 選 好 時 區 , 網 路 攝 影 機 就 會 自 動 調 整 系 統 的 本 機 時 間 。<br />
Server Name ( 伺 服 器 名 稱 )<br />
您 可 以 選 擇 保 留 預 設 的 SNTP 伺 服 器 ( 例 如 ,tock.stdtime.gov.tw), 或 者 改 成 您<br />
知 道 的 其 他 伺 服 器 。<br />
Sync. Period ( 時 間 校 正 頻 率 ) 選 擇 [Daily] 每 天 同 步 攝 影 機 和 網 路 的 時 間 , 或 選 擇 [None] 關 閉 此 功 能 。<br />
Sync Server Time ( 同 步 化 伺 服 器 時 間 ) 按 此 按 鈕 後 , 網 路 攝 影 機 的 時 間 即 會 與 網 路 時 間 同 步 。<br />
4.2.3 FTP<br />
輸 入 詳 細 的 FTP 資 訊 , 然 後 按 [Apply] ( 套 用 ) 確 認 。 在 [General] → [Trigger] 選 取 [FTP] 時 ,<br />
則 會 套 用 設 定 於 此 的 功 能 。<br />
19
4.2.4 Email<br />
輸 入 詳 細 的 電 子 郵 件 資 訊 , 然 後 按 [Apply] ( 套 用 ) 確 認 。 在 [General] → [Trigger] 選 取 [Email]<br />
時 , 則 會 套 用 設 定 於 此 的 功 能 。<br />
功 能<br />
說 明<br />
Server ( 伺 服 器 ) 輸 入 您 從 電 子 郵 件 系 統 供 應 商 取 得 的 SMTP 伺 服 器 位 址 。<br />
Mail From ( 寄 信 者 ) 輸 入 完 整 的 電 子 郵 件 位 址 , 以 確 保 電 子 郵 件 不 會 被 SMTP 封 鎖 。<br />
Verify Password ( 密 碼 驗 證 ) 有 些 郵 件 伺 服 器 需 要 驗 證 密 碼 。 請 輸 入 「 帳 號 」 和 「 密 碼 」。<br />
Email Address ( 郵 件 位 址 ) 新 增 指 定 收 信 方 的 電 子 郵 件 位 址 。<br />
4.2.5 Filter<br />
選 擇 要 允 許 或 封 鎖 能 登 入 此 攝 影 機 的 IP 位 址 。<br />
功 能<br />
Error Login Count ( 錯 誤 次 數 )<br />
說 明<br />
設 定 登 入 失 敗 的 最 大 可 接 收 次 數 。 登 入 失 敗 次 數 達 到 設 定 上 限 後 , 該 IP 位 址 就 會 被 封<br />
鎖 。<br />
Error Lock Time ( 錯 誤 封 鎖 時 間 ) 設 定 被 封 鎖 的 IP 位 址 , 要 被 封 鎖 多 久 時 間 。<br />
Echo Request ( 要 求 回 覆 )<br />
選 擇 [Non-Block] 讓 其 他 使 用 者 可 以 ping 到 此 網 路 攝 影 機 的 IP 位 址 , 而 選 擇 [Block]<br />
則 可 拒 絕 回 覆 ping 指 令 。<br />
Filter ( 過 濾 ) 選 擇 要 啟 用 (YES) 或 停 用 (NO) IP 位 址 過 濾 功 能 。<br />
若 選 擇 [YES] ( 是 ), 請 確 認 要 允 許 或 封 鎖 指 定 的 IP 位 址 。<br />
‧ 若 要 新 增 IP 位 址 , 請 在 [IP Address] (IP 位 址 ) 輸 入 IP 位 址 , 然 後 按 [Add] ( 新 增 )。<br />
‧ 若 要 刪 除 現 有 IP 位 址 , 先 點 選 要 刪 除 的 位 址 , 然 後 按 [Delete] ( 刪 除 )。<br />
Apply ( 套 用 ) 確 認 設 定 無 誤 後 , 按 [Apply] ( 套 用 ) 讓 變 更 生 效 , 否 則 系 統 就 不 會 記 錄 此 設 定 變 更 。<br />
20
4.2.6 UPnP<br />
UPnP 為 Universal Plug and Play ( 通 用 隨 插 即 用 ) 的 縮 寫 , 即 允 許 此 裝 置 可 以 在 家 用 與 企 業 的 網<br />
路 環 境 中 被 偵 測 與 使 用 , 且 可 簡 化 安 裝 與 設 定 流 程 。<br />
勾 選 [Enable UPnP] ( 啟 用 UPnP) 後 , 此 網 路 攝 影 機 就 可 以 被 位 在 同 一 網 域 的 其 他 裝 置 偵 測 到 。<br />
而 且 , 您 還 可 在 [Friendly name] ( 網 路 電 腦 名 稱 ) 處 為 此 攝 影 機 設 定 一 個 好 記 的 名 稱 。<br />
啟 用 此 功 能 後 , 其 他 與 此 攝 影 機 位 在 相 同 網 域 下 的 電 腦 就 可 在 [Network Neighbor] ( 網 路 上 的 芳<br />
鄰 ) 看 到 此 攝 影 機 , 名 稱 即 為 您 在 [Friendly name] ( 網 路 電 腦 名 稱 ) 設 定 的 名 稱 。 連 按 兩 下 找 到<br />
的 攝 影 機 , 即 可 快 速 開 啟 網 路 瀏 覽 器 並 進 入 登 入 頁 面 。<br />
如 需 使 用 網 路 瀏 覽 器 登 入 網 路 攝 影 機 的 詳 細 資 訊 , 請 參 閱 第 23 頁 的 「5. 透 過 網 路 瀏 覽 器 來 登 入<br />
攝 影 機 」。<br />
4.3 Video ( 影 像 )<br />
設 定 影 像 解 析 度 、 畫 質 和 傳 輸 速 率 。<br />
項 目<br />
說 明<br />
JPEG / MPEG / H264 選 擇 影 像 解 析 度 和 畫 質 。<br />
影 像 解 析 度 :CIF / 4CIF<br />
影 像 品 質 :BEST / HIGH / NORMAL / LOW ( 最 佳 / 高 / 一 般 / 基 本 )<br />
Frame Rate (Frame 速 率 ) 可 以 在 此 調 整 每 台 攝 影 機 的 Frame 速 度 , 以 符 合 網 路 頻 寬 。<br />
設 定 影 像 傳 輸 速 率 全 開 (FULL / 全 速 ), 或 者 指 定 傳 輸 速 率 (1/2、1/3、1/4、1/5、1/10、1/15、1/20、<br />
1/25、1/30)。<br />
實 際 的 Frame 速 度 必 須 視 實 際 網 路 連 線 而 定 , 而 且 可 能 會 低 於 指 定 速 度 。<br />
21
4.4 Color ( 顏 色 )<br />
調 整 色 彩 效 能 :Brightness ( 亮 度 )、Contract ( 對 比 度 )、Hue ( 色 度 ) 和 Saturation ( 飽 和 度 )。 按 住 滑 桿<br />
做 調 整 即 可 預 覽 色 彩 變 更 。 確 認 後 , 按 [Apply] ( 套 用 )。<br />
若 要 回 復 預 設 值 , 請 按 [Default] ( 預 設 值 ), 然 後 按 [Apply] ( 套 用 ) 確 認 變 更 。<br />
4.5 Time ( 時 間 )<br />
設 定 日 光 節 約 時 間 和 目 前 的 時 間 。<br />
功 能<br />
說 明<br />
Daylight Saving ( 日 光 節 約 ) 選 擇 是 否 要 開 啟 日 光 節 約 功 能 :ON ( 開 啟 ) / OFF ( 關 閉 )。<br />
Time ( 時 間 ) 設 定 目 前 的 時 間 。<br />
若 啟 動 了 此 功 能 , 請 設 定 開 始 和 結 束 時 間 , 並 調 整 日 光 節 約 時 間 , 以 小 時 為 單 位 。<br />
22
5. 透 過 網 路 瀏 覽 器 來 登 入 攝 影 機<br />
使 用 者 也 可 透 過 網 路 瀏 覽 器 來 登 入 網 路 攝 影 機 ,<br />
但 僅 限 單 隻 登 入 。 若 使 用 者 想 在 一 個 介 面 同 看 到 多 隻 攝 影 機 畫 面 , 建 議 請 改 使 用 隨 附 產 品 提 供 的 Video<br />
Viewer CMS 軟 體 。 詳 情 請 參 閱 第 4 頁 的 「3. 透 過 VIDEO VIEWER 登 入 攝 影 機 」。<br />
• 若 要 得 知 如 何 登 入 攝 影 機 , 請 參 閱 第 23 頁 的 「5.1 登 入 攝 影 機 」。<br />
• 若 要 得 知 即 時 畫 面 的 解 說 , 請 參 閱 第 24 頁 的 「5.2.1 即 時 畫 面 」。<br />
• 若 要 得 知 系 統 設 定 的 解 說 , 請 參 閱 第 24 頁 的 「5.2.2 系 統 設 定 畫 面 」。<br />
• 若 要 得 知 將 錄 影 資 料 儲 存 到 USB 隨 身 碟 的 解 說 , 請 參 閱 第 26 頁 的 「5.3 儲 存 錄 影 資 料 到 USB 隨 身 碟 」。<br />
5.1 登 入 攝 影 機<br />
步 驟 1: 開 啟 您 的 網 路 瀏 覽 器 , 然 後 在 位 址 列 輸 入 http://IP 位 址 : 埠 號 。<br />
舉 例 來 說 , 若 IP 位 址 為 60.121.46.236 且 埠 號 為 888, 請 在 URL 網 址 列 中 輸 入<br />
http://60.121.46.236:888, 然 後 按 Enter。<br />
步 驟 2: 在 登 入 頁 面 中 , 輸 入 預 設 的 使 用 者 名 稱 和 密 碼 , 然 後 輸 入 下 圖 顯 示 的 驗 證 碼 。 接 著 , 按 [LOGIN]<br />
登 入 。<br />
步 驟 3: 登 入 成 功 後 , 會 出 現 與 下 圖 類 似 的 畫 面 。<br />
23
5.2 控 制 面 板 簡 介<br />
5.2.1 即 時 畫 面<br />
功 能 圖 示 使 用 者 等 級 說 明<br />
Media Type<br />
( 媒 體 類 型 )<br />
Video Quality<br />
( 影 像 畫 質 )<br />
Video Resolution<br />
( 影 像 解 析 度 )<br />
聲 音 切 換<br />
快 照<br />
-- Supervisor ( 管 理 者 )、Power User ( 高<br />
級 使 用 者 )、Normal User ( 一 般 使 用 者 )<br />
和 Guest ( 訪 客 )<br />
-- Supervisor ( 管 理 者 )、Power User ( 高<br />
級 使 用 者 ) 和 Normal User ( 一 般 使 用 者 )<br />
Supervisor ( 管 理 者 )、Power User ( 高<br />
級 使 用 者 ) 和 Normal User ( 一 般 使 用 者 )<br />
Supervisor ( 管 理 者 )、Power User ( 高<br />
級 使 用 者 ) 和 Normal User ( 一 般 使 用 者 )<br />
Supervisor ( 管 理 者 )、Power User ( 高<br />
級 使 用 者 ) 和 Normal User ( 一 般 使 用 者 )<br />
從 下 拉 式 清 單 選 擇 網 路 傳 輸 格 式 :<br />
H.264 / MPEG-4 / Motion JPEG / QuickTime<br />
若 為 使 用 Mozilla Firefox 的 使 用 者 , 則 只 能 選 擇<br />
QuickTime。<br />
QuickTime 是 Apple 公 司 的 多 媒 體 播 放 軟 體 。<br />
在 選 取 QuickTime 之 前 , 您 必 須 先 將 QuickTime<br />
安 裝 到 您 的 作 業 系 統 。 選 取 QuickTime 後 , 系<br />
統 會 提 示 您 輸 入 使 用 者 名 稱 和 密 碼 來 登 入 攝 影<br />
機 。<br />
按 住 並 拖 曳 滑 桿 來 選 取 影 像 畫 質 :<br />
Basic ( 基 本 ) / Normal ( 一 般 ) / High ( 高 ) / Best<br />
( 最 佳 )。<br />
從 下 拉 式 選 單 選 取 影 像 解 析 度 :4CIF / CIF。<br />
按 此 鈕 來 開 啟 或 關 閉 聲 音 功 能 。<br />
按 此 鈕 可 擷 取 目 前 畫 面 的 快 照 , 並 開 啟 另 一 個 瀏<br />
覽 器 視 窗 顯 示 擷 取 的 影 像 。<br />
影 像 翻 轉<br />
Supervisor ( 管 理 者 )、Power User ( 高<br />
級 使 用 者 ) 和 Normal User ( 一 般 使 用 者 )<br />
按 此 鈕 可 逆 時 鐘 180 0<br />
旋 轉 影 像 。<br />
全 螢 幕<br />
Supervisor ( 管 理 者 )、Power User ( 高<br />
級 使 用 者 ) 和 Normal User ( 一 般 使 用 者 )<br />
按 此 鈕 來 全 螢 幕 顯 示 影 像 。<br />
5.2.2 系 統 設 定 畫 面<br />
按 [Configuration] ( 系 統 設 定 ) 以 進 入 設 定 頁 面 。<br />
註 : 您 必 須 具 備 管 理 者 權 限 才 能 進 入 系 統 設 定 頁 面 。 若 不 是 以 管 理 者 權 限 登 入 , 請 以 該 權 限 重 新 登 入<br />
攝 影 機 。<br />
系 統 設 定 選 項 分 成 三 個 主 要 目 錄 選 單 :Network ( 網 路 )、Camera ( 攝 影 機 ) 和 General ( 一 般 )。<br />
• 如 需 得 知 Network ( 網 路 ) 的 相 關 資 訊 , 請 參 閱 第 17 頁 的 「4.2 Network ( 網 路 )」。<br />
24
• 如 需 得 知 Camera ( 攝 影 機 ) 的 相 關 資 訊 , 請 參 閱 第 22 頁 的 「4.4 Color ( 顏 色 )」 和 第 22 頁 的 「4.5 Time<br />
( 時 間 )」。<br />
• 如 需 得 知 General ( 一 般 ) 的 相 關 資 訊 , 請 參 閱 第 14 頁 的 「4.1 General ( 一 般 )」 和 第 21 頁 的 「4.3 Video<br />
( 影 像 )」。<br />
25
主 目 錄 子 選 單 參 照<br />
Network ( 網 路 ) Network ( 網 路 ) <strong>Remote</strong> Config ( 遠 端 設 定 ) Network ( 網 路 )<br />
QoS<br />
<strong>Remote</strong> Config ( 遠 端 設 定 ) Network ( 網 路 ) QoS<br />
Wireless ( 無 線 ) 詳 情 請 參 閱 安 裝 指 南 的 「 附 錄 2」。<br />
DDNS<br />
SNTP<br />
FTP<br />
Mail<br />
Filter<br />
UPnP<br />
<strong>Remote</strong> Config ( 遠 端 設 定 ) Network ( 網 路 ) DDNS<br />
<strong>Remote</strong> Config ( 遠 端 設 定 ) Network ( 網 路 ) SNTP<br />
<strong>Remote</strong> Config ( 遠 端 設 定 ) Network ( 網 路 ) FTP<br />
<strong>Remote</strong> Config ( 遠 端 設 定 ) Network ( 網 路 ) Email<br />
<strong>Remote</strong> Config ( 遠 端 設 定 ) Network ( 網 路 ) Filter<br />
<strong>Remote</strong> Config ( 遠 端 設 定 ) Network ( 網 路 ) UPnP<br />
Camera ( 攝 影 機 ) Color ( 顏 色 ) <strong>Remote</strong> Config ( 遠 端 設 定 ) Color ( 顏 色 )<br />
Time ( 時 間 ) <strong>Remote</strong> Config ( 遠 端 設 定 ) Time ( 時 間 )<br />
General ( 一 般 ) General ( 一 般 ) Custom Setting ( 自 訂 設 定 )<br />
Server Log<br />
( 伺 服 器 記 錄 )<br />
<strong>Remote</strong> Config ( 遠 端 設 定 ) General ( 一 般 ) Log ( 記 錄 )<br />
Login ( 登 入 ) <strong>Remote</strong> Config ( 遠 端 設 定 ) General ( 一 般 ) Account ( 帳 號 )<br />
Account ( 帳 號 ) <strong>Remote</strong> Config ( 遠 端 設 定 ) General ( 一 般 ) Account ( 帳 號 )<br />
Trigger ( 觸 發 ) <strong>Remote</strong> Config ( 遠 端 設 定 ) General ( 一 般 ) Trigger ( 觸 發 )<br />
Video ( 影 像 ) <strong>Remote</strong> Config ( 遠 端 設 定 ) Video ( 影 像 )<br />
Google Maps<br />
(Google 地 圖 )<br />
Upgrade ( 升 級 )<br />
讓 使 用 者 大 致 知 道 網 路 攝 影 機 安 裝 的 地 點 。<br />
系 統 會 通 知 您 先 申 請 一 組 Google 地 圖 密 碼 ( 若 沒 申 請 過 )。 請 遵 照 以 下 指 示 進<br />
行 申 請 :<br />
1. 按 [Sign up for a Google Maps key] 以 進 入 申 請 頁 面 。<br />
2. 確 認 申 請 前 需 遵 守 的 條 款 與 條 約 , 然 後 輸 入 網 路 攝 影 機 的 IP 位 址 。 然 後<br />
按 [Generate API Key]。<br />
3. 複 製 系 統 自 動 產 生 的 API 密 碼 , 然 後 按 [Update Google Maps Key] 貼<br />
上 。<br />
<br />
詳 情 請 參 閱 第 8 頁 的 「3.4.3 韌 體 升 級 」。<br />
5.3 儲 存 錄 影 資 料 到 USB 隨 身 碟<br />
除 了 將 錄 影 資 料 儲 存 在 電 腦 裡 之 外 , 此 網 路 攝 影 機 還 支 援 將 資 料 儲 存 到 插 入 攝 影 機 的 相 容 USB<br />
隨 身 碟 。<br />
5.3.1 在 使 用 此 功 能 之 前<br />
• 此 功 能 和 無 線 連 線 功 能 無 法 併 存 使 用 , 因 為 本 裝 置 只 有 一 個 USB 埠 。<br />
• 此 裝 置 不 支 援 USB 熱 插 拔 。 在 攝 影 機 上 電 之 前 , 請 先 確 認 您 要 插 入 的 USB 隨 身 碟 已 接 妥 。 若 欲 得<br />
知 相 容 的 USB 隨 身 碟 品 牌 , 請 參 閱 第 30 頁 的 「 附 錄 2 相 容 USB 隨 身 碟 品 牌 」。<br />
• 確 認 已 啟 動 您 要 的 錄 影 功 能 ( 手 動 / 位 移 / 預 約 / 警 報 )。<br />
• 錄 影 資 料 是 儲 存 在 EXT3 檔 案 系 統 上 , 無 法 直 接 從 電 腦 讀 取 。 若 要 讀 取 、 回 放 和 下 載 錄 影 資 料 , 請 先<br />
從 網 路 瀏 覽 器 登 入 攝 影 機 。 詳 情 請 參 閱 以 下 各 節 說 明 。<br />
26
5.3.2 即 時 畫 面<br />
攝 影 機 正 確 偵 測 到 USB 隨 身 碟 後 , 您 會 看 到 類 似 以 下 的 畫 面 :<br />
5.3.3 USB 隨 身 碟 狀 態<br />
按 [Configuration] ( 設 定 ) [USB] 進 入 USB 隨 身 碟 頁 面 , 即 可 查 看 連 接 USB 隨 身 碟 的 可 用 空<br />
間 、 進 行 格 式 化 , 或 者 從 攝 影 機 移 除 。<br />
註 : 您 必 須 具 備 管 理 者 權 限 才 能 進 入 系 統 設 定 頁 面 。 若 不 是 以 管 理 者 權 限 登 入 , 請 以 該 權 限 重 新 登 入<br />
攝 影 機 。<br />
27
5.3.4 錄 影 資 料 回 放 和 下 載<br />
按 [Playback] ( 回 放 ) 進 入 回 放 畫 面 , 即 可 搜 尋 或 選 取 要 回 放 的 事 件 , 並 同 時 下 載 資 料 到 電 腦 。<br />
28
附 錄 1 規 格<br />
▓ 網 路<br />
LAN 埠<br />
LAN 速 度<br />
支 援 的 協 定<br />
USB 埠<br />
無 線 功 能 ( 選 用 )<br />
一 般 解 型 號<br />
是<br />
10/100 Based-T Ethernet<br />
高 解 型 號<br />
DDNS、DNS、PPPoE、DHCP、NTP、SNTP、TCP/IP、UDP<br />
ICMP、SMTP、FTP、HTTP、RTP、RTSP<br />
可 連 接 到 選 購 的 無 線 接 收 器 或 USB 隨 身 碟<br />
(1) 支 援 802.11 n/b/g 無 線 接 收 器 (WU5214)<br />
(2) Ad-Hoc 和 infrastructure 模 式<br />
(3) WPS 和 Push Button Config<br />
傳 輸 速 度 NTSC:30 / PAL: 25<br />
線 上 使 用 者 人 數 10<br />
安 全 性 設 定<br />
網 路 管 理<br />
▓ 影 音<br />
影 像 壓 縮 格 式<br />
遠 端 控 制 影 像<br />
影 像 調 整<br />
手 機 監 控<br />
聲 音 壓 縮 格 式<br />
聲 音 輸 入<br />
聲 音 輸 出<br />
▓ 攝 影 機<br />
支 援 多 種 使 用 者 權 限 設 定<br />
WEP 64/128 bit、WPA-PSK、WPA2-PSK<br />
(1) 隨 附 的 Video Viewer 軟 體 , 最 多 可 同 時 管 控 16 支 網 路 攝 影 機<br />
(2) 網 路 瀏 覽 器 使 用 AJAX 管 理 使 用 介 面<br />
H.264 / MPEG4 / MJPEG<br />
是<br />
Brightness、Contrast、Saturation 和 Hue<br />
支 援 3GPP 手 機 監 控<br />
ULaw, 128kbps<br />
內 建 麥 克 風 、 外 接 麥 克 風<br />
影 像 感 測 器 1/3” CCD 1/3” 高 解 CCD<br />
像 素<br />
鏡 頭<br />
NTSC:512(H) x 492(V) / PAL:<br />
512(H) x 582(V)<br />
是<br />
f4.6mm<br />
F 值 F1.9<br />
角 度 60°<br />
快 門 速 度<br />
IR LED<br />
最 低 照 度<br />
影 像 輸 出<br />
背 光 補 償 (BLC)<br />
白 平 衡<br />
▓ Others<br />
遠 端 控 制<br />
位 移 偵 測<br />
警 報 與 事 件 通 知<br />
輸 入 / 輸 出<br />
電 源<br />
1 / 60 (1/50) to 1 / 100,000 sec<br />
是<br />
0 Lux (10m IR ON)<br />
1.0 Vp-p. 75Ω<br />
AUTO<br />
ATW<br />
是<br />
是<br />
NTSC:768(H) x 494(V) / PAL:<br />
752(H) x 582(V)<br />
可 設 定 影 像 上 傳 到 FTP 和 / 或 電 子 郵 件 位 址<br />
警 報 輸 入 x1<br />
DC 12V / 1A<br />
操 作 溫 度 0~40℃<br />
溼 度 85%<br />
網 路 瀏 覽 最 低 設 備 需 求<br />
‧ Pentium 4 CPU 1.3 GHz 或 更 高 , 或 同 等 級 AMD<br />
‧ 256 MB RAM<br />
‧ AGP 圖 形 介 面 卡 、Direct Draw、32MB RAM<br />
‧ Windows Vista、XP、Windows 2000 Server、ME、98、DirectX 9.0<br />
或 更 新 版 本<br />
‧ Internet Explorer 6.x 或 更 新 版 本<br />
尺 寸 (mm)** 152.5(L) x 115.2(W) x 40.2(H) (6.00” x 4.54” x 1.58”)<br />
總 重 量<br />
室 內 / 戶 外 用<br />
* 規 格 變 動 以 實 際 產 品 為 準 , 將 不 另 行 通 知 。<br />
** 尺 寸 誤 差 範 圍 :(± 5mm)<br />
812g (1.79 lbs)<br />
內 含 支 架 和 電 源 供 應 器<br />
室 內 用<br />
29
附 錄 2 相 容 USB 隨 身 碟 品 牌<br />
品 牌 名 稱 型 號 容 量<br />
Transcend JFV35 4G<br />
JFV30<br />
8G<br />
Kingston DataTraveler 1G<br />
PQI U172P 4G<br />
Apacer AH320 2GB<br />
AH320A<br />
8GB<br />
AH220<br />
1GB<br />
AH320<br />
4GB<br />
A-data RB-18 1GB<br />
Sandisk Cruzer Micro 2G<br />
Cruzer Micro<br />
4G<br />
Cruzer4-pk<br />
2G<br />
Netac U208 1G<br />
MSI F200 4G<br />
SONY Micro Vault Tiny 2G 2G<br />
Micro Vault Tiny 4G<br />
4G<br />
Micro Vault Tiny<br />
1G<br />
30
Telecamera IP H.264<br />
Day&Night<br />
MANUALE D’USO<br />
Leggere accuratamente le istruzioni prima dell’uso e conservarle per riferimenti futuri.<br />
Italian_N204_212_system_V1.0
IMPORTANTI ISTRUZIONI DI SICUREZZA<br />
Tutti i prodotti senza piombo forniti dall’azienda sono conformi ai requisiti delle Leggi<br />
Europee in materia di restrizione dell’uso di determinate sostanze pericolose all’interno<br />
delle apparecchiature elettriche ed elettroniche (RoHS), questo significa che le nostre<br />
procedure di produzione ed in nostri prodotti sono rigorosamente “senza piombo” e privi<br />
delle sostanze citate nella Direttiva.<br />
Il simbolo del bidone della spazzatura annullato da una croce, indica che all’interno<br />
dell’Unione Europea il prodotto deve essere smaltito separatamente dai rifiuti urbani al<br />
termine della sua durata utile. Questo vale per il prodotto e per tutte le periferiche marcate<br />
con questo simbolo. Non smaltire questi prodotti indistintamente insieme ai rifiuti urbani.<br />
Contattare il proprio rivenditore locale per le procedure di riciclaggio dell’apparecchio.<br />
Limitazione delle responsabilità<br />
Ci riserviamo il diritto di rivedere o rimuovere, in qualsiasi momento, qualsiasi contenuto di questo<br />
manuale. Non facciamo garanzie, né ci assumiamo alcuna responsabilità legale nei riguardi dell’accuratezza,<br />
completezza o utilità di questo manuale. I contenuti di questo manuale sono soggetti a modifica senza<br />
preavviso.<br />
Messa a terra<br />
Questo è un prodotto di sicurezza di Classe 1 (dotato di messa a terra protettiva incorporata nel cavo<br />
d’alimentazione). La spina elettrica deve essere inserita esclusivamente in una presa di corrente dotata di<br />
contatto di messa a terra. Qualsiasi interruzione del conduttore protettivo, all’interno o all’esterno dello<br />
strumento, lo renderà pericoloso. L’interruzione intenzionale è proibita.<br />
Acqua e Umidità<br />
Non esporre questo prodotto a gocciolamenti o spruzzi; inoltre, sul prodotto non devono essere collocati<br />
oggetti riempiti con liquidi, come vasi.<br />
Informazioni sui Marchi<br />
Internet Explorer, Microsoft, Windows, Mozilla & QuickTime sono marchi registrati dai rispettivi<br />
proprietari.<br />
Licenza MPEG4<br />
QUESTO PRODOTTO È SOTTO LA LICENZA DEL PORTAFOGLIO LICENZE DI BREVETTI MPEG-4<br />
VISUAL PER USO PERSONALE NON COMMERCIALE DEGLI UTENTI PER LA (i) CODIFICA VIDEO IN<br />
CONFORMITÀ ALLO STANDARD MPEG-4 VISUAL (“VIDEO MPEG-4”) E/O (ii) LA DECODIFICA VIDEO<br />
MPEG-4 CHE È STATO CODIFICATO DA UN UTENTE IMPEGNATO IN UNA ATTIVITÀ PERSONALE E<br />
NON COMMERCIALE E/O CHE È STATO OTTENUTO DA UN FORNITORE VIDEO AUTORIZZATO DA<br />
MPEG LA A FORNIRE VIDEO MPEG-4. NESSUNA ALTRA LICENZA E GARANTITA, NE DEVE<br />
CONSIDERASI IMPLICITA, PER QUALSIASI ALTRO USO. ALTRE INFORMAZIONI, INCLUDENDO<br />
QUELLE RELATIVE AD USI PROMOZIONALI INTERNI E COMMERCIALI ED ALLE CONCESSIONI DI<br />
LICENZA, POSSONO ESSERE OTTENUTE DALLA MPEG LA, LLC. VISITARE IL SITO<br />
HTTP://WWW.MPEGLA.COM.<br />
Licenza GPL<br />
Versione<br />
Questo prodotto contiene codici che sono sviluppati da Terze Parti e che sono soggette a GNU<br />
General Public License (“GPL”) o a GNU Lesser Public Licence (“LGPL”).<br />
Il codice GPL utilizzato in questo prodotto viene rilasciato senza alcuna garanzia ed è soggetto al<br />
copyright dell’autore.<br />
Ulteriori codici sorgente soggetti a licenze GPL, sono disponibili su richiesta.<br />
Siamo lieti di fornire le nostre modifiche al Linux Kernel, oltre ad alcuni comandi nuovi, ed alcuni<br />
strumenti per accedere al codice. I codici sono disponibili sul sito FTP, si raccomanda di scaricarli<br />
dal seguente sito oppure consultare il proprio distributore:<br />
ftp://ftp.dvrtw.com.tw/GPL/AV074/<br />
Firmware: 1W35-1W14-1W13-1W04-A2<br />
Software Video Viewer AP: 0130
CONTENUTI<br />
1. PANORAMICA .................................................................................................................................... 1<br />
1.1 Caratteristiche del Prodotto....................................................................................................................... 1<br />
1.2 Contenuto della confezione....................................................................................................................... 1<br />
1.3 Panoramica dell’Hardware ........................................................................................................................ 1<br />
1.4 Pannello posteriore ................................................................................................................................... 2<br />
2. PRIMA DI USARE LA VIDEOCAMERA IN RETE ............................................................................... 3<br />
3. ACCEDERE ALLA VIDEOCAMERA ATTRAVERSO VIDEO VIEWER........................................................... 4<br />
3.1 Installazione del software .......................................................................................................................... 4<br />
3.2 Accedere alla videocamera ....................................................................................................................... 4<br />
3.3 Descrizione del pannello di controllo......................................................................................................... 5<br />
3.3.1 Versione semplificata (impostazione predefinita).............................................................................................5<br />
3.3.2 Versione completa di tutte le funzioni ..............................................................................................................6<br />
3.3.3 Descrizione dei tasti principali..........................................................................................................................6<br />
3.4 Funzioni usate di frequente....................................................................................................................... 7<br />
3.4.1 Registra............................................................................................................................................................7<br />
3.4.2 Riproduzione ....................................................................................................................................................7<br />
3.4.3 Upgrade del Firmware......................................................................................................................................8<br />
3.4.4 E-Map...............................................................................................................................................................8<br />
4. CONFIGURAZIONE DEL SISTEMA................................................................................................. 13<br />
4.1 Generale ................................................................................................................................................. 14<br />
4.1.1 Registro..........................................................................................................................................................14<br />
4.1.2 Account...........................................................................................................................................................14<br />
4.1.3 OnLineUser ....................................................................................................................................................16<br />
4.1.4 Trigger ............................................................................................................................................................16<br />
4.2 Rete......................................................................................................................................................... 17<br />
4.2.1 QoS ................................................................................................................................................................19<br />
4.2.2 SNTP..............................................................................................................................................................19<br />
4.2.3 FTP.................................................................................................................................................................19<br />
4.2.4 MAIL ...............................................................................................................................................................20<br />
4.2.5 Filtro ...............................................................................................................................................................20<br />
4.2.6 UPnP..............................................................................................................................................................21<br />
4.3 Video ....................................................................................................................................................... 21<br />
4.4 Colore...................................................................................................................................................... 22<br />
4.5 Modalità Ora............................................................................................................................................ 22<br />
5. ACCEDERE ALLA VIDEOCAMERA VIA BROWSER........................................................................ 23<br />
5.1 Accedere alla videocamera ..................................................................................................................... 23<br />
5.2 Descrizione del pannello di controllo....................................................................................................... 24<br />
5.2.1 PannelloLive View Panel................................................................................................................................24<br />
5.2.2 Pannello di Configurazione del Sistema ........................................................................................................24<br />
5.3 Registrare i video direttamente su flash drive USB................................................................................. 26<br />
5.3.1 Prima di Usare questa Funzione....................................................................................................................26<br />
5.3.2 PannelloLive View Panel................................................................................................................................26<br />
5.3.3 Stato del Dispositivo USB ..............................................................................................................................26<br />
5.3.4 Riprodurre e Scaricare i dati Registrati ..........................................................................................................27<br />
APPENDICE 1 SPECIFICHE................................................................................................................ 28<br />
APPENDICE 2 ELENCO UNITÀ FLASH USB COMPATIBILI............................................................... 29
1. PANORAMICA<br />
1.1 Caratteristiche del Prodotto<br />
• Breve tempo di attesa per la riproduzione video con il formato di compressione H.264 per immagini nitide<br />
e chiare.<br />
• CCD 1/3" CCD sensore di immagine per immagini di alta qualità.<br />
• Uscita video ibrida digitale/analogica.<br />
• Rilevamento di movimento e funzioni di notifica dell’allarme<br />
• Microfono esterno entrata audio, uscita a due vie per comunicazione vocale<br />
• Funzionalità Day & night con caratteristiche di Controllo Intelligente della Luce per immagini chiare e<br />
accurate.<br />
1.2 Contenuto della confezione<br />
□ Telecamera di rete<br />
□ Guida all’installazione<br />
□ Sostegno<br />
□ Adattatore e cavo d’alimentazione<br />
□ Cavo di Rete RJ45<br />
□ Cavo di Allarme<br />
□ CD-ROM (comprende il manuale d’uso e<br />
il software CMS “Video Viewer”)<br />
1.3 Panoramica dell’Hardware<br />
Foro per la vite di<br />
fissaggio<br />
Foro per la vite di<br />
fissaggio<br />
Microfono<br />
Lente<br />
Pannello<br />
posteriore<br />
Lato Superiore<br />
Lato inferiore<br />
1
1.4 Pannello posteriore<br />
Reset<br />
Default<br />
Uscita<br />
Audio<br />
Ingresso<br />
Audio<br />
LAN<br />
Connettore<br />
Allarme<br />
Indicatore di<br />
Porta USB<br />
Output video<br />
Alimentazione Connettore<br />
Alimentazione<br />
CONNETTORE/PULSANTE<br />
Reset Default<br />
Indicatore di Alimentazione<br />
Uscita Audio<br />
Ingresso Audio<br />
Output video<br />
LAN<br />
Connettore Alimentazione<br />
Connettore Allarme<br />
DESCRIZIONE<br />
Questo pulsante è nascosto nella spina. Premere e mantenere premuto il<br />
pulsante di reset fino a quando la videocamera in rete non si sarà riavviata.<br />
Questo resetterà tutti i paramentri, incluso l’indirizzo IP e li riporterà alle<br />
impostazioni di default di fabbrica.<br />
Quando la videocamera è alimentata ad elettricità, questo indicatore sarà acceso<br />
e di colore rosso.<br />
Supporta la connessione ad un dispositivo audio, come ad esempio uno<br />
speaker, per la trasmissione remota della voce.<br />
Supporta la connessione ad un dispositivo audio, come ad esempio un microfono,<br />
per la trasmissione locale della voce.<br />
Collegare i connettori di entrata video del vostro monitor con un cavo video<br />
(cioè un cavo RCA con connettore BNC, o un cavo coassiale per l’uscita video.)<br />
* Il cavo video è un optional.<br />
Collegare la videocamera alla rete con il cavo RJ45 in dotazione.<br />
Collegare l’adattatore da 12V DC per l’alimentazione elettrica.<br />
Supporta la connessione ad un dispositivo d’allarme con il cavo d’allarme per la<br />
scalabilità della funzione.<br />
Cavo di Allarme<br />
Filo rosso: Segnale d’allarme +<br />
Black wire: Segnale d’allarme - (Terra)<br />
Porta USB<br />
Collegare il dongle wireless opzionale per la funzione wireless o il flash drive<br />
USB per la registrazione dei video.<br />
2
2. PRIMA DI USARE LA VIDEOCAMERA IN RETE<br />
Prima di usare la videocamera, assicurarsi di:<br />
1) Aver installato il software CMS fornito, "Video Viewer".<br />
2) Aver configurato le impostazioni di rete e che la connessione di rete sia ottimale.<br />
In caso non lo fosse, fare riferimento alla guida di installazione.<br />
Si può accedere a questa videocamera attraverso il software CMS fornito "Video Viewer", o<br />
attraverso il browser "Microsoft Internet Explorer" o "Mozilla Firefox" a seconda delle differenti<br />
situazioni d’uso.<br />
• Per controllare o configurare fino a 16 dispositivi di sorveglianza simultaneamente con funzione di<br />
registrazione, si prega di usare "Video Viewer".<br />
Per dettagli sull’utilizzo di Video Viewer, fare riferimento alla sezione "3. ACCEDERE ALLA<br />
VIDEOCAMERA ATTRAVERSO VIDEO VIEWER" a pagina 4, e "4. CONFIGURAZIONE DI SISTEMA”<br />
a pagina 13.<br />
• Per controllare o configurare solo questa videocamera, si consiglia di usare il browser. "Microsoft Internet<br />
Explorer" o "Mozilla Firefox".<br />
Per i dettagli sull’utilizzo del browser, fare riferimento alla sezione "5. ACCEDERE ALLA<br />
VIDEOCAMERA VIA BROWSER" a pagina 23.<br />
3
3. ACCEDERE ALLA VIDEOCAMERA ATTRAVERSO VIDEO VIEWER<br />
3.1 Installazione del software<br />
Fase 1: Porre il CD in dotazione nell’unità CD-ROM o DVD-ROM. Il programma viene eseguito<br />
automaticamente.<br />
Fase 2: Cliccare su "Licensed Software AP" (Licenza d’Uso per il Software Access Point) per<br />
installare Video Viewer, o cliccare su "Download The Latest Version" (Scarica l’Ultima<br />
Versione) sotto "Licensed Software AP" (Licenza d’Uso per il Software Access Point)<br />
per scaricare l’ultima versione di Video Viewer da Internet (se il vostro PC è connesso<br />
ad Internet).<br />
Fase 3: Seguire le istruzioni su schermo per terminare l’installazione. Completata l’installazione,<br />
sul desktop del PC viene visualizzata l’icona di collegamento rapido “ ”.<br />
3.2 Accedere alla videocamera<br />
Fase 1: Fare doppio clic su “ ” sul desktop del PC per aprire Video Viewer e accedere al<br />
pannello di controllo. Come impostazione predefinita, il pannello della “Address Book”<br />
(Rubrica) verrà visualizzato a destra del pannello di controllo.<br />
Fase 2: Fare clic sul tasto “ ” “ ” per inserire indirizzo IP o l’host name, nome utente<br />
password e numero di porta della videocamera che si vuole collegare.<br />
OPPURE<br />
Cliccare su “ ” “ ” per cercare l’indirizzo/i IP disponibile/i di altre<br />
videocamere. Saranno elencati gli indirizzi trovati che possono essere aggiunti alla<br />
rubrica facendo clic su “ ”.<br />
Fase 3: Fare doppio clic sull’indirizzo IP appena aggiunto alla rubrica per accedere.<br />
La live view viene visualizzata sul Video Viewer.<br />
4
3.3 Descrizione del pannello di controllo<br />
Ci sono a disposizione due pannelli di controllo che possono essere cambiati in base alle<br />
abitudini personali.<br />
3.3.1 Versione semplificata (impostazione predefinita)<br />
Rubrica<br />
Controlli vari<br />
Registro<br />
Registra<br />
Istantanea<br />
Informazioni<br />
Versione<br />
Riduci<br />
Notifica eventi e Lista<br />
di controllo rapido<br />
Cambia visualizzazione completa<br />
Chiudi programma<br />
Rotazione immagine di 180° in senso antiorario<br />
Istantanea<br />
Pulsante Off/On Speaker<br />
Chiudere tutte le visualizzazioni presentate<br />
Chiudere visualizzazione corrente<br />
Dimensioni originali<br />
Schermo pieno<br />
Cambia modalità di visualizzazione<br />
Volume audio<br />
5
3.3.2 Versione completa di tutte le funzioni<br />
Notifica eventi e Lista<br />
di controllo rapido<br />
Rotazione immagine di 180° in senso antiorario<br />
Istantanea<br />
Informazioni<br />
Pulsante Off/On Speaker<br />
Chiudi programma<br />
Cambia visualizzazione semplificata<br />
Riduci<br />
Versione<br />
Impostazione<br />
Controllo PTZ<br />
Capacità Disco Disponibile<br />
Chiudere tutte le<br />
visualizzazioni presentate<br />
Chiudere<br />
visualizzazione corrente<br />
Dimensioni originali<br />
Schermo pieno<br />
Mostra visualizzazione:<br />
1-Taglia<br />
Mostra visualizzazione:<br />
4-Taglia<br />
Mostra visualizzazione:<br />
6-Taglia<br />
Volume audio<br />
Mostra visualizzazione:<br />
9-Taglia<br />
Mostra visualizzazione:<br />
13-Taglia<br />
Mostra visualizzazione:<br />
16-Taglia<br />
Registra<br />
Istantanea<br />
Controlli vari<br />
Registro<br />
3.3.3 Descrizione dei tasti principali<br />
Versione<br />
semplificata<br />
Tasto<br />
Versione<br />
completa<br />
Funzione<br />
Rubrica<br />
Descrizione<br />
Fare clic per visualizzare gli indirizzi IP predefiniti. È possibile aggiungere,<br />
rimuovere o ricercare gli indirizzi IP per l’accesso al DVR da remoto.<br />
Controlli vari<br />
Configura<br />
zione<br />
remota<br />
Impostazi<br />
oni di<br />
registrazi<br />
one<br />
Impostazi<br />
oni<br />
personali<br />
zzate<br />
Cliccare per accedere alla configurazione di sistema<br />
dettagliata Fare riferimento alla sezione “4.<br />
CONFIGURAZIONE DEL SISTEMA”, a pagina 13,<br />
per i dettagli.<br />
Fare clic per andare alle impostazioni di registrazione<br />
dettagliate. Fare riferimento alla sezione “3.4.1<br />
Remoto”, a pagina 7, per i dettagli.<br />
Fare clic per scegliere la lingua di questo programma.<br />
La modifica della lingua sarà applicata solo dopo<br />
avere chiuso e riavviato questo programma.<br />
Registro<br />
Fare clic per visualizzare i registri di tutti gli eventi e le registrazioni, ricercare i<br />
registri desiderati per data, o riprodurre le registrazioni dei registri selezionati.<br />
/ /<br />
Registra/Arresta<br />
registrazione<br />
Il pulsante di registrazione sarà disabilitato quando la capacità del disco riservata<br />
impostata in “Impostazione di Registrazione” è maggiore della capacità attuale del<br />
disco. Fare riferimento alla sezione “3.4.1 Remoto”, a pagina 7, per i dettagli.<br />
Istantanea<br />
Fare clic per scattare una foto della visualizzazione corrente. Questa foto verrà<br />
salvata nel percorso specificato in “Record Setting” (Impostazioni registrazione).<br />
Informazioni<br />
Fare clic per mostrare i dettagli della connessione di rete corrente.<br />
6
3.4 Funzioni usate di frequente<br />
3.4.1 Registra<br />
Per la registrazione remota, cliccare su “ ” o “ ” → “ ” per andare alla pagina “Impostazioni di<br />
Registrazione”.<br />
Nella pagina “Record Setting” (Impostazioni Registrazione), è possibile impostare i seguenti elementi:<br />
‧Tipo registrazione<br />
‧Tempo di registrazione pre/post evento (0 ~ 10 secondi)<br />
‧Impostazione orario di registrazione<br />
‧Percorso di registrazione<br />
Nota: La funzione di registrazione verrà disabilitata quando la capacità del disco riservata in “MB<br />
Riservati” è maggiore rispetto alla capacità attuale in “MB Liberi”.<br />
Se la voce “Manual” (Manuale) è selezionata, cliccare su “ ” o “ ” nel pannello di controllo principale per<br />
avviare immediatamente la registrazione manuale; la registrazione sarà salvata nel posto specificato in “Percorso<br />
Registrazione”.<br />
Quando "Motion" (Movimento) e/o “Alarm” (Allarme) sono controllati, la funzione di registrazione sarà attivata da<br />
qualunque evento di movimento o di allarme e la registrazione sarà salvata nel posto specificato in "Record Path"<br />
(Percorso Registrazione).<br />
3.4.2 Riproduzione<br />
Per riprodurre una registrazione, fare clic su “ ” o “ ” e selezionare la scheda “Record” (Registrazione).<br />
Come impostazione predefinita, verrà visualizzato un elenco con tutte le registrazioni, e sarà anche possibile<br />
ordinare i registri per velocizzare i tempi di ricerca.<br />
7
3.4.3 Upgrade del Firmware<br />
Questa funzione è utilizzata quando gli utenti hanno bisogno di aggiornare la videocamera per la scalabilità delle<br />
funzioni.<br />
Nota: Prima di utilizzare questa funzione, accertatevi di avere il giusto file di aggiornamento fornito dal<br />
vostro installatore o distributore.<br />
Fase 1: Cliccare su "<br />
Fase 2: Cliccare su "<br />
", e selezionare l’indirizzo IP della vostra videocamera nella rubrica.<br />
" per accedere alla pagina di upgrade , "Update Server" (Aggiornare il Server).<br />
1. Rubrica<br />
2. Selezionare un indirizzo<br />
3. Aggiornamento server<br />
Fase 3: Cliccare su "Add" (Aggiungi) per scorrere i file di aggiornamento.<br />
Fase 4: Cliccare su "Upgrade Firmware" (Aggiornare Firmware ) per iniziare l’upgrade del firmware.<br />
Nota: Ci vogliono pochi minuti per terminare il processo di upgrade. Non scollegare l’elettricità durante<br />
l’upgrade del firmware o l’upgrade potrebbe non riuscire. La videocamera si riavvierà dopo<br />
l’upgrade.<br />
Fase 5: Selezionare l’indirizzo IP della videocamera e cliccare su "<br />
è stato aggiornato.<br />
" di nuovo per controllare se il firmware<br />
3.4.4 E-Map<br />
Video Viewer è anche un software CMS (Central Management System), che permette il controllo e la gestione<br />
simultanea di un massimo di 16 dispositivi di rete.<br />
Nota: Prima di usare questa funzione, assicurarsi che Video Viewer sia collegato a tutti i dispositivi (16<br />
al massimo) che si vogliono monitorare.<br />
E-Map è disponibile SOLO quando il pannello di controllo è impostato sulla versione completa di tutte le funzioni.<br />
Come si aggiunge un gruppo E-Map<br />
FASE 1: Nella versione semplificata, fare clic su “ ” per passare alla versione completa, poi fare clic su “ ” per<br />
accedere alla pagina di E-Map, come segue.<br />
Nota: Per conoscere la posizione dei pulsanti, fare riferimento a “3.3.1 Versione semplificata (Default)”<br />
a pagina 5, e “3.3.2 Versione completa di tutte le funzioni” a pagina 6.<br />
8
FASE 2: Fare clic col tasto destro del mouse nel pannello in alto a sinistra per mostrare il menu e selezionare il<br />
gruppo E-Map che si vuole aggiungere. Si possono aggiungere tre tipi di gruppo E-Map: Google E-MAP,<br />
Single E-MAP (E-Map livello singolo) e Building E-MAP (E-Map su più livelli).<br />
Come si aggiunge un gruppo Google E-Map:<br />
Inserire il nome del gruppo Google E-Map.<br />
Inserire un indirizzo specifico o punto di<br />
riferimento, e fare clic su “Search” (Cerca).<br />
OPPURE<br />
Spostare e trascinare la mappa sulla posizione<br />
desiderata.<br />
Fare clic e trascinare l’indirizzo IP sul punto dove è<br />
posizionato nel livello corrente.<br />
Fare clic su “Apply” (Applica) per salvare e<br />
completare.<br />
Come si aggiunge un singolo gruppo E-Map:<br />
Inserire il noem del singolo gruppo E-Map.<br />
Fare clic su “…” per scorrere il file della mappa in<br />
BMP o JPEG.<br />
Fare clic e trascinare l’indirizzo IP sul punto dove è<br />
posizionato nel livello corrente.<br />
Fare clic su “Apply” (Applica) per salvare e<br />
completare.<br />
9
Come si aggiunge un gruppo edifici E-Map:<br />
Inserire il nome del gruppo edifici E-Map.<br />
Inserire i livelli totali dell’edificio.<br />
Selezionare il livello dell’edificio dall’elenco a<br />
discesa.<br />
Inserire il nome del livello.<br />
Fare clic su “…” per scorrere il file della mappa in<br />
BMP o JPEG.<br />
Fare clic e trascinare l’indirizzo IP sul punto dove è<br />
posizionato nel livello corrente.<br />
Tornare alla FASE 3 per selezionare altri livelli<br />
dell’edificio, e ripetere dalla FASE 3 alla 6 fino a<br />
impostare tutti i livelli.<br />
Fare clic su “Apply” (Applica) per salvare e<br />
completare.<br />
FASE 3: Dopo avere creato il gruppo E-Map, nel pannello in alto a sinistra si vedranno tutti i dispositivi che sono<br />
stati aggiunti a questo gruppo.<br />
Dispositivo Attualmente Selezionato<br />
Gruppo: Quartier generale<br />
Livello: 1° piano<br />
Dispositivo: 60.251.8.56<br />
Icona<br />
Descrizione<br />
Il dispositivo collegato è una telecamera. Quando è selezionato, diventa di colore rosso.<br />
Il dispositivo collegato è il DVR. Quando è selezionato, diventa di colore rosso.<br />
Apparirà sullo schermo per attirare l’attenzione in caso di qualsiasi movimento o allarme.<br />
Per sapere rapidamente che cosa sta succedendo, fare doppio clic sull’icona del dispositivo su E-Map per mostrare<br />
la veduta dal vivo.<br />
10
Come di modifica/rimuove un gruppo E-Map esistente<br />
‣ Gruppi Google E-Map<br />
Fare clic col tasto destro del mouse sul nome del gruppo per mostrare il<br />
menu e selezionare “Edit E-MAP” (Modifica E-Map) o “Remove E-MAP”<br />
(Rimuovi E-Map), come necessario.<br />
Si può anche aggiungere un gruppo E-Map livello singolo (Add Single<br />
E-MAP) o un gruppo E-Map su più livelli (Add Building E-MAP) al gruppo<br />
Google E-Map esistente.<br />
‣ Per gruppi E-Map livello singolo<br />
Fare clic col tasto destro del mouse sul nome del gruppo per mostrare il<br />
menu e selezionare “Edit E-MAP” (Modifica E-Map) o “Remove E-MAP”<br />
(Rimuovi E-Map), come necessario.<br />
11
‣ Per gruppi E-Map su più livelli<br />
Fare clic col tasto destro del mouse sul nome del gruppo per mostrare il<br />
menu e selezionare “Edit Building E-MAP” (Modifica E-Map su più livelli)<br />
o “Remove E-MAP” (Rimuovi E-MAP), come necessario.<br />
12
4. CONFIGURAZIONE DEL SISTEMA<br />
Prima di usare la videocamera in rete, assicurasi di aver installato il software fornito, "Video Viewer",<br />
e di aver configurato le impostazioni di rete. Se non è stato fatto, si prega di consultare la sezione<br />
“3.1 Installare il software " a pagina 4 del manuale di installazione.<br />
Nota: Si consiglia di consultare un installatore prima di cambiare le configurazioni del<br />
sistema.<br />
Nota: Dovete essere il supervisore per poter accedere alla pagina di configurazione del<br />
sistema. Se non lo siete, effettuate il login nella videocamera con il livello di<br />
utilizzatore supervisore.<br />
Cliccare su " " e selezionare " " per accedere alla pagina di configurazione del sistema. Tutte<br />
le configurazioni del sistema sono elencate in una struttura ad albero nel pannello a sinistra così<br />
come segue.<br />
Menu<br />
Principale<br />
General<br />
(Generale)<br />
Network (Rete)<br />
Video<br />
Color (Colore)<br />
Menu<br />
Secondario<br />
Log (Registro)<br />
Account<br />
OnLineUser<br />
Trigger<br />
QoS<br />
DDNS<br />
SNTP<br />
FTP<br />
MAIL<br />
Filter (Filtro)<br />
UPnP<br />
Cosa potete fare per questa funzione?<br />
1. Controllare la versione del firmware e l’indirizzo MAC della videocamera.<br />
2. Cambiare il titolo della videocamera.<br />
Controllare gli event log del sistema.<br />
1. Creare un nuovo account utente con privilegi di accesso differenti.<br />
2. Modificare o cancellare un account utente esistente.<br />
Controllare l’utente/i attualmente online.<br />
1. Attivare/Disattivare l’allarme o il rilevamento di movimento.<br />
2. Impostare l’area di rilevamento di movimento.<br />
3. Selezionare la modalità di notifica dell’evento.<br />
Configurare le impostazioni di rete.<br />
Limitare il flusso di dati per il live streaming.<br />
Inserire le informazioni di DDNS quando il tipo di rete è PPPOE o DHCP.<br />
Sincronizzare l’orario della videocamera con i sistemi in rete del computer.<br />
Inserire le informazioni FTP per la notifica degli eventi quando "FTP" è stato scelto in<br />
"General" (Generale) → "Trigger".<br />
Inserire le informazioni Email per la notifica degli eventi quando " Email " è stato scelto in<br />
"General" (Generale) → "Trigger".<br />
Scegliere per autorizzare o bloccare l’indirizzo/i che può/possono accedere alla<br />
videocamera.<br />
Permetti che la videocamera sia rilevata tra i dispositivi all’interno della stessa area di rete<br />
per un utilizzo veloce e rapido.<br />
Imposta la risoluzione dell’immagine, la qualità e il frame rate.<br />
Regolare la resa del colore.<br />
Time (Modalità Ora)<br />
Impostare l’ora legale e l’orario attuale.<br />
13
4.1 Generale<br />
In "General" (Generale), è possibile controllare le informazioni generali della videocamera, come ad<br />
esempio la versione del firmware e l’indirizzo MAC e anche modificare il nome di identificazione della<br />
videocamera (fino a 15 caratteri alfanumerici).<br />
4.1.1 Registro<br />
Per cercare rapidamente il log di sistema per tipo di evento, cliccare la finestra a tendina per<br />
selezionare il tipo di log di sistema che si vuole controllare e cliccare su "Reload" (Ricarica) per<br />
aggiornare la lista.<br />
Per cancellare tutti gli eventi di sistema cliccare su “Clear” (Cancella).<br />
4.1.2 Account<br />
Potete creare un nuovo account con diversi privilegi di accesso per l’utente, o cancellare o<br />
modificare le impostazioni di un account esistente.<br />
Come creare un nuovo account<br />
Fase 1: Cliccare su "New" (Nuovo), e completare le seguenti colonne.<br />
14
Colonna<br />
User Name<br />
(Nome utente)<br />
Password<br />
User Level<br />
(Livello utente)<br />
Life Time<br />
(Durata)<br />
Descrizione<br />
Impostare un nome utente da utilizzare per l’accesso alla videocamera. Il nome utente può essere composto da un<br />
massimo di 16 caratteri alfanumerici.<br />
Impostare una password da utilizzare per l’accesso remoto. La password può essere composta da un massimo di<br />
16 caratteri alfanumerici.<br />
Impostare il livello di sicurezza di un account per fornire l’autorizzazione al controllo delle differenti funzioni.<br />
Sono disponibili 4 livelli utente: Supervisore, Power User, Utente normale e Ospite.<br />
Permette di selezionare per quanto tempo è consentito stare in linea a questo account (1 MIN/5 MIN/10 MIN/1<br />
ORA/1 GIORNO/INFINITO).<br />
Fase 2: Quindi, fare clic su “Apply” (Applica) per salvare le proprie impostazioni e creare un<br />
nuovo account.<br />
Come modificare o cancellare un account esistente<br />
Fase 1: Selezionare l’account che si vuole modificare o cancellare.<br />
Fase 2: Per modificare l’account, cambiare direttamente l’impostazione e cliccare su "Apply"<br />
(Applica).<br />
Per rimuovere l’account, cliccare su "Delete" (Cancella).<br />
Nota: Non è permesso rimuovere l’account se nella account list (lista degli account) c’è<br />
un solo account.<br />
15
4.1.3 OnLineUser<br />
Potete controllare l’utente/i attualmente online con le rispettive informazioni online. Per<br />
aggiornare la lista, cliccare su “Refresh (Aggiorna)”.<br />
4.1.4 Trigger<br />
Potete impostare il rilevamento di movimento o l’allarme e selezionare la funzione di notifica.<br />
<br />
Impostazione Trigger<br />
In questa sezione, potete scegliere di attivare o disattivare l’allarme o il rilevamento di<br />
movimento.<br />
Voce<br />
Alarm<br />
(Allarme)<br />
Motion<br />
(Movimento)<br />
Descrizione<br />
Selezionare per attivare o disattivare la funzione d’allarme.<br />
Selezionare per attivare o disattivare la funzione di rilevamento di movimento.<br />
‧ Impostazione dell’area di rilevamento del movimento<br />
Quando "Enable" (Attiva) è selezionato, cliccare su "Setting" (Impostazione) per accedere alla pagina del’area<br />
di rilevamento del movimento come segue:<br />
Sensibilità:<br />
Impostare la sensibilità di rilevamento (Alta/Normale/Bassa).<br />
Impostazione Area:<br />
Permette di impostare l’area di rilevamento movimento selezionando le griglie con il mouse. Le griglie rosa rappresentano le<br />
aree che non sono rilevate, mentre le griglie trasparenti rappresentano le aree sotto rilevamento. È possibile impostare più<br />
aree per il rilevamento.<br />
Fare clic su “-” (Cancella tutto) per rimuovere il rilevamento dell’intera area.<br />
Fare clic su “+” (Seleziona tutto) per impostare il rilevamento dell’intera area.<br />
Duration<br />
(Durata)<br />
Impostare la durata del trigger di registrazione (5/10/20/40 secondi).<br />
16
Impostazione Notifica<br />
In questa sezione, potete selezionare di attivare la notifica via E-mail e/o FTP quando<br />
scatta l’allarme o quando viene rilevato un movimento.<br />
Voce<br />
Method (Metodo)<br />
Video Type<br />
(Tipo Video)<br />
Total (Totale)<br />
Descrizione<br />
‧Email<br />
Quando viene scelta questa opzione la videocamera manderà il video o l’immagine registrati<br />
all’indirizzo/i E-mail scelto/i quando scatta l’allarme o quando viene rilevato un movimento.<br />
‧FTP<br />
Quando viene scelta questa opzione la videocamera in rete caricherà il video o l’immagine registrati<br />
sul sito FTP specificato quando scatta l’allarme o quando viene rilevato un movimento.<br />
Selezionare il tipo di file di notifica: H264 (video)/MPEG4 (video)/JPEG (immagine).<br />
Impostare il tempo di registrazione del video di notifica (1 ~ 5 secondi).<br />
4.2 Rete<br />
Selezionare "Network" (Rete) per adattare le impostazioni di rete al vostro ambiente di rete. Sono<br />
disponibili 3 tipi di connessione di rete: Static IP (IP Statico), PPPOE e DHCP.<br />
Nota: Questa videocamera non supporta router POE o hub.<br />
Per IP statico:<br />
a) Inserire le informazioni di "Server IP", "Gateway" e "Net Mask" ottenute dal vostro ISP (Internet<br />
Service Provider, Provider di Servizi Internet).<br />
b) Inserire il numero della porta. Il numero valido va da 1 a 9999. Il valore predefinito è 80. Tipicamente la<br />
porta TCP usata dal protocollo HTTP è 80. Tuttavia, in alcuni casi, è meglio cambiare questo numero<br />
di porta per una maggiore flessibilità o protezione.<br />
c) Cliccare su "Apply" (Applica), e cliccare su "OK" per uscire dalla pagina delle impostazioni.<br />
Per PPPOE:<br />
a) Andare su "Network" (Rete) "DDNS", e selezionare "default" nella finestra a tendina "System<br />
Name" (Nome Sistema).<br />
b) In "Hostname", mantenere il valore di default, cioè. L’indirizzoMAC di questa videocamera, o cambiare<br />
il nome con uno che abbia un significato. E’ più facile da memorizzare.<br />
c) Annotare l’intero indirizzo della videocamera, per esempio, MAC000E53114389.ddns.dvrtw.com.tw.<br />
Nota: Potete anche creare un account DDNS da un sito web che fornisce il servizio DDNS<br />
gratis. Fare riferimento alla “APPENDICE 1” nella guida per l’installazione.<br />
Host name di Default:<br />
Indirizzo MAC della<br />
videocamera<br />
17
d) Andare su "Network" (Rete) e selezionare "PPPOE". Quindi inserire lo user name e la password<br />
ottenuti dal vostro ISP.<br />
e) Cliccare su "Apply" (Applica), e cliccare su "OK" per uscire dalla pagina delle impostazioni.<br />
Per DHCP:<br />
a) Completare l’impostazione del router DHCP.<br />
Prendere un router e collegarlo a Internet tramite il PC (con impostazioni IP statico o PPPoE). Sono<br />
disponibili diversi metodi di impostazione in relazione ai diversi router. Fare riferimento ai rispettivi<br />
manuali d’uso.<br />
b) Andare su "Network" (Rete) "DDNS", e selezionare "default" nella finestra a tendina "System<br />
Name" (Nome Sistema).<br />
c) In "Hostname", mantenere il valore di default, cioè. L’indirizzoMAC di questa videocamera, o cambiare<br />
il nome con uno che abbia un significato. E’ più facile da memorizzare<br />
d) Annotare l’intero indirizzo della videocamera, per esempio, MAC000E53114389.ddns.dvrtw.com.tw.<br />
Nota: Potete anche creare un account DDNS da un sito web che fornisce il servizio DDNS<br />
gratis. Fare riferimento alla “APPENDICE 1” nella guida per l’installazione.<br />
Host name di Default:<br />
Indirizzo MAC della<br />
videocamera<br />
e) Andare su "Network" (Rete) e selezionare " DHCP ".<br />
f) Cliccare su "Apply" (Applica), e cliccare su "OK" per uscire dalla pagina delle impostazioni.<br />
Fase 3: Disconnettere la videocamera e il PC e connetterli a Internet separatamente.<br />
Fase 4: Aggiungere l’indirizzo IP o l’host name della videocamera in " " di Video Viewer con<br />
lo user name e la password corretti e cliccarlo due volte per vedere se riuscite ad<br />
accedere alla videocamera.<br />
18
4.2.1 QoS<br />
QoS, Qualità del Servizio, è la capacità di controllare il flusso dei dati per lo streaming in tempo<br />
reale. Questa funzione è importante se la larghezza di banda della vostra rete è insufficiente e<br />
avete altri dispositivi con i quali condividere la larghezza di banda della rete.<br />
Controllare "QoS Enable" (Attivazione QoS) e impostare la velocità massima di caricamento da<br />
256 a 10240 kbp.<br />
4.2.2 SNTP<br />
SNTP (Simple Network Time Protocol) (Protocollo Orario di Rete Semplice) è usato per<br />
sincronizzare l’orario della videocamera con i sistemi in rete del computer.<br />
Funzione<br />
GMT (Tempo del meridiano di<br />
Greenwich)<br />
Server Name (Nome del Server)<br />
Sync. Period (Periodo di<br />
Sincronizzazione)<br />
Sync Server Time (Sincroniz.<br />
Orario Server)<br />
Descrizione<br />
Una volta che gli utenti avranno scelto il fuso orario, la videocamera in rete regolerà<br />
automaticamente l’orario dell’area locale del sistema.<br />
Utilizzare il server di default SNTP (Per esempio, tock.stdtime.gov.tw) o cambiare con<br />
un altro server con il quale gli utenti hanno familiarità.<br />
Selezionare "Daily" (Giornaliero) per sincronizzare l’orario della videocamera con<br />
l’orario di rete ogni giorno o "None" (Nessuno) pe disattivare questa funzione.<br />
Cliccare e la videocamera sincronizzerà l’orario con l’orario di rete.<br />
4.2.3 FTP<br />
Inserire le informazione FTP dettagliate e cliccare su “Apply” (Applica) per confermare. Le<br />
informazioni qui impostate saranno applicate quando viene selezionato “FTP” in “General”<br />
(Generale) → “Trigger”.<br />
19
4.2.4 MAIL<br />
Inserire le informazioni email dettagliate e cliccare su “Apply” (Applica) per confermare. Le<br />
informazioni qui impostate saranno applicate quando viene selezionato “Email” in “General”<br />
(Generale) → “Trigger”.<br />
Funzione<br />
Server<br />
Mail From (Posta da)<br />
Verify Password<br />
(Verifica password)<br />
Email Address<br />
(Indirizzo email)<br />
Descrizione<br />
Inserire l’indirizzo del server SMTP fornito dal proprio provider di posta elettronica.<br />
Inserire l’indirizzo email intero per assicurare che le email non verranno bloccate dall’SMTP.<br />
Alcuni server di posta richiedono di verificare la password. Inserire il “nome utente” e la<br />
“password”.<br />
Aggiungere l’indirizzo email del destinatario assegnato.<br />
4.2.5 Filtro<br />
Scegliere per autorizzare o bloccare l’indirizzo/i che può/possono accedere alla videocamera.<br />
Funzione<br />
Error Login Count<br />
(Errore Conto Login)<br />
Error Lock Time<br />
(Tempo di blocco<br />
Errore)<br />
Descrizione<br />
Impostare il numero massimo di login errati. Quando viene raggiunto il numero massimo,<br />
l’indirizzo IP che sta tentando di accedere alla videocamera in rete verrà bloccato.<br />
Impostare il tempo di blocco in minuti quando il numero massimo di login errati per un indirizzo IP<br />
è stato raggiunto.<br />
20
Funzione<br />
Echo Request<br />
(Richiesta Echo)<br />
Filter (Filtro)<br />
Apply (Applica)<br />
Descrizione<br />
Selezionare "Non-Block" (non Bloccare) per autorizzare altri utenti a pingare per risalire<br />
all’indirizzo IP della videocamera in rete, o "Block" (Bloccare) per rifiutare la richiesta di effettuare il<br />
comando di ping.<br />
Scegliere di attivare ”YES" (SI) o disattivare (NO) la funzione filtro.<br />
Se viene selezionato ”YES" (SI), scegliere se volete permettere (Autorizza) o bloccare (Rifiuta)<br />
l’indirizzo IP elencato di seguito.<br />
‧ Per aggiungere una voce alla lista degli indirizzi IP, digitare l’indirizzo IP in "Indirizzo IP" e<br />
cliccare su "Add" (Aggiungi).<br />
‧ Per rimuovere una voce esistente nella lista di indirizzi IP, cliccare sulla voce che si vuole<br />
rimuovere e cliccare su "Delete" (Cancella).<br />
Cliccare su "Apply" (Applica) nell’angolo in basso a destra quando viene effettuato un<br />
cambiamento in questo menù, o il cambiamento non verrà registrato nel sistema.<br />
4.2.6 UPnP<br />
"UPnP" è l’acronimo "Universal Plug and Play", che permette ai dispositivi di collegarsi ininterrottamente<br />
negli ambienti home e corporate e di semplificare l’installazione dei componenti del computer.<br />
Controllare "Enable UPnP" (Attiva UPnP) per permettere alla videocamera in rete di essere individuata<br />
tra i dispositivi nella stessa area di rete, e impostare il nome di identificazione della videocamera in<br />
“Friendly name".<br />
Quando questa funzione è attiva, l’altro PC nello stesso dominio di questa videocamera potrà<br />
ricercare la videocamera in "Network Neighbor" (Vicino di Rete) con il nome di identificazione<br />
impostato in "Friendly name". Cliccare due volte per aprire velocemente il browser per<br />
accedere alla videocamera.<br />
Per dettagli sull’accesso alla videocamera via browser, fare riferimento alla sezione "5.<br />
ACCEDERE ALLA VIDEOCAMERA VIA BROWSER" a pagina 23.<br />
4.3 Video<br />
Imposta la risoluzione dell’immagine, la qualità e il frame rate.<br />
Voce<br />
JPEG/MPEG/H264<br />
Descrizione<br />
Selezionare la qualità e la risoluzione dell’immagine.<br />
Risoluzione Immagine: CIF/4CIF.<br />
21
Voce<br />
Frame Rate<br />
Descrizione<br />
Qualità Immagine: MIGLIORE/ALTO/NORMALE/BASSO.<br />
Il frame rate autorizzato per ogni osservatore può essere adattato alla larghezza della banda della<br />
rete.<br />
Impostare la frequenza di immagine desiderata sul massimo (FULL) o su uno specifico frame rate<br />
(1/2; 1/3; 1/4; 1/5; 1/10; 1/15; 1/20; 1/25; 1/30).<br />
Il valore del frame rate attuale dipende dalla connessione di rete attuale, e può essere inferiore a<br />
quello specificato.<br />
4.4 Colore<br />
Regolare la resa del colore da Brightness (Luminosità) , Contrast (Contrasto) Hue (tono) e<br />
Saturation (Saturazione). Cliccare e trascinare il cursore per l’anteprima del cambio di colore sul<br />
pannello live view e regolare il colore dell’immagine. Quindi, cliccare su “Apply” (Applica) per<br />
confermare il cambiamento.<br />
Per ripristinare i valori di default, cliccare su "Default", e cliccare su "Apply" (Applica) per confermare<br />
il cambiamento.<br />
4.5 Modalità Ora<br />
Impostare l’ora legale e l’orario attuale.<br />
Funzione<br />
Daylight Saving<br />
(Salv. Luce Diurna)<br />
Time (Ora)<br />
Descrizione<br />
Permette di specificare se usare l’ora legare (ACCESO/SPENTO).<br />
Se questa funzione viene attivata, impostare il periodo di tempo (AVVIA/FINE) e regolare l’ora legale in ore<br />
(REGOLA).<br />
Impostare l’orario corrente.<br />
22
5. ACCEDERE ALLA VIDEOCAMERA VIA BROWSER<br />
L’utente può accedere alla videocamera in rete anche via browser, come ad esempio Microsoft<br />
Internet Explorer o Mozilla Firefox.<br />
Tuttavia, il browser è disponibile solo per l’accesso di un singolo dispositivo. Se l’utente desidera<br />
accedere con più di due dispositivi attarverso un’interfaccia, si consiglia l’utilizzo del software CMS<br />
fornito, Video Viewer. Per i dettagli, fare riferimento alla sezione “3 ACCEDERE ALLA<br />
VIDEOCAMERA VIA VIDEO VIEWER”, a pagina 4.<br />
• Per sapere come accedere alla videocamera, fare riferimento alla sezione "5.1 Accedere alla<br />
videocamera" a pagina 23.<br />
• Per dettagli sul pannello live view, fare riferimento alla sezione "5.2.1 PannelloLive View Panel" a pagina<br />
24.<br />
• Per dettagli sul pannello di configurazione del sistema, fare riferimento alla sezione “5.2.2 Pannello di<br />
Configurazione del Sistema” a pagina 24.<br />
• Per i dettagli sulla registrazione dei video su un flash drive USB, fare riferimento alla sezione "5.3<br />
Registrazione video direttamente su flash drive USB" a pagina 26.<br />
5.1 Accedere alla videocamera<br />
Fase 1: Aprire il browser, e digitare http://indirizzoIP:numporta nella finestra dell’indirizzo URL.<br />
Ad esempio, per l’indirizzo IP 60.121.46.236 e la porta N. 888, digitare<br />
“http://60.121.46.236:888” nella casella dell’indirizzo URL e premere “Enter” (Invia).<br />
Fase 2: Nella pagina di login, digitare lo username e la password, e inserire il codice di sicurezza<br />
nell’immagine sottostante. Quindi cliccare su "LOGIN".<br />
Fase 3: Quando il login è effettuato con successo, verrà visualizzato il live view come segue.<br />
23
5.2 Descrizione del pannello di controllo<br />
5.2.1 PannelloLive View Panel<br />
Informazioni sulla Riproduzione Corrente<br />
FR: Frame rate<br />
DR: Velocità Dati<br />
Ora: Orario sistema corrente<br />
Q: Qualità<br />
R: Risoluzione<br />
Funzione Icona Livello utente Descrizione<br />
Media Type (Tipo di<br />
Media)<br />
Video Quality (Qualità<br />
Video)<br />
-- Supervisore/Utente<br />
power/Utente<br />
normale/Ospite.<br />
-- Supervisore/Utente<br />
power/Utente normale<br />
Selezionare dall’elenco a tendina il formato di<br />
trasmissione web: H.264/MPEG-4/Motion<br />
JPEG/QuickTime.<br />
Per gli utenti che usano Mozilla Firefox, è<br />
selezionabile solo "QuickTime".<br />
QuickTime è un software multimediale della Apple<br />
Inc. È necessario che QuickTime sia installato nel<br />
sistema operativo prima di selezionarlo. Quando sarà<br />
selezionato, sarete autorizzati ad inserire lo user<br />
name e la password per accedere alla videocamera.<br />
Cliccare e trascinare lo slider per selezionare la<br />
qualità del video: Migliore/Normale/Alta/Base.<br />
Video Resolution<br />
(Risoluzione Video)<br />
Interruttore Audio<br />
Istantanea<br />
Flip<br />
Schermo pieno<br />
Supervisore/Utente<br />
power/Utente normale<br />
Supervisore/Utente<br />
power/Utente normale<br />
Supervisore/Utente<br />
power/Utente normale<br />
Supervisore/Utente<br />
power/Utente normale<br />
Supervisore/Utente<br />
power/Utente normale<br />
Selezionare la risoluzione video dall’elenco a tendina:<br />
4CIF/CIF.<br />
Cliccare per accendere/spegnere la funzione audio.<br />
Cliccare per visualizzare uno snapshot dell’immagine<br />
corrente e una nuova finestra del browser verrà<br />
aperta per visualizzare l’immagine registrata.<br />
Cliccare per ruotare l’immagine di 180° in senso<br />
antiorario se necessario.<br />
Cliccare per visualizzare l’immagine a schermo intero.<br />
5.2.2 Pannello di Configurazione del Sistema<br />
Cliccare su "Configuration" (Configurazione) per accedere alla pagina di configurazione.<br />
Nota: Dovete essere il supervisore per poter accedere alla pagina di configurazione del<br />
sistema. Se non lo siete, effettuate il login nella videocamera con il livello di<br />
utilizzatore supervisore.<br />
Le funzioni sono divise in categorie in tre menu. Network (Rete), Camera (Telecamera) e<br />
General (Generale).<br />
• Fare riferimento alla sezione “4.2 Rete”, a pagina 17, per i dettagli sulla Rete.<br />
• Per i dettagli sulla “Videocamera", fare riferimento alla sezione "4.4 “Color” (Colore) a pagina 21, e alla<br />
sezione"4.5 Time" (Orario) a pagina 22.<br />
• Per i dettagli sulla “Camera ", fare riferimento alla sezione "4.4 “General” (Generale) a pagina 14, e alla<br />
sezione"4.3 “Video” a pagina 21.<br />
24
Menu Principale<br />
Menu<br />
Secondario<br />
Riferimento<br />
Network (Rete) Network (Rete) <strong>Remote</strong> Config. (Configurazione Remota) Network (Rete)<br />
QoS<br />
Wireless<br />
<strong>Remote</strong> Config. (Configurazione Remota) Network (Rete) QoS<br />
Fare riferimento alla “APPENDICE 2” nella guida per l’installazione.<br />
DDNS<br />
SNTP<br />
FTP<br />
Mail<br />
Filter<br />
UPnP<br />
<strong>Remote</strong> Config. (Configurazione Remota) Network (Rete) DDNS<br />
<strong>Remote</strong> Config. (Configurazione Remota) Network (Rete) SNTP<br />
<strong>Remote</strong> Config. (Configurazione Remota) Network (Rete) FTP<br />
<strong>Remote</strong> Config. (Configurazione Remota) Network (Rete) MAIL<br />
<strong>Remote</strong> Config. (Configurazione Remota) Network (Rete) Filter (Filtro)<br />
<strong>Remote</strong> Config. (Configurazione Remota) Network (Rete) UPnP<br />
Camera Color (Colore) <strong>Remote</strong> Config. (Configurazione Remota) Color (Colore)<br />
Time (Ora)<br />
<strong>Remote</strong> Config. (Configurazione Remota) Time (Ora)<br />
General (Generale) General (Generale) Custom Setting (Impostazioni Personalizzate)<br />
Server Log<br />
(Registro server)<br />
Login<br />
Account<br />
Trigger<br />
Video<br />
Google Maps<br />
<strong>Remote</strong> Config. (Configurazione Remota) General (Generale) Log (Registro)<br />
<strong>Remote</strong> Config. (Configurazione Remota) General (Generale) Account<br />
<strong>Remote</strong> Config. (Configurazione Remota) General (Generale) Account<br />
<strong>Remote</strong> Config. (Configurazione Remota) General (Generale) Trigger<br />
<strong>Remote</strong> Config. (Configurazione Remota) Video<br />
Vi permette di sapere dove si trova la videocamera in rete.<br />
Il sistema vi richiederà di applicare una Chiave Goole Maps se l’accesso vi è negato. Seguire le<br />
istruzioni di seguito se l’accesso vi è negato:<br />
1. Cliccare su "Sign up for a Google Maps key" (Registrarsi per una Chiave Google Maps) per<br />
accedere alla pagina di applicazione.<br />
2. Controllare i termini e le condizioni, e inserire l’indirizzo IP della videocamera in rete. Quindi<br />
cliccare su "Generate API Key" (Generare Chiave API).<br />
3. Copiare la chiave API generata e cliccare su "Update Google Maps Key" (Aggiorna Chiave<br />
Google Maps) sul browser per incollarla.<br />
Upgrade (Aggiorna) .<br />
Fare riferimento alla sezione “3.4.3 Upgrade del Firmware” a pagina 8, per i dettagli.<br />
25
5.3 Registrare i video direttamente su flash drive USB<br />
Oltre a registrare in remoto, questa videocamera di rete supporta anche la registrazione locale<br />
direttamente su un flash drive USB se viene inserito un flash drive USB compatibile nella<br />
videocamera e se viene individuato correttamente.<br />
5.3.1 Prima di Usare questa Funzione<br />
• Questa funzione e l’applicazione wireless non possono coesistere perchè c’è solo una porta USB<br />
per questo dispositivo.<br />
• Questo dispositivo non supporta l’hot-swapping o l’hot-plugging USB. Prima che la videocamera<br />
venga accesa assicurarsi che il flash drive USB di cui avete bisogno sia collegato correttamente.<br />
Fare riferimento alla sezione “APPENDICE 2 ELENCO UNITÀ FLASH USB COMPATIBILI”, a<br />
pagina 29, per l’elenco delle chiavette USB compatibili.<br />
• Assicurarsi che la/e funzione/i di registrazione che desiderate (manuale/movimento/timer/allarme)<br />
sia/no abilitata/e.<br />
• I dati registrati sono salvati su file system EXT3 e non possono essere letti direttamente dal PC.<br />
Per leggere, avviare o scaricare i dati registrati, si prega di accedere alla videocamera via browser.<br />
Fare riferimento alle sezioni che seguono per i dettagli.<br />
5.3.2 PannelloLive View Panel<br />
Quando il flash drive USB viene individuato correttamente, vedrete un pannello simile a quello<br />
sottostante:<br />
Andare al Pannello<br />
di Riproduzione<br />
Icona dello Stato<br />
Registrazione Manuale On<br />
Pulsante di Registrazione<br />
Manuale<br />
5.3.3 Stato del Dispositivo USB<br />
Cliccare su "Configuration" (Configurazione) → "USB” per accedere alla pagina del dispositivo<br />
USB dove potrete controllare la capacità rimanente del flash drive USB collegato, formattarlo se<br />
necessario o rimouverlo in sicurezza dalla videocamera.<br />
Nota: Dovete essere il supervisore per poter accedere alla pagina di configurazione del<br />
sistema. Se non lo siete, effettuate il login nella videocamera con il livello di<br />
utilizzatore supervisore.<br />
26
Info sulla<br />
Capacità<br />
Formatta<br />
Rimuovi<br />
5.3.4 Riprodurre e Scaricare i dati Registrati<br />
Fare clic su “Playback” (Riproduzione) per accedere al pannello di riproduzione dove si<br />
possono cercare o selezionare gli eventi che si vogliono riprodurre e scaricare<br />
simultaneamente sul PC.<br />
Controllo<br />
riproduzione<br />
Barra<br />
d’avanzamento<br />
27
APPENDICE 1 SPECIFICHE<br />
▓ Rete<br />
Porta LAN<br />
Modalità di Risoluzione Standard.<br />
Velocità LAN Base 10/100<br />
Protocolli Supportati<br />
Porta USB<br />
Caratteristiche Wireless (optional)<br />
SI<br />
Modalità di Risoluzione Alta<br />
DDNS, DNS, PPPoE, DHCP, NTP, SNTP, TCP/IP, UDP ICMP, SMTP,<br />
FTP, HTTP, RTP, RTSP<br />
Per dongle wireless opzionale e flash drive USB<br />
(1) Supporta dongle wireless 802.11 n/b/g (WU5214)<br />
(2) Modalità Ad-Hoc e infrastruttura<br />
(3) Funzione WPS con "Push Button Config" (Premi Pulsante<br />
Configurazione)<br />
Frame Rate NTSC: 30, PAL: 25<br />
Numero di utenti in linea 10<br />
Sicurezza<br />
Gestione Web<br />
▓ Video/Audio<br />
Compressione Video<br />
Telecomando Video<br />
Regolazione Video<br />
Accesso utente a livelli multipli con protezione della password, WEP<br />
64/128 bit, WPA-PSK, WPA2-PSK<br />
(1) Software "Video Viewer" concesso in licenza per controllare fino a 16<br />
videocamere in rete simultaneamente<br />
(2) Interfaccia AJAX di gestione utente per browser<br />
H.264 / MPEG4 / MJPEG<br />
SI<br />
Luminosità ,Contrasto, Tono, Saturazione<br />
Mobile Supporta la sorveglianza con telefoni cellulari 3G.<br />
Compressione Audio<br />
Ingresso Audio<br />
Uscita Audio<br />
▓ Camera<br />
Sensore Immagine Sensore immagine CCD 1/3"<br />
Pixel<br />
Lente<br />
ULaw, 128 kbp<br />
Microfono Integrato, Entrata Microfono Esterno.<br />
NTSC: 512(H) x 492(V) / PAL:<br />
512(H) x 582(V)<br />
SÌ<br />
f4.6mm<br />
Numero F F1.9<br />
Angolo di Visuale 60°<br />
Velocità Otturatore<br />
IR LED<br />
Illuminazione Minima<br />
Output video<br />
BLC<br />
Auto-regolazione<br />
▓ Altri<br />
Telecomando<br />
Rilevamento di Movimento<br />
Notifica Allarme e Eventi<br />
I/O Generale<br />
Alimentazione<br />
Temperatura operativa<br />
1/60 (1/50) ~ 1/100,000 sec.<br />
SÌ<br />
0 Lux (10 m IR ON)<br />
1.0 Vp-p. 75Ω<br />
AUTO<br />
ATW<br />
SI<br />
SI<br />
Caricare immagine su FTP e Email<br />
Alarm x1<br />
CC 12V, 1A<br />
0~40°C<br />
Umidità 85%<br />
Requisiti Minimi del Browser<br />
Sensore immagine CCD Alta<br />
Risoluzione 1/3"<br />
NTSC: 768(H) x 494(V) / PAL:<br />
752(H) x 582(V)<br />
‧Pentium 4 CPU 1.3 GHz o superiore, o equivalente AMD<br />
‧ 256 MB RAM<br />
‧Graphics card AGP, Direct Draw, 32 MB RAM<br />
‧Windows Vista, XP, Windows 2000 Server, ME, 98, DirectX 9.0 o successivo<br />
‧Internet Explorer 6.x o successivo<br />
Dimensioni (mm)** 152.5 (L) x 115.2 (W) x 40.2 (H) (6.00" x 4.54" x 1.58")<br />
Peso di Spedizione<br />
Uso all’interno e all’esterno<br />
* Il design e le specifiche sono soggette a cambiamenti senza preavviso.<br />
** Tolleranza dimensioni: (± 5 mm).<br />
812 g (1.79 lbs)<br />
incluso il sostegno per il montaggio e l’alimentatore elettrico<br />
All’interno<br />
28
APPENDICE 2 ELENCO UNITÀ FLASH USB COMPATIBILI<br />
PRODUTTORE MODELLO CAPACITÀ<br />
Transcend JFV35 4G<br />
JFV30<br />
8G<br />
Kingston DataTraveler 1G<br />
PQI U172P 4G<br />
Apacer AH320 2GB<br />
AH320A<br />
8GB<br />
AH220<br />
1GB<br />
AH320<br />
4GB<br />
A-data RB-18 1GB<br />
Sandisk Cruzer Micro 2G<br />
Cruzer Micro<br />
4G<br />
Cruzer4-pk<br />
2G<br />
Netac U208 1G<br />
MSI F200 4G<br />
SONY Micro Vault Tiny 2G 2G<br />
Micro Vault Tiny 4G<br />
4G<br />
Micro Vault Tiny<br />
1G<br />
29