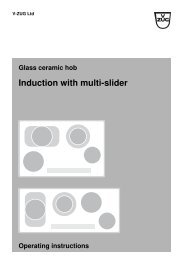
Piano di cottura in vetroceramica Quicklight Istruzioni ... - V-ZUG Ltd
Piano di cottura in vetroceramica Quicklight Istruzioni ... - V-ZUG Ltd
Piano di cottura in vetroceramica Quicklight Istruzioni ... - V-ZUG Ltd

You also want an ePaper? Increase the reach of your titles
YUMPU automatically turns print PDFs into web optimized ePapers that Google loves.
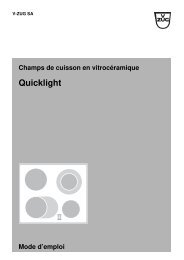
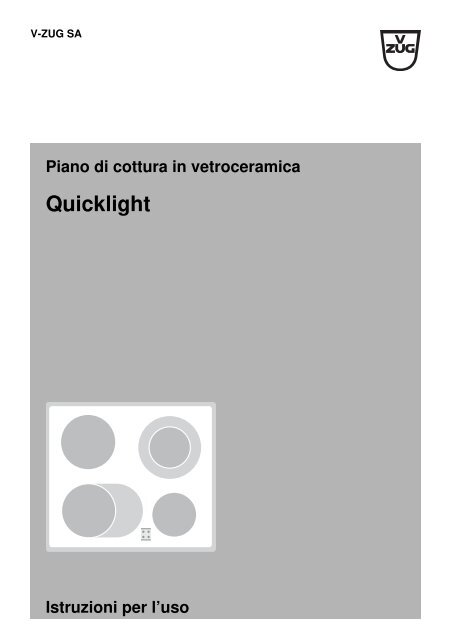
V-<strong>ZUG</strong> SA<br />
<strong>Piano</strong> <strong>di</strong> <strong>cottura</strong> <strong>in</strong> <strong>vetroceramica</strong><br />
<strong>Quicklight</strong><br />
<strong>Istruzioni</strong> per l’uso
Grazie per aver scelto uno dei nostri prodotti. Il vostro apparecchio sod<strong>di</strong>sfa<br />
elevate esigenze, e il suo uso è molto semplice. E’ tuttavia necessario che vi<br />
pren<strong>di</strong>ate il tempo per leggere queste istruzioni per l’uso che vi permetteranno<br />
<strong>di</strong> comprendere meglio l’apparecchio e <strong>di</strong> utilizzarlo <strong>in</strong> modo ottimale<br />
e senza problemi.<br />
Vi preghiamo <strong>di</strong> attenervi alle osservazioni sulla sicurezza.<br />
Mo<strong>di</strong>fiche<br />
Testo, immag<strong>in</strong>e e dati corrispondono al livello tecnico dell’apparecchio al<br />
momento della stampa <strong>di</strong> queste istruzioni per l’uso. Con riserva <strong>di</strong> mo<strong>di</strong>fiche<br />
tecniche.<br />
Campo <strong>di</strong> vali<strong>di</strong>tà<br />
Il numero <strong>di</strong> modello corrisponde alle prime cifre sulla targhetta dei dati. <strong>Istruzioni</strong><br />
per l'uso <strong>di</strong>:<br />
Typo Modello n.<br />
GK43.1/F/U 031<br />
GK22H1, GK32H1, GK42H1 306<br />
GK42H/F/U 307<br />
GK43/F/U 527<br />
GK43B/F/U 528<br />
GK43BR/U 531<br />
GK43BL/U 532<br />
GK43V/F 533<br />
GK43AU 534<br />
GK43.2/F/U 978<br />
GK43.1B/F/U 979<br />
GK43.3/F/U<br />
91A<br />
GK43X/F 31006<br />
Gli scostamenti d’esecuzione sono menzionati nel testo.<br />
© V-<strong>ZUG</strong> SA, CH-6301 Zug, 2012<br />
2
In<strong>di</strong>ce<br />
1 Osservazioni sulla sicurezza 4<br />
1.1 Simboli utilizzati . . . . . . . . . . . . . . . . . . . . . . . . . . . . . . . . . . . . . . . . . . . . 4<br />
1.2 Osservazioni generali sulla sicurezza . . . . . . . . . . . . . . . . . . . . . . . . . . . . 5<br />
1.3 Osservazioni sulla sicurezza specifiche dell’apparecchio . . . . . . . . . . . . . 6<br />
1.4 Esclusione del responsabilità . . . . . . . . . . . . . . . . . . . . . . . . . . . . . . . . . . 8<br />
1.5 Avvertenze per l’uso . . . . . . . . . . . . . . . . . . . . . . . . . . . . . . . . . . . . . . . . . 8<br />
1.6 Smaltimento . . . . . . . . . . . . . . . . . . . . . . . . . . . . . . . . . . . . . . . . . . . . . . 10<br />
2 Prima messa <strong>in</strong> funzione 11<br />
2.1 Dove è applicata la targhetta dei dati? . . . . . . . . . . . . . . . . . . . . . . . . . . 11<br />
3 Il vostro apparecchio 12<br />
3.1 S<strong>in</strong>ossi sull’apparecchio . . . . . . . . . . . . . . . . . . . . . . . . . . . . . . . . . . . . . 12<br />
3.2 Elementi <strong>di</strong> comando e d’<strong>in</strong><strong>di</strong>cazione . . . . . . . . . . . . . . . . . . . . . . . . . . . 15<br />
3.3 Stoviglie <strong>di</strong> <strong>cottura</strong> . . . . . . . . . . . . . . . . . . . . . . . . . . . . . . . . . . . . . . . . . 17<br />
4 Uso 18<br />
4.1 Regolare una zona <strong>di</strong> <strong>cottura</strong> . . . . . . . . . . . . . . . . . . . . . . . . . . . . . . . . . 18<br />
4.2 Tabella degli sta<strong>di</strong> <strong>di</strong> potenza . . . . . . . . . . . . . . . . . . . . . . . . . . . . . . . . . 18<br />
4.3 Dis<strong>in</strong>serire una zona <strong>di</strong> <strong>cottura</strong> . . . . . . . . . . . . . . . . . . . . . . . . . . . . . . . . 19<br />
4.4 Accendere e spegnere la zona <strong>di</strong> <strong>cottura</strong> a due<br />
circuiti/la zona comb<strong>in</strong>ata per arrostire . . . . . . . . . . . . . . . . . . . . . . . . . 20<br />
4.5 Accendere e spegnere lo scaldavivande . . . . . . . . . . . . . . . . . . . . . . . . 21<br />
5 Cura e manutenzione 22<br />
5.1 Pulizia . . . . . . . . . . . . . . . . . . . . . . . . . . . . . . . . . . . . . . . . . . . . . . . . . . . 22<br />
6 Annotazioni 23<br />
7 In<strong>di</strong>ce 26<br />
8 Assistenza tecnica 27<br />
3
1 Osservazioni sulla sicurezza<br />
1.1 Simboli utilizzati<br />
Contrassegna tutte le istruzioni importanti per la sicurezza.<br />
L’<strong>in</strong>osservanza può provocare lesioni, danni all’apparecchio o alle<br />
<strong>in</strong>stallazioni!<br />
Informazioni e <strong>in</strong><strong>di</strong>cazioni da osservare.<br />
Informazioni sullo smaltimento.<br />
Informazioni sulle istruzioni per l’uso.<br />
➤<br />
Segnala le operazioni che devono essere eseguite <strong>in</strong> sequenza.<br />
– Descrive la reazione dell’apparecchio all’operazione eseguita.<br />
• Segnala un elenco numerato.<br />
4
1 Osservazioni sulla sicurezza<br />
1.2 Osservazioni generali sulla sicurezza<br />
• Mettere <strong>in</strong> funzione l’apparecchio solo dopo<br />
aver letto le istruzioni per l’uso!<br />
•L’uso <strong>di</strong> questo apparecchio non è dest<strong>in</strong>ato<br />
a persone (bamb<strong>in</strong>i compresi) con limitate<br />
capacità fisiche, sensoriali o mentali o che<br />
non <strong>di</strong>spongano della necessaria esperienza<br />
e/o conoscenze, a meno che l’uso avvenga<br />
sotto la supervisione <strong>di</strong> una persona responsabile<br />
per la loro sicurezza o abbiano ricevuto<br />
da quest’ultima istruzioni su come utilizzare<br />
l’apparecchio.<br />
• Assicurarsi che i bamb<strong>in</strong>i non gioch<strong>in</strong>o con<br />
l'apparecchio.<br />
• Se il cavo <strong>di</strong> collegamento dell’apparecchio è<br />
danneggiato, onde evitare pericoli farlo sostituire<br />
dal produttore o dal servizio clienti <strong>di</strong><br />
quest’ultimo, oppure da una persona opportunamente<br />
qualificata.<br />
5
1 Osservazioni sulla sicurezza<br />
1.3 Osservazioni sulla sicurezza specifiche<br />
dell’apparecchio<br />
• AVVERTENZA: se la superficie appare<br />
<strong>in</strong>cr<strong>in</strong>ata, spegnere l’apparecchio e scollegarlo<br />
dalla rete elettrica, <strong>in</strong> modo da evitare il<br />
rischio <strong>di</strong> scossa elettrica.<br />
• AVVERTENZA: durante l’uso, l’apparecchio e<br />
i relativi componenti con i quali si può venire<br />
a contatto raggiungono temperature molto<br />
alte. Prestare attenzione a non toccare gli<br />
elementi <strong>di</strong> riscaldamento. I bamb<strong>in</strong>i <strong>di</strong> età<br />
<strong>in</strong>feriore agli 8 anni vanno tenuti a <strong>di</strong>stanza, a<br />
meno che vengano costantemente sorvegliati.<br />
• Non utilizzare mai apparecchi per la pulizia a<br />
vapore.<br />
• Non appoggiare sul piano <strong>cottura</strong> oggetti <strong>in</strong><br />
metallo come p. es. coltelli, forchette,<br />
cucchiai, coperchi e pellicole <strong>in</strong> allum<strong>in</strong>io,<br />
poiché possono <strong>di</strong>ventare roventi.<br />
6
1 Osservazioni sulla sicurezza<br />
• AVVERTENZA: se non viene tenuta sotto<br />
controllo, la <strong>cottura</strong> con grassi o olio può<br />
essere pericolosa e provocare <strong>in</strong>cen<strong>di</strong>. Non<br />
cercare MAI <strong>di</strong> est<strong>in</strong>guere un <strong>in</strong>cen<strong>di</strong>o<br />
versandovi sopra dell’acqua, ma spegnere<br />
l’apparecchio e, prestando la massima attenzione,<br />
coprire le fiamme con ad esempio un<br />
coperchio o una coperta ant<strong>in</strong>cen<strong>di</strong>o.<br />
• AVVERTENZA: per evitare il pericolo<br />
d’<strong>in</strong>cen<strong>di</strong>o, non lasciare mai nessun oggetto<br />
sul piano <strong>cottura</strong>.<br />
• Non far funzionare l’apparecchio con un timer<br />
esterno o un sistema <strong>di</strong> controllo a <strong>di</strong>stanza<br />
separato.<br />
7
1 Osservazioni sulla sicurezza<br />
1.4 Esclusione del responsabilità<br />
• Riparazioni, mo<strong>di</strong>fiche o manipolazioni all’apparecchio o al suo <strong>in</strong>terno,<br />
specialmente alle parti sotto tensione, possono essere eseguite esclusivamente<br />
dal produttore, dal suo servizio clienti o da persone opportunamente<br />
qualificate. Se effettuate <strong>in</strong> modo non corretto, le riparazioni<br />
possono causare gravi <strong>in</strong>fortuni, danni all’apparecchio e alle <strong>in</strong>stallazioni e<br />
guasti <strong>di</strong> funzionamento. In caso <strong>di</strong> guasto <strong>di</strong> funzionamento<br />
dell’apparecchio o se si deve emettere un or<strong>di</strong>ne <strong>di</strong> riparazione, osservare<br />
le <strong>in</strong><strong>di</strong>cazioni riportate nel capitolo ASSISTENZA TECNICA. Se necessario,<br />
rivolgersi al nostro servizio clienti.<br />
• Prestare attenzione a non far penetrare acqua all’<strong>in</strong>terno dell’apparecchio.<br />
Non spruzzare mai acqua sull’apparecchio. La penetrazione <strong>di</strong> acqua<br />
all’<strong>in</strong>terno dell’apparecchio può provocare danni.<br />
• Conservare con cura le presenti istruzioni, <strong>in</strong> modo da poterle consultare<br />
<strong>in</strong> qualsiasi momento. In caso <strong>di</strong> ven<strong>di</strong>ta o cessione dell’apparecchio a<br />
terzi, non <strong>di</strong>menticare <strong>di</strong> allegare ad esso le istruzioni per l’uso e quelle<br />
d’<strong>in</strong>stallazione.<br />
• L’apparecchio è dest<strong>in</strong>ato alla preparazione <strong>di</strong> cibi <strong>in</strong> ambito domestico. In<br />
caso <strong>di</strong> utilizzo <strong>di</strong>verso da quello previsto o se si eseguono operazioni<br />
sbagliate, decl<strong>in</strong>iamo ogni responsabilità per gli eventuali danni che ne<br />
possono derivare.<br />
1.5 Avvertenze per l’uso<br />
• L’apparecchio è conforme alle norme riconosciute della tecnica e alle<br />
prescrizioni <strong>di</strong> sicurezza <strong>in</strong> materia. Tuttavia, per evitare danni e <strong>in</strong>fortuni, è<br />
<strong>in</strong><strong>di</strong>spensabile utilizzarlo <strong>in</strong> modo appropriato. Attenersi alle <strong>in</strong><strong>di</strong>cazioni<br />
riportate <strong>in</strong> queste istruzioni per l’uso.<br />
• La superficie riscaldata resta rovente a lungo anche dopo il <strong>di</strong>s<strong>in</strong>serimento<br />
e si raffredda tornando a temperatura ambiente solo lentamente. Attendere<br />
un tempo sufficientemente lungo prima <strong>di</strong> effettuare p. es. la pulizia.<br />
• In caso <strong>di</strong> surriscaldamento <strong>di</strong>s<strong>in</strong>serire l’apparecchio e lasciarlo<br />
raffreddare completamente. In nessun caso raffreddare con acqua fredda!<br />
• Se l’apparecchio <strong>di</strong>venta <strong>in</strong>utilizzabile, svitare i fusibili o <strong>di</strong>s<strong>in</strong>serire gli <strong>in</strong>terruttori<br />
automatici.<br />
8
1 Osservazioni sulla sicurezza<br />
• Non salire sull’apparecchio.<br />
• Non porre stoviglie <strong>di</strong> <strong>cottura</strong> roventi sulla cornice, poiché si danneggerebbero<br />
i giunti <strong>in</strong> silicone.<br />
• Prima <strong>di</strong> ogni utilizzo assicurarsi che il fondo delle stoviglie e la superficie<br />
del piano <strong>cottura</strong> siano puliti e asciutti.<br />
• Non tagliare o preparare i cibi sulla superficie del piano <strong>cottura</strong> ed evitare<br />
<strong>di</strong> farvi sbattere contro oggetti duri. Non trasc<strong>in</strong>are le stoviglie <strong>di</strong> <strong>cottura</strong><br />
sopra la superficie.<br />
• Fare attenzione a non lasciar cadere vivande o succhi contenenti zucchero<br />
sulle zone <strong>di</strong> <strong>cottura</strong> calde. Ciò può <strong>in</strong>fatti danneggiare la superficie. Se ciò<br />
nonostante sulle zone <strong>di</strong> <strong>cottura</strong> calde dovessero cadere alimenti o succhi<br />
contenenti zucchero, rimuoverli imme<strong>di</strong>atamente con un raschietto per<br />
vetrores<strong>in</strong>a f<strong>in</strong>ché sono ancora cal<strong>di</strong>.<br />
• Durante il funzionamento, non lasciare mai l’apparecchio <strong>in</strong>custo<strong>di</strong>to.<br />
• Tenere gli animali domestici lontani dall’apparecchio.<br />
9
1 Osservazioni sulla sicurezza<br />
1.6 Smaltimento<br />
Imballaggio<br />
Pericolo <strong>di</strong> soffocamento! Le varie parti che compongono l’imballaggio<br />
(p. es. pellicole, polistirolo) possono essere pericolose per i<br />
bamb<strong>in</strong>i. Tenere le parti <strong>di</strong> imballaggio lontano e dalla portata dei<br />
bamb<strong>in</strong>i.<br />
Il materiale <strong>di</strong> imballaggio è opportunamente contrassegnato e deve<br />
essere sottoposto a raccolta <strong>di</strong>fferenziata <strong>in</strong> modo da poterlo riciclare<br />
e smaltire nel rispetto dell’ambiente.<br />
Dis<strong>in</strong>stallazione<br />
➤ Estrarre la sp<strong>in</strong>a dalla presa e/o far smontare il collegamento da un elettricista.<br />
Inf<strong>in</strong>e tagliare il cavo <strong>di</strong> rete dell’apparecchio.<br />
➤ Term<strong>in</strong>ata la <strong>di</strong>s<strong>in</strong>stallazione, rendere l’apparecchio <strong>in</strong>servibile.<br />
Smaltire l’apparecchio<br />
• Sulla targhetta dei dati dell’apparecchio è raffigurato il simbolo , a<br />
<strong>in</strong><strong>di</strong>care che l’apparecchio non può essere smaltito <strong>in</strong>sieme ai normali<br />
rifiuti domestici.<br />
• Lo smaltimento deve avvenire conformemente alle <strong>di</strong>sposizioni locali per<br />
lo smaltimento dei rifiuti. Per maggiori <strong>in</strong>formazioni sul trattamento, il<br />
recupero e il riciclaggio <strong>di</strong> questo prodotto, rivolgersi alle autorità competenti<br />
della propria amm<strong>in</strong>istrazione comunale, al centro <strong>di</strong> raccolta dei rifiuti<br />
domestici locale o al riven<strong>di</strong>tore presso il quale è stato acquistato<br />
l’apparecchio.<br />
10
2 Prima messa <strong>in</strong> funzione<br />
• L’apparecchio deve essere <strong>in</strong>stallato e allacciato alla rete elettrica conformemente<br />
alle istruzioni d’<strong>in</strong>stallazione fornite a parte. Far eseguire i<br />
necessari lavori da un <strong>in</strong>stallatore/elettricista autorizzato.<br />
• Durante le prime ore d’esercizio, le zone <strong>di</strong> <strong>cottura</strong> possono sprigionare<br />
odori sgradevoli. Si tratta <strong>di</strong> un fenomeno normale per gli apparecchi nuovi<br />
<strong>di</strong> fabbrica. Accertarsi che la stanza sia ben ventilata.<br />
2.1 Dove è applicata la targhetta dei dati?<br />
La targhetta dei dati e quella dei collegamenti si trovano sul retro del piano<br />
<strong>cottura</strong>.<br />
1 2<br />
1 Targhetta dei dati con numero <strong>di</strong> fabbricazione (FN)<br />
2 Targhetta dei collegamenti<br />
La seconda targhetta dei dati fornita <strong>in</strong> dotazione deve essere <strong>in</strong>collata sul<br />
mobile ad <strong>in</strong>casso sotto il piano <strong>cottura</strong>.<br />
Prendere nota del numero <strong>di</strong> fabbricazione (FN) del proprio apparecchio<br />
riportato sull’ultima pag<strong>in</strong>a delle presenti istruzioni per l’uso.<br />
11
3 Il vostro apparecchio<br />
3.1 S<strong>in</strong>ossi sull’apparecchio<br />
GK22H1<br />
• 1 zona <strong>di</strong> <strong>cottura</strong> ø 180 mm<br />
• 1 zona <strong>di</strong> <strong>cottura</strong> ø 140 mm<br />
GK32H1<br />
• 1 zona <strong>di</strong> <strong>cottura</strong> ø 210 mm<br />
• 1 zona <strong>di</strong> <strong>cottura</strong> ø 180 mm<br />
• 1 zona <strong>di</strong> <strong>cottura</strong> ø 140 mm<br />
GK42H1, GK43.2, GK43.2F, GK43.2u<br />
• 1 zona <strong>di</strong> <strong>cottura</strong> ø 210 mm<br />
• 2 zone <strong>di</strong> <strong>cottura</strong> ø 180 mm<br />
• 1 zona <strong>di</strong> <strong>cottura</strong> ø 140 mm<br />
GK43.1, GK43.1U, GK43.1F<br />
• 1 zona <strong>di</strong> <strong>cottura</strong> ø 210 mm<br />
• 1 zona <strong>di</strong> <strong>cottura</strong> ø 180 mm<br />
• 2 zone <strong>di</strong> <strong>cottura</strong> ø 140 mm<br />
12
3 Il vostro apparecchio<br />
GK43.3, GK43.3F, GK43.3U<br />
• 1 zona <strong>di</strong> <strong>cottura</strong> a due circuiti ø 140/210 mm<br />
• 1 zona <strong>di</strong> <strong>cottura</strong> ø 180 mm<br />
• 2 zone <strong>di</strong> <strong>cottura</strong> ø 140 mm<br />
GK42H, GK42HU, GK42HF<br />
GK43, GK43U, GK43F, GK43AU,<br />
GK43X, GK43XF<br />
• 1 zona <strong>di</strong> <strong>cottura</strong> a due circuiti ø 140/210 mm<br />
• 2 zone <strong>di</strong> <strong>cottura</strong> ø 180 mm<br />
• 1 zona <strong>di</strong> <strong>cottura</strong> ø 140 mm<br />
GK43.1B, GK43.1BU, GK43.1BF<br />
• 1 zona <strong>di</strong> <strong>cottura</strong> a 2 circuiti ø 140/210 mm<br />
• 1 zona <strong>di</strong> <strong>cottura</strong> ø 180 mm per la<br />
formazione <strong>di</strong> una zona comb<strong>in</strong>ata per<br />
arrostire scaldavivande<br />
• 1 zona <strong>di</strong> <strong>cottura</strong> ø 180 mm<br />
• 1 zona <strong>di</strong> <strong>cottura</strong> ø 140 mm<br />
GK43X, GK43XF<br />
• 1 zona <strong>di</strong> <strong>cottura</strong> a due circuiti ø 140/<br />
210 mm<br />
• 2 zone <strong>di</strong> <strong>cottura</strong> ø 180 mm<br />
• 1 zona <strong>di</strong> <strong>cottura</strong> ø 140 mm<br />
13
3 Il vostro apparecchio<br />
GK43VF, GK43V<br />
• 1 zona <strong>di</strong> <strong>cottura</strong> a 2 circuiti<br />
ø 140/210 mm<br />
• 2 zone <strong>di</strong> <strong>cottura</strong> ø 180 mm con<br />
elemento riscaldante supplementare<br />
da cui risulta una zona comb<strong>in</strong>ata per<br />
arrostire me<strong>di</strong>a o grande<br />
• 1 zona <strong>di</strong> <strong>cottura</strong> ø 140 mm<br />
GK43BR, GK43BL, GK43BRU GK43BLU<br />
• 1 zona <strong>di</strong> <strong>cottura</strong> a 2 circuiti<br />
ø 140/210 mm<br />
• 2 zone <strong>di</strong> <strong>cottura</strong> ø 180 mm con<br />
elemento riscaldante supplementare da<br />
cui risulta una zona comb<strong>in</strong>ata per<br />
arrostire me<strong>di</strong>a o grande<br />
• 1 zona <strong>di</strong> <strong>cottura</strong> ø 140 mm<br />
• 1 superficie scaldavivande ovale (<strong>di</strong>sposta a destra risp. a s<strong>in</strong>istra)<br />
• Tasti a sfioramento per l’uso della superficie scaldavivande<br />
14
3.2 Elementi <strong>di</strong> comando e d’<strong>in</strong><strong>di</strong>cazione<br />
3 Il vostro apparecchio<br />
Se l’apparecchio è <strong>in</strong>stallato sopra al forno, le istruzioni per l’uso sono<br />
contenute nelle istruzioni per l’uso del forno/piano <strong>cottura</strong>.<br />
Pannello dei coman<strong>di</strong><br />
Il numero, il tipo e la <strong>di</strong>sposizione degli elementi <strong>di</strong>pendono dal modello e<br />
dall’attrezzatura.<br />
1<br />
3<br />
2<br />
2<br />
1<br />
0<br />
6<br />
5<br />
2<br />
1<br />
0<br />
6<br />
5<br />
2<br />
1<br />
0<br />
6<br />
5<br />
2<br />
1<br />
0<br />
6<br />
5<br />
3<br />
4<br />
3<br />
4<br />
3<br />
4<br />
3<br />
4<br />
4<br />
Interruttori girevoli e <strong>in</strong><strong>di</strong>cazioni<br />
1 Attribuzione delle zone <strong>di</strong> <strong>cottura</strong> davanti/<strong>di</strong>etro<br />
2 Centro dell’<strong>in</strong>terruttore girevole a scomparsa <strong>in</strong>serito/estratto<br />
3 Spia <strong>di</strong> controllo del funzionamento: m<strong>in</strong>imo una zona <strong>di</strong> <strong>cottura</strong> accesa<br />
4 In<strong>di</strong>cazione del calore residuo<br />
15
3 Il vostro apparecchio<br />
Tasti a sfioramento per lo scaldavivande<br />
(solamente per GK43BR/U e GK43BL/U)<br />
Tasti e <strong>in</strong><strong>di</strong>cazioni<br />
Scaldavivande DIS<br />
Scaldavivande INS con punto lum<strong>in</strong>oso<br />
Blocco INS/DIS con punto lum<strong>in</strong>oso<br />
16
3 Il vostro apparecchio<br />
3.3 Stoviglie <strong>di</strong> <strong>cottura</strong><br />
Stoviglie <strong>di</strong> <strong>cottura</strong> idonee<br />
Le stoviglie <strong>di</strong> <strong>cottura</strong> devono presentare un fondo stabile. Quando viene<br />
riscaldato, il fondo delle stoviglie deve aderire perfettamente alla zona <strong>di</strong><br />
<strong>cottura</strong>.<br />
Le stoviglie <strong>in</strong> metallo sono più adatte rispetto a quelle <strong>in</strong> vetro o ceramica,<br />
<strong>in</strong> quanto il metallo <strong>di</strong>stribuisce il calore <strong>in</strong> modo più rapido e uniforme.<br />
Le stoviglie <strong>di</strong> <strong>cottura</strong> con fondo <strong>in</strong> allum<strong>in</strong>io o leghe d’allum<strong>in</strong>io possono<br />
lasciare sulla superficie della piastra <strong>in</strong> <strong>vetroceramica</strong> tracce <strong>di</strong> abrasione<br />
<strong>di</strong>fficili da rimuovere.<br />
Cottura a risparmio energetico<br />
Perché l’assorbimento <strong>di</strong> energia sia il più efficace possibile e per una<br />
<strong>di</strong>stribuzione uniforme del calore, prestare attenzione ai punti seguenti.<br />
• Il fondo delle stoviglie <strong>di</strong> <strong>cottura</strong> deve essere pulito, asciutto e non ruvido.<br />
• Porre le stoviglie <strong>di</strong> <strong>cottura</strong> al centro della zona <strong>di</strong> <strong>cottura</strong>.<br />
• Utilizzare coperchi che garantiscano una buona chiusura.<br />
• Scegliere stoviglie <strong>di</strong> <strong>di</strong>ametro commisurato alla quantità <strong>di</strong> cibo che si<br />
<strong>in</strong>tende cuc<strong>in</strong>are.<br />
17
4 Uso<br />
L’uso è analogo per tutte le zone <strong>di</strong> <strong>cottura</strong>. Con l’apparecchio spento, sono<br />
spente anche tutte le <strong>in</strong><strong>di</strong>cazioni, eccetto l’<strong>in</strong><strong>di</strong>cazione del calore residuo se<br />
una zona <strong>di</strong> <strong>cottura</strong> è ancora molto calda.<br />
4.1 Regolare una zona <strong>di</strong> <strong>cottura</strong><br />
➤ Se gli <strong>in</strong>terruttori girevoli a scomparsa sono <strong>in</strong>seriti, premere al centro<br />
dell'<strong>in</strong>terruttore girevole della zona <strong>di</strong> <strong>cottura</strong> desiderata.<br />
– L’<strong>in</strong>terruttore girevole fuoriesce.<br />
➤ Impostare l’<strong>in</strong>terruttore girevole sullo sta<strong>di</strong>o <strong>di</strong> potenza desiderato.<br />
– La spia <strong>di</strong> controllo del funzionamento si accende.<br />
Per le zone <strong>di</strong> <strong>cottura</strong> normali, l’<strong>in</strong>terruttore girevole posizionato sullo<br />
sta<strong>di</strong>o <strong>di</strong> potenza 0 può essere ruotato <strong>in</strong> entrambe le <strong>di</strong>rezioni.<br />
Per le zone <strong>di</strong> <strong>cottura</strong> a due circuiti/zone comb<strong>in</strong>ate per arrostire,<br />
l’<strong>in</strong>terruttore girevole ha un arresto e può essere ruotato solamente<br />
dallo 0 <strong>in</strong> senso orario e <strong>in</strong><strong>di</strong>etro verso lo 0.<br />
4.2 Tabella degli sta<strong>di</strong> <strong>di</strong> potenza<br />
Sta<strong>di</strong>o <strong>di</strong><br />
potenza<br />
1<br />
Processo <strong>di</strong> <strong>cottura</strong><br />
Sciogliere, scaldare<br />
delicatamente<br />
Applicazione pratica<br />
Burro, cioccolato, gelat<strong>in</strong>a, salse<br />
2 Macerare Riso<br />
3<br />
Proseguire la <strong>cottura</strong>,<br />
ridurre, stufare<br />
Verdure, patate, salse, frutta, pesce<br />
4<br />
Proseguire la <strong>cottura</strong>,<br />
cuocere a fuoco lento<br />
Piatti a base <strong>di</strong> pasta, zuppe, brasati<br />
5 Cuocere delicatamente Rösti, omelette, fett<strong>in</strong>e impanate, salsicce ai ferri<br />
6<br />
Arrostire, friggere,<br />
riscaldare rapidamente<br />
Carne, patate fritte, portare l’acqua ad ebollizione<br />
18
4 Uso<br />
4.3 Dis<strong>in</strong>serire una zona <strong>di</strong> <strong>cottura</strong><br />
➤ Ruotare l’<strong>in</strong>terruttore girevole della zona <strong>di</strong> <strong>cottura</strong> desiderata sullo sta<strong>di</strong>o<br />
<strong>di</strong> potenza 0.<br />
– Se le altre zone <strong>di</strong> <strong>cottura</strong> sono spente, la spia <strong>di</strong> controllo del funzionamento<br />
si spegne.<br />
– L’<strong>in</strong>terruttore girevole a scomparsa può essere re<strong>in</strong>serito.<br />
Gli <strong>in</strong>terruttori girevoli sono a scomparsa.<br />
➤ Ruotare l’<strong>in</strong>terruttore girevole sullo sta<strong>di</strong>o <strong>di</strong> potenza 0.<br />
➤ Premere al centro dell’<strong>in</strong>terruttore girevole.<br />
– L’<strong>in</strong>terruttore girevole viene re<strong>in</strong>serito.<br />
In<strong>di</strong>cazione del calore residuo<br />
F<strong>in</strong>tantoché persiste il pericolo <strong>di</strong> ustionarsi, dopo lo spegnimento rimane<br />
acceso il punto lum<strong>in</strong>oso della relativa zona <strong>di</strong> <strong>cottura</strong>.<br />
19
4 Uso<br />
4.4 Accendere e spegnere la zona <strong>di</strong> <strong>cottura</strong> a due<br />
circuiti/la zona comb<strong>in</strong>ata per arrostire<br />
All’accensione della zona <strong>di</strong> <strong>cottura</strong> a due circuiti/della zona comb<strong>in</strong>ata per<br />
arrostire, <strong>in</strong>izialmente viene attivata solo la zona <strong>di</strong> <strong>cottura</strong> <strong>in</strong>terna A ovv. C<br />
o E. Il circuito <strong>di</strong> riscaldamento esterno B e l’elemento riscaldante supplementare<br />
D possono essere attivati <strong>in</strong> base alle esigenze.<br />
Dalla comb<strong>in</strong>azione tra zona <strong>di</strong> <strong>cottura</strong> C ed elemento riscaldante supplementare<br />
D risulta una zona comb<strong>in</strong>ata per arrostire <strong>di</strong> me<strong>di</strong>a grandezza. Dalla<br />
comb<strong>in</strong>azione tra zone <strong>di</strong> <strong>cottura</strong> C ed E ed elemento riscaldante supplementare<br />
D risulta una zona comb<strong>in</strong>ata per arrostire grande.<br />
B<br />
E<br />
A<br />
C<br />
D<br />
D<br />
C<br />
Attivare il circuito <strong>di</strong> riscaldamento esterno/l’elemento riscaldante<br />
supplementare<br />
➤ Ruotare f<strong>in</strong>o all’arresto l’<strong>in</strong>terruttore girevole della zona <strong>di</strong> <strong>cottura</strong> a due<br />
circuiti/della zona comb<strong>in</strong>ata per arrostire desiderata.<br />
– È u<strong>di</strong>bile un clic.<br />
➤ Impostare l’<strong>in</strong>terruttore girevole sullo sta<strong>di</strong>o <strong>di</strong> potenza desiderato.<br />
Per la comb<strong>in</strong>azione della zona comb<strong>in</strong>ata per arrostire grande, oltre<br />
alla zona comb<strong>in</strong>ata per arrostire centrale attiva va regolata come <strong>di</strong><br />
consueto la zona <strong>di</strong> <strong>cottura</strong> E.<br />
Disattivare il circuito <strong>di</strong> riscaldamento esterno/l’elemento riscaldante<br />
supplementare<br />
➤ Ruotare l’<strong>in</strong>terruttore girevole della zona <strong>di</strong> <strong>cottura</strong> a due circuiti/della zona<br />
comb<strong>in</strong>ata per arrostire desiderata sullo sta<strong>di</strong>o <strong>di</strong> potenza 0.<br />
➤ Impostare l’<strong>in</strong>terruttore girevole sullo sta<strong>di</strong>o <strong>di</strong> potenza desiderato.<br />
– Il circuito <strong>di</strong> riscaldamento esterno B ovv. l’elemento riscaldante supplementare<br />
D viene <strong>di</strong>sattivato e la zona <strong>di</strong> <strong>cottura</strong> <strong>in</strong>terna A ovv. C viene<br />
messa <strong>in</strong> funzione.<br />
20
4 Uso<br />
4.5 Accendere e spegnere lo scaldavivande<br />
(solamente GK43BR/BL/BRU/BLU)<br />
Accensione<br />
➤ Premere il tasto .<br />
– Il punto lum<strong>in</strong>oso del tasto si accende.<br />
➤ Premere il tasto .<br />
– Lo scaldavivande è acceso.<br />
– Il punto lum<strong>in</strong>oso del tasto è acceso.<br />
– Il punto lum<strong>in</strong>oso del tasto si spegne.<br />
Spegnimento<br />
➤ Premere il tasto .<br />
– Lo scaldavivande è spento.<br />
– Il punto lum<strong>in</strong>oso del tasto si spegne.<br />
21
5 Cura e manutenzione<br />
L’apparecchio va pulito preferibilmente da tiepido; <strong>in</strong> caso<br />
contrario vi è il pericolo <strong>di</strong> ustioni.<br />
5.1 Pulizia<br />
Pulire il piano <strong>cottura</strong> dopo ogni uso, <strong>in</strong> modo da evitare che i residui <strong>di</strong> cibo<br />
si bruc<strong>in</strong>o, <strong>in</strong>taccando la superficie. A tal proposito si consideri che per<br />
rimuovere lo sporco secco e <strong>in</strong>crostato è necessario molto più tempo.<br />
Una pulizia non appropriata può causare danni alle f<strong>in</strong>iture o alla superficie.<br />
Non pulire <strong>in</strong> nessun caso la superficie della piastra <strong>in</strong> <strong>vetroceramica</strong><br />
con detersivi abrasivi, spugne multiuso abrasive, lana metallica, ecc.,<br />
<strong>in</strong> quanto potrebbero danneggiare la superficie stessa.<br />
➤ Per rimuovere lo sporco quoti<strong>di</strong>ano, utilizzare solo un panno morbido o<br />
una spugna <strong>in</strong>umi<strong>di</strong>ta con dell’acqua e del detergente idoneo. Osservare<br />
le istruzioni del produttore del detersivo. Si consiglia l’uso <strong>di</strong> detersivi con<br />
effetto protettivo.<br />
➤ Le macchie ost<strong>in</strong>ate, come p. es. i residui <strong>in</strong>crostati <strong>di</strong> latte traboccato,<br />
vanno rimosse quando la superficie è tiepida, utilizzando un raschietto per<br />
pulizia specifico per <strong>vetroceramica</strong>.<br />
Osservare le avvertenze del produttore del raschietto per pulizia.<br />
➤ I residui <strong>di</strong> alimenti contenenti un’alta percentuale <strong>di</strong> zucchero, come p. es.<br />
le marmellate, vanno rimossi quando la superficie è tiepida, utilizzando un<br />
raschietto per pulizia specifico per <strong>vetroceramica</strong>. In caso contrario vi è il<br />
rischio <strong>di</strong> danneggiare la superficie <strong>in</strong> <strong>vetroceramica</strong>.<br />
➤ La plastica fusa deve essere rimossa quando la superficie è tiepida,<br />
utilizzando un raschietto per pulizia specifico per <strong>vetroceramica</strong>. In caso<br />
contrario vi è il rischio <strong>di</strong> danneggiare la superficie <strong>in</strong> <strong>vetroceramica</strong>.<br />
➤ Le macchie <strong>di</strong> calcare vanno elim<strong>in</strong>ate una volta fatta raffreddare la superficie,<br />
utilizzando una quantità ridotta <strong>di</strong> prodotti anticalcare (p. es. aceto,<br />
succo <strong>di</strong> limone, decalcificante). Al term<strong>in</strong>e, passare sulla superficie un<br />
panno umido.<br />
22
6 Annotazioni<br />
23
6 Annotazioni<br />
24
6 Annotazioni<br />
25
7 In<strong>di</strong>ce<br />
A<br />
Accessori<br />
Or<strong>di</strong>nare . . . . . . . . . . . . . . . . . . . 27<br />
Assistenza tecnica . . . . . . . . . . . . 27<br />
Avvertenze per l’uso . . . . . . . . . . . . . 8<br />
B<br />
Brevi istruzioni. . . . . . . . . . . . . . . . 28<br />
C<br />
Campo <strong>di</strong> vali<strong>di</strong>tà . . . . . . . . . . . . . . . 2<br />
Centro <strong>di</strong> servizio . . . . . . . . . . . . . 27<br />
Circuito <strong>di</strong> riscaldamento esterno . 20<br />
Contratto <strong>di</strong> servizio . . . . . . . . . . . 27<br />
Cottura a risparmio energetico . . . 17<br />
Cura . . . . . . . . . . . . . . . . . . . . . . . 22<br />
D<br />
Disturbi del funzionamento . . . . . . 27<br />
Domande . . . . . . . . . . . . . . . . . . . 27<br />
E<br />
Elementi d’<strong>in</strong><strong>di</strong>cazione . . . . . . . . . 15<br />
Elementi <strong>di</strong> comando . . . . . . . . . . 15<br />
Elemento riscaldante<br />
supplementare . . . . . . . . . . . . . . . 20<br />
Esclusione del responsabilità . . . . . . 8<br />
I<br />
In<strong>di</strong>cazione del calore<br />
residuo . . . . . . . . . . . . . . . 15, 18, 19<br />
In<strong>di</strong>cazioni . . . . . . . . . . . . . . . . 15, 16<br />
Interruttore girevole . . . . . . . . . . . . 15<br />
M<br />
Manutenzione . . . . . . . . . . . . . . . . 22<br />
Messa <strong>in</strong> funzione . . . . . . . . . . . . . 11<br />
Modello n. . . . . . . . . . . . . . . . . . . . . . 2<br />
N<br />
Numero <strong>di</strong> fabbricazione (FN). 11, 27<br />
O<br />
Or<strong>di</strong>nazioni . . . . . . . . . . . . . . . . . . 27<br />
Osservazioni sulla sicurezza . . . . . . . 4<br />
Generali . . . . . . . . . . . . . . . . . . . . . 5<br />
Specifiche dell’apparecchio . . . . . . 6<br />
P<br />
Prima messa <strong>in</strong> funzione. . . . . . . . . 11<br />
Pulizia . . . . . . . . . . . . . . . . . . . . . . . 22<br />
R<br />
Ricambi<br />
Or<strong>di</strong>nare . . . . . . . . . . . . . . . . . . . . 27<br />
S<br />
Scaldavivande. . . . . . . . . . . . . . . . . 21<br />
Spegnimento . . . . . . . . . . . . . . . . 21<br />
Simboli . . . . . . . . . . . . . . . . . . . . . . . 4<br />
S<strong>in</strong>ossi sull’apparecchio . . . . . . . . . 12<br />
Smaltimento<br />
Dis<strong>in</strong>stallazione . . . . . . . . . . . . . . . 10<br />
Imballaggio . . . . . . . . . . . . . . . . . . 10<br />
Smaltire l’apparecchio . . . . . . . . . 10<br />
Sta<strong>di</strong> <strong>di</strong> potenza<br />
Tabella . . . . . . . . . . . . . . . . . . . . . 18<br />
Stoviglie <strong>di</strong> <strong>cottura</strong> . . . . . . . . . . . . . 17<br />
T<br />
Targhetta dei dati . . . . . . . . . . 11, 27<br />
Tasti . . . . . . . . . . . . . . . . . . . . . . . . 16<br />
Tasti a sfioramento . . . . . . . . . 15, 16<br />
Type . . . . . . . . . . . . . . . . . . . . . . . . . 2<br />
U<br />
Uso . . . . . . . . . . . . . . . . . . . . . . . . . 18<br />
Z<br />
Zona comb<strong>in</strong>ata per arrostire . . . . . 20<br />
Zona <strong>di</strong> <strong>cottura</strong> . . . . . . . . . . . . . . . . 18<br />
Regolazione . . . . . . . . . . . . . . . . . 28<br />
Spegnimento . . . . . . . . . . . . . . . . 28<br />
Zona <strong>di</strong> <strong>cottura</strong> a due circuiti . . . . . 20<br />
Zona <strong>di</strong> <strong>cottura</strong> a due circuiti/zona<br />
comb<strong>in</strong>ata per arrostire<br />
Spegnimento . . . . . . . . . . . . . . . . 20<br />
26
8 Assistenza tecnica<br />
Se ci dovete contattare per un’anomalia <strong>di</strong> funzionamento o per trasmetterci<br />
un’or<strong>di</strong>nazione, <strong>in</strong><strong>di</strong>cate sempre il numero <strong>di</strong> fabbricazione (FN) e la denom<strong>in</strong>azione<br />
dell’apparecchio. Riportate queste <strong>in</strong><strong>di</strong>cazioni qui <strong>di</strong> seguito e<br />
sull’adesivo <strong>di</strong> servizio fornito <strong>in</strong>sieme all’apparecchio. Incollate l’adesivo <strong>in</strong><br />
un luogo ben visibile o nella vostra agenda telefonica.<br />
FN<br />
Apparecchio<br />
Questi dati sono riportati sul certificato <strong>di</strong> garanzia, sulla fattura orig<strong>in</strong>ale e<br />
sulla targhetta dei dati dell’apparecchio.<br />
In caso <strong>di</strong> anomalie <strong>di</strong> funzionamento può rivolgersi al più vic<strong>in</strong>o Centro <strong>di</strong><br />
servizio della V-<strong>ZUG</strong> SA con un telefono fisso presso l’ubicazione<br />
dell’apparecchio, telefonando al numero gratuito 0800 850 850.<br />
Domande, or<strong>di</strong>nazioni, contratto <strong>di</strong> servizio<br />
Per domande e problemi <strong>di</strong> or<strong>di</strong>ne amm<strong>in</strong>istrativo o tecnico, così come per<br />
or<strong>di</strong>nazioni <strong>di</strong> pezzi <strong>di</strong> ricambio e accessori, voglia rivolgersi <strong>di</strong>rettamente alla<br />
sede pr<strong>in</strong>cipale a Zug, tel. +41 (0)41 767 67 67.<br />
Alla scadenza della garanzia, per tutti i nostri prodotti il cliente ha la possibilità<br />
<strong>di</strong> stipulare un contratto <strong>di</strong> servizio. Le <strong>in</strong>viamo volentieri la relativa documentazione.<br />
27
Brevi istruzioni<br />
Leggere dapprima le osservazioni sulla sicurezza delle istruzioni per l’uso!<br />
Regolare una zona <strong>di</strong> <strong>cottura</strong><br />
➤ Se l’<strong>in</strong>terruttore girevole a scomparsa è <strong>in</strong>serito, premere al centro<br />
dell’<strong>in</strong>terruttore girevole della zona <strong>di</strong> <strong>cottura</strong> desiderata.<br />
➤ Impostare l’<strong>in</strong>terruttore girevole sullo sta<strong>di</strong>o <strong>di</strong> potenza desiderato.<br />
Dis<strong>in</strong>serire una zona <strong>di</strong> <strong>cottura</strong><br />
➤ Ruotare l’<strong>in</strong>terruttore girevole della zona <strong>di</strong> <strong>cottura</strong> desiderata sullo sta<strong>di</strong>o<br />
<strong>di</strong> potenza 0.<br />
V-<strong>ZUG</strong> SA<br />
Industriestrasse 66, 6301 Zug<br />
Tel. +41 (0)41 767 67 67, Fax +41 (0)41 767 61 61<br />
vzug@vzug.ch, www.vzug.ch<br />
Service-Center: Tel. 0800 850 850<br />
J306.12-10