You also want an ePaper? Increase the reach of your titles
YUMPU automatically turns print PDFs into web optimized ePapers that Google loves.
GB<br />
Dear Customer,<br />
Installation instructions<br />
Congratulations on purchasing your new STEINEL SensorLight<br />
and thank you for the confidence you have shown in us. You<br />
have chosen a high-quality product that has been manufactured,<br />
tested and packed with the greatest care.<br />
Principle <br />
LED light corona and Power LED effect light<br />
The LEDs are twilight controlled. Ideal for permanently illuminating<br />
house numbers, for example. If preferred, also only in<br />
response to movement.<br />
Activation of low-energy bulb on detecting persons<br />
When the mini-sensor detects a person, the low-energy bulb<br />
comes "ON" for the period of time selected.<br />
The integrated high-performance infrared sensor is equipped<br />
with a double 360° sensor that detects the invisible heat emitted<br />
by moving objects (persons, animals etc.).<br />
Safety instructions<br />
■ During installation, the electrical wiring being connected<br />
must be dead. Therefore, switch off the power first and use<br />
a voltage tester to check that the power supply is disconnected.<br />
■ Installing the SensorLight involves work on the mains voltage<br />
supply. This work must therefore be carried out professionally<br />
in accordance with national wiring regulations and<br />
electrical operating conditions. (D- VDE 0100,<br />
A-ÖVE/ÖNORM E8001-1, -SEV 1000)<br />
System components<br />
Glass shade<br />
Retaining screw<br />
Light housing<br />
Wall mount<br />
LED corona of light<br />
Power LED Effect Light<br />
Mini-sensor unit (removes for ease of setting functions)<br />
Sealing plug<br />
Installation<br />
The site of installation should be at least 50 cm away from<br />
another light because heat radiated from it may activate the<br />
system. To obtain the specified reach of 8 m, the sensor<br />
should be installed at a height of no more than 2 m.<br />
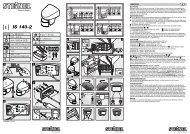
Connecting the mains and load supply lead (see illustration)<br />
The mains supply lead is a 3-core cable.<br />
L = phase conductor (usually black or brown )<br />
N = neutral conductor (usually blue)<br />
PE = protective-earth conductor (green/yellow)<br />
If in doubt, a voltage detector must be used to identify the<br />
lead; subsequently disconnect the power supply again.<br />
- 10 -<br />
Please familiarise yourself with these instructions before<br />
attempting to install the SensorLight because prolonged reliable<br />
and trouble-free operation will only be ensured if it is fitted<br />
properly.<br />
We hope your new STEINEL SensorLight will bring you lasting<br />
pleasure.<br />
The heat detected in this way is converted electronically into a<br />
signal that switches the light “OFF” automatically. Heat is not<br />
detected through obstacles, such as walls or panes of glass.<br />
Heat radiation of this type will, therefore, not trigger the sensor.<br />
The unit achieves a coverage angle of 360° with an aperture<br />
angle of 90°. A sneak-by guard ensures coverage below<br />
the sensor.<br />
Important: The most reliable way of detecting motion is to<br />
install the SensorLight with the sensor aimed across the<br />
direction in which a person would walk and by ensuring that<br />
no obstacles (such as trees and walls, for example) obstruct<br />
the line of sensor vision.<br />
Reach is limited when walking directly towards the light.<br />
■ Only use genuine replacement parts.<br />
■ Repairs must only be made by specialist workshops.<br />
■ The glass shade must be screwed firmly onto the light<br />
housing with the sealing ring 8.1 .<br />
8.1 Sealing ring<br />
Engagement lug for removing sensor unit<br />
Time setting<br />
Twilight setting<br />
Programme setting<br />
Principle<br />
Adjusting the detection zone<br />
Manual override<br />
Operation / Maintenance<br />
Connect the phase conductor (L), neutral conductor (N) to the<br />
terminal block. Getting the cable connections crossed will<br />
produce a short circuit in the unit or in your fuse box. In this<br />
case, you must identify the individual cables and re-connect<br />
them. Insulate protective-earth conductor (PE) and simply<br />
place it next to terminal block.<br />
Note: A mains switch for switching the unit ON and OFF may<br />
of course be installed in the mains supply lead. A mains<br />
switch is required for the manual override function (see Manual<br />
override function) .<br />
Functions , , <br />
Once installed, the sensor can be put into operation. Control<br />
dials are provided on the sensor unit for selecting time, twilight<br />
and programme settings. After pressing the engagement<br />
Switch-off delay<br />
(time setting) <br />
(factory setting: 5 sec.)<br />
Twilight setting<br />
(sensor response<br />
threshold) <br />
(factory setting: daylight operation 2000 lux)<br />
Programme setting <br />
(factory setting: programme 1)<br />
The following programmes only relate to<br />
the LED corona of light and the Power LED<br />
effect light. Once ambient light levels reach<br />
the twilight setting, the main light always<br />
switches “ON” in response to movement<br />
and “OFF” again after the selected time<br />
setting.<br />
=<br />
5 sec. – 15 min.<br />
2 - 2000 lux<br />
AN<br />
LED SENSOR<br />
ON<br />
- 11 -<br />
lug with a flat-bladed screwdriver, the sensor unit can be<br />
removed for ease of setting. In this case, the SensorLight<br />
automatically switches to constant output.<br />
Light '“ON”' duration can infinitely varied from 5 sec. to 15 min.<br />
Control dial set to – = shortest time (5 sec.)<br />
Control dial set to + = longest time (15 min.)<br />
When setting the detection zone, it is recommended to select<br />
the shortest time –.<br />
The sensor's response threshold can be infinitely varied from<br />
2 – 2000 lux.<br />
Control dial set to = daylight operation at approx. 2000 lux.<br />
Control dial set to = night-time operation at approx. 2 lux.<br />
To adjust the detection zone in daylight, the control dial must be<br />
set to (daylight operation).<br />
Programme 1 + 2 : LED comfort programme:<br />
● LEDs “ON” from twilight setting for the whole night.<br />
Programme 3 : LED comfort economy programme*:<br />
● LEDs “ON” from twilight setting to the middle of the night.<br />
● The LEDs then switch “ON” in response to movement.<br />
Programme 4 : LED standard programme:<br />
● LEDs switch “ON” in response to movement.<br />
● LEDs go out when time setting elapses.<br />
* Note on LED comfort economy programme 3 :<br />
The sensor does not have any integrated clock. The middle of We recommend not to interrupt the power supply in pro-<br />
the night is only determined on the basis of the length of darkgramme 3 . As the values are determined over several nights,<br />
ness phases. To work perfectly, therefore, it is important for the sensor should, in the event of any fault, be observed over<br />
the light to be permanently connected to the power supply several nights to ascertain whether the LED switch-off time<br />
during this period. During the first night (calibration phase) the<br />
LEDs remain activated. Values remain saved even in the event<br />
of mains power failure.<br />
moves towards the middle of the night.<br />
GB


